

Transcript
Even with a rock solid automation code base, it can still prove quite challenging to develop reliable scripts if the application lacks test automatability.
In this chapter, we’ll talk about techniques to improve the robustness of your test automation framework by developing with test automatability in mind. We’ll discuss the test automation pyramid, code seams, and UI element locator strategies.
# Test Automation Pyramid
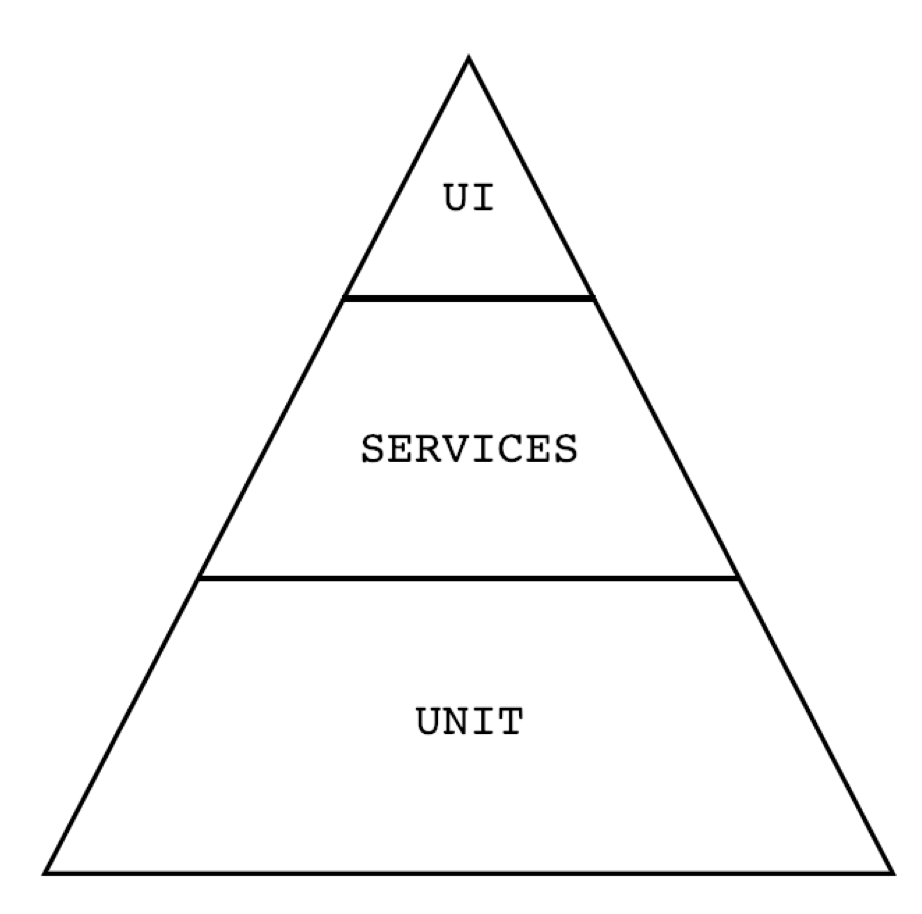
In his book Succeeding with Agile: Software Development Using Scrum, Mike Cohn introduced the test automation pyramid which a model that describes three levels in which tests can be automated against: unit, services, and UI.
If a part of the reason you’re automating tests is to have fast feedback, you’ll want to design your automated tests to run as quickly as possible. One way to accomplish this to is to automate the tests as close to the production code as you can get away with.
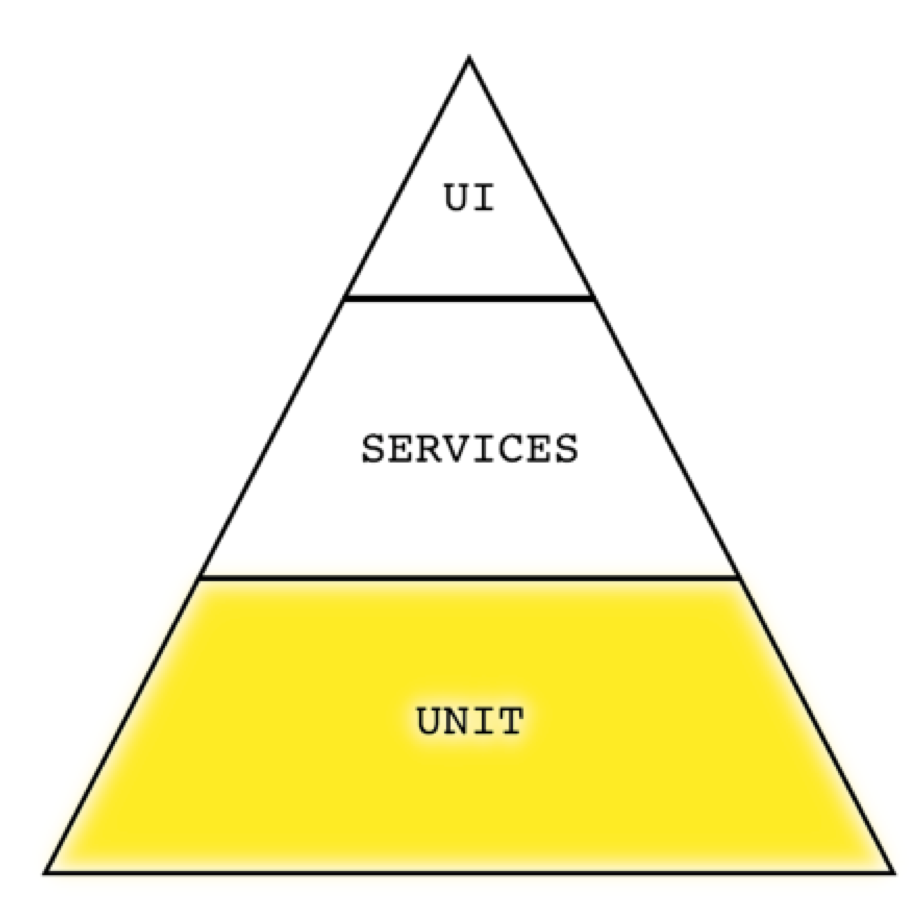
In addition to being fast, unit tests are also able to pinpoint the exact function in which a bug exists. Therefore, the bulk of the tests that are automated should be written at this level. This aligns with the goal of fast feedback.
These are the tests that are best written by your product developers as part of their feature development work. However, if tests are later identified as good candidates for automation, but were not included by the developers themselves, those tests can still be added at this level by anyone with the know-how. Just because the developer didn’t add it to the unit level, doesn’t mean it has to be automated at a higher level.
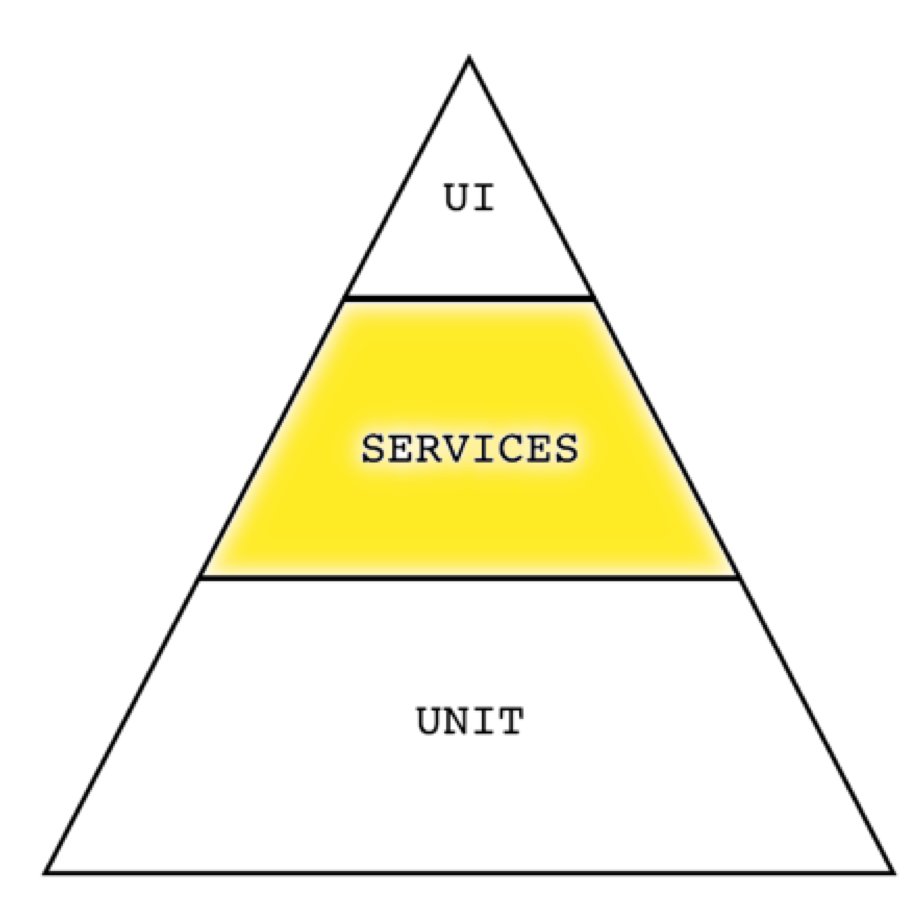
The services level is a bit further from the code itself and focuses on the functionality that the code provides, but without a user interface. Tests automated at this level can make calls to the product’s APIs and/or business logic to verify the integration of various individual functions.
This level should contain the second largest number of automated tests after the unit level.
When considering a test for automation, determine what information the test needs to verify, and choose the lowest level of the pyramid possible to write the test against. The lower the level, the faster the test – thus upholding the goal of fast feedback.
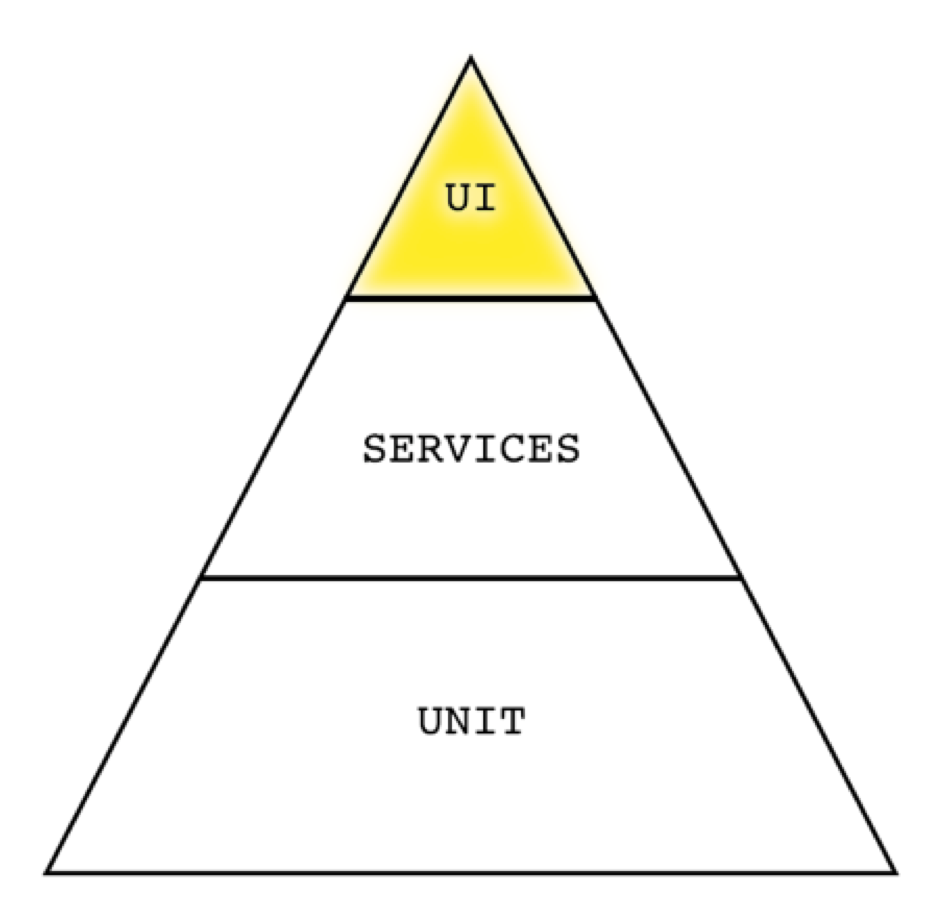
Now this seems practical in theory, but when the team is building UI level features, it’s tempting to believe everything must be automated at the UI level. I get it. You want to verify that the application looks the way it’s supposed to and that the controls work.
You should certainly verify your UI, but all of the steps required for the test case do not have to be executed at that level.
Let’s take a look at an example.

If you are automating one Search test, then I agree – automate it at the UI level and perform all of those UI-level checks.
However, if you need to automate multiple Search tests, ask yourself do they all need to be performed at this costly level. Or can you automate one at the UI level, and automate the rest of them at a lower level. At this point, you've already verified the UI components and now what you’re really exercising is the functionality of the Search algorithm. This can be verified at the service or even the unit level.
Let’s take another example where you want to add a product to the shopping cart.

- Searching for the product
- Looking through the search results to find the product you want
- Clicking on the product
- Clicking the Add to Cart button
- Clicking the cart icon to get to the cart
- Verifying that the item is actually in the cart
Automating all of these steps at the UI level is risky. If any of those steps fail due to the brittleness of navigating the UI, your test won't get to the step that you actually care about.
You’ve already added a UI-level search test to your suite, so you can bypass that in this new scenario. Instead, look for seams - or shortcuts - in your application which make automating easier.
In this example, instead of searching for the product, you can instead go straight to the product’s URL within your automated test. That’s the seam and this will save a lot of time and mitigate some of the risk of using the UI by eliminating the steps that you can. Not only that, but you’re eliminating the dependency of the Search feature working for this test. The test of adding something to the cart has nothing to do with Search. However, if you automated Search as part of this scenario, this test would fail and you’d be blocked from verifying what it is this test is aimed to.
One more example. Let’s say you have a test that verifies you can increase the quantity of a product within the shopping cart.
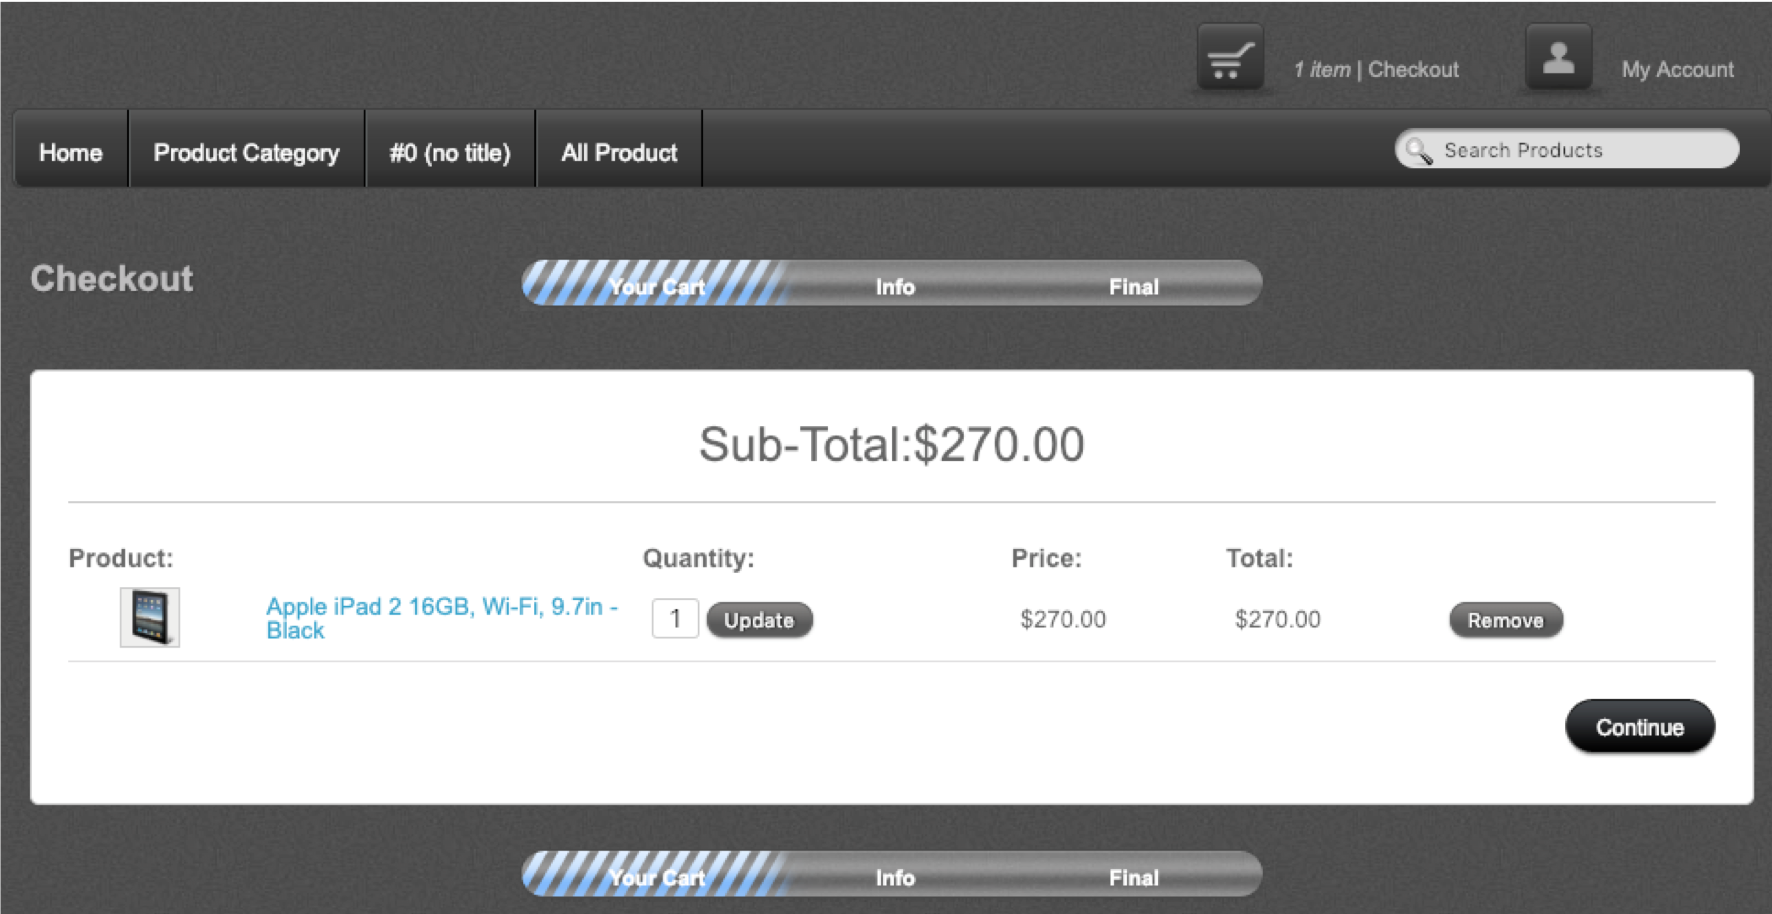
Thinking of this scenario, the steps might include:
- Searching for the product
- Looking through the search results to find the product you want
- Clicking on the product
- Clicking the Add to Cart button
- Clicking the cart icon to get to the cart
- Increasing the quantity of the product
- Verifying the cart
Again, the process of Searching and even adding the product to the cart do not necessarily need to be done at the UI level. By doing them there, you’re adding time, dependency, redundancy (because you already have a UI-level test for this), and exposure to brittleness to your tests.
You can utilize a seam such as a web service call that adds the product to the cart, then go straight to the cart URL and begin your test. This is much faster and less prone to failing for an unrelated cause.
# Seams
We’ve talked about seams a bit. These are shortcuts within the application that make automating tests much easier. Some seams are provided within the application by default - such as unique URLs for various pages. Utilize these when possible within your automated tests as opposed to trying to navigate the UI via menu items and various click streams.
Additional seams can be provided by developers such as web services, which allows your test code to bypass the UI and send quick HTTP requests to the application. These are great for pre-requisite setup, verification of data, and cleaning up after test completion. This is a prime example of how your developers can contribute to improving the test automatability of the application and therefore allow for faster, more reliable tests.
Exposure to business functions can also prove useful. For example, instead of going through the UI and navigating to a page in order to click a button, the test code can call directly into the function that executes the action. This type of automation would be considered service level automation. To automate in this fashion, your test code would need to be able to access the application’s logic without a user interface.
# UI Locators
For the tests that need to execute at the UI level, the tests will need to interact with the application by accessing its HTML elements. A leading cause of flaky tests is the absence or unreliability of identifiers for these HTML elements.
When developers create new web elements, it’s extremely important that they add identifiers to these elements. This can be in the form of an ID attribute, name attribute, or a custom attribute that is solely for test automation purposes.
This is not something that is typically taught to front-end developers while they’re learning to code, so it’s necessary to make this a part of your team’s culture. While informing the developers that this is needed, it’s still relatively easy to forget to do. So, put other processes in place to enforce this behavior.
Options include:
- adding a rule to the team’s code linter that flags any elements which do not contain an ID attribute, or better yet the custom test attribute
- actively looking for these omissions during code review
- meeting with developers in advance and labeling a mockup of the elements with the attributes that are needed for test automation
