Transcripted Summary
So, you're ready to add visual checks to your tests... but where? Which ones? What should it cover?
We'll discuss these tests design considerations in this chapter.

A common question I get from customers is which of my tests need visual checks?
Obviously, you should focus on your UI tests.
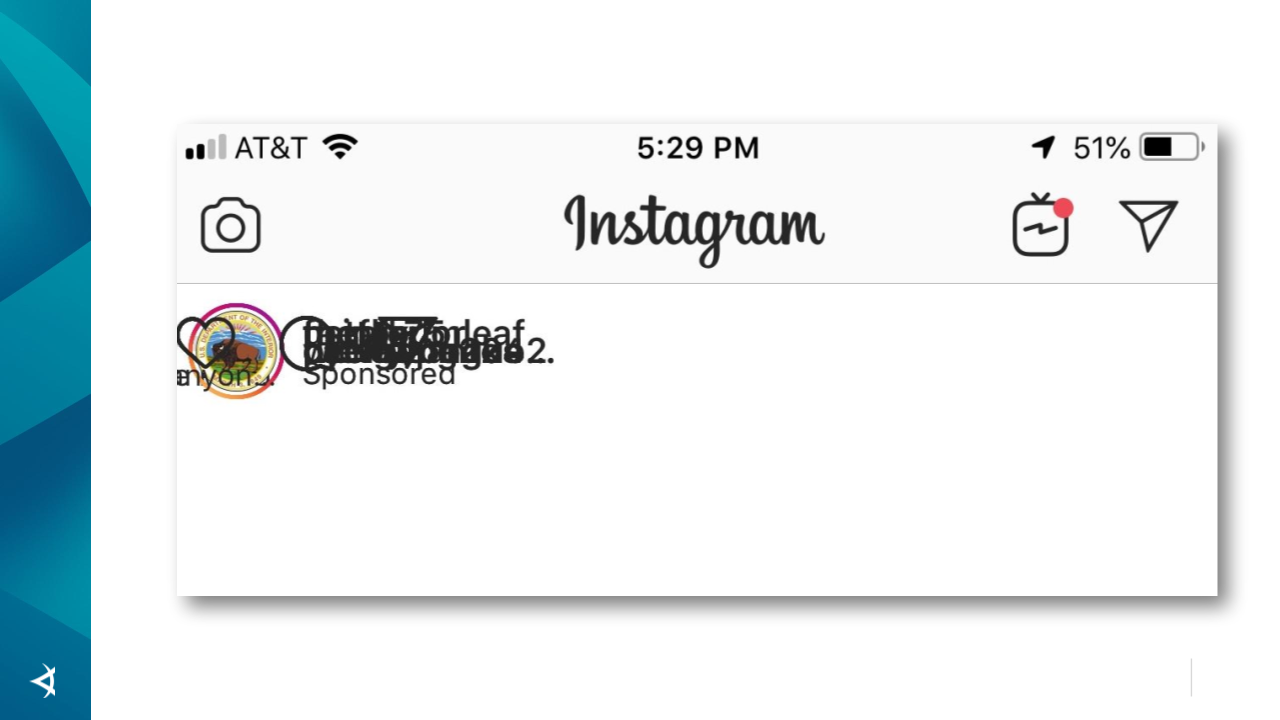
If there's a test with a functional UI assertion, then you should evaluate to see if a visual assertion would be necessary. There's a lot that can go unchecked with functional assertions, such as this visual bug on Instagram.

If there was an automated test that used functional assertions to make sure that this sponsored content was displayed, every assertion would pass because technically all of the expected text is present and visible.
The problem is of course that visually this is very wrong.
Imagine paying for premium placement on Instagram's platform and your content being displayed this way. You've lost money because no one can click on this. So, you most certainly are going to request a refund from Instagram, which means they've now lost money. And they've probably also lost your trust and therefore future business as well. Not a good look, no pun intended.
The point here is no matter how good your functional assertions are, they can't give you the confidence that a visual assertion would so it's best to evaluate any of your UI validating checks and consider adding a visual assertion as well.
In fact, I encourage you to think of visual testing as a superset of functional testing, not simply an add on. For example, if we were to add a visual check to this particular test, it would make sure everything appears as it should. But with that it's also making sure that all of this text exists and that the actual image does as well. So, it's covering everything the existing functional assertions would cover. This should be considered when you're adding your checks.

Adding a visual check to an existing test is fairly straightforward.
However, if you're going to do this at scale, I strongly recommend creating a wrapper class for your visual testing calls.
By abstracting out the Eyes API calls, you can easily handle upgrades to the API and introduce global changes when needed. You will still have the flexibility to make isolated modifications for particular tests.
Let's look at a good way to do this within our testing project.
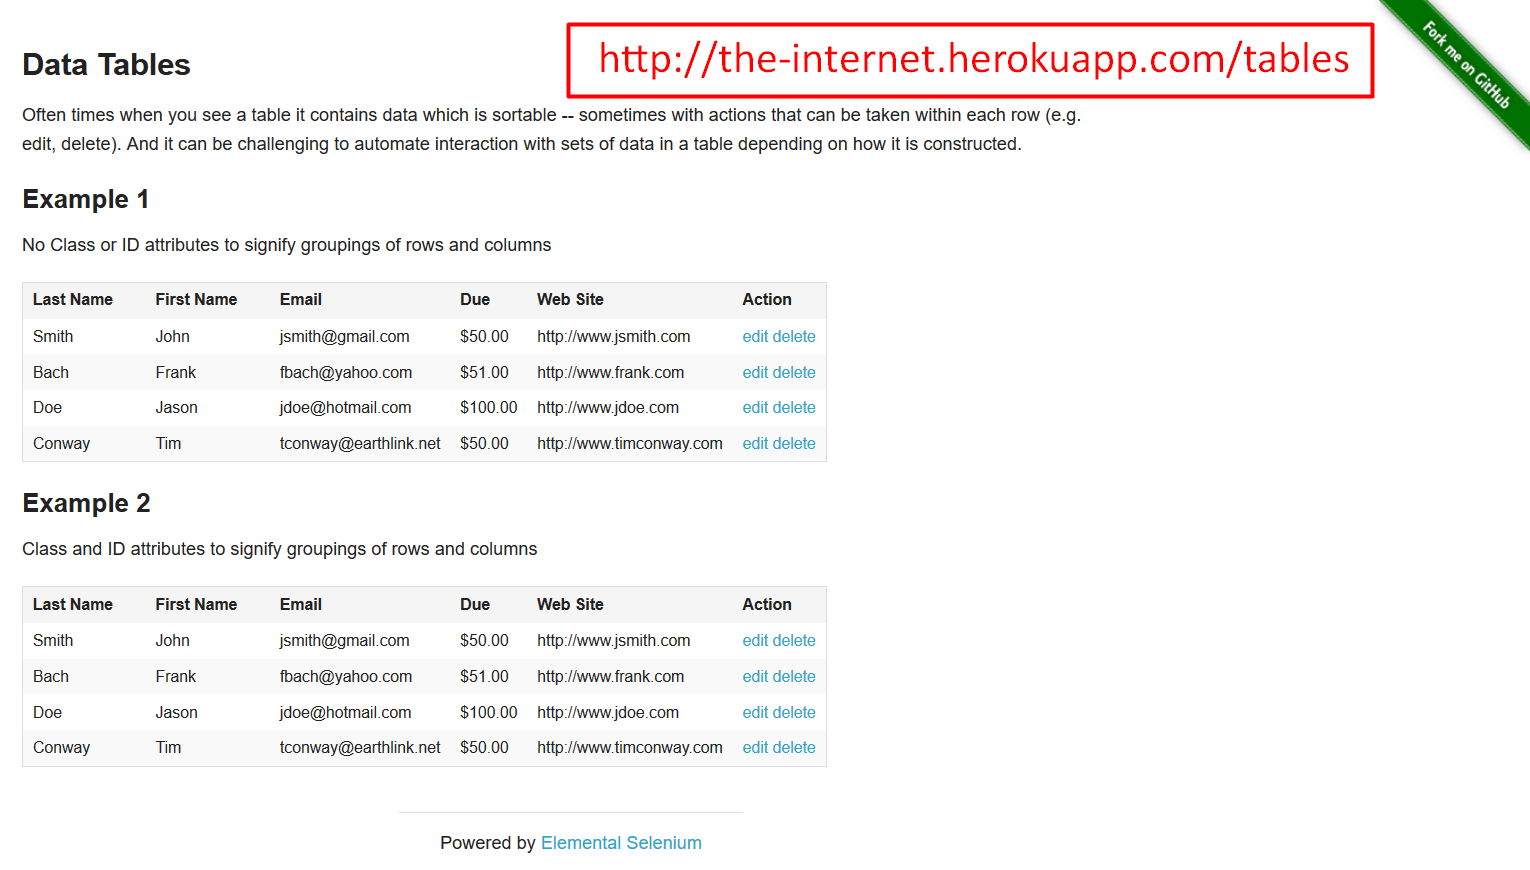
Here's an example application.

Let's say that we wanted to test sorting this table and we could choose any of the columns. We can click on maybe last name and we see that now it's sorted in alphabetical order. But with that sorted, it also took all of these other columns into consideration and made sure that the data stayed with each other.
So, if I wanted to verify that this sort actually works, this would be quite a bit. Not only am I verifying the column that I sorted, but I need to make sure that all of the related information is there as well. As you can imagine, this would be quite a bit of functional assertions that I would be adding.
Instead of doing that, this is where I can put in my visual check — this makes a lot of sense because I can verify a bunch of things at one time.
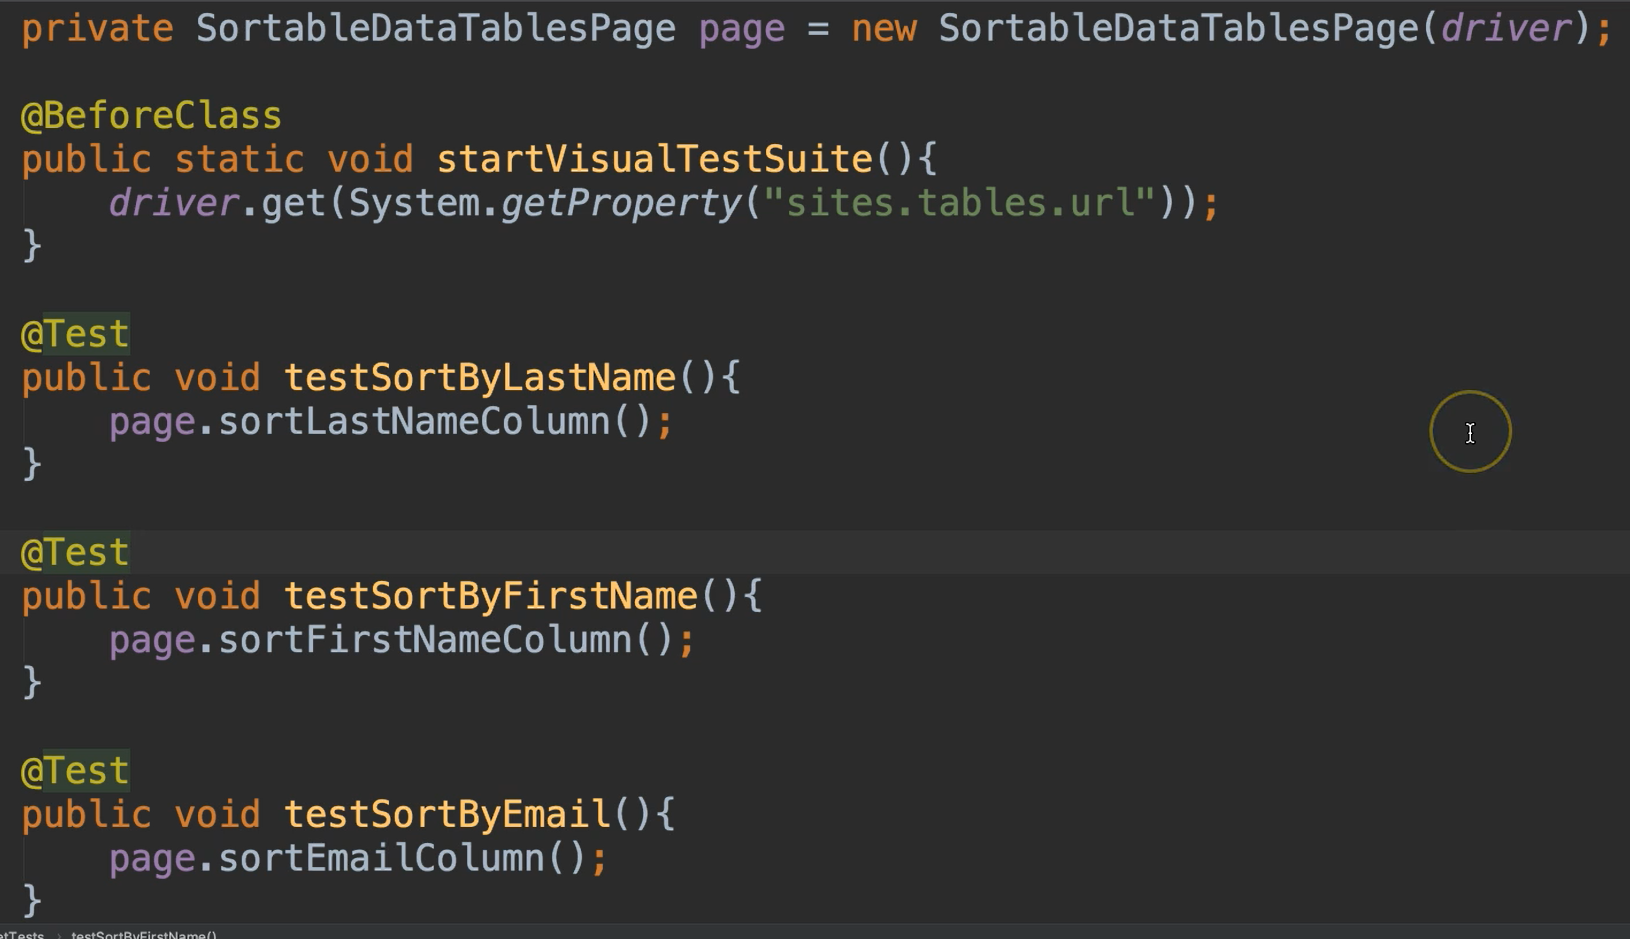
Here's the test class for this and you see we have a bunch of these that sorts the different columns.

Now we want to add the assertion in.
Let's just take the very first one testSortByLastName and we're going to add a visual assertion to this one.
So, I can instantiate this Eyes object
Then I would need to set my API key (which I’ve already stored in a system variable).
Then I'll need to open Eyes and give it the WebDriver, the name of the application and the name of the test.
Then I would need to do the actual check. I want to say checkElement and then we are only checking that one table.
Then, after I've done my check, I can just say close.
@Test
public void testSortByLastName(){
    page.sortLastNameColumn();
    Eyes eyes = new Eyes();
    eyes.setApiKey(System.getenv("APPLITOOLS_API_KEY"));
    eyes.open(driver,"The Internet", "testSortByLastName");
    eyes.checkElement(page.getTableElementLocator());
    eyes.close();
}
Design Considerations for Visual Checks
This is where you start thinking about which checks you should use as well. Since we were only sorting that table, to check the entire window might be overkill. But in other cases, it's perfectly valid to check the entire window because you want to check everything that's there. So, this is a design consideration on your part.
Now while this isn't a lot of code, I don't want to repeat it for every test in here.
I can do some things right inside of the class, like maybe moving these 2 lines (instantiating Eyes and setting the API key) to a @BeforeClass method so that they're only done once and then utilize them in the tests. But I still would have at least these 3 lines of code repeated in every test here. And then if anything ever change with this signature of these methods within the Eyes API and we needed to update our test, we would have to do that in each one of these tests. So, you could see how this might be a little bit of a pain to maintain if we were to do it like this.
Instead of that we can use a wrapper class.
So, I've already created a wrapper class called EyesManager.
In our BaseTest class, which essentially just opens up the WebDriver, it also then creates an instance of this EyesManager, which is a wrapper class that I created within project.
public class BaseTests {

    protected static WebDriver driver;
    protected static EyesManager eyesManager;

    @BeforeClass
    public static void setUp() {
        driver = new ChromeDriver();
        eyesManager = new EyesManager(driver, "The Internet");
    }
}
In EyesManager is where I have those methods that instantiate Eyes and set the API key.
I also have the validate methods here. So, this stuff is done in one spot and I can update anything if I needed to.
public class EyesManager {

    private Eyes eyes;
    private String appName;
    private WebDriver driver;

    public EyesManager(WebDriver driver, String appName){
        this.driver = driver;
        this.appName = appName;
        eyes = new Eyes();
        eyes.setApiKey(System.getProperty("applitools.api.key"));
    }

    public void setBatchName(String batchName){
        eyes.setBatch(new BatchInfo(batchName));
    }

    public void setTestGroup(String group){
        eyes.addProperty("Test Group", group);
    }

    public void validateWindow(){
        eyes.open(driver, appName, Thread.currentThread().getStackTrace()[2].getMethodName());
        eyes.checkWindow();
        eyes.close();
    }

    public void validateElement(By locator){
        eyes.open(driver, appName, Thread.currentThread().getStackTrace()[2].getMethodName());
        eyes.checkElement(locator);
        eyes.close();
    }

    public void validateFrame(String locator){
        eyes.open(driver, appName, Thread.currentThread().getStackTrace()[2].getMethodName());
        eyes.checkFrame(locator);
        eyes.close();
    }

    public void abort(){
        eyes.abortIfNotClosed();
    }

    public Eyes getEyes(){
        return eyes;
    }
}
So inside of our test, instead of writing all of this code, we can simply say eyesManager.validateElement.
@Test
public void testSortByLastName(){
    page.sortLastNameColumn();
    eyesManager.validateElement(page.getTableElementLocator());
}
And now this is much simpler to maintain.
