

Transcripted Summary
In this chapter we will create our first contract.
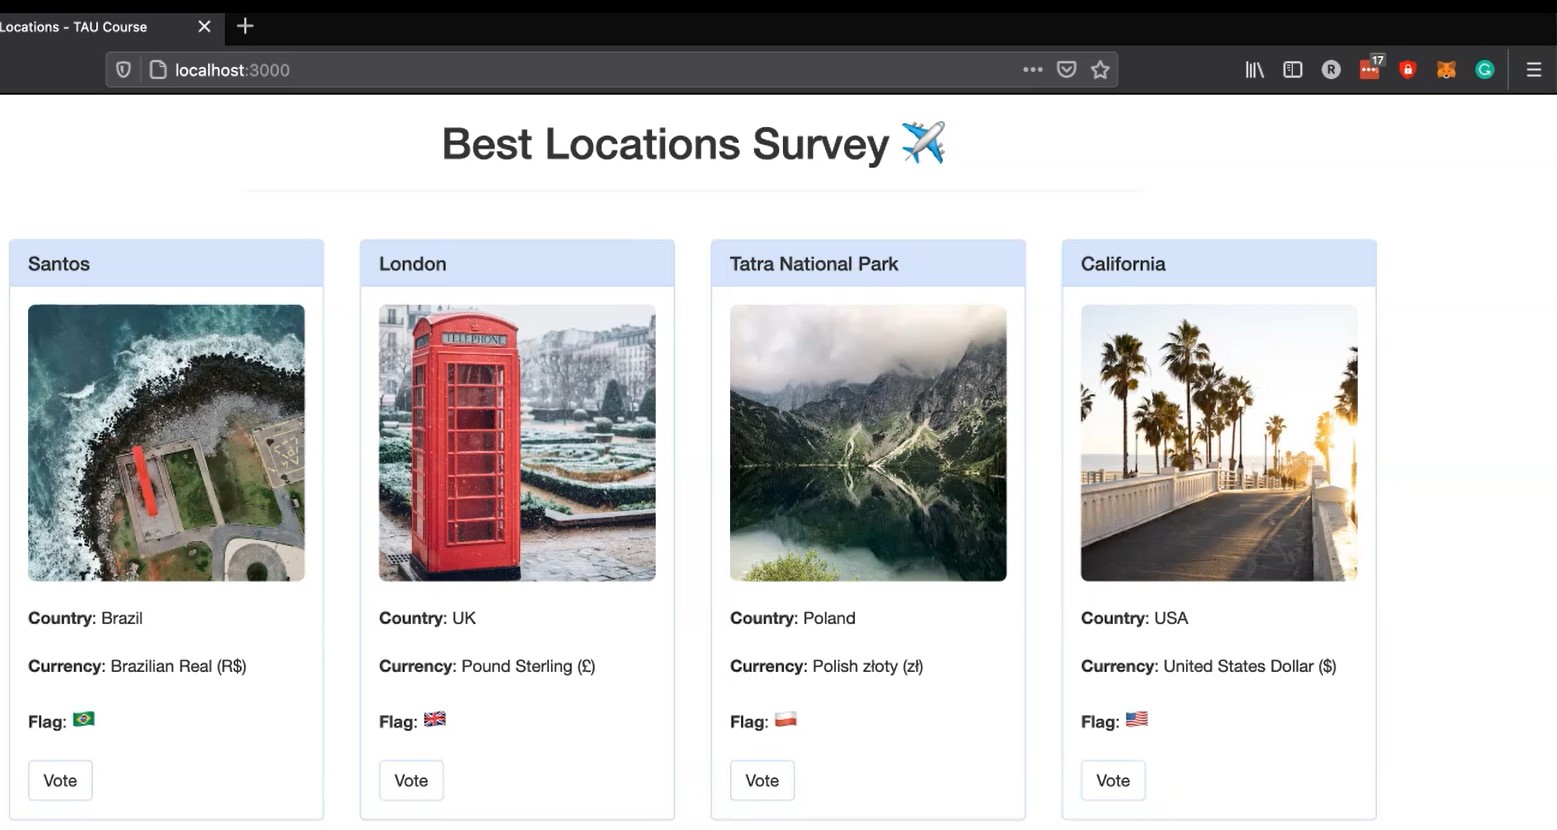
We will code a contract for this website where a user can vote for different locations to travel.
You can see this follows the Pet Shop Tutorial example from the Truffle website.
The user will be able to vote for a location which will trigger the transaction on the MetaMask wallet, and then call Ganache with our local Ethereum network to mark that location as voted.
Then the vote button will be disabled, and the transaction confirmed.
# Smart Contracts
We'll talk about smart contracts a lot in this chapter.
A smart contract is an agreement or transaction between 2 users in the form of computer code without the need of a third party. They run on the blockchain. So, they are stored on a public database and cannot be changed.
If you remember our blockchain explanation, the smart contract is the code with the agreement that will be deployed to the blockchain as a new block.
# Blockchain Project Structure
Let's start explaining the project structure first. You see the contracts migrations and test folders are already in the structure of the project.
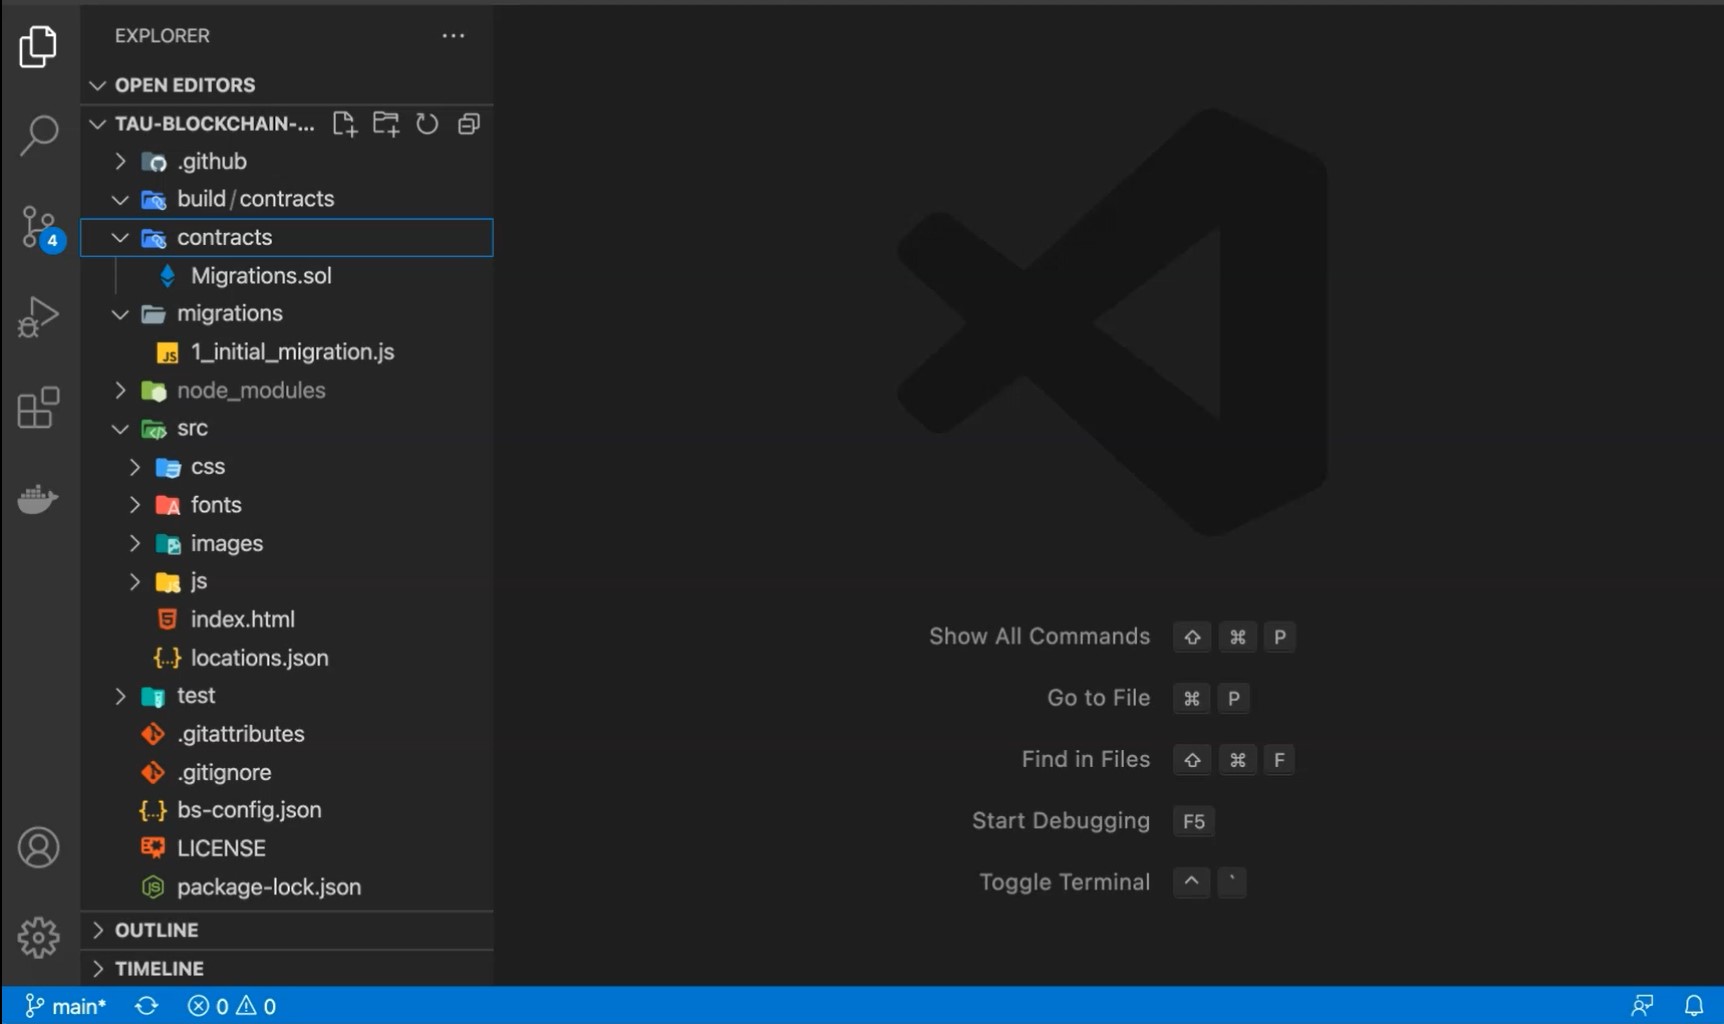
The contracts folder contracts/ contains the Solidity source files for our smart contracts.
There is an important contract called Migrations.sol.
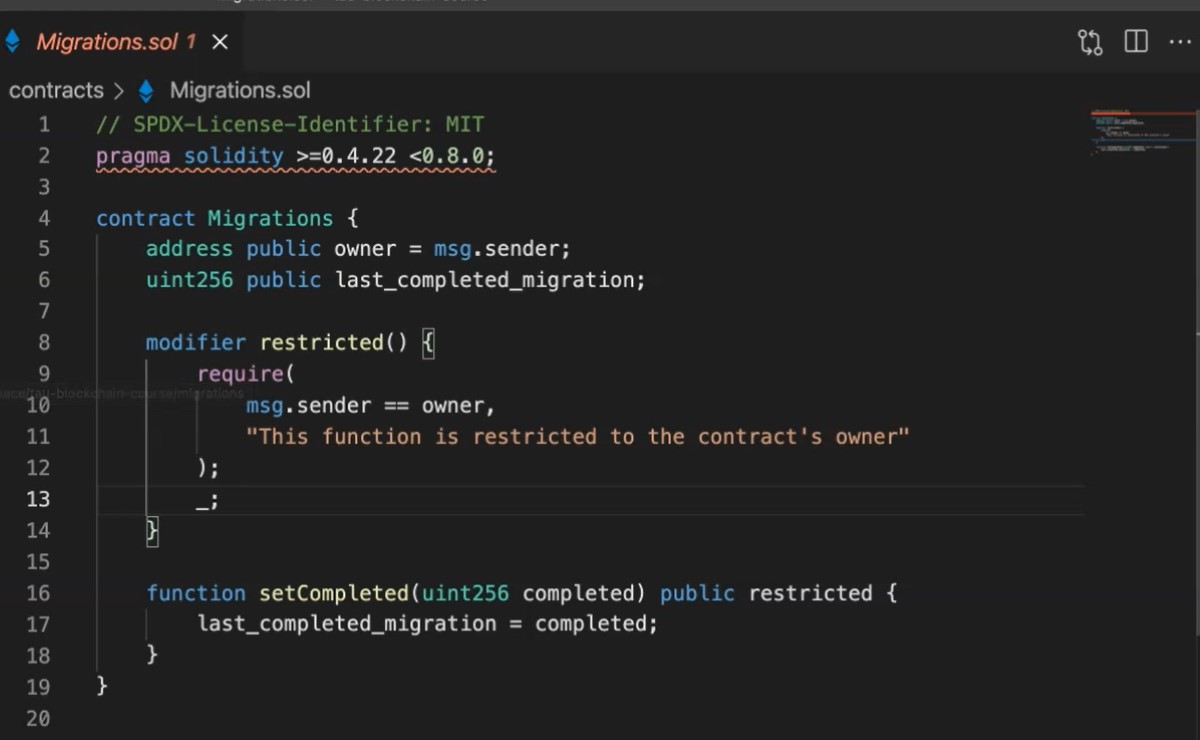
When you create a Truffle project through truffle init command, you have a single Migrations.sol file that helps in a deployment process, and it keeps a record of the contract deployments in the blockchain.
In the migrations folder migrations/ you see all the migrations of the contracts and these scripts help you handle smart contract deployments.

The test folder test/ can contain both JavaScript and Solidity tests for our smart contracts.
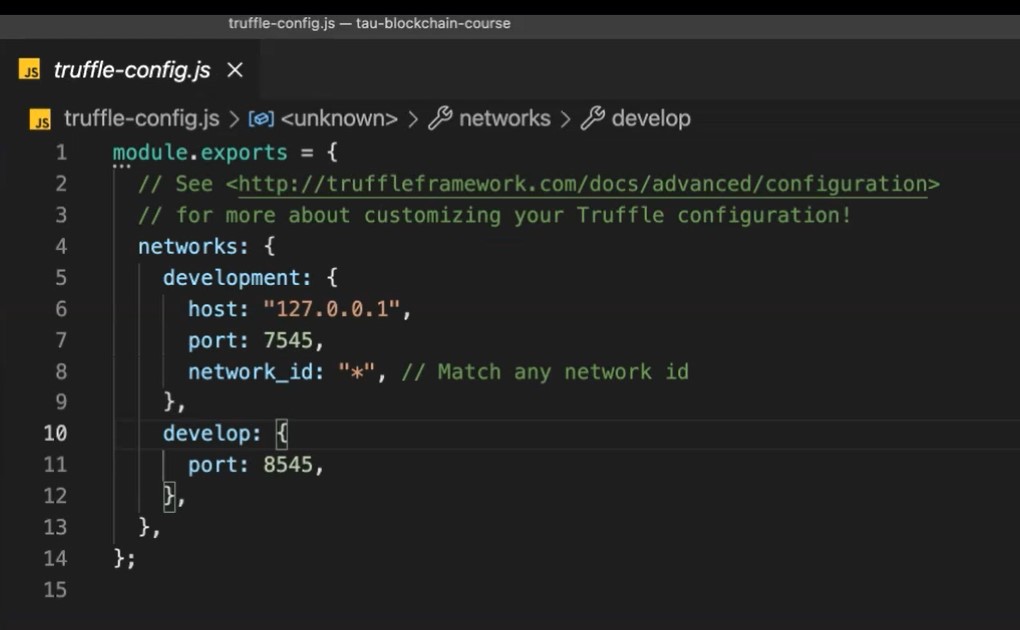
And also, you see the Truffle configuration file truffle-config.js which is a file that allows us to add the networks that we are going to use.
# Creating Your First Contract — Voting.sol
Let's create our first smart contract that will act as the back-end logic and storage of this best location voting website.
pragma solidity >=0.4.22 <0.8.0;

contract Voting {
    address[16] public locations;

    function vote(uint256 locationId) public returns (uint256) {
        require(locationId >= 0 && locationId <= 15);

        locations[locationId] = msg.sender;

        return locationId;
    }

    function getLocations() public view returns (address[16] memory) {
        return locations;
    }
}
We create a new file, named Voting.sol in the contracts/ directory. Then add the required version of Solidity at the top of the contract.

The pragma command means additional information that only the compiler cares about.
Like JavaScript or PHP, statements are terminated with semicolons.
Solidity has a unique type called an address. Addresses are Ethereum addresses stored as 20-byte values.
Every account and its smart contracts on the Ethereum blockchain has an address and can send and receive Ether to and from this address.
Add the following variable on the next line after contract Voting — address[16] public locations;.
We have defined a single variable, “locations”. This is an array of Ethereum addresses.
Arrays contain one type and can have a fixed or variable length. In this case, the type is address and the length is 16.
You also note “locations” is public and public variables have automatic getter methods. But in the case of arrays, a key is required and will only return a single value.
In Solidity the types of both the function parameters and output must be specified.
In this case, we will be taking a locationId integer and returning an integer.
We are checking to make sure locationId is in range of our locations array.
Arrays in Solidity are indexed from zero, so the ID value will need to be between 0 and 15.
We use the require statement to ensure the ID is within range. If the ID is in range, we then add the address that made the call to our locations array.
The address of the person or smart contract who called this function is denoted by msg.sender.
Finally, we return the locationId provided as a confirmation.
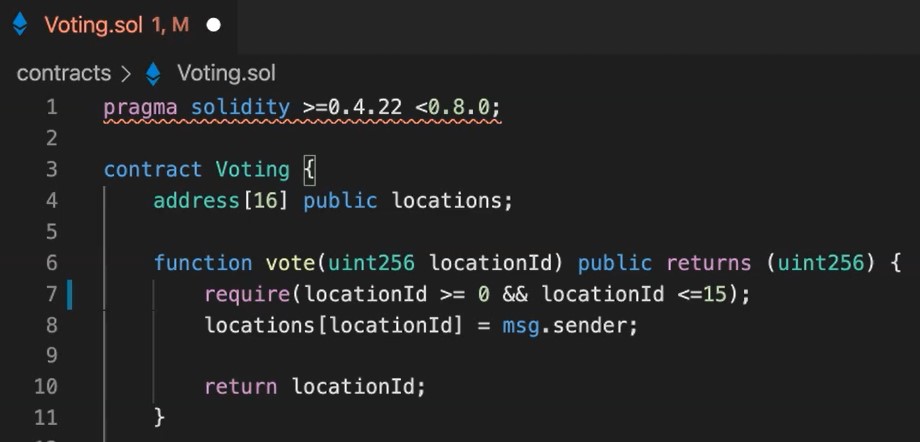
Now we write a function to return the entire array.
Add the following getLocations() function to the smart contracts after the Voting function we added above.
Since the location is already declared, we can simply return it.
Be sure to specify the return type, in this case the type for locations is address[16] memory. memory gives the location in memory for the variable.
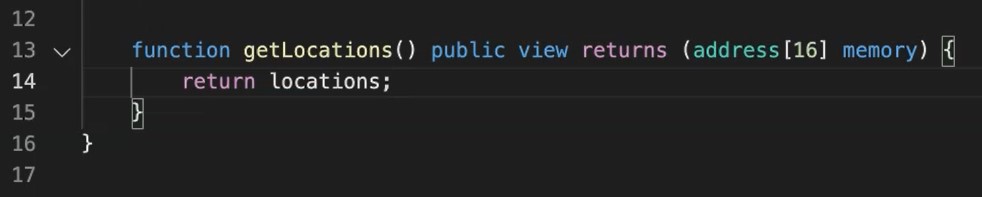
The view keyword in the function declaration means that the function will not modify the state of the contract.
# Importing and Declaring Dependencies
You can declare contract dependencies using Solidity's import even though we are not going to use it in this class. But Truffle will compile contracts in the correct order and ensure all dependencies are sent to the compiler.
Dependencies can be specified in two ways.
Importing dependencies internally via file name.
To import contracts from a separate file, add the following code to your Solidity source file:
import "./AnotherContract.sol";
Or you can import contracts from an external package.
Truffle supports dependencies installed via both ethPM and NPM. To import contracts from a dependency, use the following syntax:
import "Anotherpackage/AContract.sol";
NOTE
Truffle will search installed packages from ethPM first, before searching for packages installed from NPM. So, in the rare case of a name conflict, the package installed via ethPM will be used.
# Compile Command and Migration Script
Let's compile and migrate.
As this is our first run, all contracts need to be compiled. On the subsequent runs Truffle will compile only the contracts that have been changed since the last compile.
Solidity is a compiled language, meaning we need to compile our Solidity to byte code for Ethereum Virtual Machine (EVM) to execute. Think of it as translating our human readable Solidity into something that the EVM will understand.
In the terminal make sure you are in the root of the directory that contains the dapp and type:
truffle compile
Artifacts of your compilation will be placed in the viewed contracts folder relative to your project root. This folder will be created if it doesn't exist.
The name of the generated artifacts.json file does not reflect the name of the source file, but of the name of the contract definition.
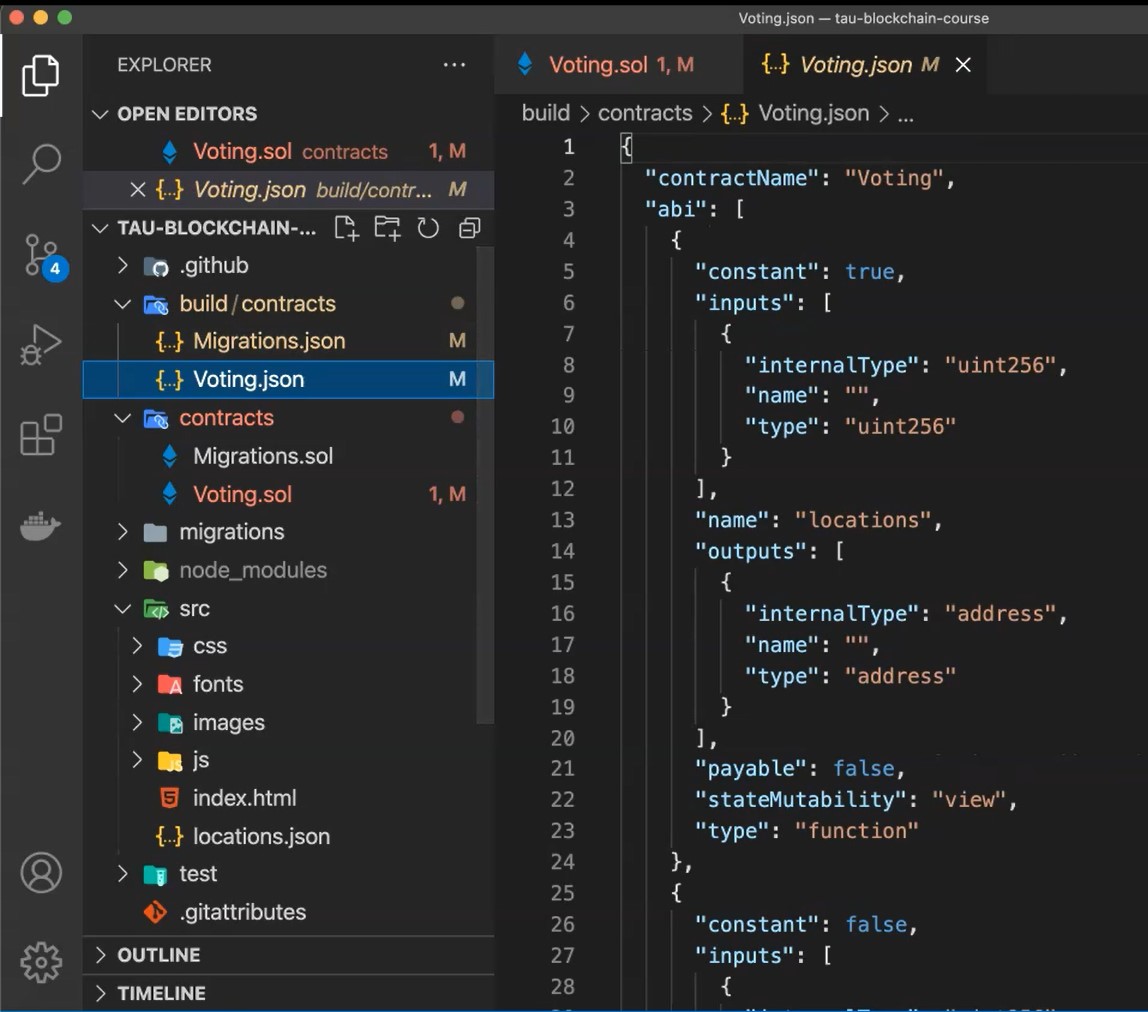
These artifacts are integral to the inner workings of Truffle, and they play an important part in the successful deployment of your application.
For this reason, do not edit these files as they will be overwritten by contracts compilation and deployment.
NOTE FOR WINDOWS USERS
If you are on Windows and encountering problems running this command, please see the documentation on resolving naming conflicts on Windows link in the resources (or click here).
Now we need to migrate.
For the first migration you might just be deploying new code, but over time, other migrations might move data around, or replace a contract with a new one.
You can see there is already a JavaScript file out in the migrations/ folder called 1_initial_migration.js.
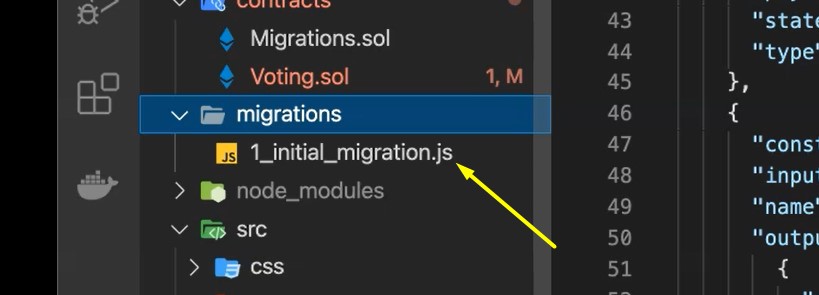
This script handles deploying the Migrations.sol contract to observe subsequent smart contract migrations and ensure we don't double migrate and change contracts in the future.
Now we are ready to create our own migration script.
var Voting = artifacts.require("Voting");

module.exports = function (deployer) {
deployer.deploy(Voting);
};
So, create a new file and name it 2_deploy_contracts.js in the migrations/ folder.
Type...
var Voting = artifacts.require("Voting")
...which is our contract. Then...
module.exports = function (deployer)
... followed by...
deployer.deploy(Voting)
This is going to deploy our contracts.
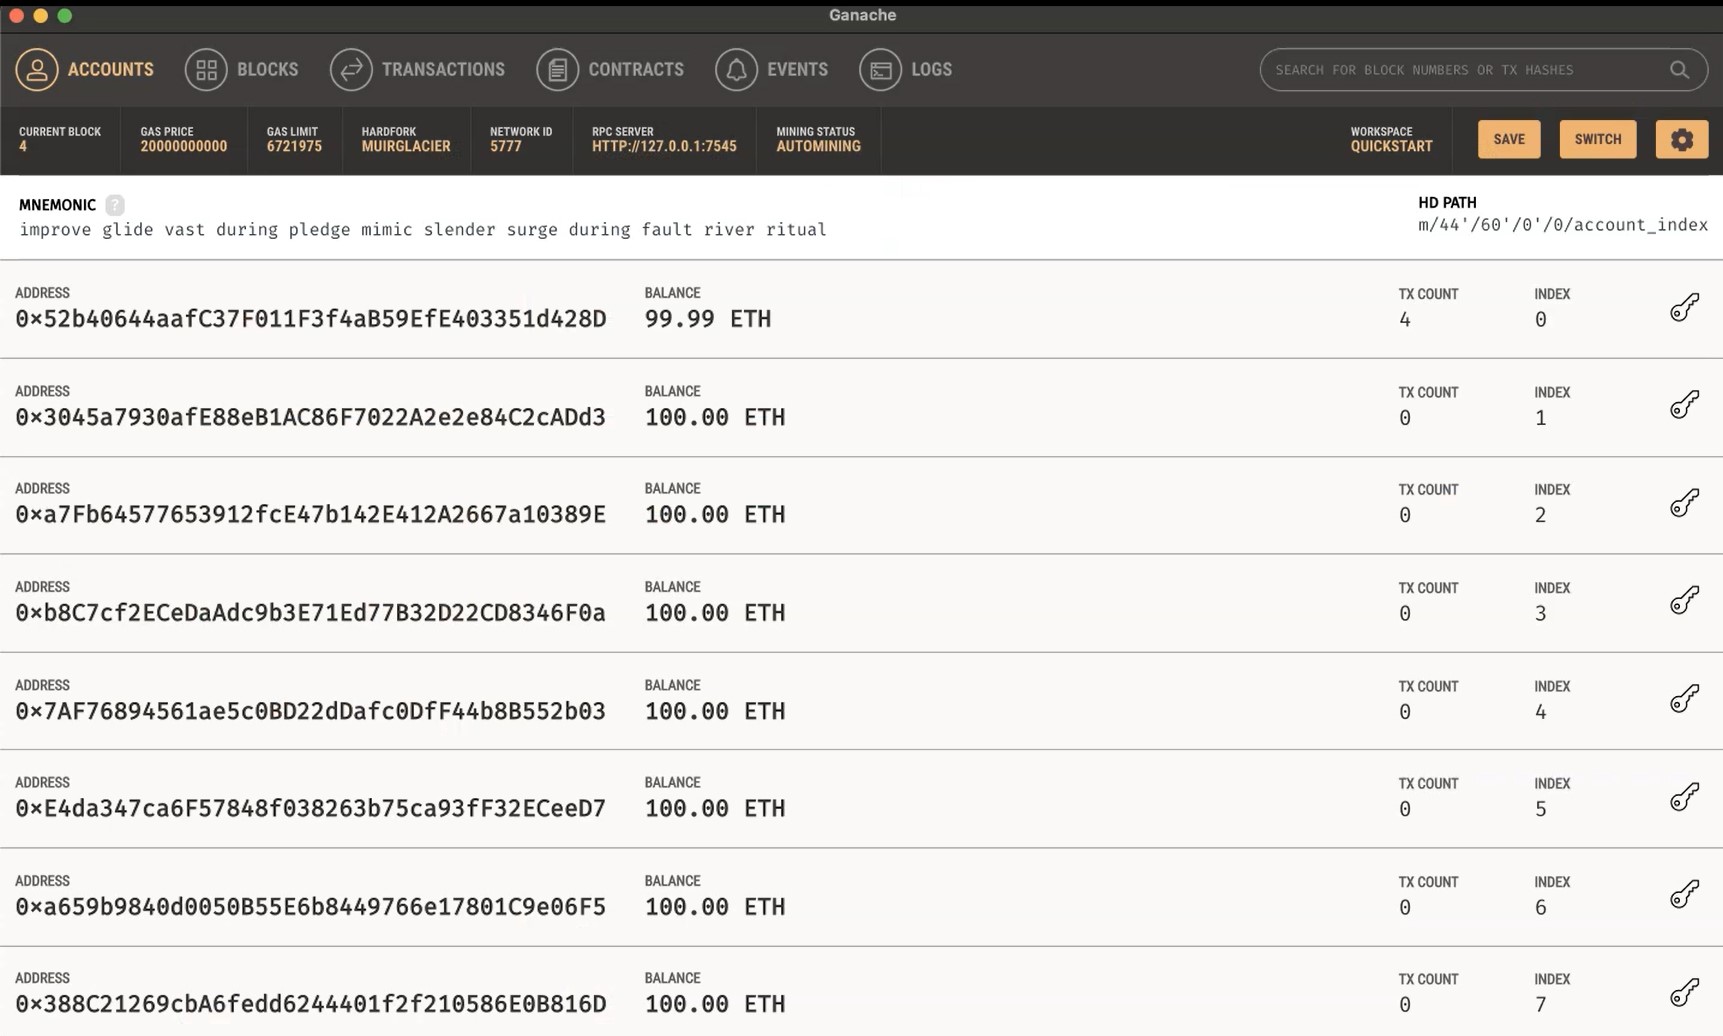
Before we can migrate our contract to the blockchain, we need to have a blockchain running.
So, make sure Ganache is running and go to your terminal and type truffle migrate.
You can see the migrations being executed in order followed by some information related to each migration.
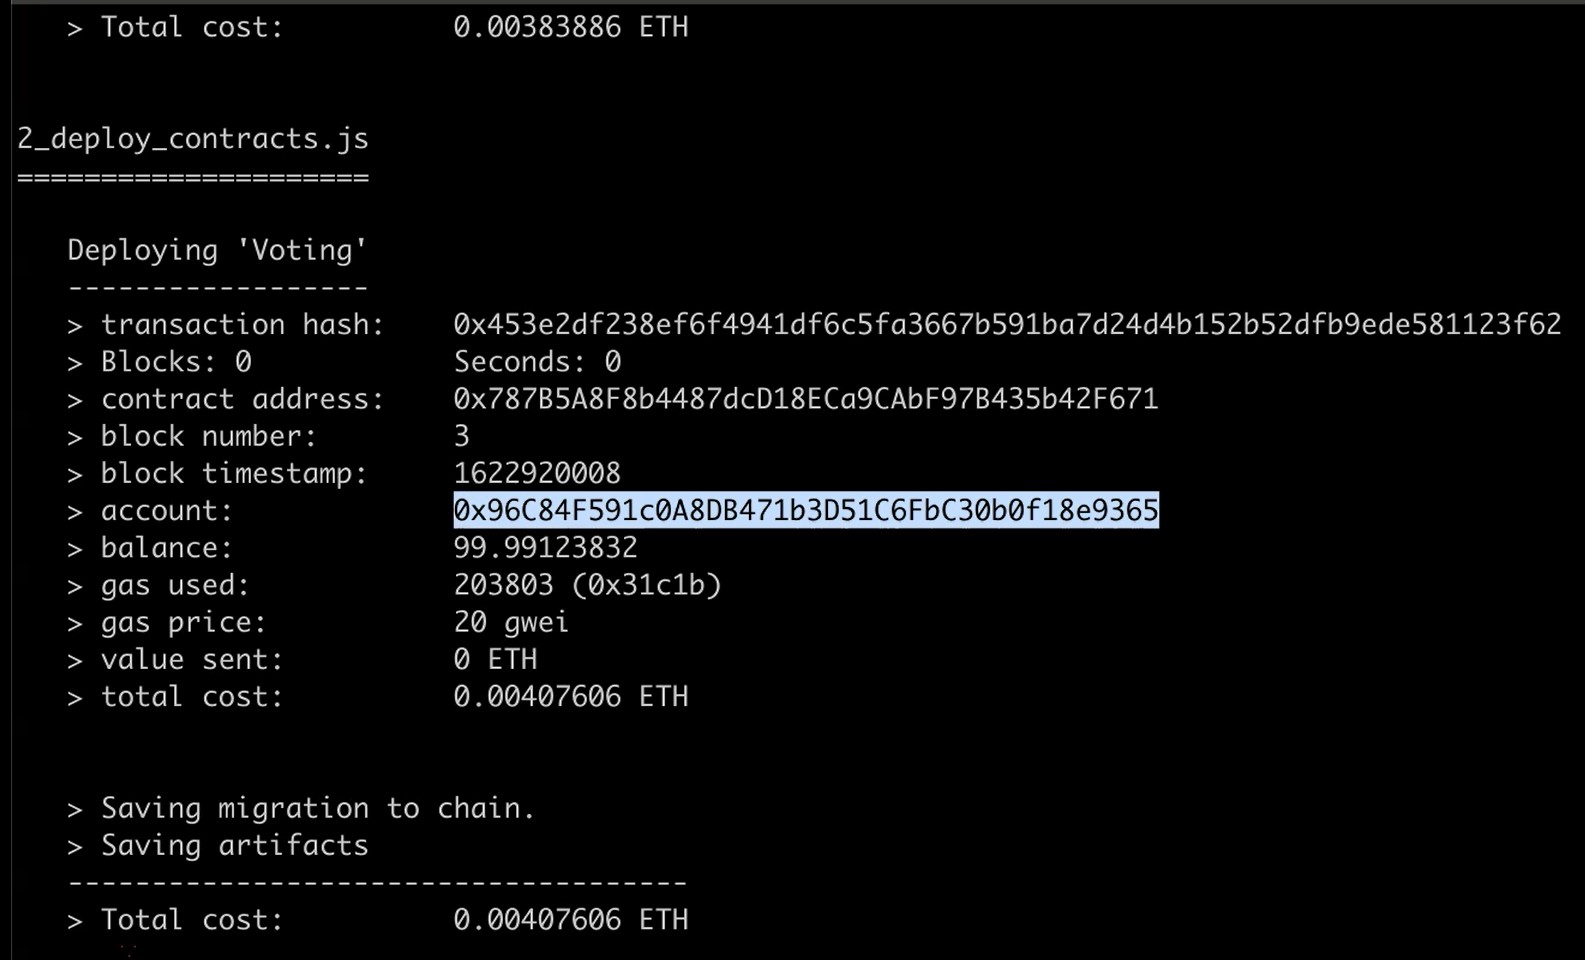
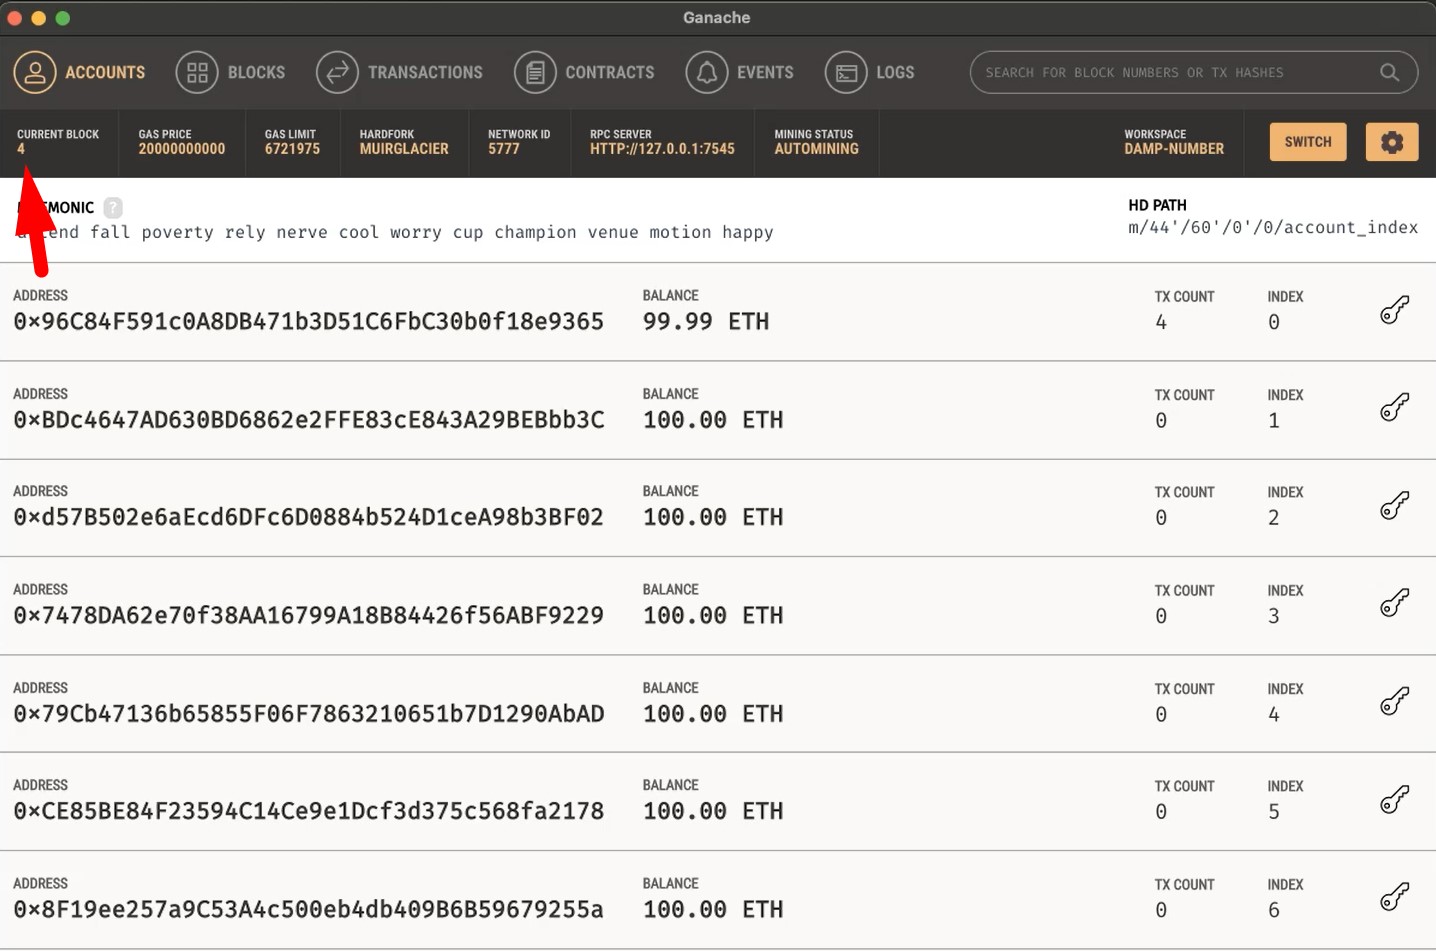
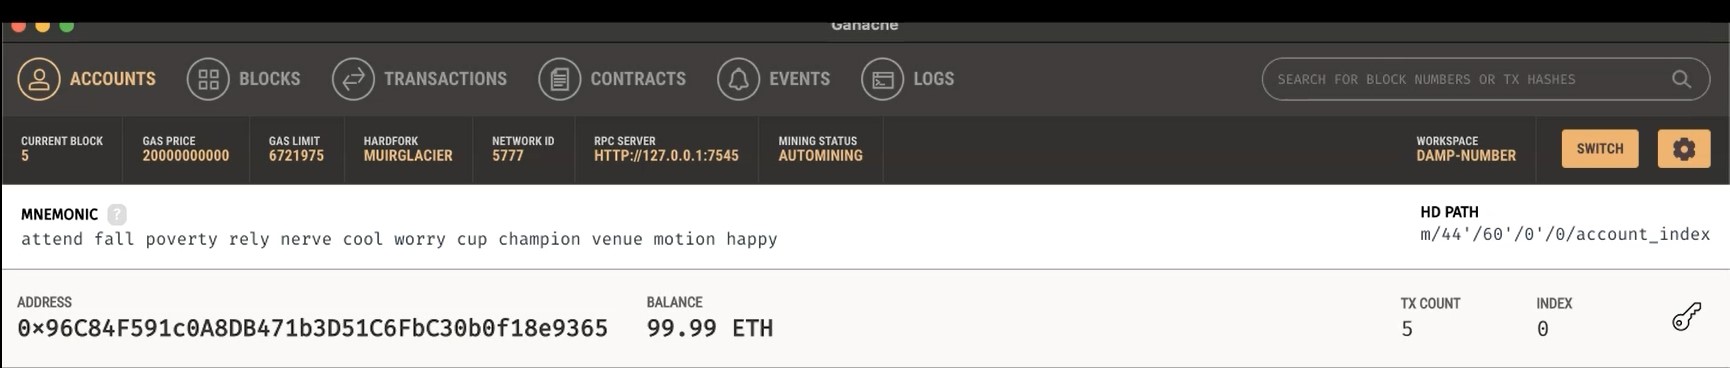
In Ganache note that the state of the blockchain has changed.
The blockchain now shows that the current block that previously was 0, is now 4.
And in addition, while the first account originally had 100 Ether, it is now lower due to transaction costs of migration.
# Reading and Writing Data
Let's talk about reading and writing data.
The Ethereum network makes a distinction between writing data to the network and reading data from it.
In general, writing data is called a transaction, whereas reading data is called a call.
Transactions and calls are treated very differently and have the following characteristics.
# Transactions
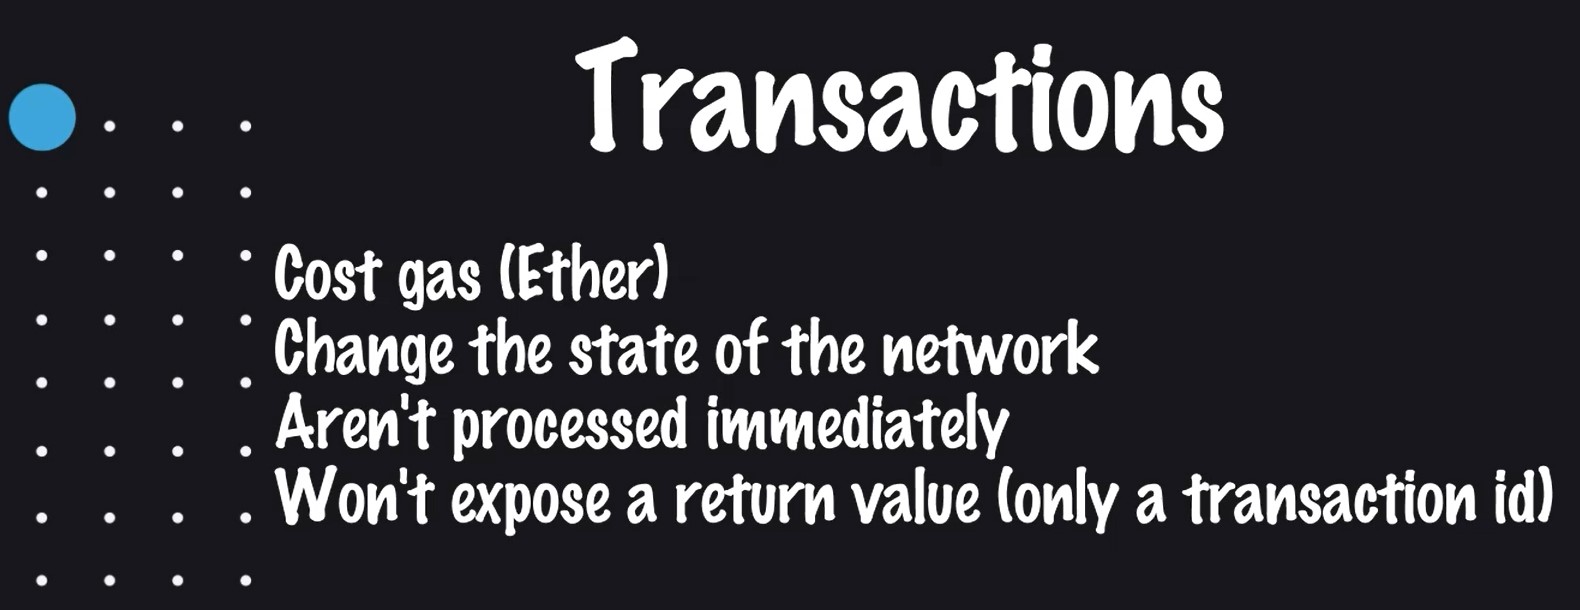
Transactions fundamentally change the state of the network.
Transactions can be as simple as sending Ether to another account. Or as complicated as executing a contract function or adding a new contract to the network.
Transactions take time to process, and they cost Ether to run, known as Gas.
On the Ethereum blockchain Gas refers to the cost necessary to perform a transaction on the network. Miners set the price of Gas based on supply and demand for the computational power of the network.
When you execute a contract's function via transaction, you cannot receive that function’s return value because the transaction isn't processed immediately.
In general functions meant to be executed via transaction will not return a value. They will return a transaction ID instead.
So, in summary transactions cost gas, change the state of the network, aren't processed immediately and won't expose a return value.
# Calls
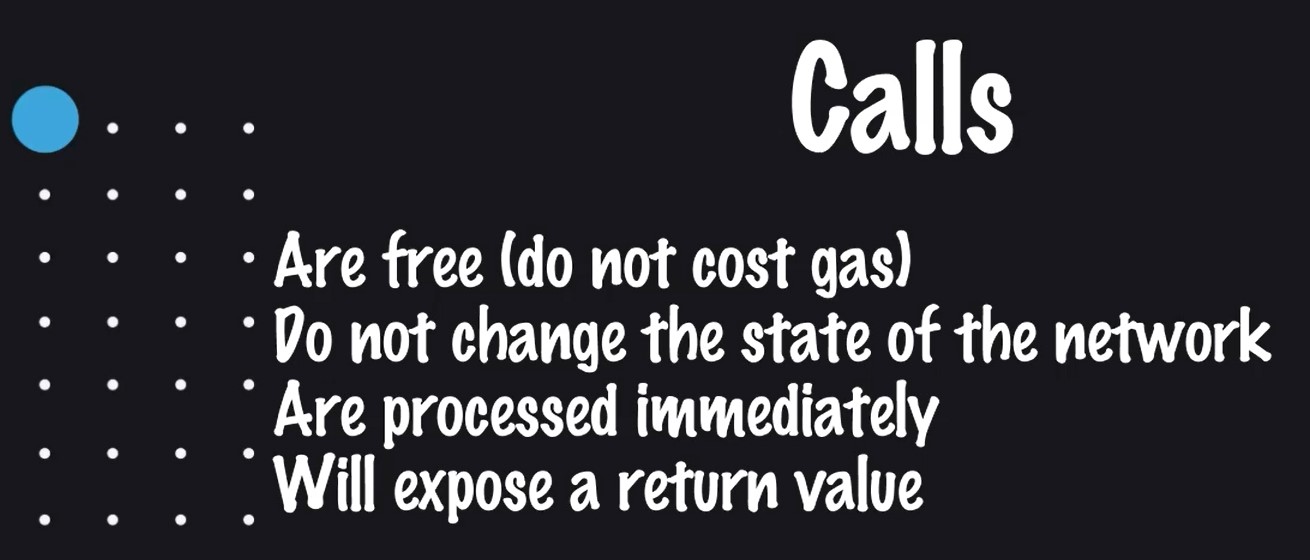
Calls on the other hand are free to run, and their defining characteristic is that they read data.
When you execute a contract function via a call, you receive the return value immediately.
So in summary, calls are free, do not change the state of the network, are processed immediately, and expose a return value. Basically, if you need to read data, just use a call and if you need to write data, use a transaction function.
# Running the Smart Contract
You have now written your first smart contract and deployed it to a locally running blockchain. It's time to interact with our smart contract to make sure it does what we want.
So run npm run dev on your terminal. Make sure Ganache is running.
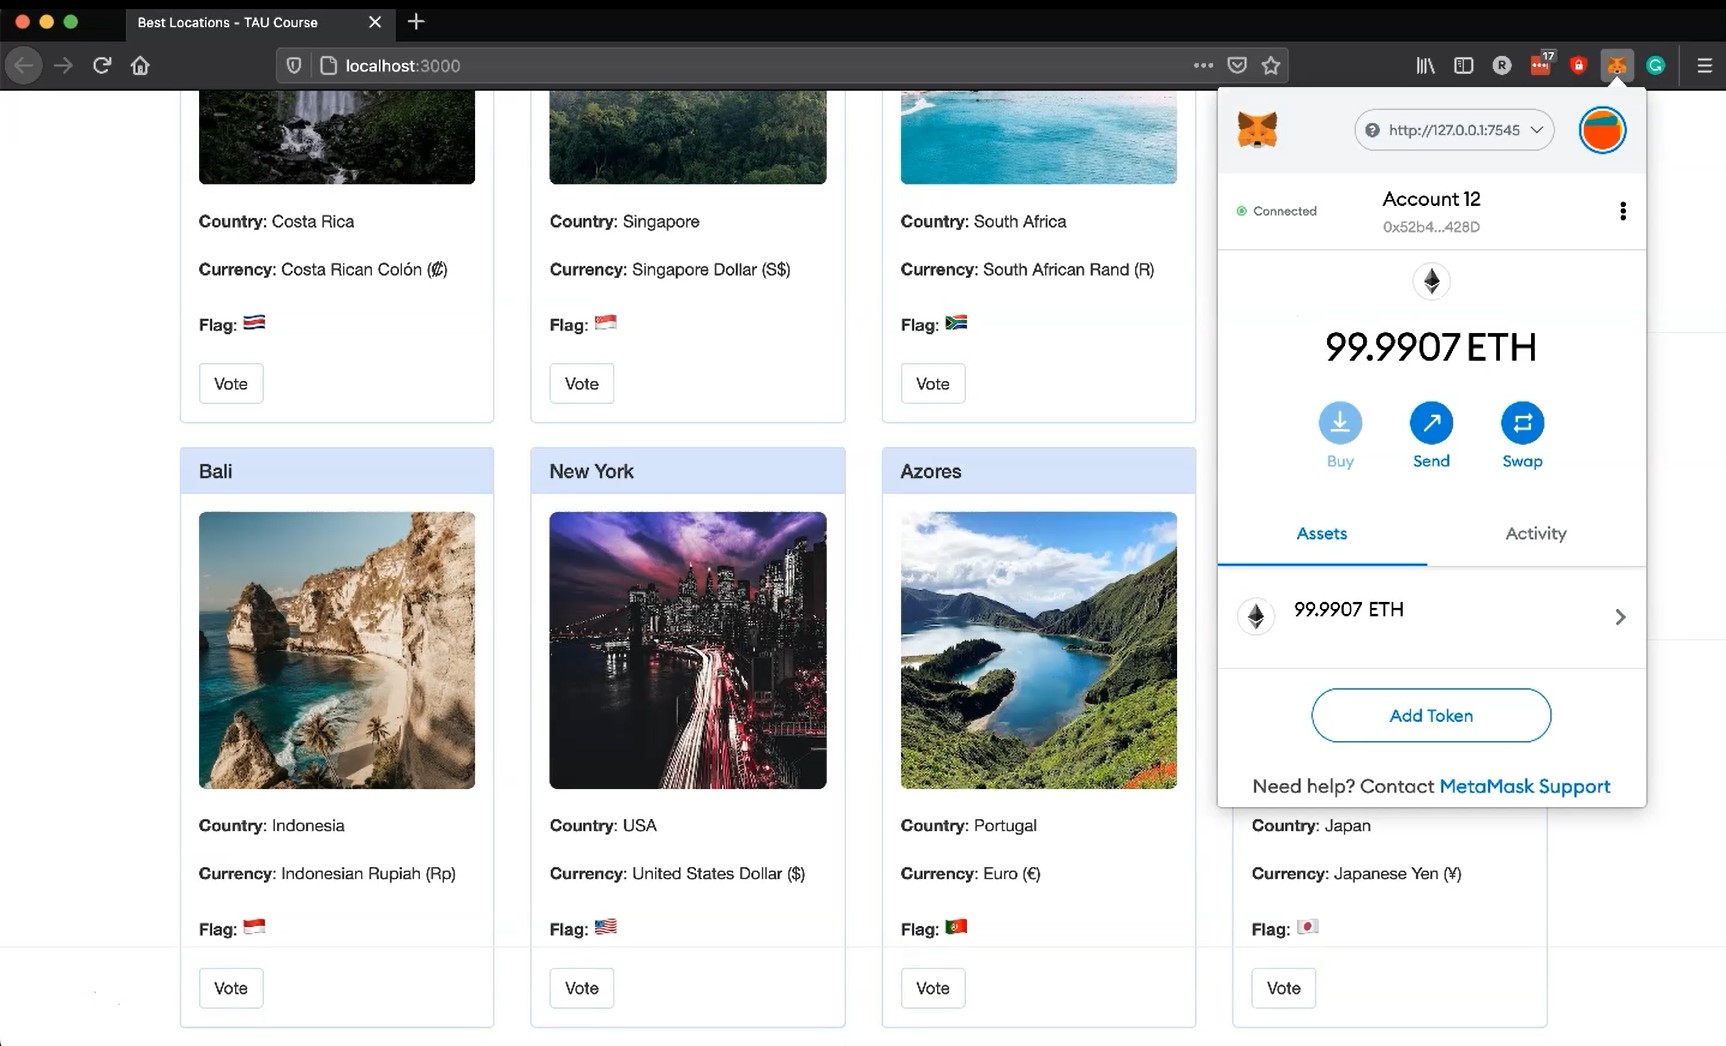
Choose a location and click on vote.
MetaMask should pop up with the Gas cost of that transaction.

When you confirm, you should see the vote button was disabled and now it says voted.
You also see the account has less Ether than before on Ganache.
So, you have created your first contract. Let's write some tests for it in the next chapter.
