

Transcript
Overview: In the previous lesson we did a simple test just checking the status code, but let's do something a little more interesting. In this lesson, I'm going to show you how Postman supports data driven testing.
Note:
For maximum benefit, please view the course video for dynamic demonstrations.
Data driven testing is when you have one test that you run multiple times with different data variables. It's useful for things like, if you have a certain range of characters that you're supporting in your names, to make sure that all those characters are supported in different tests. That's just one example.
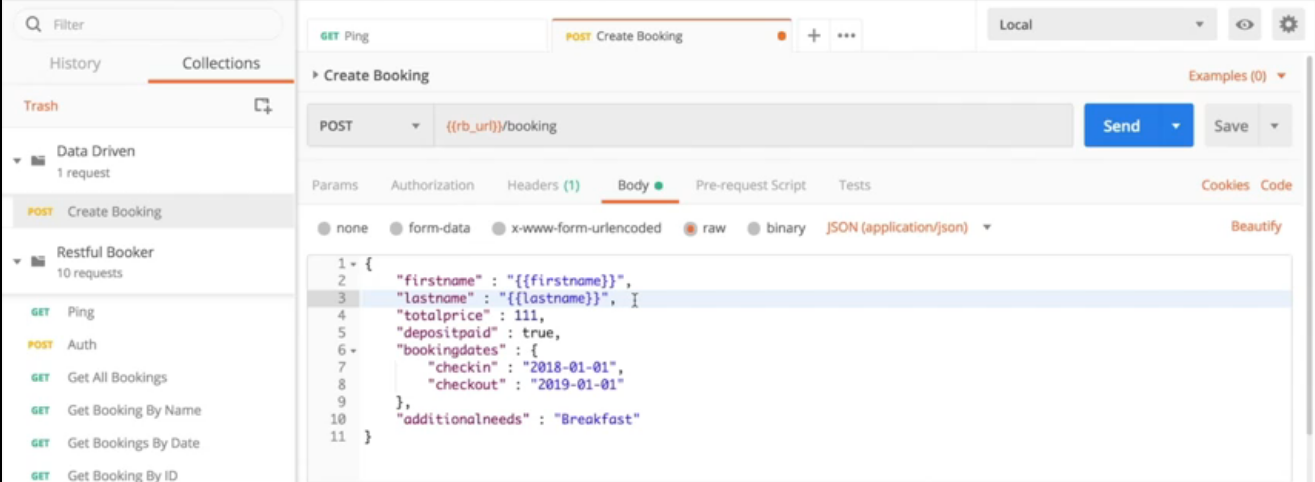
So let's start a collection. We'll call it Data Driven. And we'll just copy our Create Booking into there. I'm just using Control C and Control V to copy. Okay, so here in the body of the request, let's make sure everything is working.
Okay, but we're, instead of just having Jim Brown like we had in our previous default examples, we're just going to put in curly braces in the last name variable field and call this the “firstname”. And then “last name” in that variable field:
{
	“firstname” : “firstname”,
	“Lastname” : “lastname”,
	“totalprice” : 111,
	“depositpaid” : true,
	“bookingdates” :  {
		“checkin” : “2018-01-01”,
		“checkout” : “2019-01-01”
	},
	“additionalneeds” : “Breakfast”
}
I find that if you keep the variable names the same as the key names, it's easier to keep track of what goes together. So we have first name and last name as variables. So now the question is, where are those variables going to come from?
So I've created the CSV file, that's just a comma file, comma delimited file, very simple. Here's our header, first name, last name, and then just some examples of names that I think should be supported. So that's our file with our first names and our last names.
And then in our test section, let's put in some tests. We're going to again with the 200 from our last lesson. That's always a good one to have. And then a json value check, because we're making sure that the name is there.
pm.test(“Check first name”, function () {
	var jsonData = pm.response.json();
	pm.expect(jsonData.value).to.eql(100);
});
So you're going to go check first name, and looking here, we can see that when our result comes back, we have the booking ID, and then we have the booking, and then the first name.
pm.test(“Check first name”, function () {
	var jsonData = pm.response.json();
	pm.expect(jsonData.booking.firstname).to.eql(100);
});
So when we come here to the tests, this is going to be the JSON response that's pulled out. So it's going to be the booking, and then the first name is equal to what? It's going to be our first name variable, right?
So on a separate line, get a variable. And you're going to get the first name. And let's do that also for the last name. And first name equals, and var last name equals.
var fn = pm.variables.get(“firstname”);
var ln = pm.variables.get(“lastname”);

pm.test(“Check first name”, function () {
	var jsonData = pm.response.json();
	pm.expect(jsonData.booking.firstname).to.eql(100);
});
And so now, I also like to update the name of the test with the name of the variable 'cause then if something fails, we know exactly what it was without having to dig too hard. So first name, and then the first name equal to first name (fn). And we're going to do the same thing for the last name. Last name, last name, last name, and last name (ln).
var fn = pm.variables.get(“firstname”);
var ln = pm.variables.get(“lastname”);

pm.test(“Check first name” + ln, function () {
	var jsonData = pm.response.json();
	pm.expect(jsonData.booking.firstname).to.eql(fn);
});

pm.test(“Check last name” + ln, function () {
	var jsonData = pm.response.json();
	pm.expect(jsonData.booking.lastname).to.eql(ln);
});
Okay, so here's our test, save that.
Now the question is, how do we get these variables in the test? We go to the collection runner, and this time we're going to go to data, and we're going to select a file. And we're going to select our names file. And we can preview it here, first name, last name, etc. When I run the tests, we can see here that everything passed, and we can see all the names that were put in.
So that's how you can do data driven testing in Postman.
# Code Resource
Quiz:
Note: Chapter 4 has been divided into multiple sub-chapters. You'll find the Quiz on the last sub-chapter, i.e. Chapter 4.4. Read on!
