Transcript
**Overview: Now that we've looked at a few ways to create tests in Postman, I wanted to walk you through a more fully fleshed out test suite to show what the Postman tool is capable of doing.**
Note:
For maximum benefit, please view the course video for dynamic demonstrations.
Postman really is a fully fledged automation tool. There's lots of companies that use Postman tests to automate all of their API tests. Let's take a look at some of the stuff that's possible with this tool.
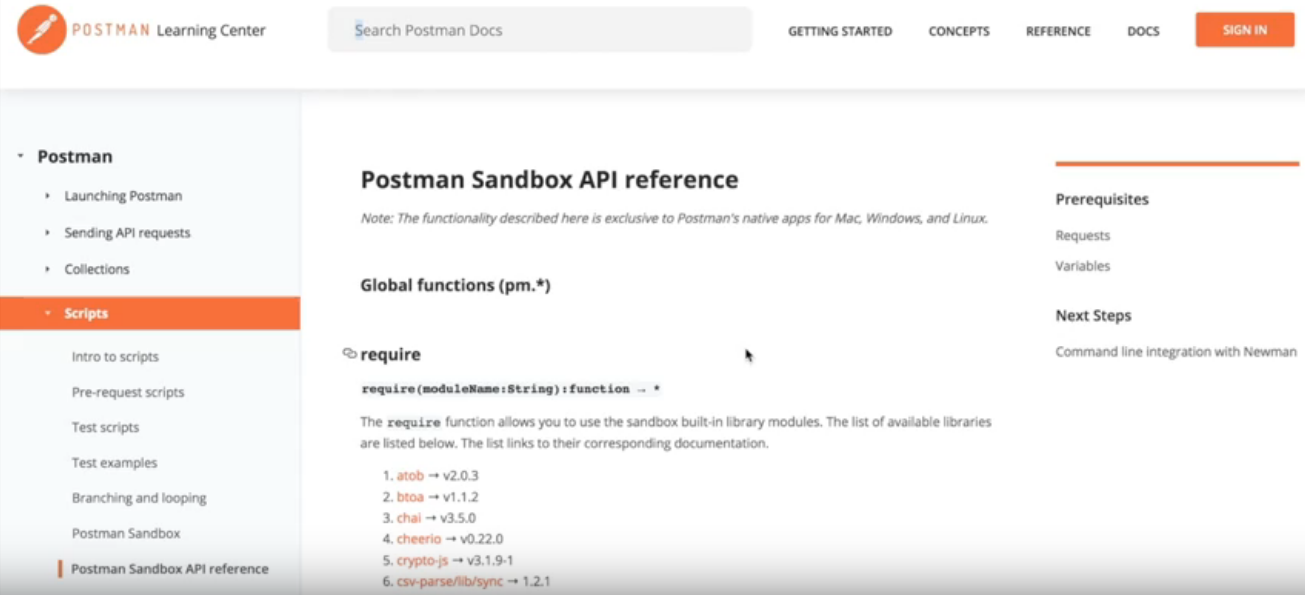
Before I start going through the tests, I just wanted to let you know where the references for all the stuff you can do in the tests sandbox, and the pre-request scripts. It's all in the [Postman Scripting docs] (https://learning.getpostman.com/docs/postman/scripts/postman_sandbox_api_reference).
This really tells you all you need to know. Postman basically uses a subset of JavaScript to do their testing. I'm not a JavaScript expert. Honestly, most of what I know about JavaScript comes from doing things in Postman. This is a really great way to get started with automation, it's a great way to get started using JavaScript.
Okay, that’s the documentation, so let's take a look at the tests.
I created a new collection called the Restful Booker BVT. We're going to pretend this is a sort of a smoke test for the Restful Booker to make sure that the functionality is working as it should with a very quick set of tests.
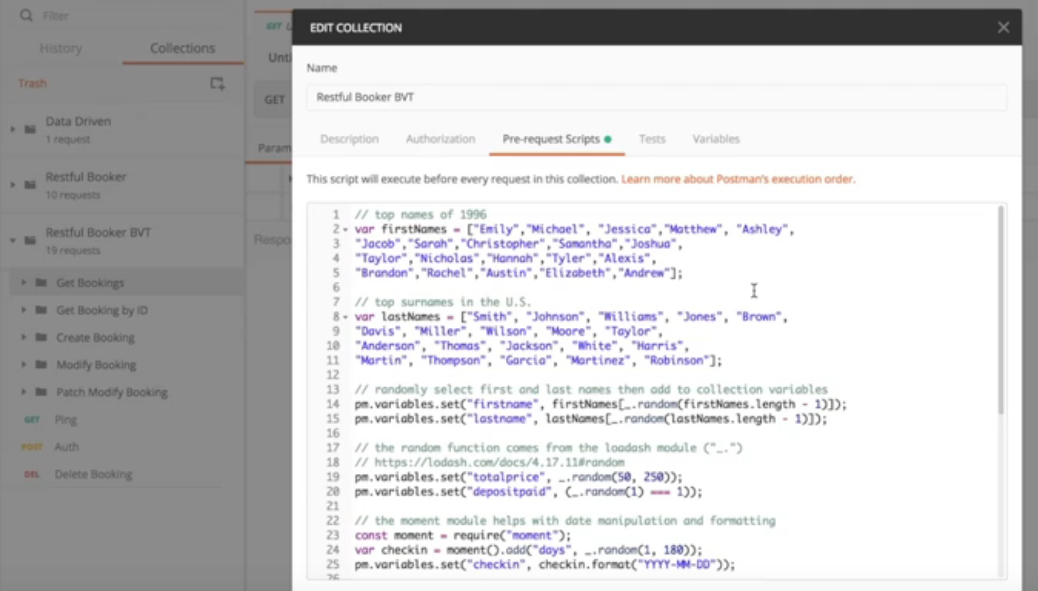
The first thing we've done is at the collection level, let's go to the edit collection tab. Here we have the pre-request scripts. What these are, are scripts that run before the requests. At the collection level, these are things that run first before anything else.

What I've done here is I want to set up a situation where we always know what the booking object is that we're working with. It's really important in automation to know what the answer should be before you ask the question. This is how we're going to create our object that we're then going to run tests on.
I have some arrays of common first names and last names. Then I am randomly picking things from those arrays and setting them in the Postman variables objects. The Postman variables are available to the collection while the tests are running, but then they go away so they're not cluttering everything up while the tests aren't running.
//randomly select first and last names then add to collection variables
pm.variables.set(“firstname”, firstNames[_.random(firstNames.length - 1)]);
pm.variables.set(“lastname”, lastNames[_.random(lastNames.length - 1)]);
**This random functionality comes from a module called Lodash which is available automatically. ** See it's a low dash (_), that's why it's called Lodash. This has a lot of functionality for dealing with arrays and collections, and also for creating random numbers. So, that's Lodash.
Note:
Lodash is a JavaScript library which provides utility functions for common programming tasks using the functional programming paradigm.
I'm getting first name, last name, some prices. This random one is equal to one is basically a coin flip to decide whether we pay the deposit or not.
This next module that we're using is Moment.
Note:
Moment is a JavaScript library which parses, validates, manipulates, and displays dates and times in JavaScript.
// the moment module helps with data manipulation and formatting
const moment = require(“moment”);
var checkin = moment ().add(“days”, _.random(1, 180));
pm.variables.set(“checkin”, checkin.format(“YYYY-MM-DD”));
This is something that works with dates and formatting. It makes it a lot easier than just the native JavaScript date. In order to input it and bring it in to our script, we just need to do this require. Now we have this require moment and we can call this moment object to do all of our date manipulation.
Now we have all our randomly picked values and we can put them together into a brand new booking object, and then we're saving that also into our variables so that all of the tests in our build verification tests can use this new booking object.
// put all the selected variables into a new booking object and save to a variable
var booking = {
	“firstname” : pm.variables.get(“firstname”),
	“lastname” : pm.variables.get(“flasttname”),
	“totalprice” : pm.variables.get(“totalprice”),
	“depositpaid” : pm.variables.get(“depositpaid”),
	“bookingdates” : {
“checkin” : pm.variables.get(“checkin”),
“checkout” : pm.variables.get(“checkout”)
},
	“additionalneeds” : pm.variables.get(“additionalneeds”)
}
pm.variables.set(“new_booking”, booking)
Let's just take a quick look at how this random booking generator is going to work. We'll go to our Create Booking and let's just run it a few times. You can see in the body, I'm accessing all the variables with the double curly braces. First name, last name, etc.
{
	“firstname” : “{{firstname}}”,
	“lastname” : “{{lastname}}”,
	“totalprice” : “{{totalprice}}”,
	“depositpaid” : “{{depositpaid}}”,
	“bookingdates” : {
“checkin” :  “{{checkin}}”,
“checkout” :  “{{checkout}}”
},
	“additionalneeds” : “{{additionalneeds}}”,
}
Now when I send, you can see that I have a booking for Joshua Martin for 219 whatevers, we'll say dollars. Send again, and I have the results for Austin Harris. I can run this any number of times and the booking is going to be a little different every time, but still realistic. That's basically what we want in our booking generator.
We'll look at a couple of the simple tests first.
We have Ping:
pm.test(“Ping is successful”, function () {
	pm.response.to.be.success;
});
We already looked at Ping. Of course it doesn't return a 200, it returns at 201. What matters is that it's a heartbeat that is returning 200 something. That's this response to the success. It means that the response is in the 200s.
Our Auth, this is going to respond with a 200.
pm.test(“Status code is 200”, function () {
	pm.response.to.have.status(200);
});

pm.test(“Response contains token”. Function () {
	var jsonData = pm.response.json();
	pm.expect(jsonData).to.have.property(“token”);
});
The response contains token. This is based on that we don't know what the value of token is going to be. We just want to know that there is a token value. That's with this to.have.property is.
**Delete Booking is a little more interesting. **
Before we run the delete, we have to have something to delete. What we're going to do is we take our generated booking object, and we're actually going to call Create Booking sort of under the covers here in our pre-request.
// create the base booking
const createBooking = {
    url: pm.environment.get(\"rb_url\") + \"/booking\",
    method: 'POST',
    header: 'Content-Type:application/json',
    body: {
    mode: 'raw',
        raw: JSON.stringify(pm.variables.get(\"new_booking\"))
    }
};
pm.sendRequest(createBooking, function (err, res) {
pm.expect(err).is.null;
pm.variables.set(\"booking_id\", res.json().bookingid)
});
This is a setup for our delete test. This is using the pm.sendRequest (https://learning.getpostman.com/docs/postman/scripts/postman_sandbox_api_reference/#pmsendrequest). All of that information on how to do send request is in the Postman documentation. We're doing a sendRequest and we get the result back here, this res, this result response, and then we can pull the new booking ID out of the json booking and save that.
Now we know what the booking ID is, and we can delete that booking.
    pm.test(\"Status code is 200\", function () {
        pm.response.to.have.status(200);
    });

    pm.sendRequest(pm.environment.get(\"rb_url\") + \"/booking/\" + pm.variables.get(\"booking_id\"),
    function (err, res) {
        if (err) {
            console.log(err);
        }
        pm.test('Booking no longer exists', function () {
        pm.expect(err).to.equal(null);
        pm.expect(res.code).to.eql(404);
        });
    });
We have our booking ID and then we make sure we got a 200. Then what we do here is again, we're doing a sendRequest. This is now after the request has been made, we want to make sure that the booking is actually deleted.
We're doing a sendRequest to get the booking by ID. So, we get our environment URL and add the booking and the booking ID that we already know. Note that in the script we can't use this double curly brace. We have to get it from the variables using pm.variables. We get that and we make sure that it becomes a 404. Basically, we create the booking, we delete the booking, and then we make sure that we cannot get it again, that it's a 404.
So, let's see how this works. Of course we have our 201 created, which I consider a bug. But the good news is that the booking no longer exists. The delete functionality is still working.
There's a lot of other tests here and we could spend the next hour, or two, or three going through all the possible ways to test, and all the different variables you can try, and the little quirks of JavaScript. But before we really get in the weeds with that, let's run this BVT and see what happens with it.
We come up to the collection runner and we're going to “Run.” You can run just the folders or you can run the whole thing. Let's just go for it here and see what happens. We have 44 that passed and nine that failed.
In the collection runner, you can narrow it down to ones that passed, or ones that failed. Let's look at some of the failed ones.
This one is very interesting here, invalid create. The check-in was actually not what we wanted. I'm going to admit that I've been working with Restful Booker for quite a while now, and I never realized that the date handling was so whack until I did this BVT. This is why dates should always be timestamps and not strings. But enough of the soap box about dates.
There's some other interesting ones here. For example, here in the Patch, when we inserted a null first name, it actually turns out that if you do it through Patch, it will take the no first name.
These are some of the issues that have been revealed by our build verification test.
If you want to dig in a little deeper on to a specific test, a great tool is the Postman Console. For example, if I go to the Invalid Patch and I have the pre-request script, again I'm creating the object before I modify it. I'm doing the first name null in our tests so we can send this.
If we look at our console window, this shows all the requests that went through. The post that happened in the pre-request, and you can see that the booking dates are not correct. We submitted July 4th, 2019 and it thought we meant July 3rd. Also, it shows here's our Patch and it shows the null here, and then the response body where it said null is just fine.
That's the collection runner and the console. This is just a little peek at the kinds of tests you can do in Postman. I encourage you to load this collection and go through the tests.
Hopefully you can be inspired to think about how you could write tests for your own APIs.
# Code Resource
Quiz
Note: Chapter 4 has been divided into multiple sub-chapters. You'll find the Quiz on the last sub-chapter, i.e. Chapter 4.4. Read on!
