

Transcripted Summary
In this lesson, I am going to walk you through the process of coding your first Selenium test using .NET Core in Visual Studio. If you have not installed Visual Studio yet, and need help with installation, please refer back to Chapter 1 for instructions.
Alrighty. So, here we are in Visual Studio Community edition for Mac.
Let's go ahead and see if you can remember how to create a new project. You're going to come here, add a new project. You can use the recently used MSTest Project, or you can get it from Tests -> MSTest Project, and click Next. Use the latest .NET Core version, and then we're going to give this project a name "Selenium Core".
We will create a project directory and we'll also use Git 4 version control so that ignores a bunch of Studio Visual files that are not necessary if we're using Git 4 source control.
Alright, fantastic. So here is our code.
using Microsoft.VisualStudio.TestTools.UnitTesting;

namespace SeleniumCore
{
    [TestClass]
    public class HomePageFeature
    {
        [TestMethod]
        public void ShouldBeAbleToLogin()
        {

		}
	}
}
Now, what is the exact application that we are testing and what is the test case that we're going to automate? Let's go ahead and take a look at that.
So here I have one of my new favorite demo applications for practicing test automation: saucedemo.com.
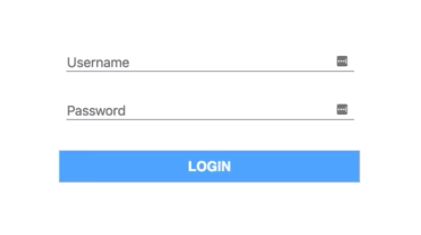
We can pull up this page in a browser and then use username: standard_user and password secret_sauce. Then we're going to log in and then validate that we are logged in.
So that is going to be our scenario. Let's go ahead and code it.
What is the very first step we need to accomplish when doing test automation with Selenium? Well, remember we need to create a driver instance. A driver instance will allow us to communicate with any kind of browser that we want to support, so in this case we have a Chrome browser, which you should have, as well, and we will create a driver instance that will work with that browser.
        [TestMethod]
        public void ShouldBeAbleToLogin()
        {
            var driver = new ChromeDriver();
		}
Alright you can see here the compiler is complaining that this namespace does not exist, and the reason that it doesn't exist is because we don't have the appropriate NuGet package in order to be able to work with ChromeDriver.
So, the NuGet package in C# is basically a package of code that someone has created that we can reuse in our test automation or in any C# code, we just kind of pull it in. In Java it's similar to a Maven package or in Ruby they have the gems, or in JavaScript we have the MPM packages, and NuGet package is something very similar, just reusable code that we can use throughout our coding process.
And so, Selenium has been created for us by the Selenium community and we can get that from the NuGet package store, you can come here, you can right click, you can do "add NuGet package" and we're going to search for Selenium.
Selenium WebDriver's the very top one so we're going to select it and then we're going to add it. You can see up here that it's adding Selenium WebDriver. As soon as it's done, it's going to tell us. We're going to accept the license and it says, "Selenium WebDriver successfully added".
You'll even find it here in the NuGet Selenium WebDriver folder, and you can see the Version 3.141.0, is the latest one that we are using (at the time of this recording).
Now we can actually fix this problem by adding using OpenQA.Selenium.Chrome and you'll see an import statement appear at the top. Boom. There we go, so now that is fixed.
using Microsoft.VisualStudio.TestTools.UnitTesting;
using OpenQA.Selenium.Chrome;

namespace SeleniumCore
{
    [TestClass]
    public class HomePageFeature
    {
        [TestMethod]
        public void ShouldBeAbleToLogin()
        {
            var driver = new ChromeDriver();
		}
	}
}
Now that we have a driver, what is the next step that we want to do? Well, we want to open up the actual URL. So, we can do driver.Navigate().GoToURL("https://www.saucedemo.com/");
        [TestMethod]
        public void ShouldBeAbleToLogin()
        {
            var driver = new ChromeDriver();
            driver.Navigate().GoToURL("https://www.saucedemo.com/");
		}
And fantastic, wasn't that so simple? Now with that we are able to navigate to our URL.
Let's go ahead and actually run this test. We're going to open up our test explorer. So here go to Test, and then we're just going to click "Run All."
Uh-oh, something very weird happened here. Let's go and take a look.
We got some kind of an exception, it says
DriverServiceNotFoundException: The chromedriver file does not exist in the current directory or in a directory on the PATH environment variable. The driver can be downloaded at https://chromedriver.storage.googleapis.com/index.html
Oh, okay! So remember that I told you that your code communicates with the WebDriver server that communicates with the browser? Well, right now right we're missing the WebDriver server because we never downloaded the chromedriver. So, you need that actual executable, which is the server, to be able to talk to the different kinds of browsers.
There's going to be a chromedriver for a Chrome browser, there's going to be a safaridriver for a Safari browser, and so on and so forth. So, what we're going to do is download our chromedriver so that through it we can talk to our Chrome browser.
To get the Chrome driver, go to: chromedriver.chromium.org.
Here you can see all the information, this is a very excellent page. You should come here and see for any kind of errors and you always want to get the latest version of Chrome because the latest version of chromedriver will support the latest version of Chrome. It's actually a nightmare to try and make sure that your Chrome is not up to date. Chrome always stays up to date, so you need to make sure that your chromedriver's up to date, as well. So, we're going to go ahead and get this chromedriver.
You can see, there's a bunch of details about it, it even tells you which versions are supported and so on and so forth.
We're going download the one for Mac, since that's where we're using. If you're using a different operating system, make sure you download the chromedriver for the appropriate operating system. After downloadiing it, I will actually copy it over to the directory with my code, so that it's part of the code base.
Then, in our code, what we need to do is add it to a dependency to our code so that our code knows about it.
So, I do "add files" ... And there's our chromedriver and we're going to add it.
You can see that now chromedriver is part of our solution, which means that whenever we build anything, chromedriver will come along, and we just have to perform one step to make that happen. Go to properties, and whenever we build, we want this to be copied to the output directory and we want to select "Copy if newer." So, if a newer version is found of Chrome driver that we put in here, this will automatically get copied, otherwise it will just leave it in the bin directory.
Whenever we build our code, what happens is this bin folder gets created and inside of here we have debug and netcoreapp2.1. And so right now you can see that we don't have any chromedriver in here, and this where all of the executables go that we use for our testing and for our coding. We need the chromedriver in here, so that whenever old executables are compiled, then it's in there and we can reference it.
Now, if we build ... you can see that now chromedriver has appeared in here and so we have all of our executables in a single place so that we know exactly where to look for it.
Now there's only one other thing left. This ChromeDriver() constructor actually needs to know where the chromedriver executable is. You can either put in the PATH variable or you can put it inside of your code.
I like to put it inside of the code so that my code can figure out dynamically where the bin directory is. You can do it with this line of code here:
var outPutDirectory = Path.GetDirectoryName(Assembly.GetExecutingAssembly().Location);
and the compiler's going to complain because we need to import System.IO and then it complains about assembly because we need import System.Reflection and after importing those, this will compile, and this will automatically figure out where that bin debug application is, and it will go inside of this outPutDirectory variable and we can pass that to the ChromeDriver().
Now everything should work.
using System;
using System.IO;
using System.Reflection;
using Microsoft.VisualStudio.TestTools.UnitTesting;
using OpenQA.Selenium.Chrome;

namespace SeleniumCore
{
    [TestClass]
    public class HomePageFeature
    {
        [TestMethod]
        public void ShouldBeAbleToLogin()
        {
            var outPutDirectory = Path.GetDirectoryName(Assembly.GetExecutingAssembly().Location);
            var driver = new ChromeDriver(outPutDirectory);
            driver.Navigate().GoToURL("https://www.saucedemo.com/");
		}
	}
}
Let's go ahead and give this a run.
Whoop-whoop! How awesome is that?! We got our first Chrome browser open, going to saucedemo.com.
Give yourself a pat on the back, you are officially an automation expert.
