
Transcript
It's time to start creating your containers using Docker in the terminal!
Quick Look at our Structure
Let's take a quick look at what our structure will be so we have a good idea of what we'll be creating and how they work together.
There are three main pieces to the setup of our grid:
- The Docker machine with the Docker Engine
- The "Hub" container
- And the "Node" containers with the browsers that are connected to the Hub
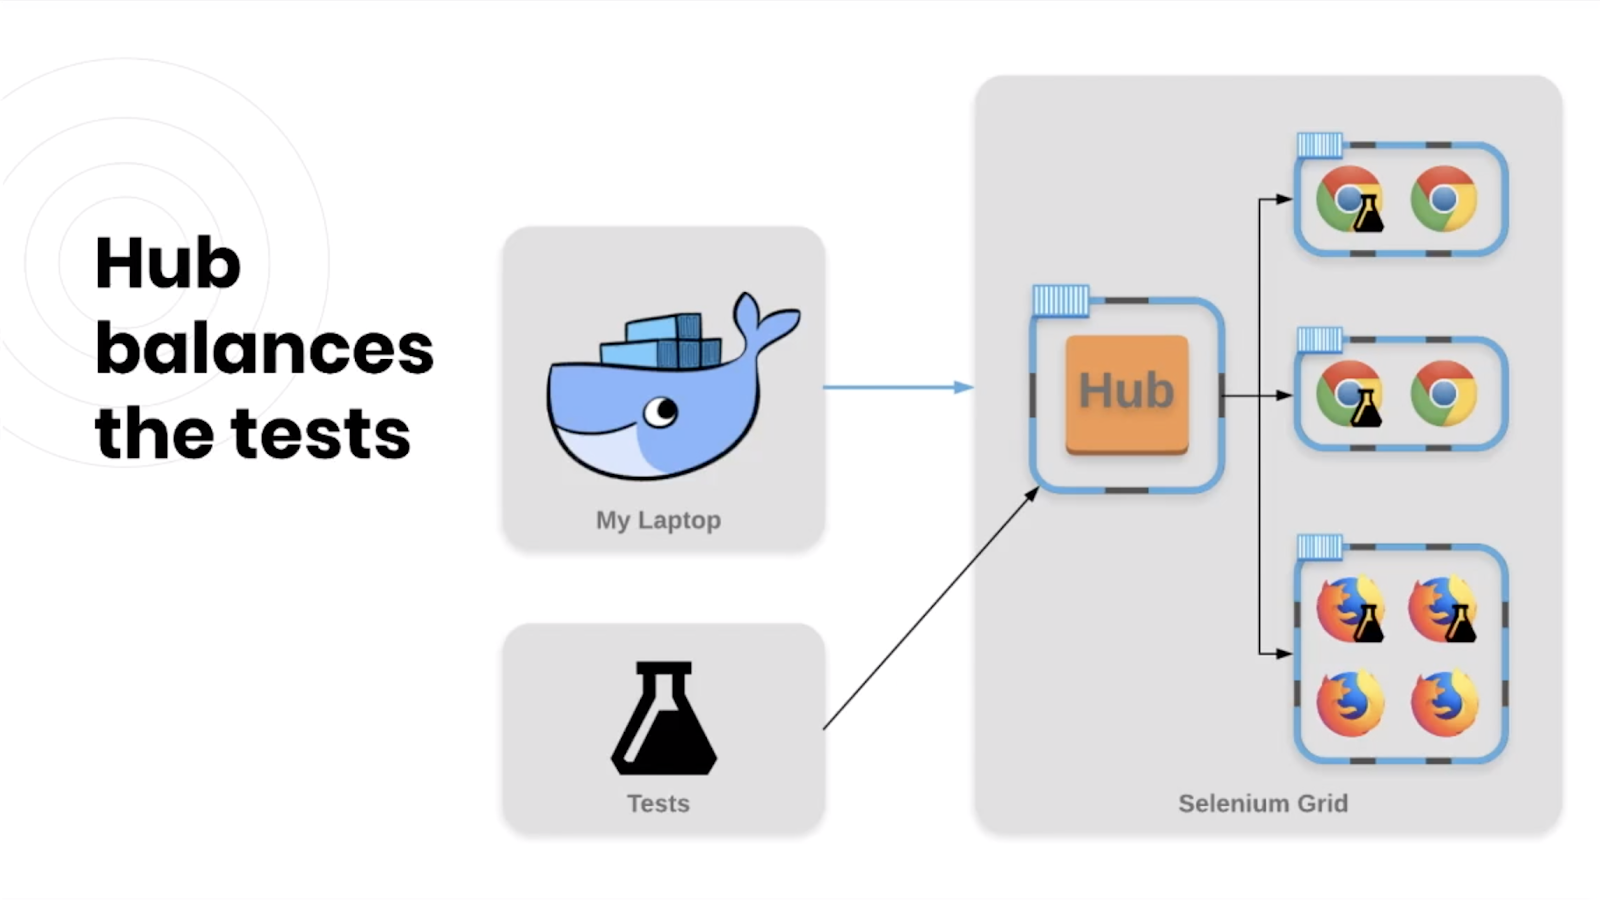
Our tests are run against the Hub which balances them across the Nodes.
I'm running these docker commands and tests through my current laptop, so we can think of it as the Docker Engine that the hub is connected to which ultimately connects the browser nodes.
Docker Hub has the Images
Like I said, the Hub and Nodes are containers. If you remember, containers need to be started by using images.
We get these images from a place called **Docker Hub **which is a repository for holding our images. You can either save your images to the hub, or you can download them from the hub! So let's get to it!
- Go to www.hub.docker.com and sign in with the account you created in the previous chapter.
- Enter "selenium" in the search field
- Look for the official images from Selenium. These are the images that start with "selenium"
- Scroll until you find "selenium/hub" and click on it
- This opens the Image Details and provides some helpful information regarding the image, like the command to use to pull it down!
- Copy the command and paste it into your terminal and hit enter
- You now have the selenium/hub image installed!
Pull the Images
Now that the Hub container has been downloaded, we want to do the same thing for the headless and non-headless browsers by running the following commands:
docker pull selenium/node-chrome
docker pull selenium/node-chrome-debug
docker pull selenium/node-firefox
docker pull selenium/node-firefox-debug
docker images
You should now see all five selenium images listed!
NOTE: The non-debug images are headless, and the debug images are not.

We can start creating containers now that we have the images. You are able to run and start containers one at a time through the docker run command, but we don't want to create one container at a time. We'd rather create the containers and network them together in ONE command.
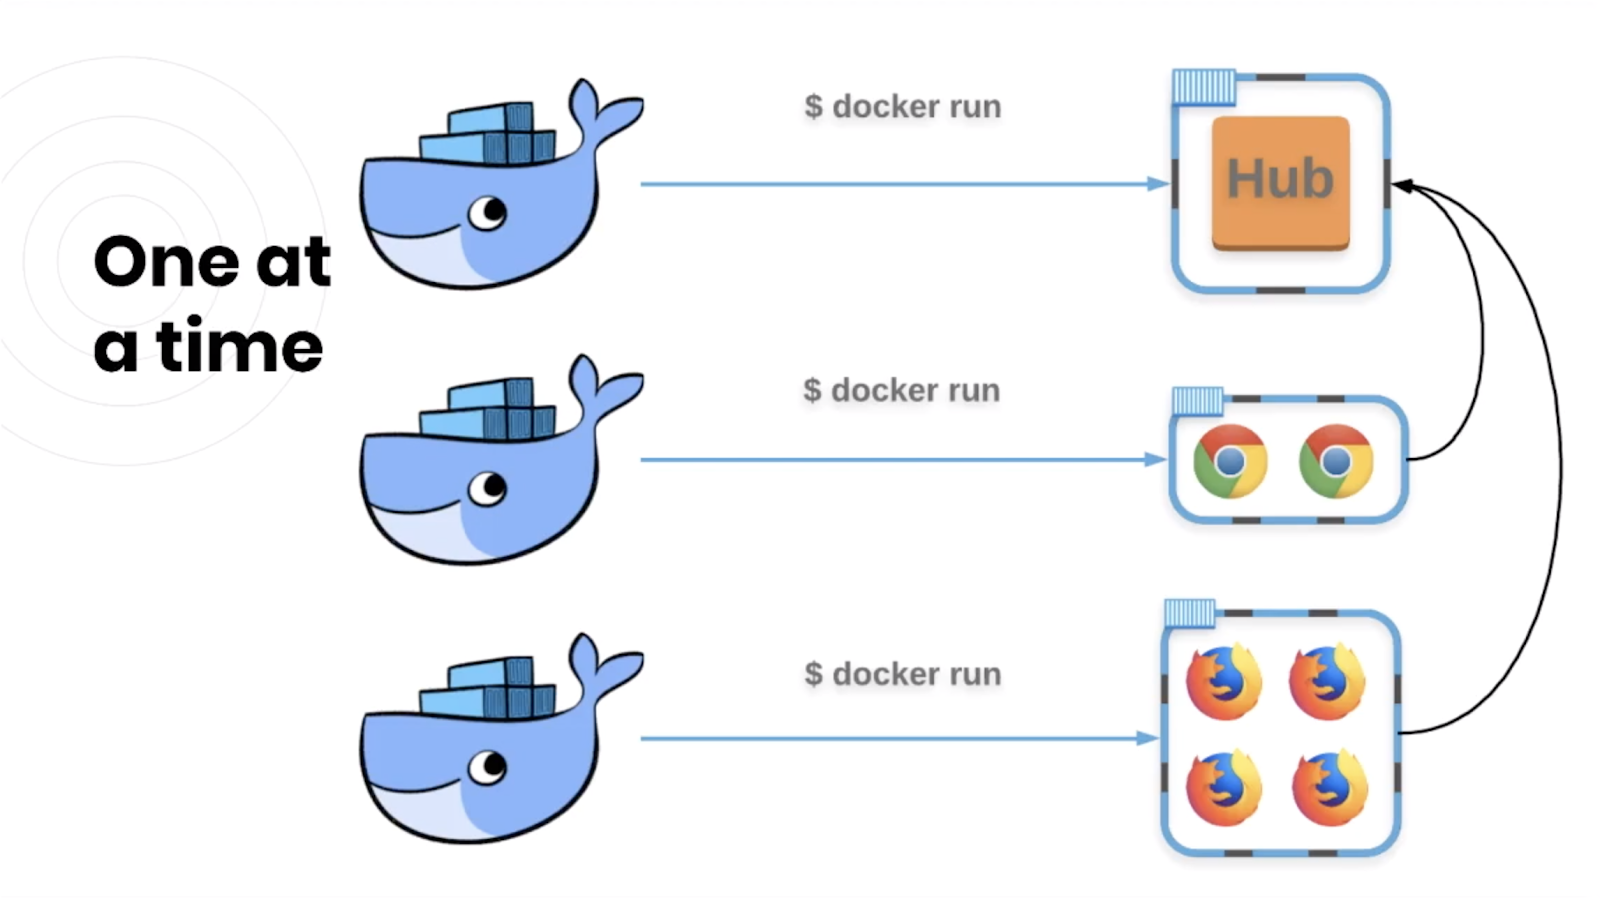
Finally! It's time to get spicy with docker-compose.
Docker Compose and YML Overview
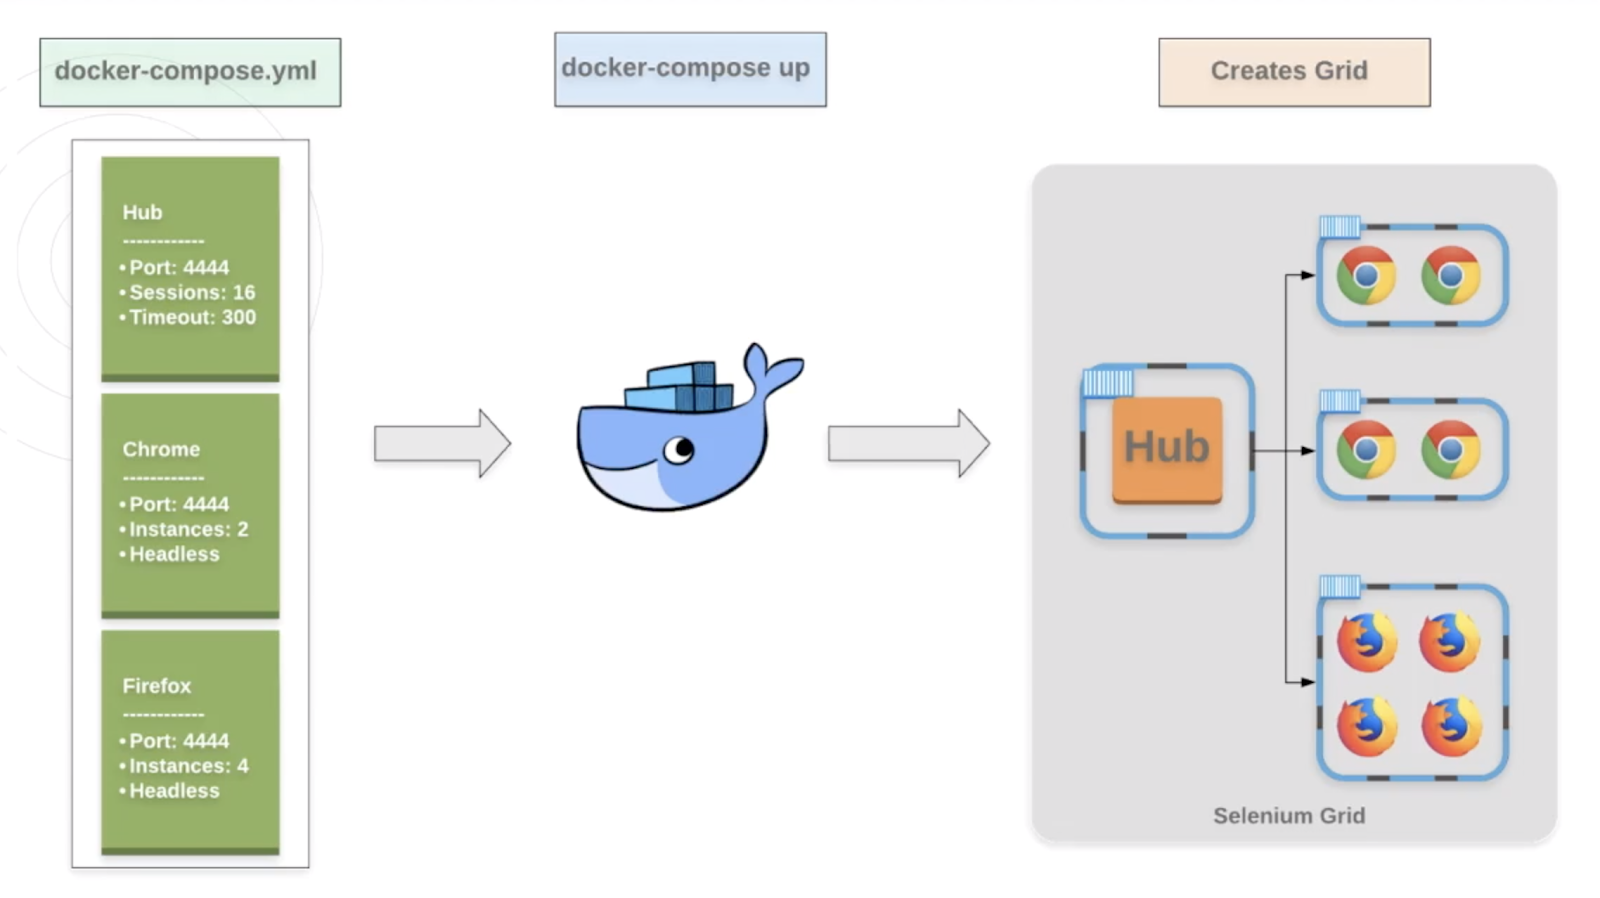
docker-compose is part of Docker but has its own commands and uses a yml file to know which images you want to use, how you want to create your containers, and link them together. You define a single yml file with the services you want and then use the following command to create all of it at once.
docker-compose up -d
I'm so excited to finally get into code!
You can either use the docker-compose.yml file I've included in this Chapter, or you can follow along with my C# project by going to github.com/elsnoman/esports-automation.
Here is the docker-compose.yml file, which I've included in the Tests project of my solution so it can be version controlled and easily accessible.
version: "3"
services:

  selenium-hub:
    image: selenium/hub
    ports:
      - "4444:4444"
    environment:
        GRID_MAX_SESSION: 16
        GRID_BROWSER_TIMEOUT: 300
        GRID_TIMEOUT: 300

  chrome:
    image: selenium/node-chrome
    depends_on:
      - selenium-hub
    environment:
      HUB_PORT_4444_TCP_ADDR: selenium-hub
      HUB_PORT_4444_TCP_PORT: 4444
      NODE_MAX_SESSION: 2
      NODE_MAX_INSTANCES: 2
    # volumes:
    #   - /dev/shm:/dev/shm

  firefox:
    image: selenium/node-firefox
    depends_on:
      - selenium-hub
    environment:
      HUB_PORT_4444_TCP_ADDR: selenium-hub
      HUB_PORT_4444_TCP_PORT: 4444
      NODE_MAX_SESSION: 4
      NODE_MAX_INSTANCES: 4
Let's break down this file:
- Version: "3" - as of this recording, this is the latest version of docker-compose files
- Services (or containers): - this is where we list the images we'll be using and their configuration
- We're calling the first container "selenium-hub" and saying that:
- It will use the selenium/hub image
- It will expose a port at 4444 (we'll use this later to connect to the grid)
- It will allow 16 sessions or tests to run at one time
- And we'll set some grid timeouts to the recommended 300 seconds
- The next two containers are similar, but use different images and are called appropriately.
- The first one is named "chrome" and will have two chrome browsers on it
- Depends_on will link this container to the hub container. Because it is dependent on the selenium-hub container, it will wait until that container is fully up and operational before linking to it
- We then provide the ADDR and PORT which are the same as selenium-hub to link it
- The firefox image is the same, but we'll give this container 4 browsers instead of 2
Spin up our Grid using Docker Compose
Save the file as docker-compose.yml. Open your terminal in the directory where you just saved your yaml file and run:
docker-compose up -d
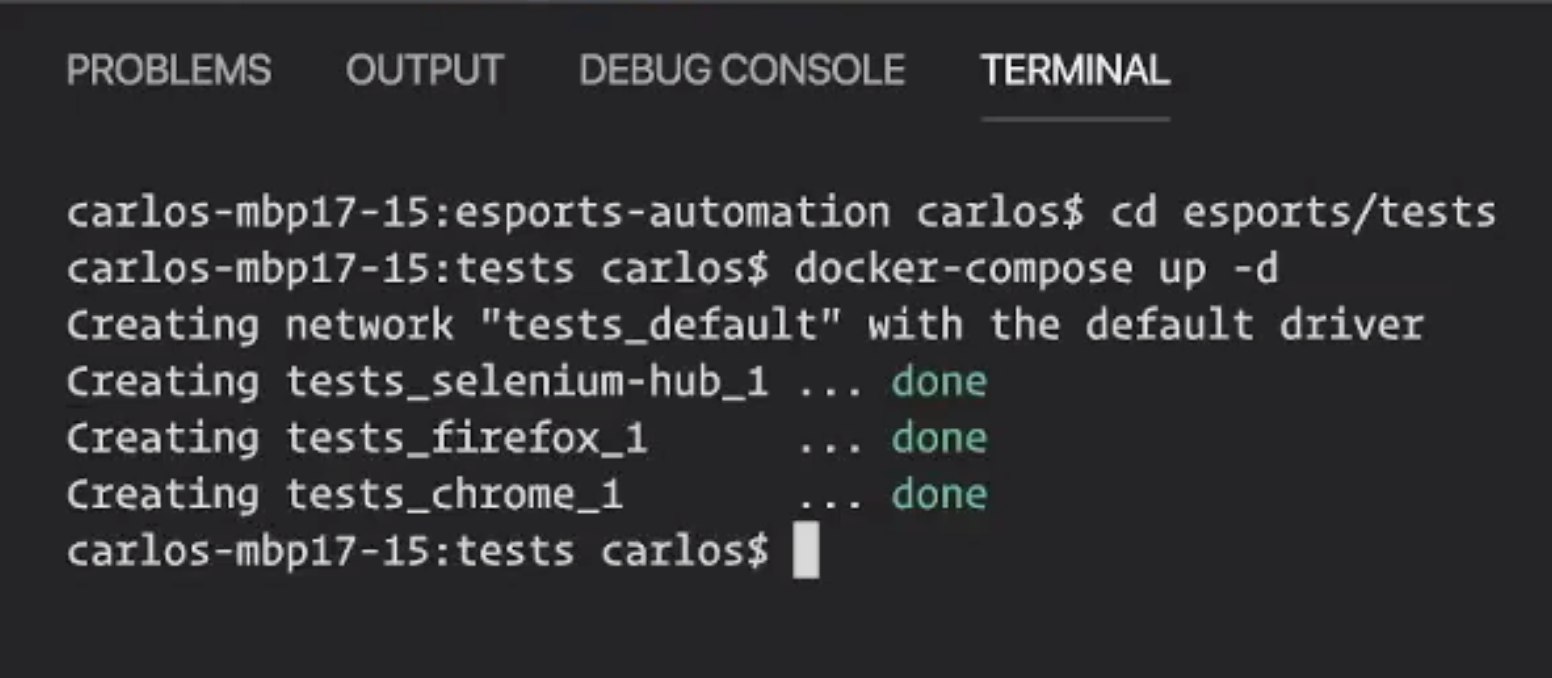
After the process is completed, run:
docker ps -a

This will list all of your containers. Observe that you have 3 containers running: hub, chrome, and firefox.
Because this also spun up your grid and linked your chrome and firefox nodes, we can visually take a look at our grid in a browser!
Just go to http://localhost:4444/grid/console and you'll see a firefox container with 4 browser and a chrome container with 2 browsers!

Restart or Teardown our Grid
Spinning up your grid was easy, but what about restarting or tearing it down? You guessed it! It's so easy that I want to go to an ocean and high-five a whale.
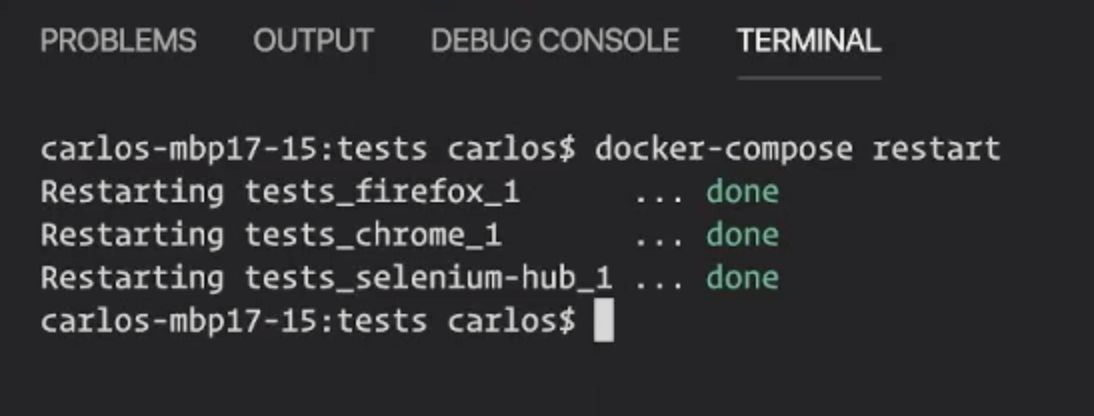
To restart your Grid, simply run:
docker-compose restart
This deletes the previous containers and spins up brand new ones!
To tear down the Grid for good, simply run:
docker-compose down
Then this command should show that no containers are up or running anymore!
docker ps -a

