

Transcript
Clusters and Next Steps
I want to start this chapter by saying that I won't be doing a full demo like the previous chapters. This chapter is all about the concepts of creating clusters using multiple machines and then putting your Grid on those clusters. You will most likely need help from your Sys Admins, DevOps, or Infrastructure team if you'd like to implement this at work, but I will also provide some helpful links to some "hello world" and "do it yourself" tutorials if you'd like to play with some simple clustering on your local machine.
One Machine isn't Enough
We ended the previous chapter by using docker-compose to easily create and scale our Selenium Grid using containers. However, your machine can only scale so far before running out of resources. In other words, you can only create so many containers and browsers on one machine.
Introducing Swarm
We solve this by connecting multiple machines together that each have a Docker Engine. A collection of Docker Engines joined into a cluster is called a Swarm.
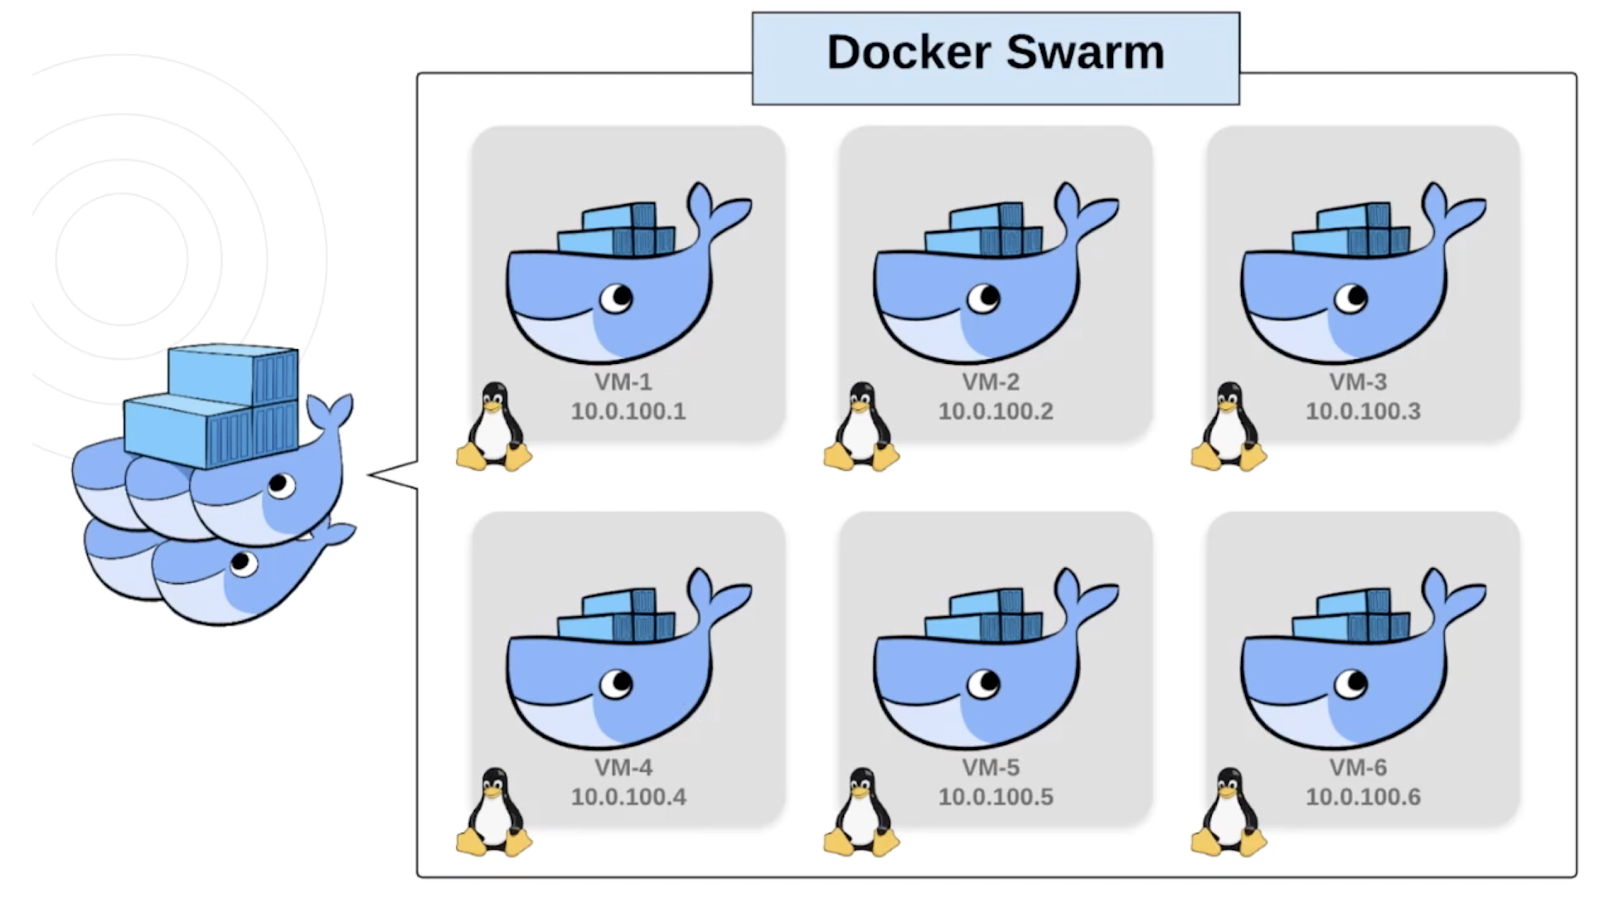
Here we have six Linux VMs. These could be physical machines, or virtual machines created with something like VirtualBox, or even cloud instances like ec2's from AWS. Either way, you need to know their IPs and configure some ports so they can communicate with each other. Then you just join each machine into the swarm. Each machine in the swarm is called a Node.
Swarms consist of Manager Nodes and Worker Nodes. Worker Nodes listen for tasks sent by the Manager Nodes and then execute them. Manager Nodes can execute tasks just like Workers, but they are also in charge of sending tasks to Workers and maintaining the Desired State of the Swarm.
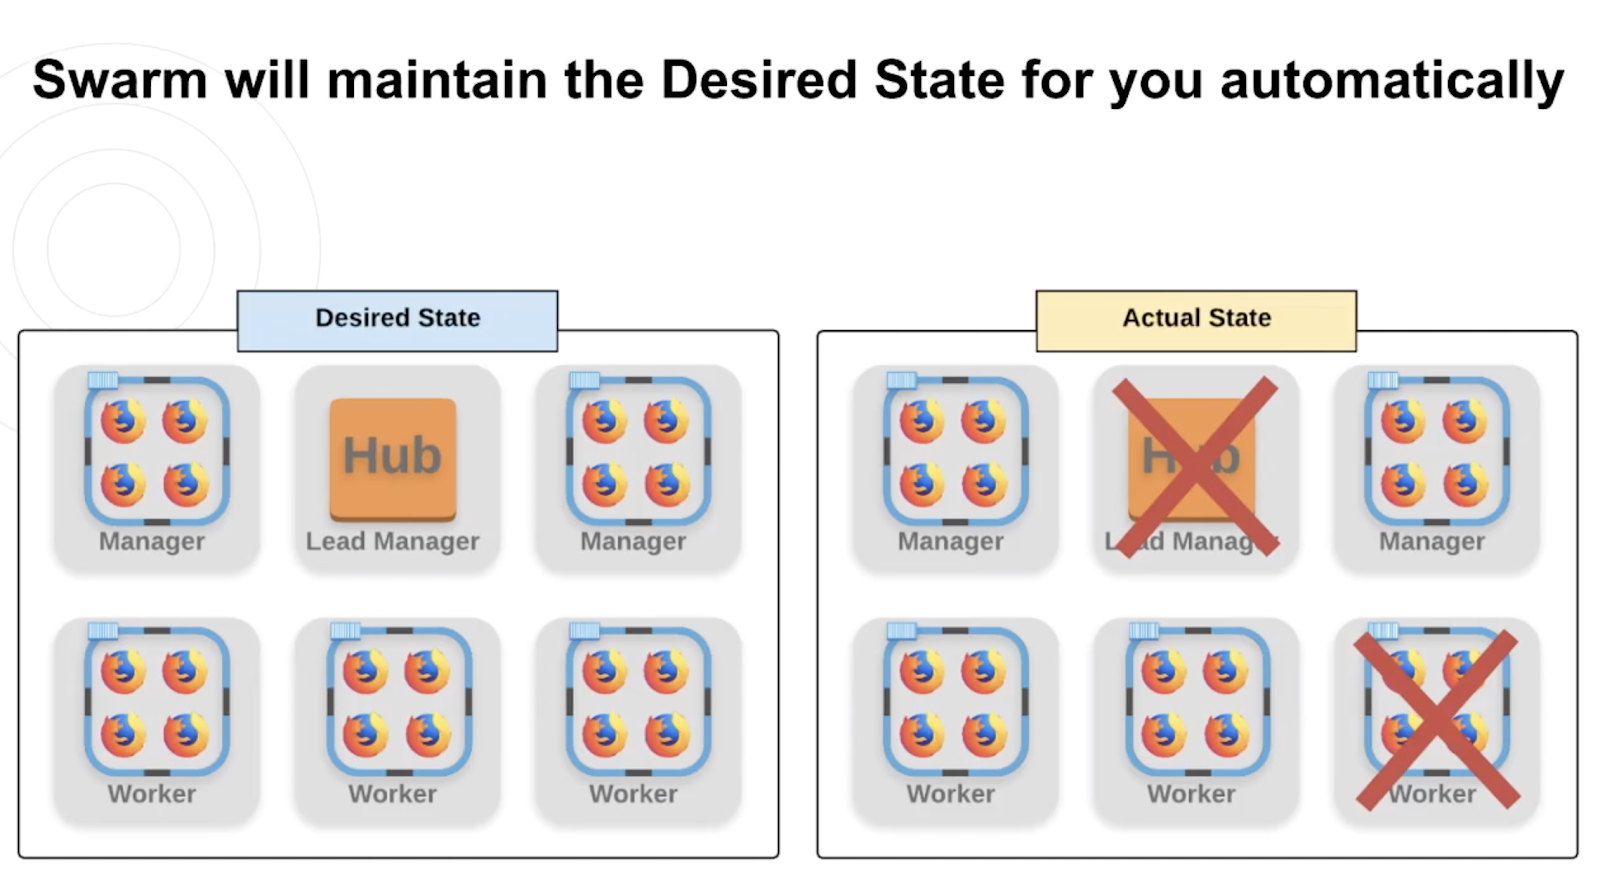
Desired vs Actual State
Desired State is just what we want our swarm to look like.
If our Desired State was to have 6 nodes with 3 managers and 3 workers where the lead would have the Hub and the rest of the nodes would have one or more containers of Firefox browsers, then Docker Swarm would make sure that its Actual State always matched the Desired State.
So if our Hub and one of our worker nodes went down or got stale or anything else for whatever reason, then Docker would detect this and spin up an entirely new Lead Manager with a hub and a Worker with new Firefox containers for us! We wouldn't have to move a finger. Now that's impressive.
Docker Stack
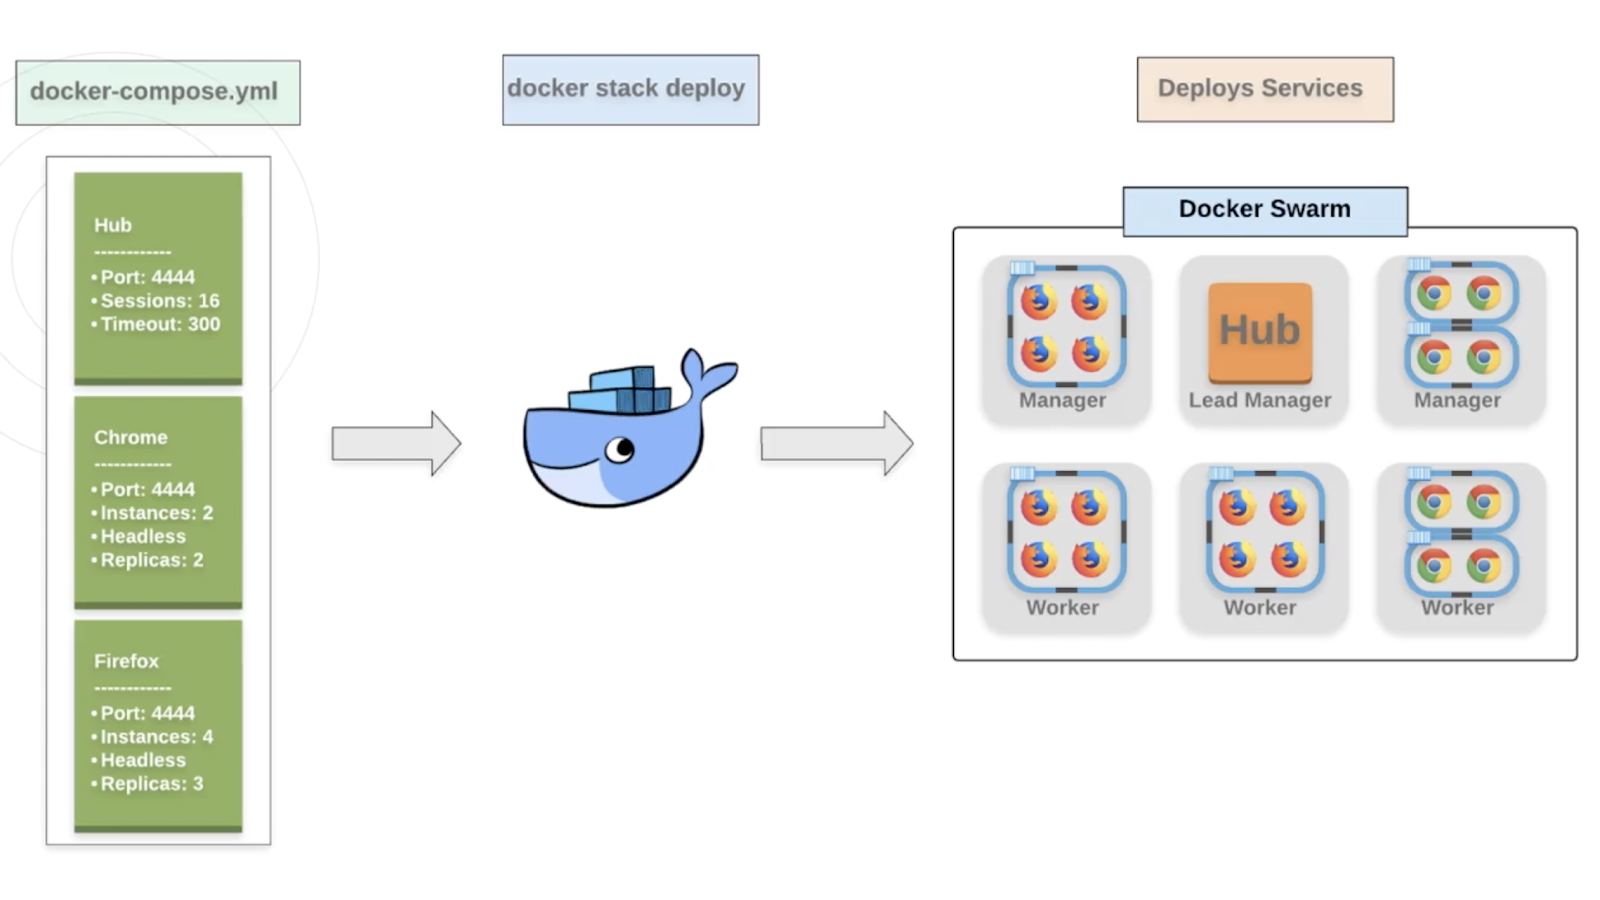
The final piece to talk about is the Docker Stack. A stack is a group of interrelated services that share dependencies, and can be orchestrated and scaled together.
When we needed to scale containers on our one machine, we used:
docker-compose up
Docker Stack does the same thing but allow us to deploy our services across an entire swarm in one command! The best part is that you can even use the same docker-compose.yml file you were using before.
Granted you will probably make a few tweaks, but just like we used **docker-compose up, ** you just run:
docker stack deploy
How to start?
Let's review the steps to get started with Docker Swarm:
You need more than one machine and Docker must be installed on each.
You need to know their IPs and network them successfully. You may need to remove some firewalls for example.
Run this command on the first machine to start the swarm and have a Lead Manager Node:
docker swarm initThis will also provide you with the commands and tokens needed to join other machines as workers or managers.
Run this command in the terminal of the other machines to join them to the swarm:
docker swarm joinYou will have two tokens to choose from - one that joins the machine as a manager and another that joins the machine as a worker.
Once you have all the nodes you want in the swarm connected, then deploy your stack against your swarm. Remember that this uses the
docker-compose.ymlfile to easily spin up your Selenium Grid.Now you can start running your tests at any scale! Just remember to change the URL that you pass into your
RemoteWebDriverso the tests target the Grid correctly.
Next Steps
So what are the next steps? Well, first you're gonna want to get comfortable with docker or at least containers. Understanding images and containers may actually help you or your team solve some complex challenges like the ones we talked about in Chapter 1.
Now that you're done with this course, you should have much better control of the Grid and the browsers you're testing on. But what about making other services more immutable? For example, you could containerize some APIs so it's easy to deploy it and then run your service-level tests against a cleaner, more controlled environment. Hopefully you're already thinking of things that can be solved by using containers.
The next piece would be trying to create your own clusters and deploying services on them using Docker Swarm. Networking will be half the battle, but once you've joined the nodes, deploying the services is relatively simple.
The last thing I would suggest is to look at orchestration tools like Kubernetes and pipeline tools like Jenkins.
Docker Swarm does a great job of scaling containers by clustering machines, but you'll soon find that it can be pretty difficult and complex. Tools like Kubernetes are made to make orchestrating swarms super easy.
If you're also close to the pipeline side of things, then it would be helpful not just to understand how your tests are triggered and run in the pipeline, but also if there are some Dockery things that you could be doing in a pre or post step. I can tell you from experience that you will save a ton of money if you can automatically scale up or scale down the number of containers you need to run your tests.
And with that, we have finally arrived at the end. Make sure to checkout out the Resources section of each chapter for helpful links. Thank you to everyone who helped me with this course and thank YOU for watching it. Please feel free to reach out to me on either LinkedIn or Twitter. I'd love to hear any questions, feedback, or experiences you have!
Resources
- SeleniumHQ Official "Getting Started with Docker Compose"
- Docker Swarm Documenation
- Docker Stack Documentation
- Getting started with Kubernetes and Selenium
- Jenkins with Docker Documentation
