

Transcripted Summary
# Now let's discuss what this course expects you to know already.

This is not a course that introduces Appium itself, so I'll assume you already know how to use Appium for basic mobile app testing.
We'll be working through code examples in Java, but none of the techniques or principles discussed are unique to Java. And everything we'll do can also be accomplished in all the other languages that Appium supports, Python and Ruby, JavaScript, and so on. But certainly, a working knowledge of Java will help in following along with this course.
Finally, I'll assume this is not your very first introduction to automated testing in general since I won't be explaining every concept related to automated testing along the way.
# Now let's talk about some setup assumptions.
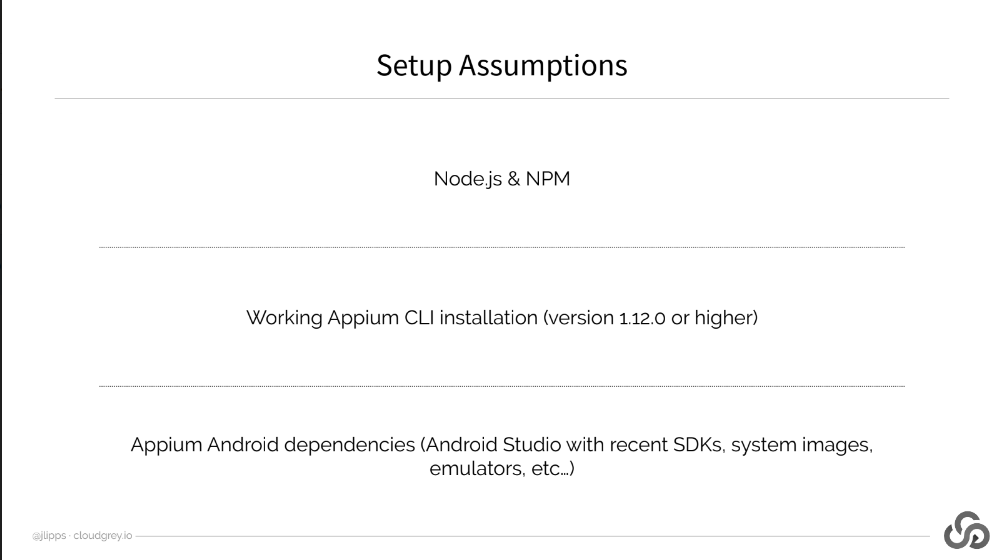
In terms of system set up, we'll assume that you already have Appium installed via NPM, which implies a Node.Js installation as well.
The Appium version you should have installed should be at least 1.12.0 or higher.
You'll also need the typical Android dependencies, for example, Android Studio, and a working Android Emulator.
Resources Are Available
If you've been able to run Android tests from the command line Appium server installed this way, you're probably good to go already with these assumptions. If not, seek out an Appium tutorial or the Appium setup docs to make sure you're set up before proceeding listed in the resources below.
# OpenCV Set Up
The one additional non-standard dependency Appium requires for image-based functionality is called OpenCV.
This dependency comes in 2 parts: the OpenCV libraries themselves and the Node.Js bindings for OpenCV, which Appium relies on.
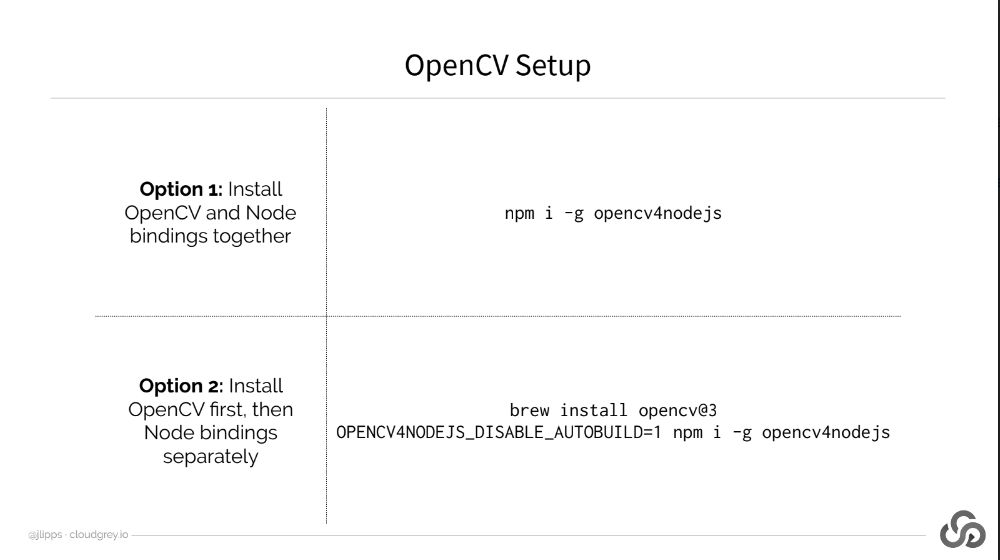
The first thing you can do is try to install the Node.Js bindings on their own. By default, they will also try to build and compile OpenCV for you. You can do this with the command: npm i -g opencv4nodejs.
If OpenCV building fails, as it did for me when trying to use this method, you'll have to get OpenCV on your system in another way, following OpenCV's own instructions.
Since I'm on a Mac, I used Homebrew and it was pretty easy. The only issue I had was that I needed to install OpenCV 3, not 4, which is the latest version. So, I had to make sure to specify that in the brew install command, so I ran: brew install opencv@3
With that done, I was able to rerun the npm install command for “opencv4nodejs”, but this time with a special flag in front of it to tell the “opencv4nodejs” module not to try and compile OpenCV on its own, but instead, to link to the system version that I just installed.
This was done using the OPENCV4NODEJS_DISABLE_AUTOBUILD=1 environment variable:
OPENCV4NODEJS_DISABLE_AUTOBUILD=1 npm i -g opencv4nodejs
Where to Get Help
If you run into problems there, or if you need assistance getting OpenCV installed on another platform, like Windows or Linux, please have a look at the documentation for the opencv4nodejs node module, or seek help in the Appium forums or on GitHub, since you'll definitely need these pieces working in the beginning part of the course.
