

Transcripted Summary
As we saw in the previous chapter, it's possible to use Appium to run visual tests of your native mobile apps, but there are some drawbacks to the Appium only approach.
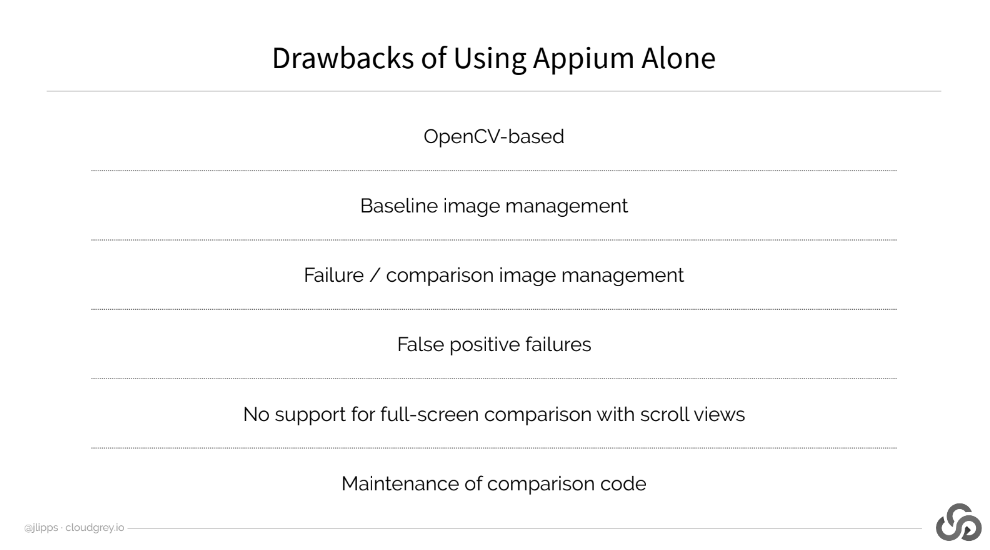
First, you're limited to the kind of image processing provided by OpenCV. It's pretty good, but it's not specialized for visual testing of app UIs. Also, depending on how unlucky you are, you might have had to wrestle quite a bit even to get OpenCV installed and working on your system, like I did.
Second, you'll have to manage your own baseline images.
Third, you have to manage your own failure images for when there is a mismatch between a current screenshot and the baseline. This can be hard to do, especially when running tests in CI, because you'll need to teach your script to connect to a central repository, link the image with the particular test run, and so on.
Fourth, you'll likely run into a lot of false positives that have to do with changing visual areas of the app that don't actually constitute real visual bugs.
Fifth, if you want to do full-screen image comparisons, meaning image comparisons that take into account content which has not yet been scrolled into view, you're going to have to write a bunch of helper code to actually scroll it into view, take screenshots, and stitch those all together before doing the comparison. I've tried to do this before, and it's an awful lot of work.
Finally, you're responsible for writing and maintaining the actual visual check code. As I showed, it's not too much code, but you'll likely be tweaking it a fair amount, especially the image match threshold.
The Applitools Eyes product has been designed to solve all these issues, and to make the whole experience of managing your visual tests more streamlined in general.
So, let's take a look at how we could take our previous test, and modify it to work with Applitools.
Here's our project just as we left it from the last chapter.
The first thing we need to do is to teach our test how to connect to the Applitools API.
What I've done in our project is to create a new base test class, which inherits from our old base test class. This one is called “BaseApplitoolsTest.java”.
# BaseApplitoolsTest.java
import com.applitools.eyes.StdoutLogHandler;
import com.applitools.eyes.appium.Eyes;
import org.junit.After;
import org.junit.Before;

public class BaseApplitoolsTest extends BaseTest {

    Eyes eyes;

    @Override
    @Before
    public void setUp() throws Exception {
        super.setUp();

        // Initialize the Eyes SDK with our API key (set it as an environment variable)
        eyes = new Eyes();
        eyes.setLogHandler(new StdoutLogHandler());
        eyes.setApiKey(System.getenv("APPLITOOLS_API_KEY"));
    }

    @Override
    @After
    public void tearDown() {
        eyes.abortIfNotClosed();
        super.tearDown();
    }
}
The only difference in this new BaseTest class is that we've added a field called Eyes. Eyes will be a reference to the Applitools API, which we can make calls to whenever we want to perform a visual check.
On test setup, we instantiate this field to tell the Eyes SDK we want to log as output to standard out, here [eyes.setLogHandler(new StdoutLogHandler())]. This step isn't actually necessary for the functioning of the test itself, but it's just so we can see what's going on as the API is doing its thing.
And finally, we set our API key so that everything we do within the SDK is linked to my account.
Note on the API Key
I have set the API key to come from an environment variable rather than show up in the code directly, which is always a good practice. It means if you're running this example yourself, you'll need to make sure you're signed up to Applitools and have stored your API key in this exactly named environment variable here, “APPLITOOLS_API_KEY”. Of course, you could just put your API key in as a String directly into your code. Then you just have to make sure that nobody sees it, and it doesn't get committed to a public repository, and things like that.
Finally, in the teardown method, we make sure to call this method here, abortIfNotClosed, on the Eyes SDK.
What this does is direct Applitools to end our visual test session if we haven't already ended it intentionally in the test itself. Basically, it's just a safety check in case we wind up in teardown here after having encountered an exception in our test, and we weren't able to clean up normally. In this case, the visual test will be marked as aborted in the Applitools website.
Now let's have a look at an Applitools test class itself.
Over here, we have a file called ApplitoolsVisualTest.java, so I'll go ahead and open it up.
# ApplitoolsVisualTest.java
import io.appium.java_client.MobileBy;
import java.net.URISyntaxException;
import org.junit.Test;
import org.openqa.selenium.By;
import org.openqa.selenium.WebElement;
import org.openqa.selenium.remote.DesiredCapabilities;
import org.openqa.selenium.support.ui.ExpectedConditions;
import org.openqa.selenium.support.ui.WebDriverWait;

public class ApplitoolsVisualTest extends BaseApplitoolsTest {

    private final static String CHECK_HOME = "home_screen";
    private final static String CHECK_LOGIN = "login_screen";
    private final static By LOGIN_SCREEN = MobileBy.AccessibilityId("Login Screen");
    private final static By USERNAME_FIELD = MobileBy.AccessibilityId("username");

    @Override
    protected DesiredCapabilities getCaps() throws URISyntaxException {
        DesiredCapabilities capabilities = new DesiredCapabilities();
        capabilities.setCapability("platformName", "Android");
        capabilities.setCapability("deviceName", "Android Emulator");
        capabilities.setCapability("automationName", "UiAutomator2");
        capabilities.setCapability("app", getResource("apps/TheApp-v1.apk").toString());

        // make sure we uninstall the app before each test regardless of version
        capabilities.setCapability("uninstallOtherPackages", "io.cloudgrey.the_app");
        return capabilities;
    }

    private WebElement waitForElement(WebDriverWait wait, By selector) {
        WebElement el = wait.until(ExpectedConditions.presenceOfElementLocated(selector));

        try { Thread.sleep(750); } catch (InterruptedException ign) {}

        return el;
    }

    @Test
    public void testAppDesign() {
        eyes.open(driver, "TheApp", "basic design test");
        WebDriverWait wait = new WebDriverWait(driver, 5);

        // wait for an element that's on the home screen
        WebElement loginScreen = waitForElement(wait, LOGIN_SCREEN);

        // now we know the home screen is loaded, so do a visual check
        eyes.checkWindow(CHECK_HOME);

        // nav to the login screen, and wait for an element that's on the login screen
        loginScreen.click();
        waitForElement(wait, USERNAME_FIELD);

        // perform our second visual check, this time of the login screen
        eyes.checkWindow(CHECK_LOGIN);
        eyes.close();
    }
}
The first thing that I'll say about this test is that it's almost exactly like the “AppiumVisualTest.java” we explored earlier. That's this one.
It's actually the same test — it's just that with the Applitools version here, we're using Applitools instead of Appium to perform the actual image comparisons.
The Applitools visual test file is, however, quite a bit shorter. We don't have any mention up here of a validation image directory, or baseline image prefixes, and we don't have a method to actually perform a visual check. That was our doVisualCheck method in the other class.
Instead, we just have our test.
The first thing we do in the test is register a new test session using the Eyes SDK by calling eyes.open. As parameters, we pass it the name of our app, so that tests can be grouped appropriately since we might be testing multiple apps with the same account, and also the name of the particular test we're running. I've called it “basic design test” here.
At this point, everything else is exactly the same, except instead of our homegrown doVisualCheck method, we call eyes.checkWindow. That directs Eyes to use our Appium session to take a screenshot and send it to Applitools for verification.
If the Applitools image check passes, meaning the image match the baseline, or a new baseline was generated, then we continue on. All this is the same as in our previous example.
Finally, once the test is complete, we make sure to call eyes.close to end the session cleanly.
Let's go ahead and run this so we can see the results.
As you can tell in our capabilities, I'm starting off again with version 1 of the app, so we should be starting fresh and generating baselines.
We'll make sure, of course, that we have our Appium server up and running. And here it is, still waiting faithfully for commands. And the Appium server's up and running, and of course, we're still going to be using our local emulator, so our test itself is not running on Applitools.
Our test is running wherever we want it to run, in our case, locally. It's just the visual image comparisons, which are being done on the Applitools infrastructure.
At this point, we should be able to see everything happening just like it did when we are running the visual checks locally. And here we are, the test is completed.
Let's go back to IntelliJ, and indeed, our test passed.
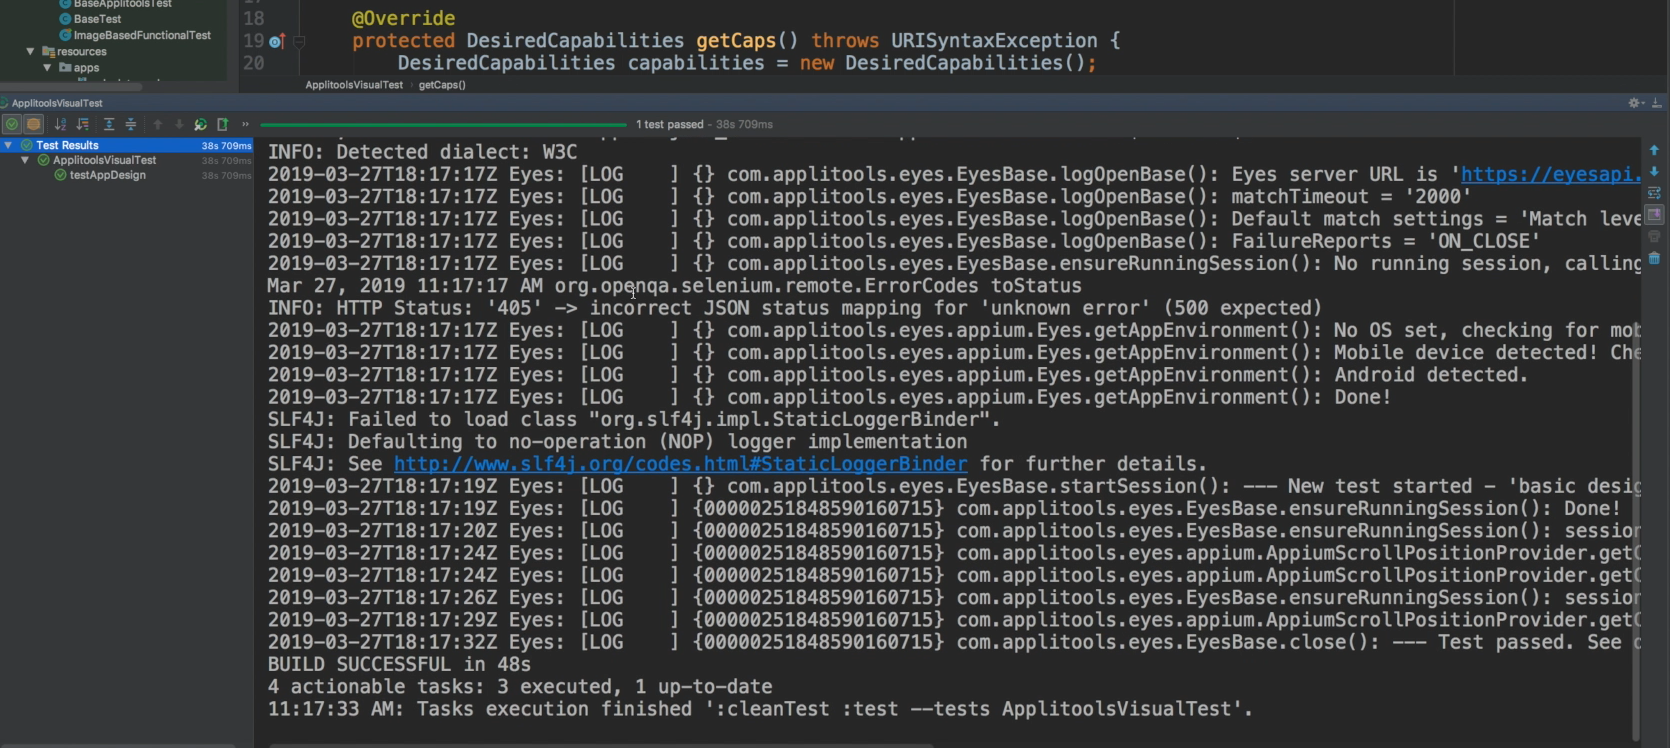
We can see all the log output here from the Applitools Eyes SDK. Now that the test is done, and it passed, we can head over to Applitools website and see what happened.
This is the Applitools website. I'm already logged in, and I've selected Apps & Tests up here, so I can look at my test based on the app that's in use.
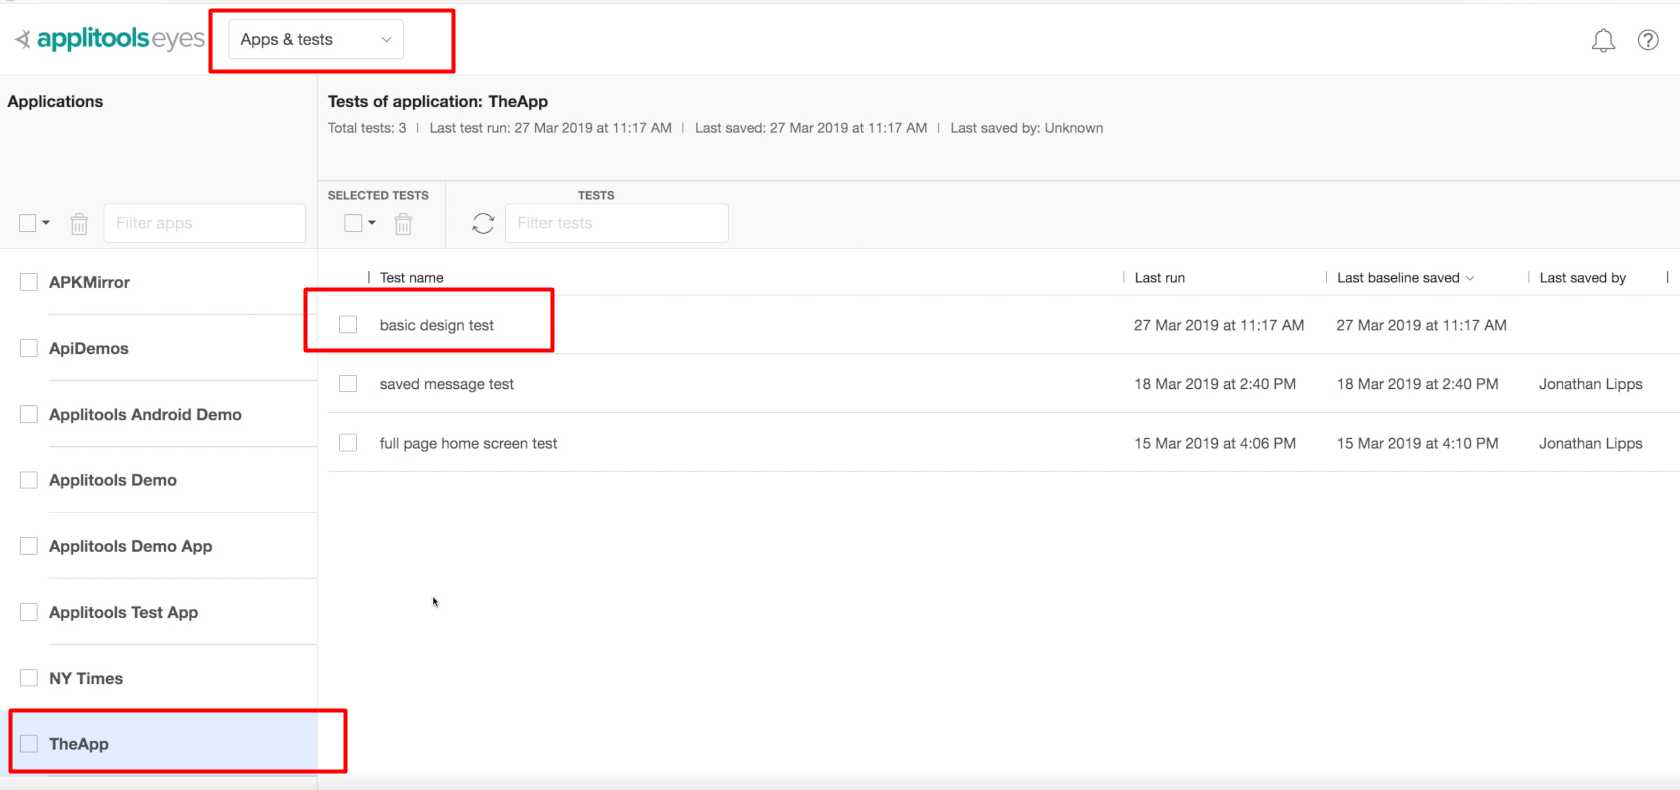
And I see our app here on the left side, “TheApp”. I can drill down into the particular test that we ran. I remember we named this test “basic design test”.
I can click here, and I can see all the different instances that were run.
Here we go. This one was just run, and you can see that when I click on it, it showed up as passed, which is good.
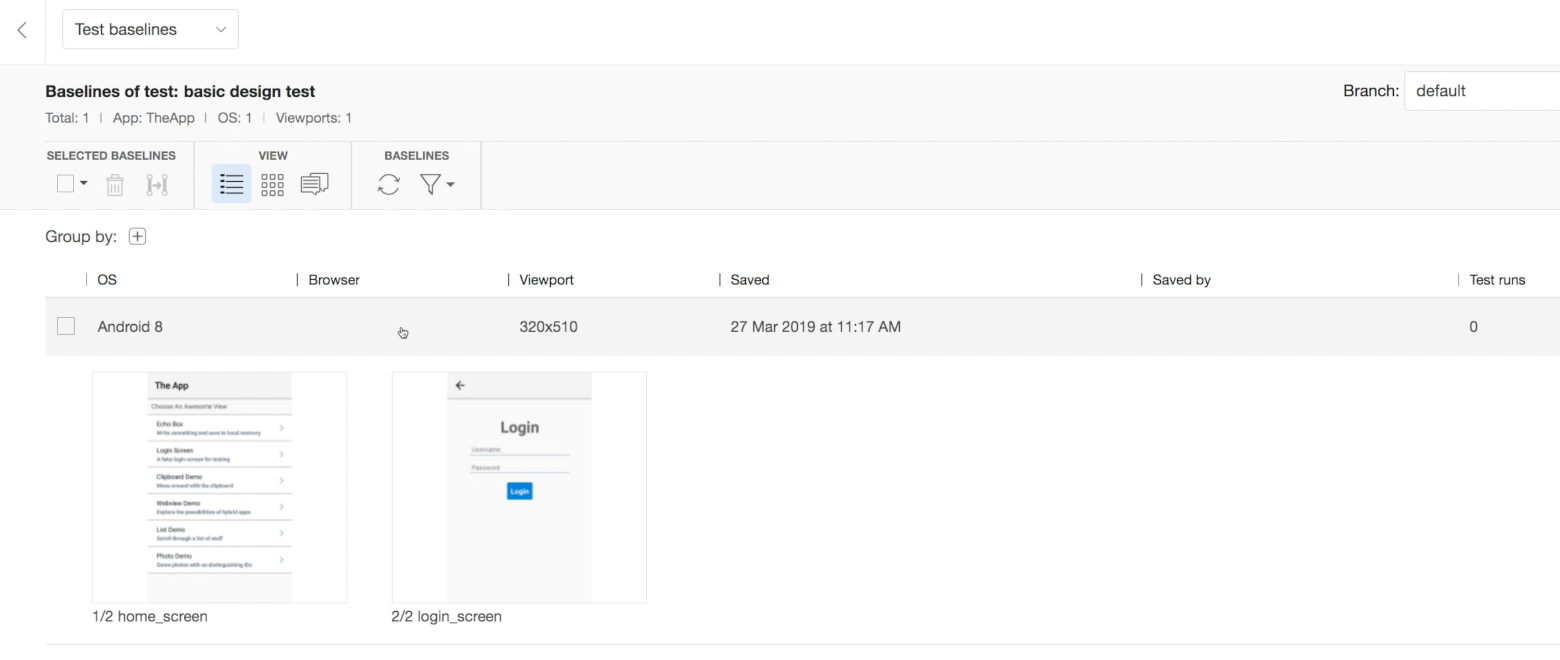
But this is theoretically the first time we're running it, so Applitools should just be collecting baselines, and you can see that it did in fact, since when we clicked on this test, here we get a view of all the screenshots that were taken.
There's number 1, and there's number 2. You can see that it even has our particular name.
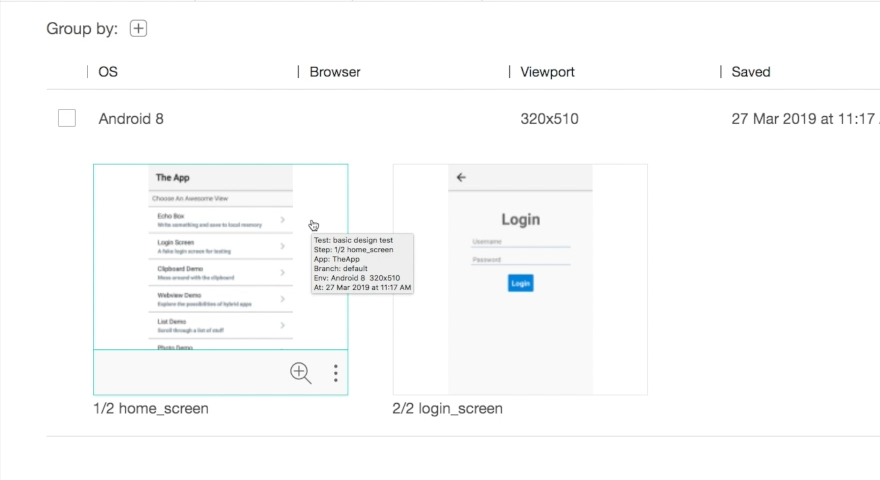
This is the login screen view here. At a glance, it's easy to see that the individual screenshots are green, and that they indeed match what happened in our app.
So far, so good, but with only one test run, we aren't actually testing anything yet, so let's do that.
Back in IntelliJ, let's change our app version to V2, like we did before, and we can rerun the test.
This time, we should see some visual comparisons actually take place, because Applitools has stored the baselines.
Let's make sure that Appium is handling our test. It appears to be doing its thing, and now we can watch the test run again just like before.
This time, the test is going to fail, as we expect, but we'll want to pay careful attention to the error message.
If we go back to IntelliJ, we can see that indeed it failed.
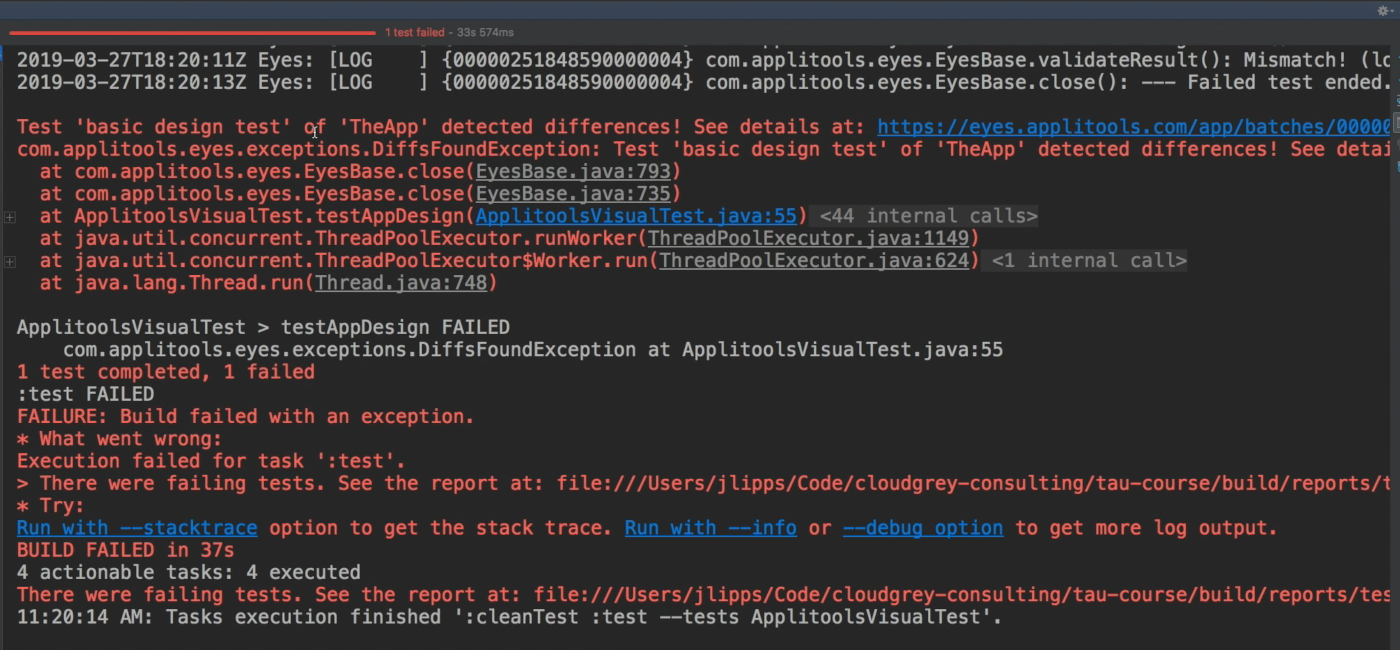
This message however is not from our own code, it's from the Applitools SDK.
Let's read it. It says, "Test: 'basic design test' of 'TheApp' detected differences! See details at this particular link."
This message is from the Applitools SDK, and it even gives us a really nice link to click on to explore the particular changes that caused this test to fail. Let's click the link.
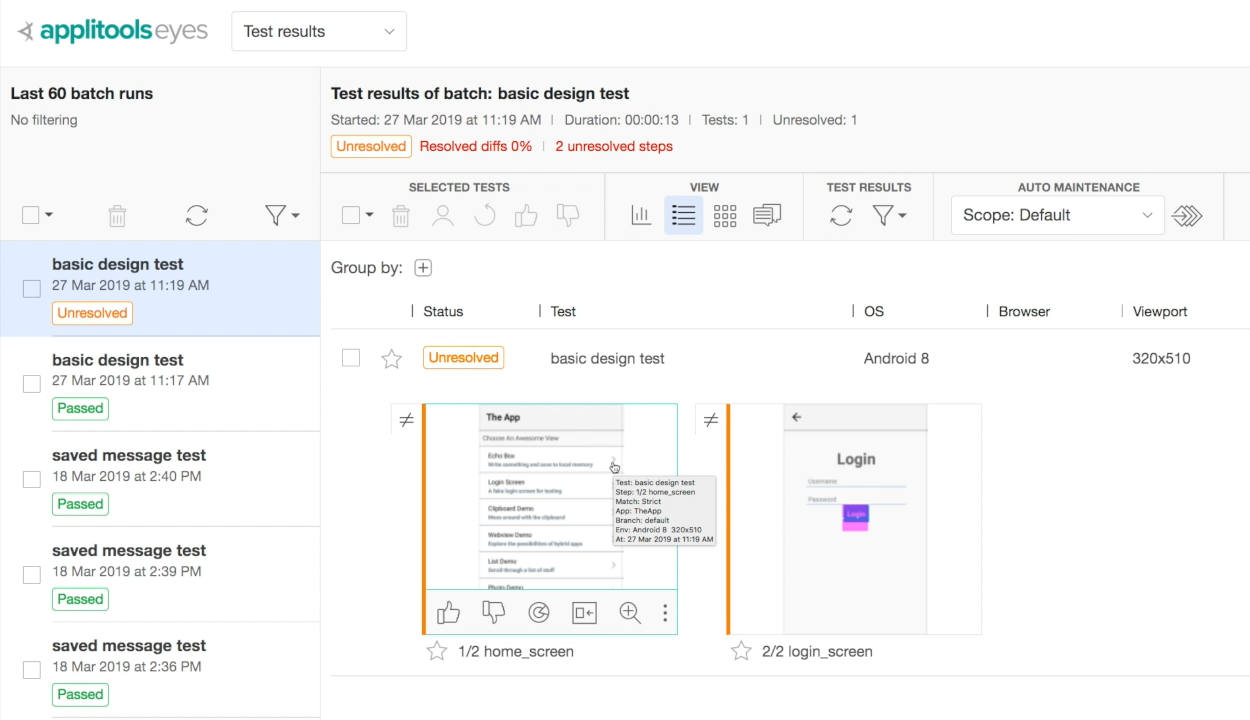
Now, just as before, we are already drilled into the specific test, and we can see the individual screenshots, which are highlighted as orange because Applitools does not yet know whether this is a failure or something that we just need to update.
One thing to notice also is that we have two screenshots here, not just 1. This means that even though Applitools detected visual differences, in the first step of the test, it allowed the test to continue. It didn't throw an exception immediately. It just saved the knowledge that there was a visual difference for us to resolve later, and then went on to collect more potential differences throughout the course of the test. This is an improvement over our homegrown test code, which just stopped the test immediately upon the first visual error.
As we look at the screenshots, one thing to notice right off the bat is that Applitools has not included the device bar at the top. It's not part of the app anyway, and only serves to confuse the image comparison algorithms with changing clock times and things like that. So, that's nice.
Now, looking at this first potential bug, we already know this is the case where we don't actually have a bug. We have a new feature being added. You can see here that we just have a new list item in our app.

So, all I have to do is click the thumbs up button over here, and Applitools will accept this image as correct. If I run a whole suite of tests, and if each test had encountered this screen at the beginning generating identical potential bug reports, Applitools would also resolve each of these instances in the same way.
Now that we've resolved the first visual difference, we get to the next potential bug, which is in fact the layout bug that we saw before, so I can click thumbs down, which tells Applitools that this is indeed a bug.
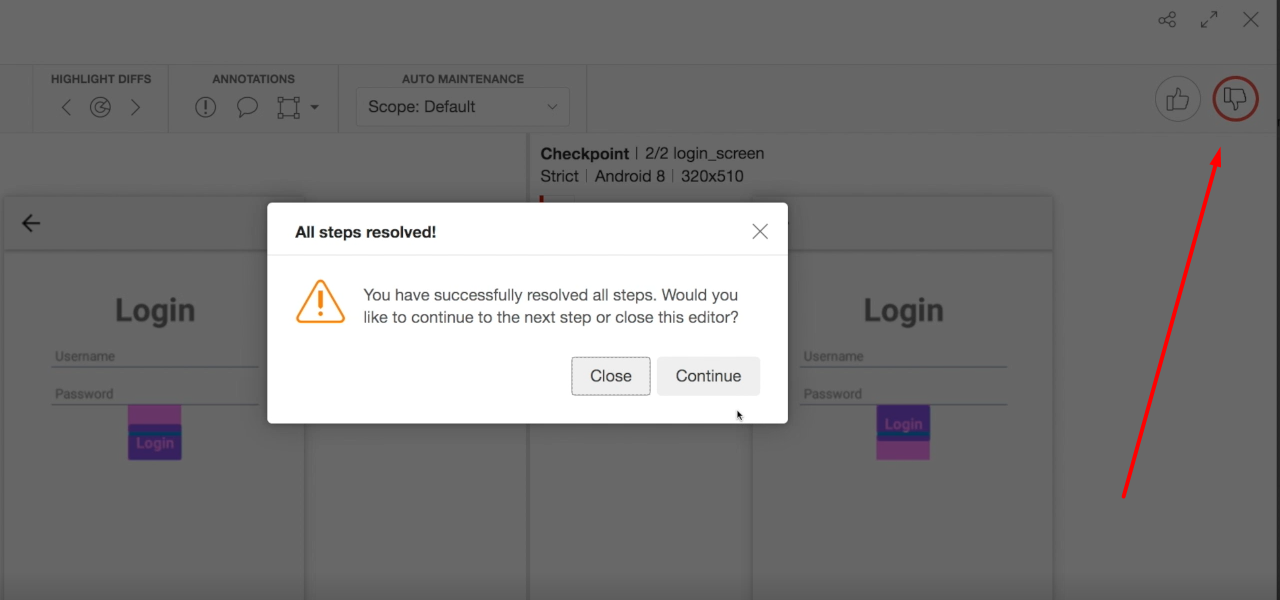
And now it wants me to tell it whether to close the editor or keep working, and I'll go ahead and close it.
Now that we marked this test as failed, I could assign someone on my team to work on the bug, or otherwise share the report with whomever should be working on fixing it.
Once I'm done resolving all the steps in this test, I can click the Save button up here, which will update the home screen baseline with the new image for any future tests I run.
There's our brief tour of Applitools for native mobile apps.
The Applitools SDK uses the same basic principles and provides the same basic functionality as what we're able to achieve with Appium's OpenCV integration, but adds a lot of convenience on top, saving time building out logic and infrastructure to handle a modern visual testing workflow.
