

Transcripted Summary
Control flow is arguably one of the more advanced features of Selenium IDE. With it, it offers a powerful set of options to influence how your test code executes. There's really two types of control flow commands:
Conditionals — the ability to execute only a subset of the steps within your test, if a predefined condition is met; or
Loops —the ability to execute a set of steps in your test multiple times based on a predefined condition.
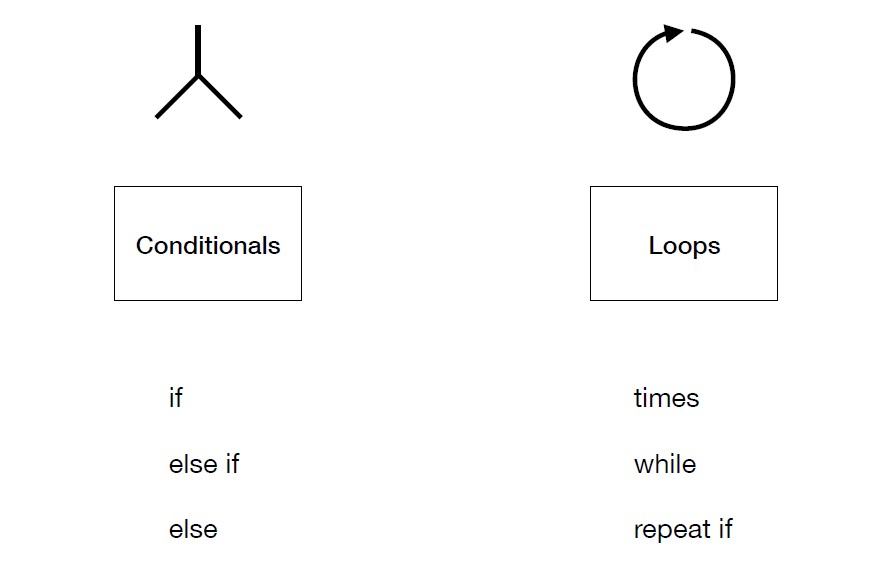
Within the IDE, there's a handful of commands that fall into either one of these two categories. For conditionals, there's things like if, else if and else, and then for loops, there's times, while, and repeat if.
I mentioned predefined conditions, what I really mean by that is JavaScript expressions.
Let's go ahead and step through examples of each of these commands. Let's hop over to Selenium IDE and create a new project. We'll call it “control flow”.
We'll take the default test and rename it to, “if else if else”, since this test, we're going to demonstrate a simple foobar example. What I mean by that is, it's an example that's not going to exercise or work against an application under test. It's just going to work entirely within JavaScript, within Selenium IDE.
But for it to work, we do need to specify a base URL since that's a requirement for Selenium IDE. We'll use this one: https://the-internet.herokuapp.com
The first command we're going to do is specify our predefined condition. The simplest way to do this would be to store a value on a variable and then, within our control flow commands, use that variable and check its value.
In Selenium IDE, you can use execute script to execute JavaScript. We're just going to return a string value of "a" — return “a” — and store it on a variable called “myVar”.
Command: execute script
Target: return “a”
Value: myVar
If you're curious about what each of these input fields do or what each command is doing, you can always look at the reference tab to see.
We now have a variable, “myVar”. We can check to see — if “myVar” equals "a".
In order to access a variable within a JavaScript expression, which is effectively what's happening here, we need to wrap it in these characters, the dollar sign and curly braces.
Command: if
Target: ${myVar}= = = “a”
Value:
Then, if it is, any command that comes after this, up until the closing command, which is end will be executed — if this condition is true.
What we'll do is we'll execute another snippet of JavaScript. We'll — return "a" — because that's where we are. We'll store it another variable called “output”, which we’ll use for our assertion.
Command: execute script
Target: return "a"
Value: output
So, what we can do is assert the “output” variable. There's an assert command that enables you to assert against a variable. We can assert that “output” is equal to the value of "a".
Command: assert
Target: output
Value: a
If we run this, it will actually open a browser window, but it's not going to use it. It'll run through all the commands.
Each command, as it was executed, is highlighted in green. We can see that it actually executed the if block and then the assertion passed.
Now, if we change return to a different value, say return "b".
Command: execute script
Target: return "b"
Value: output
And run this, we see that the test failed.
We also see that the color didn't change on this command, the execute script command, which means the test didn't actually reach this command, because the conditional wasn't true. It was false.
So, what we can do is actually add another control flow command.
If we do else if, and just like with if, we can specify “myVar”. We say if it's equal to "b":
Command: else if
Target: ${myVar}= = = “b”
Then we want to execute another script and return a value to the “output” variable. Instead of just doing this by hand, which you can also do, you can copy/paste the command. Then, we can just change the value.
Command: execute script
Target: return "b"
Value: output
And then we would obviously want to assert that the value was "b".
Command: assert
Target: output
Value: b
Let's run this.
We see that it skipped over this conditional block and met this one instead. The test passed.
Alternatively, one thing we can also do is add a final control flow command of else. If neither of these conditions are met, this block will be executed. What we can do is just copy paste and then say return "c".
Command: execute script
Target: return "c"
Value: output
Assert that it's c. Obviously, we want to change the predefined condition to just be "c".
Command: assert
Target: output
Value: c
We run this.
We see that the if and the else if were skipped over and the else block was executed and the test passes.
Let's go ahead and step through an example now of loops.
To start, let's go ahead and add a test. As I mentioned, there's three different commands for loops — there's the repeat if, there's times and there's while.
We'll start with repeat if.
Just like with the conditionals, we'll start with a predefined condition using an execute script command. This time instead of a string, we'll return a number. We'll just call it “check”. That's the name of the variable.
Command: execute script
Target: return 1
Value: check
Counterintuitively, there's actually two commands for repeat if. The first command is actually do. You say do, specify all of the commands that you want to execute and then end the block withrepeat if. You say do and then repeat if. Then, that's it.
So, do doesn't take any arguments. repeat if does. Repeat if takes the expression that you're looking for.
Within the block, we'll say we want to execute script. We will return a modified value of “check”. We're going to take the number in the variable and then increment it by one. We'll store that value back on “check”.
Command: execute script
Target: ${check} +1
Value: check
What we'll do is we'll say — repeat if check is less than three.
Command: repeat if
Target: ${check} < 3
What we want to do is assert, that check is three, by the time that this loop finishes. It should terminate and the value should be three.
Command: assert
Target: check
Value: 3
There you have it.
I don't know if you saw, it might've gone too quick, but it executed the commands, here, multiple times and then finished and then completed the assertion.
The next command, I'll show you is times.
Let's go ahead and add a test for it. The way it works is, you specify the number of times you want a condition to be executed or a number of times a block of steps is to be executed.
We'll start by predefining a value, using a number we want to increment and assert against. We will return “1”, just like in the previous example.
Command: execute script
Target: return 1
Value: check
With times, you specify the number of times you want to execute this block of commands, (e.g., two times).
Command: times
Target: 2
What we'll do is, we'll execute script to return an incremented number. We'll return check plus one and store it back on the “check” variable.
Command: execute script
Target: return ${check} +1
Value: check
Then, we'll end and assert that “check” is three.
Command: assert
Target: check
Value: 3
Let's go ahead and run this.
It worked. It executed the commands twice and then finished.
Similarly, but different is the while command.
The while command is like repeat if, with one specific difference —repeat if executes the block of commands, then checks to see if a condition is true. If it is, then it repeats. So, by default, you get one execution and then a conditional check to see if it repeats.
The while command will only execute if the condition is true. You don't get an initial upfront execution. It's only if the condition is met.
Let's go ahead and create a while test and step through that.
Just like with the other examples, I'm going to use an execute script command, to create an initial value and store it on a variable.
Command: execute script
Target: return 1
Value: check
We'll increment that value and assert the value at the end.
So while, and the condition is to check to see if the variable is less than three.
Command: while
Target: ${check} < 3
While it is, we'll execute a bunch of stuff. We'll end and then we're going to assert. We're going to execute script, return an incremented value and store it back on “check”.
Command: execute script
Target: return ${check} +1
Value: check
We'll assert that check is three.
Command: assert
Target: check
Value: 3
Those are the basics of control full commands of what's available within Selenium IDE.
**Now, let's step through some practical examples using either loops or conditionals. **
Let's go ahead and jump over to an example of a page, where we'll use a conditional.
On this page, when you first visit it and it displays a Modal Window. This could be a display ad. This could be some sort of prompt saying, please disable your ad block.
Regardless, you generally don't want to see this in your test, because it could prevent whatever you're trying to do on the page from actually being executed. We can add a conditional check to say:
If this is present, close it.
If it's not present, don't do anything, just proceed with the test.
Let's go ahead and create a new test for that functionality. We'll call it “conditionals”.
In this test, we're going to first need to visit the page. We need to execute the evaluation of the JavaScript.
First, we'll call open. We'll go to “/entry_ad”.
Command: open
Target: /entry_ad
Now, before we actually add our conditional check for the modal, there's a bit of trickiness to this example, because the timing is not immediate. The modal doesn't always immediately appear. It could take up to a few hundred milliseconds. If the conditional check fires too soon, then it'll happen before the modal appears and the test could still fail.
What we need to do is actually wait for the modal to appear.
Unfortunately, there's no good way to do this. We have within the IDE, we have a lot of implicit “wait” functionality. We have even explicit wait commands. The problem is, that this use case falls outside of those.
What we need to do is actually use a hard-coded sleep for just a small amount of time. The rule is generally to not use hard-coded sleeps, but there are exceptions to the rule. This is one of them. It's not much time. It's just a thousand milliseconds.
Command: pause
Target: 1000
Wait for a second and the modal will render within that amount of time, if it's going to render. So, first do that and then, we can use our if command.
Before I input all the stuff in the target field here, I want to show you what I'm actually going to put there, just so you can see the results of it. If we hop into the developer tools, within the browser document, is effectively the page that we're interacting with. This is just pure vanilla JavaScript — document.querySelector
What you can do is, say I want a document, I want to look up by a CSS selector for an element. This is effectively findElement within JavaScript. The selector for the modal is an ID of modal and then that returns the modal.
document.querySelector('#modal')
What we want to do is check that the modal exists and the query selector for modal has an offset height that isn't zero. If it's not zero, arguably if it's greater than zero, it is displayed.
document.querySelector('#modal') && document.querySelector('#modal').offsetHeight !== 0
Right now, this returns true, which is what we need. We need a Boolean — we need either true or false.
The reason we have to do both of these together is that if we try to call offset height, and there is no query selector for modal, it'll be undefined. It would just throw an exception and make the test fail. We have to do both together. We take this. We can copy it. We paste it in.
Command: if
Target: document.querySelector('#modal') && document.querySelector('#modal').offsetHeight !== 0
We can move on to the rest of the tests. We need to next, click the close button. If the modal's displayed, we want to click.
Command: click
Target: css=.modal-footer > p
We can select the target element, close it. Now, we have our locator. Just for posterity, we can wait for element not visible. We can select the modal. We also need to specify a timeout. We'll just say another second.
Command: wait for element not visible
Target: css=.modal
Value: 1000
We'll wait up to a second, conditionally for the element to not appear. Then we’ll end this block.
We want the test to do something after. Something we can do after is click this footer link, and then assert that the page it takes us to is the correct place. Let's go ahead and start recording. We'll get to the correct page, click the footer, and then we'll right click and then assert title from the context menu.
We'll stop the test and that all looks correct. What we can do now is go ahead and run this test.
The test ran and everything worked correctly. The modal popped up and it was closed.
What we can do on this page is actually close this. If it's closed, it will not appear on subsequent page loads. When we run the test again, the modal shouldn't appear.
When that happens, the test should proceed and skip over these commands. Either way, the test works. Either if the modal appears or if it doesn't. We have to just pay a small penalty, just for a little bit of wait time to see if the modal appears.
**To round out all of the examples, let's go ahead and step through an example using loops to step through repetitive actions on a page. **
I'll go ahead and create a test called “loops”. There is an example, I want to show you, at this URL.
Command: open
Target: /add_remove_elements/9
It is an example where you can add an element, or a set of elements, and then delete them one by one.
You could write a test that will go through and explicitly state every command to delete an element. Or you can specify the delete command once, and then use one of the looping control flow constructs to iterate over that command numerous times.
Let's go ahead and do that.
We'll use a while command. The JavaScript we'll use, I'll go ahead and show you here. The thing we want to do is check how many of these elements appear on the page, these delete elements. While there are elements on the page, we want to keep executing that command. We'll use
document.querySelector and specify the selector for the delete button. The selector is “elements” — there's a div with an ID of elements, and there is a button within it. That's just for a single one though — querySelector. What we want is querySelectorAll.
document.querySelectorAll('#elements button')
That shows us all nine buttons, that are on the page. What we can do is actually call length, on that.
document.querySelectorAll('#elements button').length
So, while there are buttons, we want to keep clicking on the button, on the first button that shows up.
Then the while command will keep clicking until there's no more buttons. What we want to do is specify while. We can copy and paste our expression. Paste it in. Within the while command there's actually a helpful loop limit, an infinite loop protection.
What we can do is specify a maximum number of times a looping control flow command can execute. You can optionally specify this. You can either say if this while loop executes a hundred times, I want to stop or you could not.
Command: while
Target: document.querySelectorAll('#elements button').length
Value: 10
If there's an infinite loop, you have to manually stop the test. This loop should theoretically only execute nine times. We can set a loop limit of 10, just to be safe.
Within it, we want to click. We want to click on the delete button, so we can go ahead and click the delete button.
Command: click
Target: css=#elements > button:nth-child(1)
That's it. What we can do is, assert that the element is not present.
Command: assert element not present
Target: css=#elements > button:nth-child(1)
Let's go ahead and run this test and see what happens.
Voila, here we are, the test ran.
It opened up the page, where there were nine buttons present. It clicked through all the buttons until there were no more and asserted that that was the case.
So, that is control flow.
If you want to actually see a list of all the available commands, as well as, control flow commands within Selenium IDE, then you can actually head over to the docs page, there is a command reference for all of the available commands.
That's it. Happy testing.
