

Transcripted Summary
In this video, we are going to start seeing the basic Cucumber Features.
Before we get into the Features, we will first learn what is Cucumber.
# Introduction to Cucumber
Cucumber is a testing tool for Behavior-Driven Development approach.
It defines application's behavior using simple English and defined by a language called Gherkin.
Gherkin is a special language that is designed for Behavior-Driven Development approach and it is used by many organizations extensively.
It helps to easily read and understand the automated acceptance tests.
Just to recollect, while we were discussing the Three Amigos Session, we learned that the outcome of the session would be the acceptance criteria, isn't it?
These acceptance criteria are nothing but the Scenarios, and it is written in this Gherkin language.
# Introduction to Gherkin
Now let's see a bit more about Gherkin.
Gherkin is a set of grammar rules that makes plain text structured enough for Cucumber to understand.
Moreover, Gherkin is an English text language that helps the Cucumber tool to interpret and execute the automated test scripts, which are nothing but other acceptance tests.
Apart from this, Gherkin serves multiple purposes. These three purposes, which are given here, are the most common ones.
First thing, it addresses the unambiguous executable specifications; and of course, it helps to automate the tests that are related to our application, using Cucumber.
And also, it documents how the system actually behaves as well, using the concepts of living documentation.
Now it's time for us to get to know about the key concepts of Cucumber.
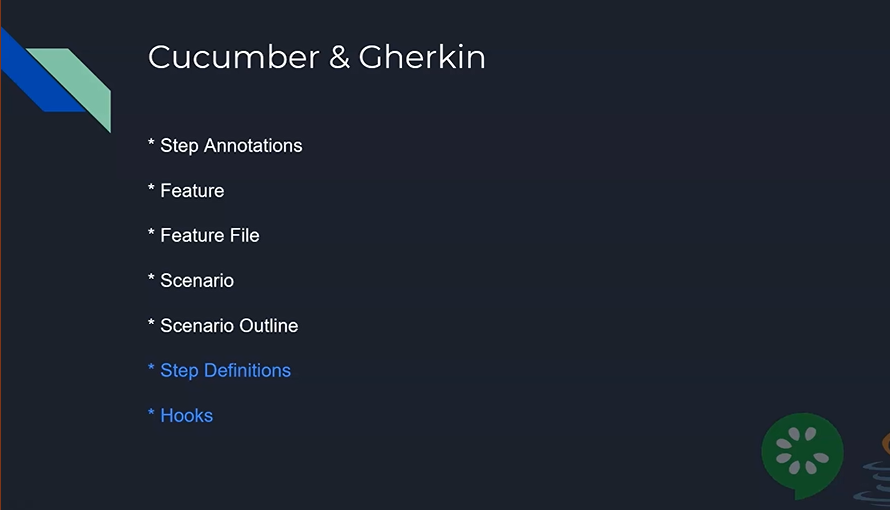
There are totally 7 key concepts that we should understand when it comes to Cucumber and Gherkin.
The first 5 that you're seeing here, the Step Annotations, Feature, Feature File, Scenario and Scenario Outline, are specific to Gherkin.
The Step Definitions and Hooks are something that are related to the test automation framework that we are going to use along with Cucumber.
No worries, we will learn all these things in detail in this video. And of course, we will see how to use this in the test automation framework from the next video.
# Step Annotations
First, we will see what are Step Annotations.
Step Annotations are the keywords used to define several factors like context, actions and outcomes, etc., in a Scenario.
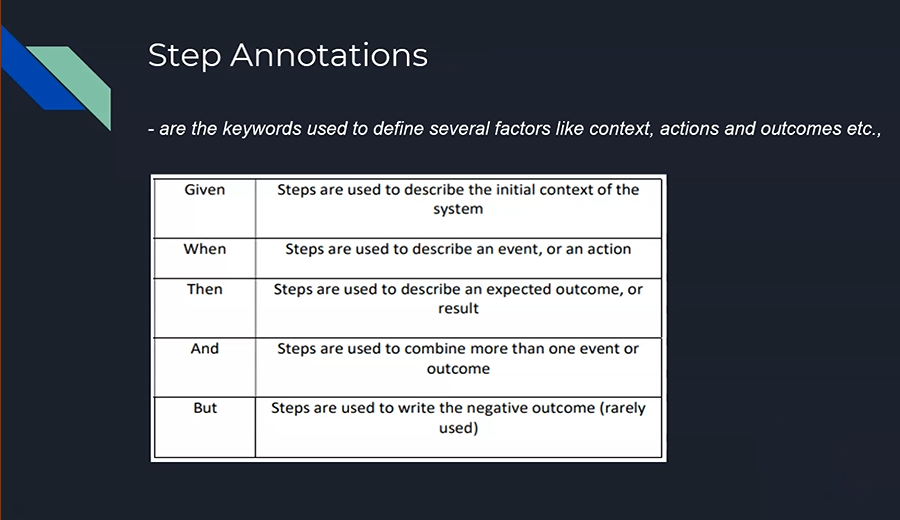
There are 5 types of Step Annotations:
The first one is
Given, which is used to describe the initial context of the system.We have
Whento describe an event or an action.We have
Then, used to describe an expected outcome or a result.We have the
AndStep Annotation, that will be used to combine more than one event or outcome.Lastly, we have the
ButStep Annotation, which is used, very rarely, to write the negative outcomes of the Scenario.
Next, we will see about our Feature.
# Feature
Our Feature is defined as a functionality or a module of an application.
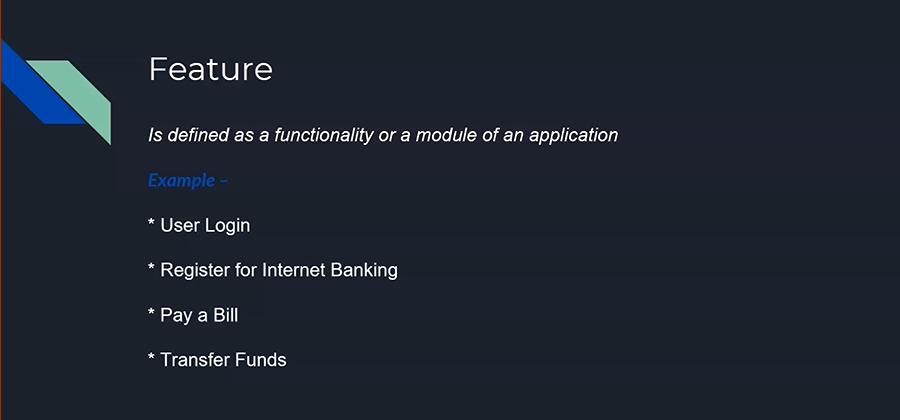
Say, for example, in a banking application, a user login is a Feature, register for an internet banking is a Feature, pay a bill is a Feature, and transfer funds is a Feature.
So, in general, any functionality of an application can be defined as a Feature from Cucumber's perspective.
Now that we know what exactly a Feature is, it's time for us to know what is a Feature File.
# Feature File
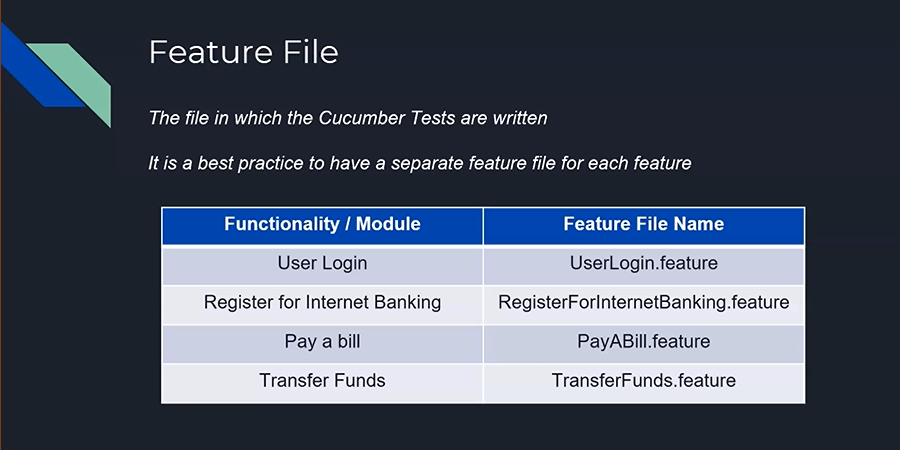
So basically, a Feature File is a file in which the Cucumber tests are written.
Or rather, we can say that it's a file in which we write the Scenarios for our acceptance tests.
It is a best practice to have a separate Feature File for each Feature. Rather than putting all the Features into one Feature File and make things complicated, we will have individual Feature Files for different modules.
If you see here, for the user login, we have a separate Feature File called UserLogin.feature and we have the same thing for RegisteredForInternetBanking.feature. Likewise, for a PayABill.feature and a TransferFunds.feature files.
# Feature File Structure
Now that we know what exactly a Feature File is, there is a syntax, or there is a structure, that we need to follow in order to write a Feature File.
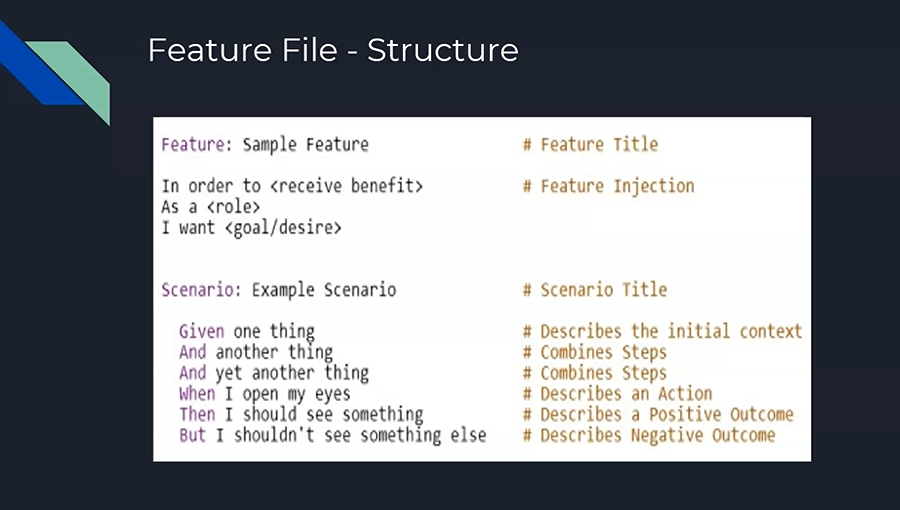
So basically, we know that a Feature File contains multiple Scenarios of our functionality.
First thing that we have to add is the Feature name by using the tag
Feature.And the next one is the Feature Injection. A Feature Injection is something that we are describing the Feature on what it does exactly.
Then comes the
Scenarioname, or the title, and we write our Scenario Steps into that. The Scenario Steps are written using the Step Annotations that we discussed earlier.
We need to start the Scenario with an initial context by using the Given annotation, and then we can start writing other consequent steps that can be combinations of multiple steps or an action step.
Of course, the outcome should come always after the action annotation, which is nothing but our When Step Annotation.
Basically, we learned that a Feature is a functionality of an application.
# Scenario
Likewise, a Scenario is defined as a test for a functionality, so it resides inside a Feature File for the functionality.
So, in our banking application where we are going to see an example in this particular course, you will be able to see that a small Scenario has been written here.
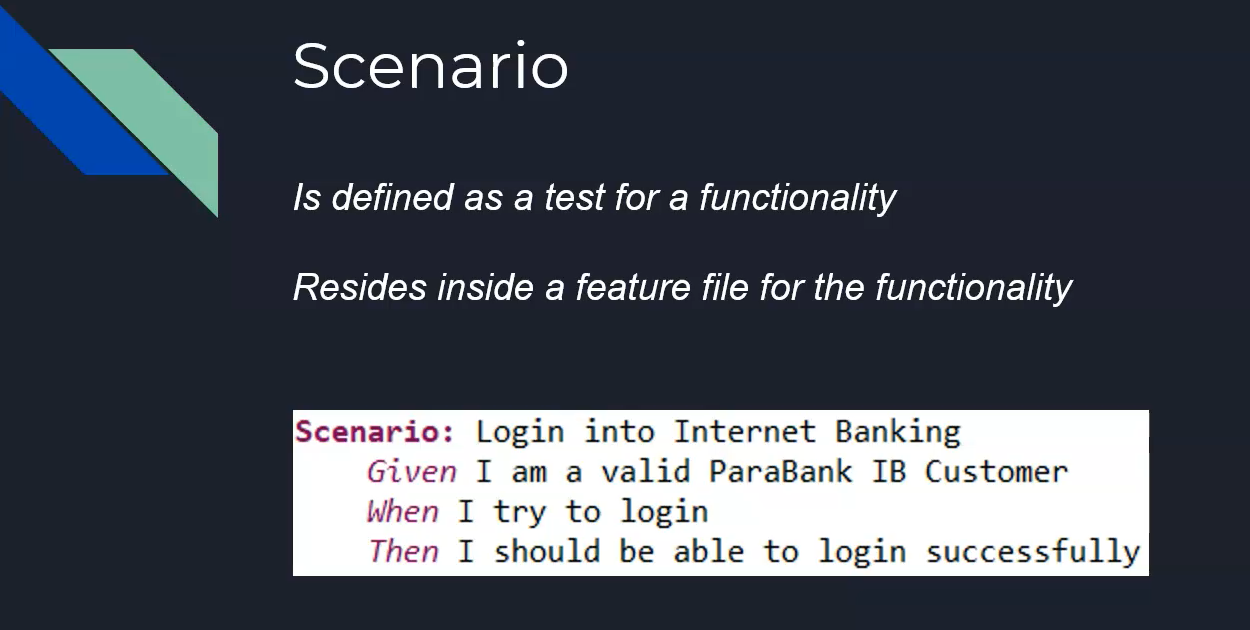
And please keep in mind, this Scenario has to be business-oriented. We will talk about it in the best practices of writing Gherkin in the coming slides, for sure.
So, what is it we have learned from Scenario?
A Scenario is defined as a test for a functionality; that's it.
# Scenario Outline
Now, coming to a Scenario Outline.
Scenario and Scenario Outline are one and the same.
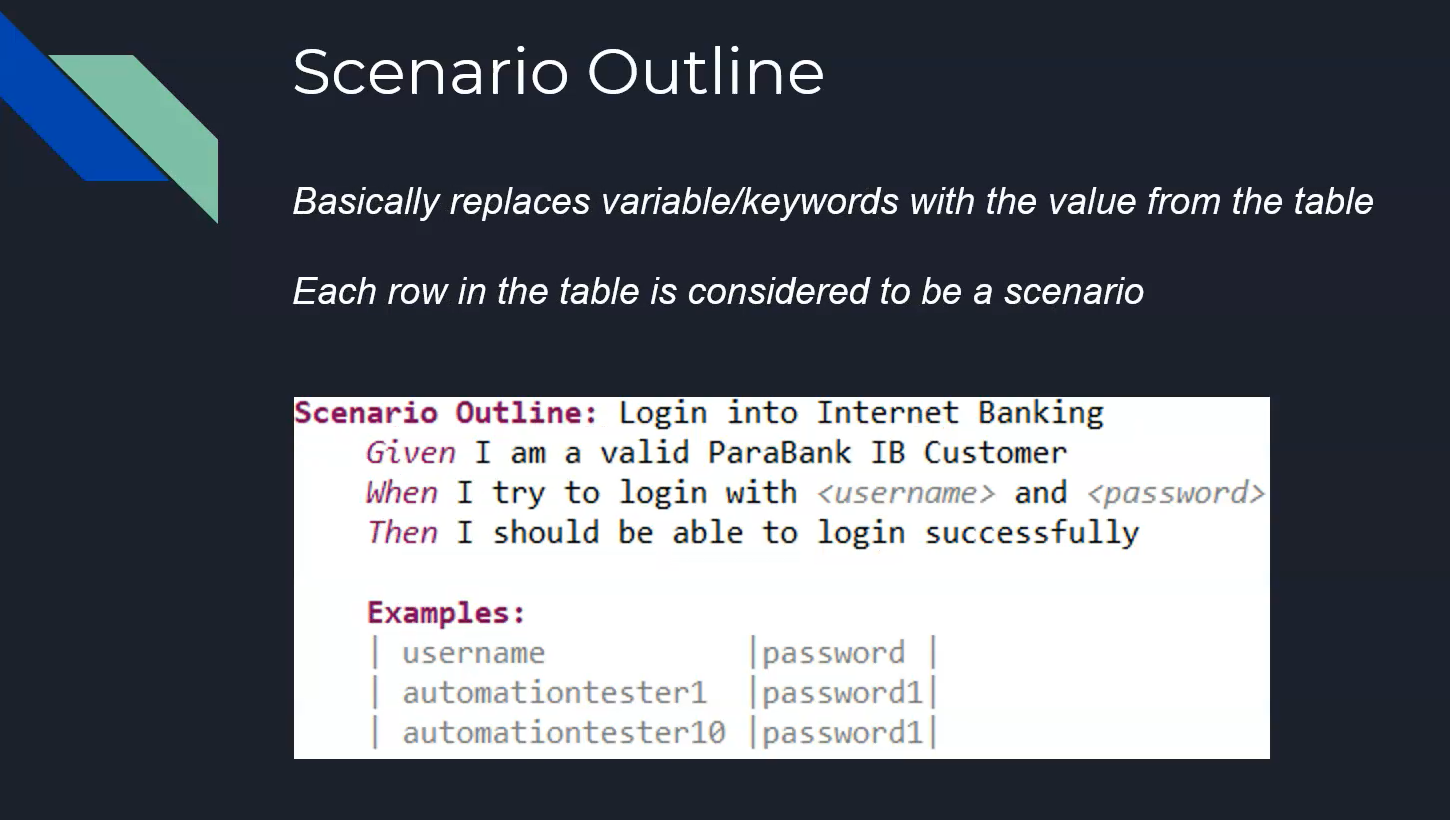
In a sense, we are writing the tests, or we are writing the acceptance tests, for our functionality. Basically, a Scenario Outline replaces variables or keywords with a value from the table.
Each row in the table is considered to be a Scenario.
So, what does it mean? It means that we are trying to parameterize the Scenario with a different set of arguments, or different set of data, that is going to be used with only one Scenario.
In this example, if you see, we are trying to have a username and password as a parameter, which means I can use the same Scenario to execute the tests with multiple combinations of username and password.
Whereas, if you take the previous one Scenario, you will be able to use only one set of data, but again, if you want to use multiple set of data, you can use the Scenario Outline and parameterize it with examples.
# Background
Now it's time for us to see about Background.
So basically, the Background allows us to add some context to the Scenarios in the Feature, and it runs before each Scenario but after any Before Hooks. We will talk about Hooks shortly, but let's keep in mind, it just executes after any Before Hooks.
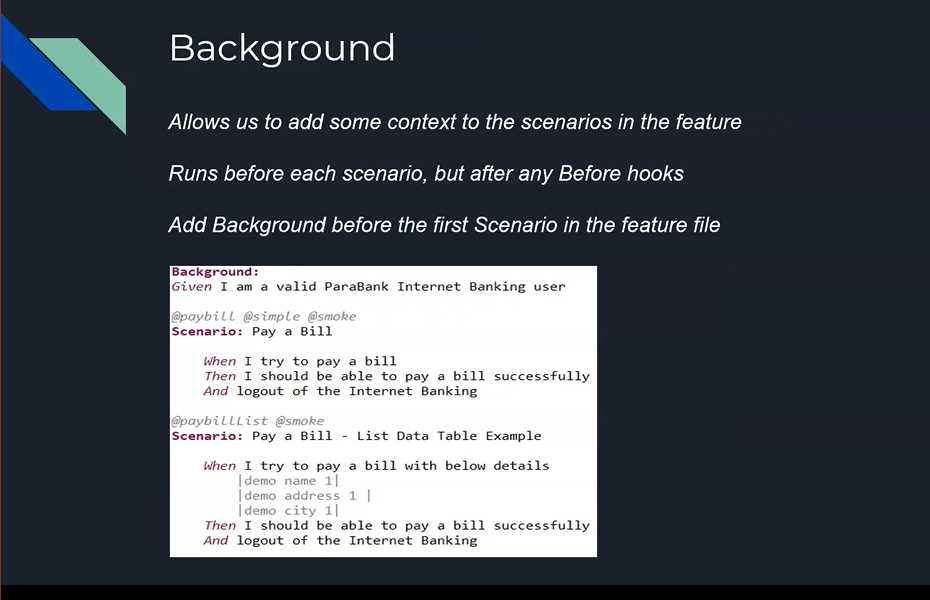
We need to add Background before the first Scenario in the Feature File.
So, in the example that is getting displayed here, you will be able to see that the Background step, which is nothing but a context to step, is given in the Background and the rest all of the steps are given within the Scenario.
Now what happens exactly here is, when you're trying to execute the tests, the “Pay a Bill” Scenario will be executed only after the Background step gets executed.
Likewise, the second Scenario, “Pay a Bill – List Data Table Example”, will be executed only after the Background gets executed, which means the common step between the “Pay a Bill” and the “Pay a Bill – List Data Table Example” Scenarios are there as part of the Background.
And it executes first, and then only these 2 Scenarios will be executed.
# Step Definitions
Next, we will see about the Step Definitions.
So, like I said earlier, a Step Definition is something to do with the test automation framework and has nothing to do with the Gherkin.
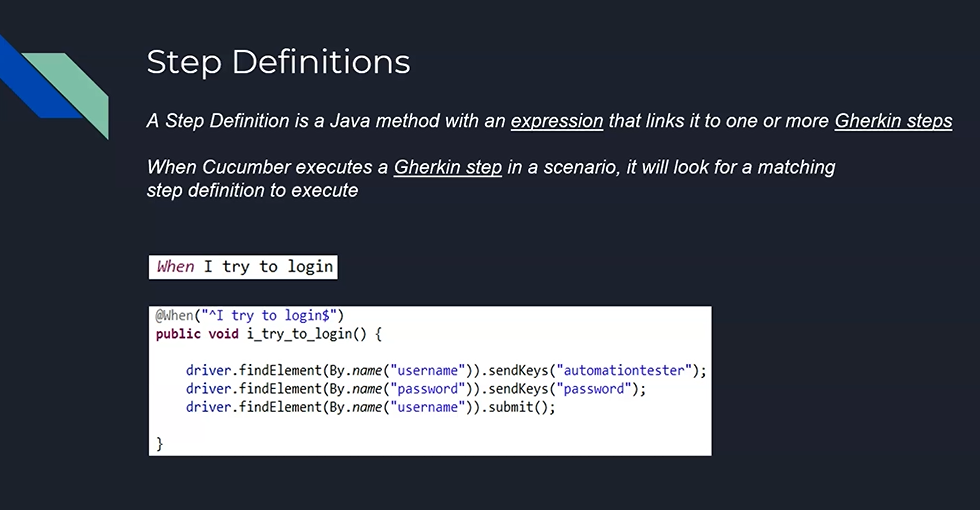
A Step Definition is a Java method with an expression that links it to one or more Gherkin steps.
So basically, a Step Definition is a bridge between the business and the technical folks, which means it is a bridge between the acceptance criteria written in simple English language, and it starts mapping it to a Java method that does the action on what is it given as part of the Gherkin step.
When Cucumber executes a Gherkin Step in a Scenario, it will look for a matching Step Definition to execute.
So, in this example, if you see, I have an action Step Annotation called “When I try to login”, and this is written in the Feature File.
The next code snippet is written in a file called “Step Definitions”. Don't worry, we will talk about the test automation framework shortly.
# Tags
Then comes the Tags. The Tags are a great way to organize our Features and Scenarios, basically.
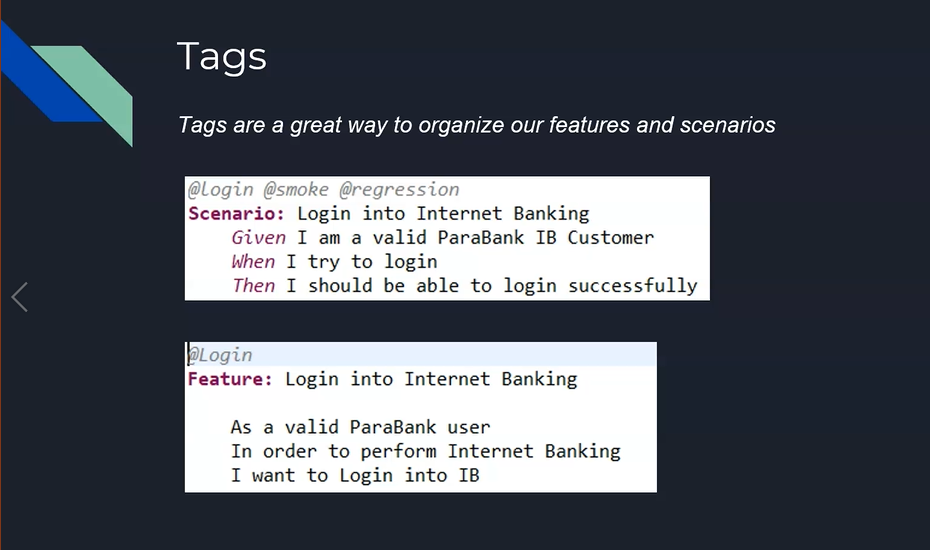
So, we have multiple sets of Scenarios for different sets of Features, and we should be able to identify what are all the test cases, or the Scenarios, that we need to execute then and there, as required.
For the Scenario, you will be able to see the Tags, so the Tags are specific to the Scenarios and you can just map it however you want, and make sure those Scenarios are getting executed.
# Hooks
Then comes the Hooks.
What are Hooks? Hooks are blocks of code that can run at various points in the Cucumber execution cycle.
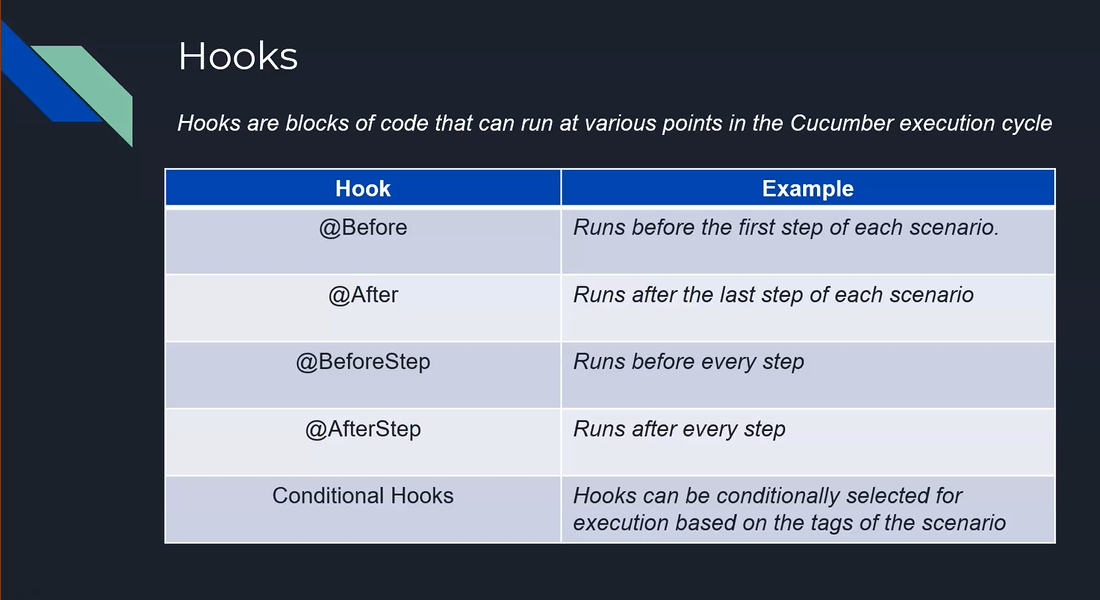
So majorly, there are 5 types of Hooks that are predominantly used within Cucumber.
The first one is
@Before, which will run the first step of each Scenario.Then comes
@After, so it runs after the last step of each Scenario.We have something called
@BeforeStepwhich runs before every step execution.We have something called
@AfterStepwhich runs after every step.
There are also several Conditional Hooks that can be used for execution, based on the tags of these Scenarios.
We will see the demo of all these hooks in the next video.
# 3 Golden Rules for Gherkin
We will see about 3 golden rules that we need to follow religiously while writing the Gherkin.
First, in a given Scenario, there should be only one
Given, oneWhenand oneThensteps — not more than oneGivenorWhenorThenshould be present as part of the Gherkin file.The next one is the maximum usage of two
Andsteps are allowedMake sure your Scenario has maximum of five steps and not more than that.
In case, if it is exceeding, try to split it into two different Scenarios.
# Best Practices for Writing Gherkin
We will see a couple of best practices of writing Gherkin Scenarios.
When writing the scenarios, make sure you always think about yourself as the end user.
Gherkin should always be business-centric and so do your Scenarios, as well.
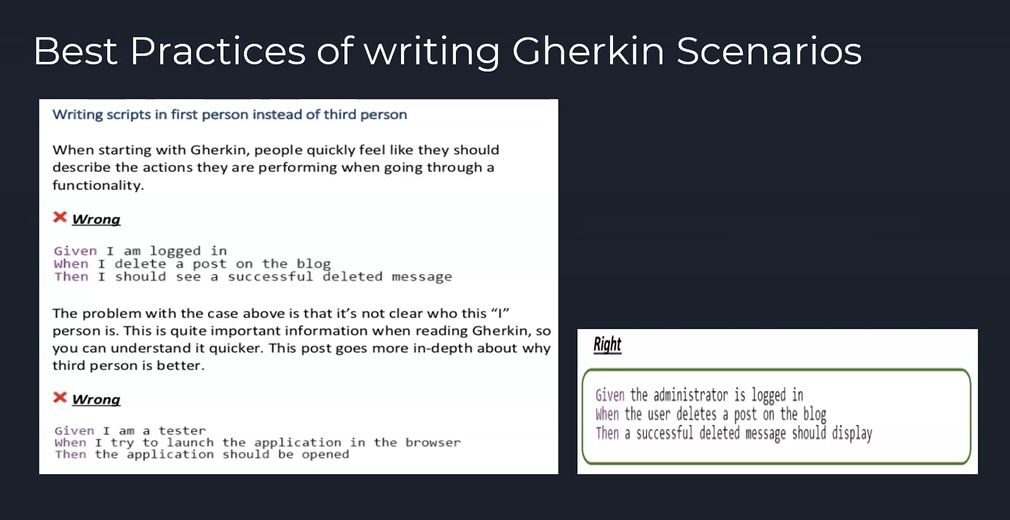
In this example, you will be able to see that the Scenario has the step, “Given I am logged in”. But from a business, who is “I” here? What role does he or she play? Nothing is mentioned here.
Likewise, never use your professional role to define Gherkin Scenarios like, "I am a tester."
It's a very bad practice of writing Scenarios.
So, the right way of writing would be, “Given the administrator is logged in, When the user deletes a post from the blog, Then a successful deleted message should display”.
Try not to be UI-centric.
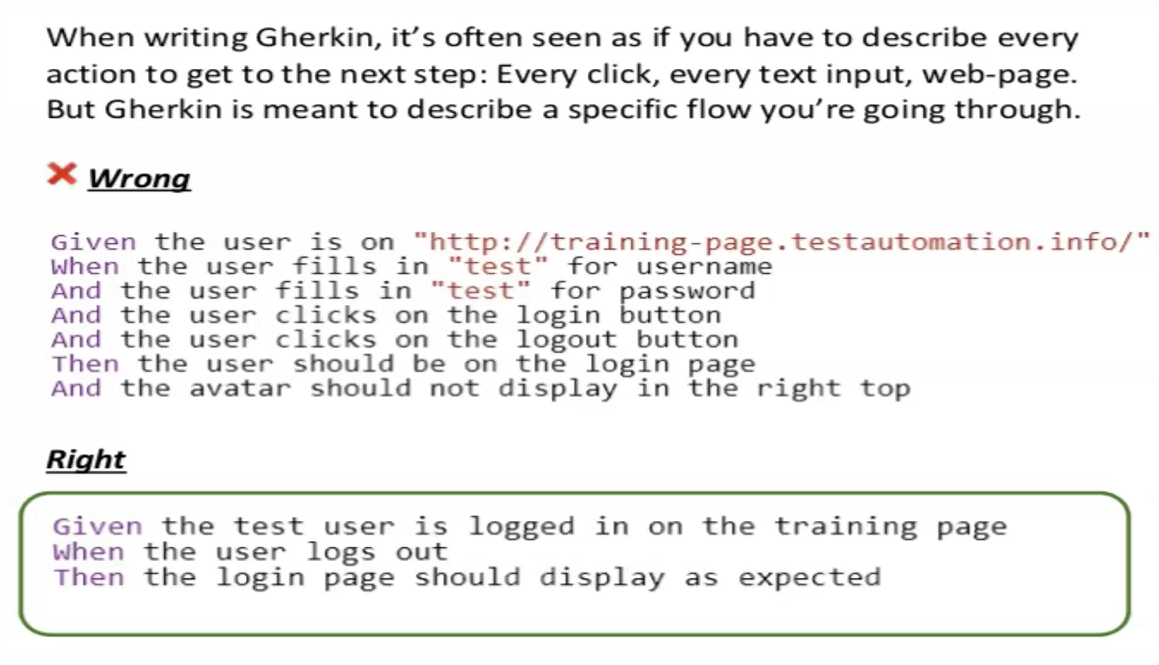
Try to avoid the usage of clicks, fills, selects, etc. Also, try not to add information like application UI into your Scenario.
If your Scenario has UI-related steps, try to think about how you can make it business-oriented, so that it falls under the behavior of the application and centric to UI competence.
Third, and the final best practice, is never to use any technical terms in the Gherkin steps, for example, using the locator IDs of the UI component.
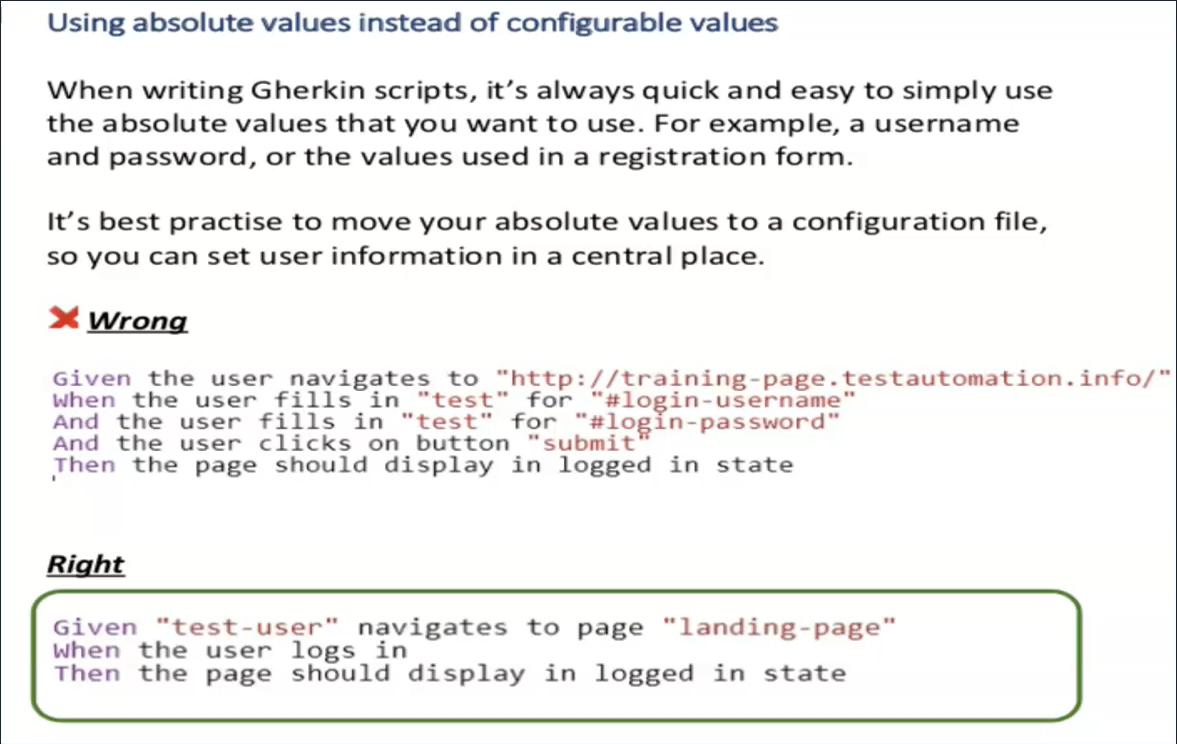
Rather, the right way of writing this particular Scenario would be, "Given the test user navigates to page ‘landing page’, When the user logs in, Then the page should display in logged in state."
I hope you have learned the usage of Cucumber concepts and the best practices for writing the Gherkin now, and in the next video, we will see about the code removed for the ones we learned in this session.
Thank you.
