

Transcripted Summary
In this video, we will learn about how to integrate Cucumber with Selenium.
Until now, we have seen what Cucumber is, and how to write Gherkin scenarios. Also, we have seen what is a Scenario, Scenario Outline, Tags, Background, and other artifacts of Cucumber.
Now, it's time for us to see them in action.
But, before we get started, we should understand that Cucumber is not a Browser Automation Tool.
It combines with Selenium-WebDriver to make it powerful for browser automation.
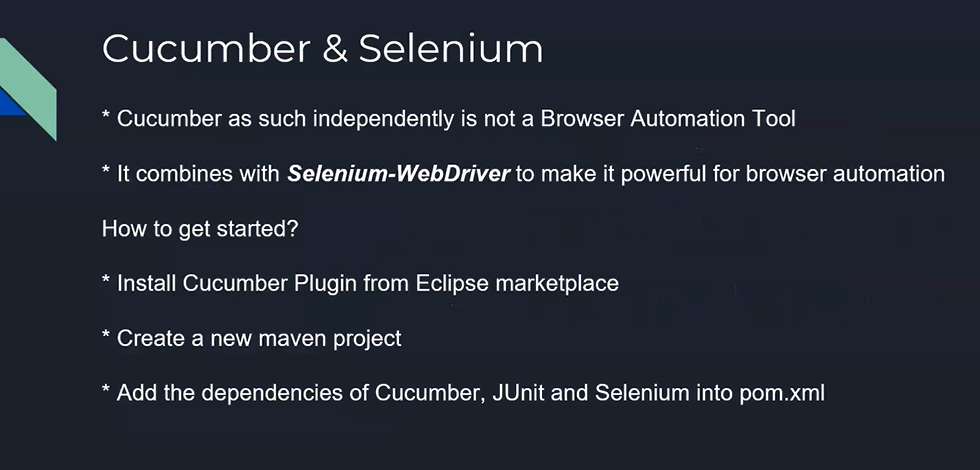
How can we get started?
It's pretty simple.
First, we need to install Cucumber plugin from Eclipse marketplace.
Once we installed that, we need to create a simple Maven project.
And then, we need to add all the dependencies of Cucumber, JUnit and Selenium into pom.xml.
# Installing Cucumber
First, we will download and install the Cucumber plugin for Eclipse.
To download it, go to the GitHub link given below in the resources section, and download the latest Snapshot of the Cucumber plugin from the GitHub repository, as it contains the latest features.
So as of today, this is the latest Snapshot that is available.
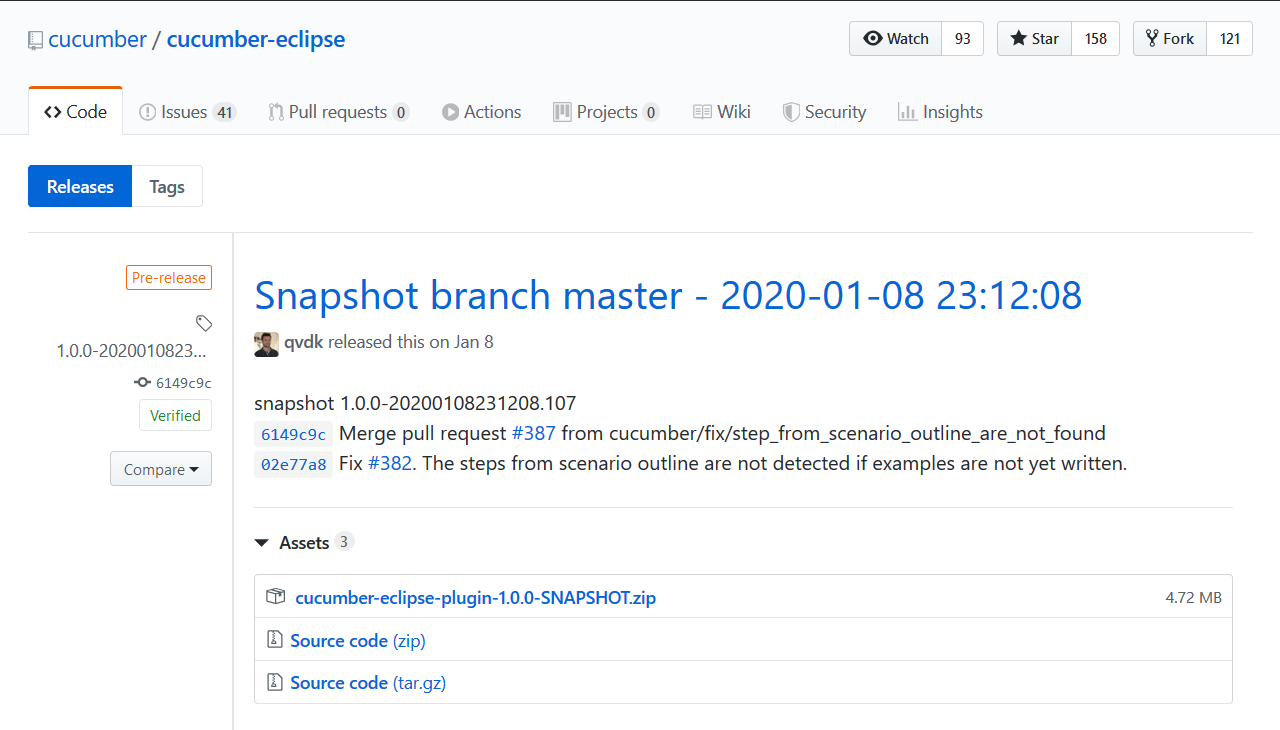
I'm going to download this. Click on this zip file to download.
Now, once downloaded, let's install it — to do that, I'm switching to my Eclipse.
So, let's go to Help> Install New Software.
Click Add, type “Cucumber”, and browse through to find the zip file that we have downloaded.
This is the one.
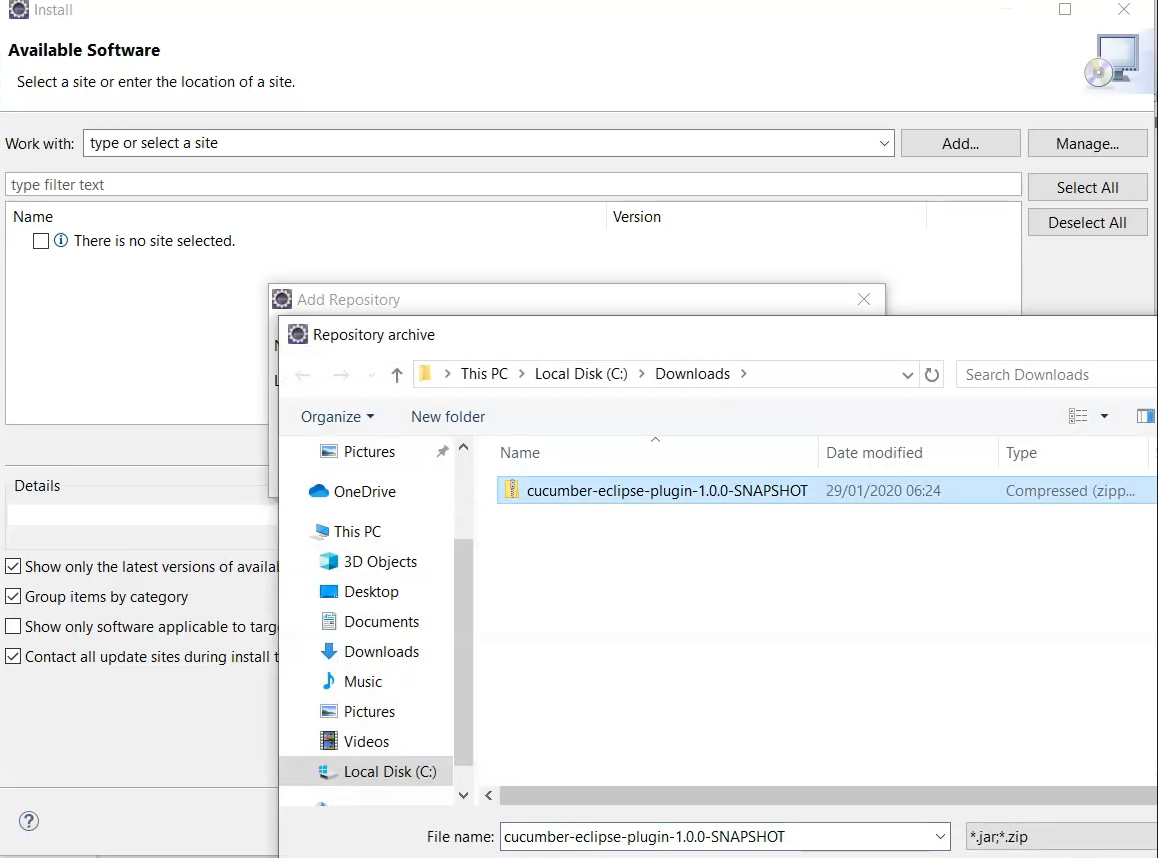
I'm going to give Open, and I'm going to give Add, select the _Cucumber Eclipse Plugi_n.
Click Next, and again click Next, accept the terms and Finish. Click I_nstall anyway_.
Once it is installed, it will prompt you to restart your Eclipse — please, restart it.
# Application Under Test
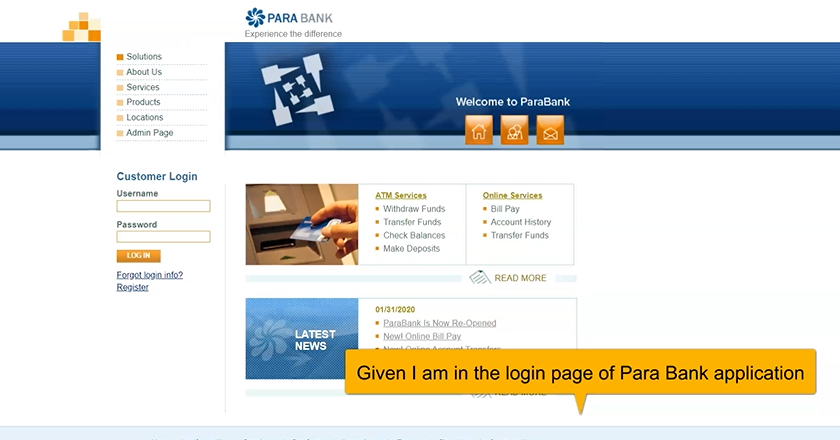
Before we start creating a Cucumber project, we will just quickly go through the demo web application, which we are going to use throughout this course.
The website is called Para Bank, and it is a simple banking application.
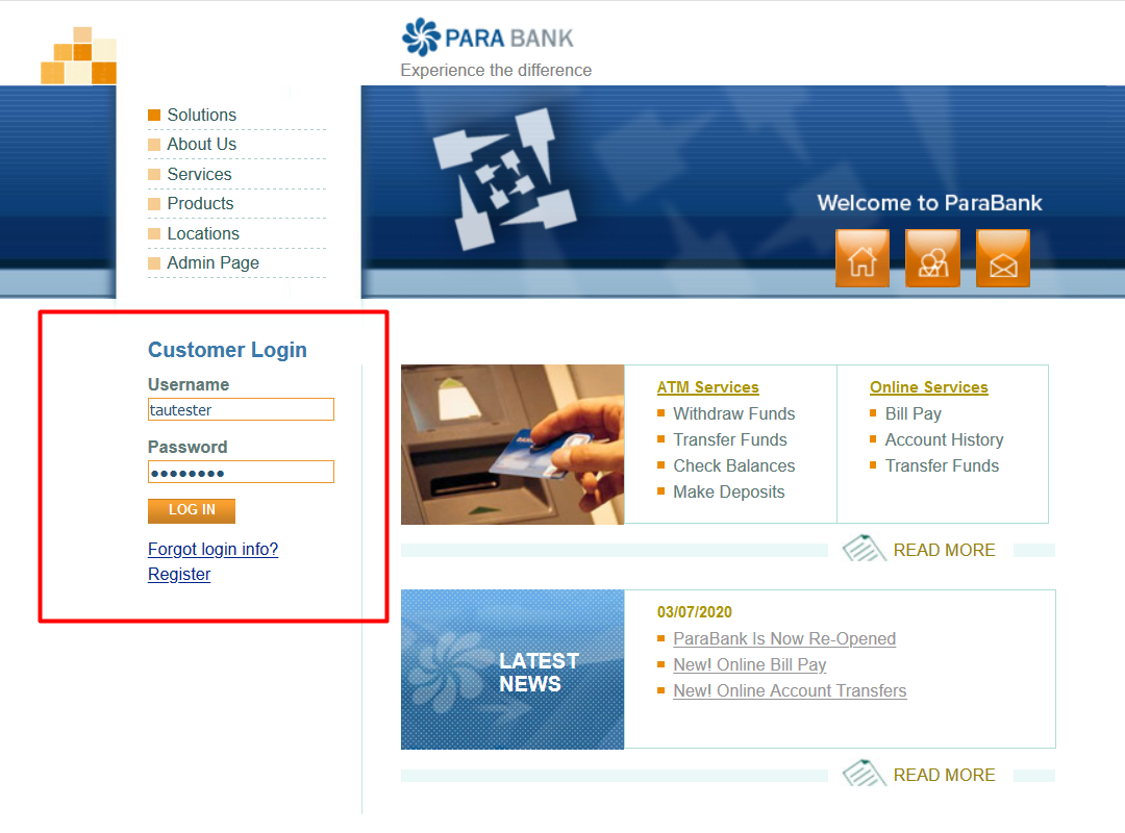
Our scenario would be very simple as well, and it includes the login functionality. I have already created a user for our course, and this is how it works.
It's a simple login page, and I'm going to enter the Username, “tautester”, and the Password as “password”.
Username/Password
If this username and password does not work, you can use “john” for username and “demo” for password. Alternatively, you can create your own test account.
Once it logs in, we are going to assert whether the Log Out link is coming or not.
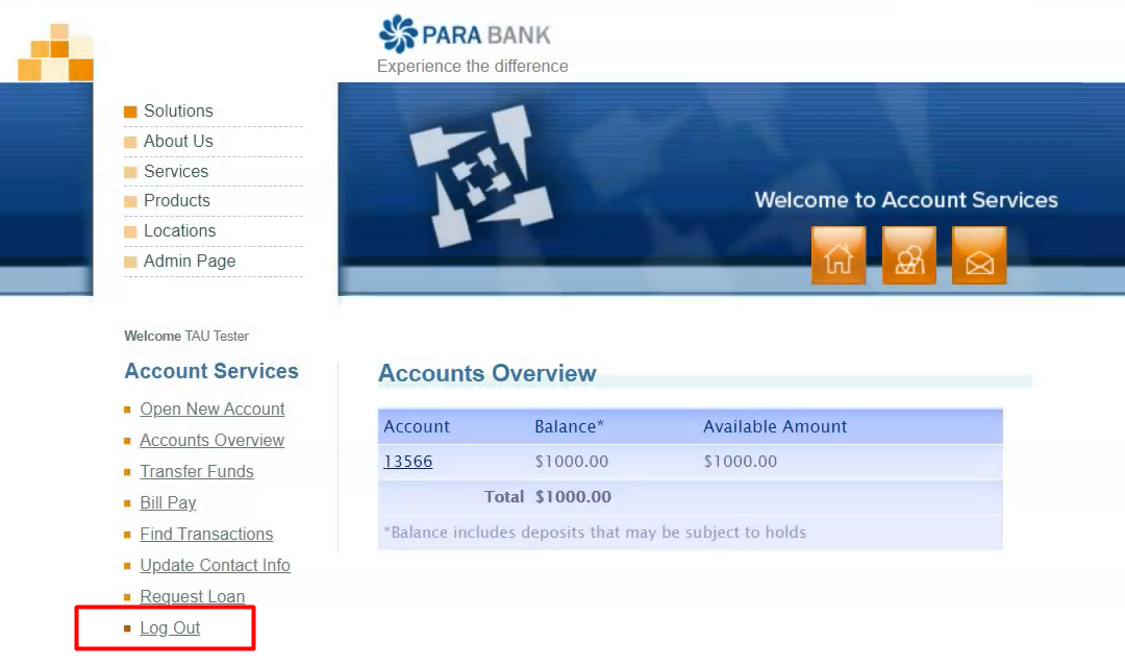
Once that is asserted, I'm going to click the Log Out link, and it should eventually take me back to the Login page.
So, this is the scenario that we are going to automate using Cucumber.
# Creating Maven Project
Well, it's time for us to create the Maven project.
To do that, I'm going to my Eclipse, and I'm right-clicking. I'm going to give New and Other.
I'm going to search for “Maven” project and click this Next.
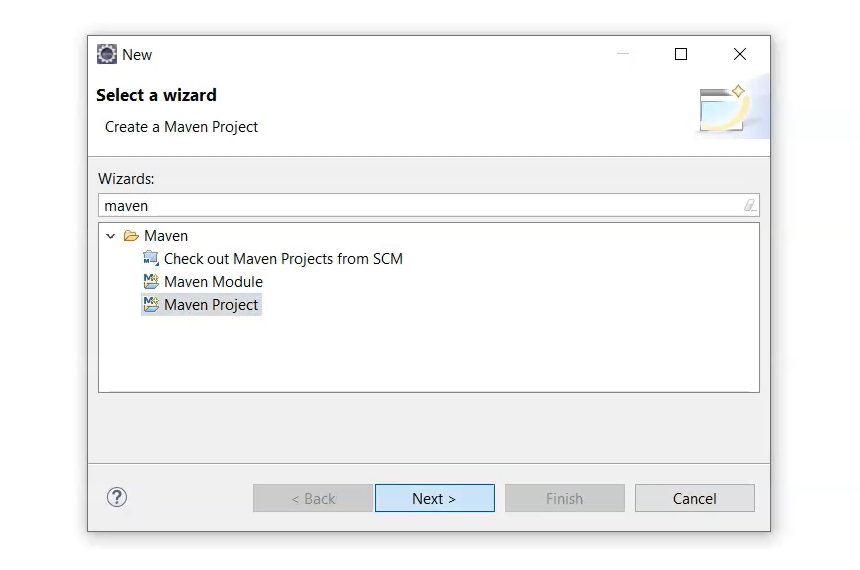
I'm going to Create a simple project and click Next.
I'm going to give the Group Id as “com.tau.cucumber.course”
I'm going to give the Artifact Id as “tau-cucumber-course”
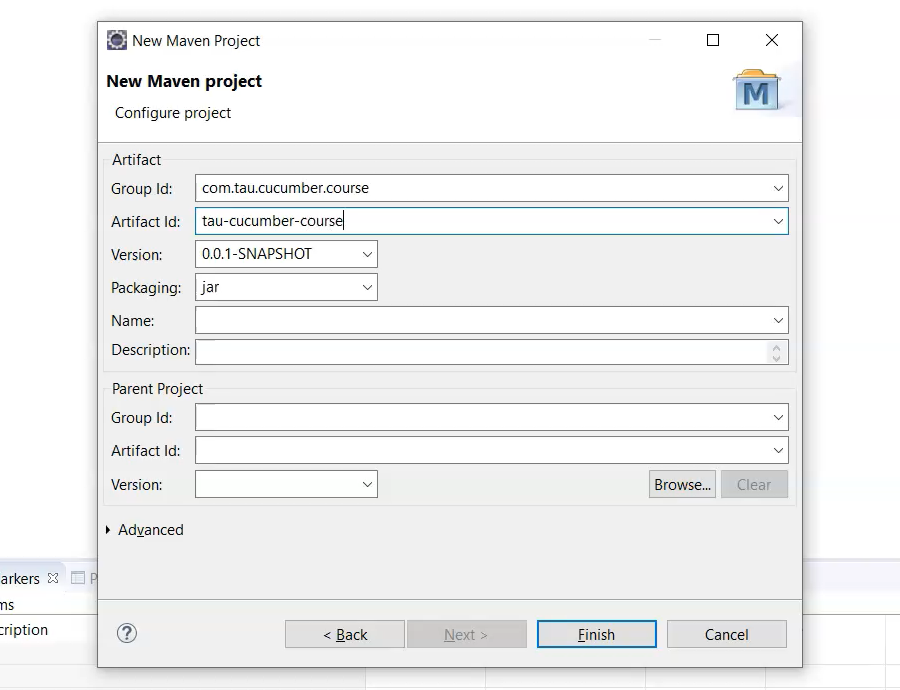
I'm going to click Finish.
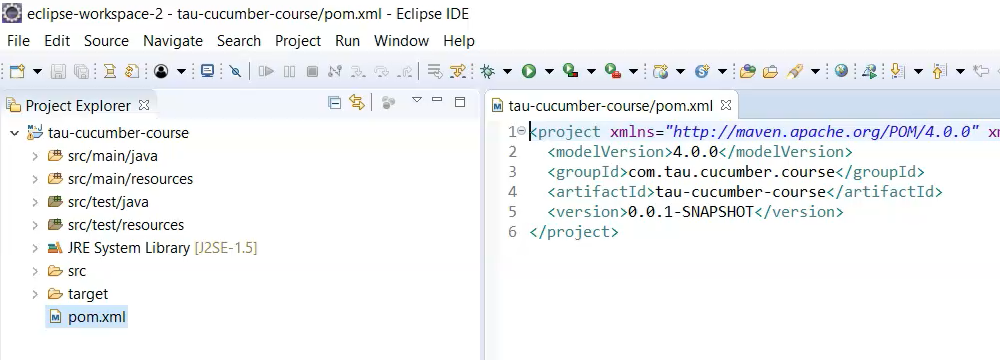
You will be able to see my Maven project that got created over here.
# Adding Dependencies
Before we start writing our Cucumber scripts, it's time for us to add the dependencies that are related to Cucumber and Selenium.
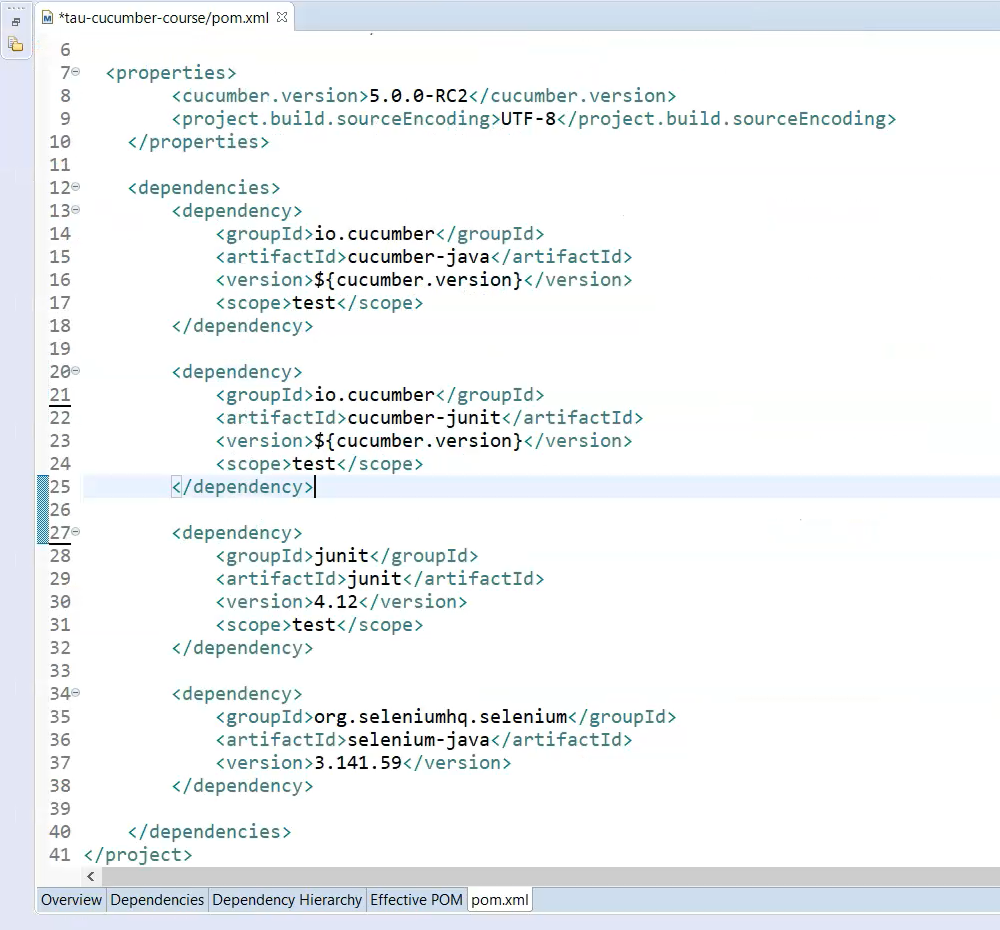
To do that, all I need to do is add the dependencies accordingly. So, these are the dependencies that I have added.
Basically, I'm going to add 4 dependencies.
- One is
cucumber-java - The other one is
cucumber-junit - I'm going to add the
junitdependency as well - And of course, the Selenium dependency (
selenium-java)
<project xmlns="http://maven.apache.org/POM/4.0.0"
	xmlns:xsi="http://www.w3.org/2001/XMLSchema-instance"
	xsi:schemaLocation="http://maven.apache.org/POM/4.0.0 http://maven.apache.org/xsd/maven-4.0.0.xsd">
	<modelVersion>4.0.0</modelVersion>
	<groupId>com.tau.cucumber.course</groupId>
	<artifactId>tau-cucumber-course</artifactId>
	<version>0.0.1-SNAPSHOT</version>

	<properties>
		<cucumber.version>5.0.0-RC2</cucumber.version>
		<project.build.sourceEncoding>UTF-8</project.build.sourceEncoding>
	</properties>

	<dependencies>
		<dependency>
			<groupId>io.cucumber</groupId>
			<artifactId>cucumber-java</artifactId>
			<version>${cucumber.version}</version>
			<scope>test</scope>
		</dependency>

		<dependency>
			<groupId>io.cucumber</groupId>
			<artifactId>cucumber-junit</artifactId>
			<version>${cucumber.version}</version>
			<scope>test</scope>
		</dependency>

		<dependency>
			<groupId>junit</groupId>
			<artifactId>junit</artifactId>
			<version>4.12</version>
			<scope>test</scope>
		</dependency>

		<dependency>
			<groupId>org.seleniumhq.selenium</groupId>
			<artifactId>selenium-java</artifactId>
			<version>3.141.59</version>
		</dependency>

		<dependency>
			<groupId>io.cucumber</groupId>
			<artifactId>cucumber-picocontainer</artifactId>
			<version>${cucumber.version}</version>
			<scope>test</scope>
		</dependency>

	</dependencies>

		<build>
			<plugins>
				<plugin>
					<groupId>org.apache.maven.plugins</groupId>
					<artifactId>maven-compiler-plugin</artifactId>
					<version>3.7.0</version>
					<configuration>
						<encoding>UTF-8</encoding>
						<source>1.8</source>
						<target>1.8</target>
					</configuration>
				</plugin>
				<plugin>
					<groupId>org.apache.maven.plugins</groupId>
					<artifactId>maven-surefire-plugin</artifactId>
					<version>2.22.0</version>
					<configuration>
						<parallel>methods</parallel>
						<useUnlimitedThreads>true</useUnlimitedThreads>
						<testFailureIgnore>true</testFailureIgnore>
					</configuration>
				</plugin>
				<plugin>
				<groupId>net.masterthought</groupId>
				<artifactId>maven-cucumber-reporting</artifactId>
				<version>4.11.2</version>
				<executions>
					<execution>
						<id>execution</id>
						<phase>verify</phase>
						<goals>
							<goal>generate</goal>
						</goals>
						<configuration>
							<projectName>cucumber-jvm-example</projectName>
							<!-- optional, per documentation set this to "true" to bypass generation
								of Cucumber Reports entirely, defaults to false if not specified -->
							<skip>false</skip>
							<!-- output directory for the generated report -->
							<outputDirectory>${project.build.directory}</outputDirectory>
							<!-- optional, defaults to outputDirectory if not specified -->
							<inputDirectory>${project.build.directory}</inputDirectory>
							<jsonFiles>
								<!-- supports wildcard or name pattern -->
								<param>**/*.json</param>
							</jsonFiles>
							<!-- optional, defaults to outputDirectory if not specified -->
							<classificationDirectory>${project.build.directory}</classificationDirectory>
							<classificationFiles>
								<!-- supports wildcard or name pattern -->
								<param>sample.properties</param>
								<param>other.properties</param>
							</classificationFiles>
							<parallelTesting>false</parallelTesting>
							<!-- optional, set true to fail build on test failures -->
							<checkBuildResult>false</checkBuildResult>
						</configuration>
					</execution>
				</executions>
			</plugin>
			</plugins>
		</build>
</project>
Now that we have created the Maven project and added all the dependencies, it's time for us to write the first feature file.
# Creating Feature File
While you're writing the feature files or creating it, make sure that you're creating it under the resources folder.
So, I'm right-clicking on resources, adding a new file (resources > New > File). I'm going to call it Login.feature.
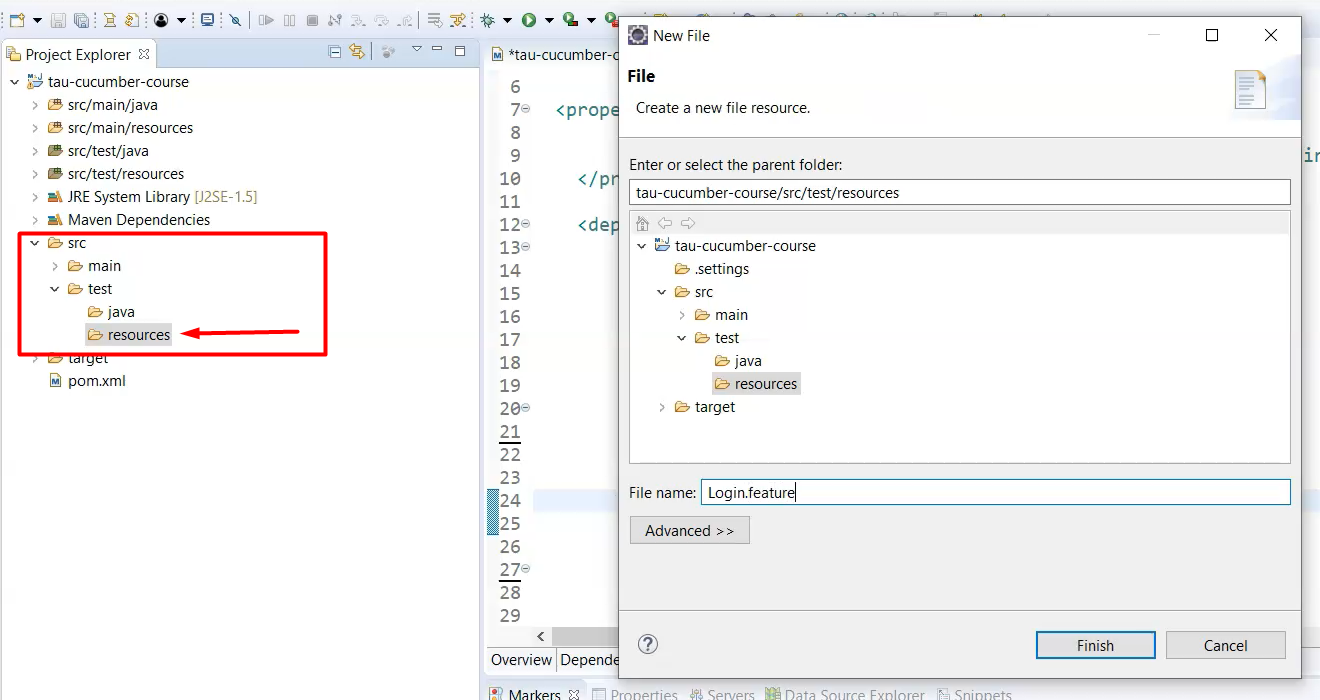
Then, I'm going to Finish it.
You will be able to see my first feature file that I have created, called “Login.feature”.
It is residing under the “Resources” folder.
Now, before we write the scenarios in the Gherkin format, let's revisit our Scenario in the Para Bank application.
I'm currently in the login page of Para Bank application, which means my first step of the scenario would be, “Given I am in the login page of Para Bank application”.
So, my second step would be, I'm entering the credentials, right?
I'm going to give it as “tautester” and the password as “password”, which will become in the Gherkin format as, “When I enter valid credentials”.
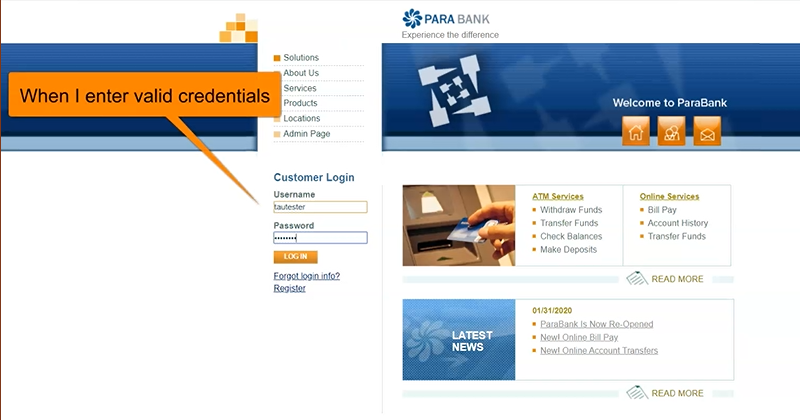
So, I'm going to click “LOG IN”.
And it takes me to the “Account Overview” page, which means “Then I should be taken to the Overview page” is the third step that I'm going to write.
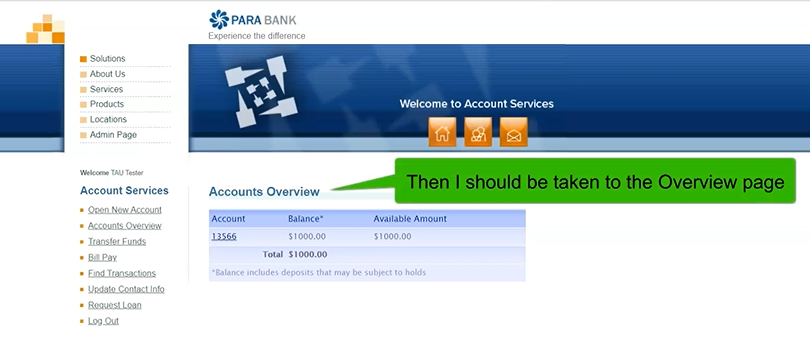
In the third step, what I'm going to do is, I'm just going to assert whether the “Log Out” link is coming, which means I'm assuring that the login has successfully happened, and it has landed in the Overview page.
Now that we know what exactly has to be written in the feature file, now let's write the Scenario accordingly.
# Writing the Gherkin Scenario
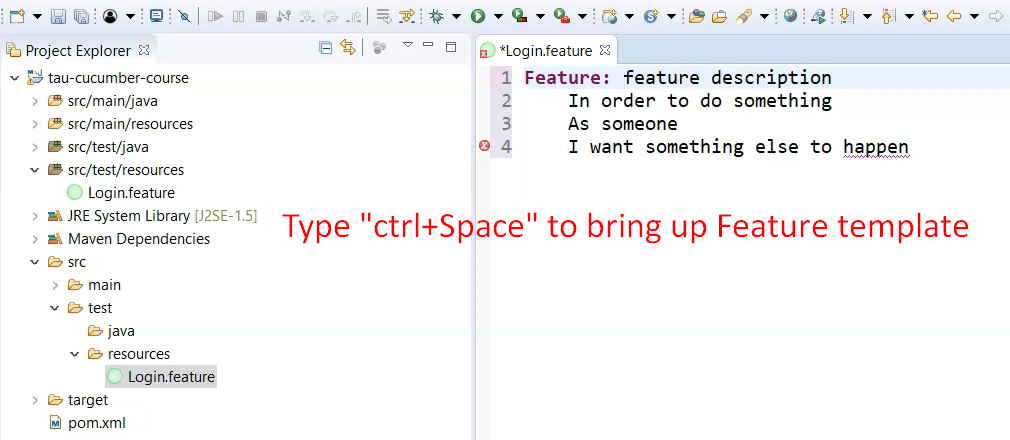
Before we write our scenario, we need to define the Feature description.
To do that, it's very simple. I'm going to write Feature and hit ctrl+space, which eventually gives me a small template of the feature description that is required.
I'm going to modify this and say that it's going to be the “Login Functionality” feature.
Then, I'm going to write the description in a simple way, saying:
Feature: Login Functionality
	In order to do internet banking
	As a valid Para Bank customer
	I want to login successfully
This is going to be our Feature description and it's time for us to write the Scenario.
So, I'm going to type Scenario, then the scenario title as “Login Successful”, which makes more sense.
And then, I'm going to write the exact Given, When, and Then statements that we discussed.
That's it.
Scenario: Login Successful
Given I am in the login page of the Para Bank Application
When I enter valid credentials
Then I should be taken to the Overview page
We have successfully written our first Scenario in the Feature file.
Now, let's see what happens if you run this Feature file.
To run this, right-click, go to Run As and run as Cucumber Feature.
If you see here in the console, it directly sees that the Step Definitions are missing, and it suggests us the Step Definition snippets as well.
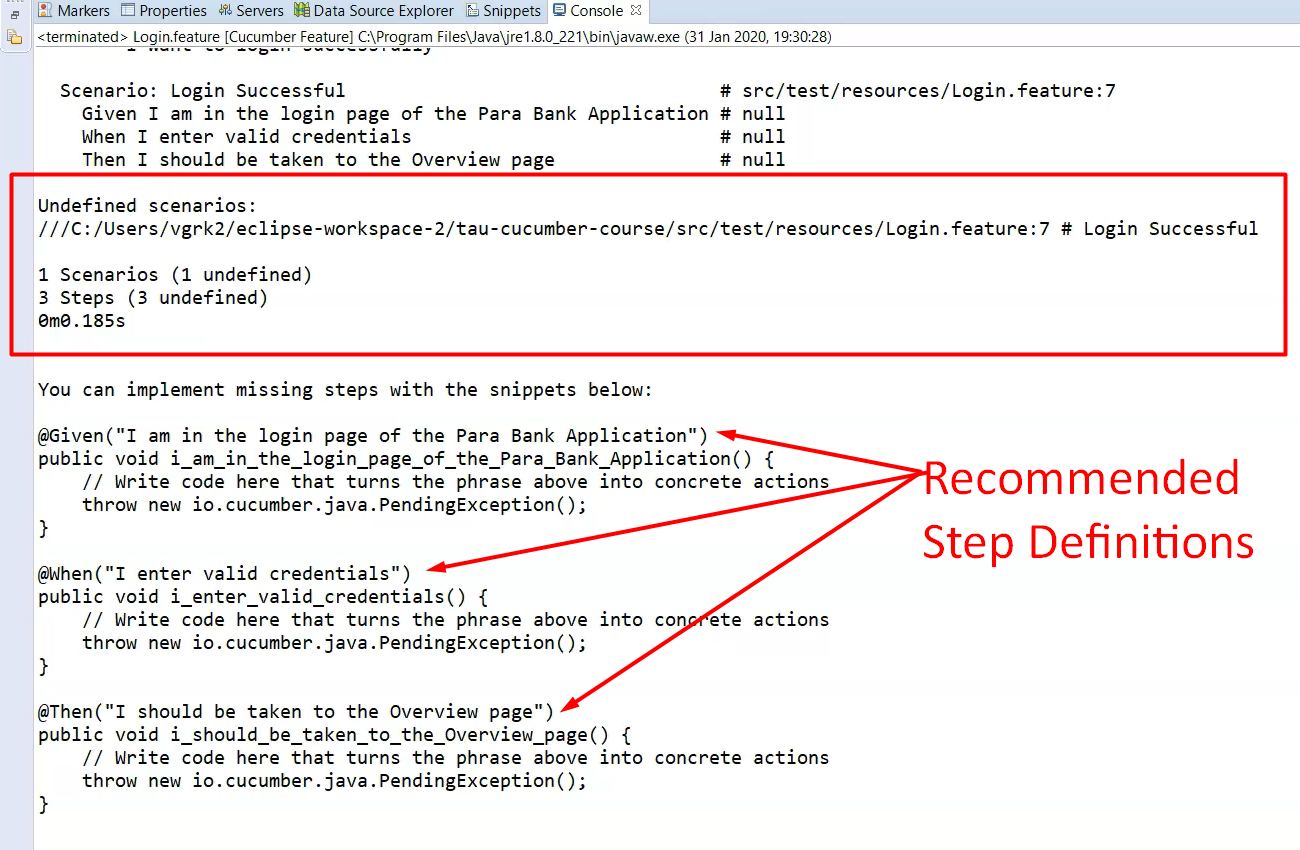
We can reuse this by just copying this and adding it to our Step Definitions Java class.
Now, let's create the Step Definitions class.
# Creating Step Definitions
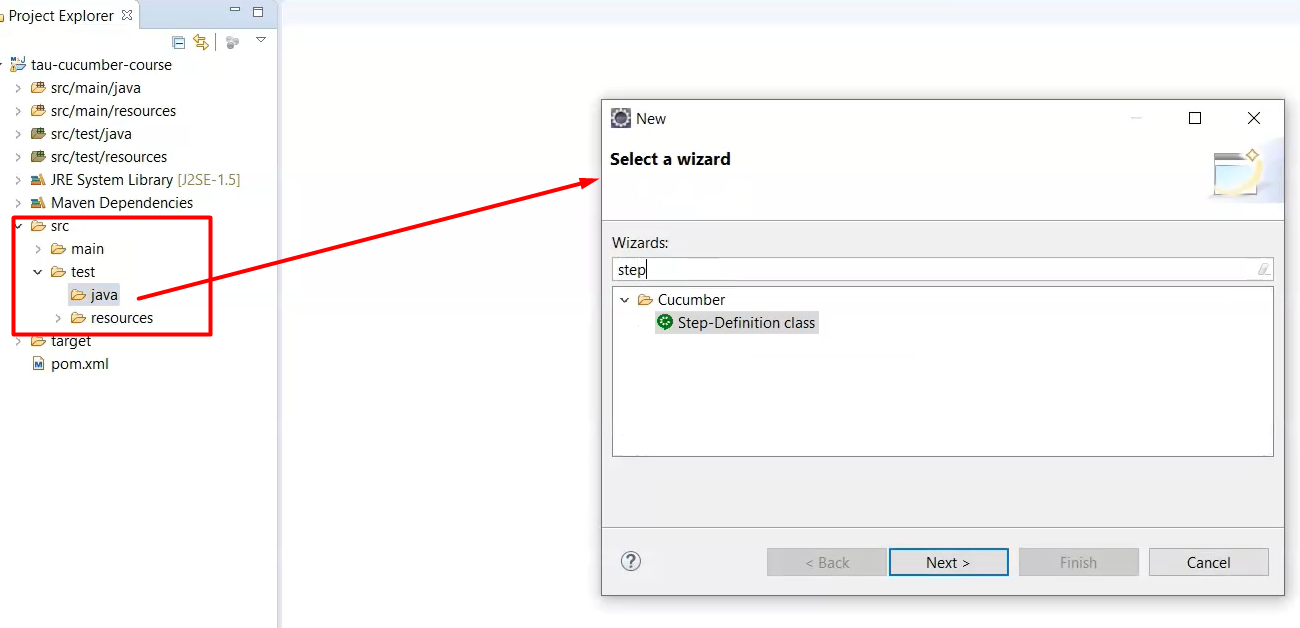
When you're creating the Step-Definitions class, make sure that you create your steps-definitions class inside the Java folder.
To do that, you just have to right-click and go to New and go do Other and search for “Step-Definition” class.
There is an inbuilt feature that is available with Cucumber, where you can create the Step-Definition class by default.
All you need to do is click Next and select the source Folder as java — under test, go to java
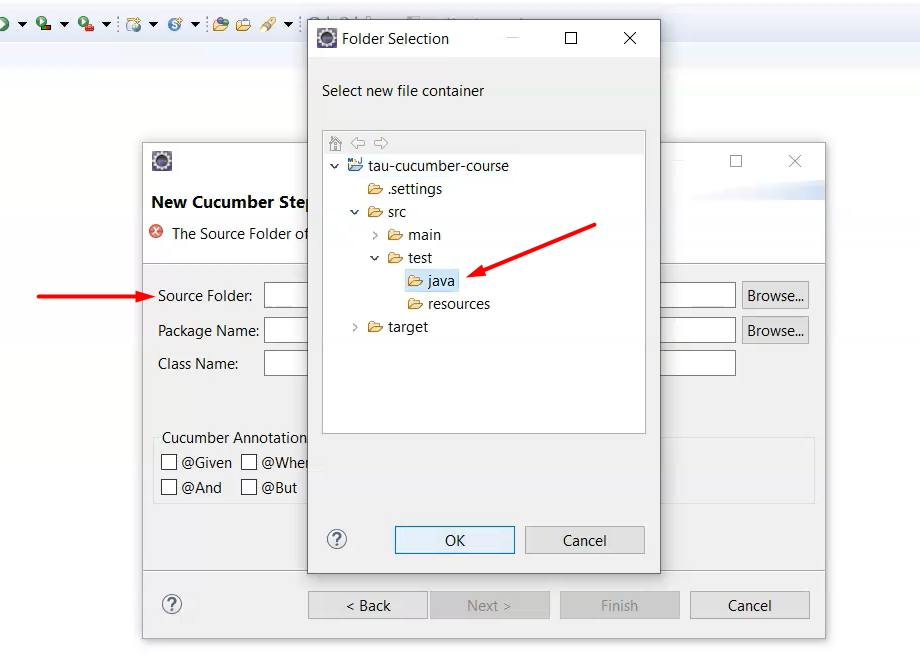
And as a Package Name, just give it something like “com.tau.steps”.
The **Class Name **would be “Steps”.
There is an option for you to auto create the Cucumber Annotations, but we're not going to do that as of now.
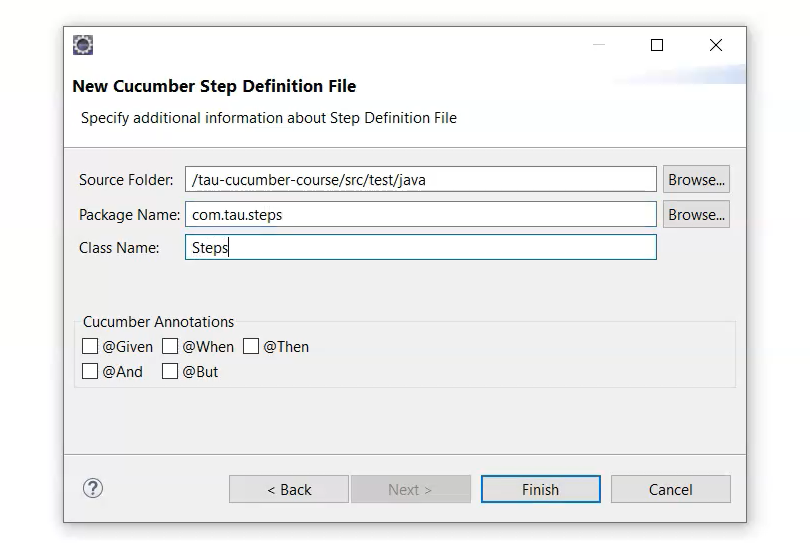
Now, I'm going to click Finish.
So, my Step-Definition class is created successfully now.
Let's paste to the Step Definition code snippet that we have copied from the console.
There are some errors.
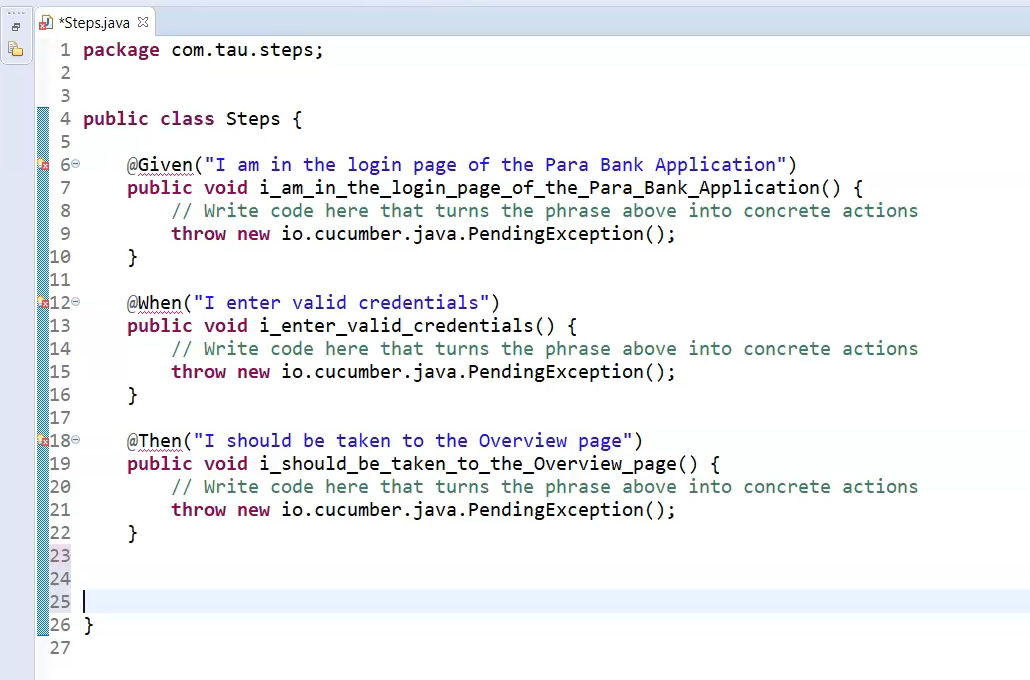
So, I need to do ctrl+Shift+O, to import the relevant libraries or references.
Once I'm done, I'll go to my “Login.feature” file and try to execute and see what exactly happens.
So, I'm going to right-click, Run As > Cucumber Feature.
In the console, we will be able to see the PendingException that has been thrown, which is unexpected behavior.
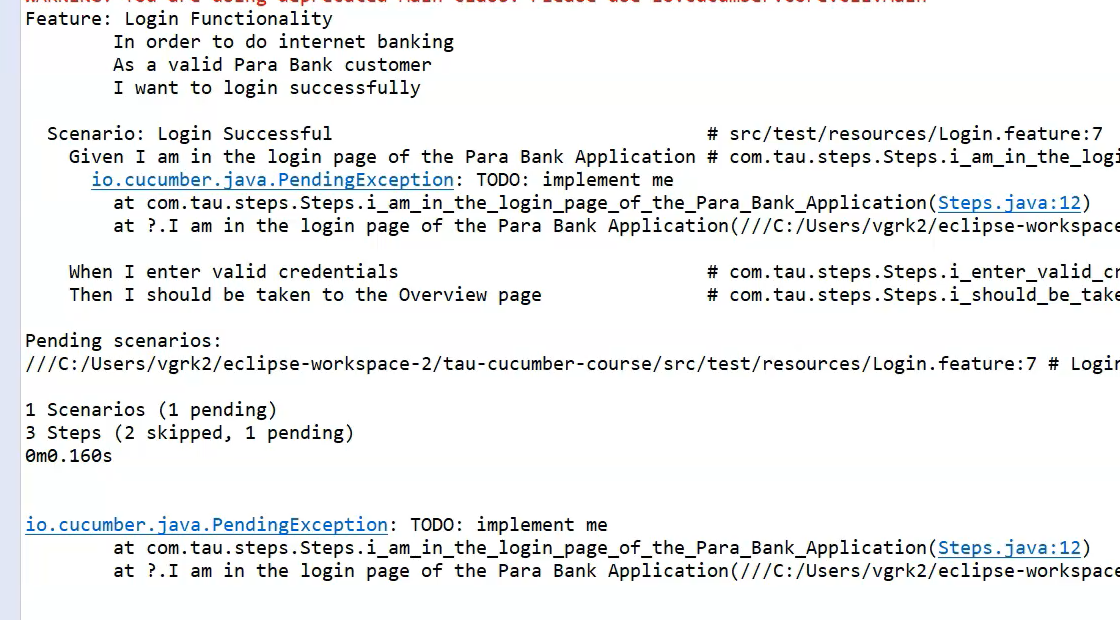
This confirms that the bond between your Cucumber feature file and Cucumber Step Definitions are happening properly.
Now, it's time for us to write some Selenium scripts in the Cucumber Step-Definition class.
# Writing Selenium Scripts for Steps
To do that, I'm going to the Cucumber Step-Definition class.
Here, I'm going to remove these 2 lines, which are not required now in all the methods.

Now, I'm going to write our Selenium WebDriver script to launch the application, enter username and password, and then validate whether we are in the overview page.
To do that, all I need to do is first create the WebDriver instance as private WebDriver driver.
I'm going to give ctrl+Shift+O, to import the selenium.WebDriver reference.
Now, I'm going to start writing our Selenium script saying that driver.get(url). I'm going to paste the URL, but before that we just have to launch our browser, right?
For that, I'm going to use ChromeDriver here. I'm going to set up the Chrome driver property, and then bring up the browser.
Similarly, I'm going to write the Selenium code to enter the username and password.
Likewise, I'm going to tick whether I'm landing to the Overview page.
So, we have written our scripts for Selenium to handle this particular Scenario, what we call it as, the “Login Successful”.
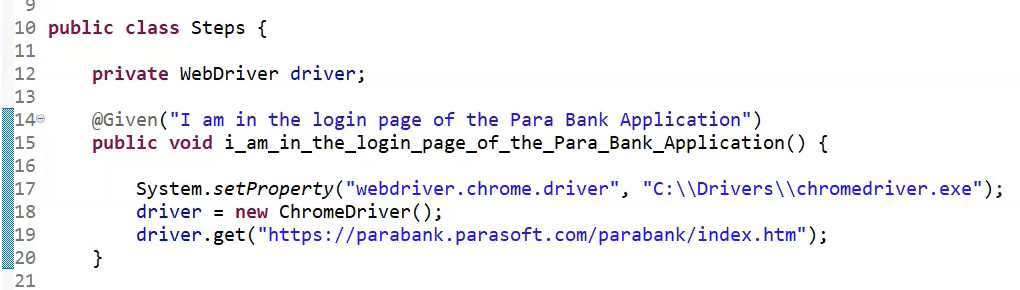
public class Steps {

    private WebDriver driver;

    @Given("I am in the login page of the Para Bank Application")
    public void i_am_in_the_login_page_of_the_Para_Bank_Application() {
        System.setProperty("webdriver.chrome.driver", "C:\\Drivers\\chromedriver.exe");
        driver = new ChromeDriver();
        driver.get("http://parabank.parasoft.com/parabank/index.htm");
    }

    @When("I enter valid credentials")
    public void i_enter_valid_credentials() {
        driver.findElement(By.name("username")).sendKeys("tautester");
        driver.findElement(By.name("password")).sendKeys("password");
        driver.findElement(By.name("username")).submit();
    }

    @Then("I should be taken to the Overview page")
    public void i_should_be_taken_to_the_Overview_page() throws Exception {
        WebDriverWait wait = new WebDriverWait(driver, 20);
        wait.until(ExpectedConditions.elementToBeClickable(By.xpath("//*[@id='rightPanel']/div/div/h1")));

        driver.findElement(By.xpath("//*[@id='rightPanel']/div/div/h1")).isDisplayed();
        driver.findElement(By.linkText("Log out")).click();

        driver.quit();
    }
}
We have saved it and we'll just try to run it once and see how it gets executed.
Well, if you see the console, you will be able to see that our test got passed.
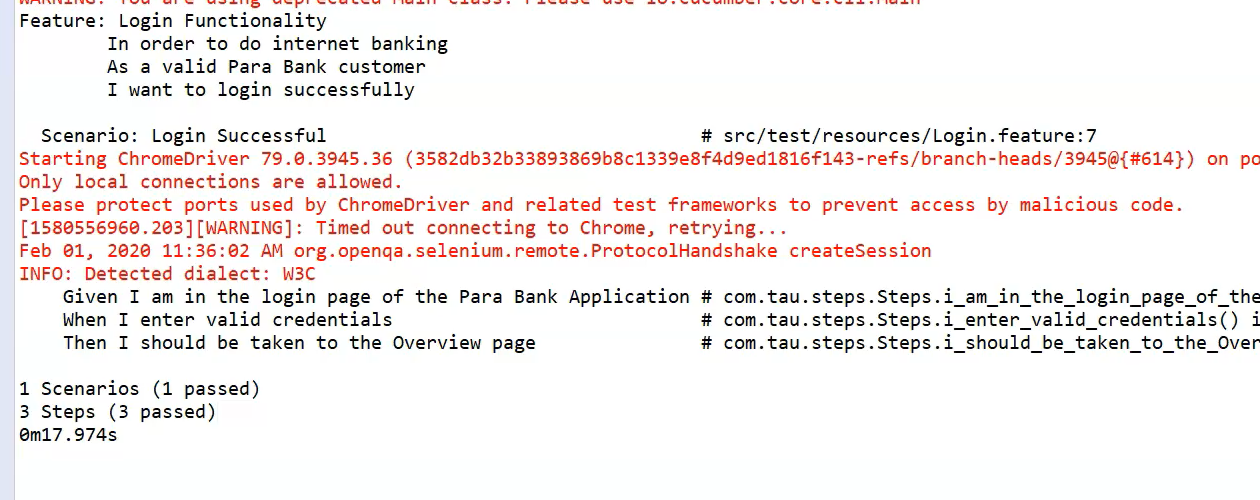
So, you will be able to get detailed test results from here, like how many Scenarios got executed and how many Steps got executed, and how much time it consumed to run that particular test.
Resources
Quiz
The quiz for this chapter is located in section 3.2
