

Hi everyone, welcome to the Functional Test Automation Through Visual AI course.
I’m Raja Rao. I’ll be the instructor for this course.
In this course, I’ll show you the modern way, or the intelligent way of doing web and mobile testing. Specifically, functional or end-to-end UI testing.
You’ll soon see how much simpler, faster and superior modern functional testing is compared to the legacy code-based or DOM-based testing.
The analogy is gasoline car versus an electric car.
They both are cars, they both need tires, seats, breaks etc., but the core engine that moves the car is different.
And that makes a huge difference.
The main idea is that, once the functionality happens, like logging into an app, simply take a screenshot of the resulting page or resulting state of the app.
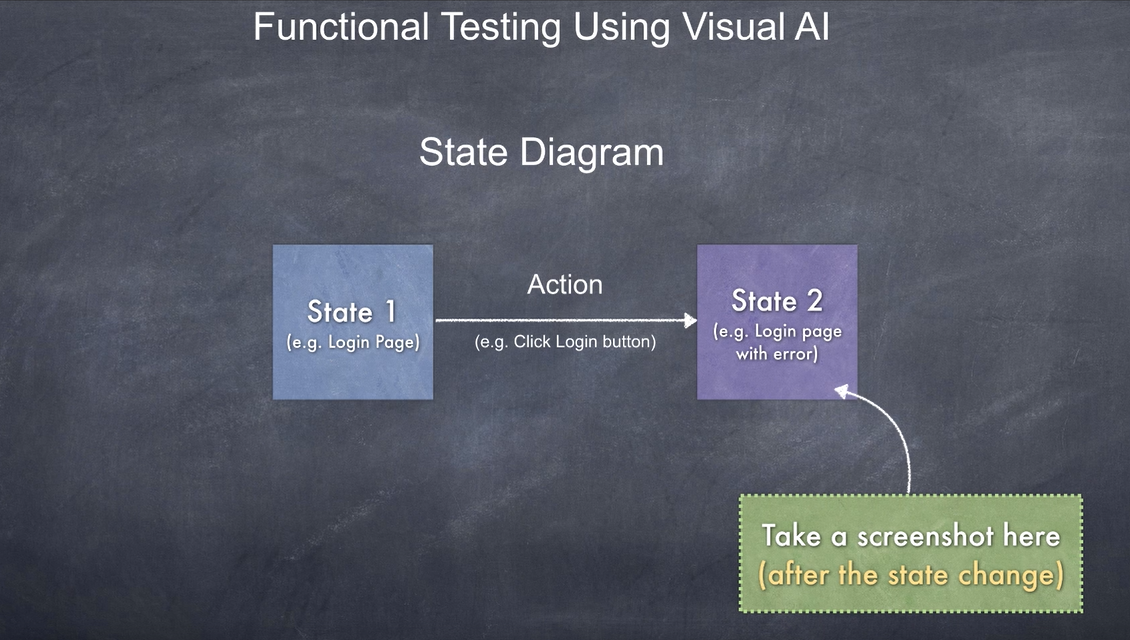
And take screenshots every time you run the test and compare it with the original screenshot.
If there is a difference, then mark the test as failed, or else mark the test as passed. Sounds pretty simple.
This is not a brand-new idea.
In theory, QA engineers should see exponential benefits by simply comparing screenshots or doing DOM diffing (where you compare entire DOM with the previous DOM).
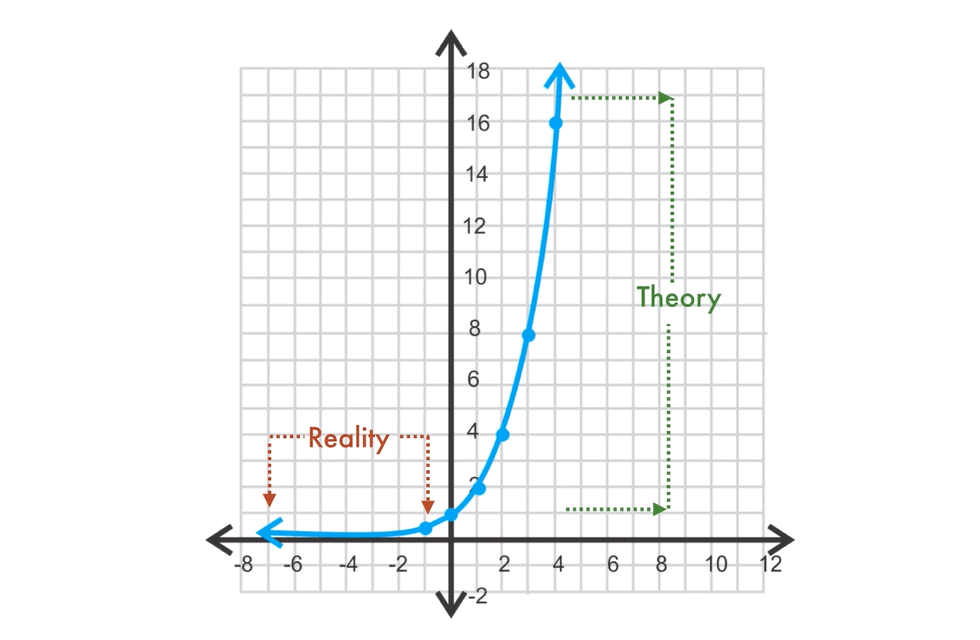
But in reality, the applications changes all the time, or they’ll always have some dynamic regions that change all the time. Or the browser updates change the way things are rendered on the screen.
And so, these screenshots and the DOM constantly differ from the original one even when there is no difference in functionality.
When you compare the screenshots using pixel-by-pixel comparison, or compare the DOM using DOM diffing techniques, you’ll constantly get false-positives.
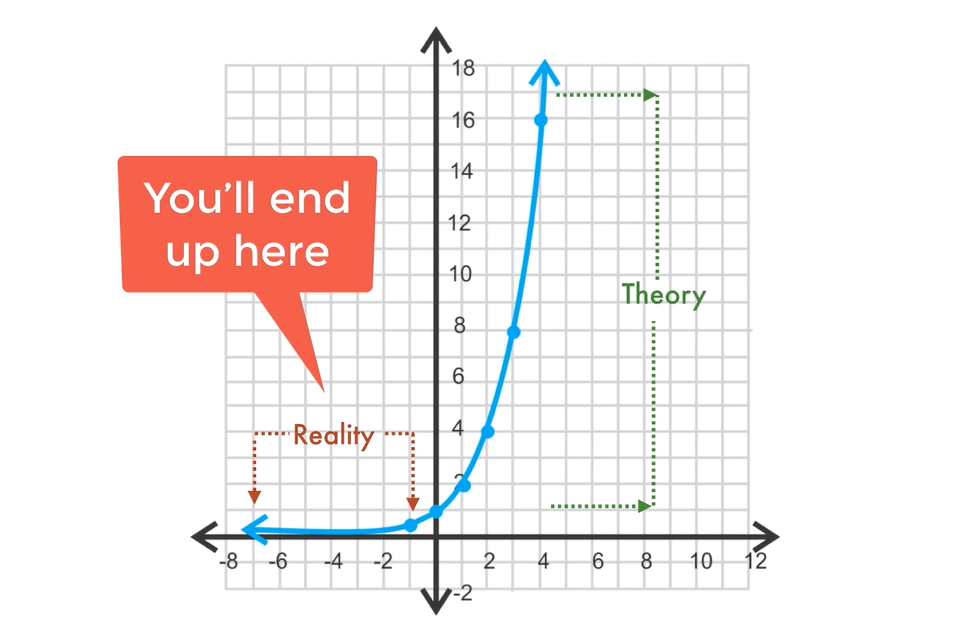
This can go out of hand pretty soon to the point where you’ll revert back to code-based validation.
In theory it sounds great but in reality, it simply doesn’t really work.
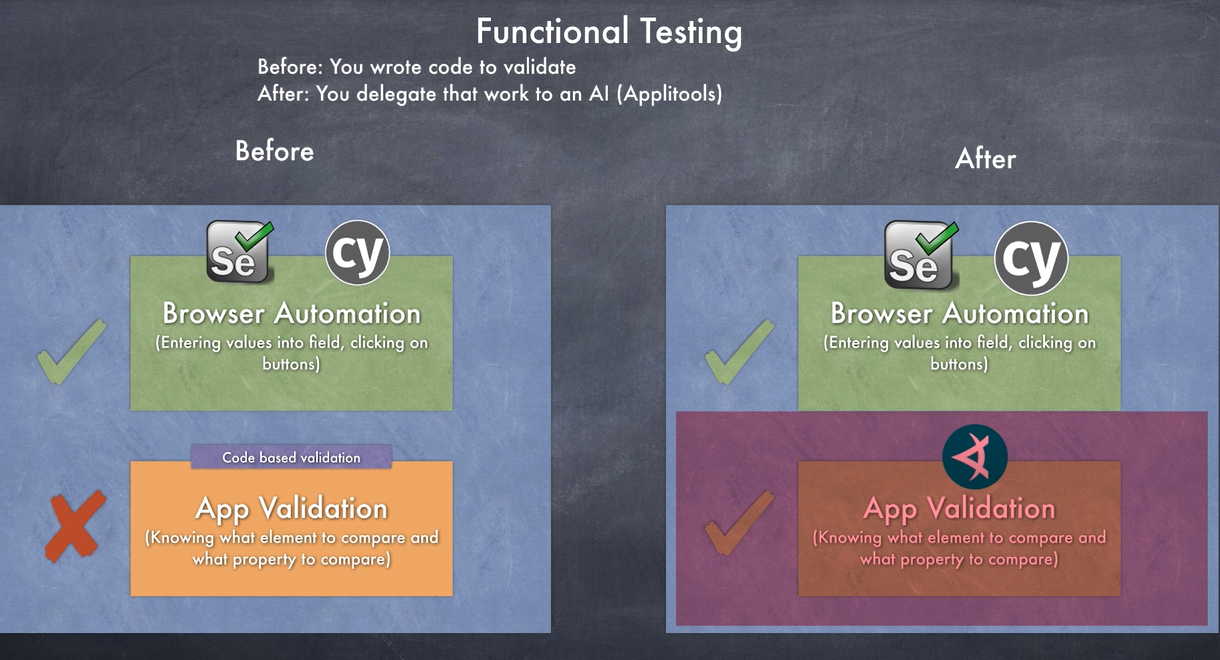
This is where Applitools comes in.
# With Applitools SDK, you’ll still take screenshots but compare them through our Visual AI.
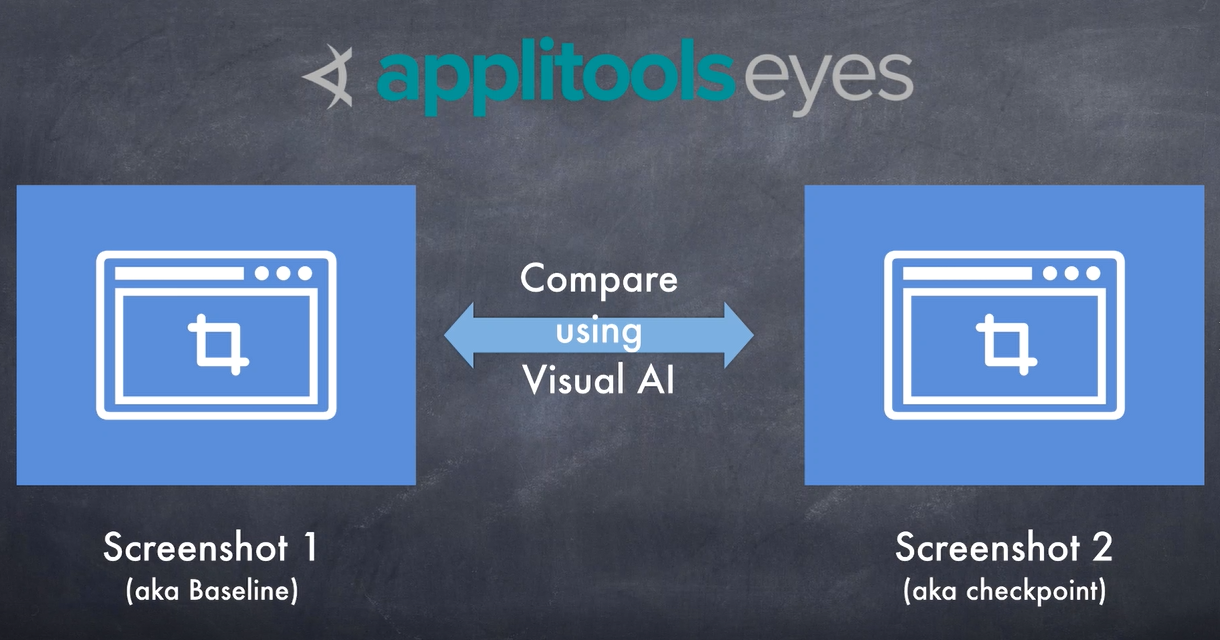
Applitools AI has been trained with billions of images and uses computer vision, advanced algorithms and other things to only highlight meaningful differences and ignore others.
Now, you don’t need to learn anything about artificial intelligence, python or computer vision.
You just use the Applitools’ SDKs and simply add a few lines of code.

The SDK takes care of taking a screenshot of your application and uploading it to the AI server.
By the way, Applitools provides various SDKs to work with your existing testing framework and programming language so you don’t need to rip and replace your existing work.
The way it works is that you’ll still use Selenium, Cypress, Appium etc. for navigation and data entry — but you delegate the validation to the AI.
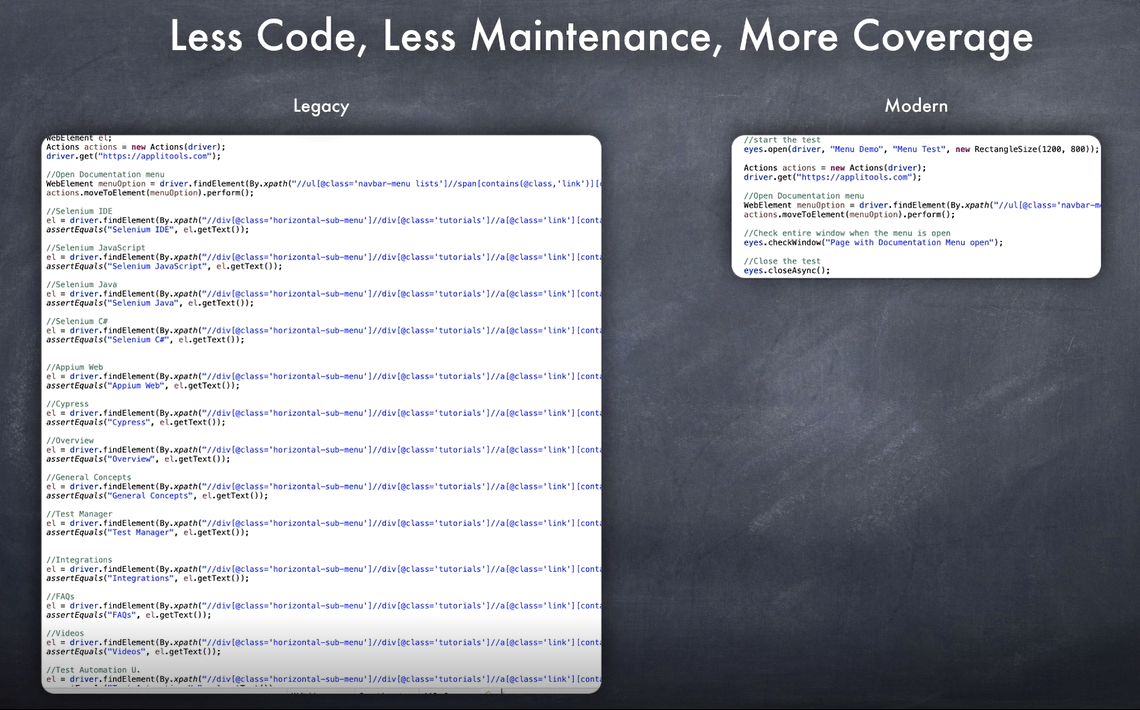
Since you are taking screenshots of the entire page, you don’t need to write a lot of tests to check individual elements like you were doing before.
So, you’ll end up with a lot less code to begin with.
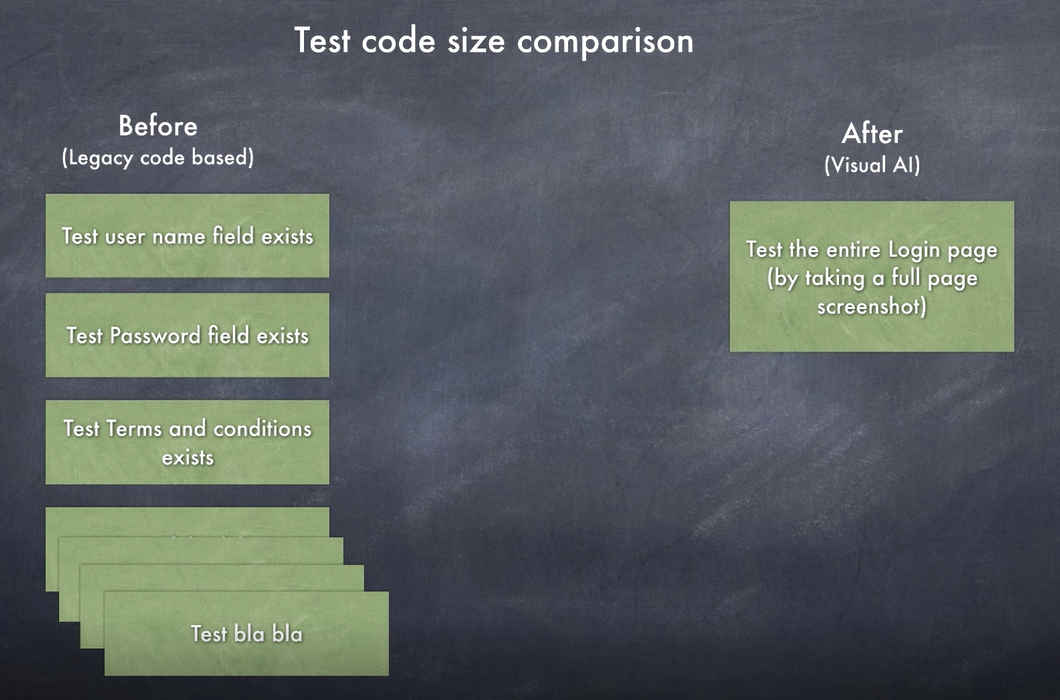
And secondly, you don’t need to write a lot of validation code because you now have screenshots.
So ultimately, you’ll end up with a lot less code and dramatically high-test coverage.
Once you watch a few chapters, I encourage you and challenge you to simply comment out your current code and replace that with Applitools code just to get a feel for how simple it is.
Now I am thrilled to have an opportunity to create this course where I'll show you how to do functional testing the modern way, the intelligent way.
# Course Agenda
The way this course is organized is that you’ll first learn the new approach or the pattern.
Then, in the following chapters, I’ll go over various common functional tests you typically do and give you a recipe as to how you’d do this the modern, intelligent way.
So essentially “Before” and “After” for different functional testing use-cases.
Near the end, I talk about how to handle dynamic pages and how to use all sorts of advanced tools that Applitools provides.
Finally, I also talk about some of the limitations and their workarounds so that you know exactly what they are and when to use the workarounds, and when to fall back to the legacy way.
Before we get started, one last thing to note is that in addition to this course, there are several other Automated Visual courses on Test Automation U.
Feel free to watch them to understand more about various features.
Further you can use Applitools tutorials site and the documentation site to get started.
OK, let’s get to the first chapter.
