

Transcripted Summary
Up to this point we've learned quite a few techniques and approaches to unit testing and got a chance to put them into practice.
However, most, if not all, of our focus has been on unit testing the middle-tier, which consists of our business objects and application logic, but what about the presentation and data tiers?
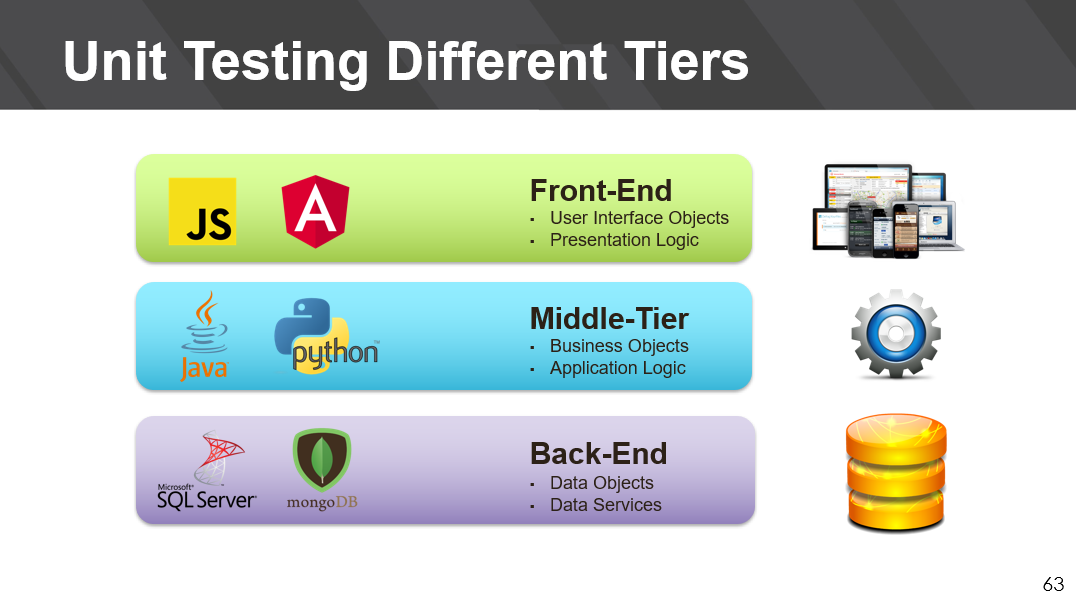
Well, the good news is that all of the techniques that you've been applying so far in this course can be applied to unit testing of both front-end and back-end technologies. Let's spend some time looking at unit testing in these different tiers.
Front-End Unit Testing: JavaScript
Let's start with JavaScript, the language of the web.
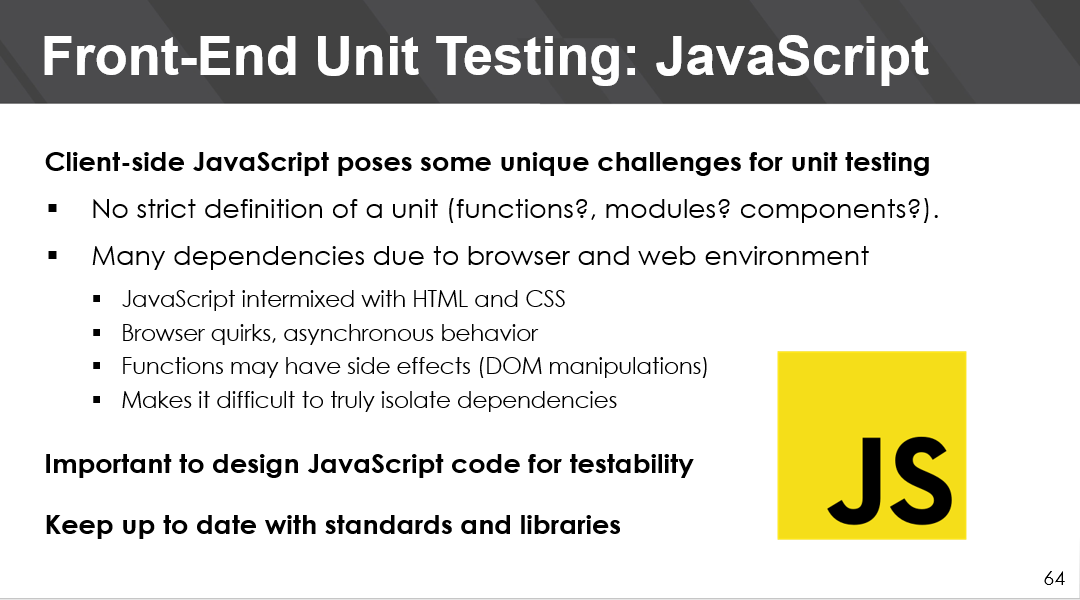
Client-side JavaScript testing poses some unique challenges, especially at the unit level.
Firstly, there's no strict definition of a unit. Is it a function, or module, or maybe it's a component in Angular or React? But regardless of what you consider to be a unit, one thing is true, there are several dependencies due to the browser and web application environment. JavaScript is intermixed with HTML and CSS, and many of these browsers have quirks, and we're generally dealing with asynchronous behavior.
Functions can have side effects, things like DOM manipulations. All of this makes it very difficult to truly isolate dependencies.
And so, an important aspect of JavaScript unit testing is to make sure that the code is actually designed for testability.** **We also have to make sure that we keep up with standards such as ES6 and libraries such as jQuery.
Front-End Unit Testing: Isolation in Angular
Modern front-end frameworks like Angular or React also help with overcoming some of these testing and testability challenges.
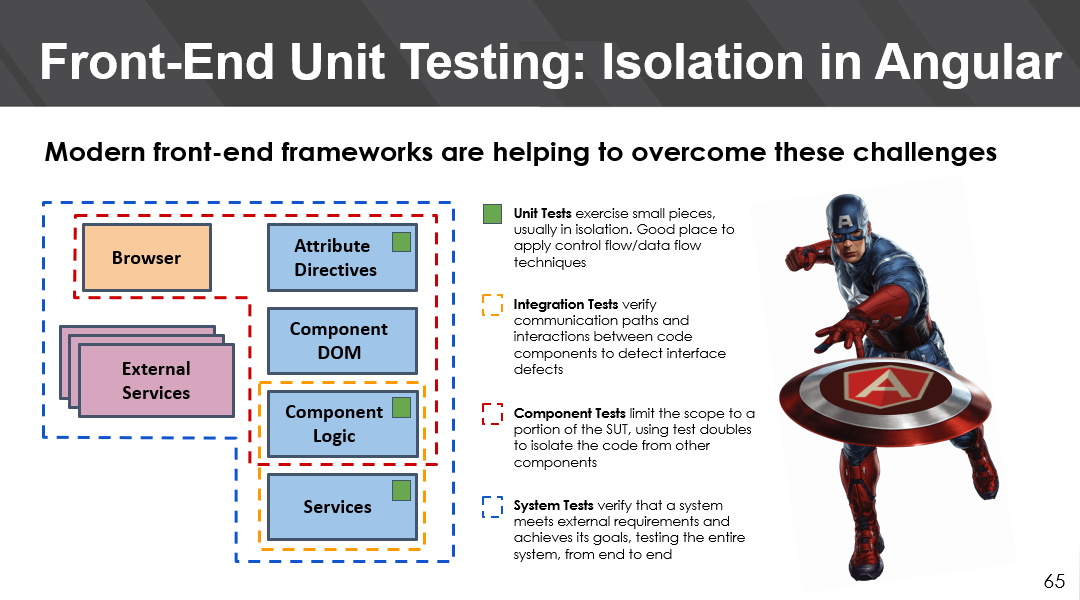
Let's take a look at isolation in Angular.
At the unit level you can test your attribute directives, component logic, and services, and then you can start looking at the interactions between two or more of these.
There's also a higher level of abstraction at the component level that lets you isolate portions of the system using tests doubles, which is just a general way to say mocks or stubs.
And of course, we also need to make sure we are testing the system as a whole.
There are a number of tools and frameworks available to help you with JavaScript testing.
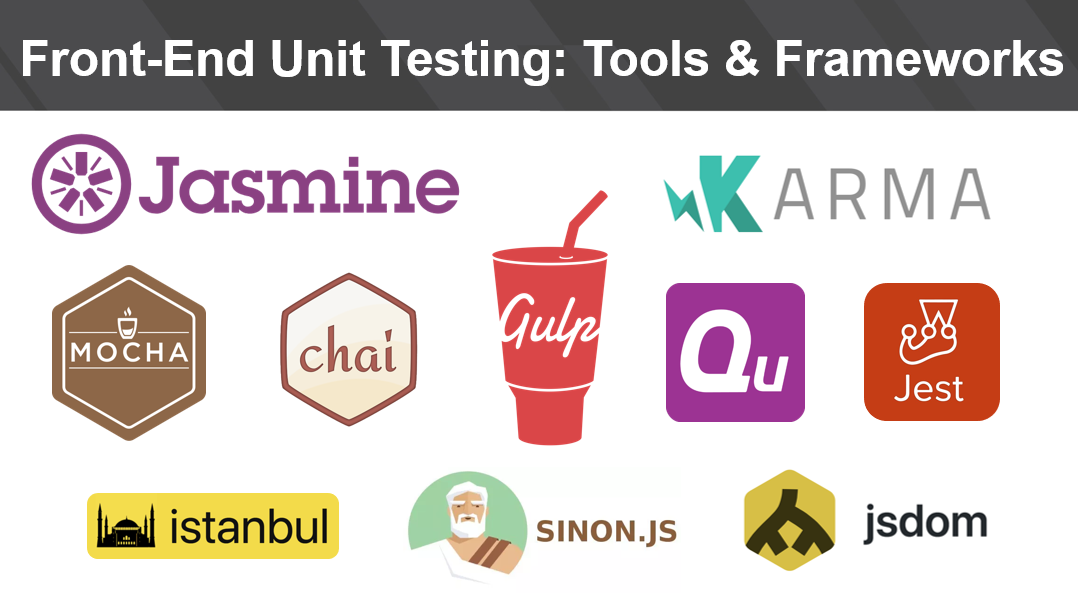
Jasmine is a popular behavior-driven development testing framework. If you're looking for a more traditional style xUnit framework, then QUnit is a popular choice. Karma is a test runner and Gulp is a streaming bill system which is frequently used for front-end web development.
These tools are more can help you set up continuous unit testing for JavaScript code using multiple browsers. But let's take a look at Jest.
Front-End Unit Testing: Let’s Jest Around!
Jest has a tagline about making testing delightful. It can be used with several of your popular front-end technologies like typescript, Node.js, React, and Angular.
Let's dive right in.
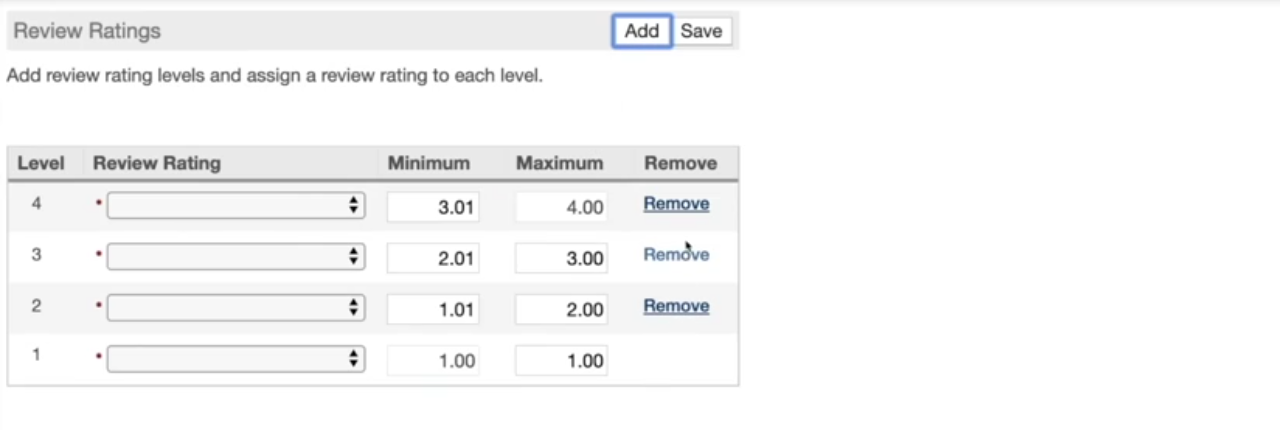
This demo application uses JavaScript implement front-end input validations.
It allows you to add rating levels for performance reviews and assign rating values to each level. Rating levels are required, and so if you submit this form with any blank levels, they'll get highlighted in red. Well, let's go ahead and fix these and then resubmit.
There's also one other validation. It's around the actual values for the ratings, they must be contiguous, and so if you break that continuity, it'll show you highlighting your red as well.
Let's take a look at the JavaScript code behind these two types of validations. Our application is just a single web page. Let's take a look in index.html.
Here we have the body of the webpage and also, we have references to the scripts that implement the client-side logic, including the validation script, rating scale levels validator (RatingScaleLevelsValidator.js).
In here, we have the functions for validation under two main functions.
/**
 * A validation helper for performance review rating scales.
 */
function RatingScaleLevelsValidator() {
    this.validate = function (levels) {
        this.validateAllLevelsHaveRating(levels);
        this.validateRangesAreContiguous(levels);
    };

    /**
    * Validate that all rating levels have an associated rating code.
    */
    this.validateAllLevelsHaveRating = function (levels) {
        // Iterate through each level in the levels collection passed in.
        $(levels).each(function () {

            // Retrieve this level's rating code.
            if (this.getRating() === "") {
                this.markRatingWithError();
            }
        });
    };

    /**
    * Validate that all rating levels are contiguous.
    */
    this.validateRangesAreContiguous = function (levels) {
        log.clearMessageNow(lstrRangeMustBeContiguous);

        for (i = 1; i < levels.length; i++) {
            var previousLevel = levels[i - 1];
            var currentLevel = levels[i];
            var previousMaxToCurrentMinDelta =
				currentLevel.getMinimumRange() - previousLevel.getMaximumRange();

            if (previousMaxToCurrentMinDelta.toFixed(2) != 0.01) {
                log.add(lstrRangeMustBeContiguous);
                previousLevel.markMaximumRangeWithError();
                currentLevel.markMinimumRangeWithError();
            }
        }
    };
}
The first one is one that validates that all levels have ratings and then the other one is about the range, making sure that the ranges are contiguous.
We also have a test project.
So, if we go through the test folder, we can see that we have a single test defined for this validator (RatingScaleLevelsValidator.test.js).
Here we get our first glimpse of Jest.
import RatingScaleLevelsValidator from '../lib/RatingScaleLevelsValidator';

describe("Validate all levels have ratings", function(){
    var validator;


    var createLevel = function(ratingCode){
        var level = new Object();
        level.getRating = level.markRatingWithError = function() { }
        spyOn(level, "getRating").and.returnValue(ratingCode);
        spyOn(level, "markRatingWithError");
        return level;
    }

    beforeEach(function(){
        validator = new RatingScaleLevelsValidator();
    })
We have our import for our validator, and then we have our first suite, which is around making sure that all levels have ratings.
Our first test is a positive test where we submit a single level with a valid value.
    /**
     * A single level with an assigned rating code should be considered valid.
     * Scenario:
     * 1. Given a set of rating levels with a single rating level
     * 2. And the rating level is assigned with a rating code of "ABC"
     * 3. When I validate the rating levels
     * 4. Then the rating level is considered valid and is not marked with an error
     */

    it("Single level with defined rating should be valid", function(){
        // Arrange.
        var levels = []
        var level = createLevel("ABC");
        levels.push(level);

        // Act.
        validator.validateAllLevelsHaveRating(levels);

        // Assert.
        expect(level.getRating).toHaveBeenCalled();
        expect(level.markRatingWithError).not.toHaveBeenCalled();
    });
Here you'll see Arrange, Act and Assert — this is similar to our Given, When, Then.
So, once we do our set up and then we submit this particular scenario, we'll expect that we want to make sure that that call that retrieves the value would have happened, and so we're spying there on that method. And we also want to make sure that the “mark to error” was not called.
In our second scenario, which is a more negative test, here we submit a single level with a blank value.
    /**
     * A single level with an empty rating code assignment should be considered invalid.
     * Scenario:
     * 1. Given a set of rating levels with a single rating level
     * 2. And the rating level is assigned with a rating code of ""
     * 3. When I validate the rating levels
     * 4. Then the rating level is considered invalid and is marked with an error
     */
    it("Single level with empty rating should be invalid", function(){
        // Arrange.
        var levels = []
        var level = createLevel("");
        levels.push(level);


        // Act.
        validator.validateAllLevelsHaveRating(levels);

        // Assert.
        expect(level.getRating).toHaveBeenCalled();
        expect(level.markRatingWithError).toHaveBeenCalled();
    });
});
Here we expect again, once we submit our validation that the retrievable function was called, but now we also want to make sure that the “mark with error” was also called.
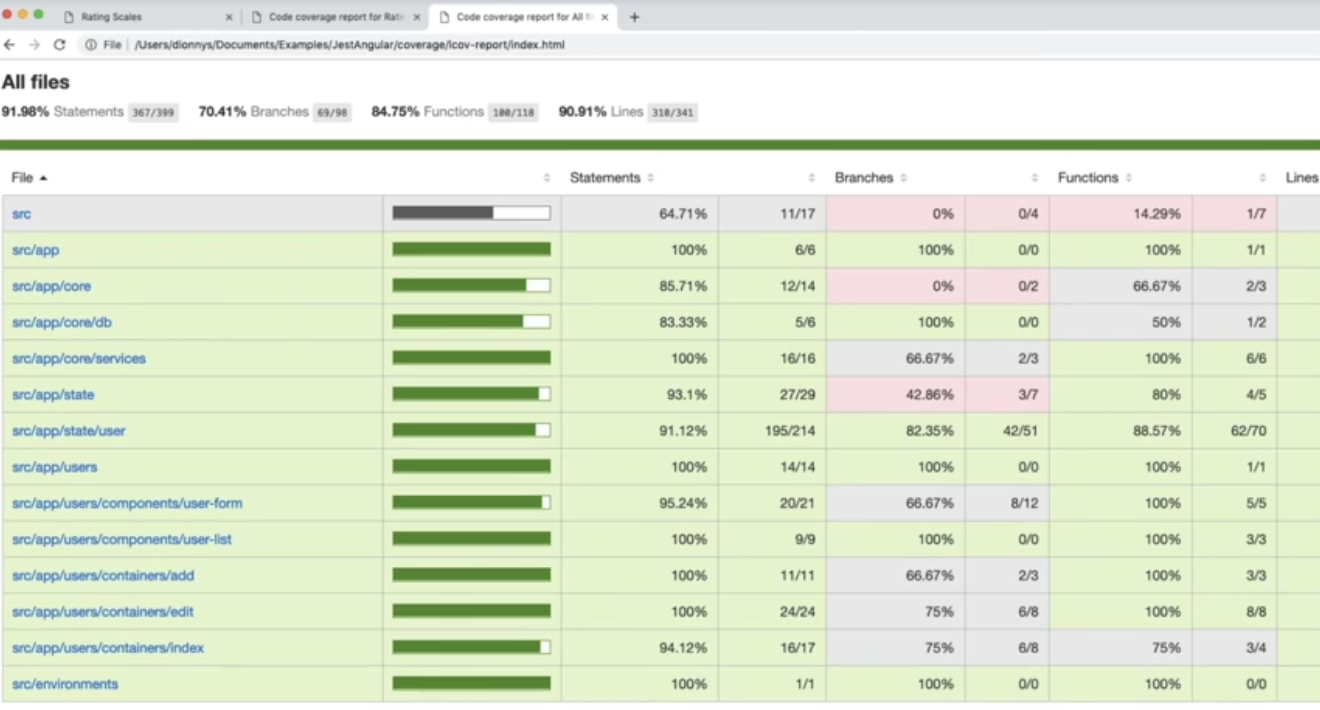
Let's go ahead and run our test. We've already configured Jest to run with coverage enabled.
Here, we see that in this output window we have a list of all the test scenarios that were run from our test suite and they all pass.
We also see a nice output window with our coverage including statements, branches, functions, and we also have lines of code that weren't covered.
We can also view this as an HTML report.
Let's take a look.
We look at the HTML, we see something very familiar, a list of all of our files, which just includes the one test file and then the coverage at that high level for all files.
We also have the specific coverage per file.
If we drill in, we also see our highlighting for our code function, including which lines weren't covered, which are these, and then these that were covered. And so even though we're not at the client side, you can still get the same type of reporting.
Let's take a look at our Angular project.
Here, we already have set up some tests and we're just going to execute these tests using Jest.
This is testing all of our angular components, and so once that completes, we start to see we're running, and we get our results trickling in. We get the same type of reporting where we can no see all of the tests that pass and their corresponding components.
Jest is really useful because we have a lot of tooling around any type of front-end technology that we might be using for JavaScript.
We get the same type of coverage report.
And here of course for a more real-world project, you get to see the usefulness of having such highlighting. You can drill in and checkout specific files and look at their coverage.
That's it for front-end.
Let's continue and take a look out back-end technologies.
Back-End Unit Testing: Testing SQL Server
If you're invested in Microsoft database technologies, then you'll want to know about tSQLt.
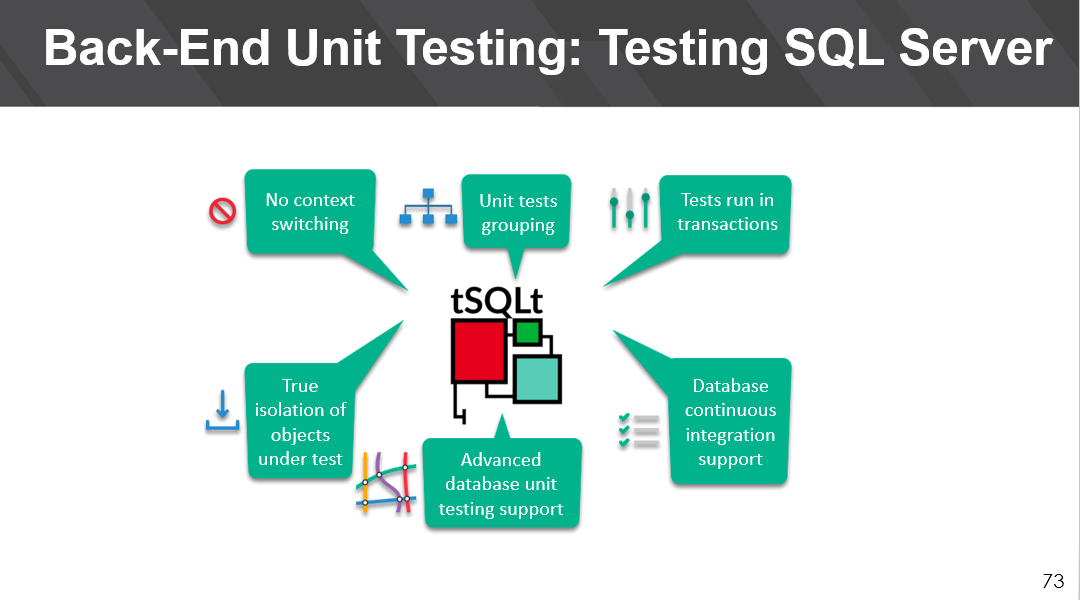
tSQLt is a database unit testing tool that allows you to do unit testing directly within SQL server, so you have no context switching.
You can group unit tests, you can run tests and your transactions, you have isolation, and all the unit testing support that you'd expect from a tool like this, including continuous integration support.
Let's take a look at tSQLt in action.
Here, within SQL server management studio, we have a tSQLt test, and many of these constructs you start to look very familiar.
TestUndoOpenValidationSp.sql
-- Create a new suite of tests.

EXEC tSQLt.NewTestClass 'testValidateUndoOpen';

GO

-- Execute the suite of tests.

EXEC tSQLt.Run 'testValidateUndoOpen';


-- Execute all tests.

tSQLt.RunAll


-- Create a new test belonging to the `testValidateUndoOpen` suite.

CREATE PROCEDURE testValidateUndoOpen.[test paygroup has printed check within a specified pay period]

AS

BEGIN

    /**

     * A payroll may not be un-opened if there is a printed post-only check.

     * Scenario:

     * 1. Given an existing payroll session that has been previously opened

     * 2. And a printed post-only check has been processed as part of the session

     * 3. When I invoke the payroll undo open validation

     * 4. Then a printed post-only check is found and reported by the validation procedure

     */

    IF OBJECT_ID('actual') IS NOT NULL DROP TABLE actual;

    IF OBJECT_ID('expected') IS NOT NULL DROP TABLE expected;


    -- Arrange.

    EXEC tSQLt.FakeTable 'dbo.M_Batch'

    INSERT INTO dbo.M_Batch(MbtPayGroup, MbtPerControl, MbtPrinted, MbtPostOnly) VALUES ('ABC', '201502251', 'Y', 'N')

    CREATE TABLE actual (HasPrintedPostOnlyCheck bit, HasPostCheckHistory bit)

    CREATE TABLE expected (HasPrintedPostOnlyCheck bit, HasPostCheckHistory bit)


    -- Act.

    INSERT actual EXEC dbo.ValidateUndoOpen 'ABC', '201502251'


    -- Assert.

    INSERT expected (HasPrintedPostOnlyCheck, HasPostCheckHistory) VALUES (1, 0)

    EXEC tSQLt.AssertEqualsTable 'expected', 'actual';


END

GO
We have tSQLt test, and many of these constructs you start to look very familiar.
Here, we're creating a new test class — testValidateUndoOpen — and so we can execute that. Every test is just a stored procedure. And so here we have our first test, which is “testValidateUndoOpen” and it has a descriptive name to indicate the purpose of the test.
We also make sure at the beginning of this test that we drop any tables that may be there related to our actual and expected results in case tests haven't been cleaned up properly. This sort of like a tear down prerequisite.
Then we have our Arrange, Act, and Assert.
You can see we create fake tables, because we can do mocking, and we do our setup, all of our values, and then we create these actual and expected tables to hold our results.
Then we run our transaction with our input data and then we assert our results.
We can execute this just as we would any stored procedure or validate the results.
Let's run it and see that our tests have passed.
No matter what level you are in, we can continue to apply these unit testing techniques effectively.
