

Transcripted Summary
This chapter is going to cover the various types of screenshots that you can take when performing visual tests with Applitools. There are 3 main types that we'll cover today which include: Viewport, Full page and Regions.
For each of these, we'll set up an example test and go over the results on the Applitools dashboard.
We'll be using the same Github repo as the previous course and building off of where we left off. Like last time, I will place the link to this Github repo in the write up down below. In the previous course I walked through the setup for this project. Please be sure to go back and review that section if you haven't already set this project up on your own machine.
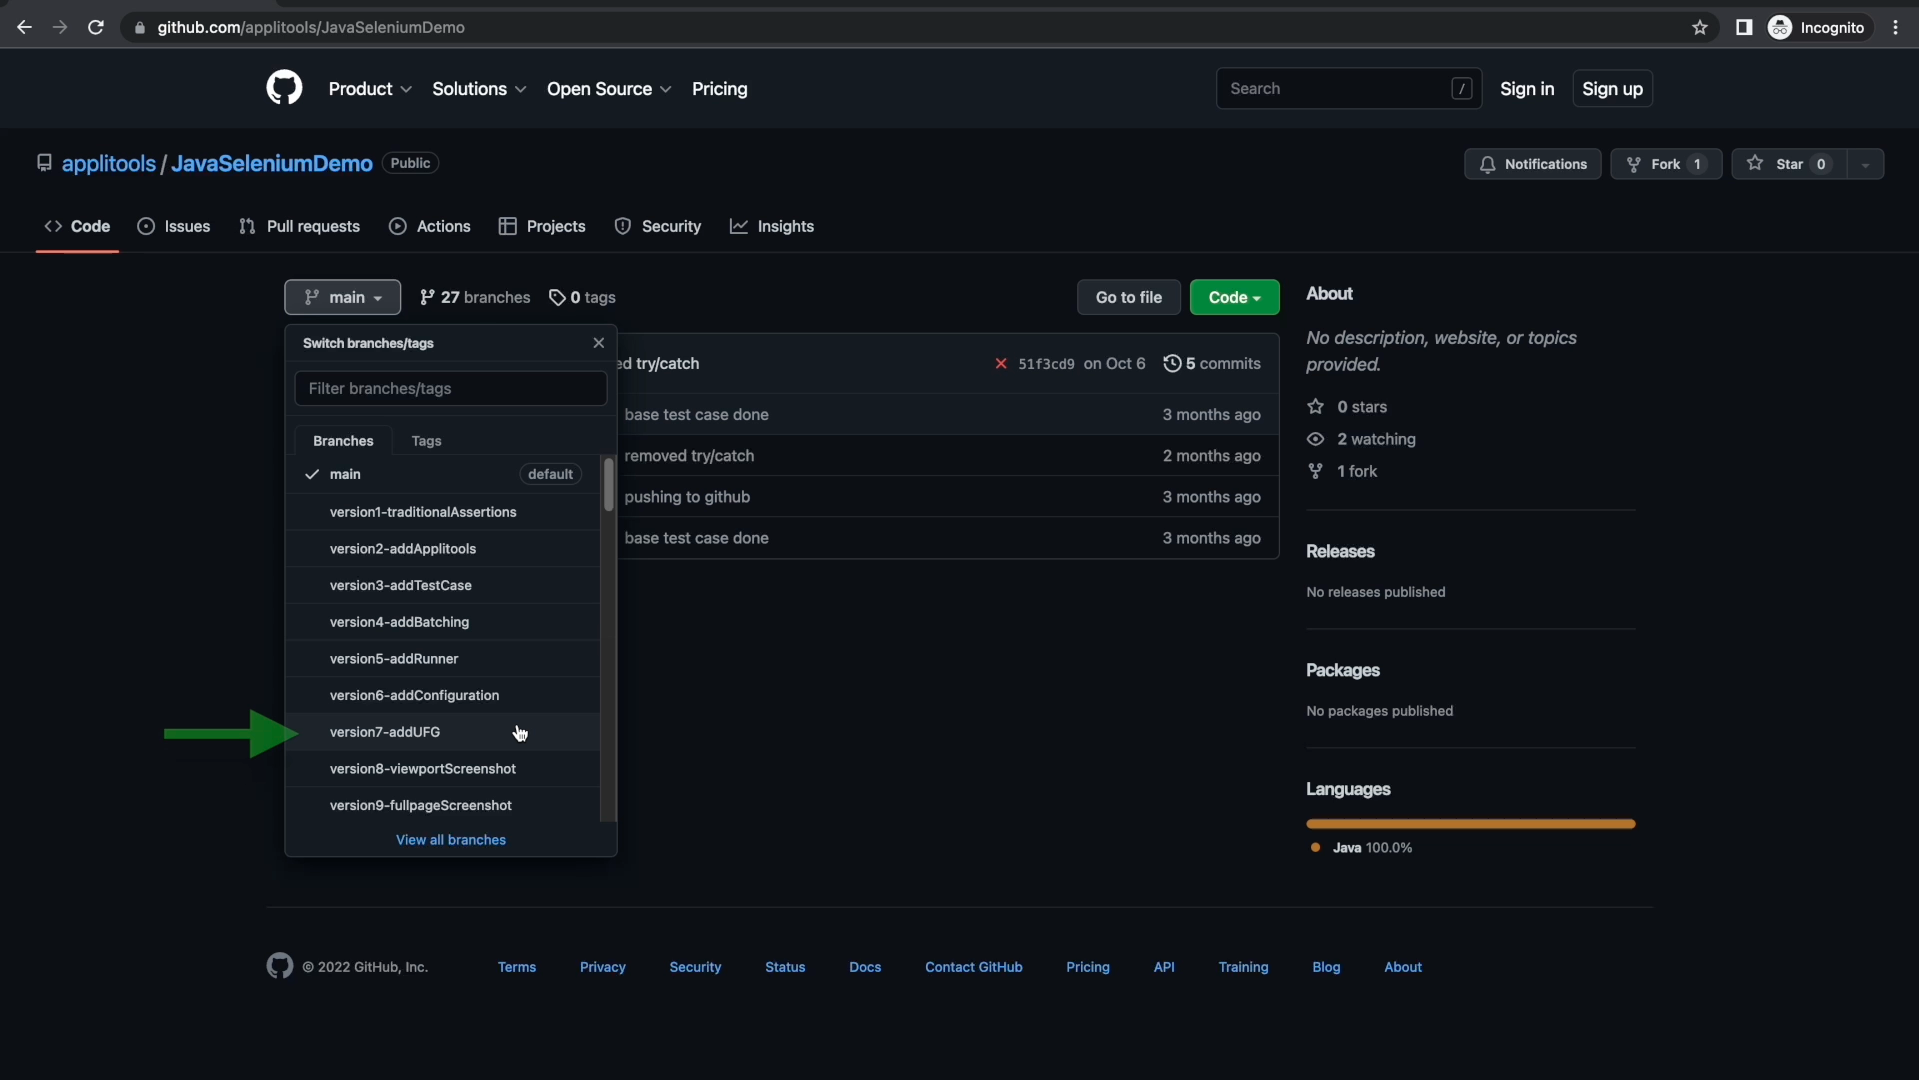
I've set up a number of branches in this project that correspond to the code changes that we're making throughout these courses. Feel free to use these branches as a reference as our project continues to evolve. The last course left off with version7-addUFG. So, if you didn't work through the last course, feel free to move directly into this branch so that you're caught up.
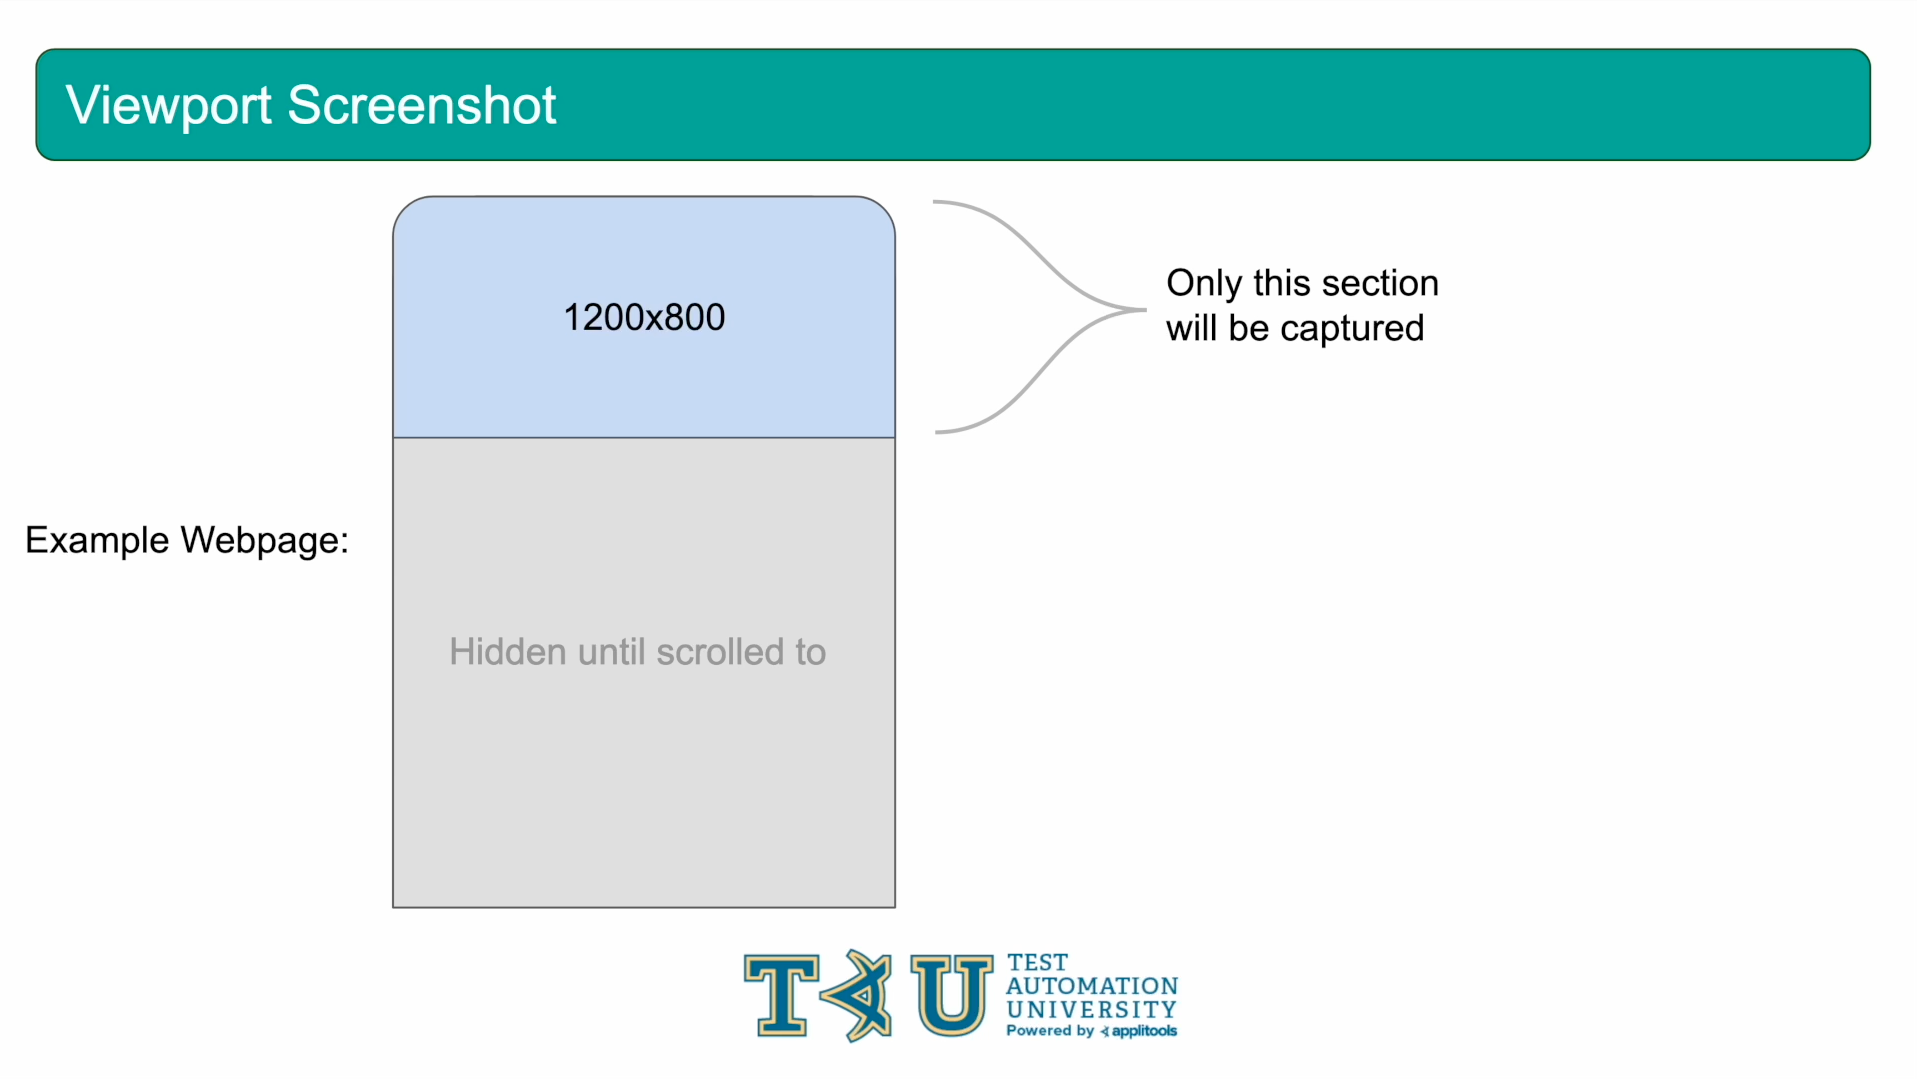
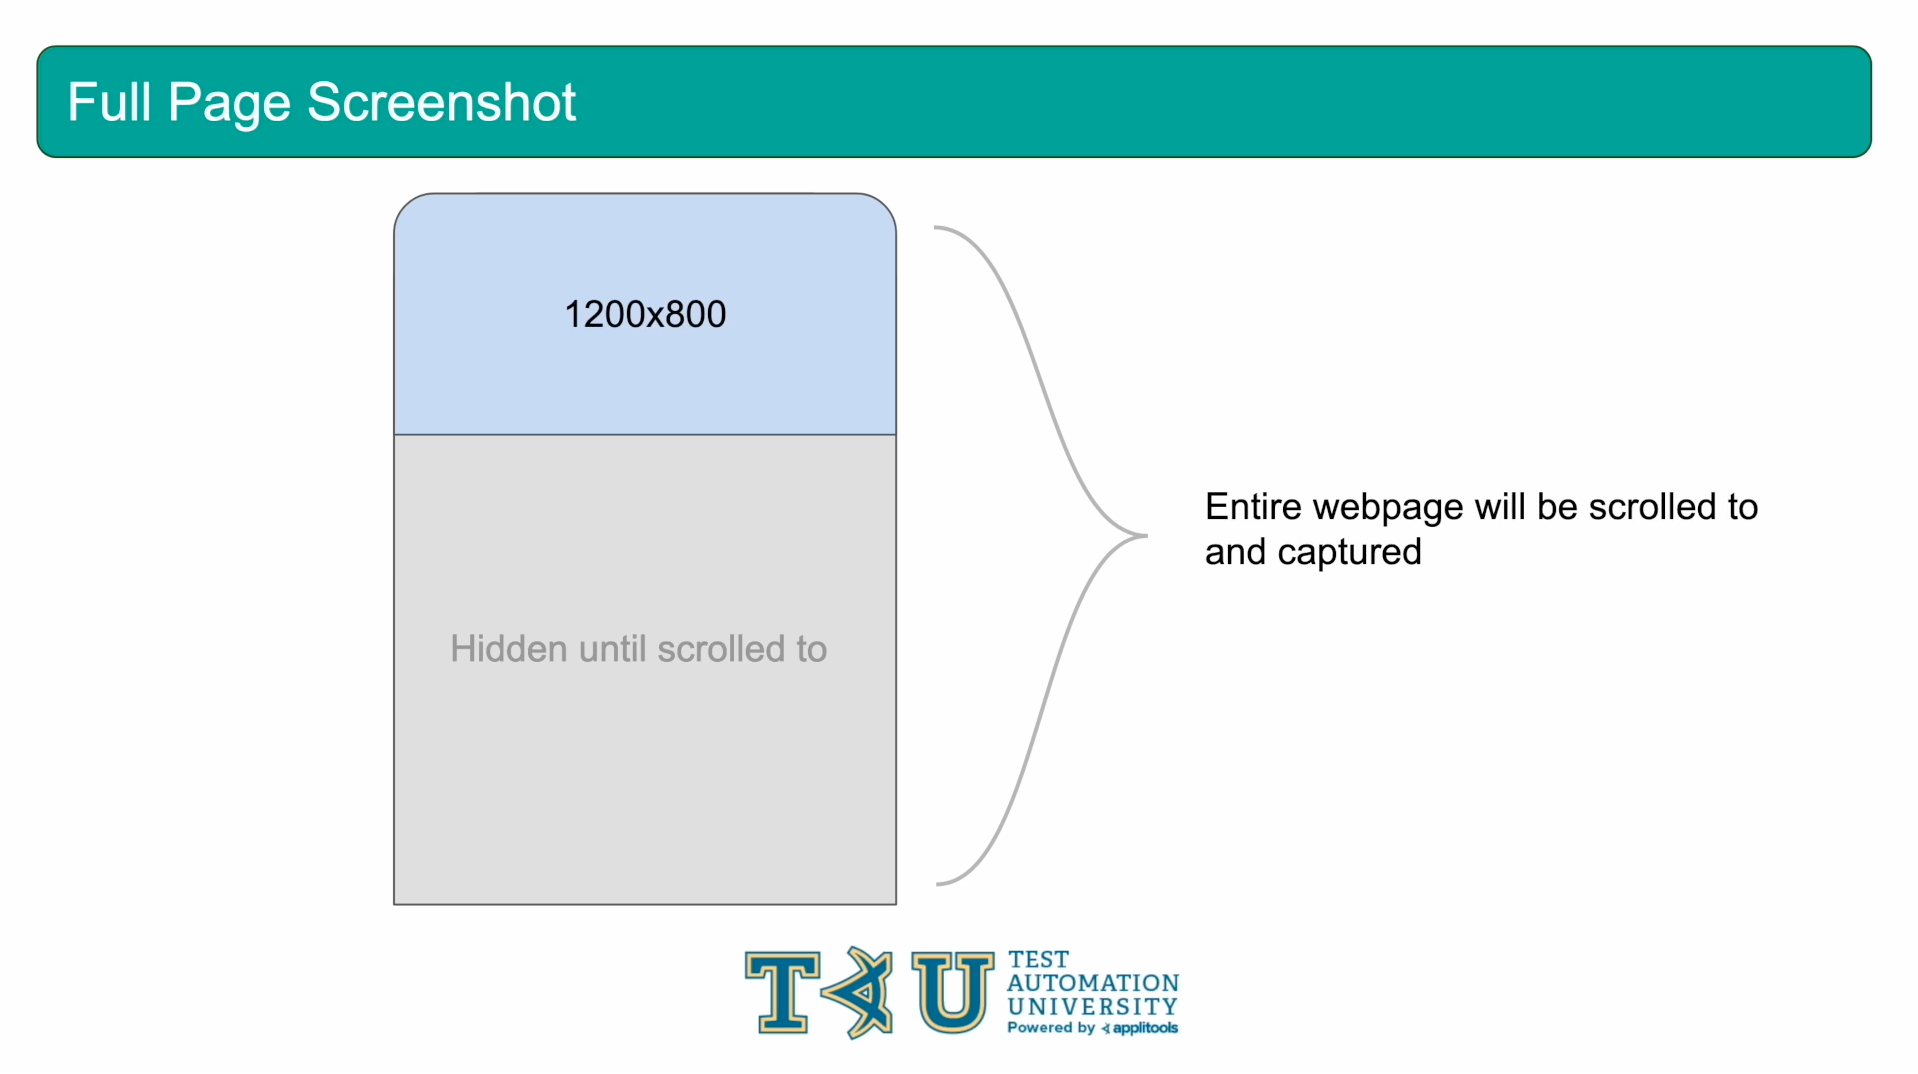
The first screenshot we're going to look at is a Viewport screenshot. This type of screenshot will capture the content that is visible in the browser's viewport. On the screen here, I have a representation of a webpage. The viewport would be the section at the top in blue which corresponds to the visible portion of the webpage when viewing it in a web browser.
The rest of the page, that is hidden down below, is not visible until it has been scrolled to. Capturing a viewport screenshot will tell the Applitools SDK to only capture this portion in blue at the top and ignore the rest of the page that isn't currently visible.
One thing I want to clarify before moving on is that there's an important distinction between the browser's viewport size and the browser's window size. The viewport covers only the portion of the browser that shows the actual webpage. Things like the URL bar, Bookmarks bar, and the close or minimize buttons are not included in the browser's viewport.
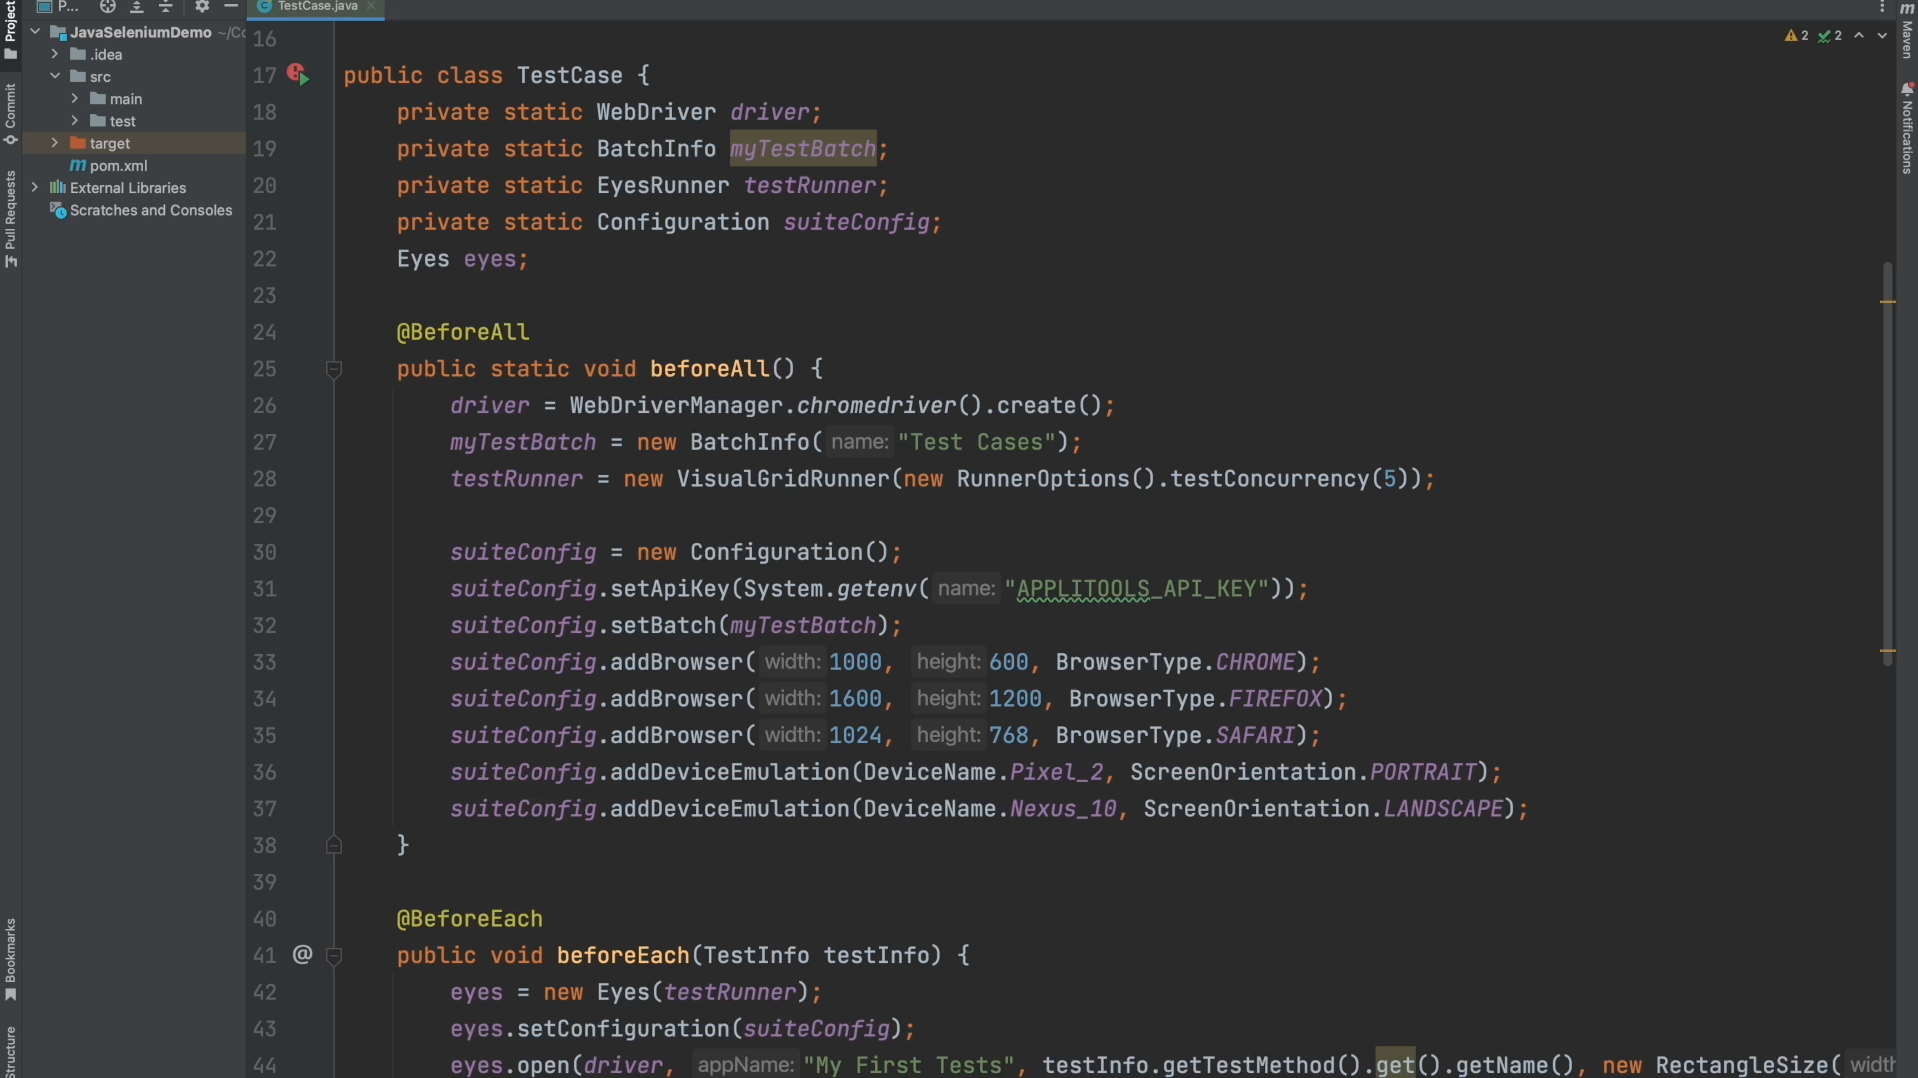
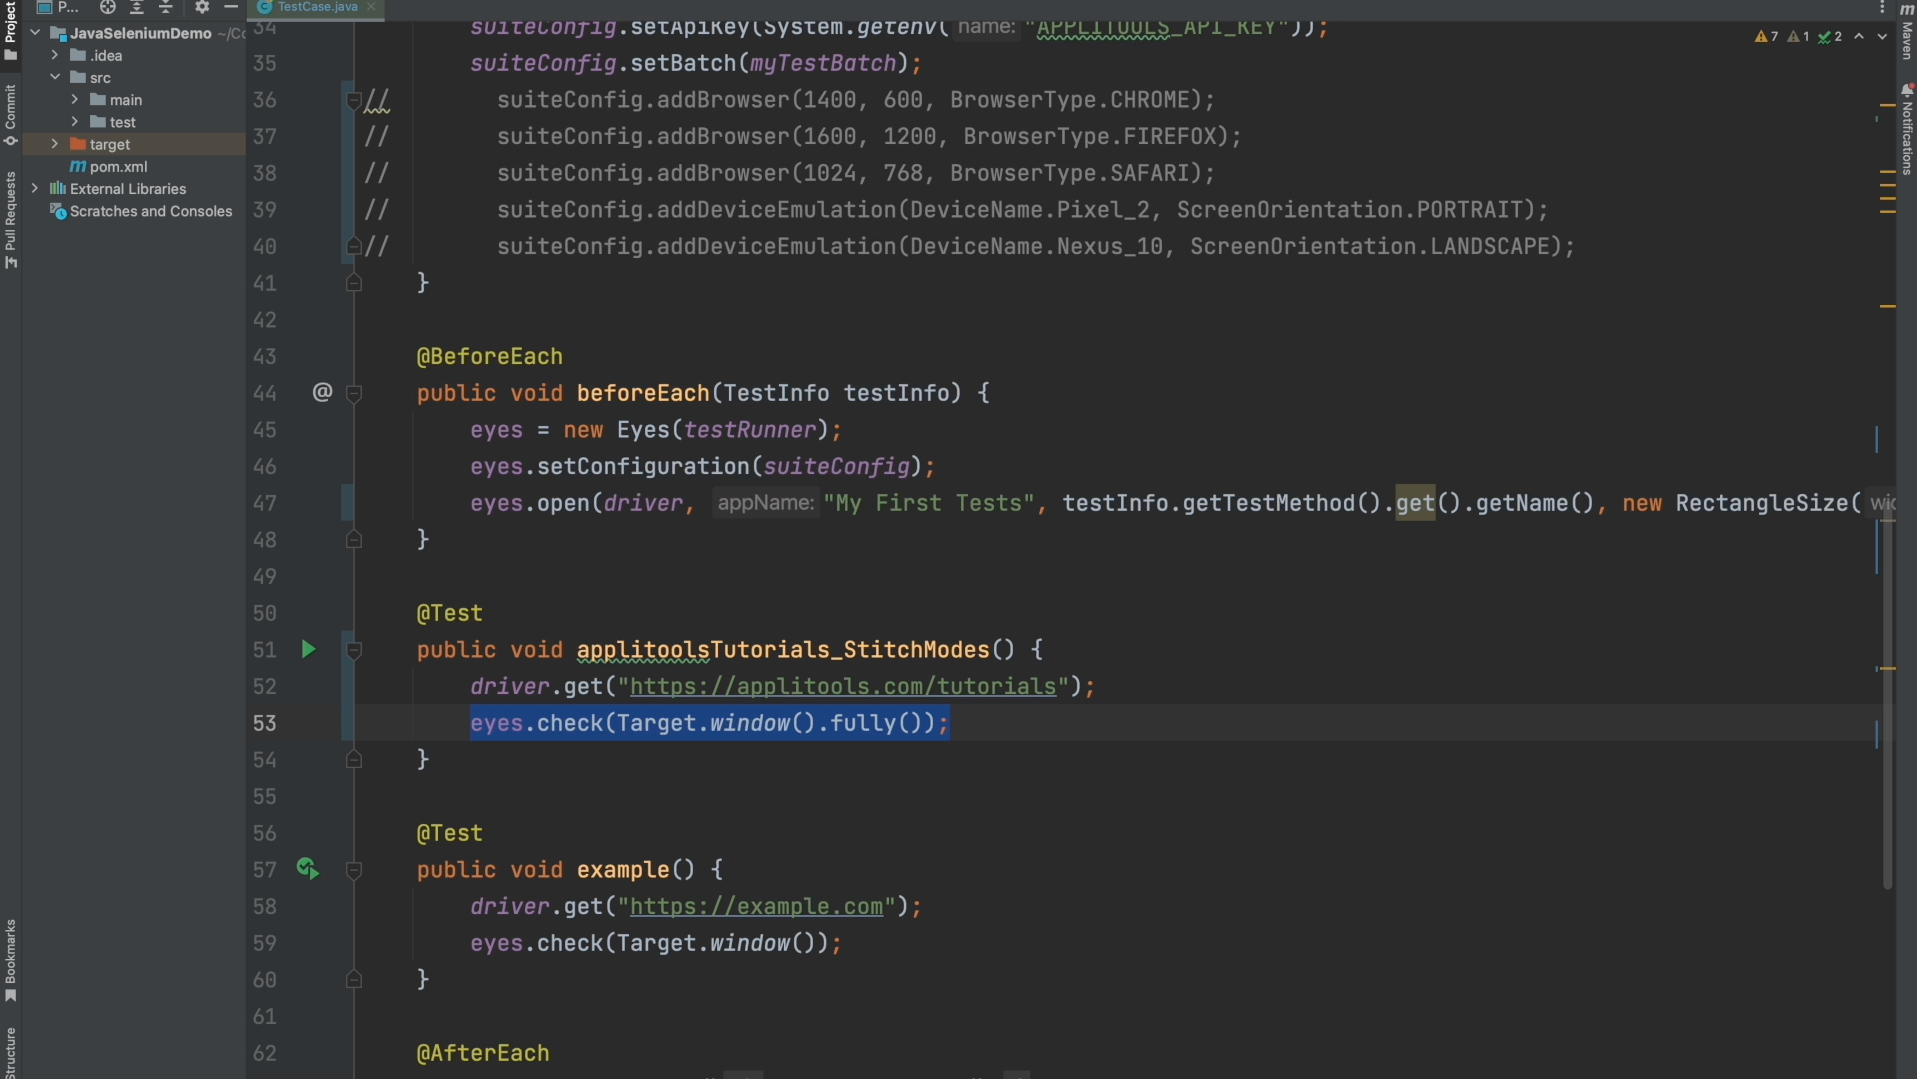
Here we are at our test code which is exactly how we left it at the end of the previous course. Let's go ahead and make some slight modifications and set up a viewport screenshot test.
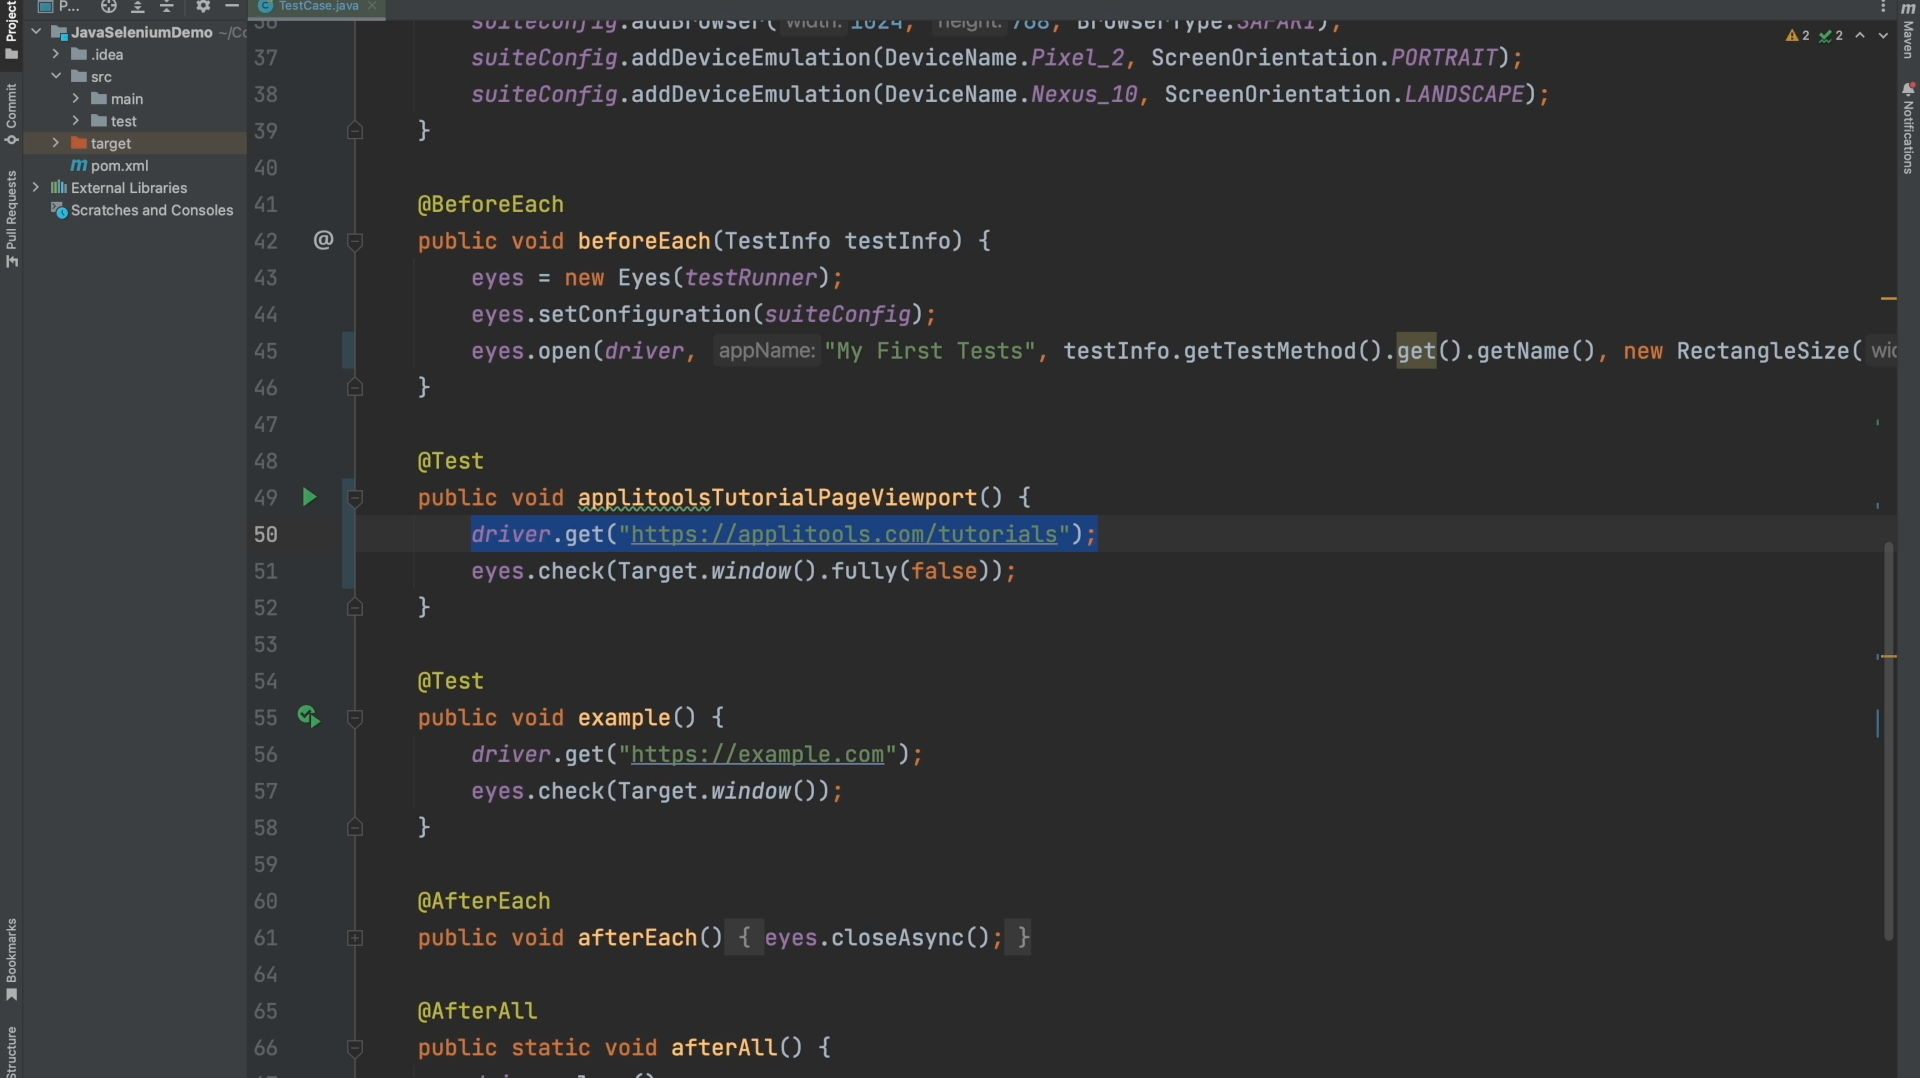
Let's go over each of the changes one by one. Firstly, I changed the URL that we're testing to be the Applitools Tutorials page.
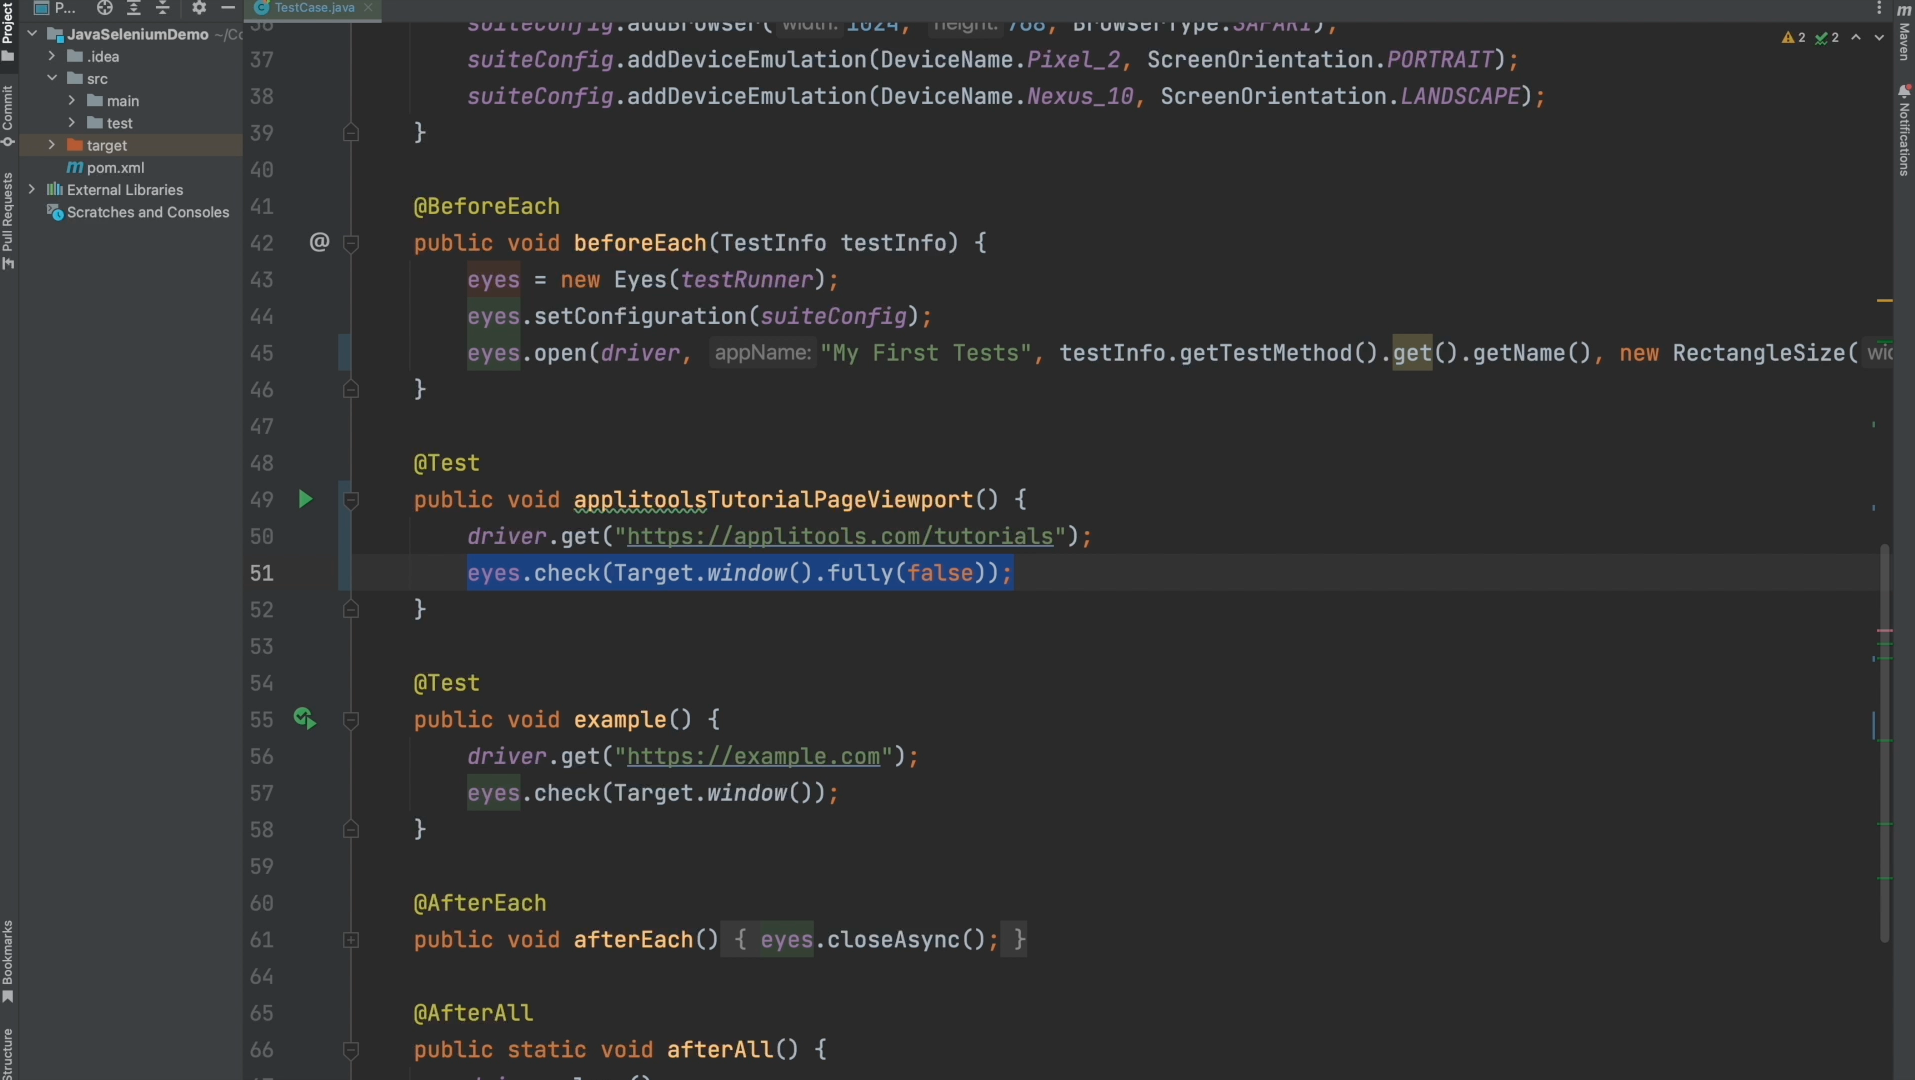
Next, I made a slight change to our call to eyes.check(). By default, the Ultrafast Grid will take a full page screenshot. In order to capture a viewport screenshot we need to add a call to fully() and pass in false. This line now indicates that we want to capture just the viewport of our browser without scrolling the full length of the page.

I also changed the name of our test to applitoolsTutorialPageViewport. I will be changing this for every section throughout this course. Changing the test name will cause a new baseline to be created on the Applitools dashboard which will help keep our test results organized.
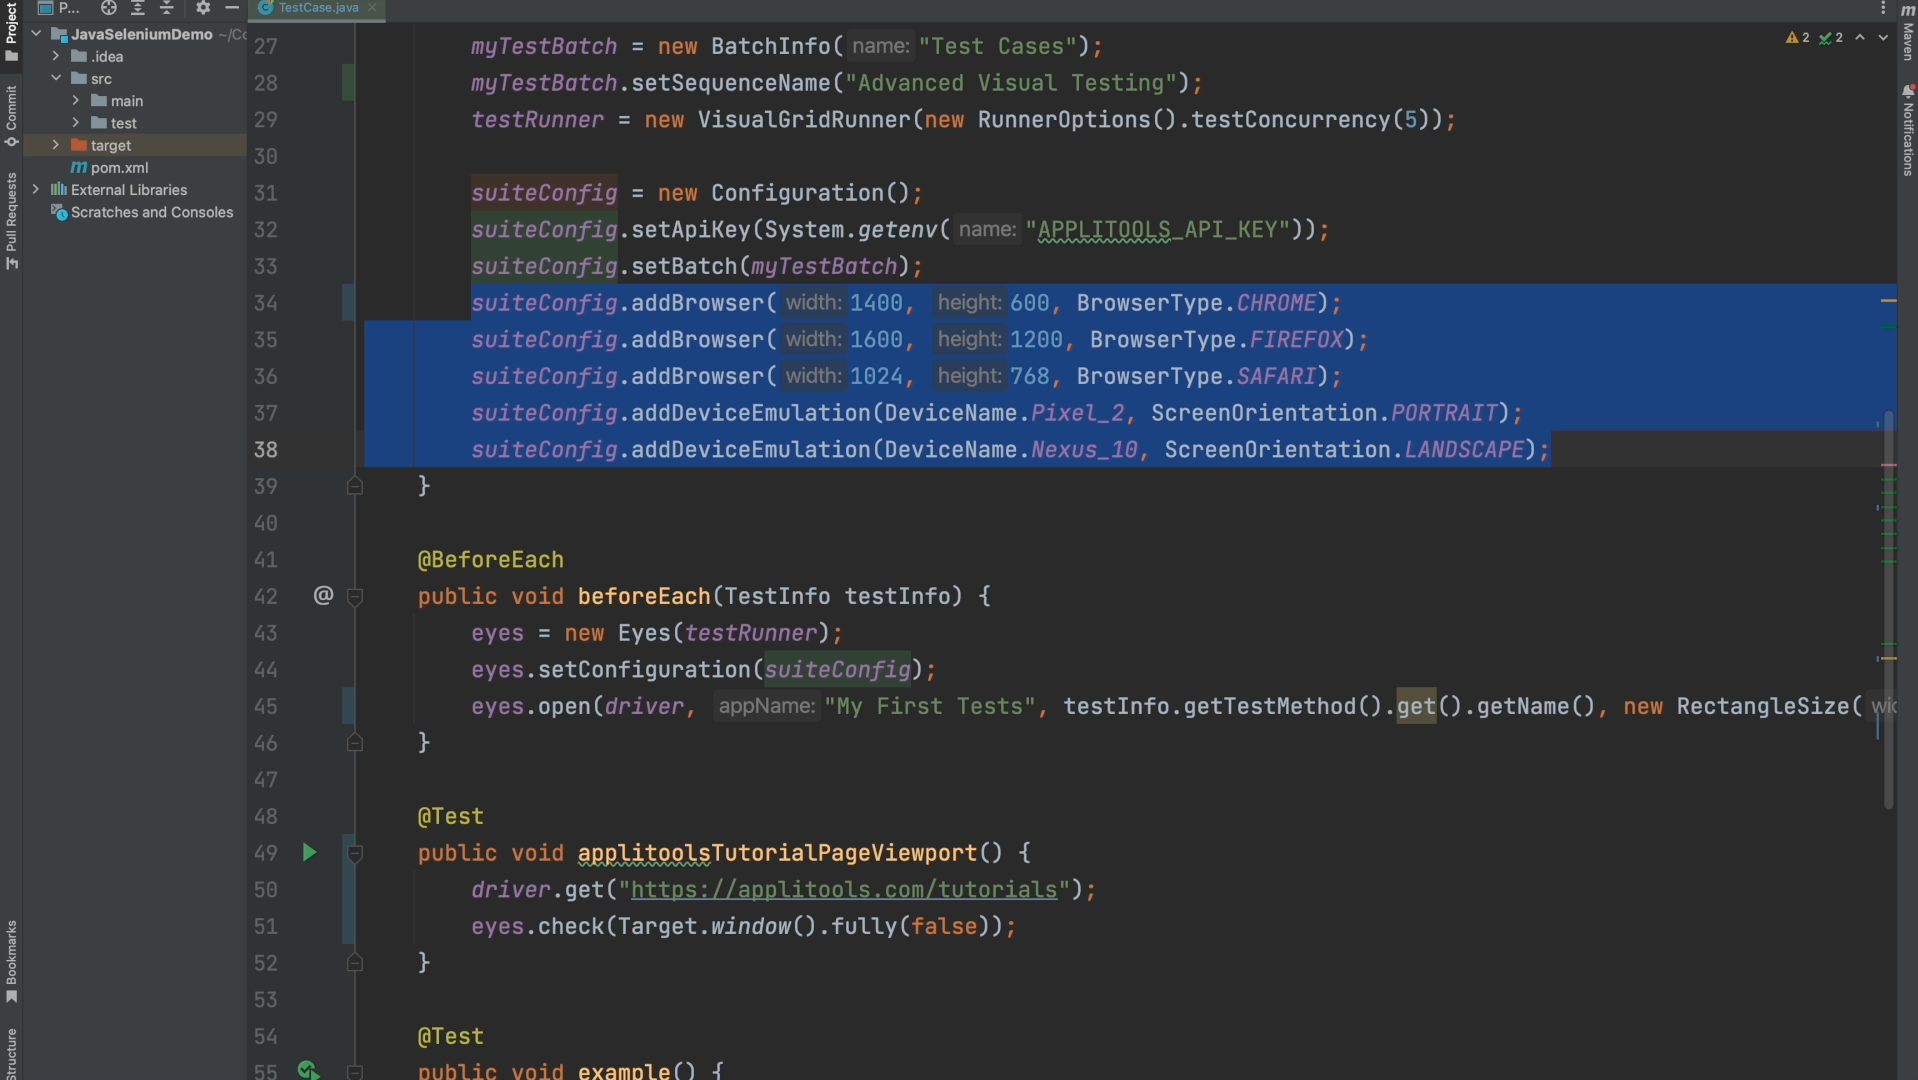
If you're following along with an Applitools Free account, I recommend commenting out all of the browsers here in the configuration except for maybe one or two environments. Free Applitools accounts have a limit of 100 checkpoints per month and running a bunch of browsers with the Ultrafast Grid will quickly take up that quota. For demonstration purposes, I will be keeping all of these browsers enabled. However, feel free to make this change on your end to conserve your checkpoints.
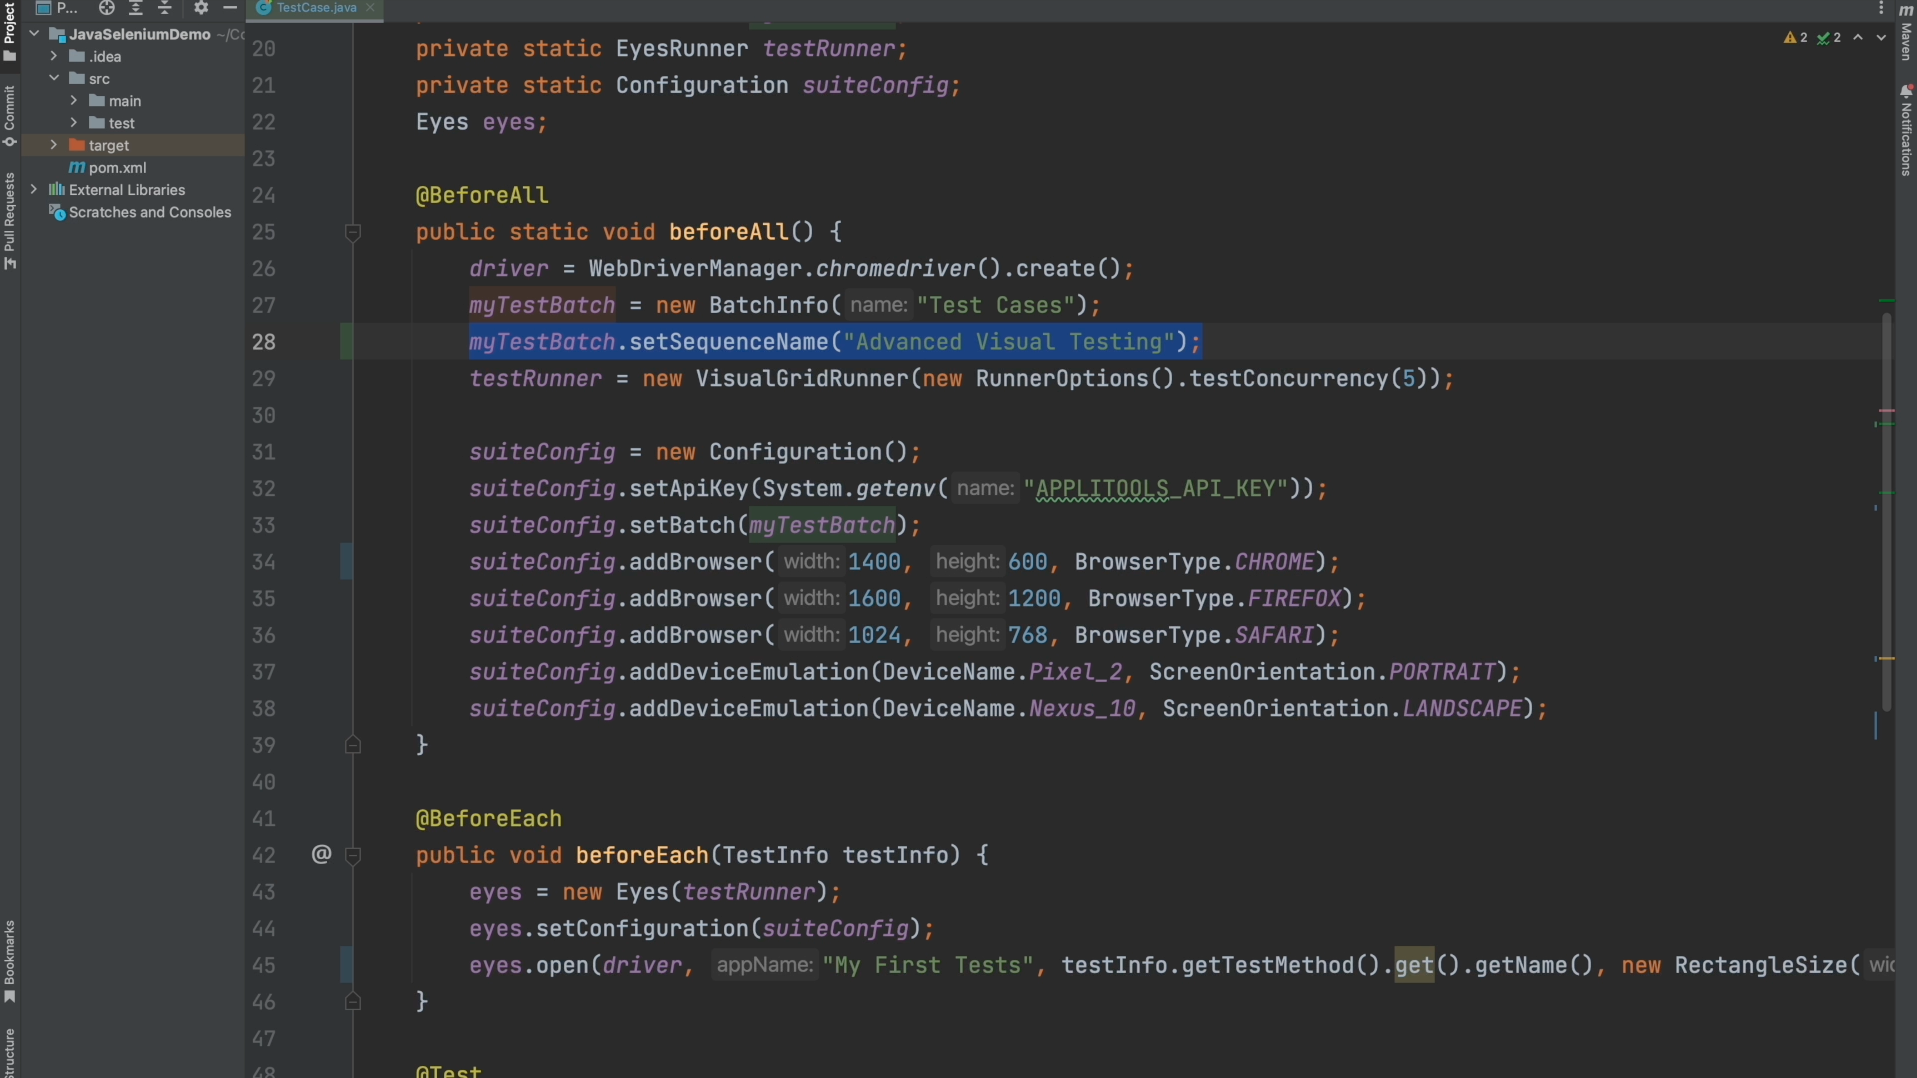
This is unrelated to our current section but I also added a sequence name to our batch object. Please add this on your end as well as this will be relevant later on in the course.
Let's now go ahead and run this test and then review the results on the Applitools dashboard.
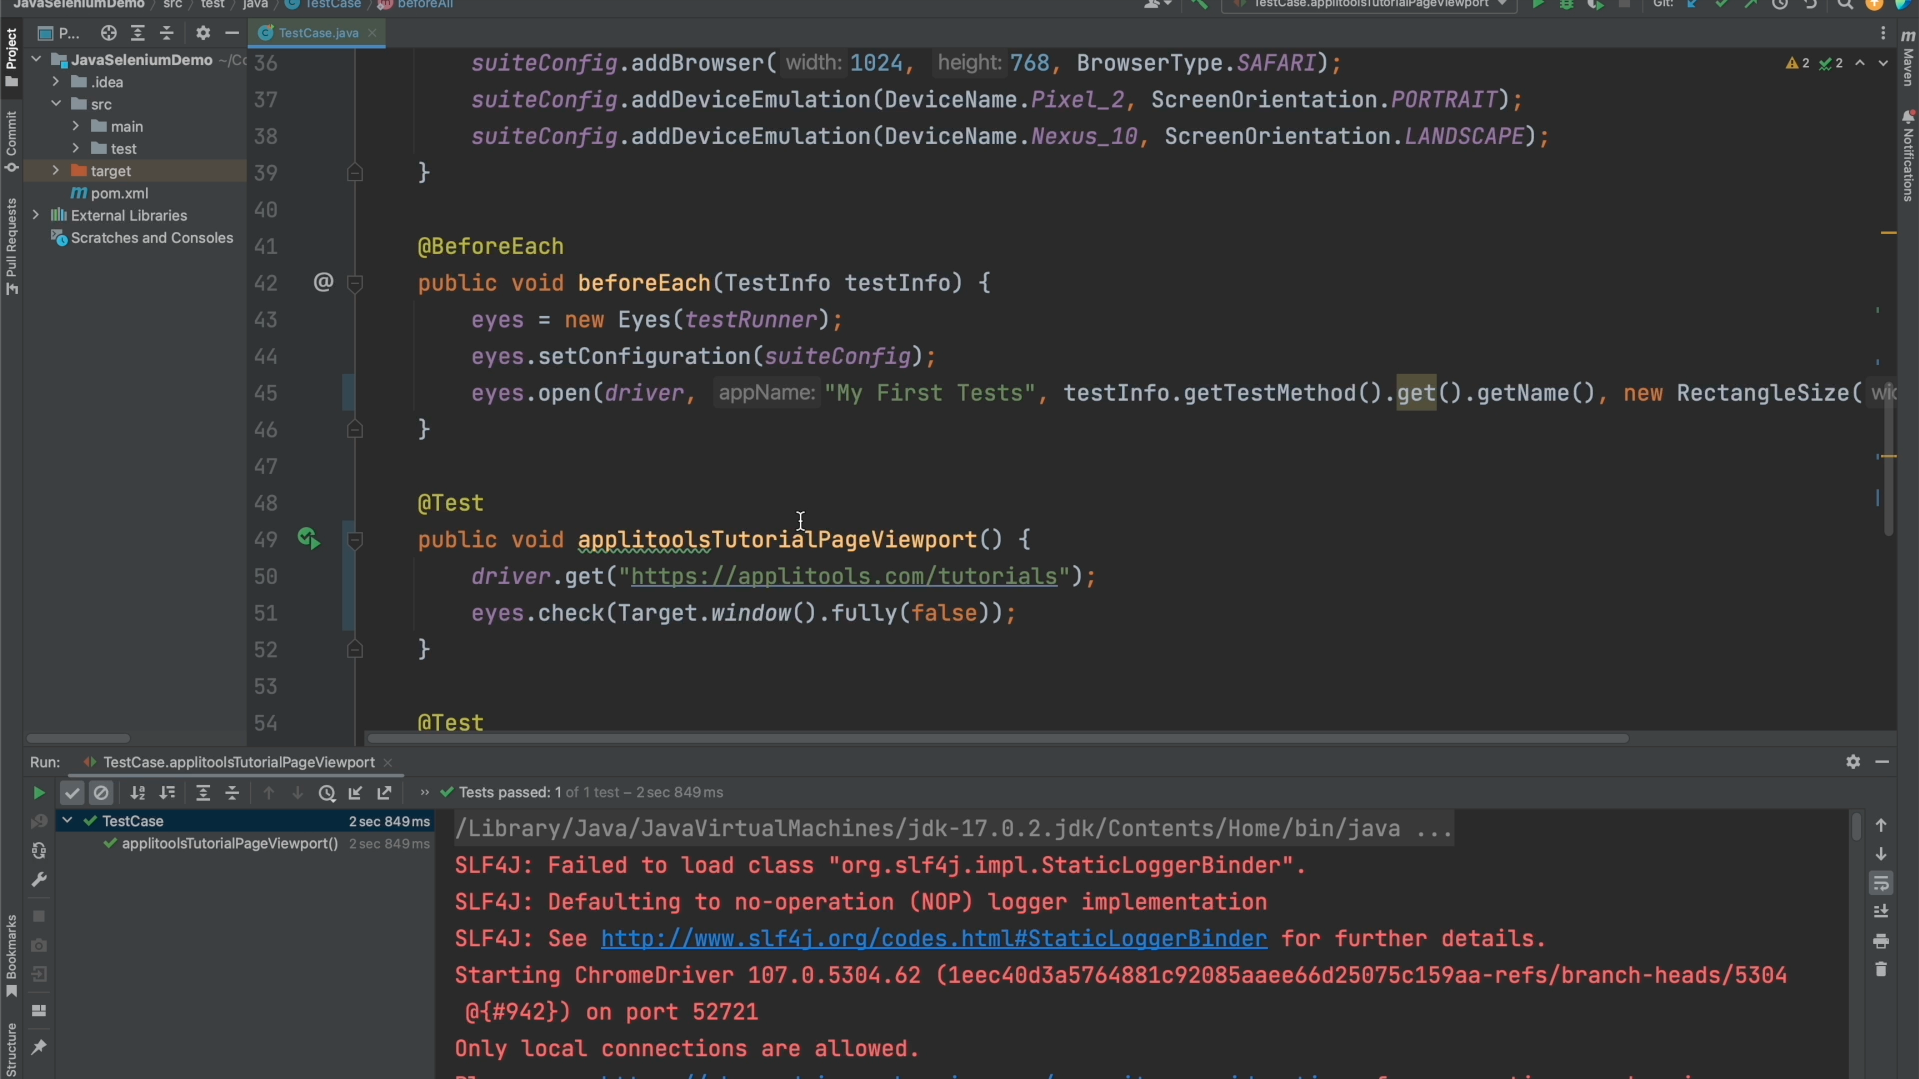
Alright, it looks like our test wrapped up without any failures. Throughout the rest of this course I will be cutting out the actual running of the test but I wanted to show it once here at the beginning. Let's go ahead and head over to our Applitools dashboard and check out the results.
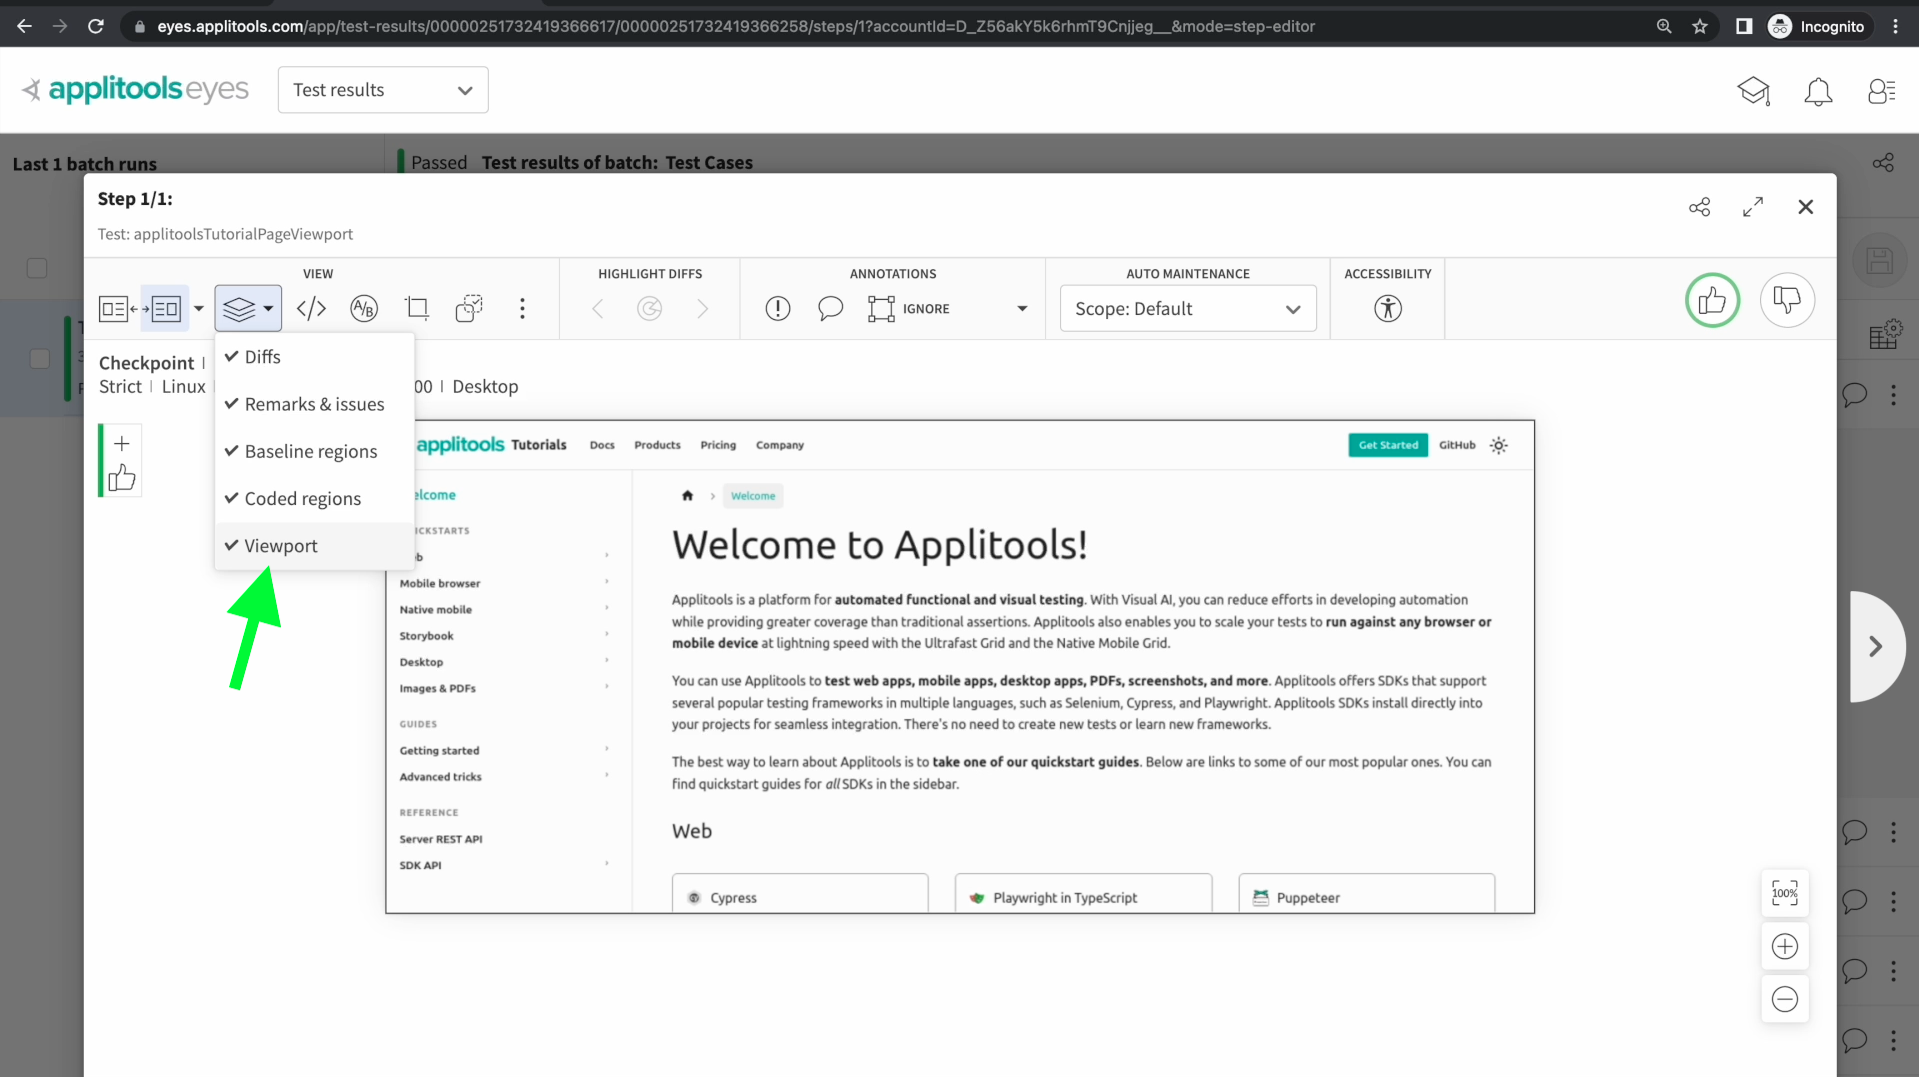
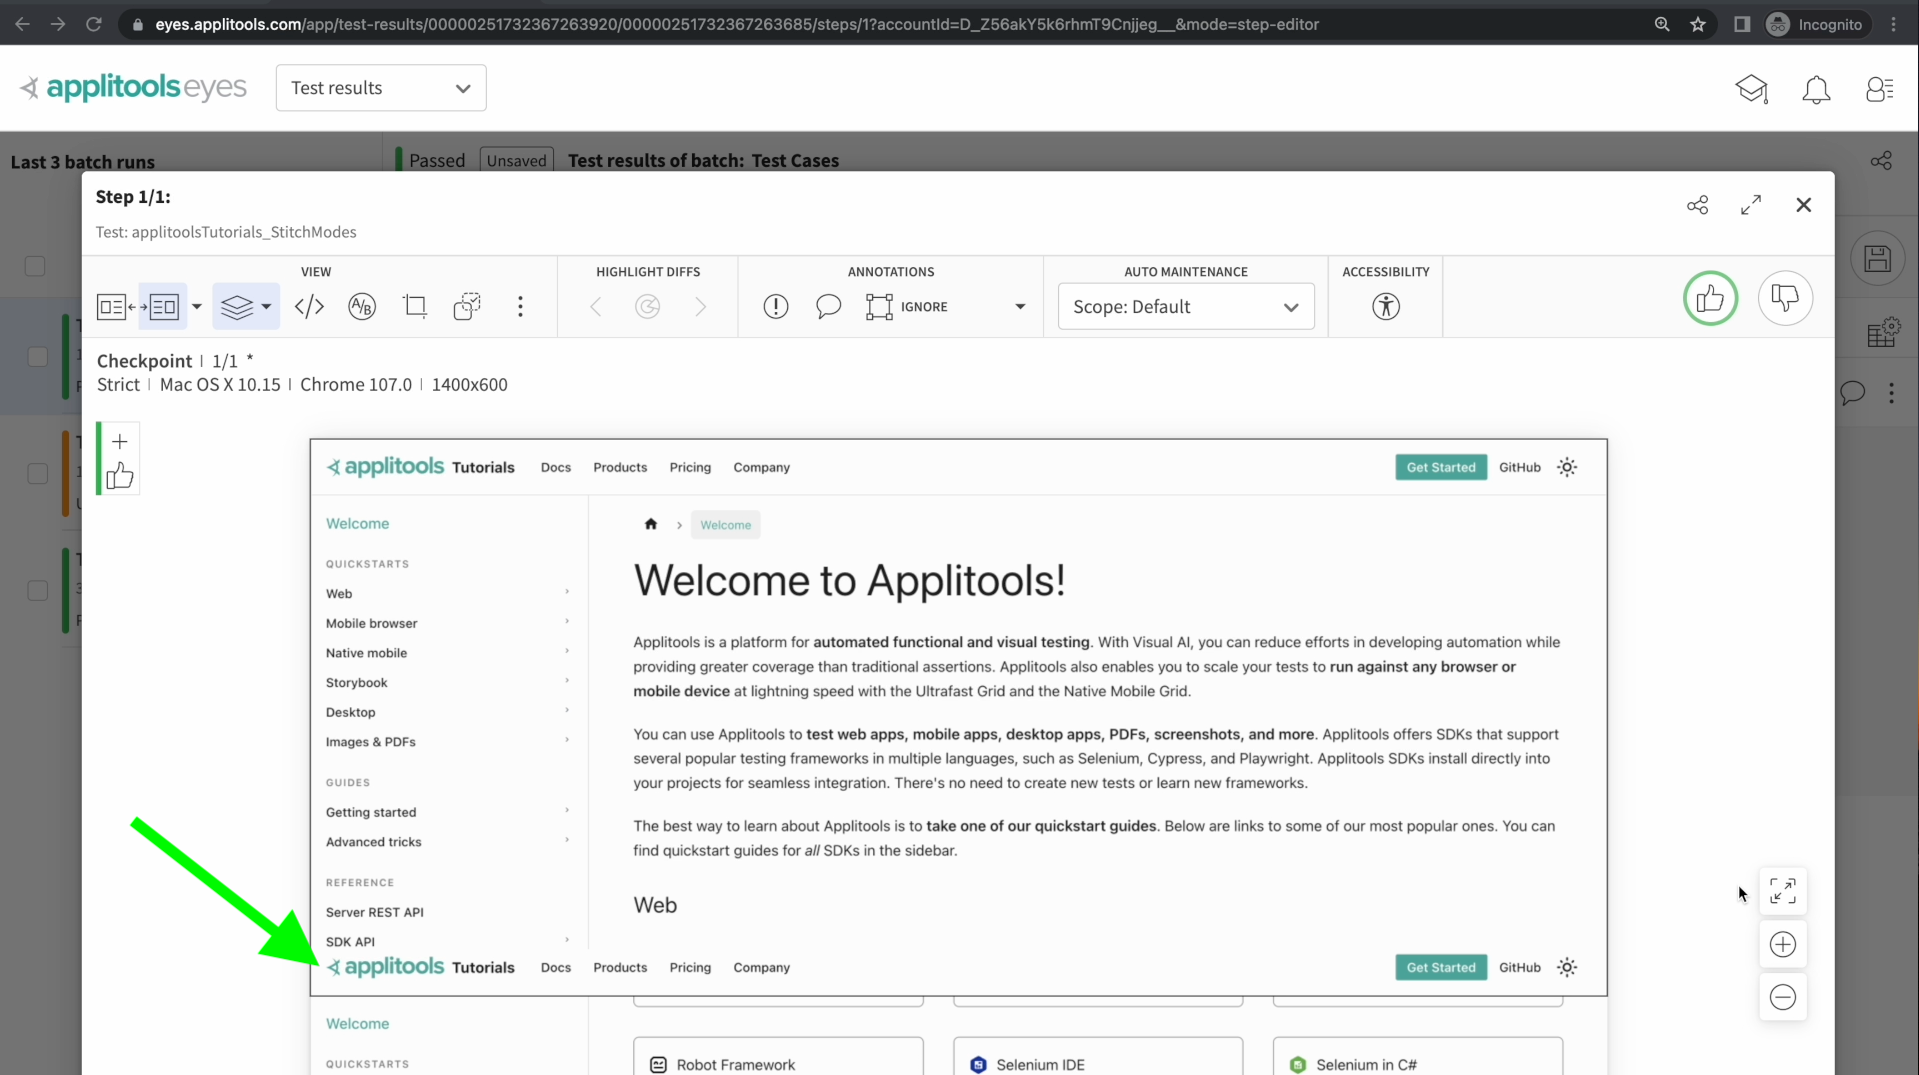
Here we have one of the screenshots from the test that we just ran. As we can see from this screenshot, we are only getting the very top portion of the Applitools tutorials page. This is what we specified in our code by adding that .fully(false) to our eyes.check() command.
A quick way to confirm that this is in fact a viewport screenshot is by clicking on this icon here followed by the viewport option. When we click on this option, a black border is added showing what the viewport was when this screenshot was captured. Since this border matches the borders of our screenshot, we've confirmed that this is a viewport screenshot.
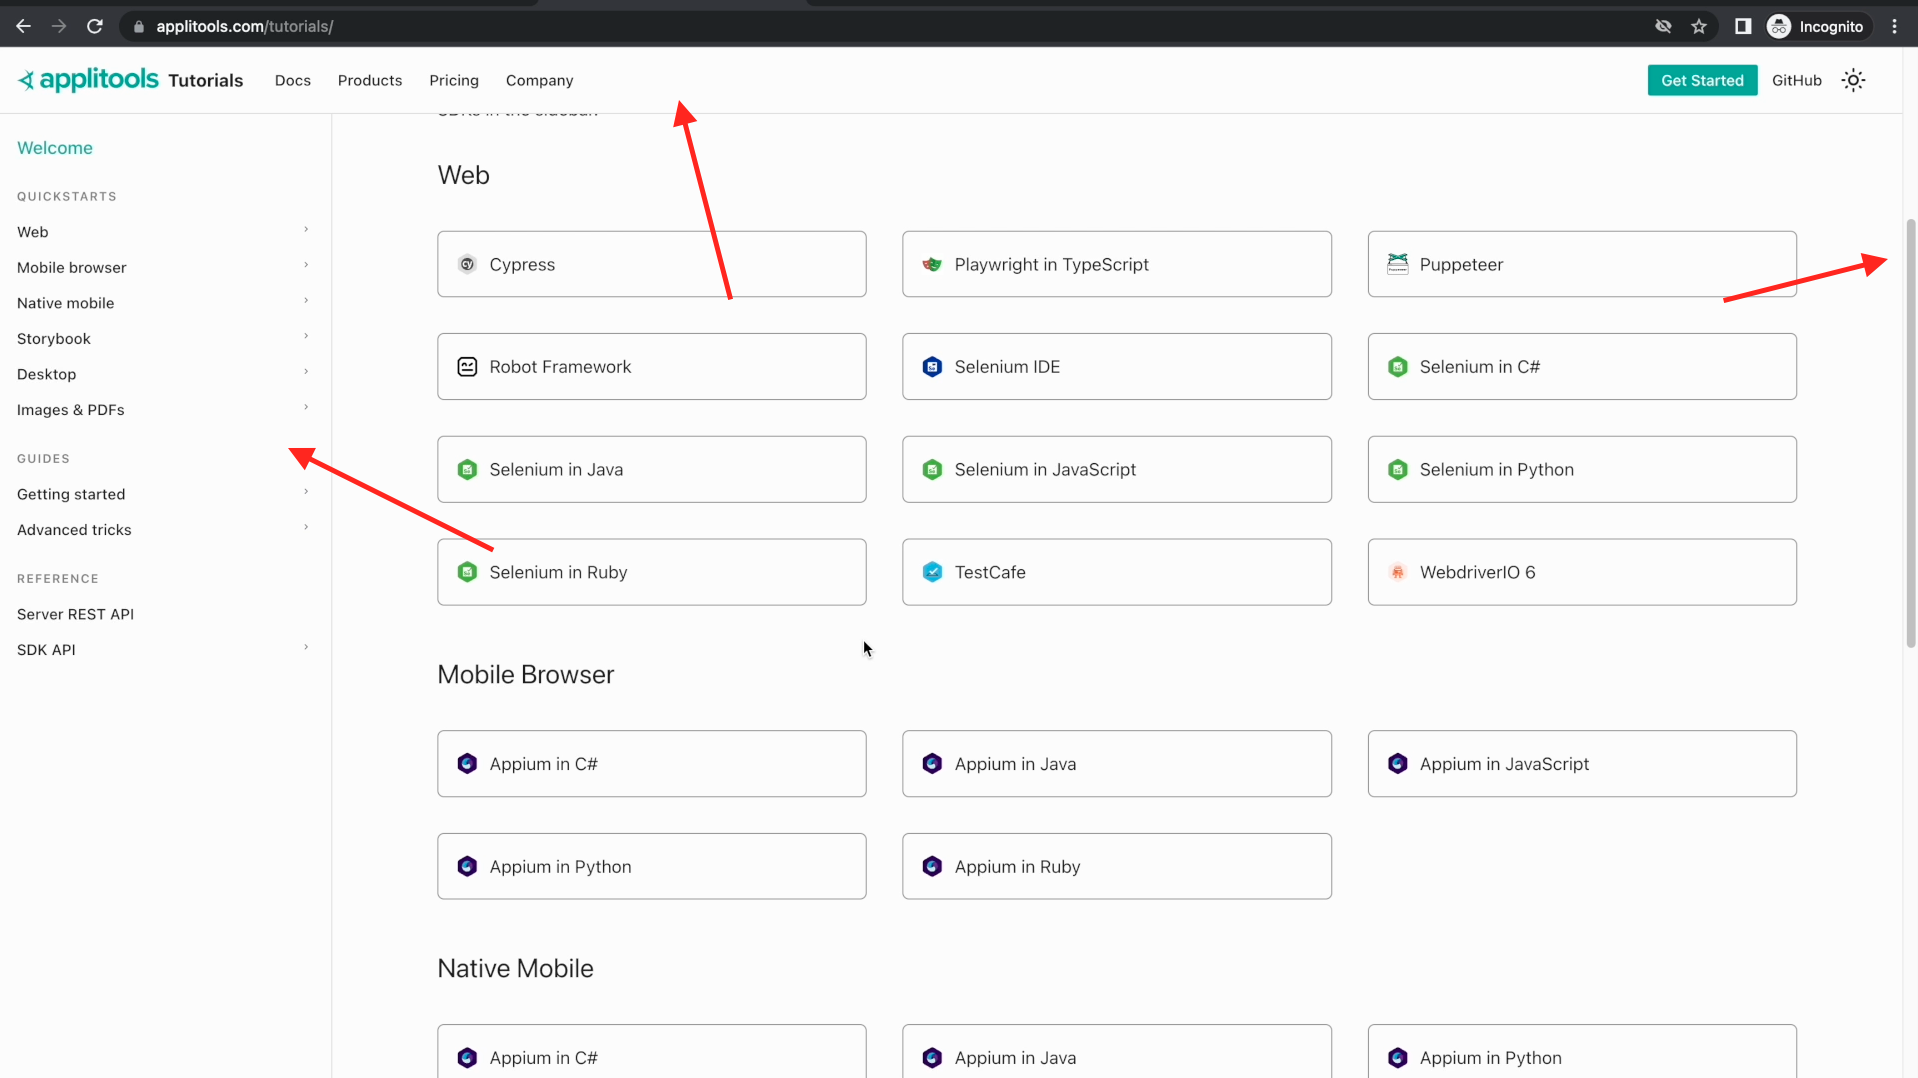
The next type of screenshot that we're going to look at is a full page screenshot and as the name suggests, rather than just capturing the viewport, this type of screenshot will scroll the page and capture the entire height and width of the page.
In this section, we're going to modify our code to capture a full page screenshot and then see how the results differ from the viewport screenshot. We're also going to introduce an important topic called StitchModes and show you how to configure that in your code. Let's go ahead and head over to our code and set up our test.

As I mentioned earlier, the Ultrafast Grid takes full page screenshots by default. So, the only thing we need to change is to remove the call to .fully() that we added in the previous section.
Let's go ahead and re-run our test and review the results on the dashboard.
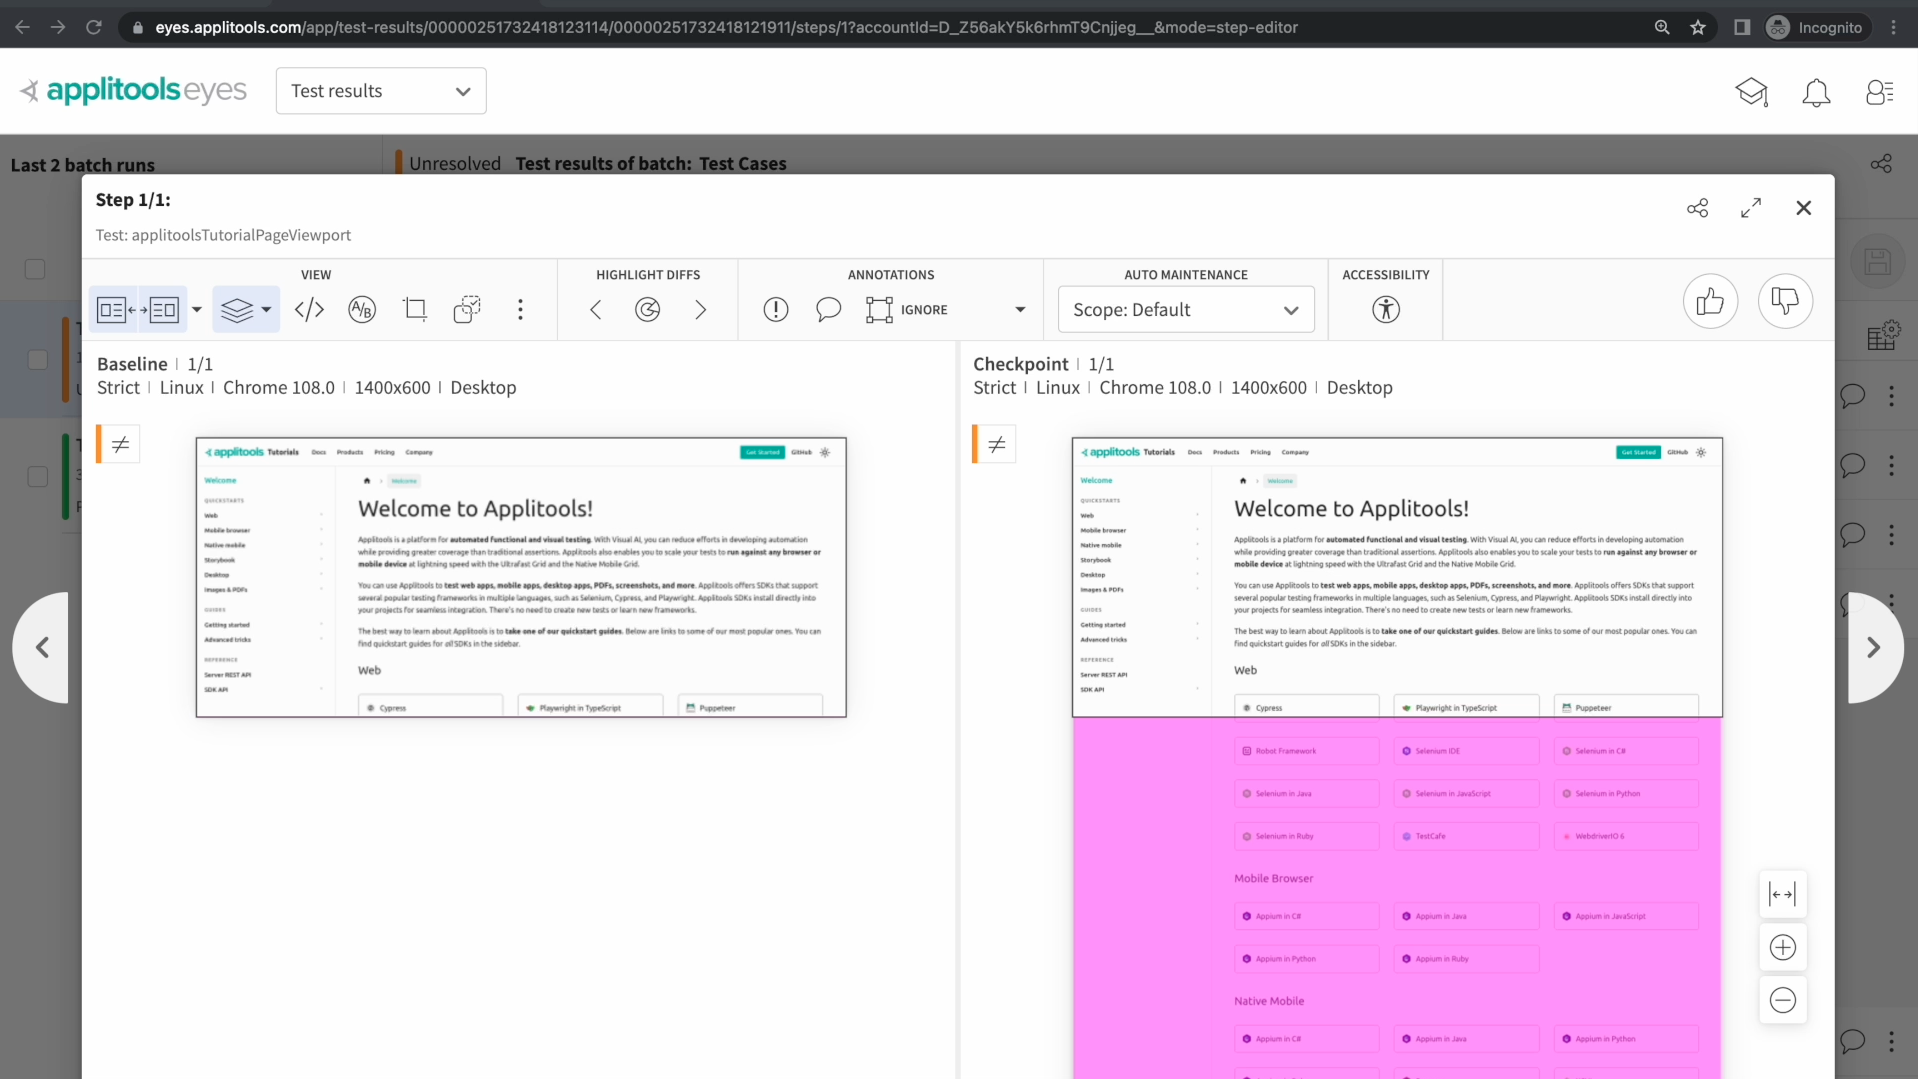
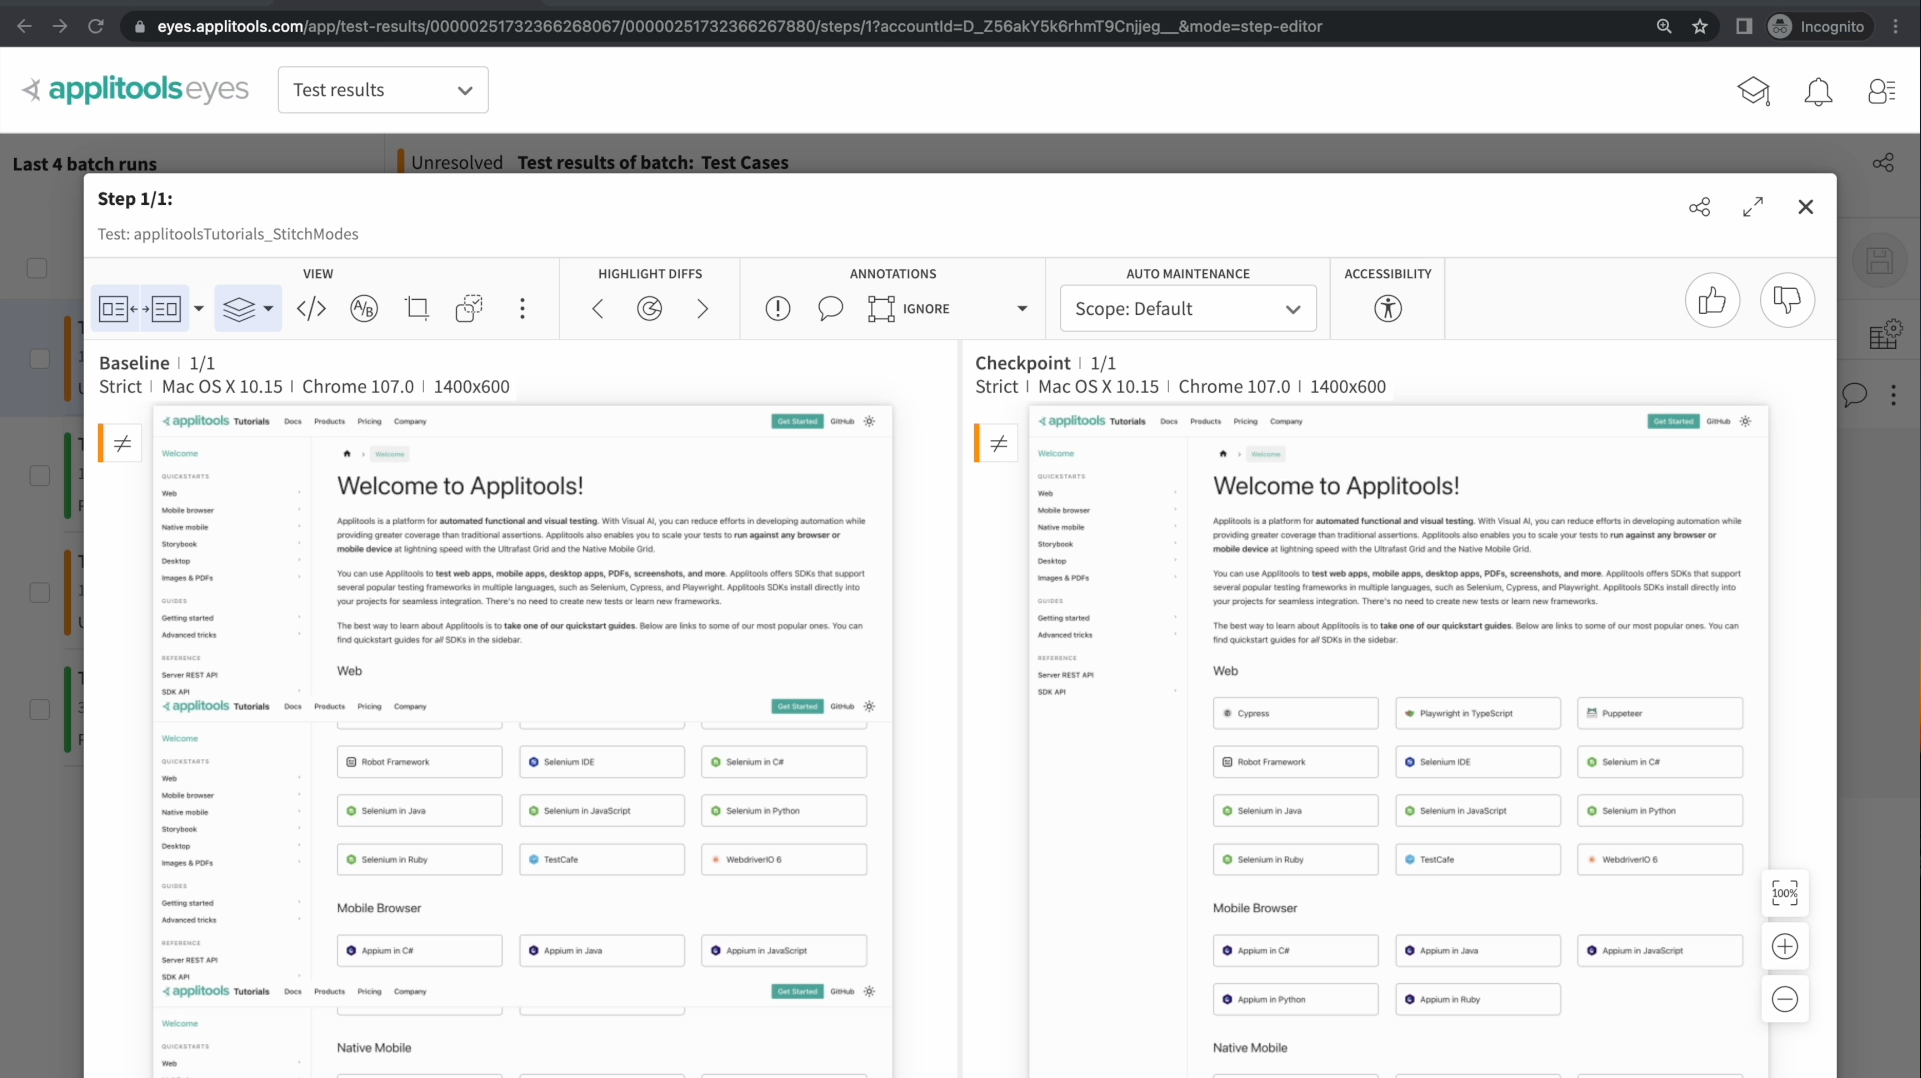
Looking at our test result, we can clearly see the difference between the viewport screenshot on the left and on the full page screenshot on the right. The viewport at the top is the same for both of these tests, but since we specified a full page screenshot on the right, we also have the rest of the page captured as well. This provides us with much more coverage than the viewport screenshot.
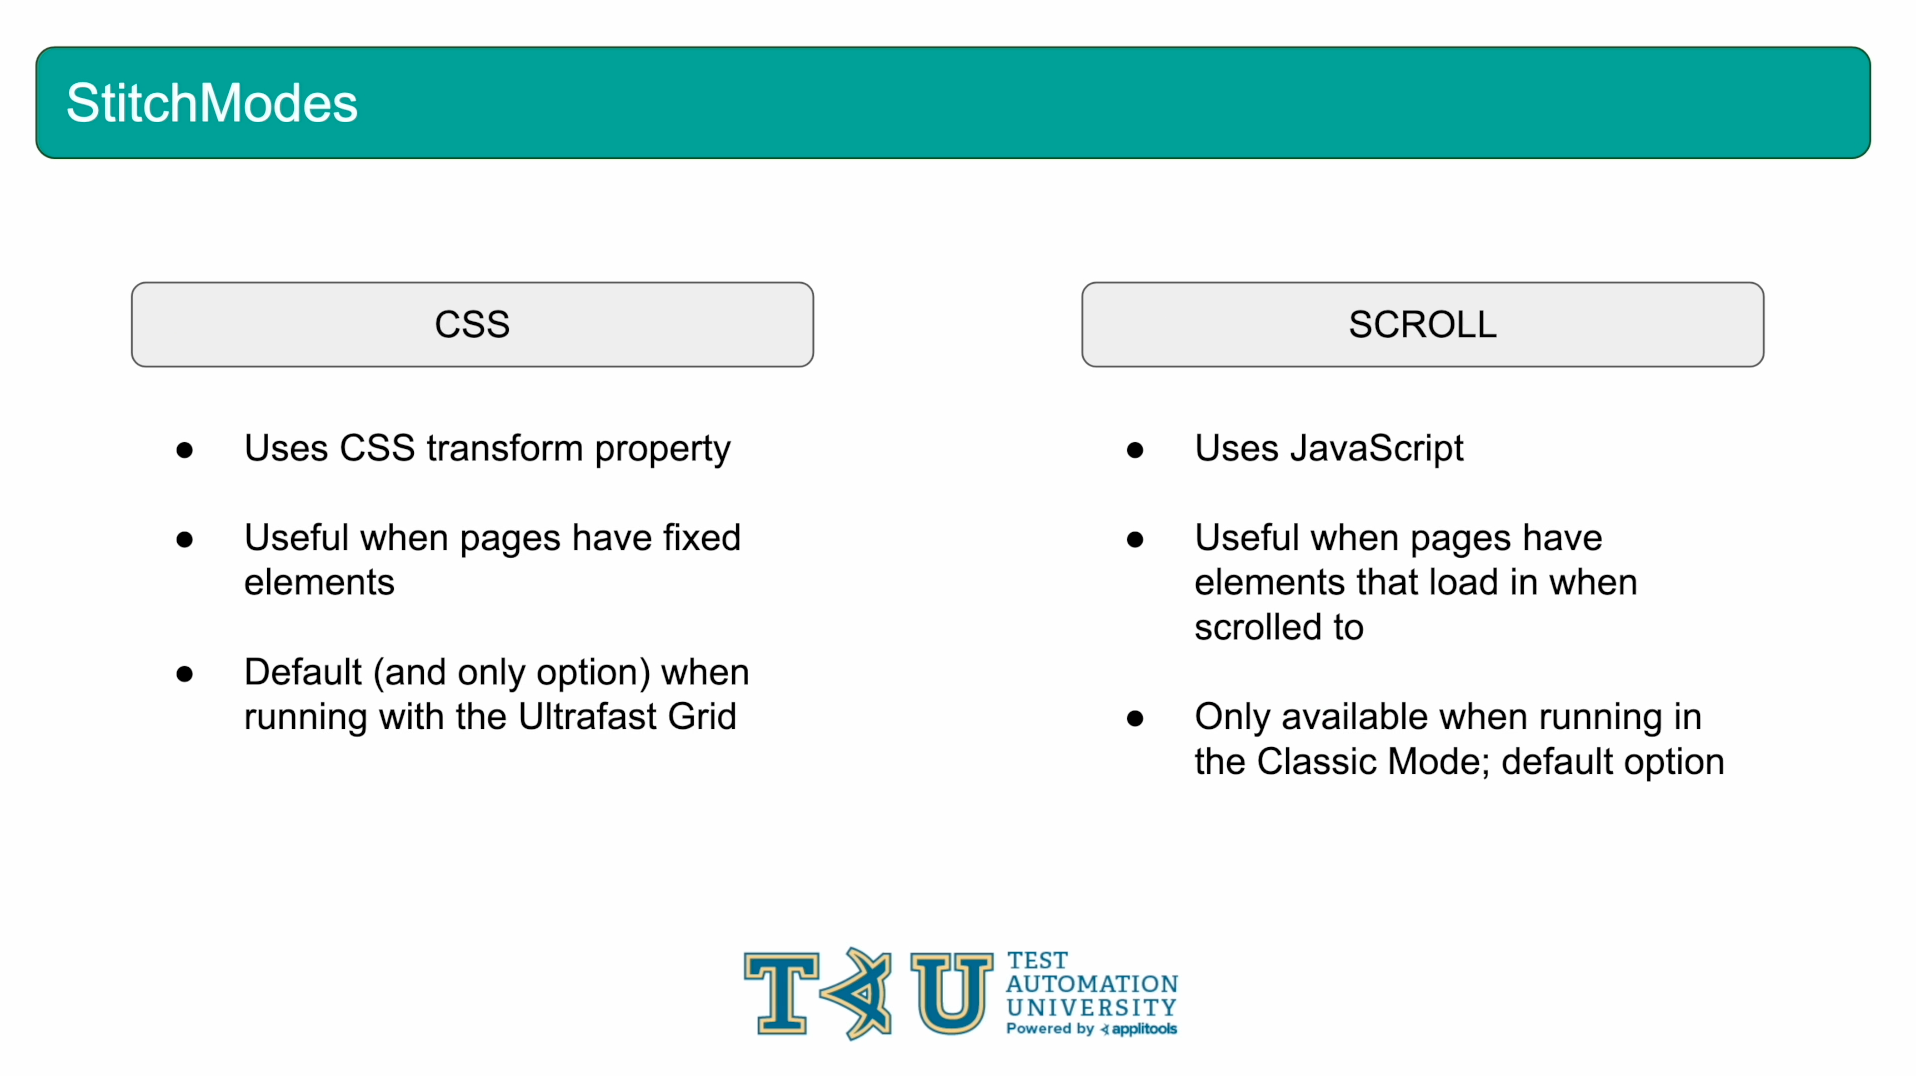
Now that we've seen how a full page screenshot looks, let's discuss how they're captured. To capture a full page screenshot, the Eyes SDK will scroll the page and then stitch together multiple screenshots that results in one full page screenshot. To do this, it uses something called a StitchMode. A StitchMode can be thought of as a strategy the Eyes SDK Uses to scroll the page. There are two options available: the CSS StitchMode or the SCROLL StitchMode.
With the CSS StitchMode, the page is scrolled using the CSS transform property. As we'll see later on, this is useful for pages that have sticky elements such as navigation bars. This mode is also the default and only option when running on the Ultrafast Grid so the full page screenshot we just captured in the previous section was running with this StitchMode.
The SCROLL StitchMode scrolls the page as if you were using your scroll wheel on your mouse or your trackpad to scroll the page down. This StitchMode is useful for pages that have lazy loaded modules that load in only when they are scrolled to. This mode is only available when running with the ClassicRunner.
In this section, we're going to go over examples of both of these StitchModes and see how they can produce different results. Let's jump over to our project.
The first example that we're going to go over is capturing a full page screenshot with the SCROLL StitchMode. As I mentioned, this mode is only supported when running with the ClassicRunner. Let's go ahead and make some modifications to our code.
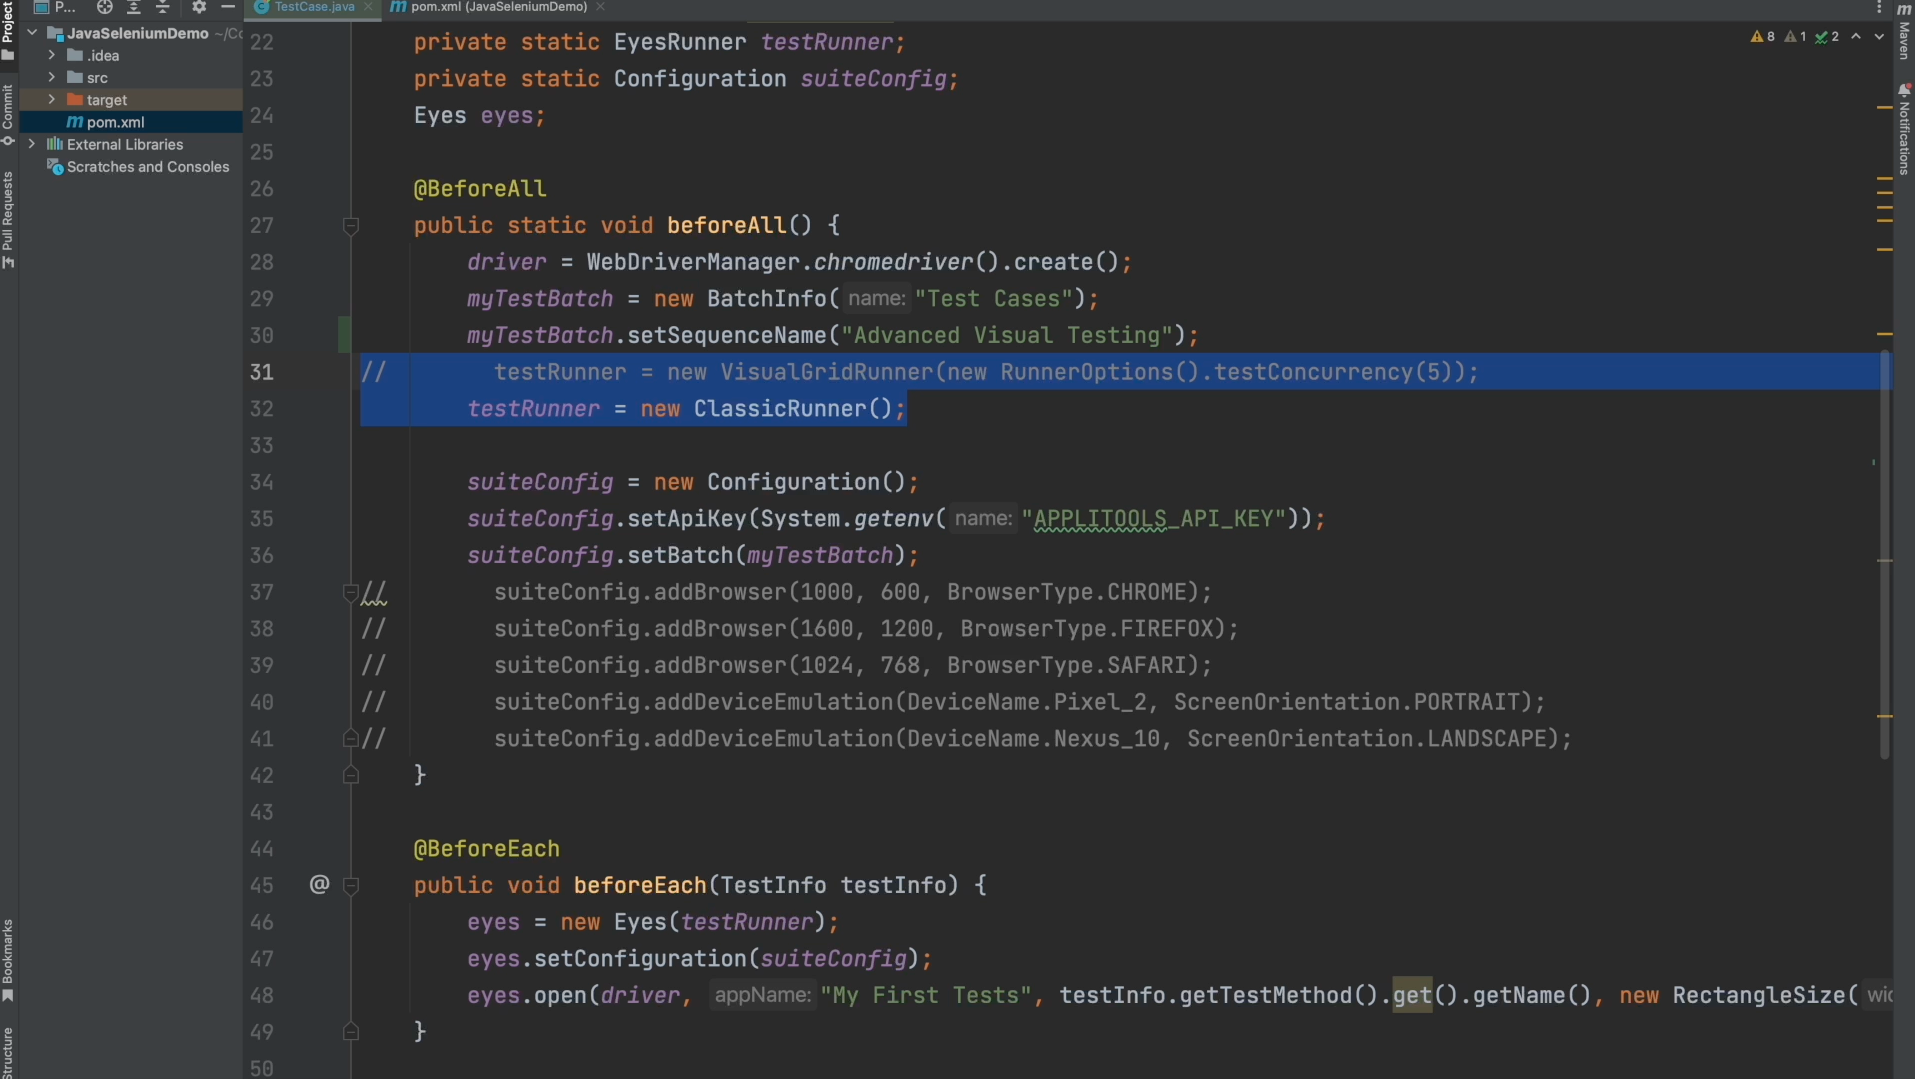
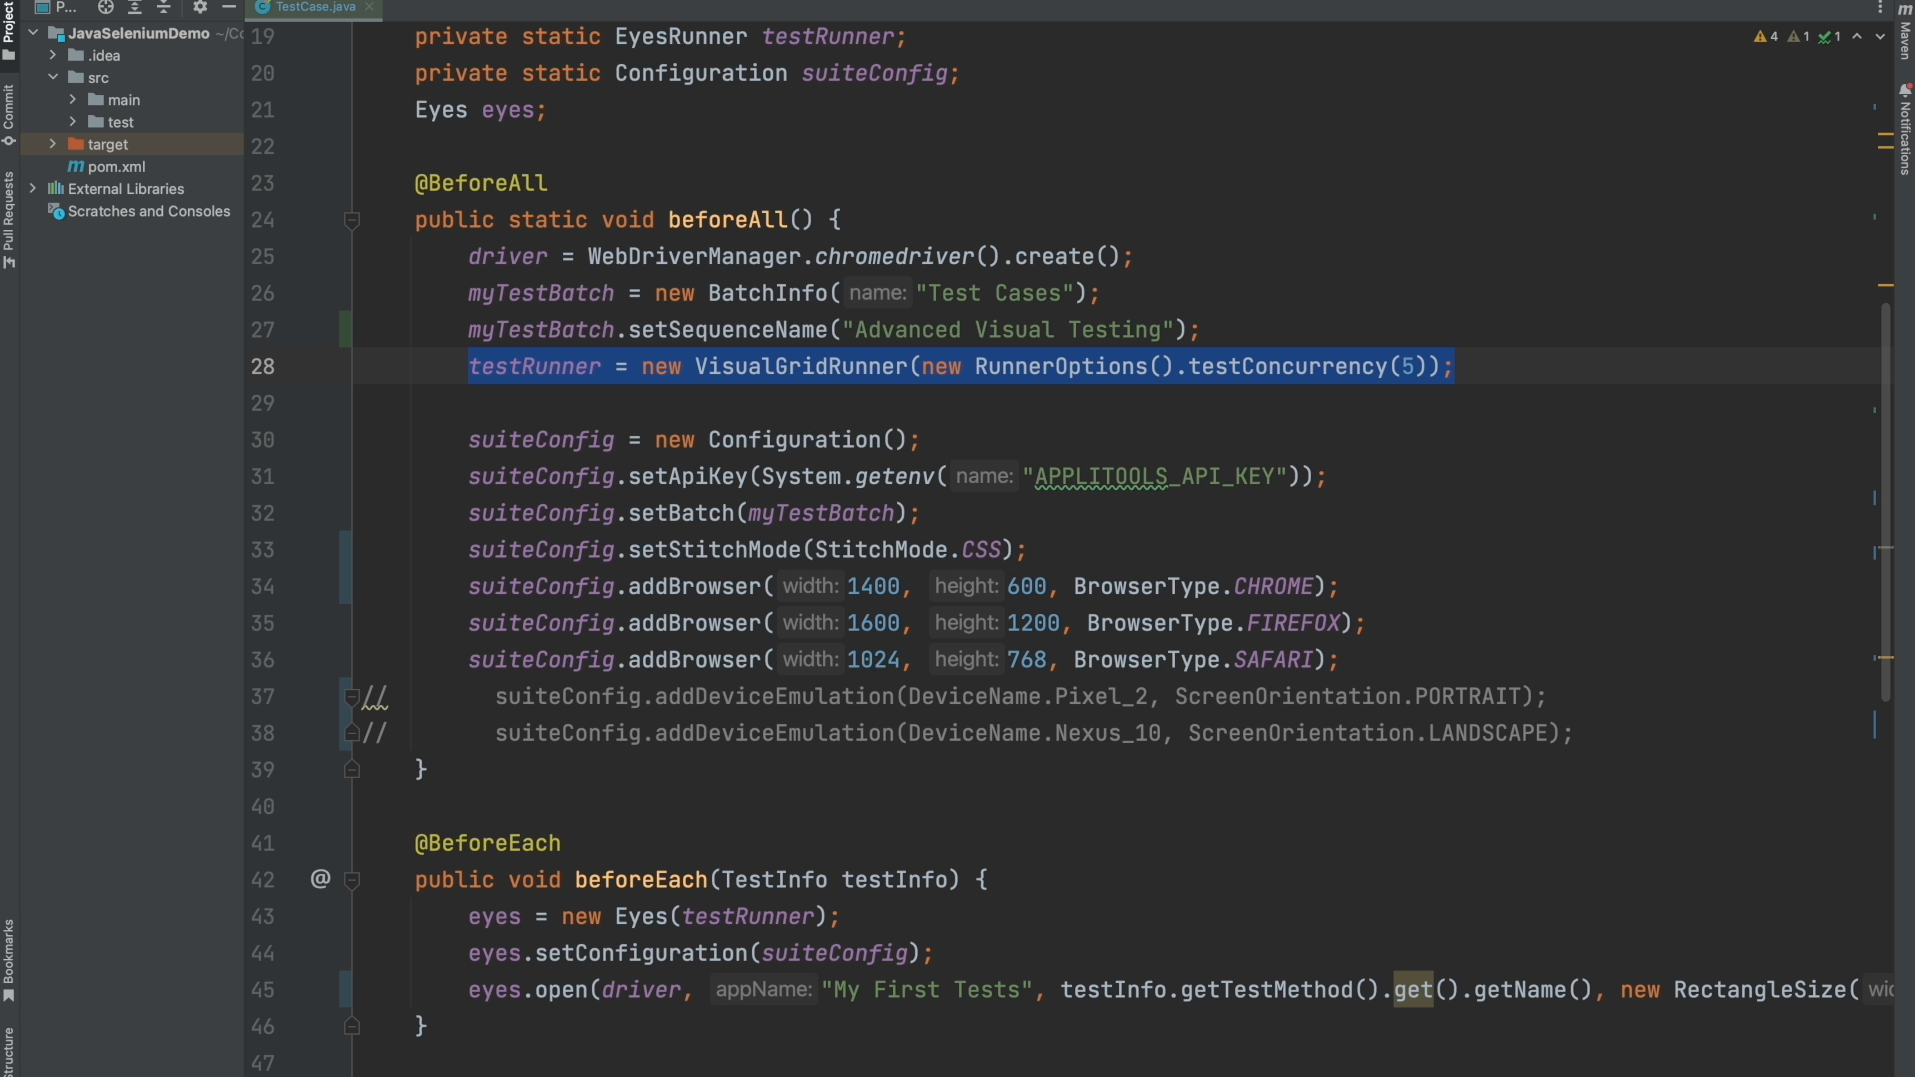
Let's go over the changes. Firstly, we set up our code to run with the ClassicRunner by changing our testRunner variable to an instance of the ClassicRunner. This will run our tests in Classic mode rather than the Ultrafast Grid. Feel free to just comment out the VisualGridRunner right above it since we'll be switching back to that shortly.
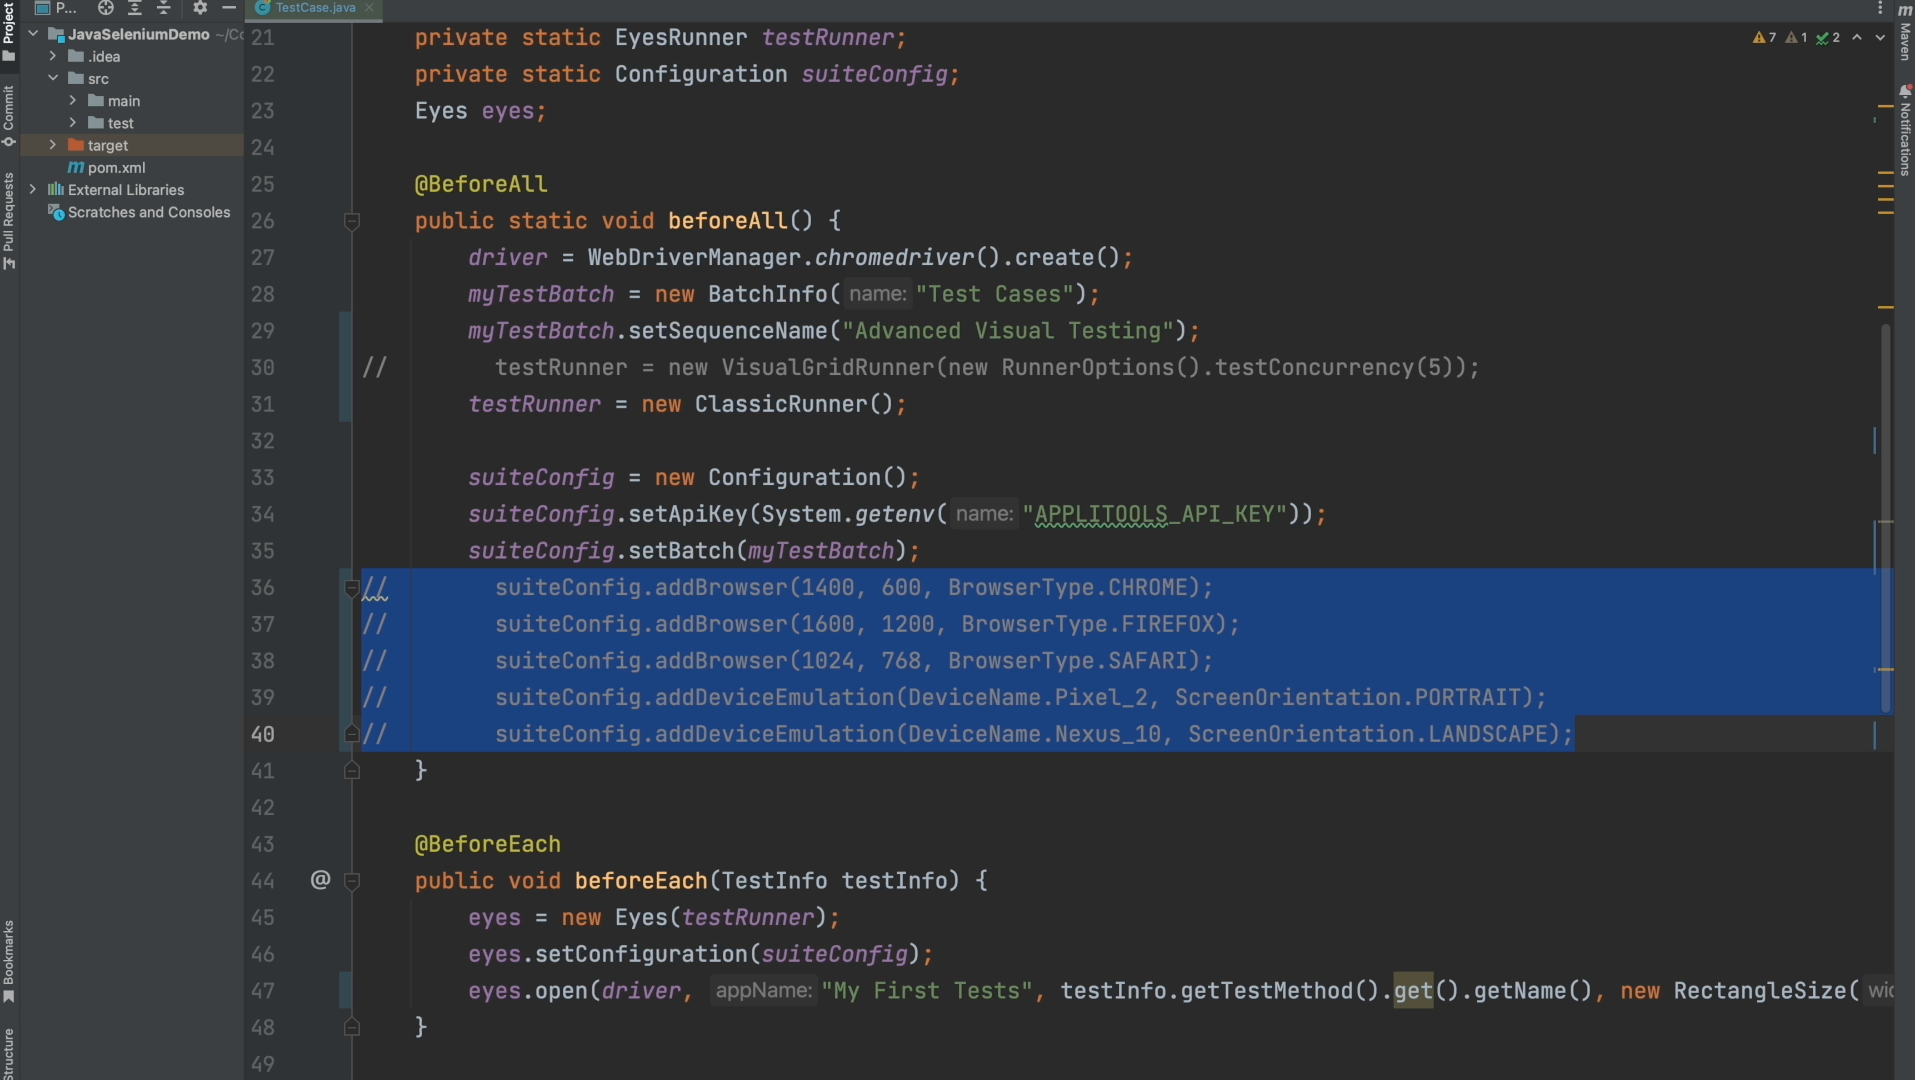
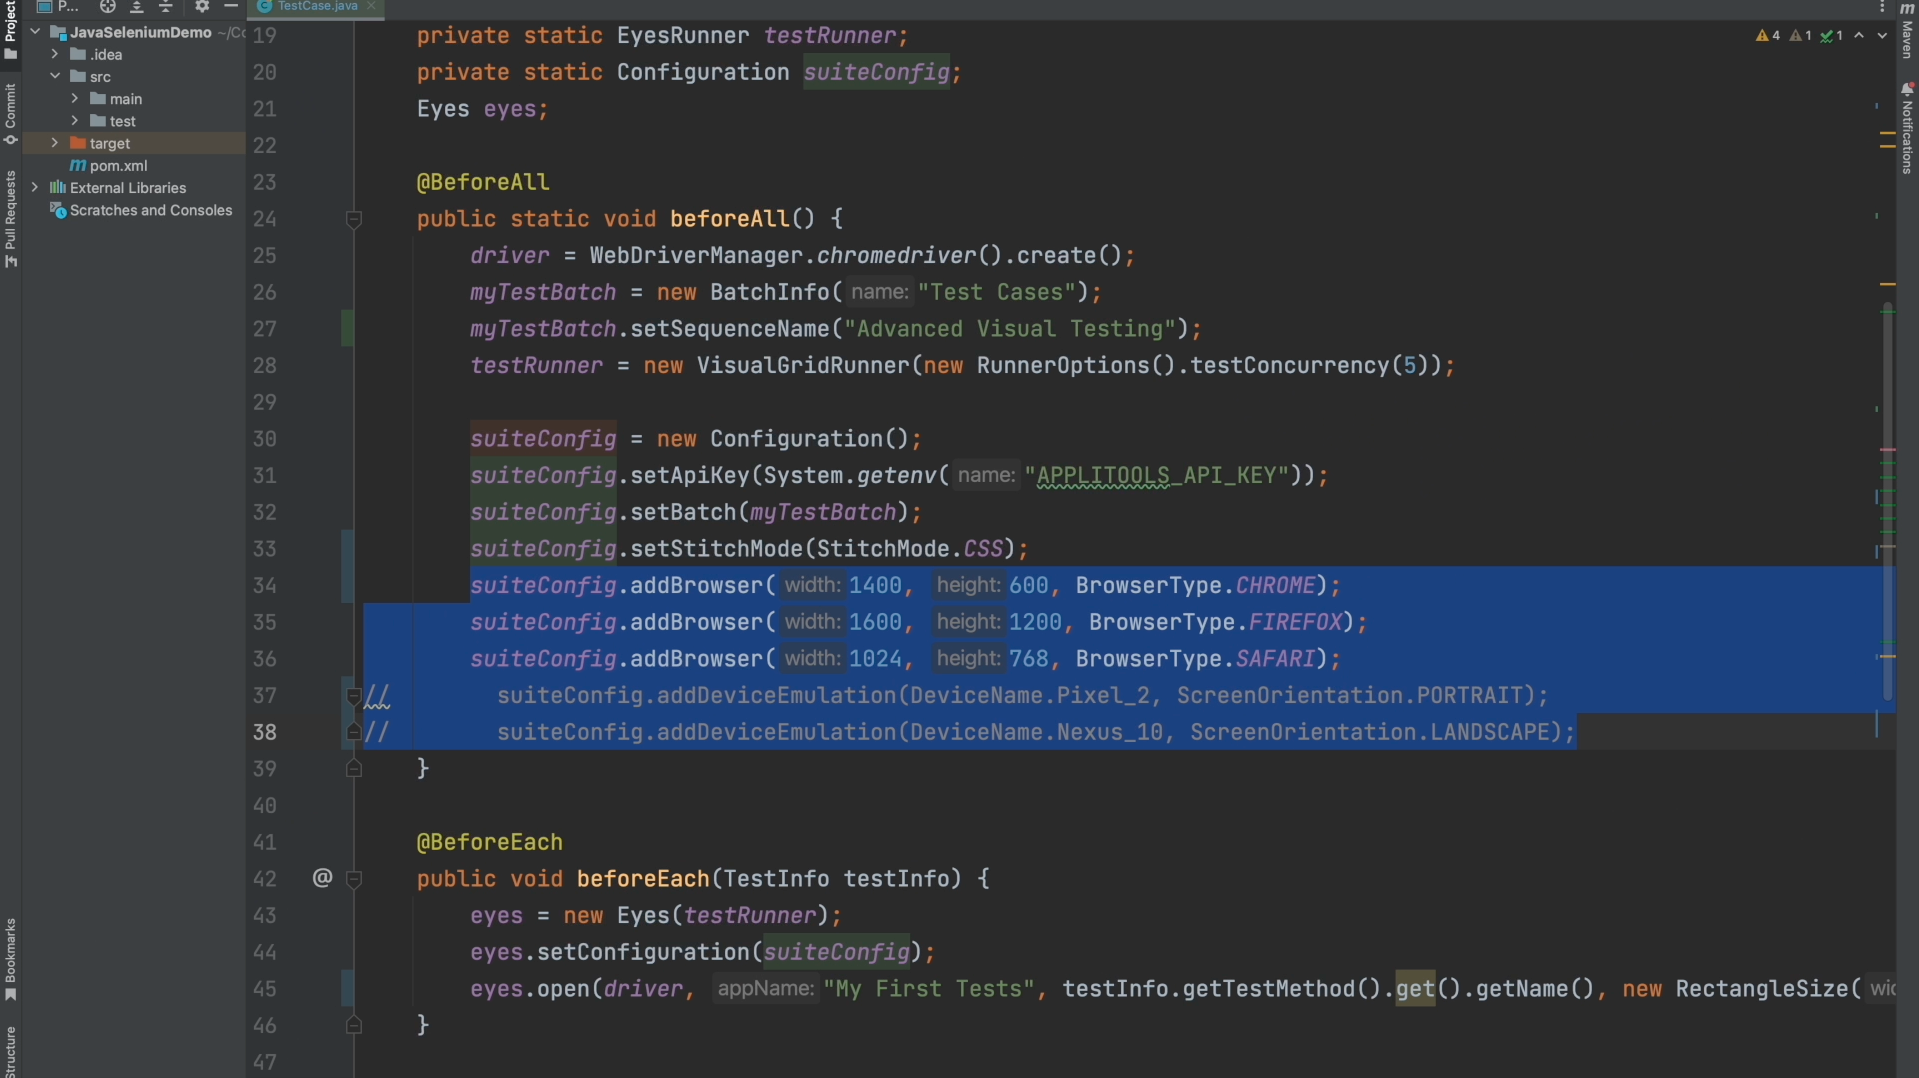
Since we're not running with the Ultrafast Grid for this test, we can comment out all of the browsers that we're applying to our Configuration object.
When running in the classic mode, viewport screenshots are the default. Therefore, if we want to capture a full page screenshot we need to call .fully(). Calling .fully() with no argument will set the value to true by default.

Lastly, I changed the test name so that a new baseline will be created. Let's go ahead and run this test and then review the results on the dashboard.
Here we have our screenshot that we just captured using SCROLL stitching. As we can see we definitely have the full page screenshot here but you may notice that something looks off. For some reason this sidebar over here and the header bar that's supposed to be at the top are both repeated throughout the entirety of our screenshot.
If we head over to the actual page that we're testing, we can see that when we scroll down, both the sidebar and the headerbar are fixed. This is exactly what happens when the Eyes SDK scrolls the page using the SCROLL StitchMode. Because of these sticky elements, we should capture this page using CSS stitching instead of SCROLL Stitching. Let's head back to our code and make a quick change.
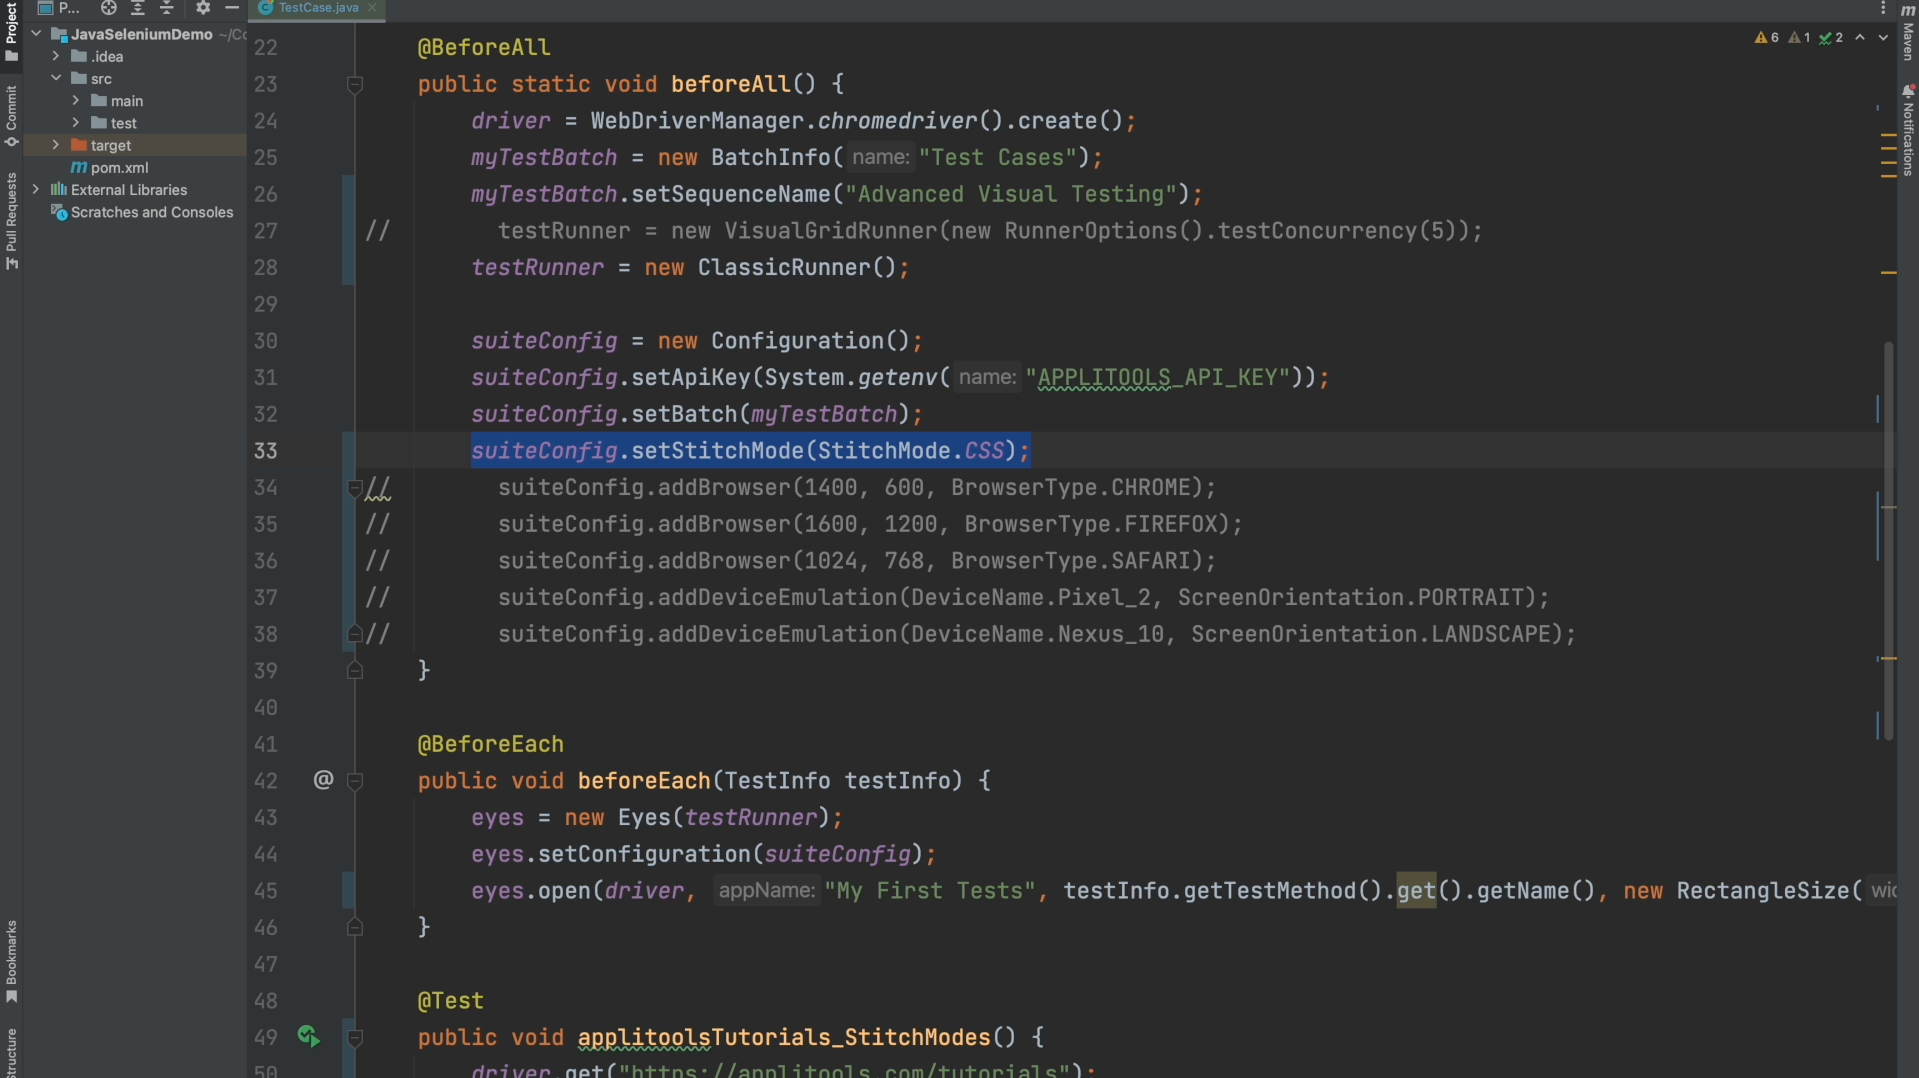
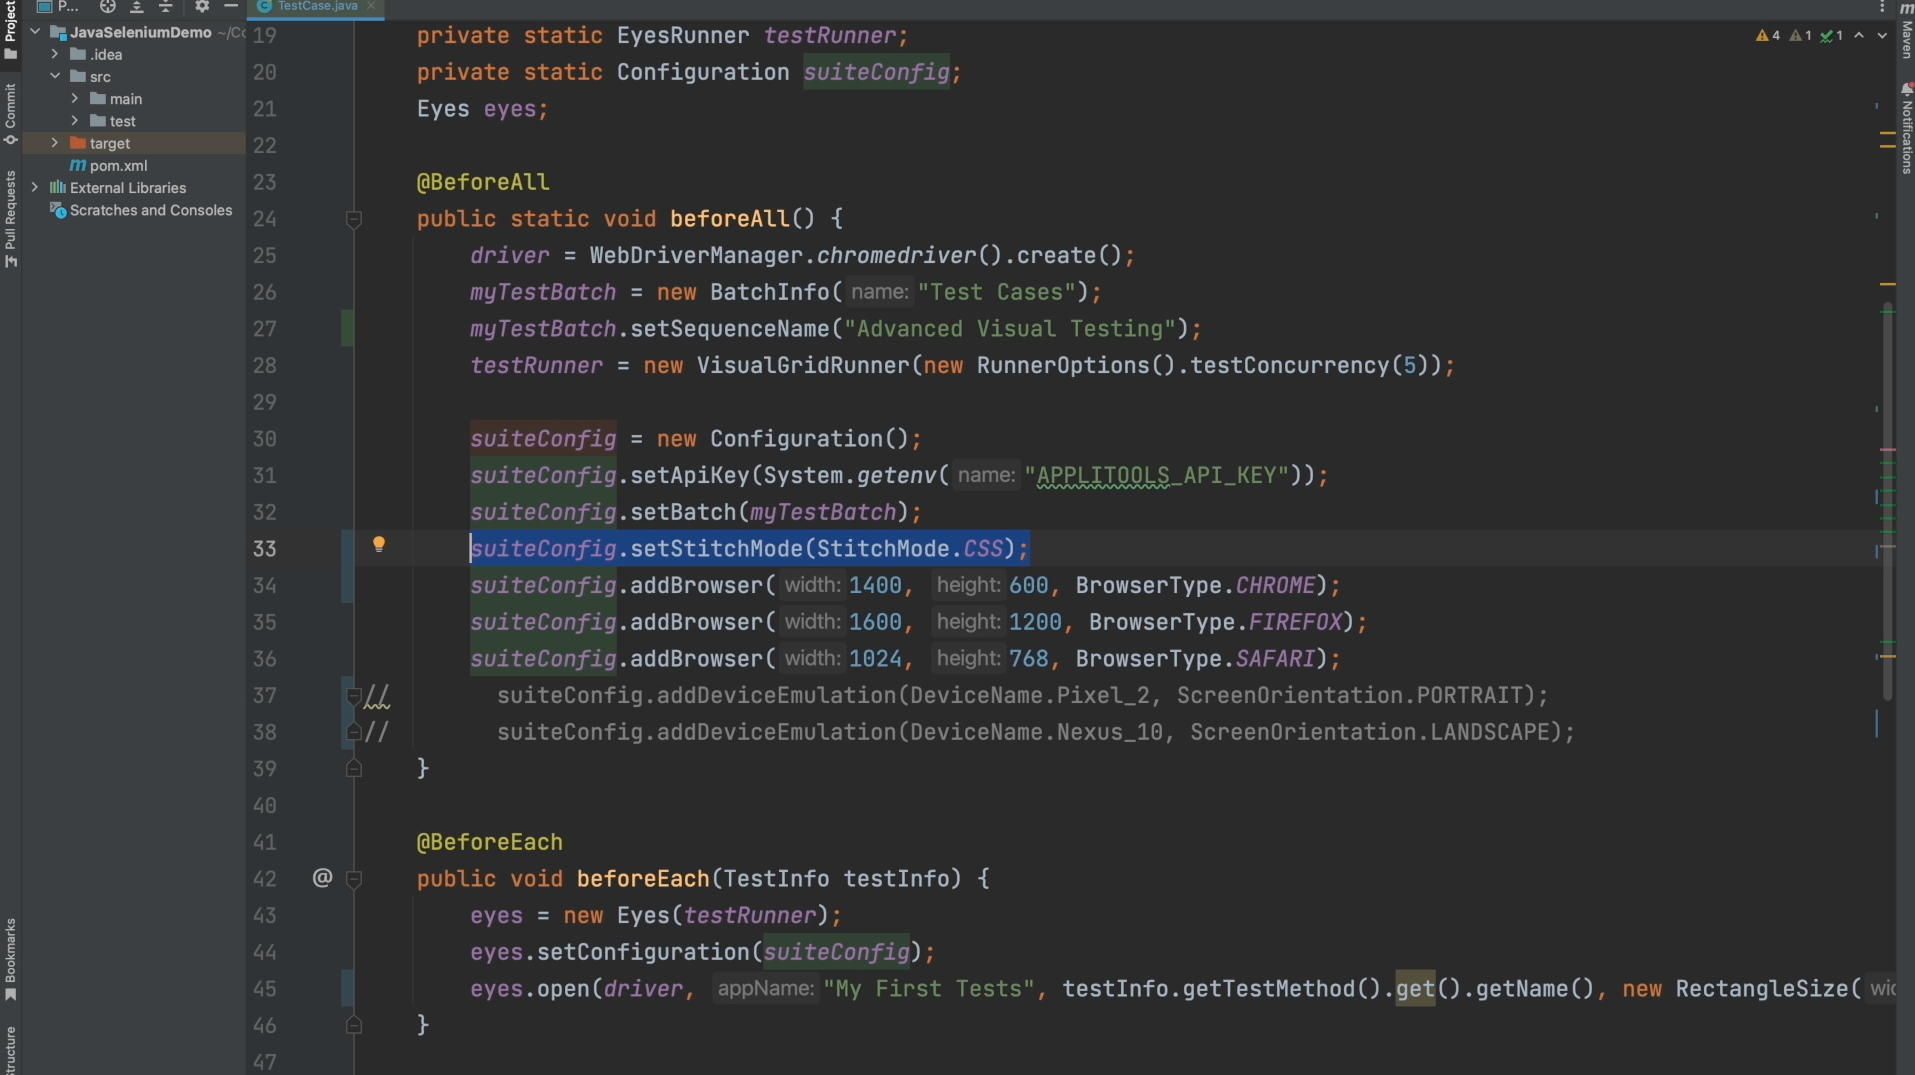
To run our test with the CSS Stitchmode, we need to make a call to setStitchMode on our configuration object and pass in the CSS option from the StitchMode enum. Let's run our test once again and then check out the difference on the dashboard.
Here we have our new checkpoint image on the right using CSS Stitchmode. Using CSS StitchMode has prevented the sticky elements on the page from repeating throughout our full page screenshot. We can still see them at the top of the screenshot but the rest of the screenshot comes back clean.
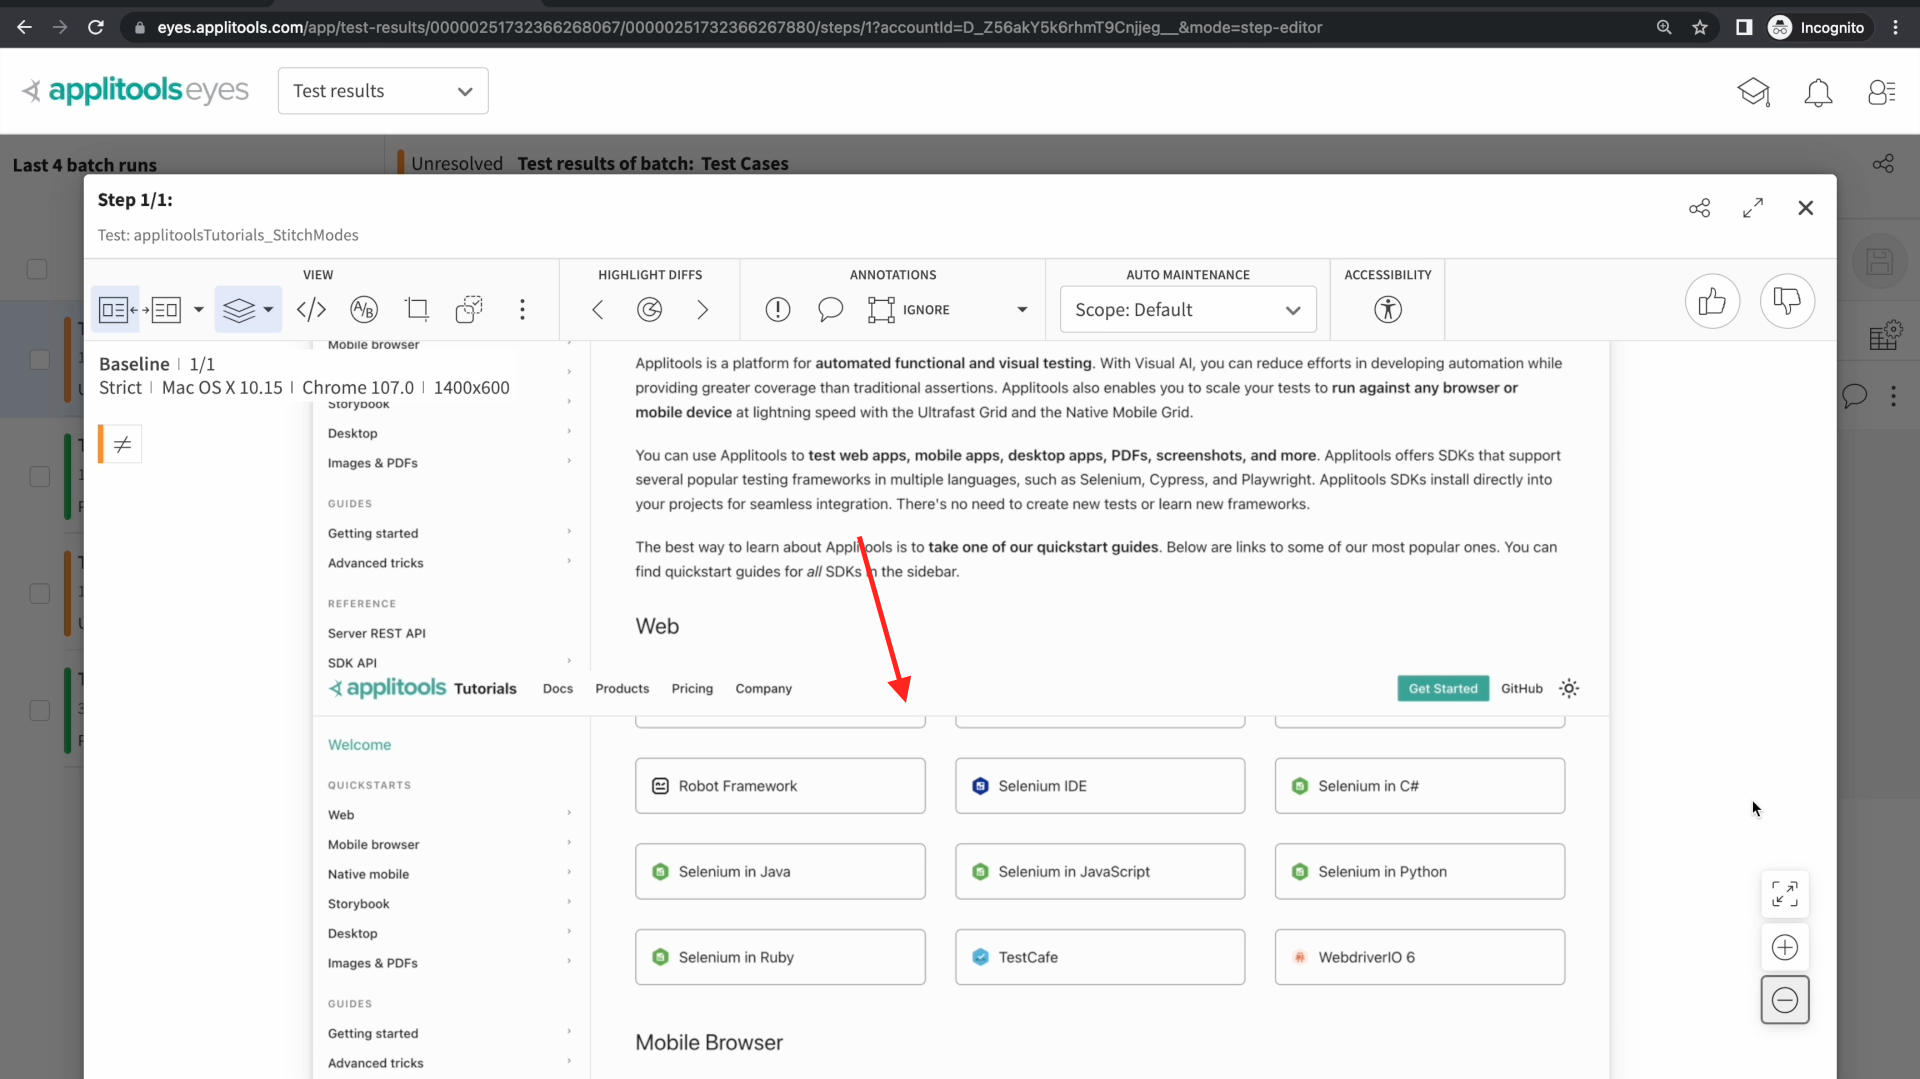
Ensuring that you don't have repeated elements in your screenshots is important because if we look at this section here, the header bar is blocking some of the content on our page. If there was a visual bug that occurred in this section we wouldn't have captured it. This is why it's important to ensure you use CSS stitching when you have fixed elements on your webpage so that these elements can be visible and visually validated.
In this case, CSS Stitching was the best tool for the job to capture a clean screenshot of this page. For other pages, for example a page that only loads content when you scroll to it, you may find that you need SCROLL stitching. Each StitchMode has its use cases and it's important to understand how each of them differ in order to pick the best tool for the job.
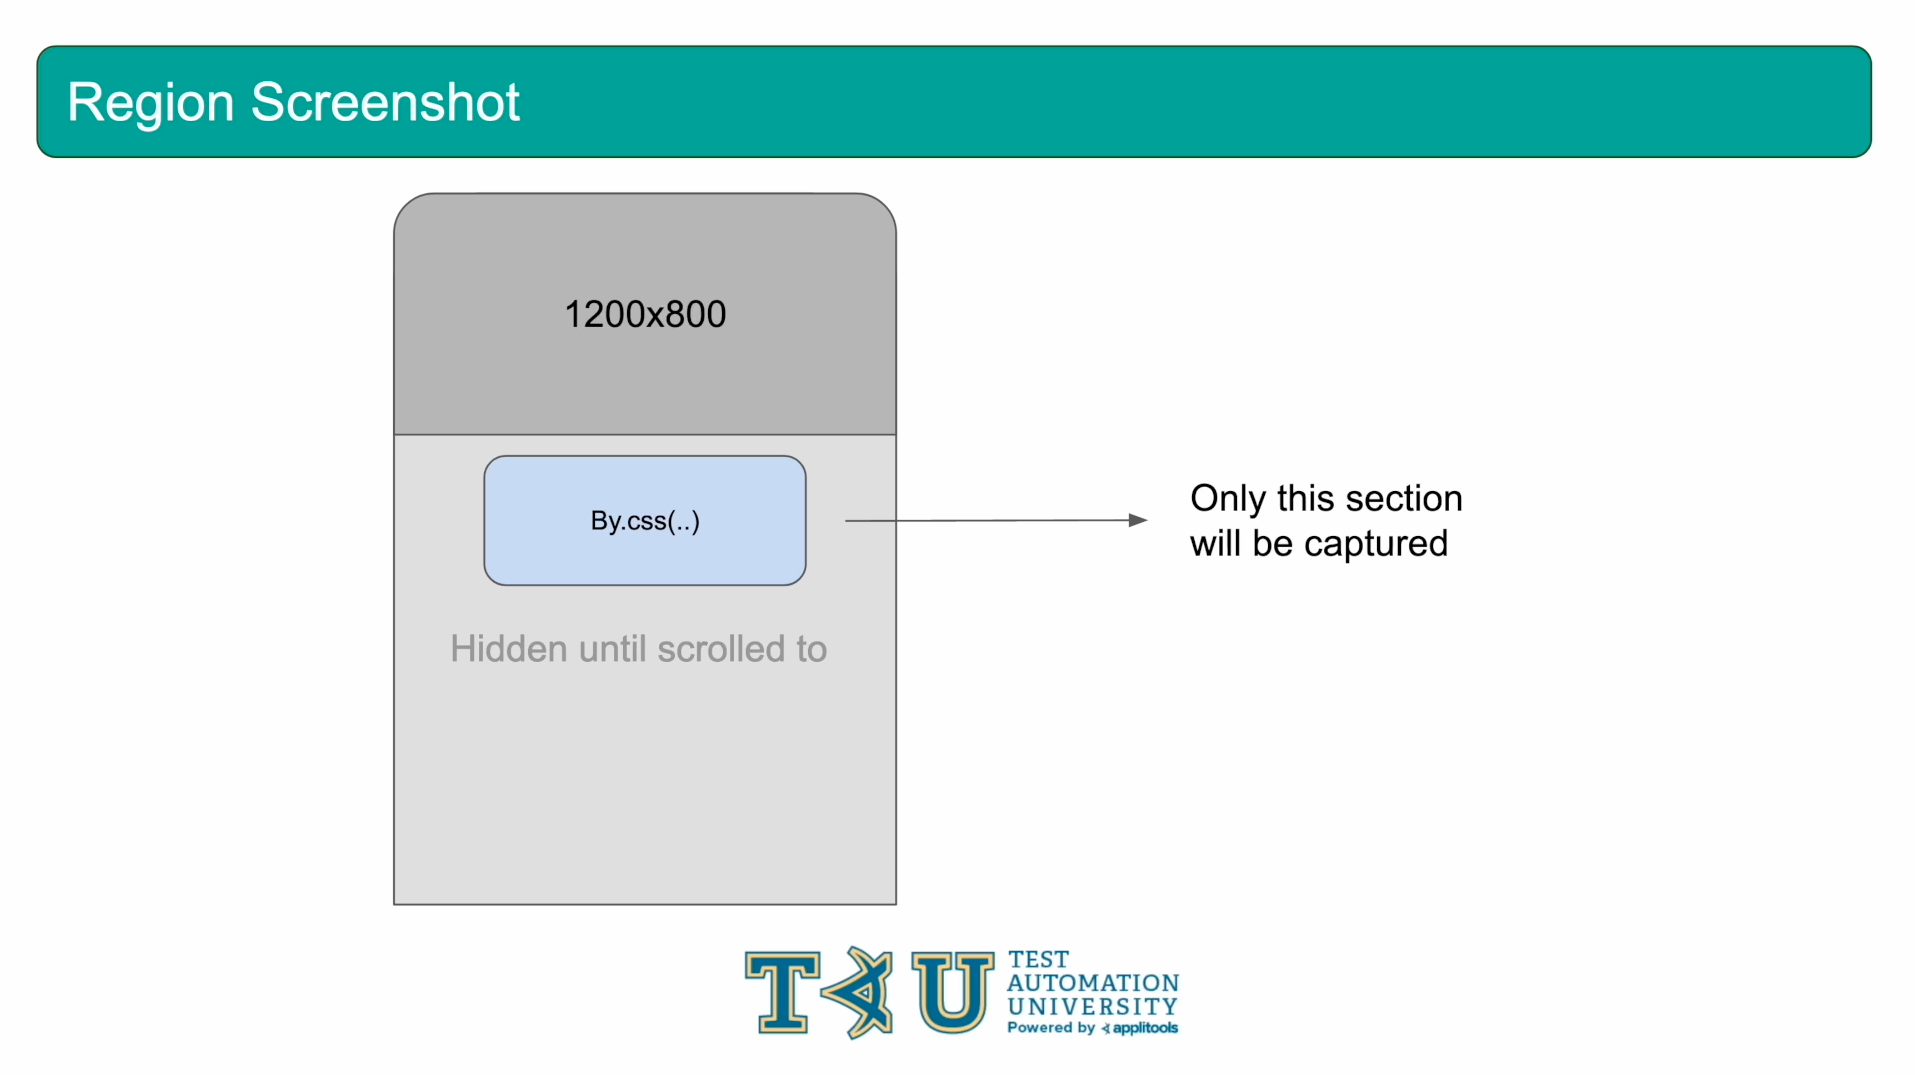
The final type of screenshot we're going to look at is a region screenshot. As you can guess by the name, this type of screenshot allows you to capture a specific portion of the page.
You can target a region of the screen using selectors, element references, coordinates and more. Let's jump right into an example of a region screenshot.
Let's go ahead and review the changes. The first change I've made is changing our runner object back to a VisualGridRunner.
I also uncommented the desktop browser configuration options only. Please uncomment at least 1 of these options depending on how many you'd like to run. I left the mobile environments commented out for this test since the region we're going to capture is only visible on desktop browsers.
Since we're running with the Ultrafast Grid there is no longer a need to specify the StitchMode since the Ultrafast Grid uses CSS Stitching by default. We can go ahead and remove this from our configuration.
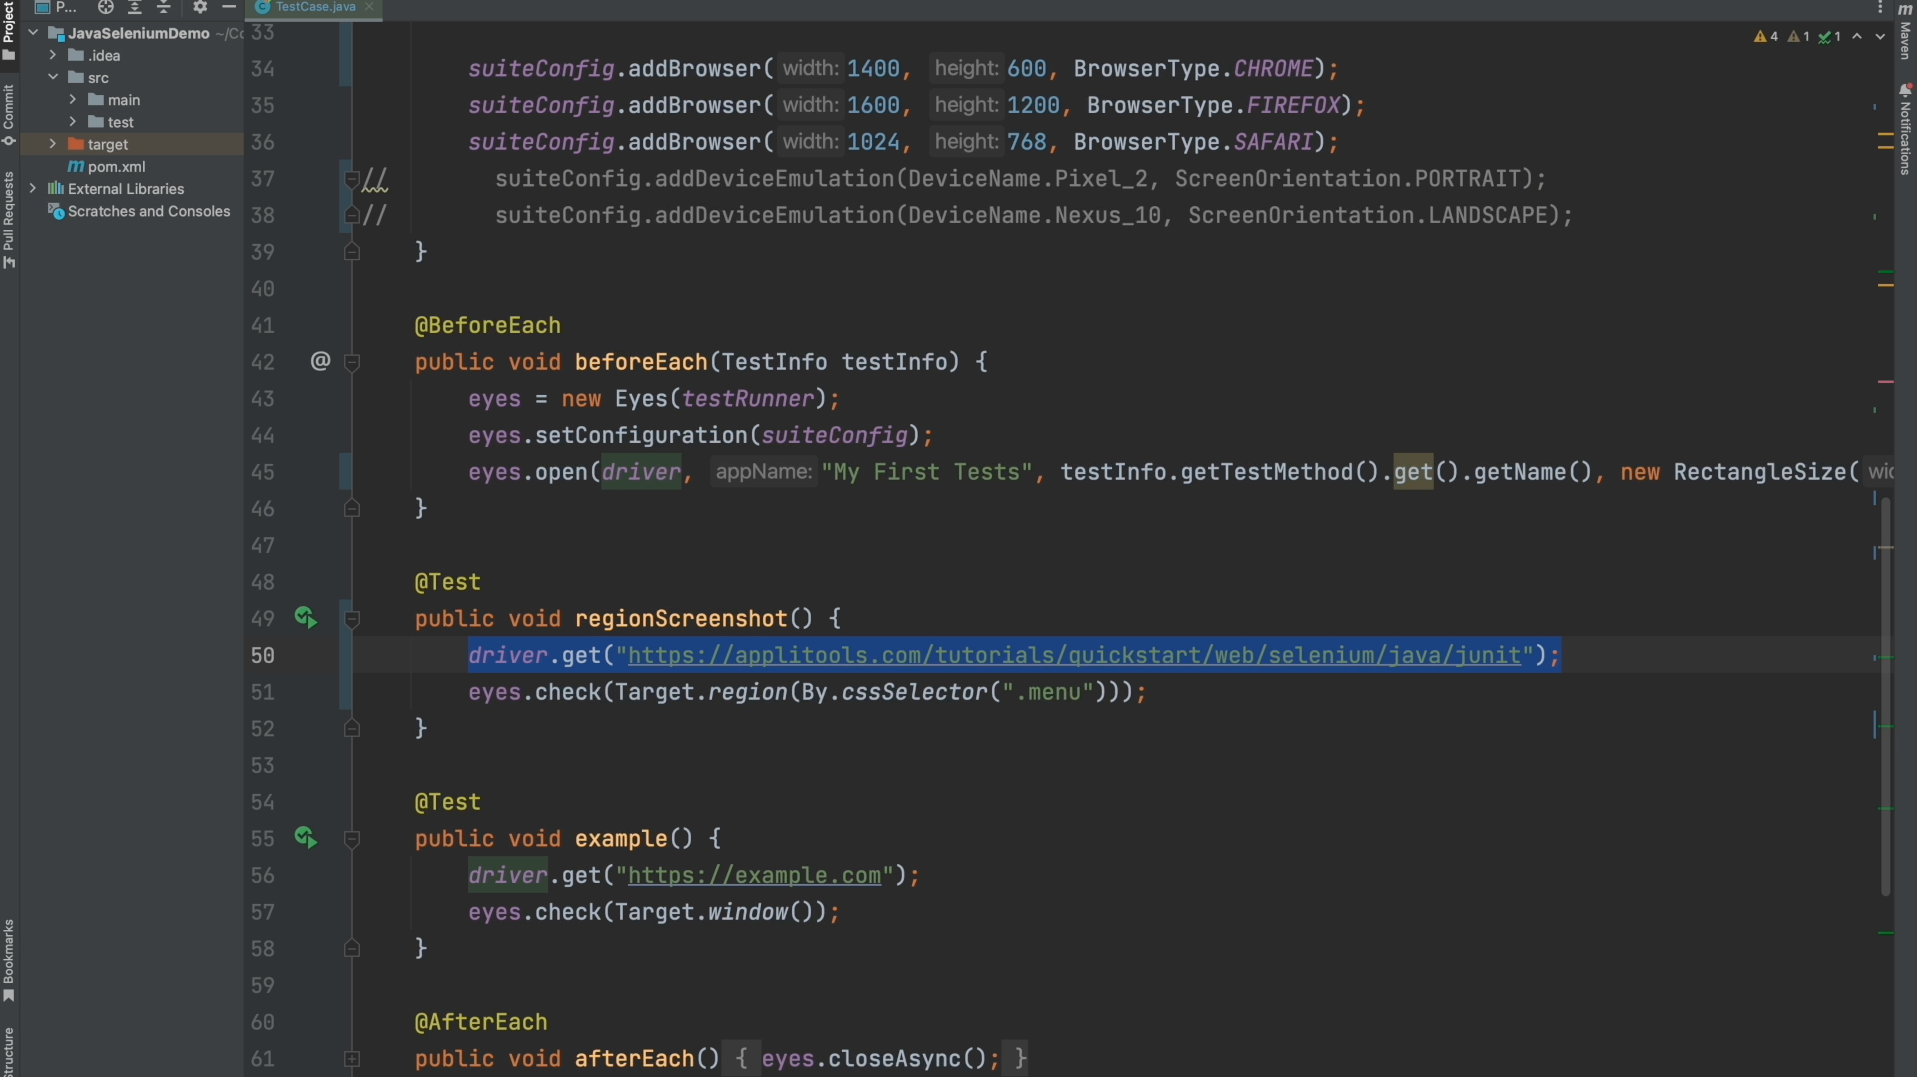
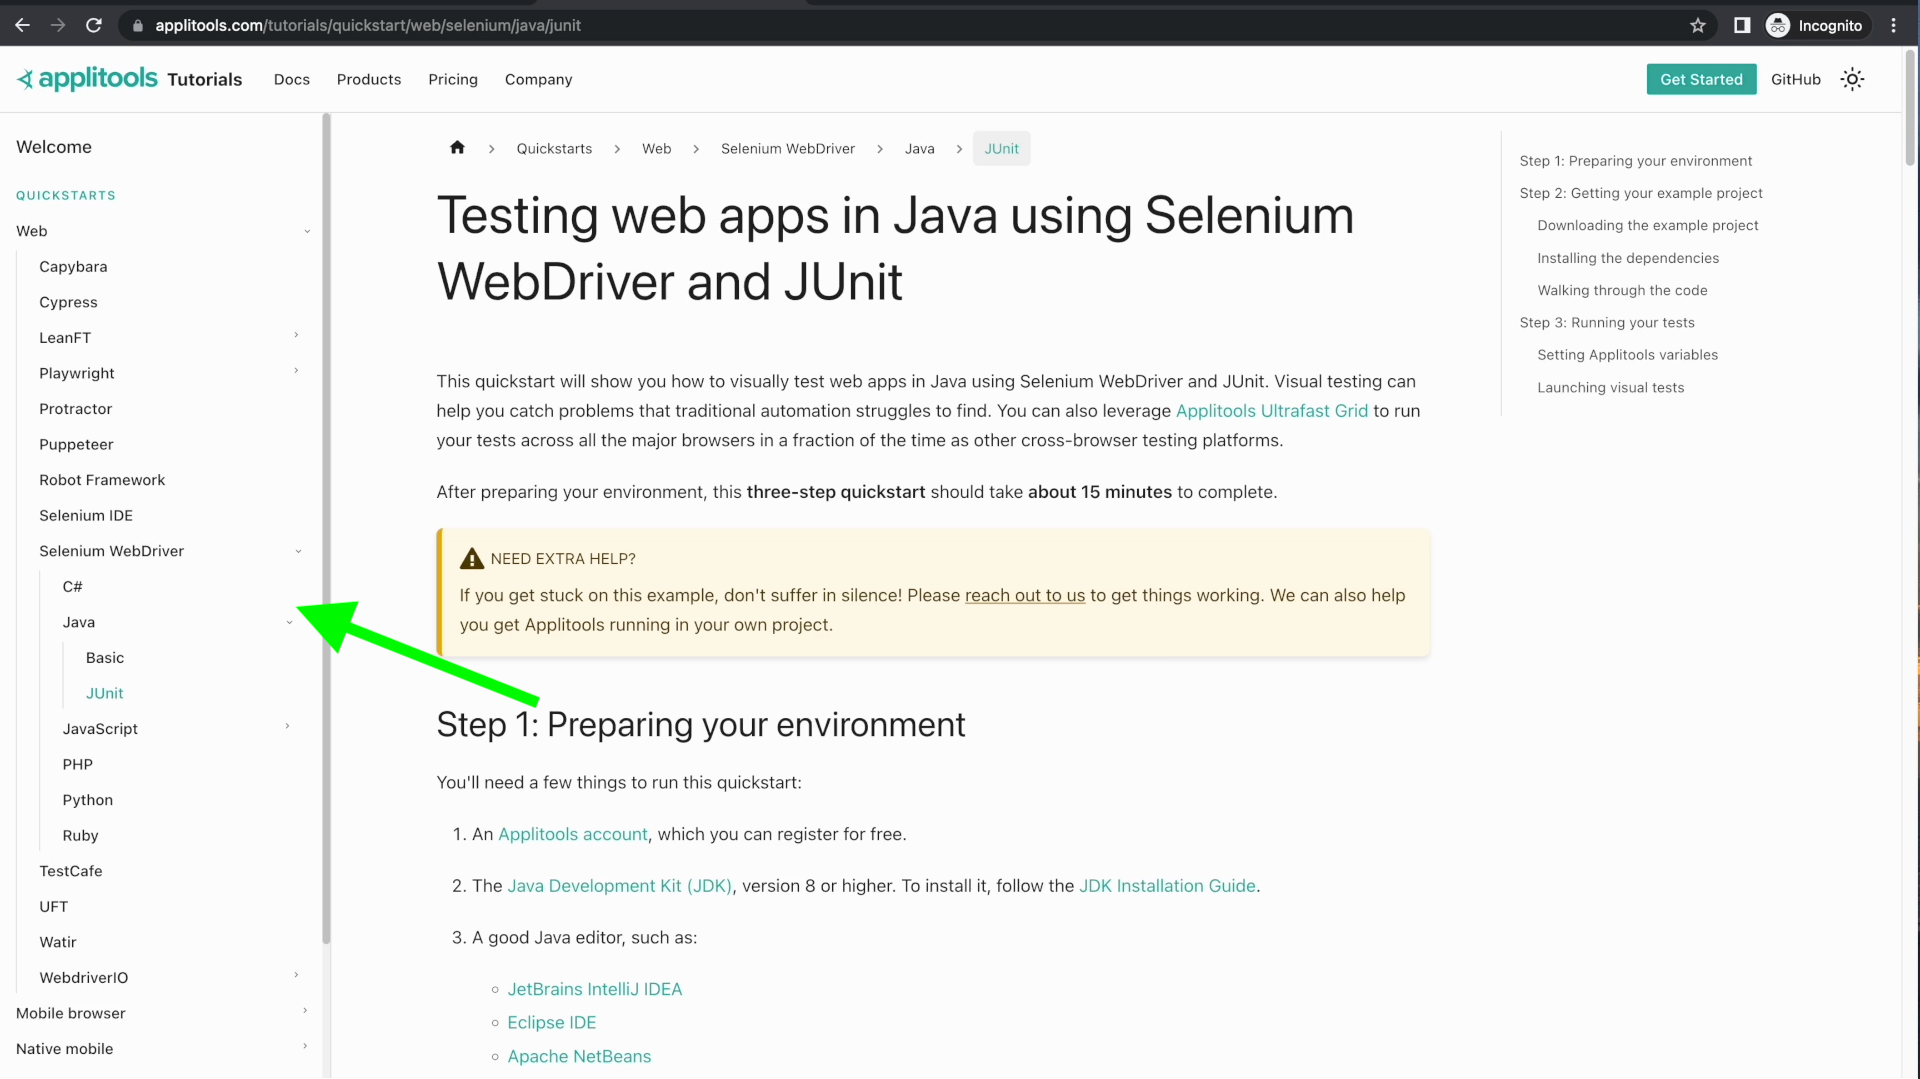
For this test, I changed the URL that we're testing to be our Java JUnit Tutorial. This is a long URL so feel free to copy it from the writeup down below: https://applitools.com/tutorials/quickstart/web/selenium/java/junit
To take a region screenshot, instead of calling Target.window(), we need to call Target.region(). To specify the region you want to capture, you can pass in a few different types of options to the Target.region() method. I'm not going to go over all of the options available but if you're interested, I've linked some documentation down below. In our case, we've passed in a Selenium By object that is referencing the CssSelector .menu.
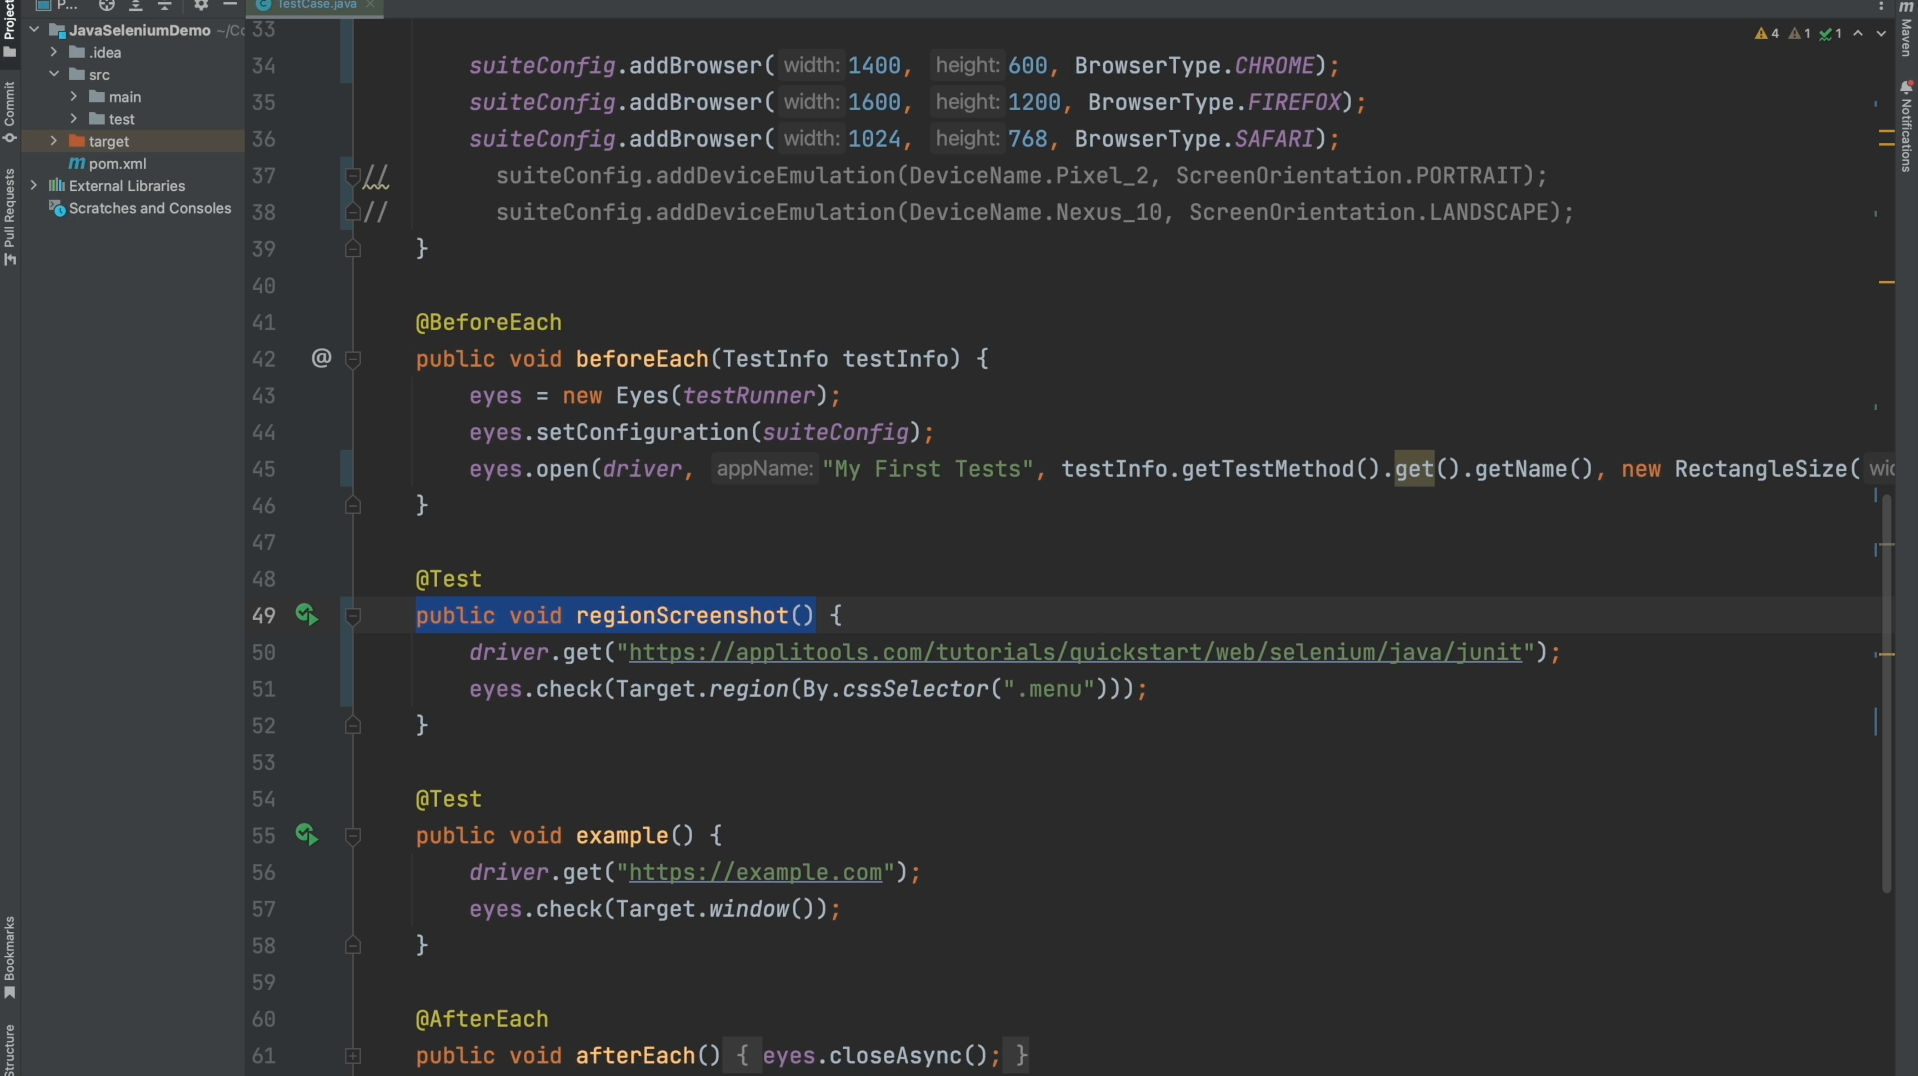
Lastly, I changed the test name once again so that we have a fresh baseline to work with. Let's go ahead and run this test and then review the results.
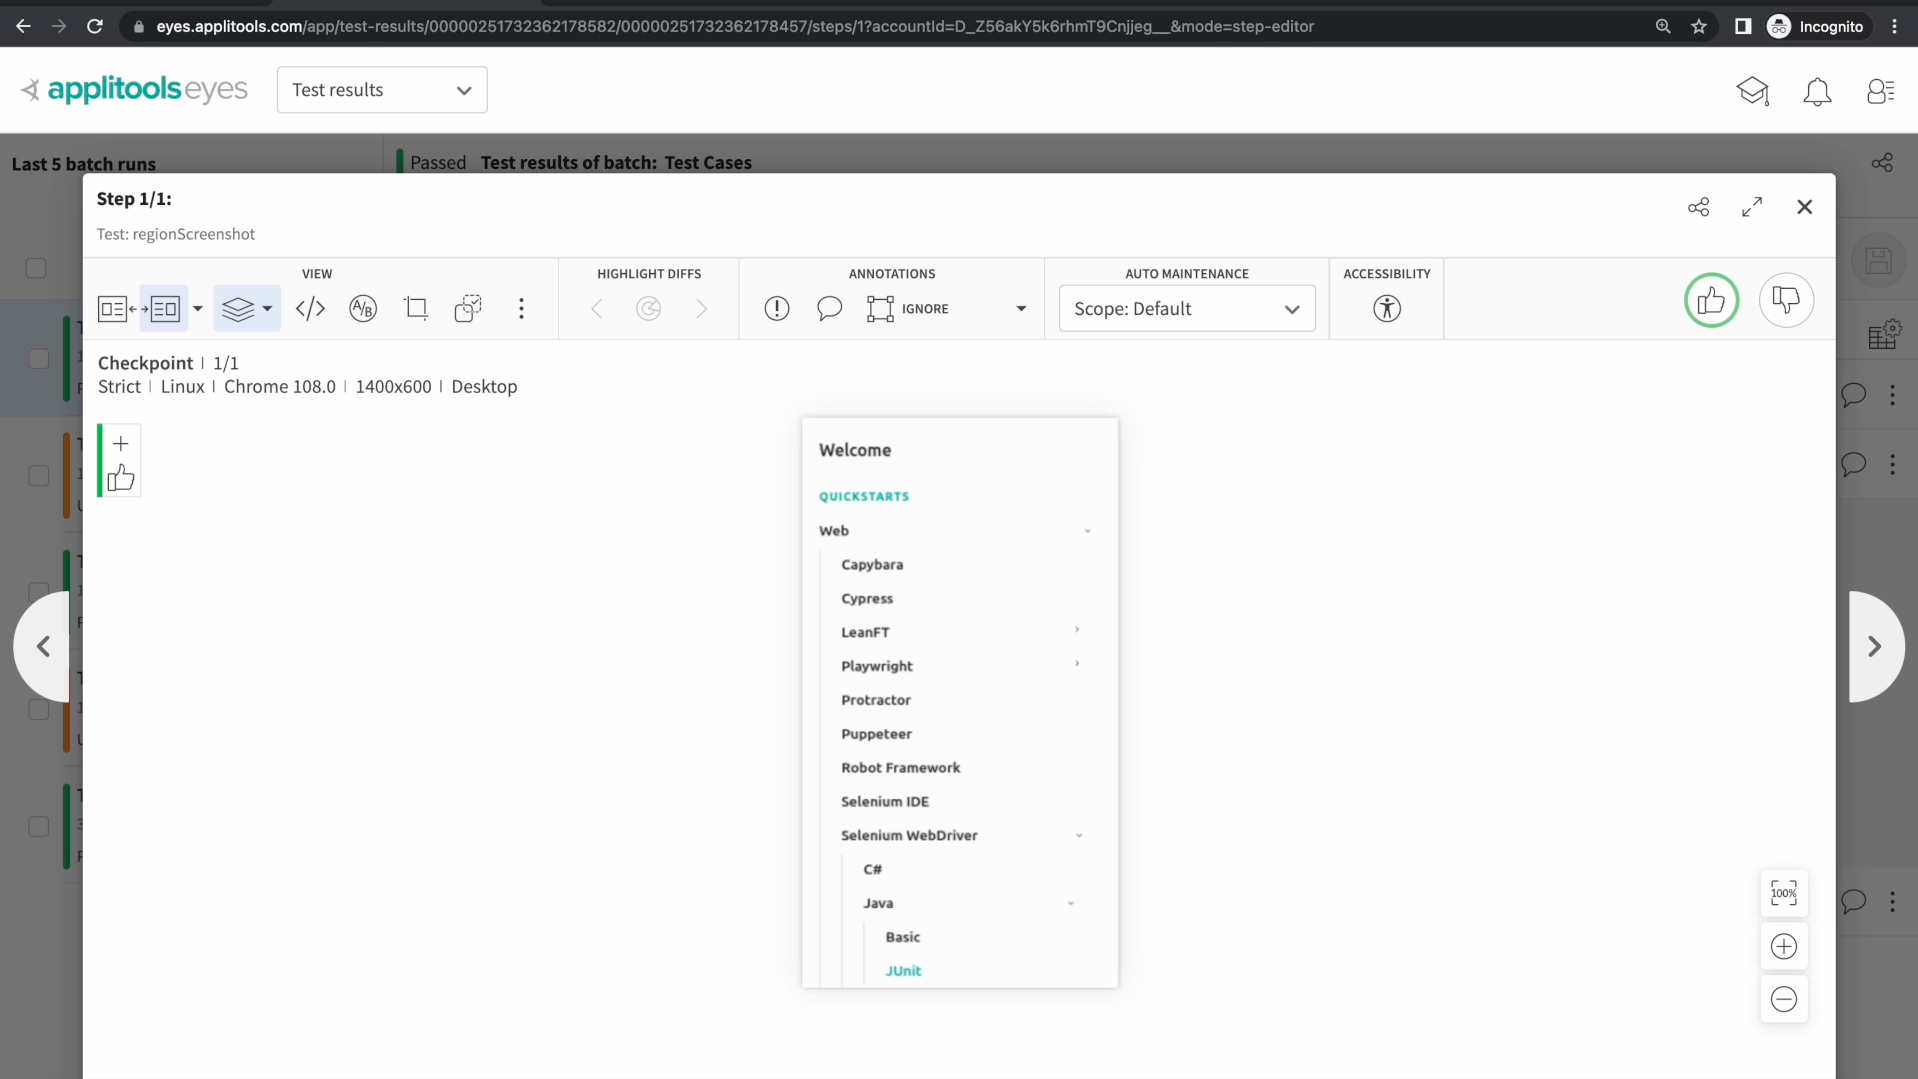
As we can see from our test result, we are capturing only a section of the page that we're interested in rather than capturing the viewport or the full page. However, it looks like our region was cut off. Let's check out the page and try to understand why.
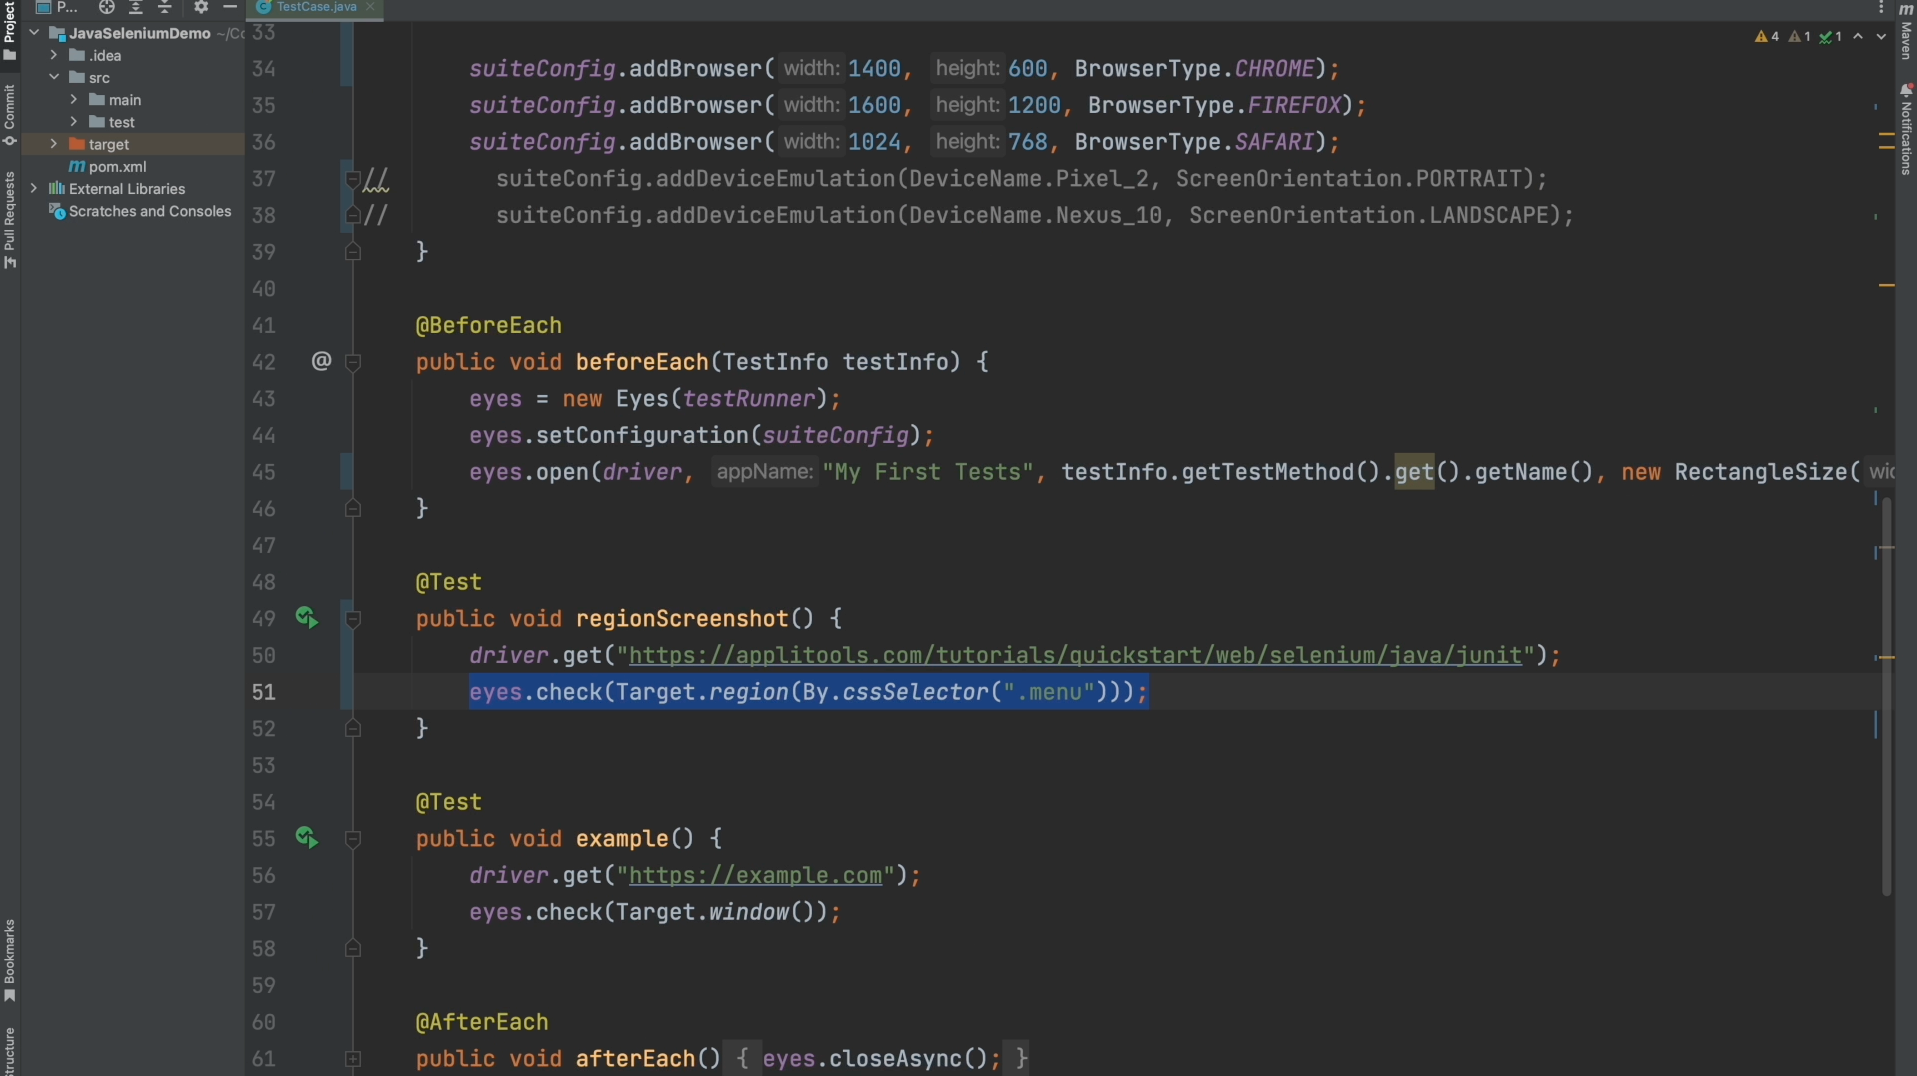
As we can see on this Tutorial page, we are trying to capture the side bar over on the left. This region is very large and has its own scroll bar within it. By default, a region screenshot will only capture the visible portion of the desired region. If we want to capture the full region, we need to alter our code. Let's go back to our code and make a quick change so that we capture the full height of the region.

To capture the entirety of our region, the only change we need to make, and I'm sure that some of you guessed it as well, is adding our call to .fully(). Now, our check call is saying I want to capture just this specific region but be sure to scroll it all the way down and capture the full height. Let's run the test once again and compare the results to our first screenshot.
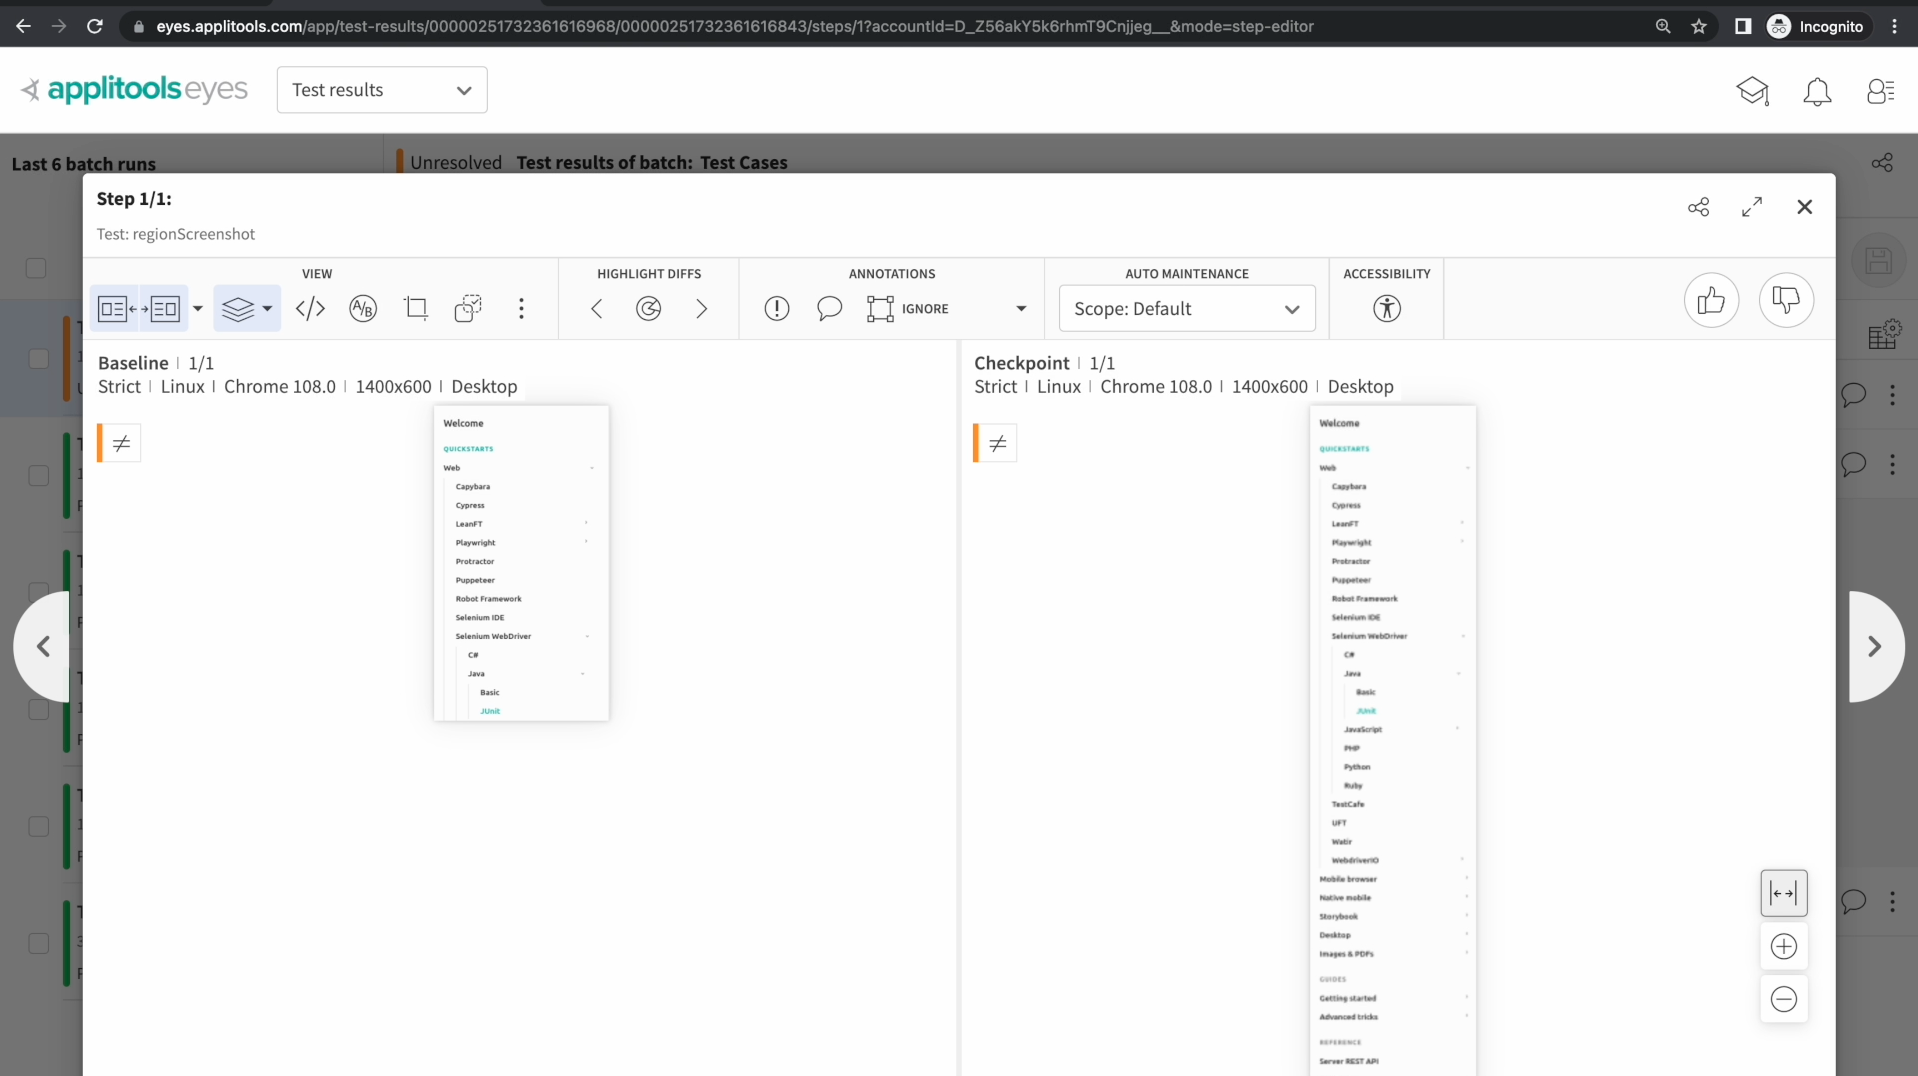
Over on our dashboard, we can see that we now get the full height of the region. When the region you're trying to capture has its own scrollbar, you can use the .fully() method to ensure the full height of the region is captured.
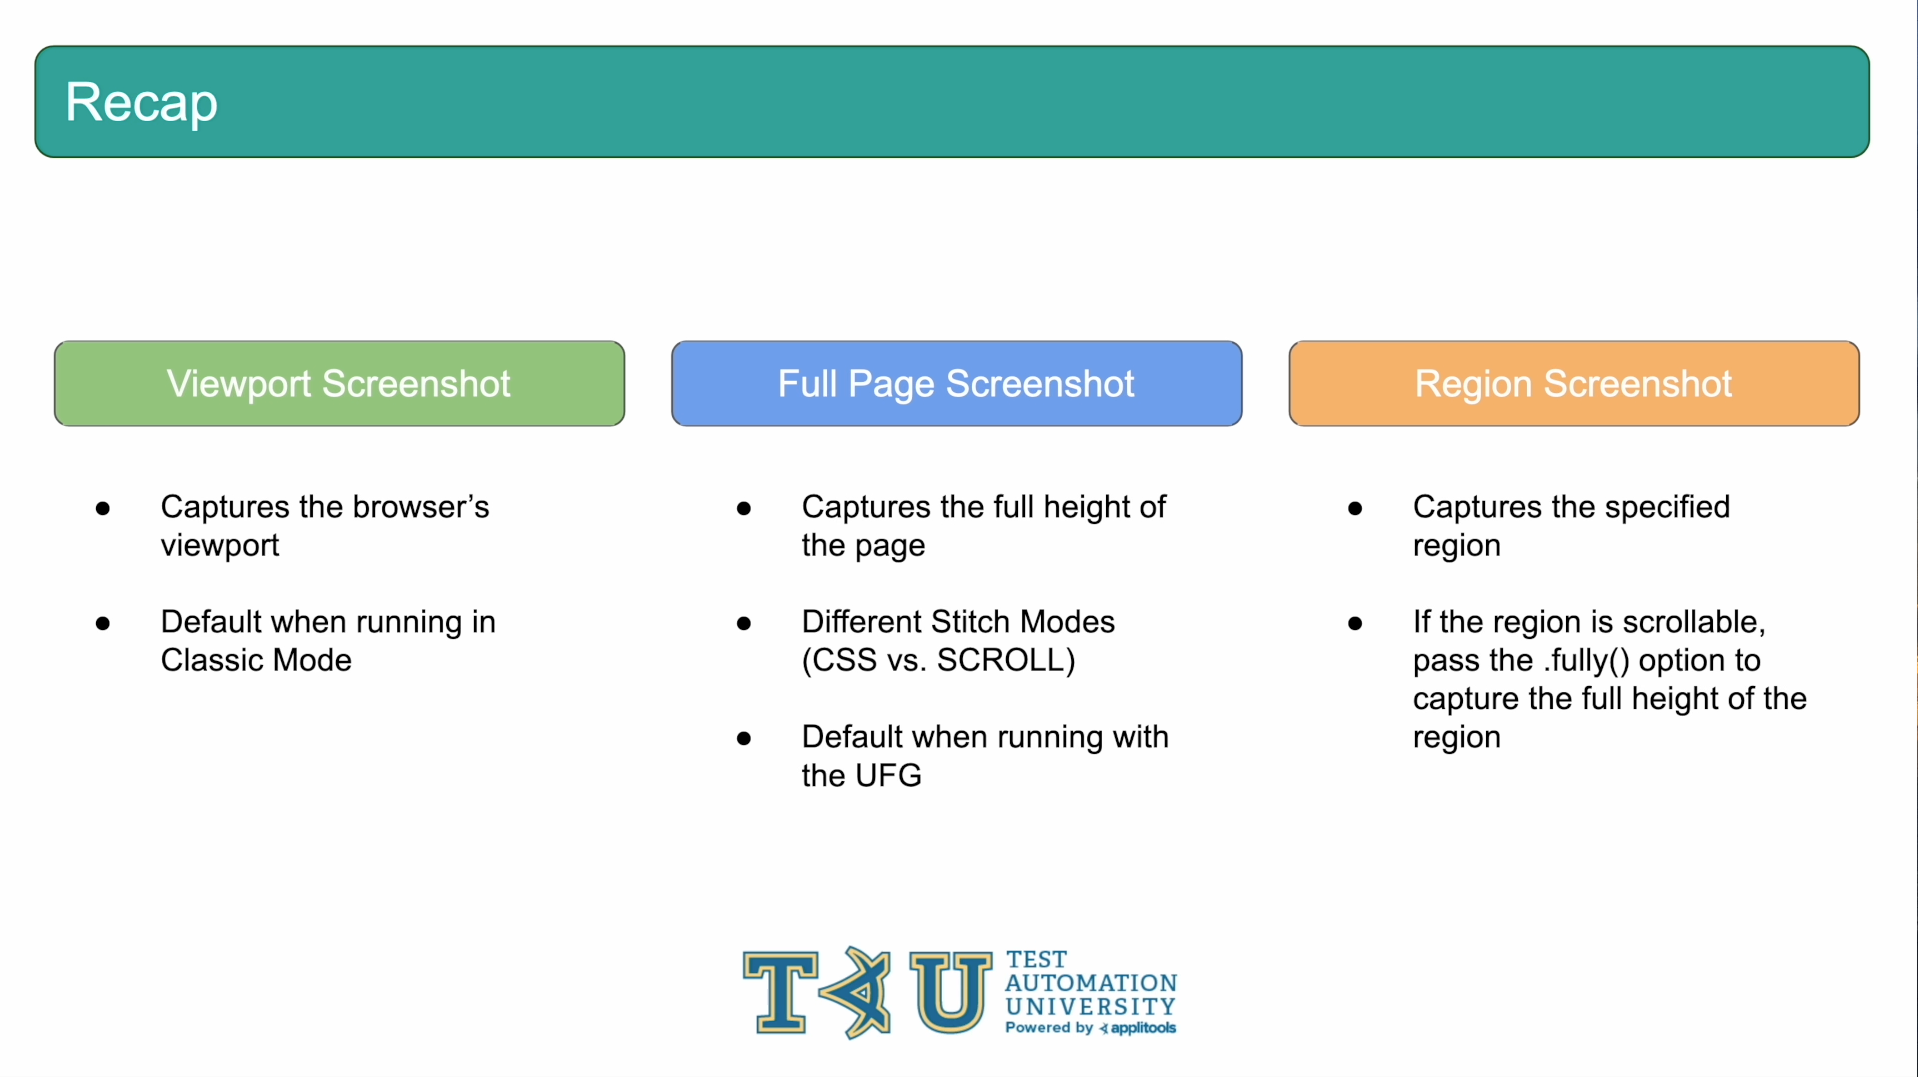
Let's go ahead and review everything that we covered in this chapter. We first discussed viewport screenshots and saw how we can tell Applitools to capture just the portion of the page that is visible in the browser's viewport.
Next, we discussed full page screenshots which capture the entire scrollable height of a page automatically. We learned about the two different StitchModes available to us and ran through a use case that required us to use the CSS StitchMode.
Finally, we took a look at region screenshots and how to use a CssSelector to target our desired region. Since our region had its own scrollbar we also added the .fully() method to capture the full height of that region.
Using these tools, you can capture pretty much any webpage. There are some other options that we'll get into in a later course but these 3 options are typically all you need to get full visual coverage. Based on your desired use case, you can pick and choose which type of screenshot to use to get the coverage that you need.
As a reminder, feel free to reach out to us using the support channels we mentioned at the beginning of this course if you have questions on any of the topics covered please don't hesitate. That's it for this chapter on screenshots. Great job running through these examples and I'll see you in the next section.
Resources
- JUnit Tutorial URL: https://applitools.com/tutorials/quickstart/web/selenium/java/junit
- Github Repo: https://github.com/applitools/JavaSeleniumDemo
- Target.region() documentation: https://applitools.com/docs/api-ref/sdk-api/selenium/java/checksettings#region-method
