

Transcripted Summary
In this chapter, we're going to go over one of the most important integrations offered by Applitools: the Github Integration. Even though I'm referring to this integration as the Github integration, it also supports Bitbucket and Gitlab.
This Integration allows you to sync your tests with your actions in source control. When you open a Pull Request and trigger your Applitools tests to run through a CI platform, you'll be able to see the test results directly on the Pull Request. Also, if the tests fail, it'll prevent the PR from being merged.
If you merge two branches in Github, it'll be synced automatically and applied on the Applitools server as well. This assists with keeping your Applitools branches in sync with your Github branches.
We'll start off this chapter by setting up the integration followed by running through some examples showing how it works. We'll also be building off of our knowledge of branching from the last chapter and batching that we've gained from the previous chapters. Let's go ahead and get started.
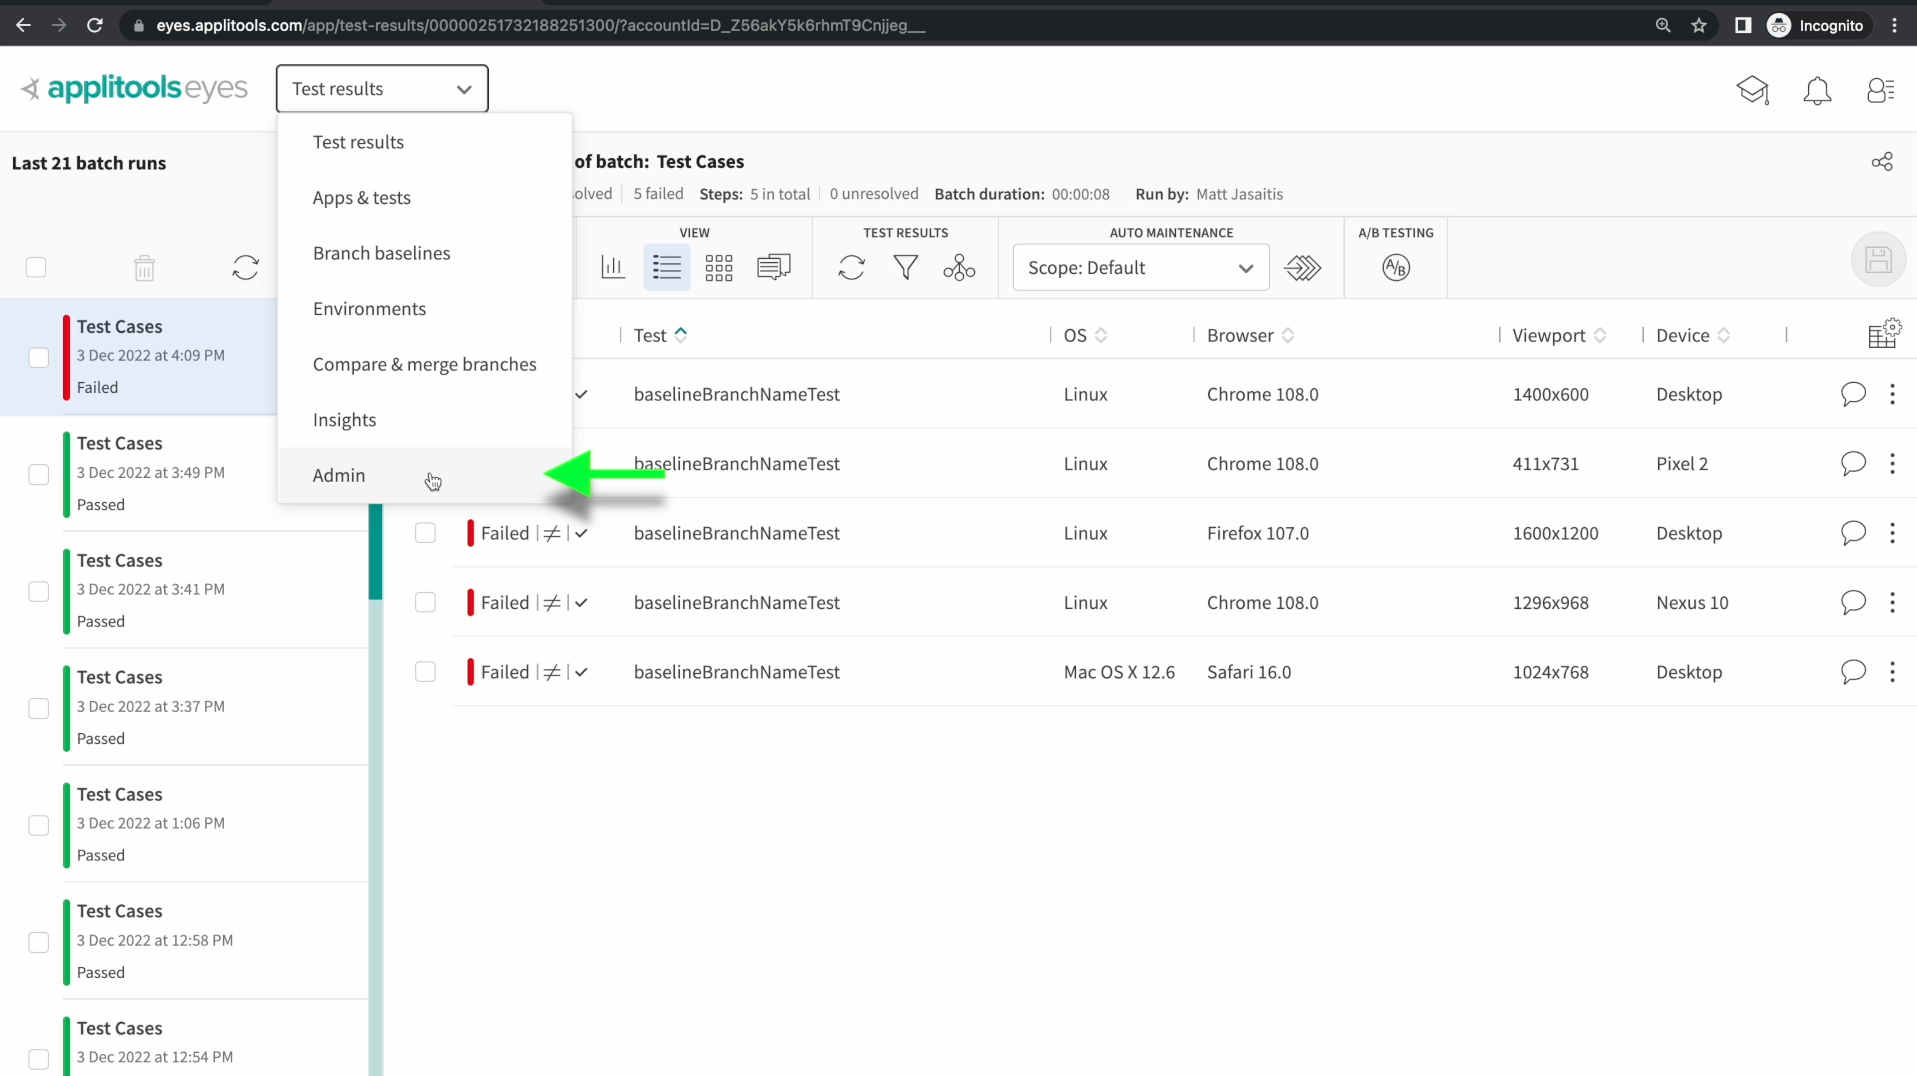
The first step to setting up our Github integration is navigating back to the integrations tab for our team. To get there, first select the admin option from the dropdown on our dashboard.
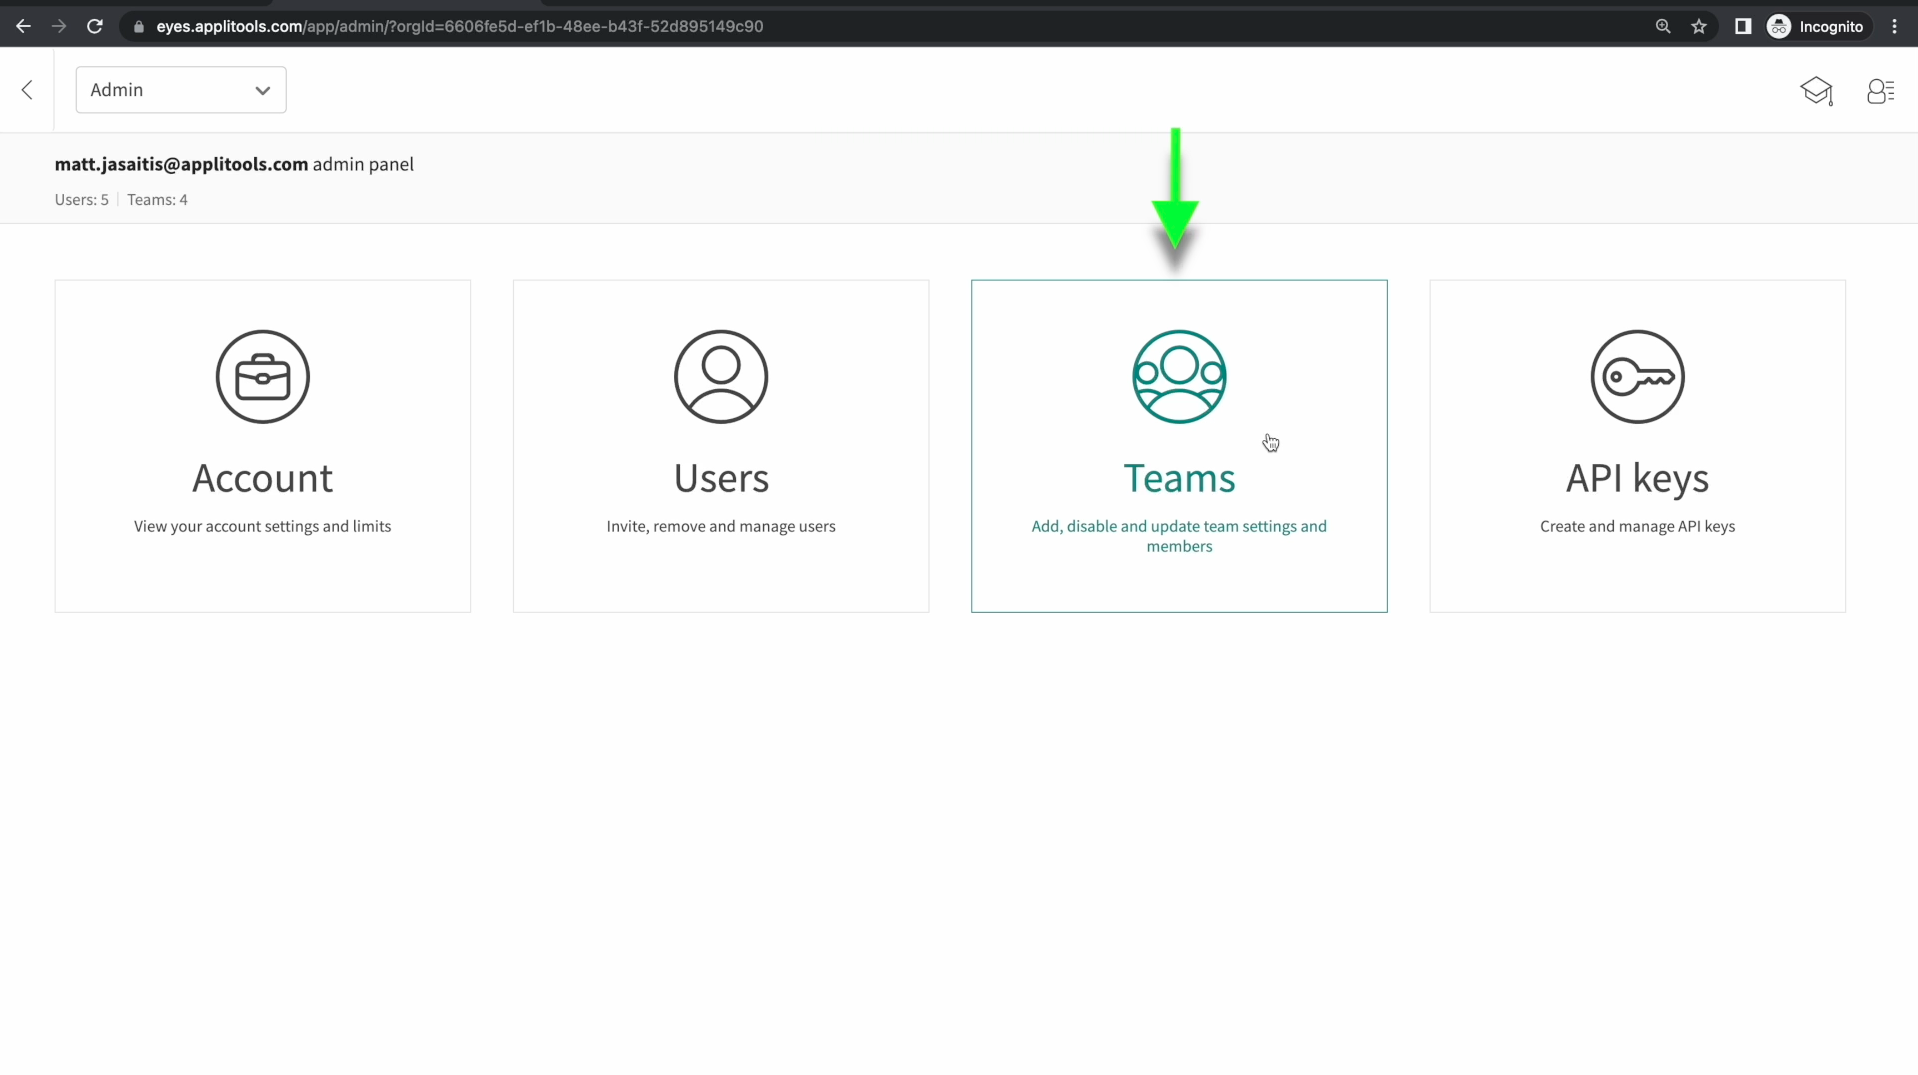
Then, click on the Teams option.
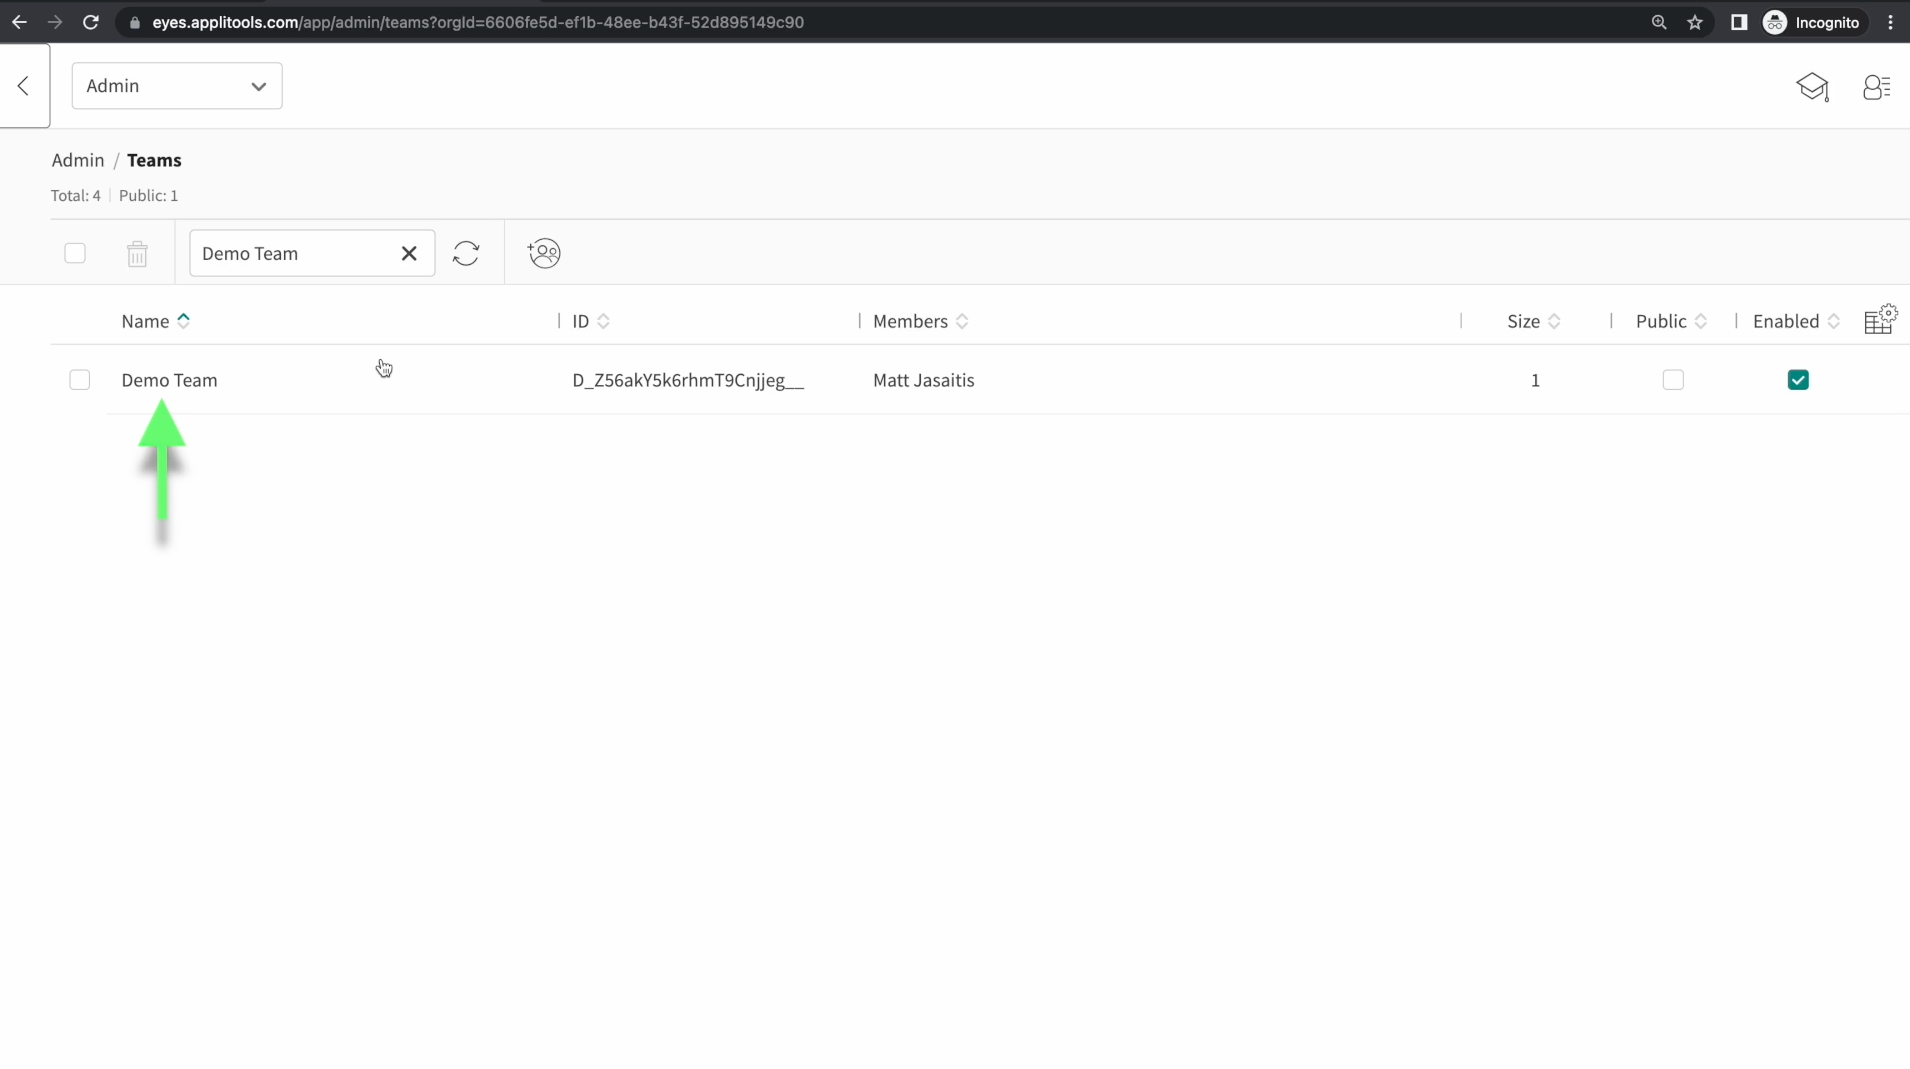
Select the team that you want to configure this integration for.
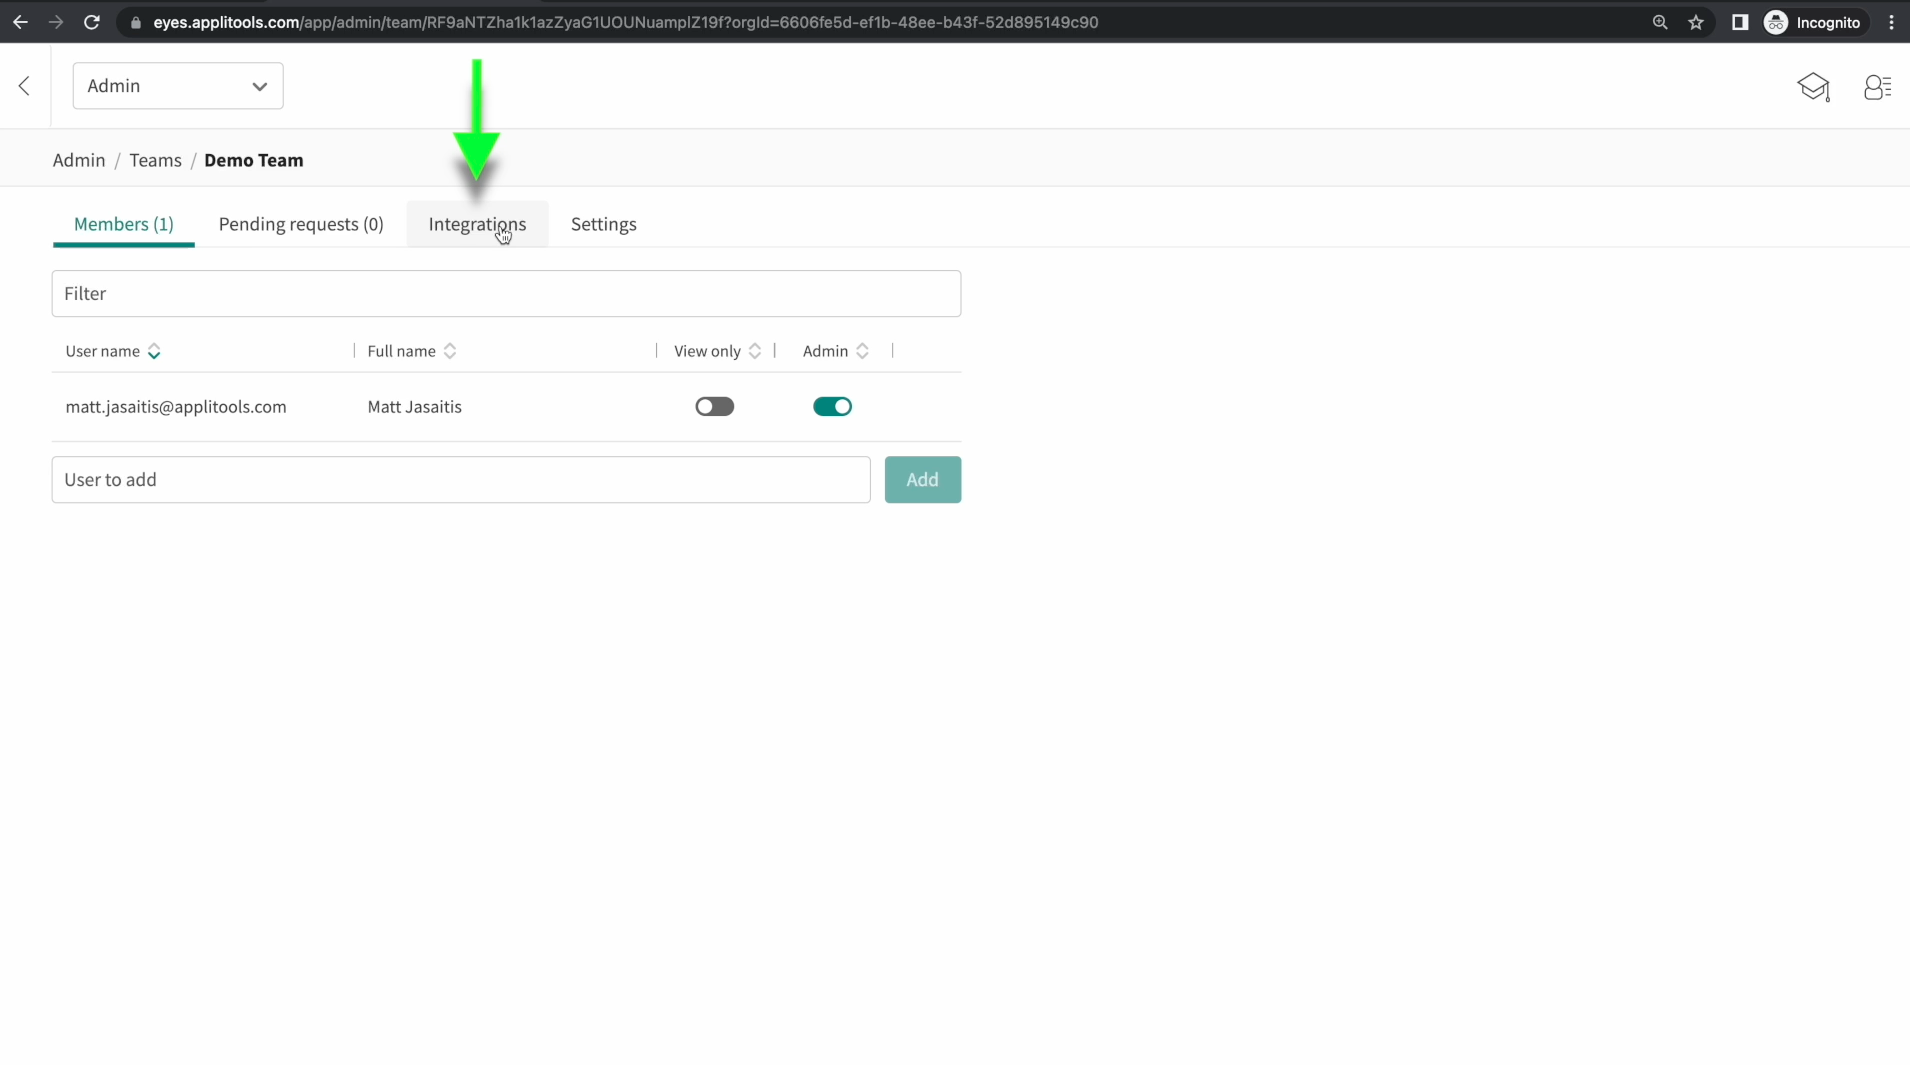
And then finally, click on the integrations tab at the top.
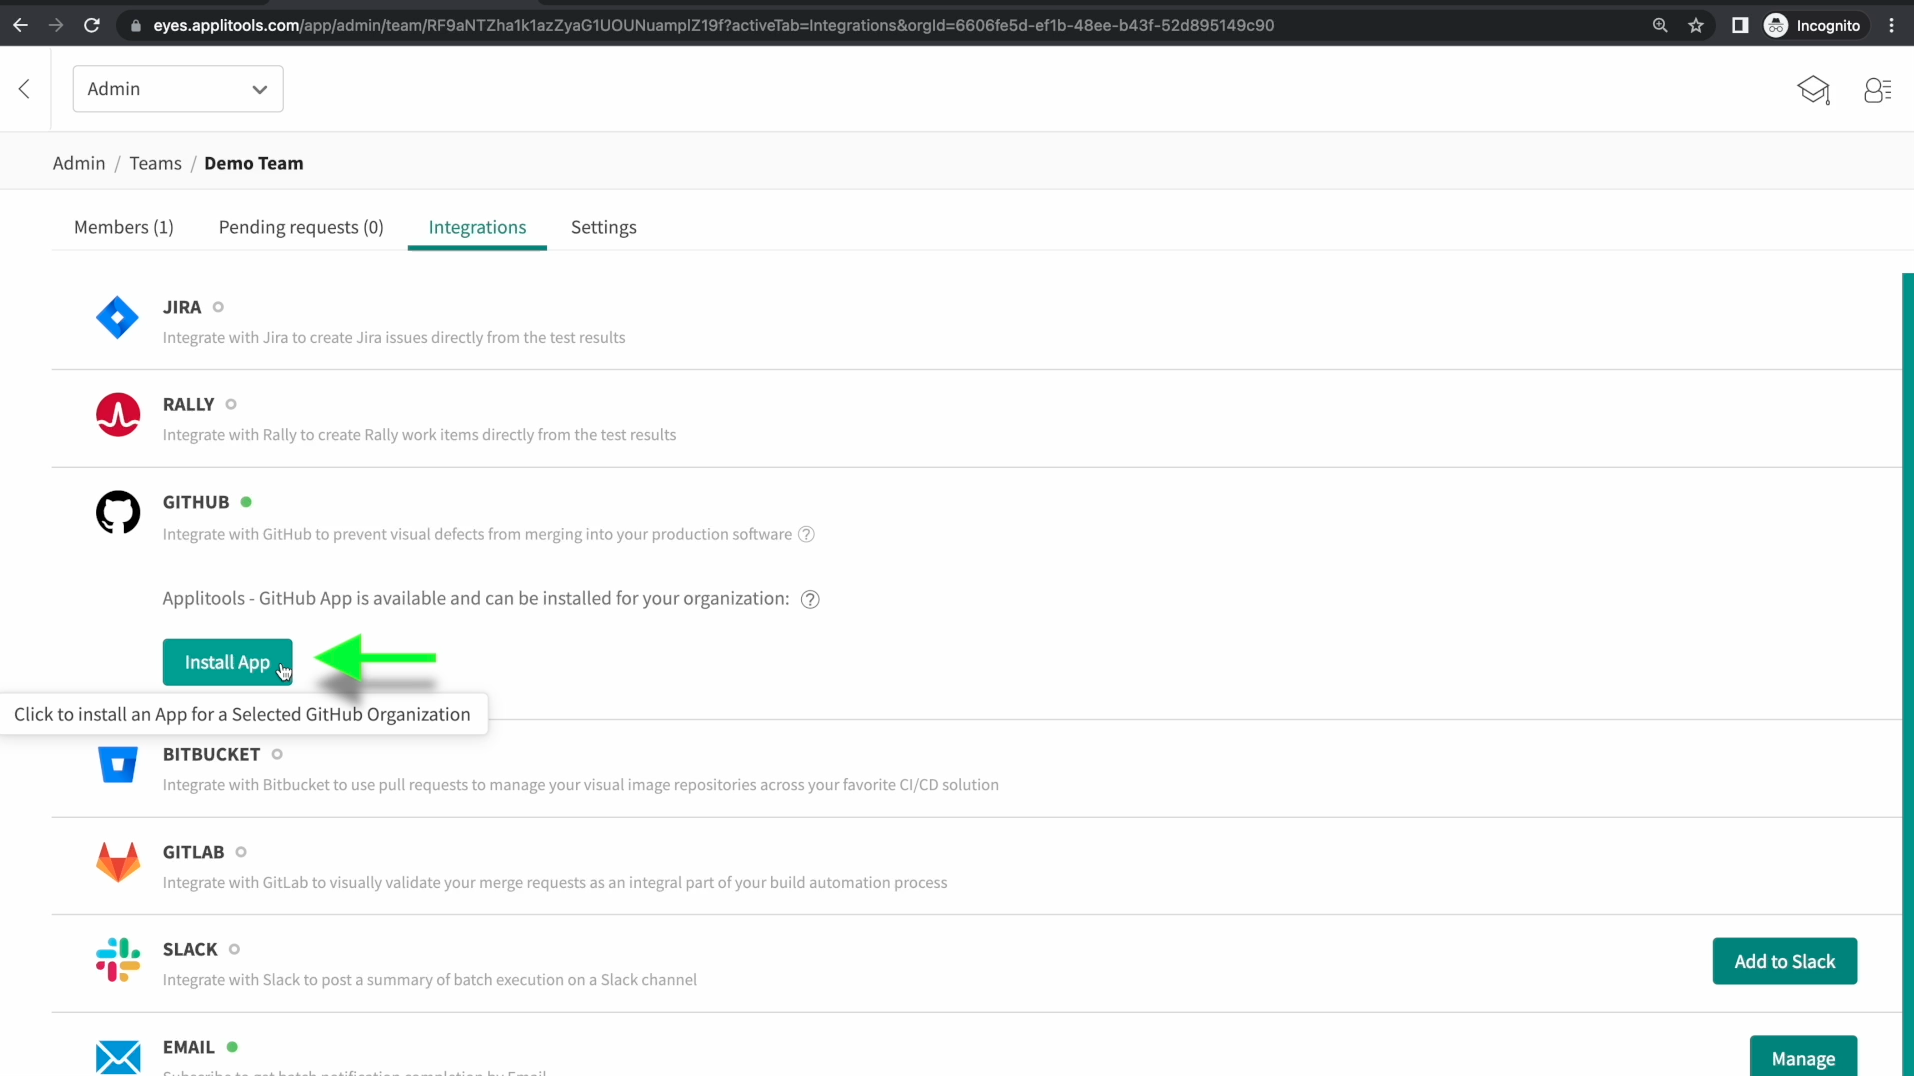
On the Integrations tab, click on Github and then click Install App.
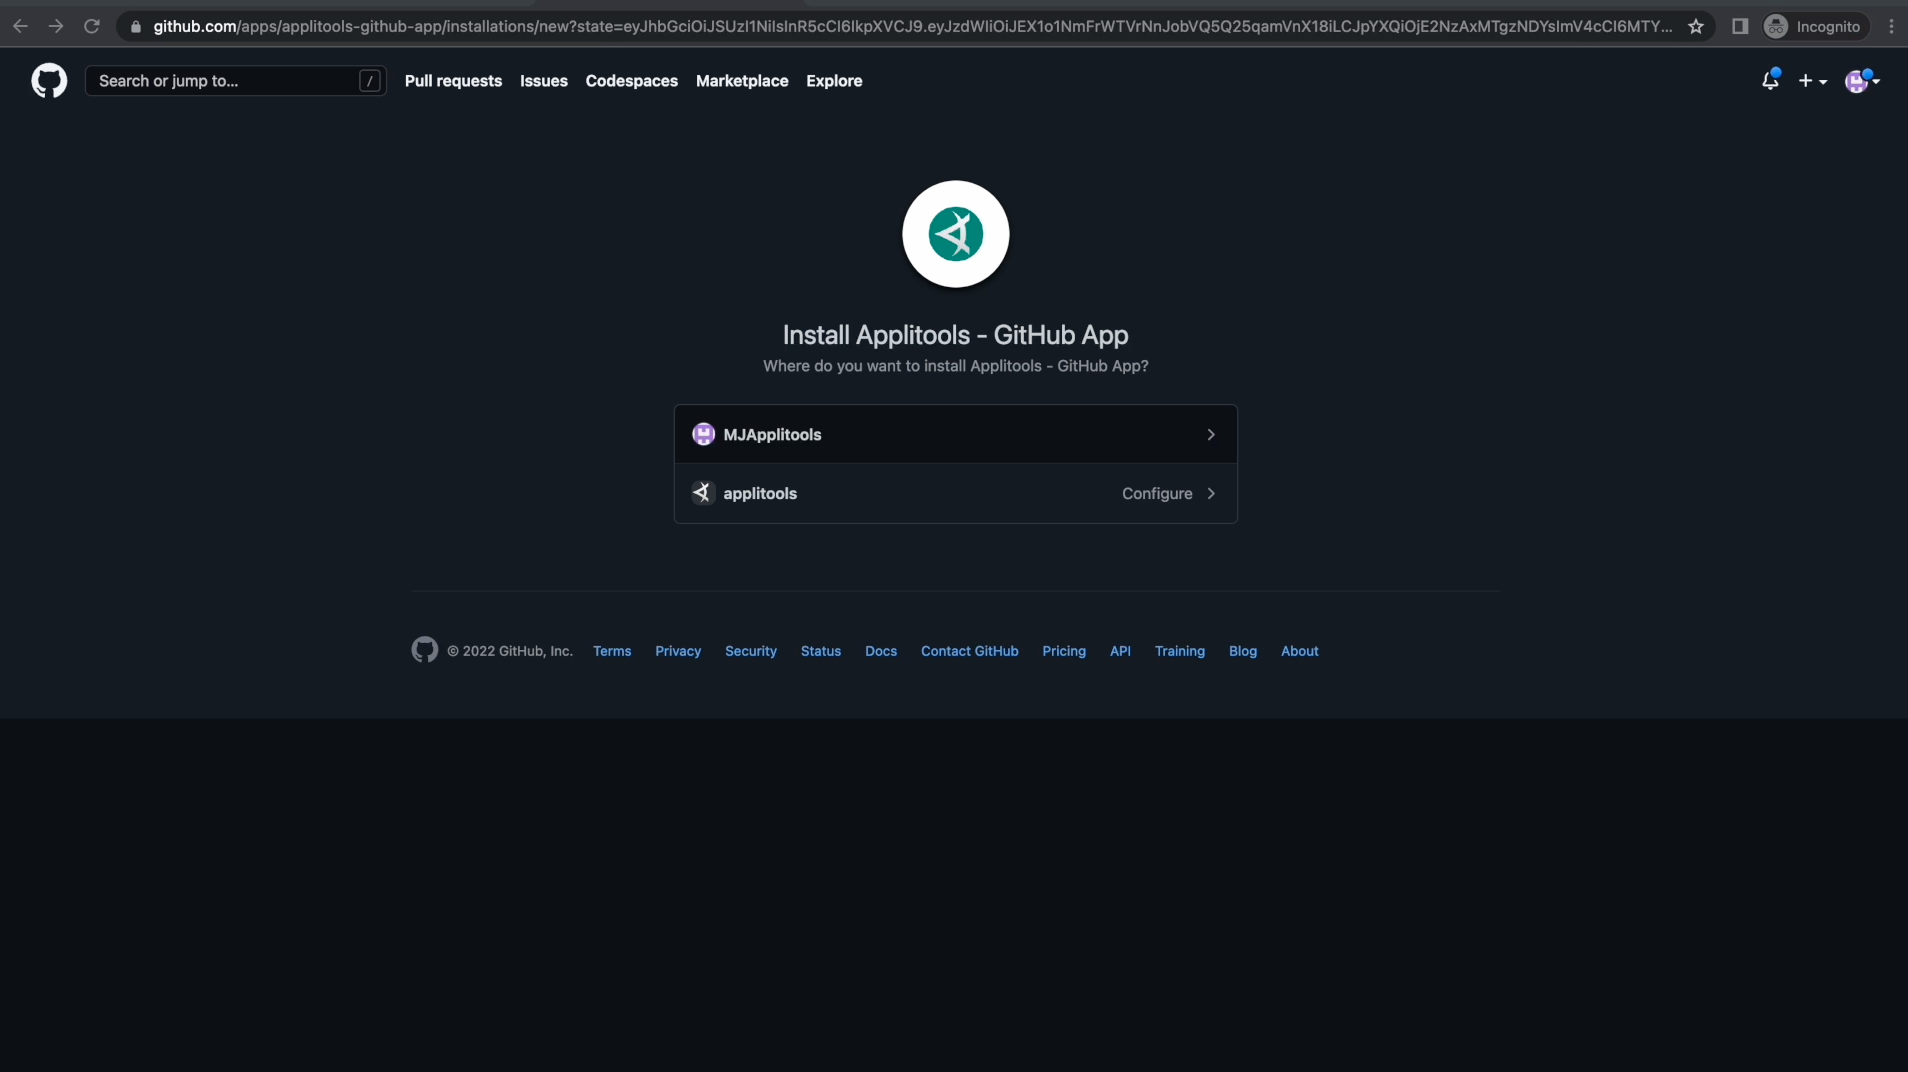
After logging into Github, this will open up a prompt that allows you to select the organization that you want to install the app on. Be sure you have the appropriate permissions needed for installing apps on your Github organization.
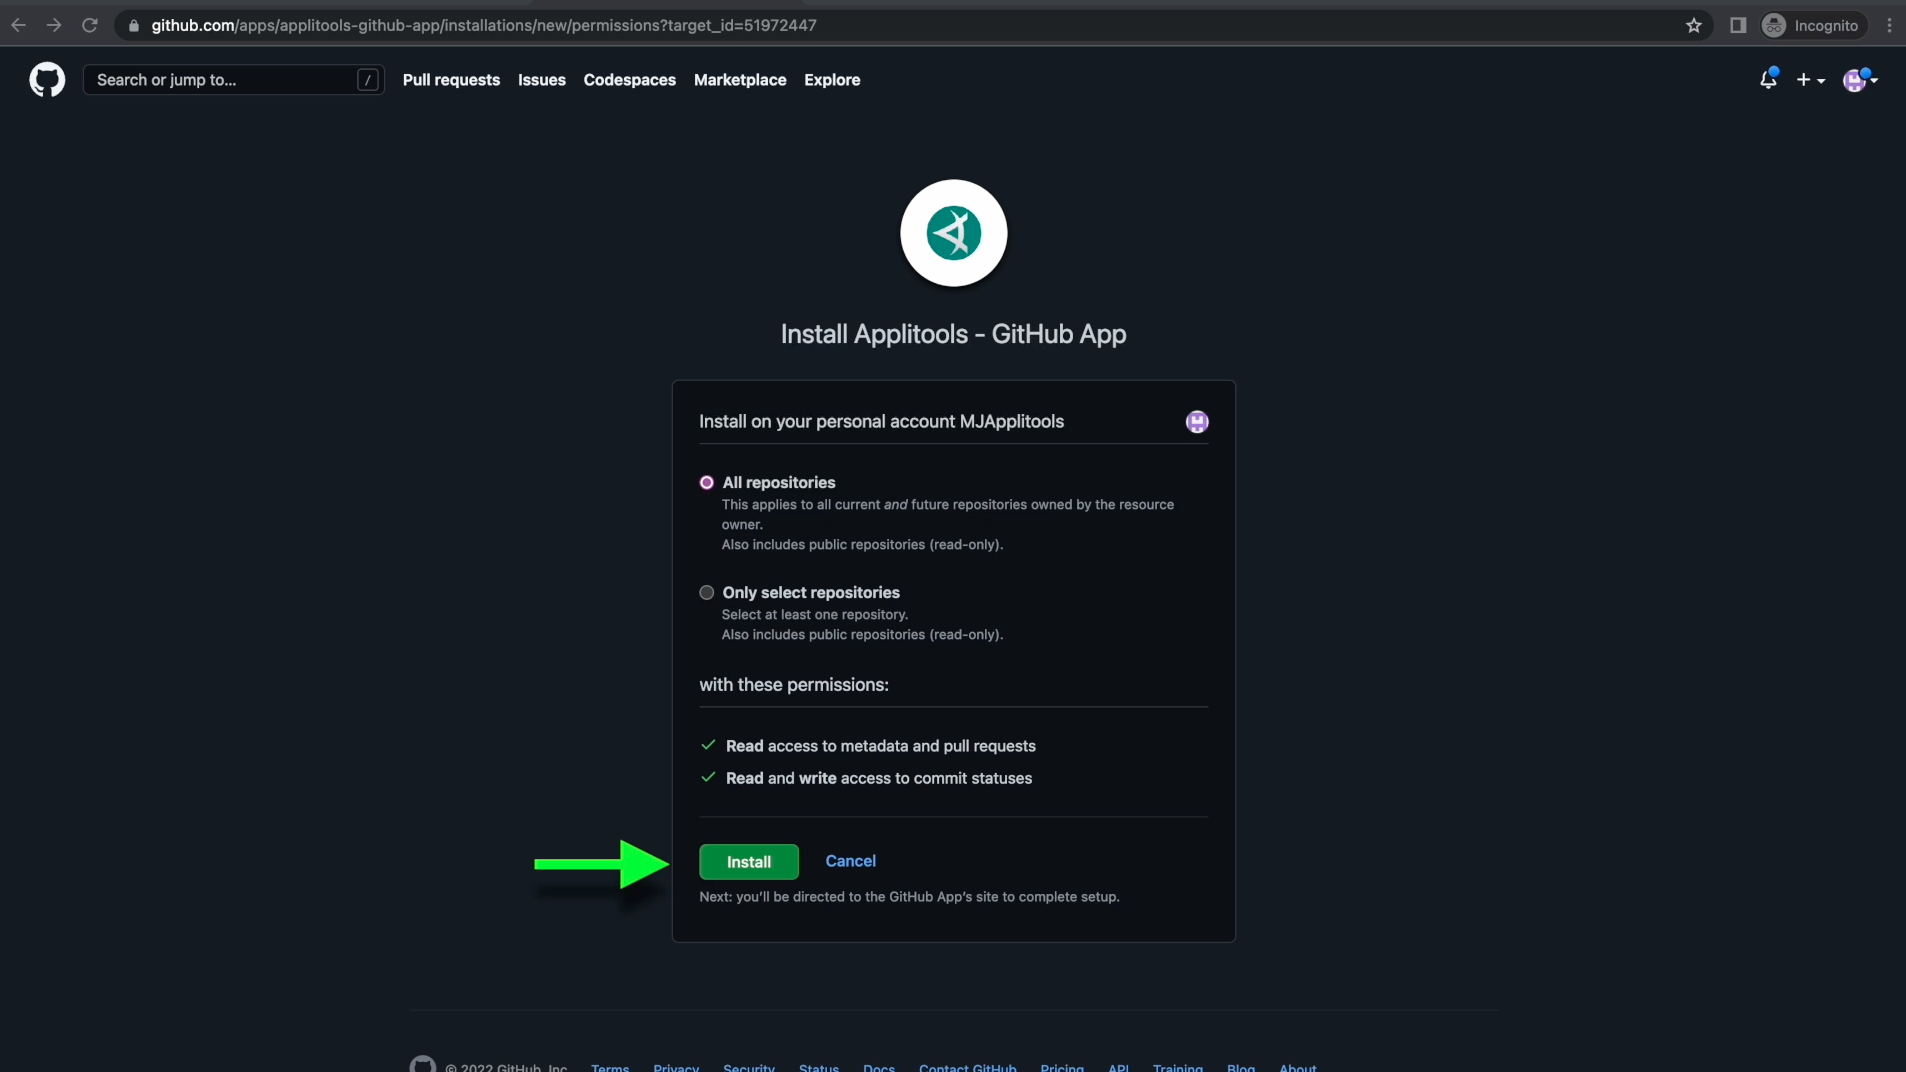
After selecting your organization, you'll then be asked to grant certain permissions to repositories you want to integrate with. You can select all repositories or only certain ones. Once you've made your choice, click on the install button at the bottom.
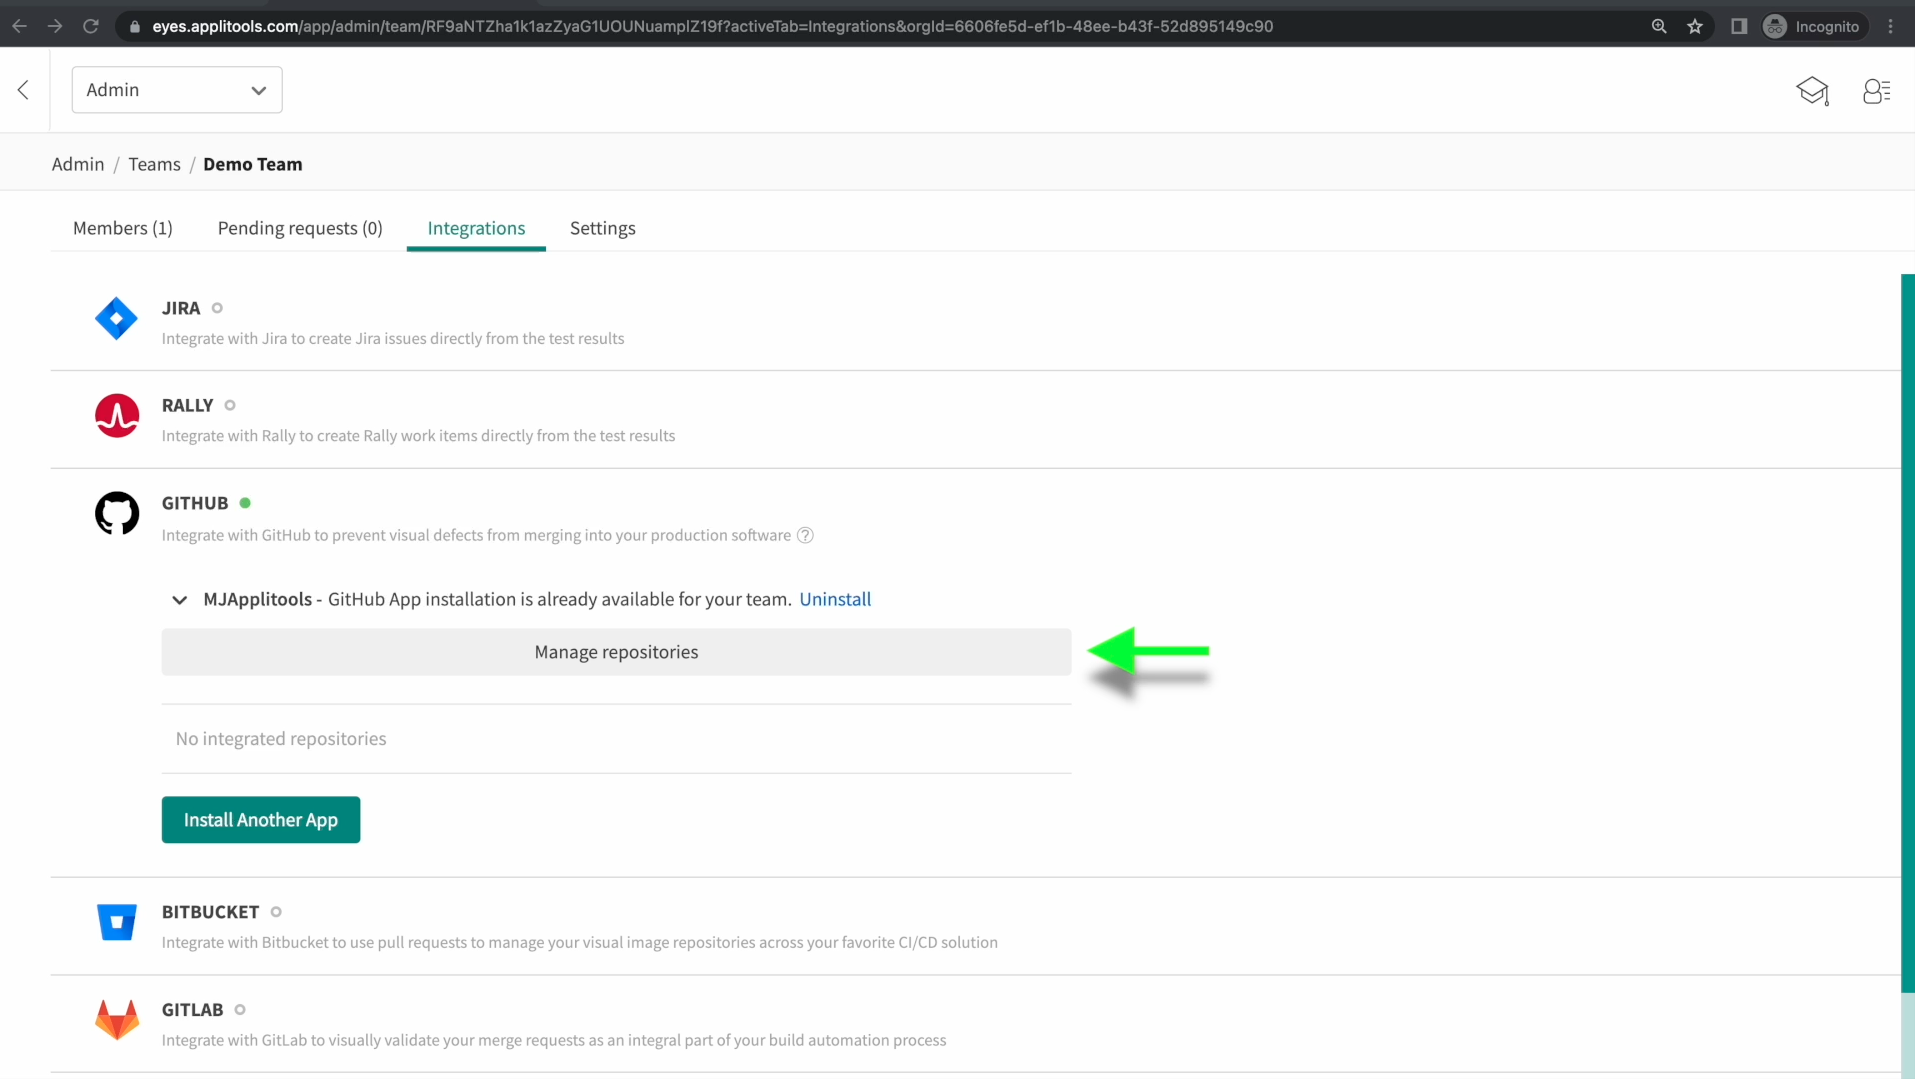
After installing the app, you'll be redirected back to the integrations tab. The last step is to select the repositories that we want to integrate. You can do this by clicking on Manage Repositories
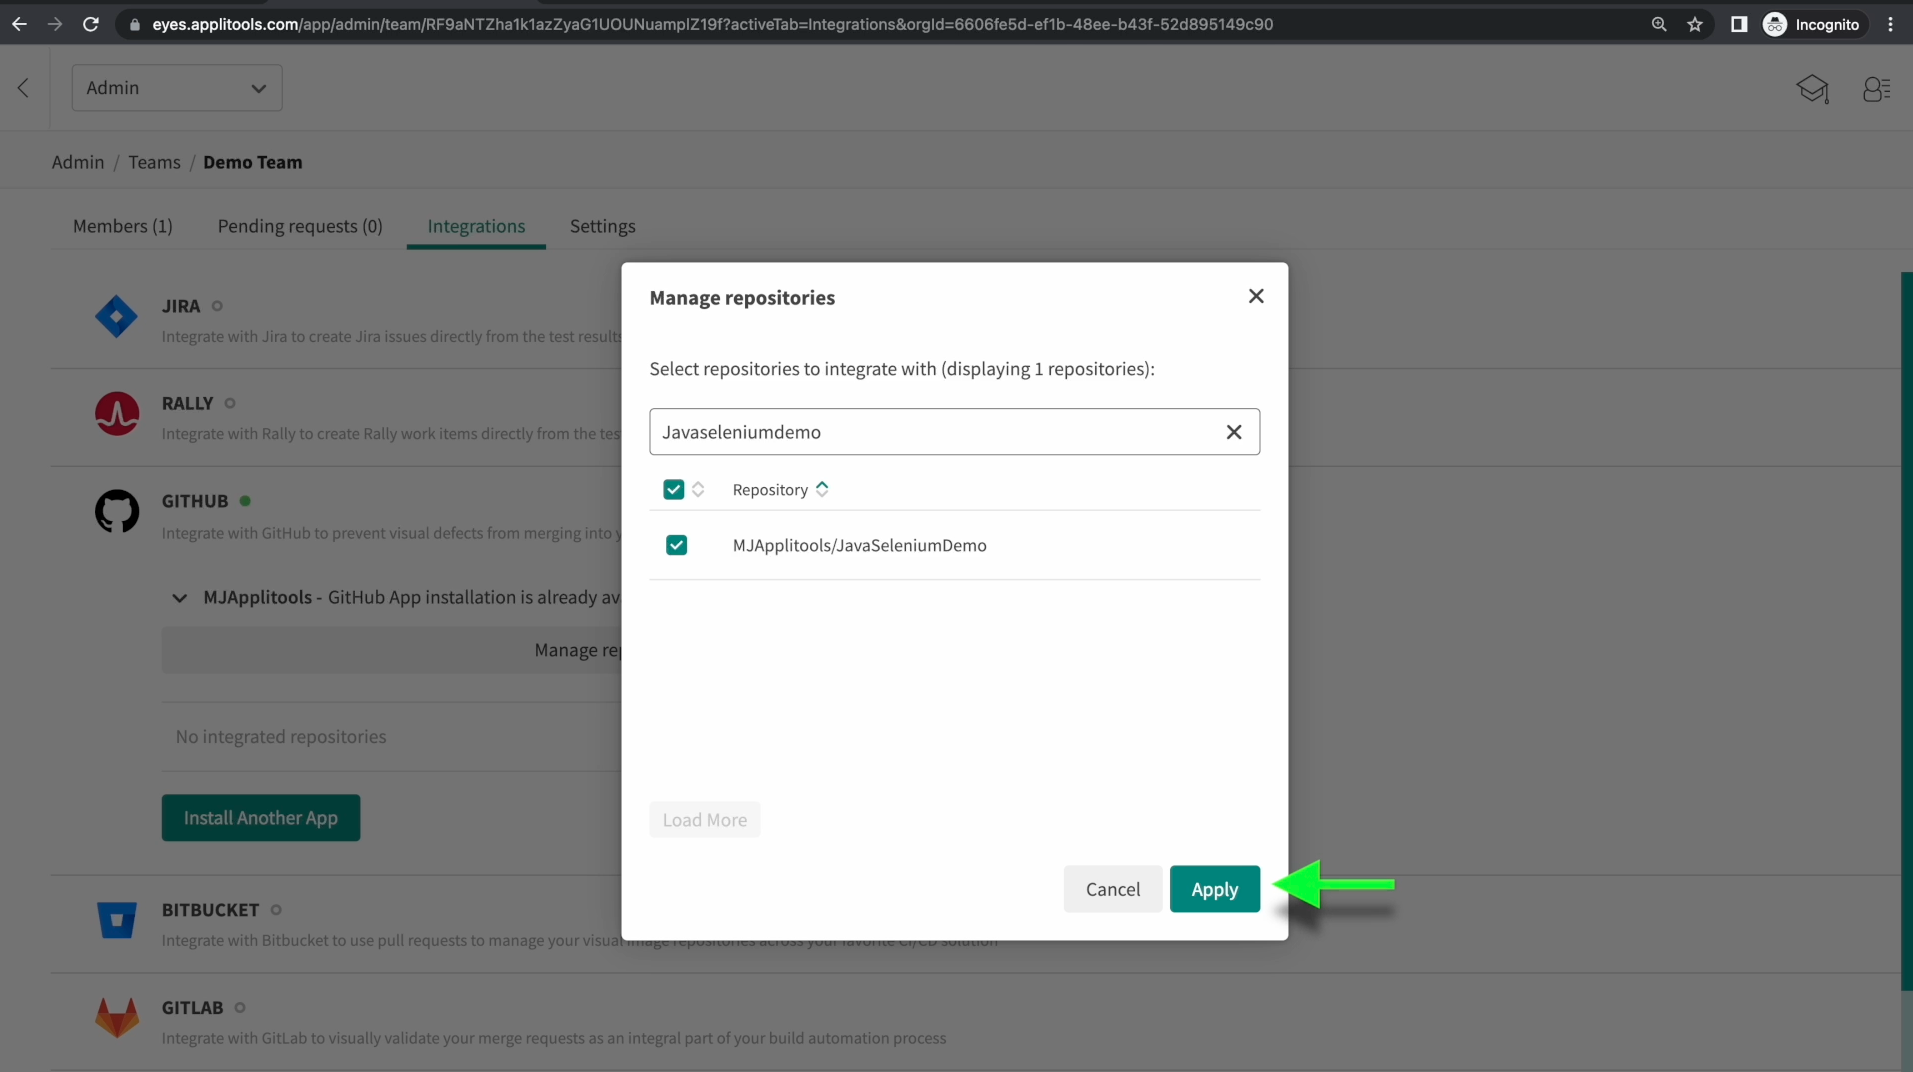
Then selecting all the repositories you want to integrate with from the list that pops up. Once that's done, go ahead and click the apply button in the bottom right.
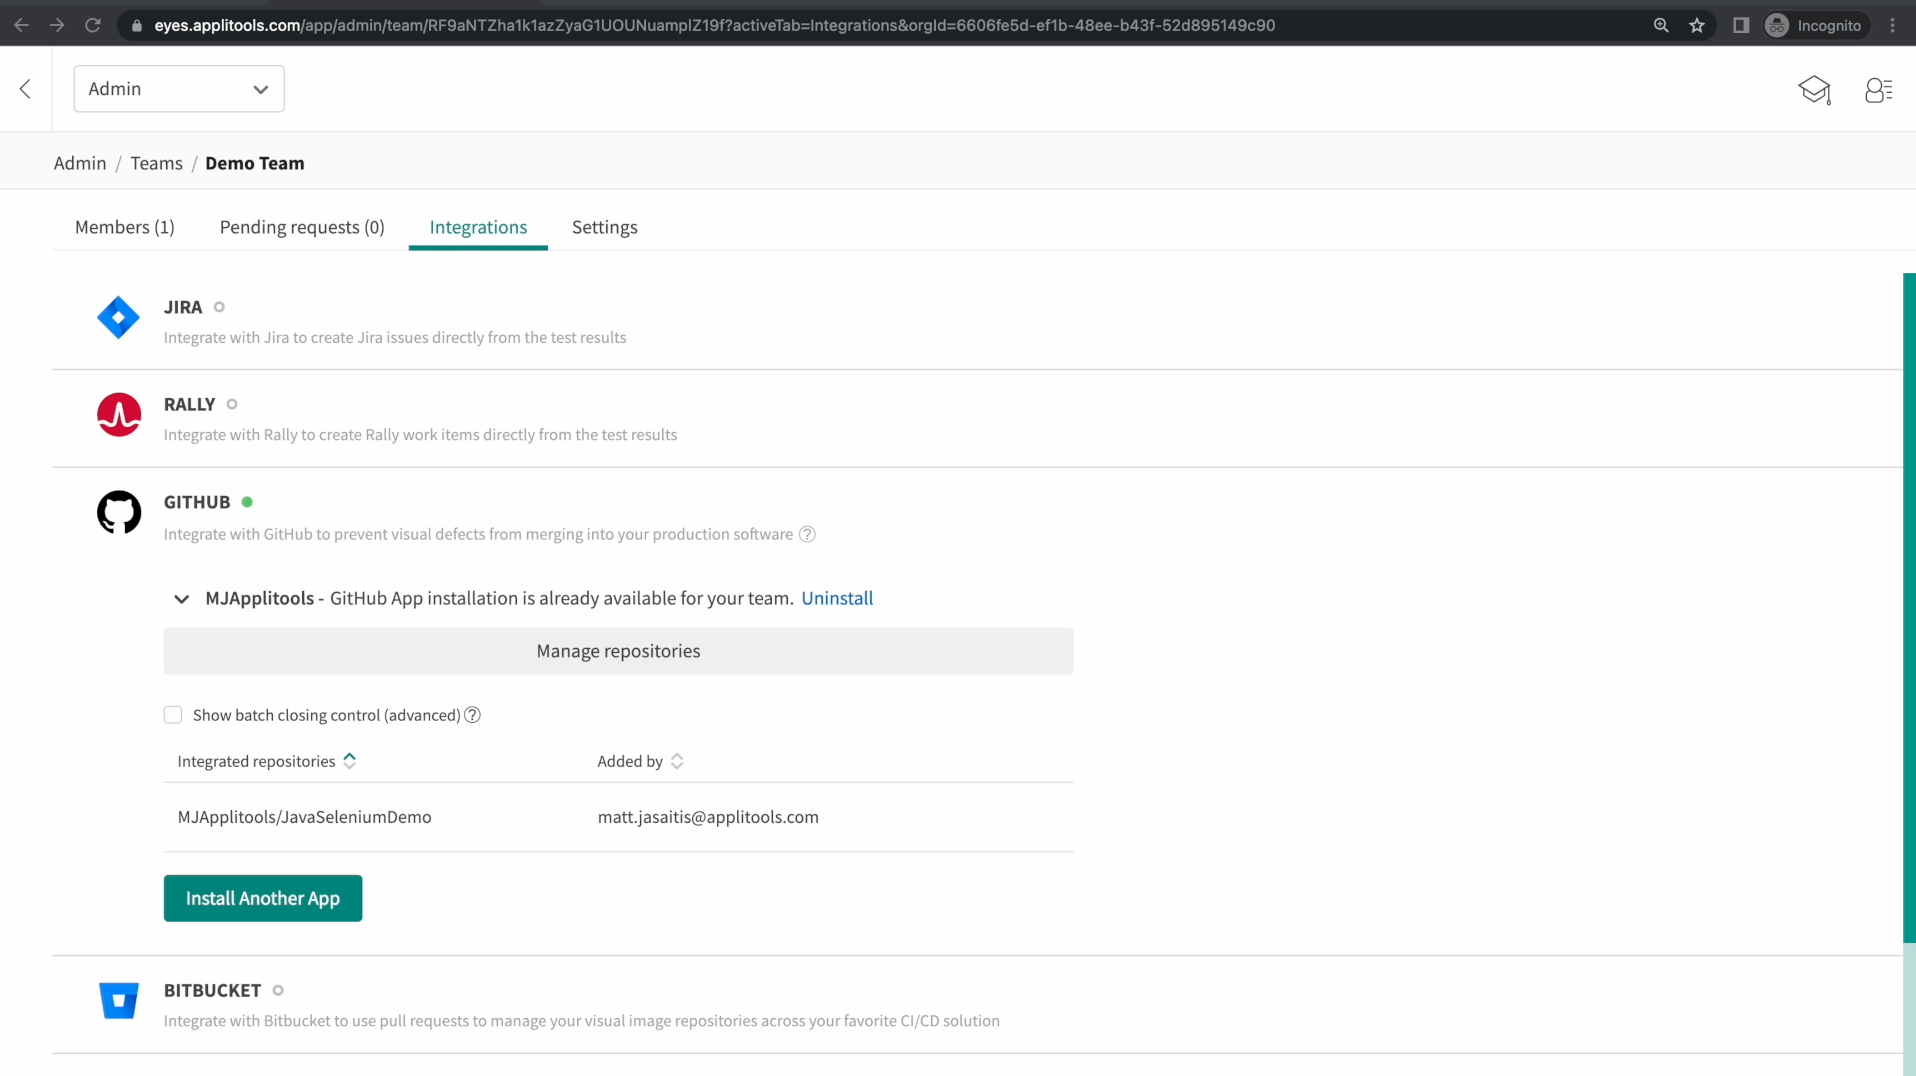
We've now successfully installed the Github Integration app and are ready for the next step.
The next step is to set up a continuous Integration pipeline. For our examples in this course, I'll be using CircleCI.
I won't be walking through the process of creating a CircleCI account but I've placed some helpful documentation down below showing how to create your account and connect your git repository to it.
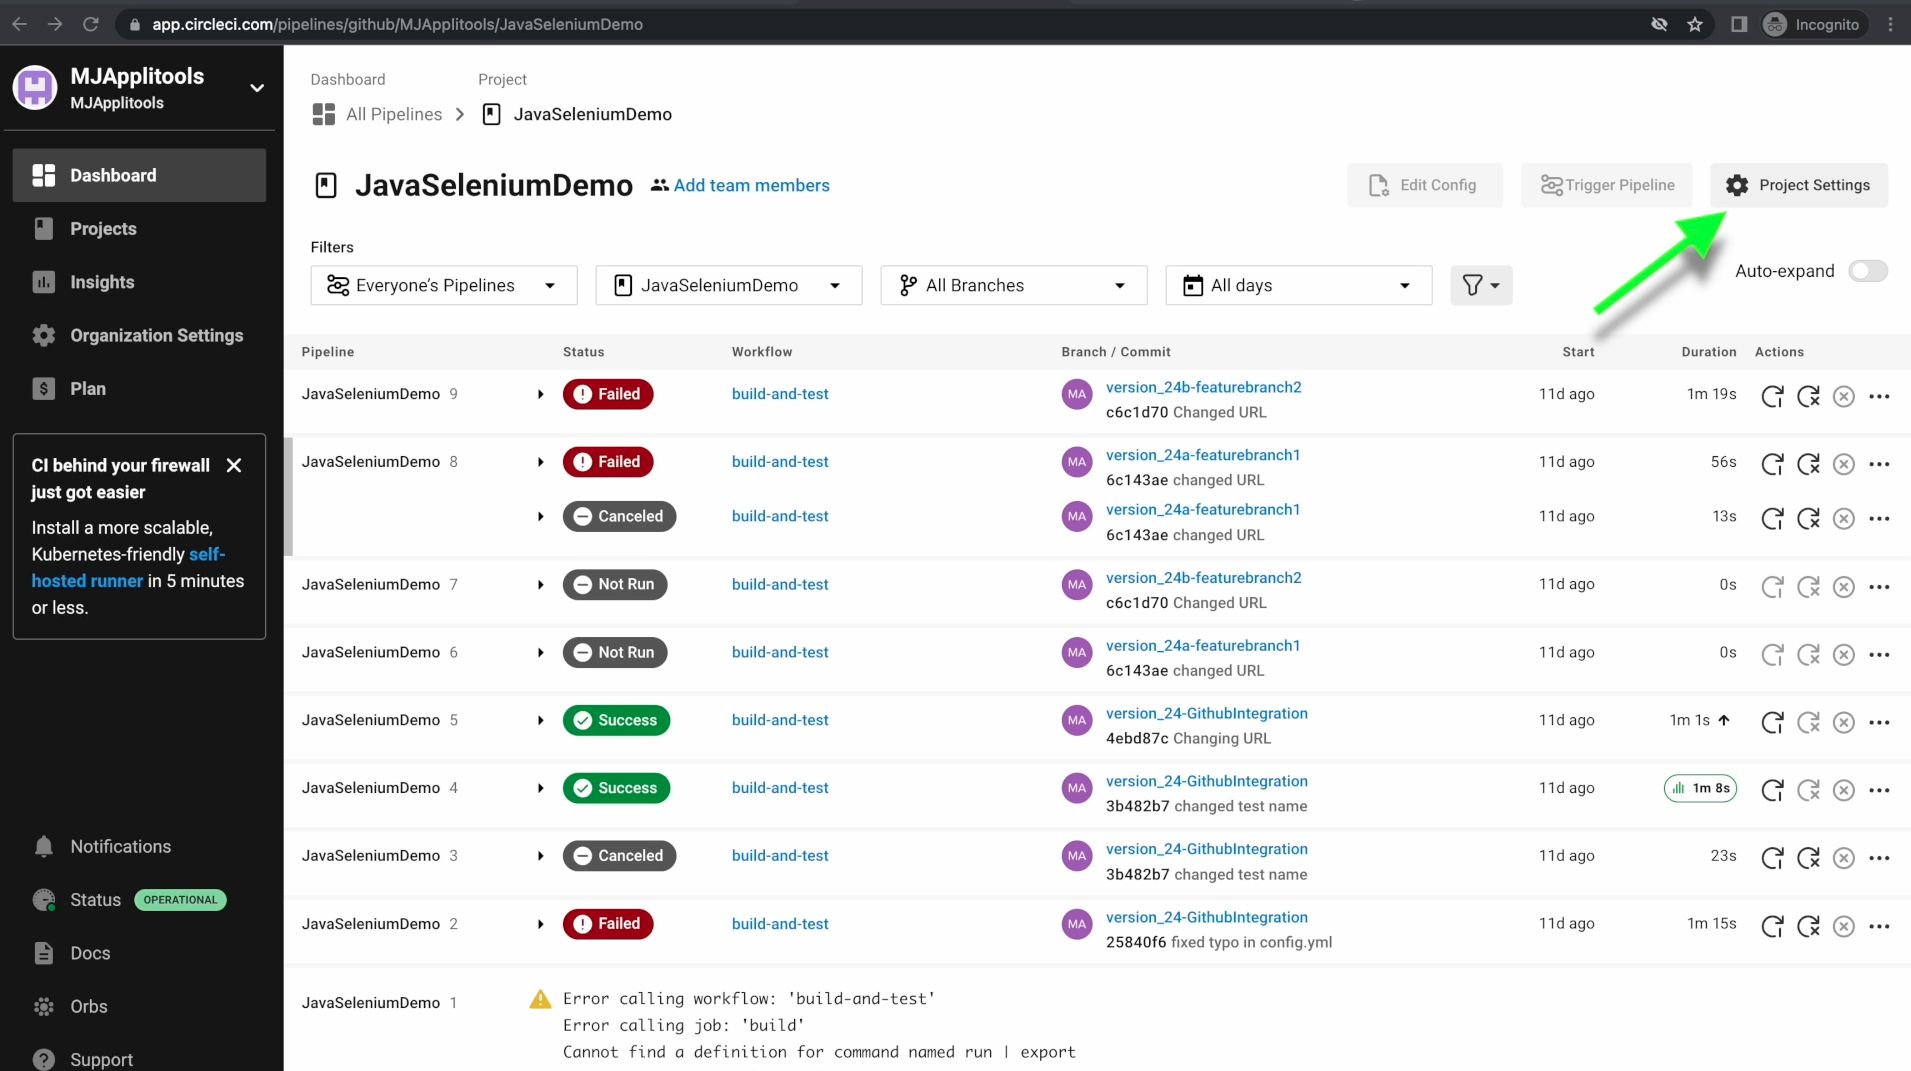
Once you've created your CircleCI account or set up another CI provider, we need to set an environment variable for our Applitools API Key. Click on Project Settings in the top right.
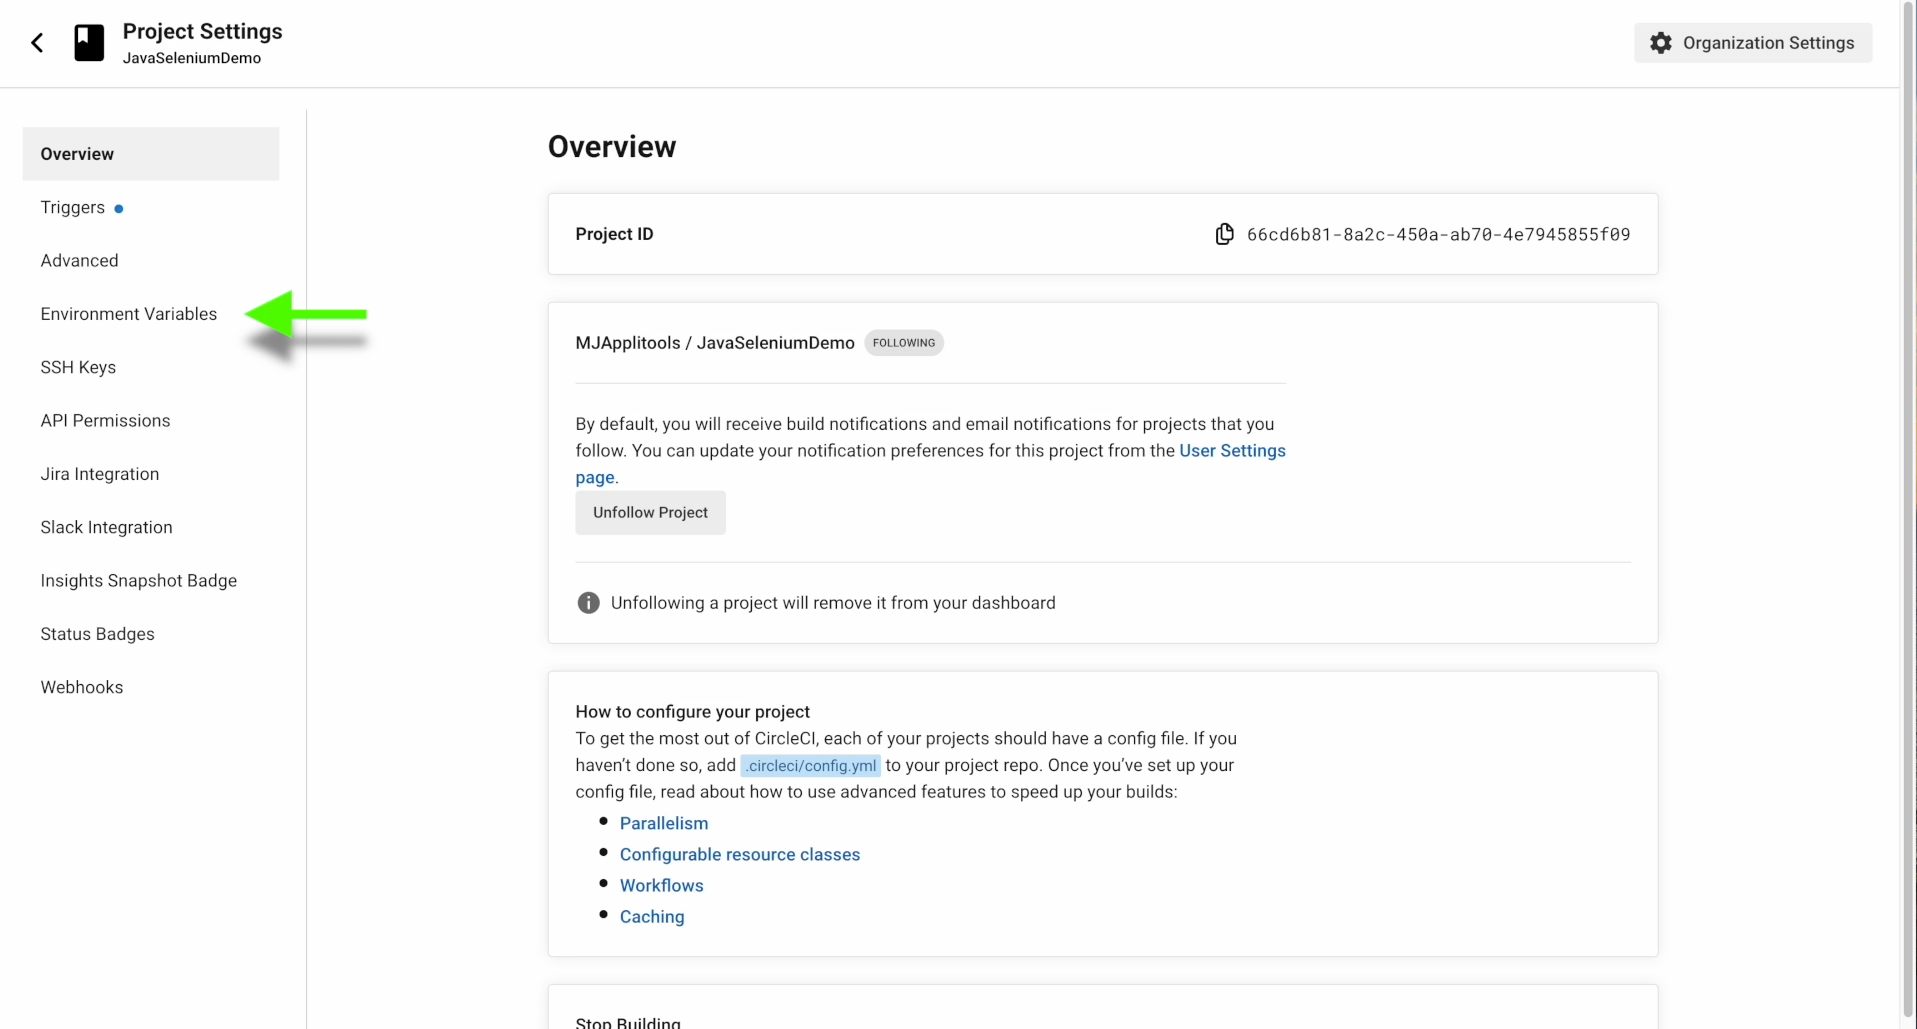
And then select Environment Variables from the sidebar on the left.
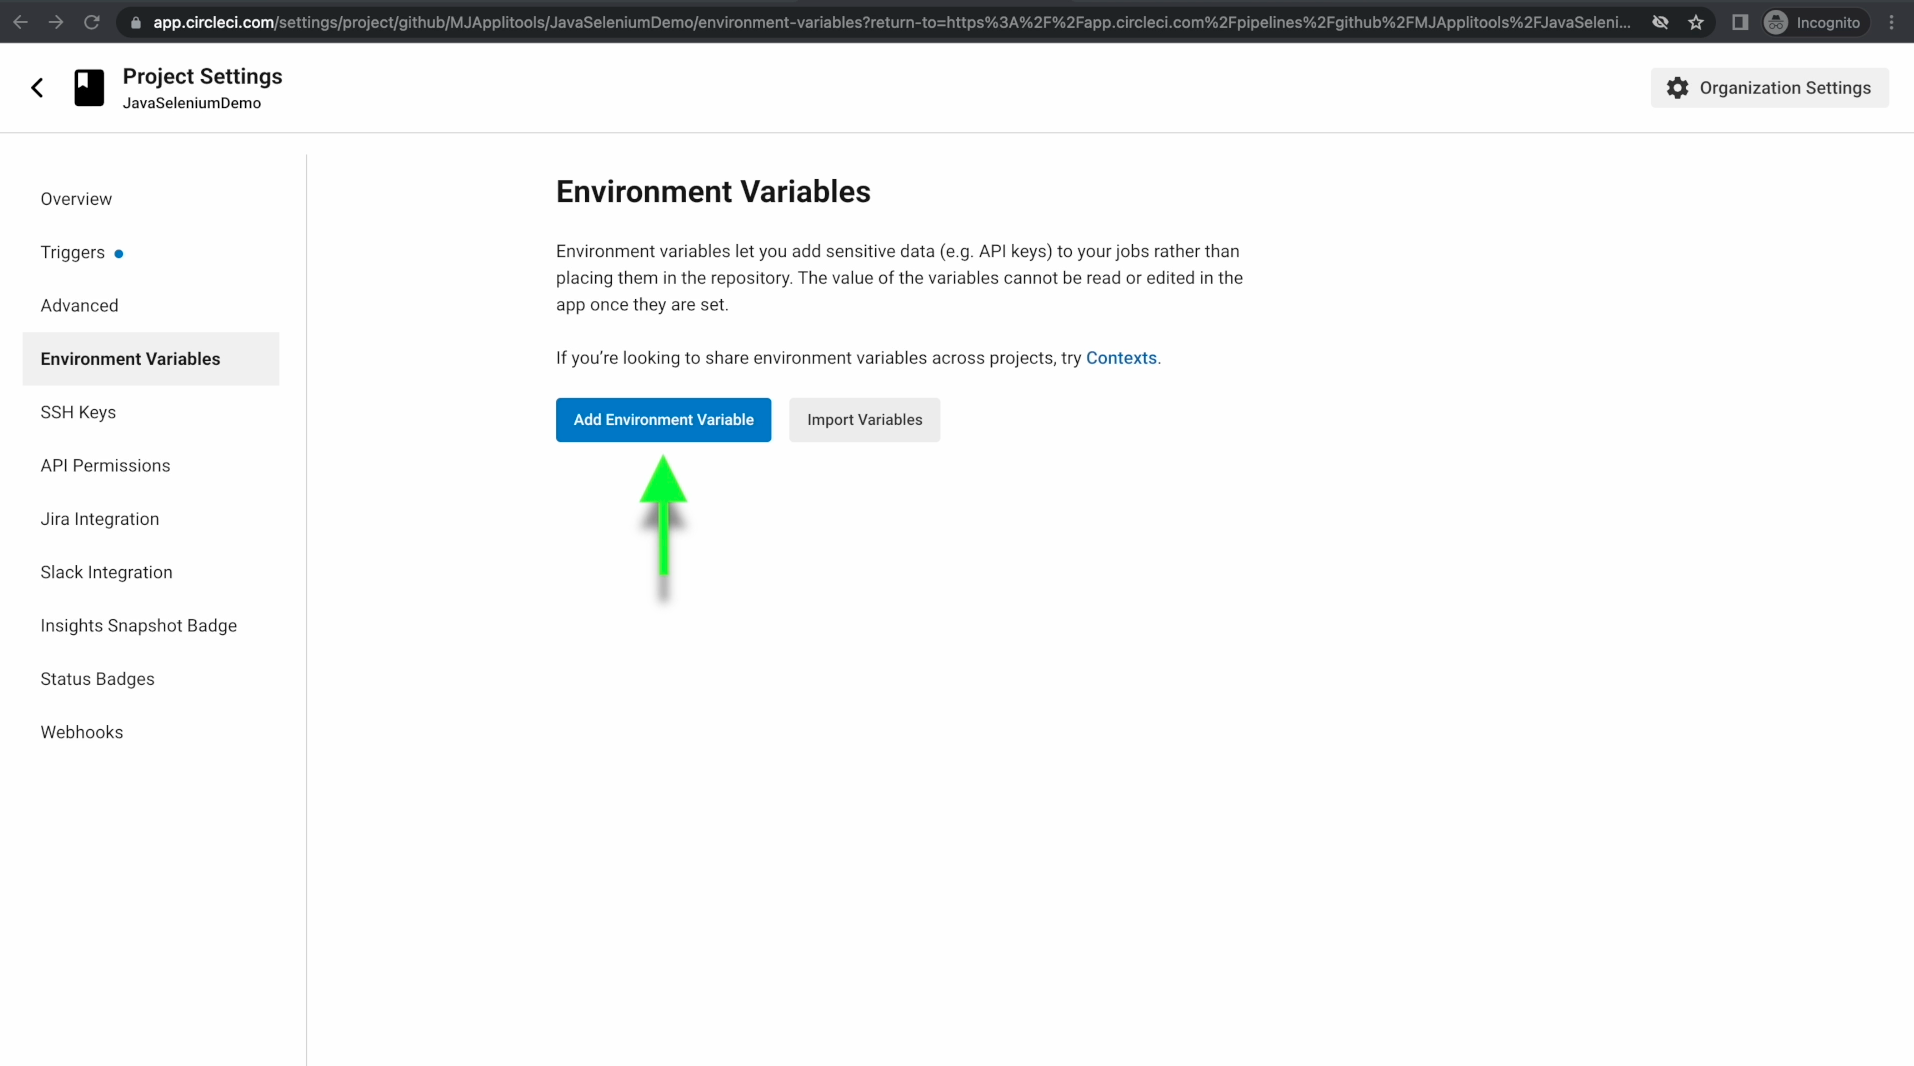
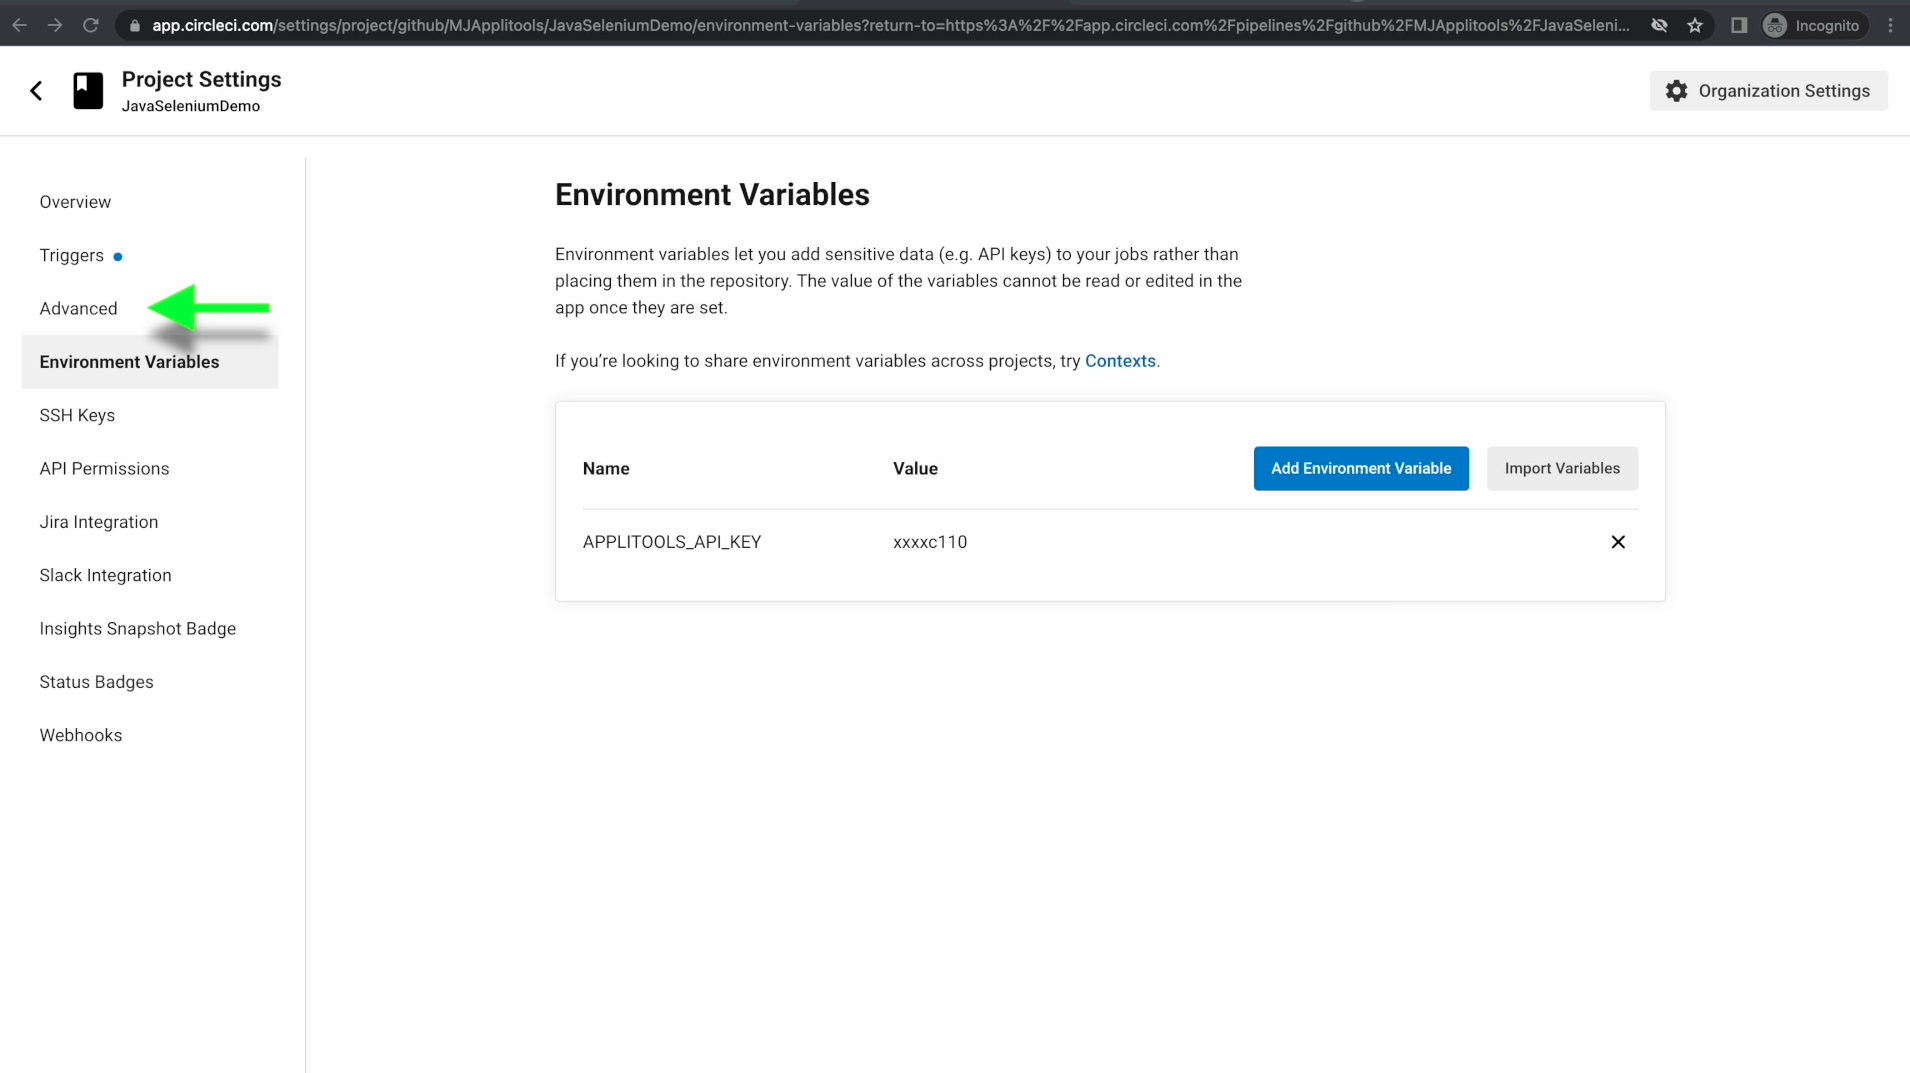
Once you're here, click Add Environment Variable
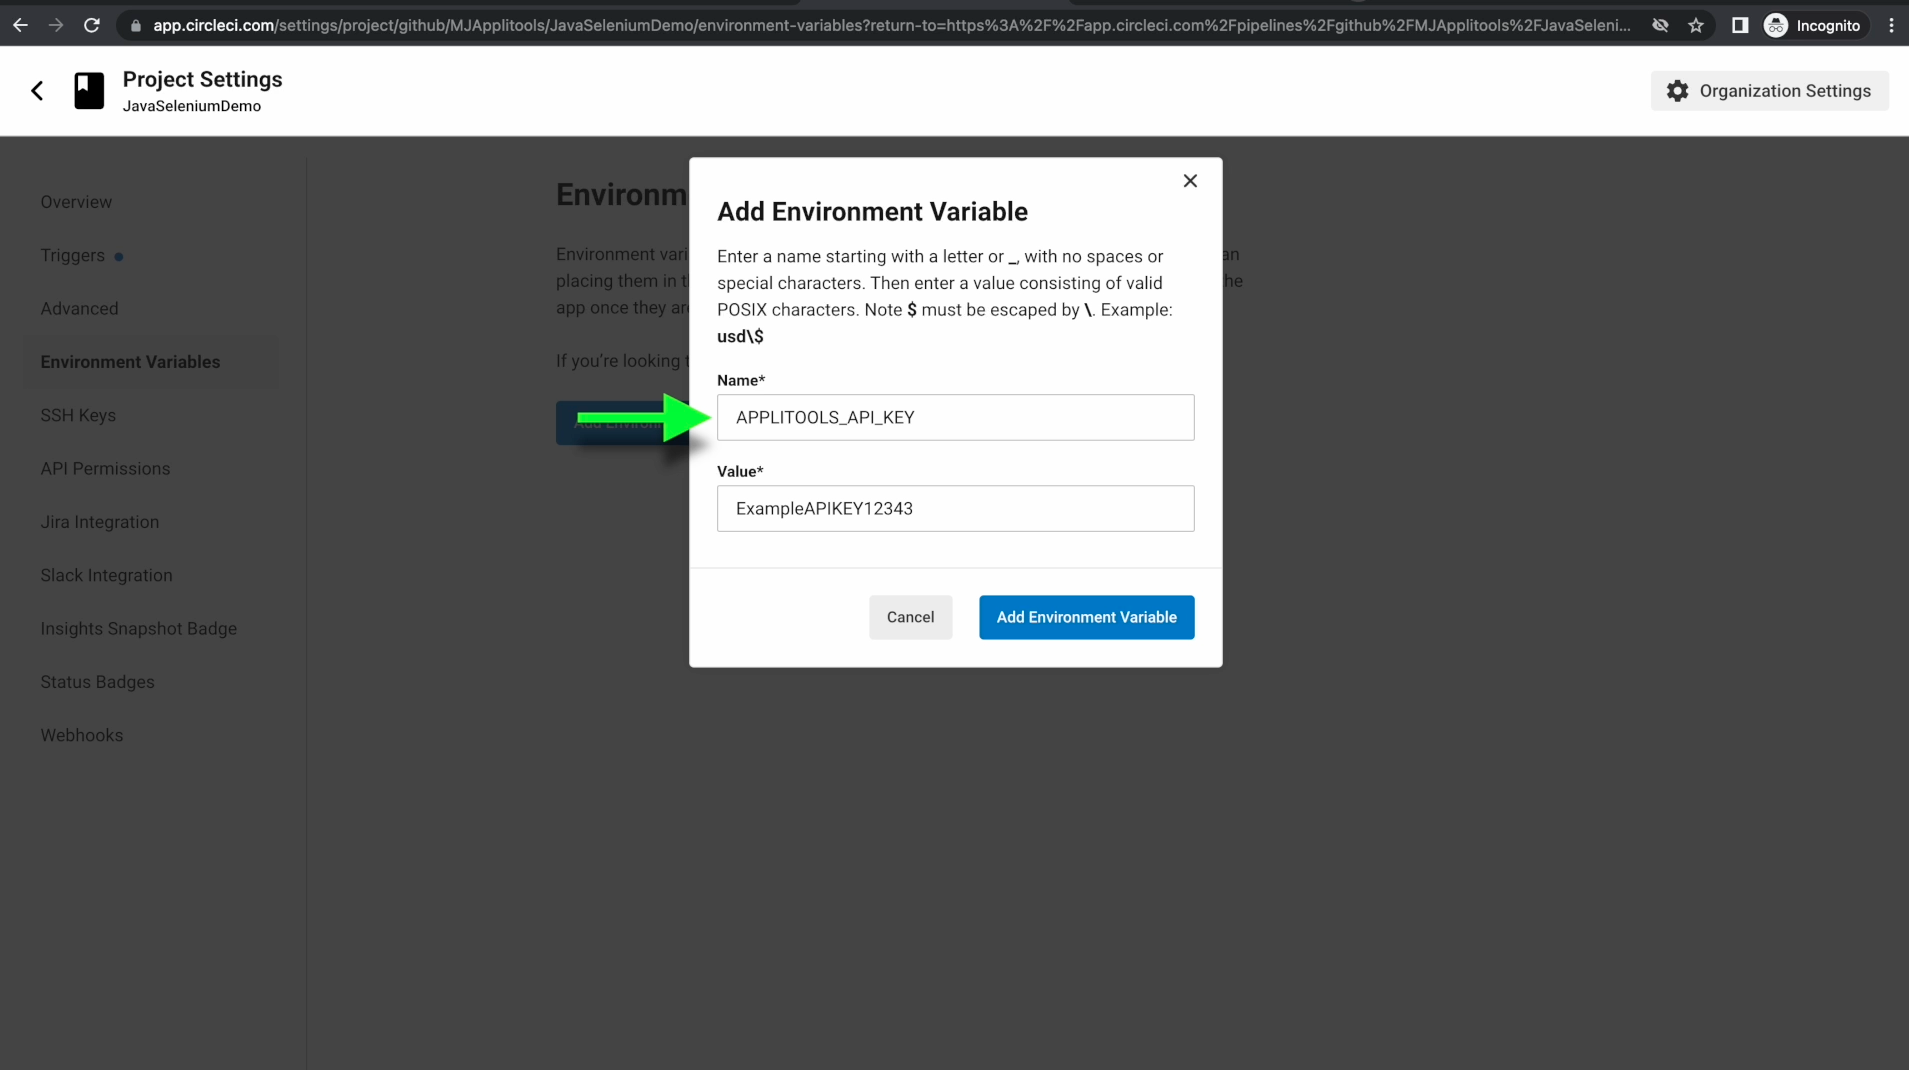
and then create a variable named APPLITOOLS_API_KEY and paste your API key in as the value.
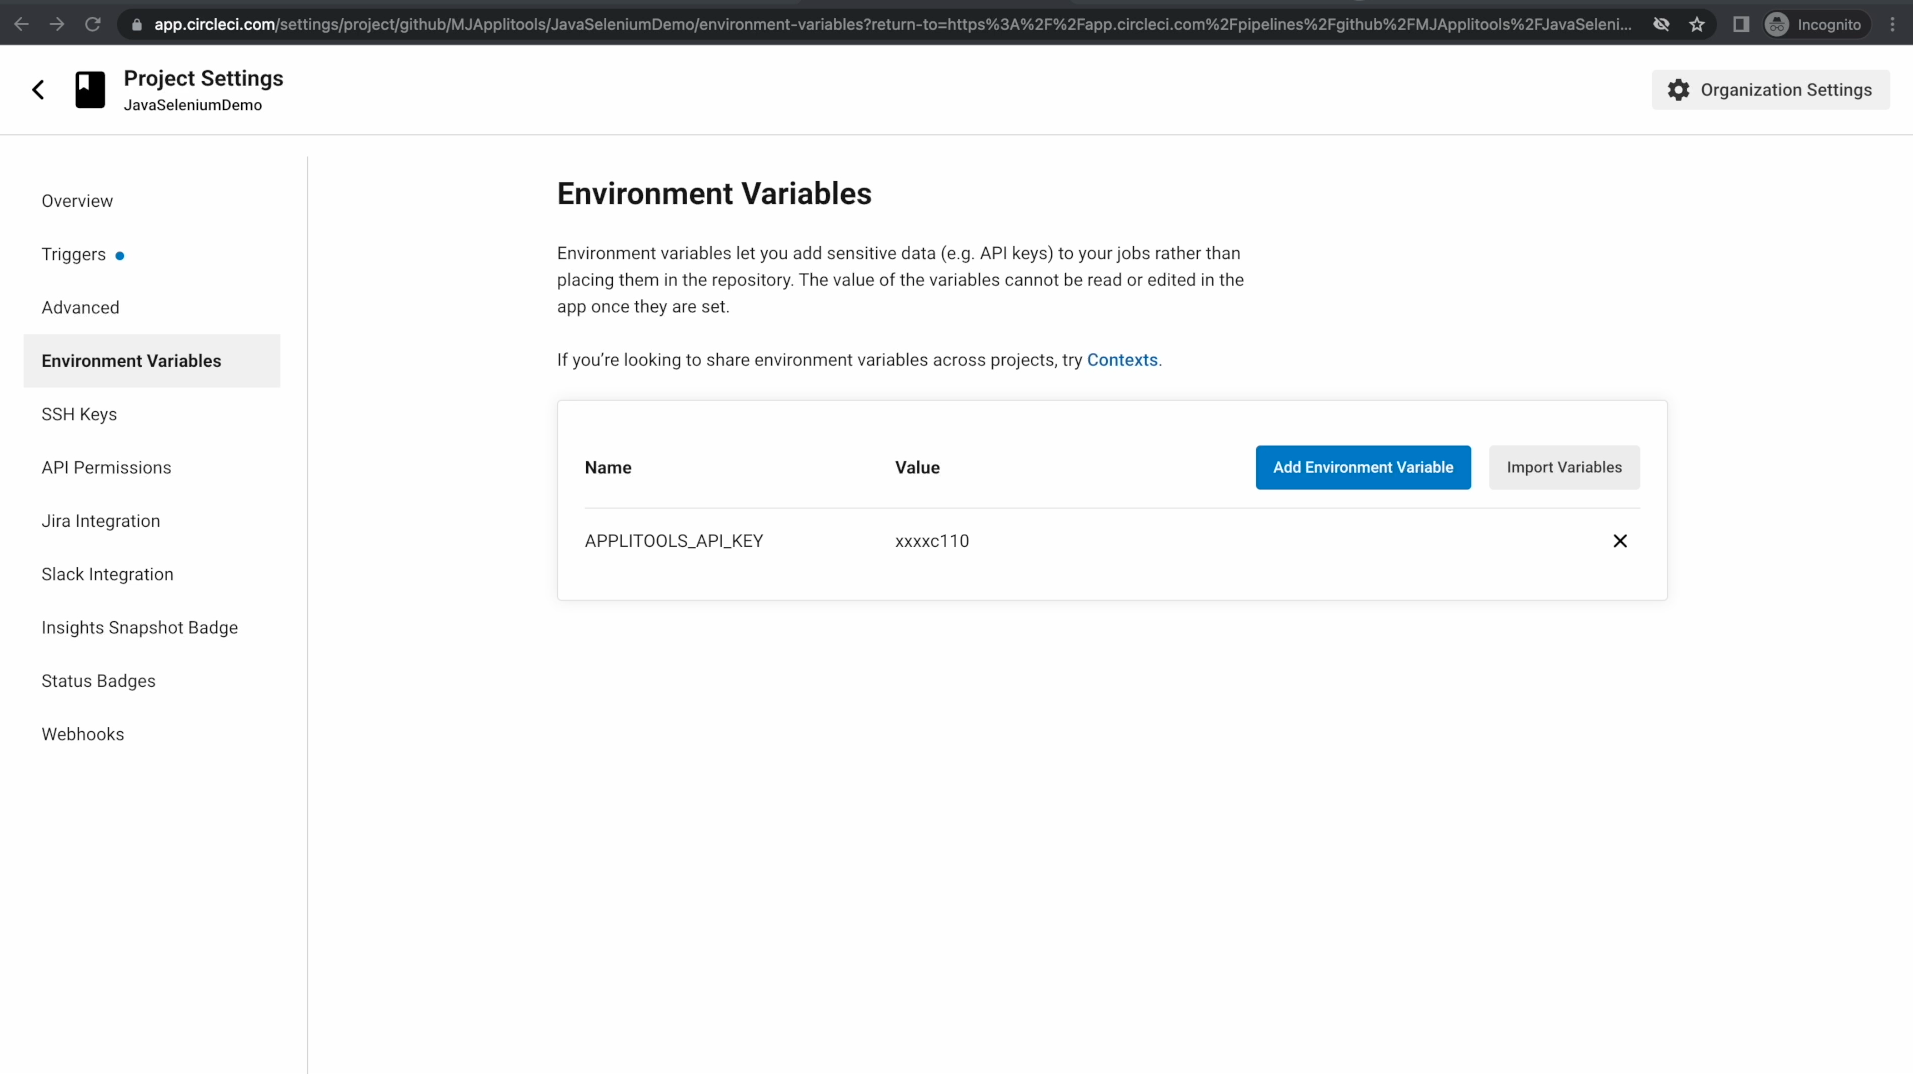
If done correctly, you should see something like this if you're using CircleCI.
This isn't a mandatory step but I'm also going to configure my pipeline to only run when a Pull Request is opened.
To do this on CircleCI, click on the Advanced option on the left
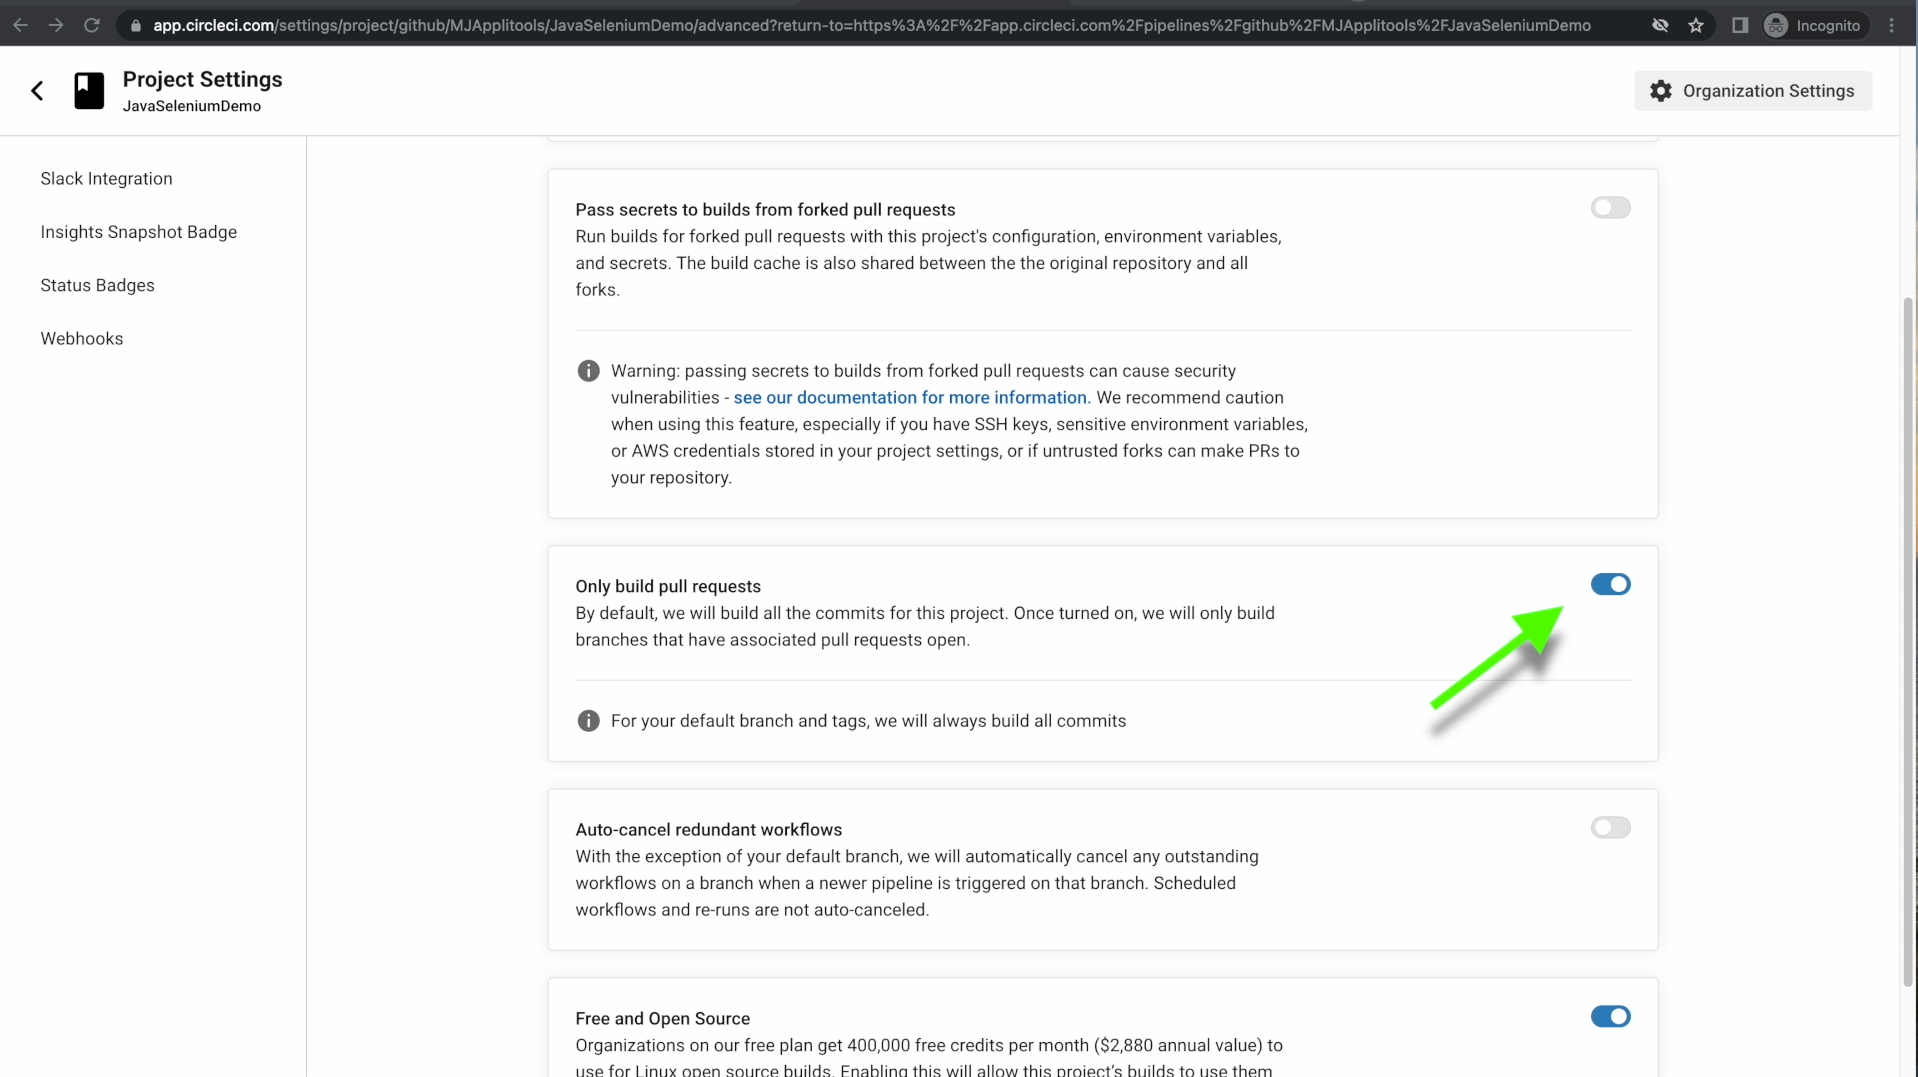
And then scroll down and toggle this switch on so that we only build on pull requests. Once that's done, let's move on to the next step.

The final phase of the setup process is to prepare our code to run in the CI pipeline.The first changes I've made are in our pom.xml file. I first added the maven surefire plugin so that we can trigger our test runs using the maven CLI.
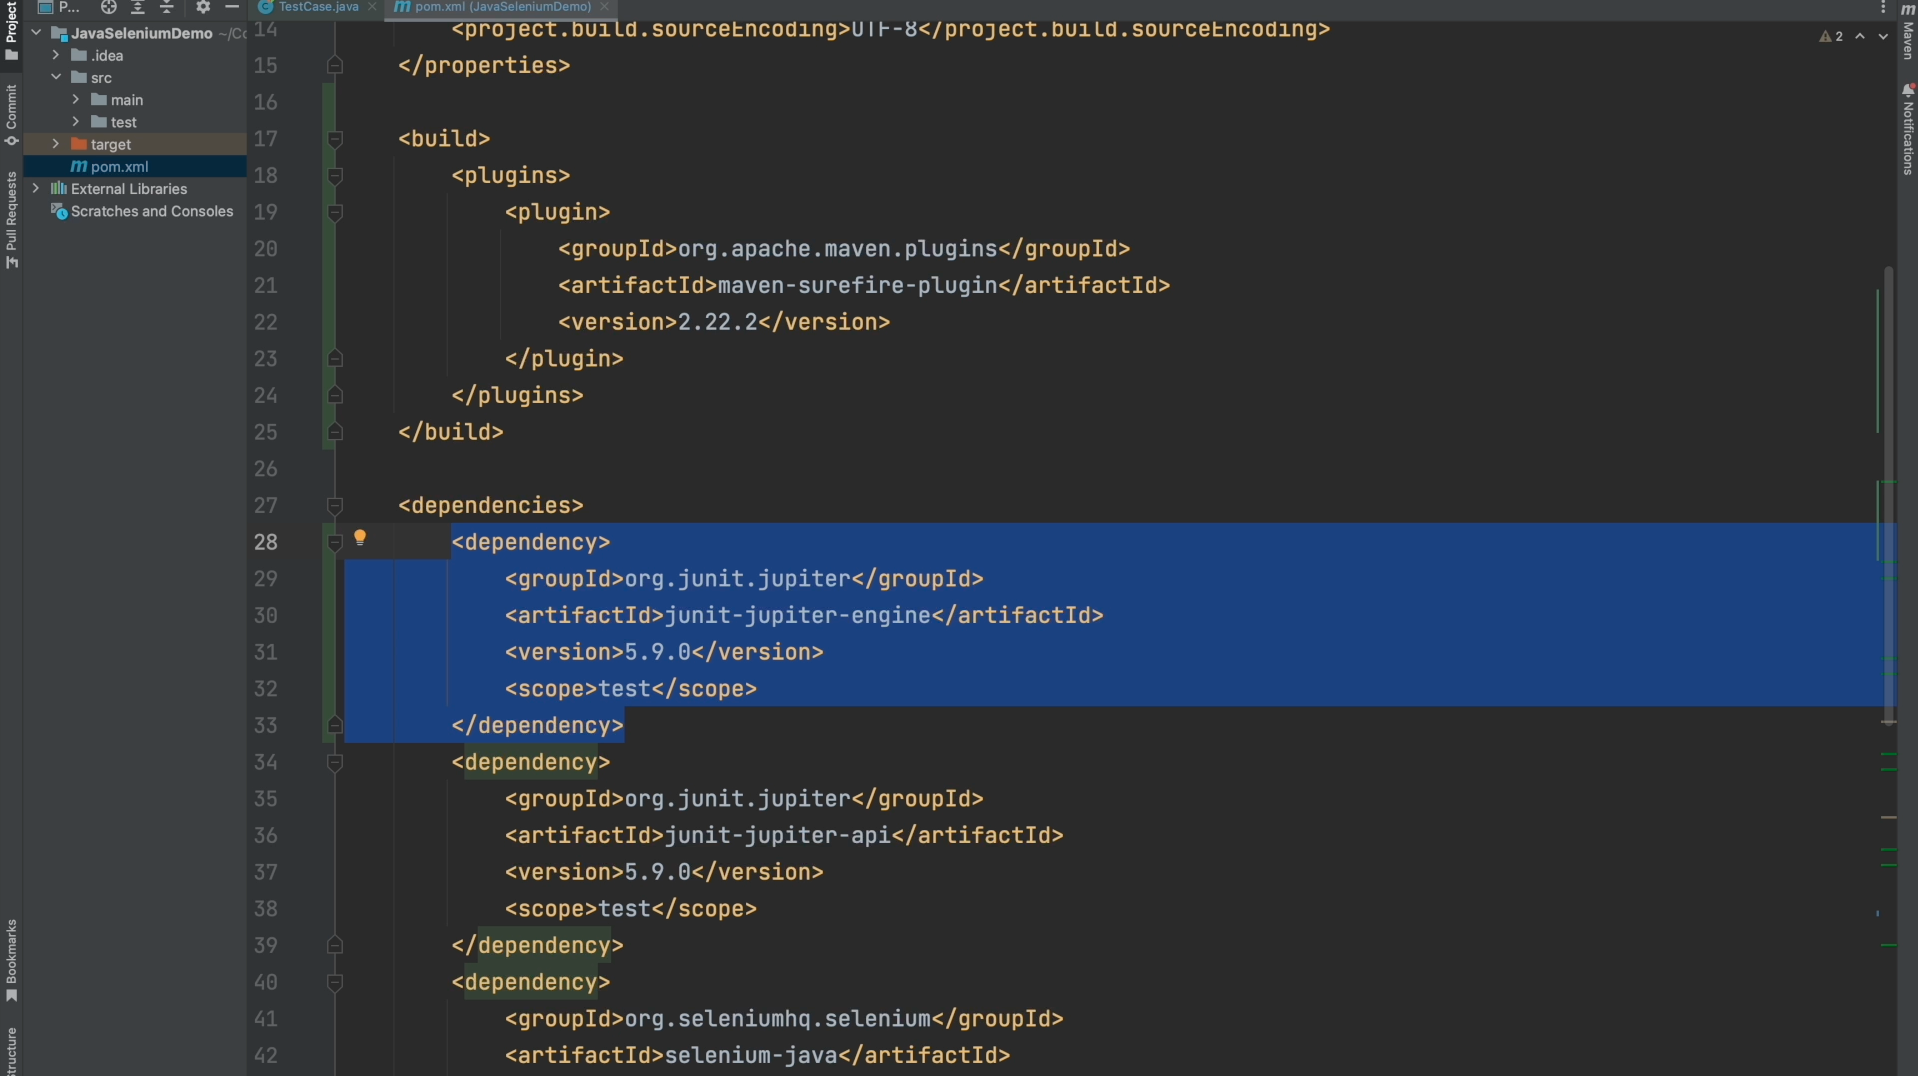
I then added the junit-jupiter-engine dependency which allows the surefire plugin to find and run our JUnit 5 tests. After making these changes, be sure to re-sync your dependencies if not done automatically.
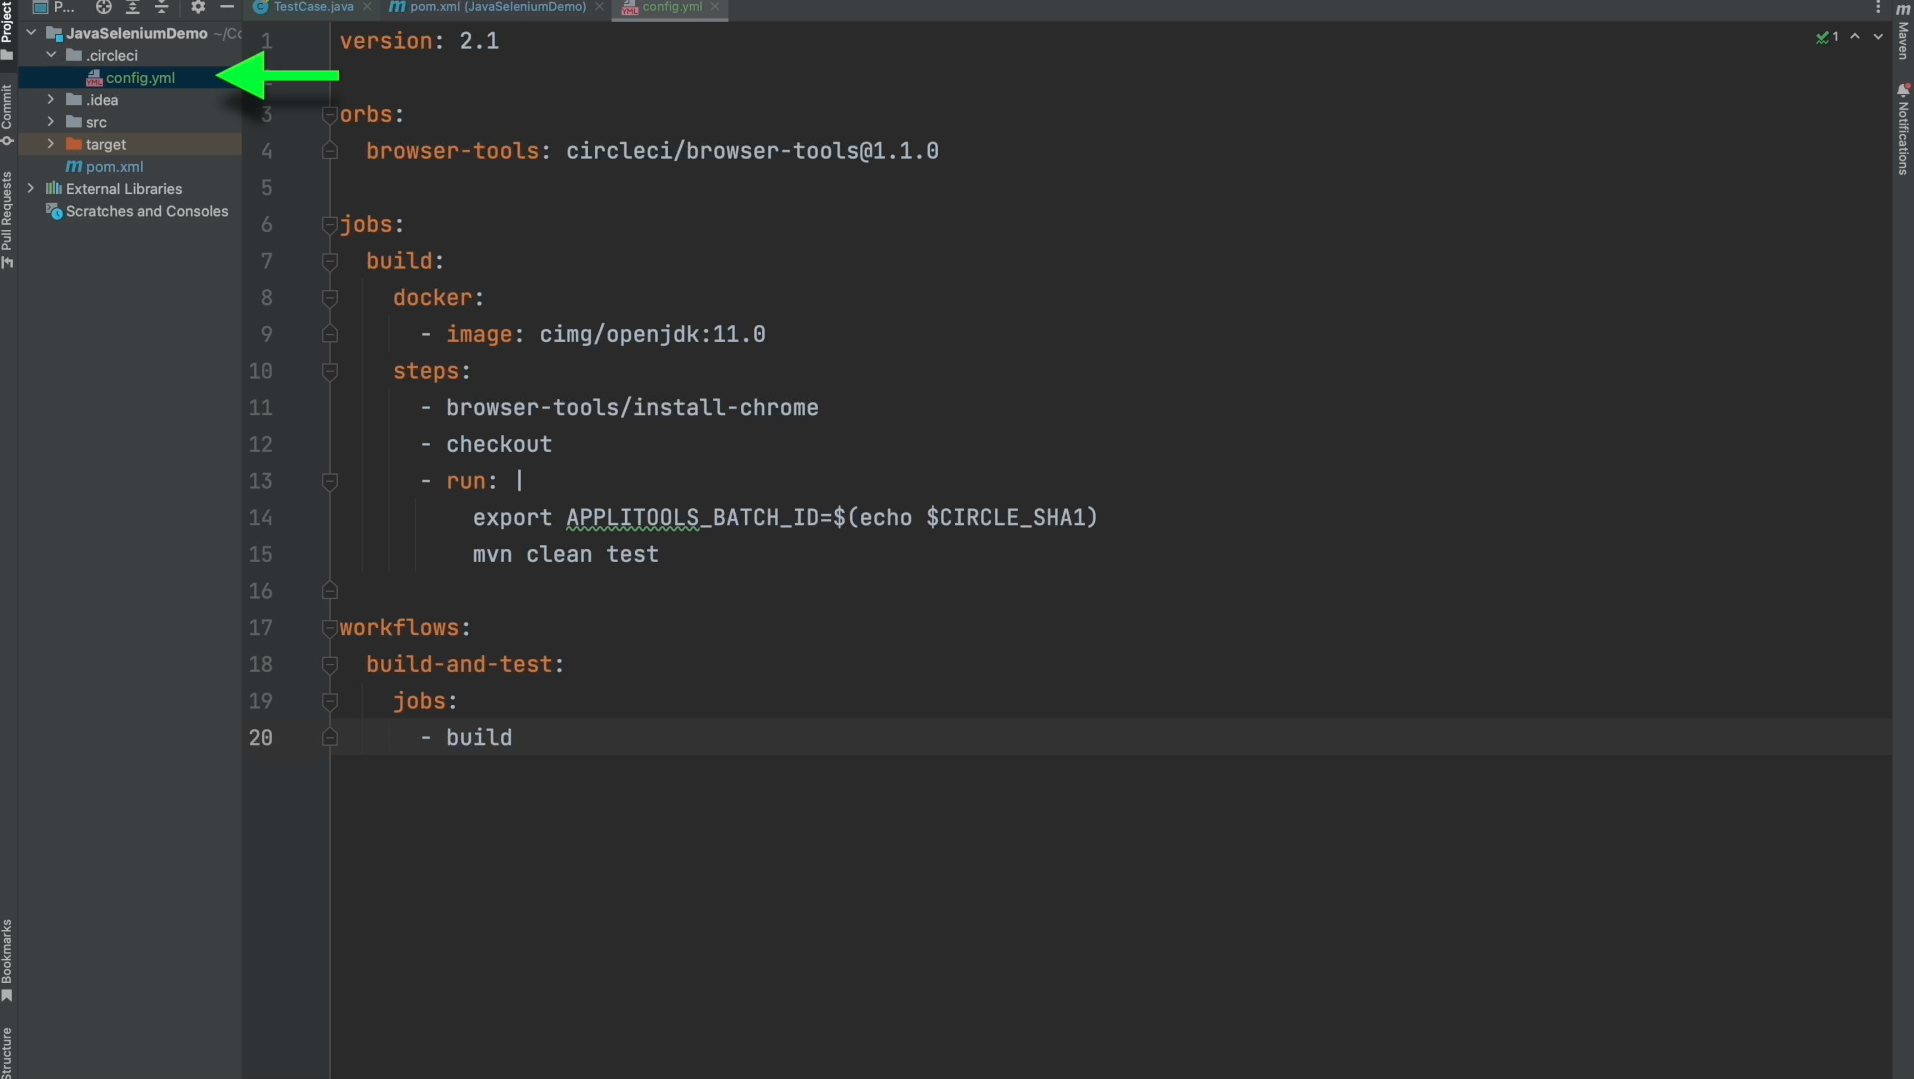
Next, I've created a .circleci folder within the root of our project and added a config.yml file to it. This file is used to configure our pipeline in CircleCI. We'll be running our tests with a docker image that comes with java and maven pre-installed. We also used a CircleCI Orb that allows for easy installation of Chrome in our docker container. I've put documentation on all of this in the write up down below.
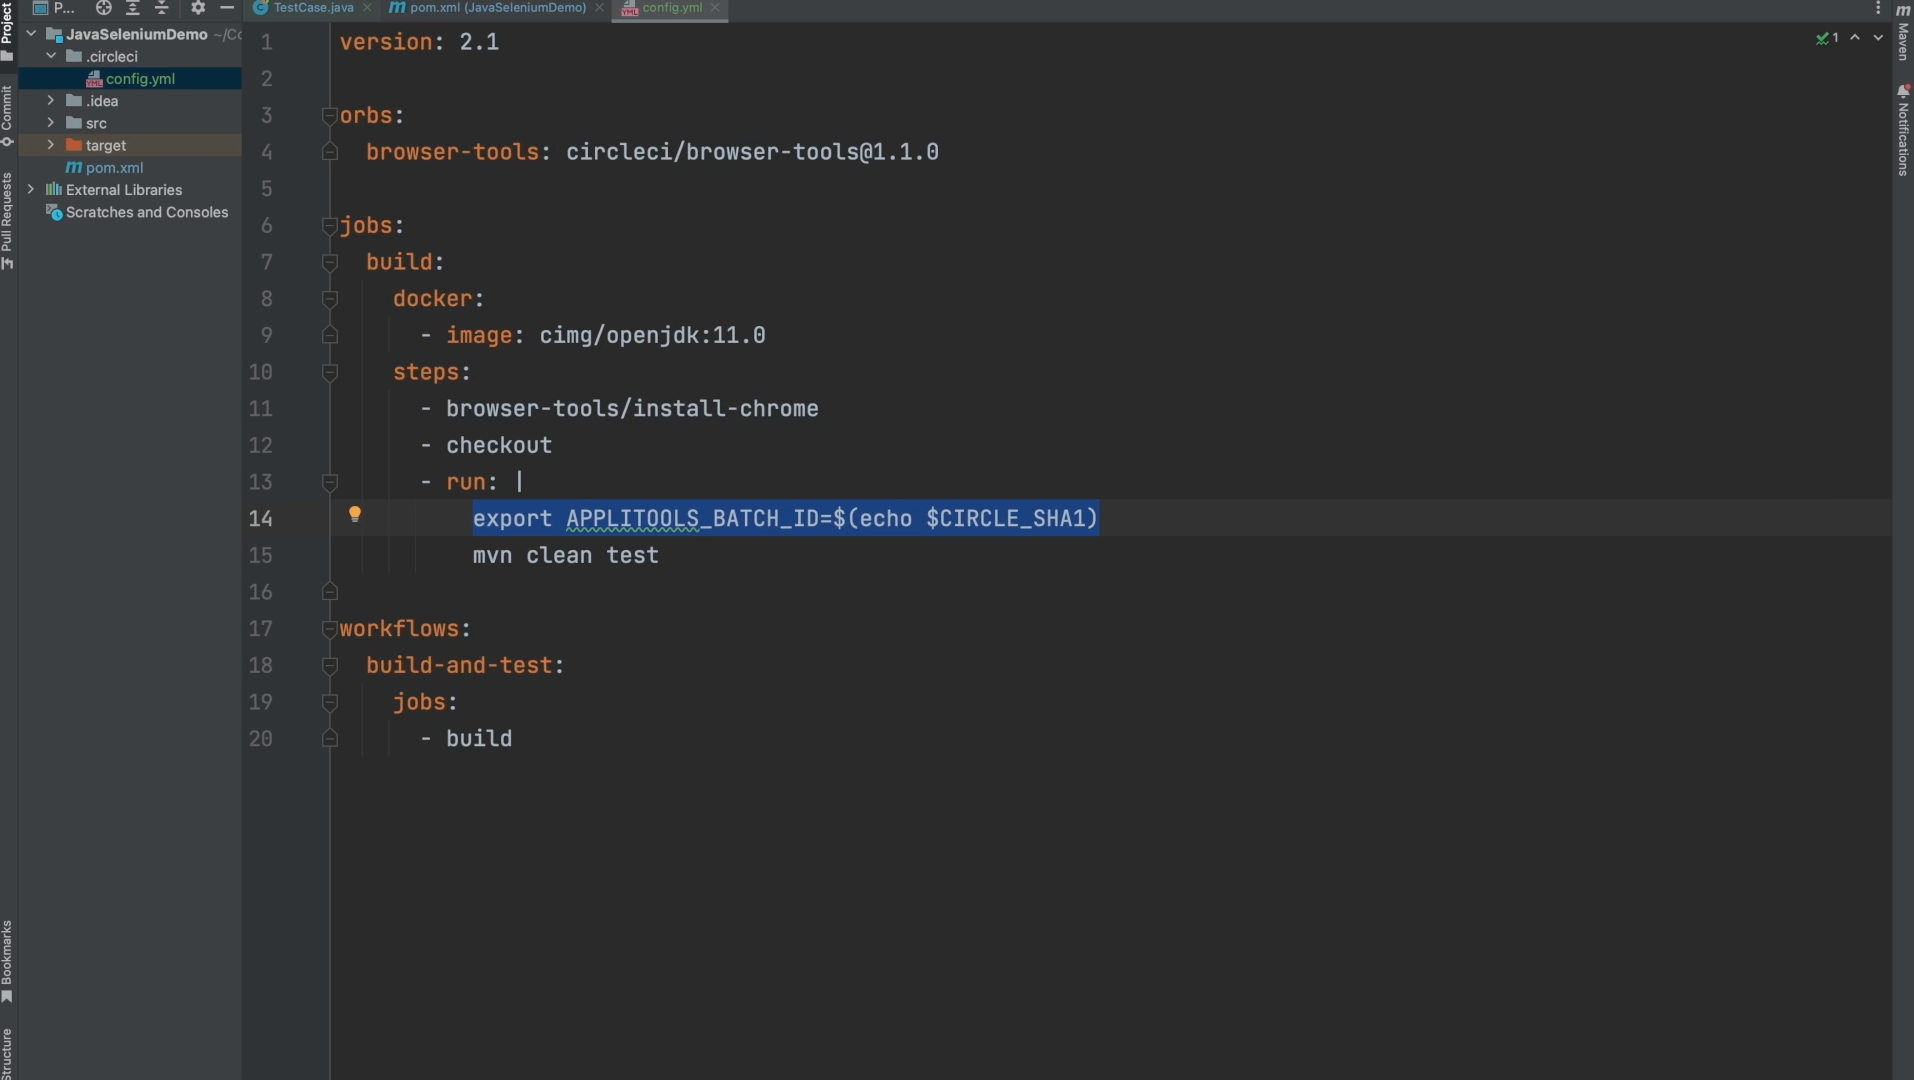
One thing to take note of in this file is this line right here where we're exporting an environment variable called APPLITOOLS_BATCH_ID and setting it equal to this value called $CIRCLE_SHA1. This $CIRCLE_SHA1 value represents the latest commit SHA on Github within the Pull Request that triggered our test run.
The Applitools server links our test run to this specific pull request by using this commit SHA as the BatchID. This is an extremely important step and the integration will not work if you leave this step out or set it to the wrong value. If you're using CircleCI then you can use this value just as I have but I've also linked some documentation below for selecting the correct value based on your CI provider.
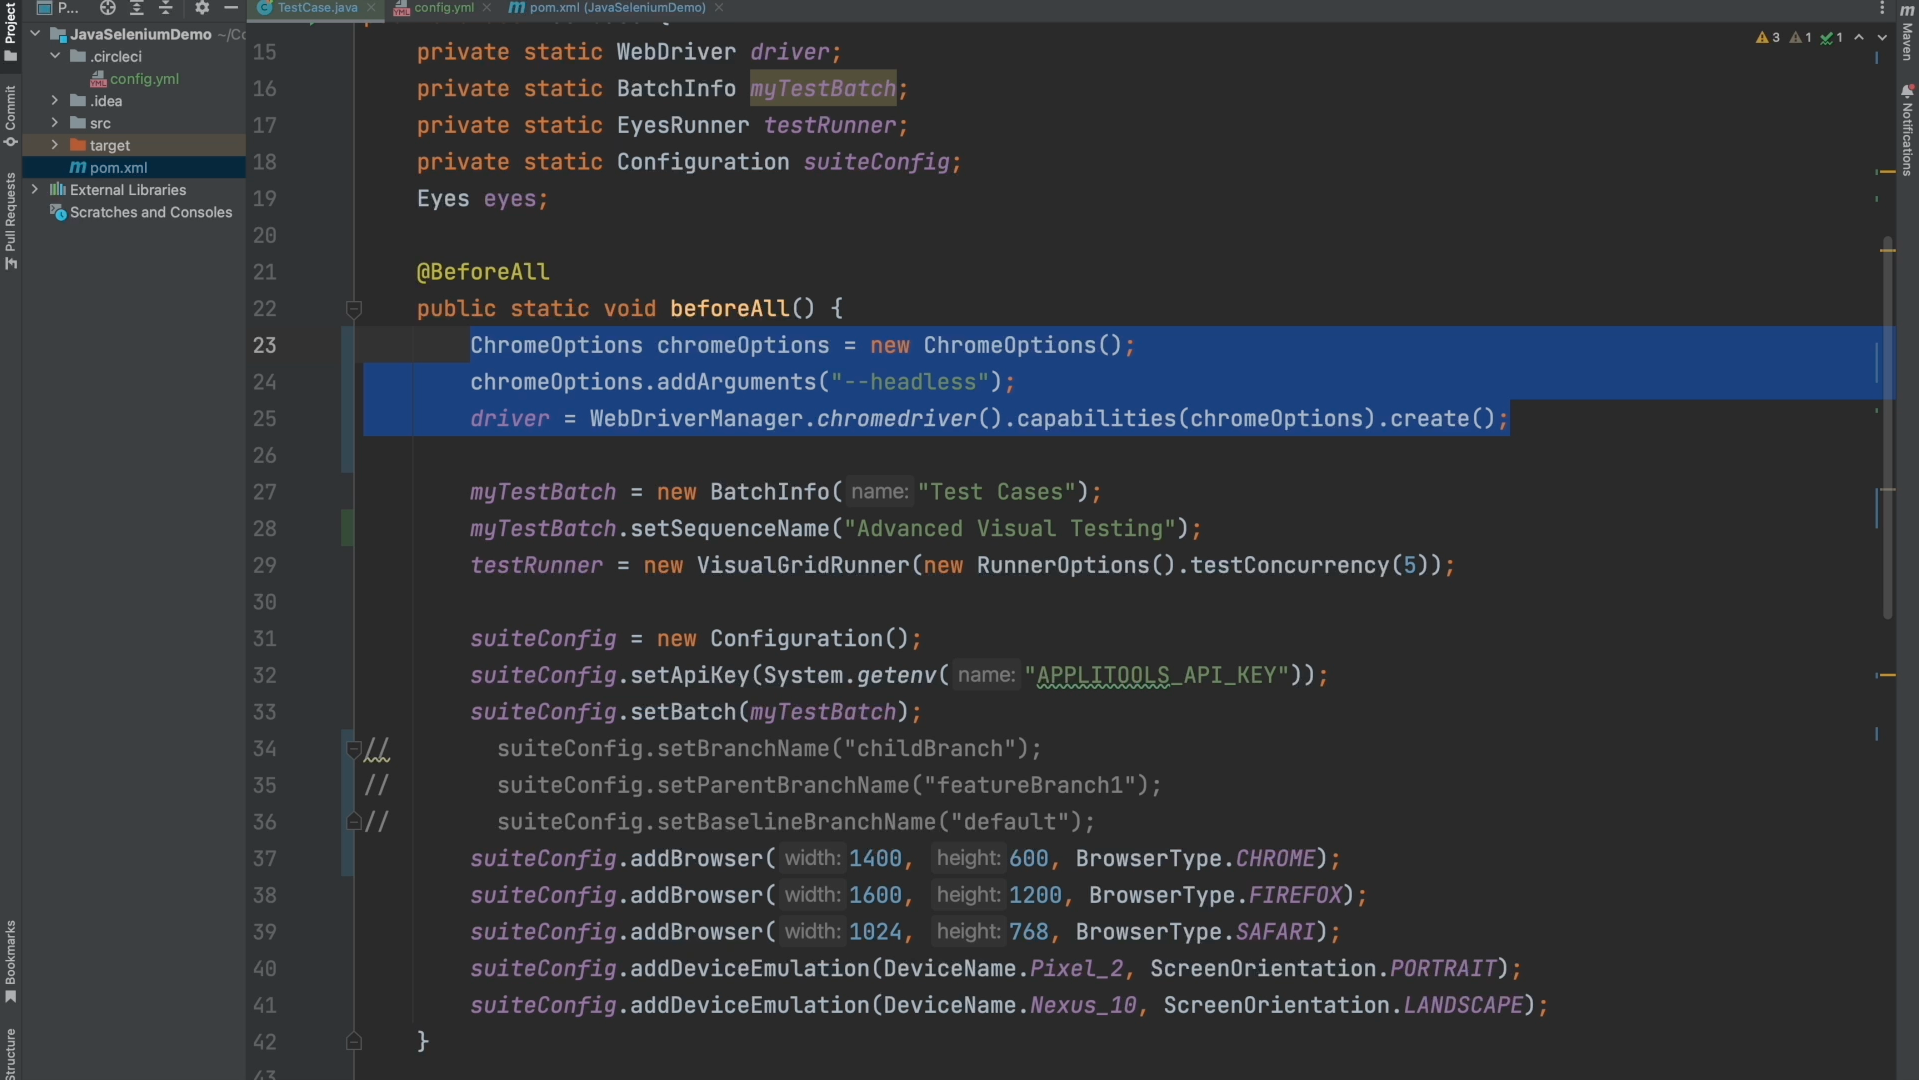
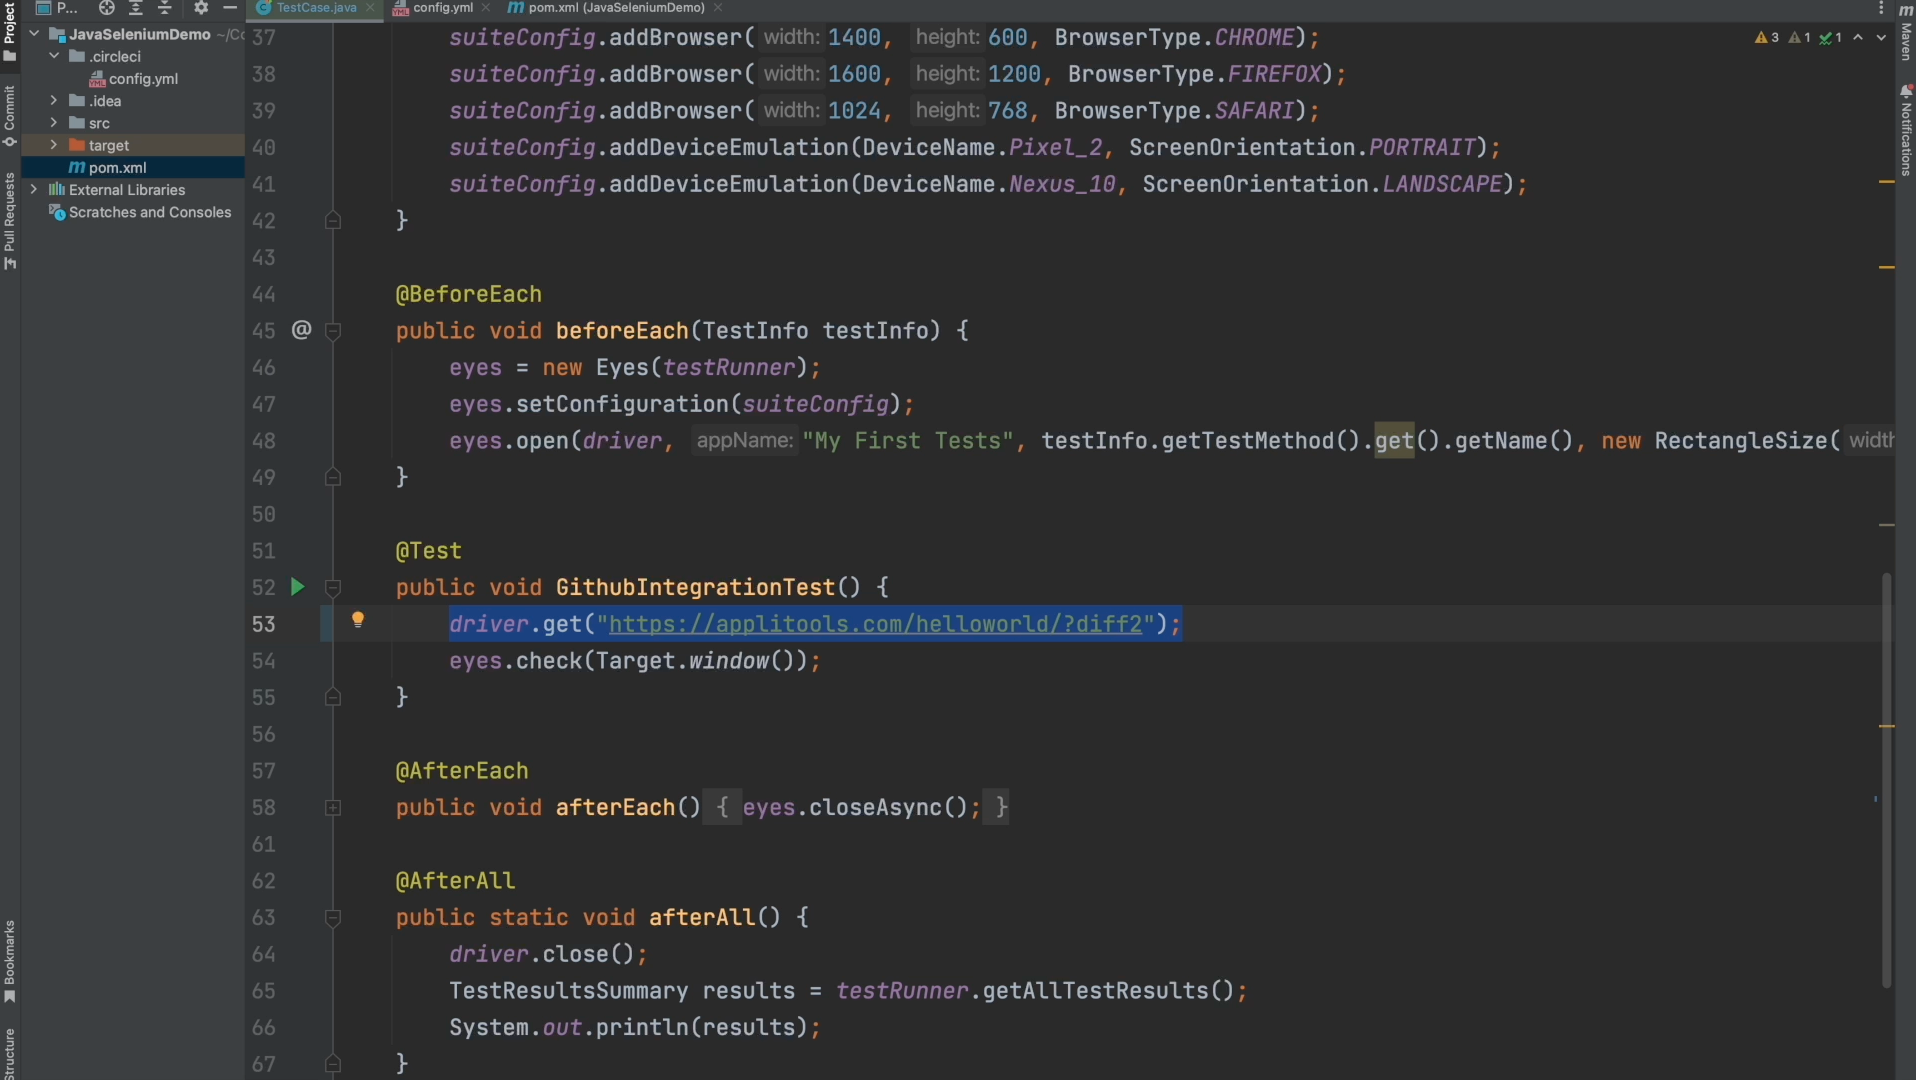
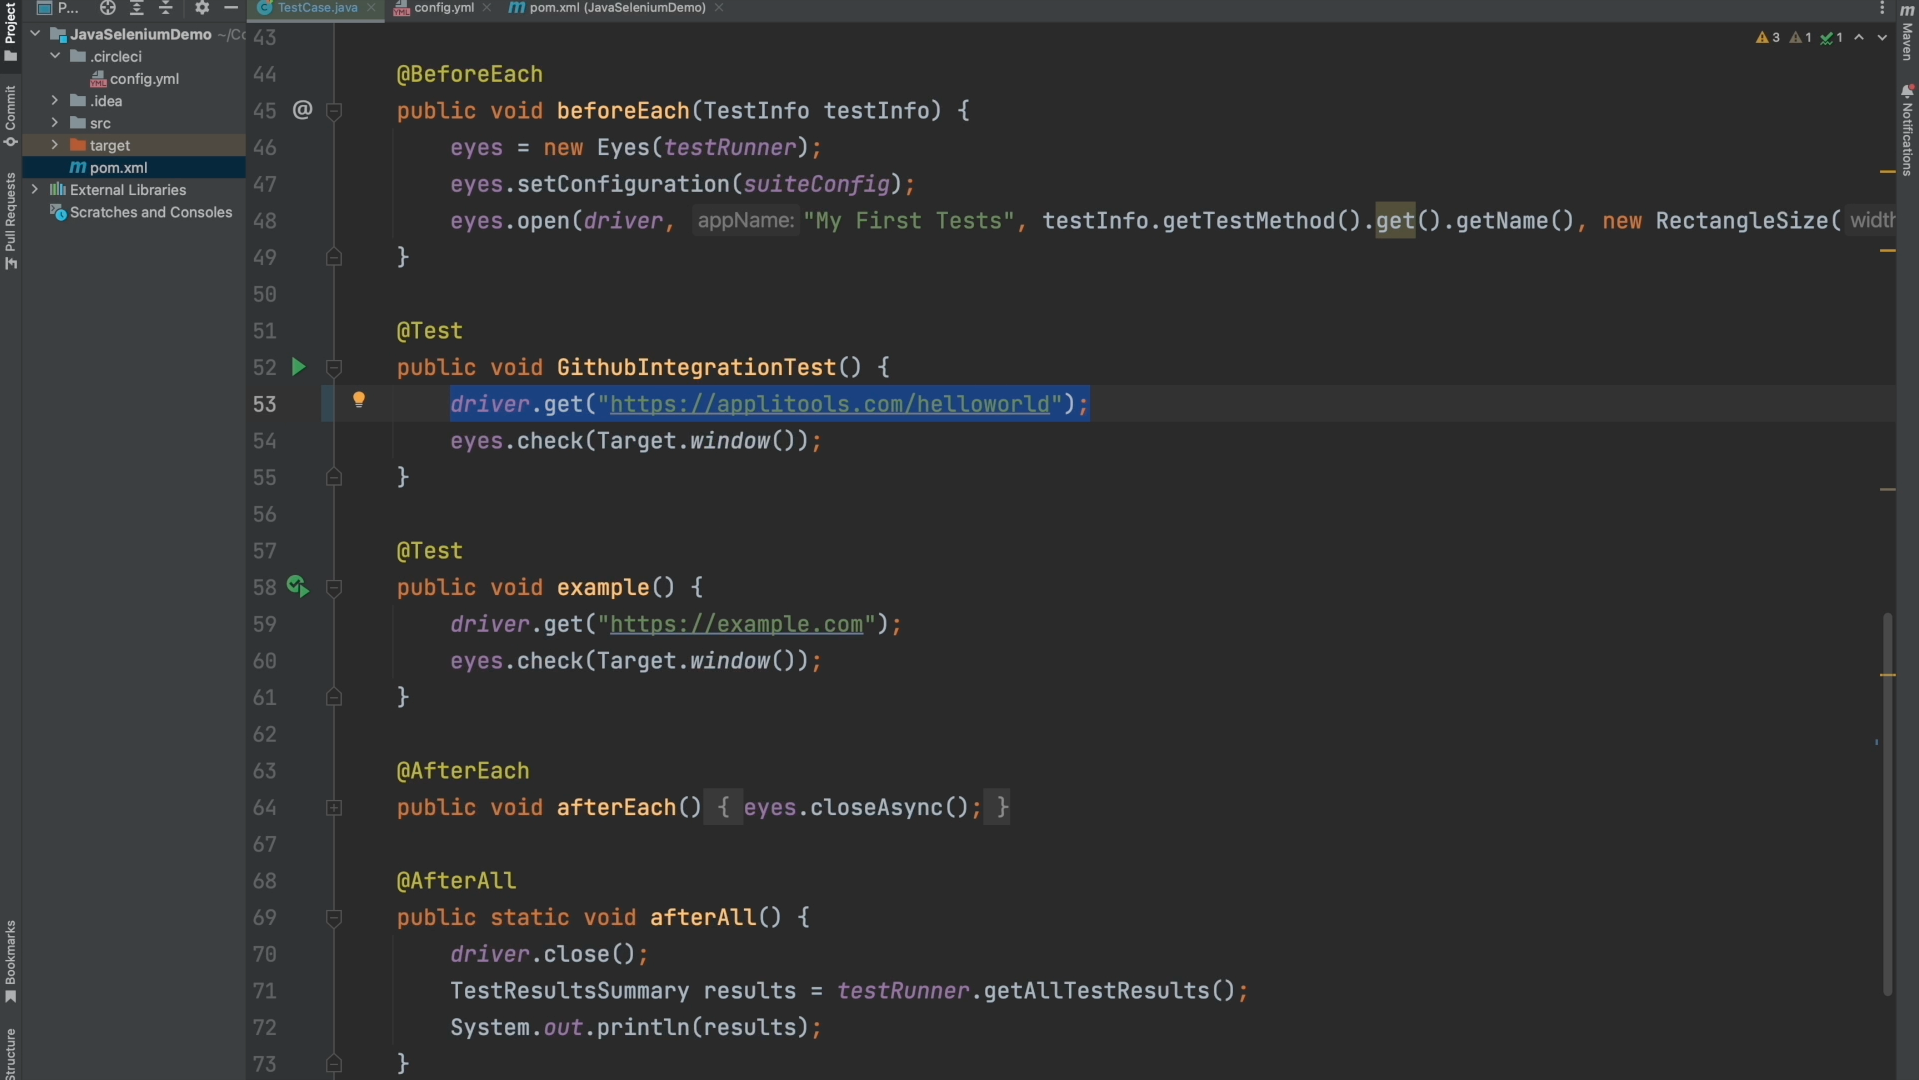
Lastly, I made some slight code changes to prepare our test to run through our CI pipeline. The first change I made is configuring our Chromedriver to run in headless mode. This is generally a best practice when running in CI environments and I've created a ChromeOptions object and added the –headless flag to it.
Next, I commented out our branching configs from the last chapter. As I mentioned in the introduction of this chapter, the Github Integration will set these values automatically so there's no need for us to set them ourselves.
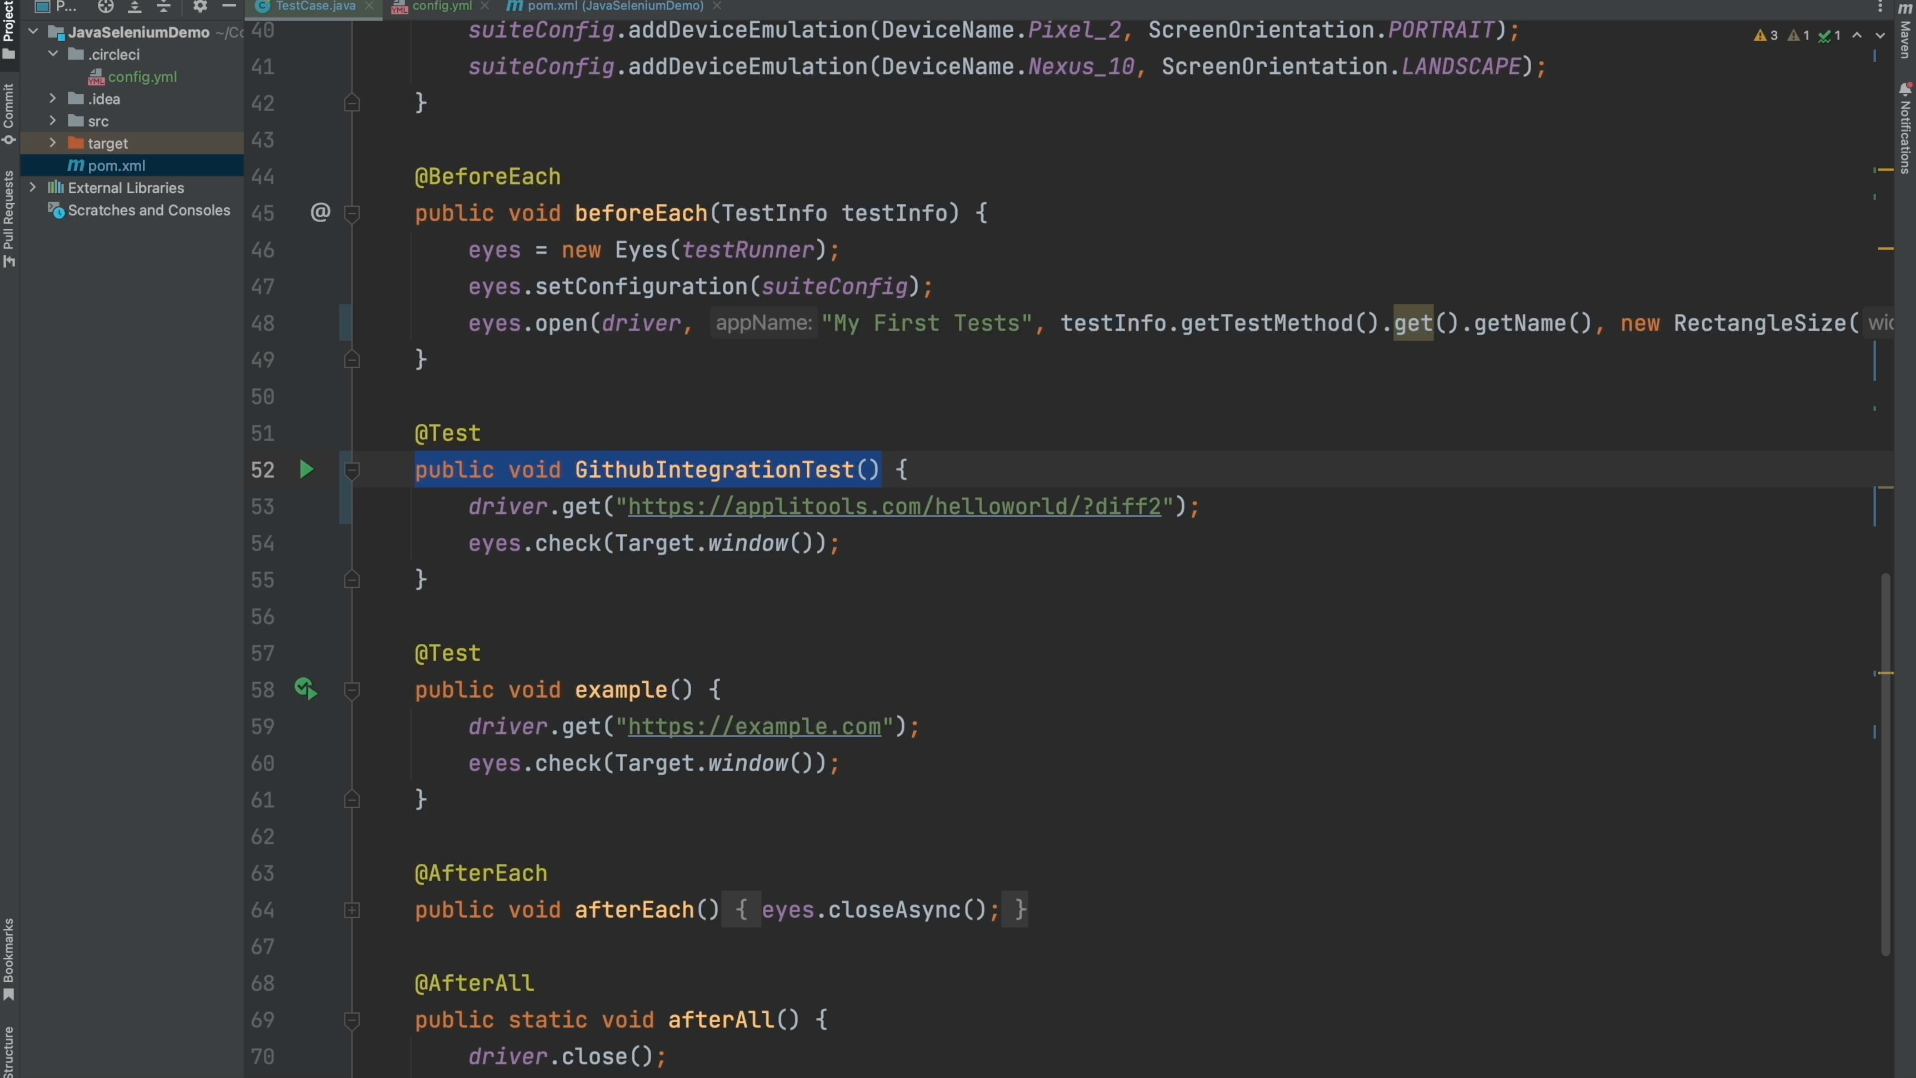
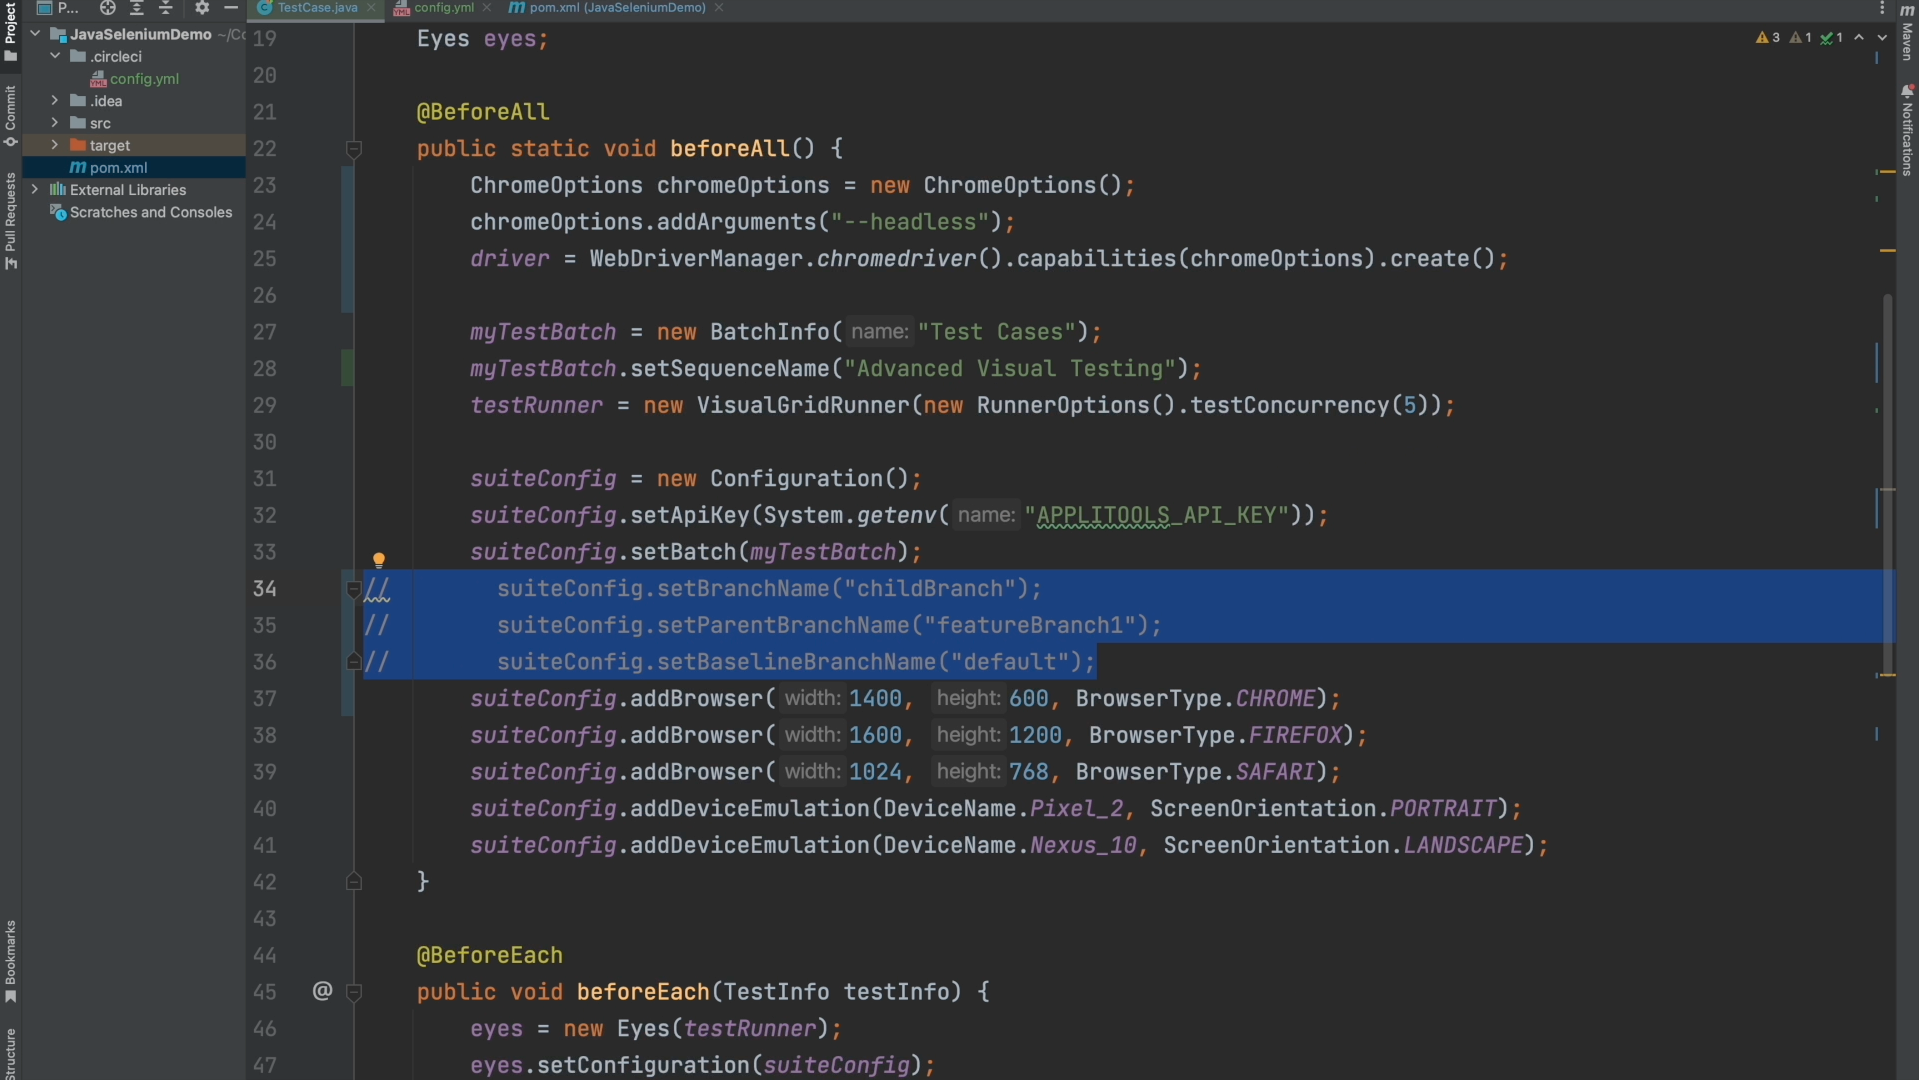
Finally, I've changed the test name once again, this time to GithubIntegrationTest so that we start off with a fresh baseline. That's it for the setup! We're now all ready to go to get started with running our tests with the GithubIntegration.

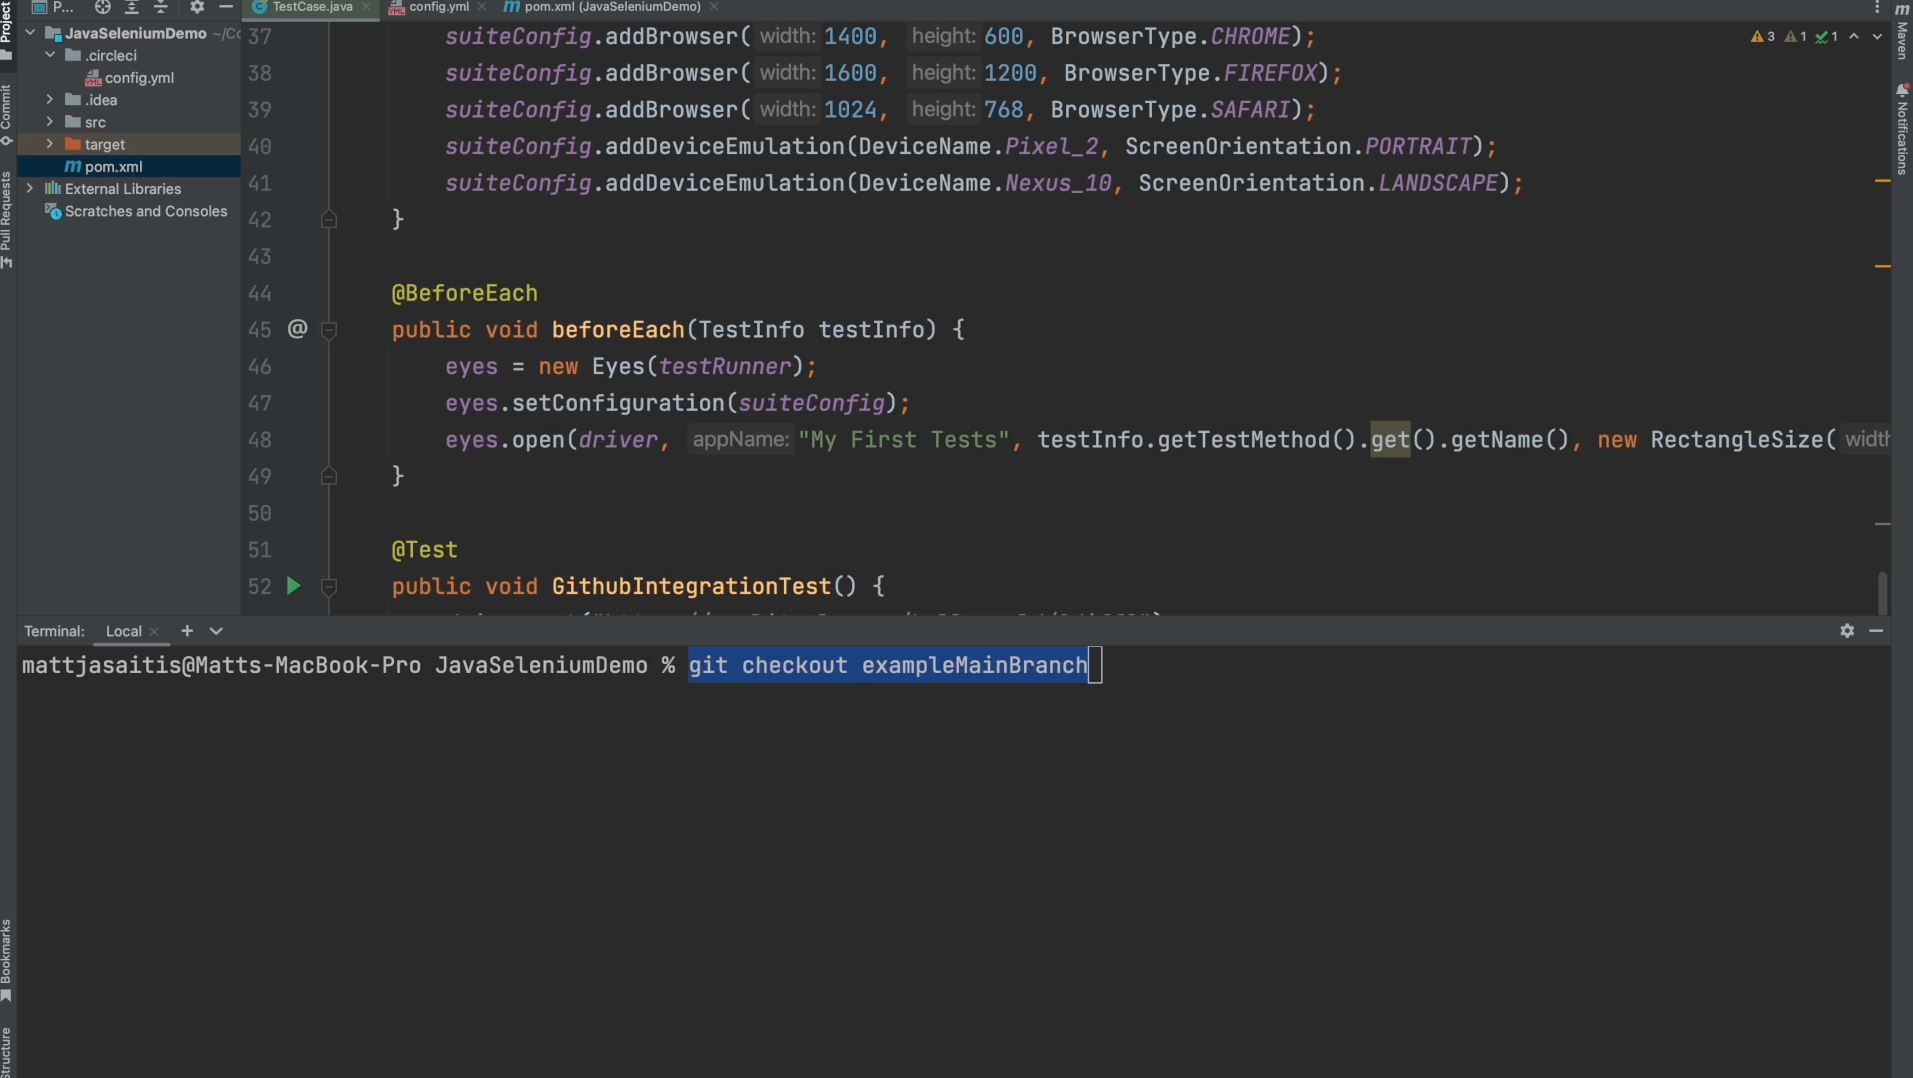
Now that we've set up our tests to run through CircleCI, we won't be running our tests locally like we have been throughout this course. To run our tests, we're going to make source control changes in git and then open up Pull Requests to trigger our CI pipeline. To get started, I've first created a temporary main branch called "exampleMainBranch" by running the git CLI command shown in the terminal.
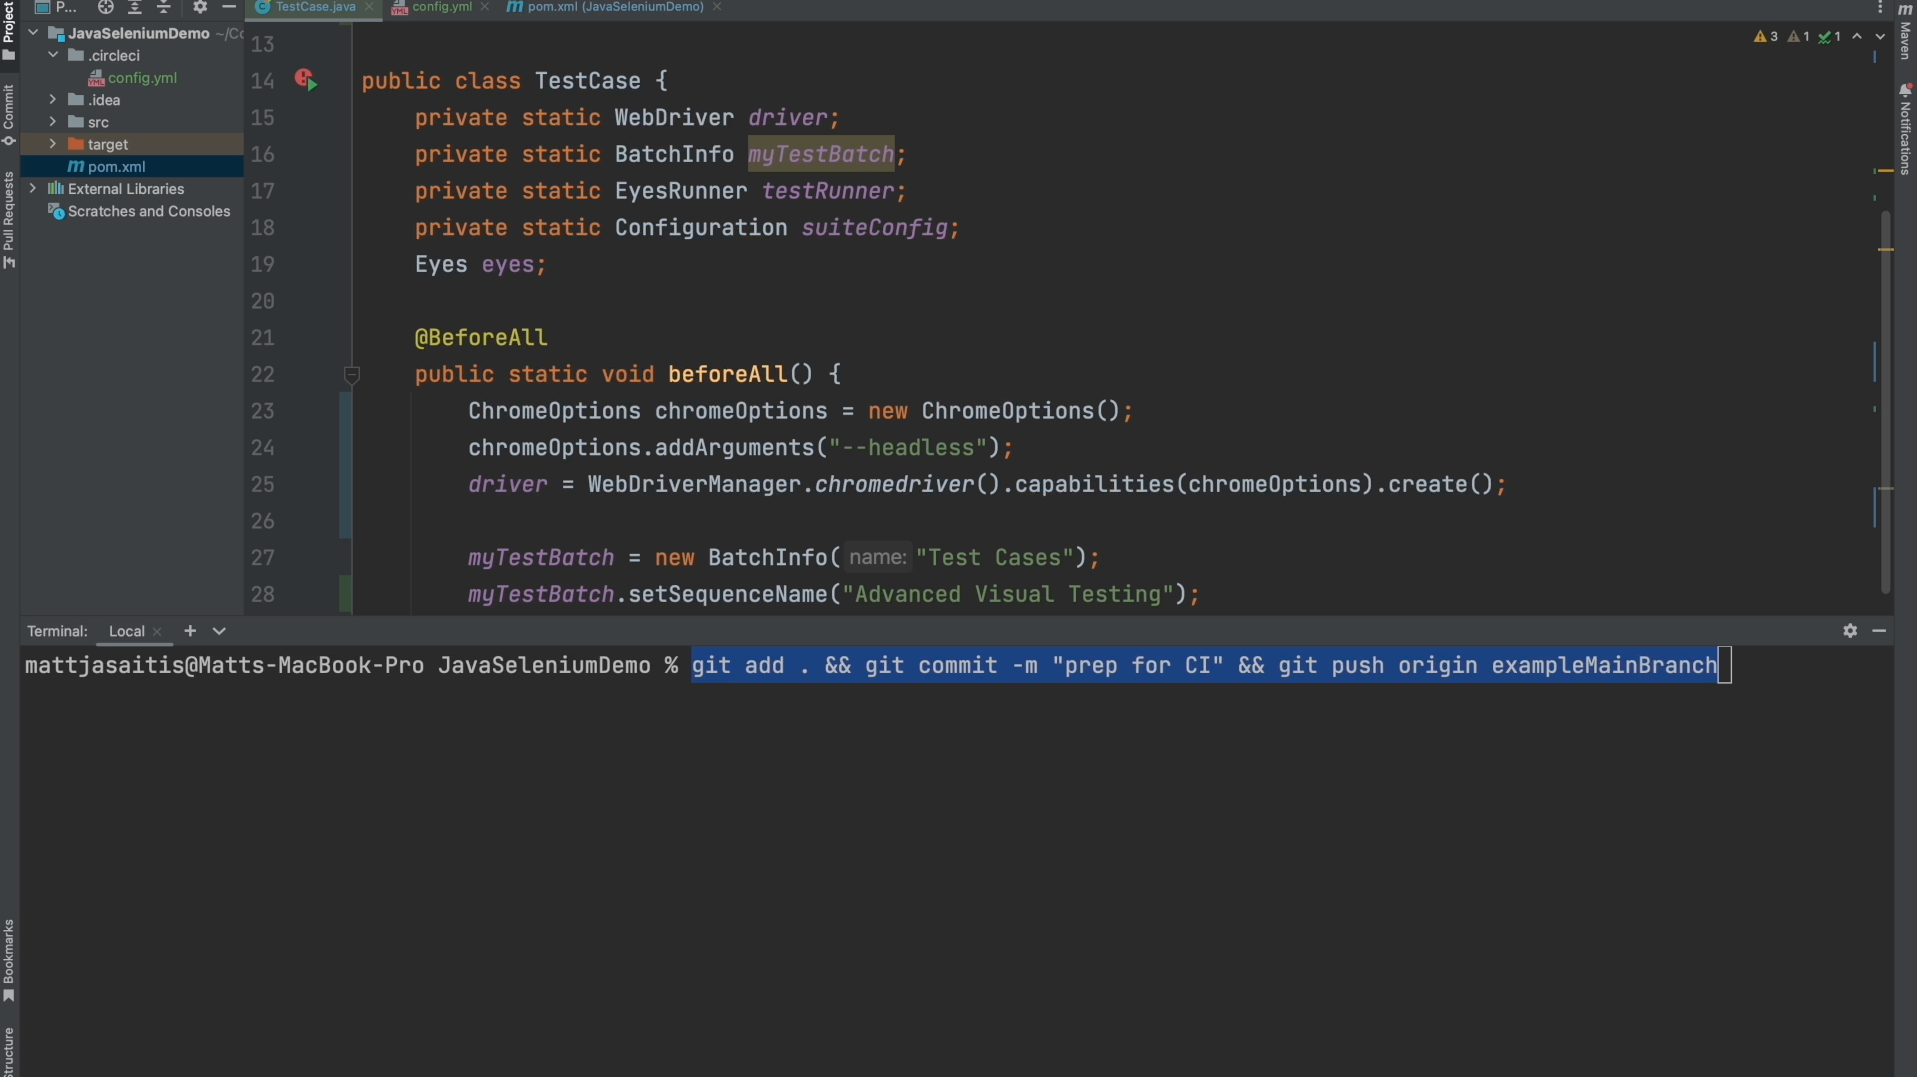
Then, I pushed all of our changes that we just made up to this new branch by running git add, git commit and git push.
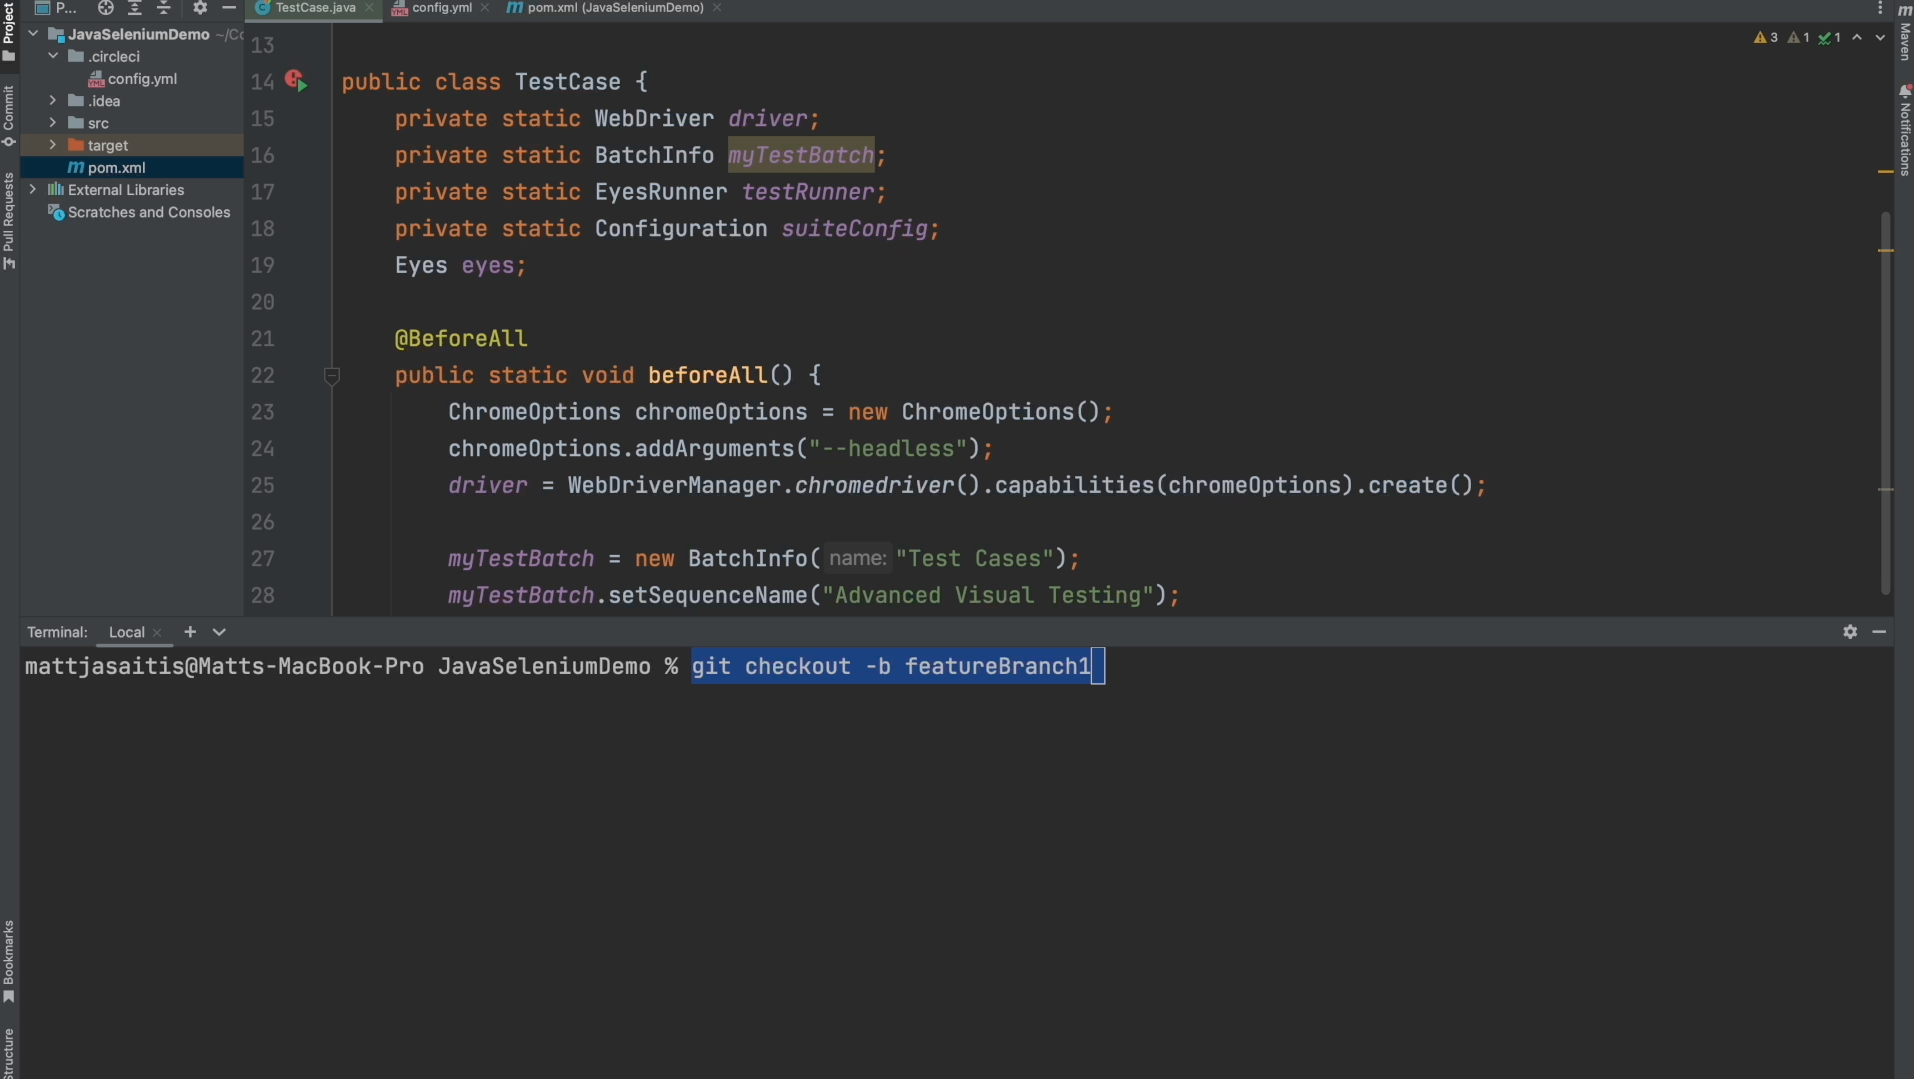
Next, I branched off from our exampleMainBranch to a new branch called "featureBranch1" by running the command shown in the terminal below.
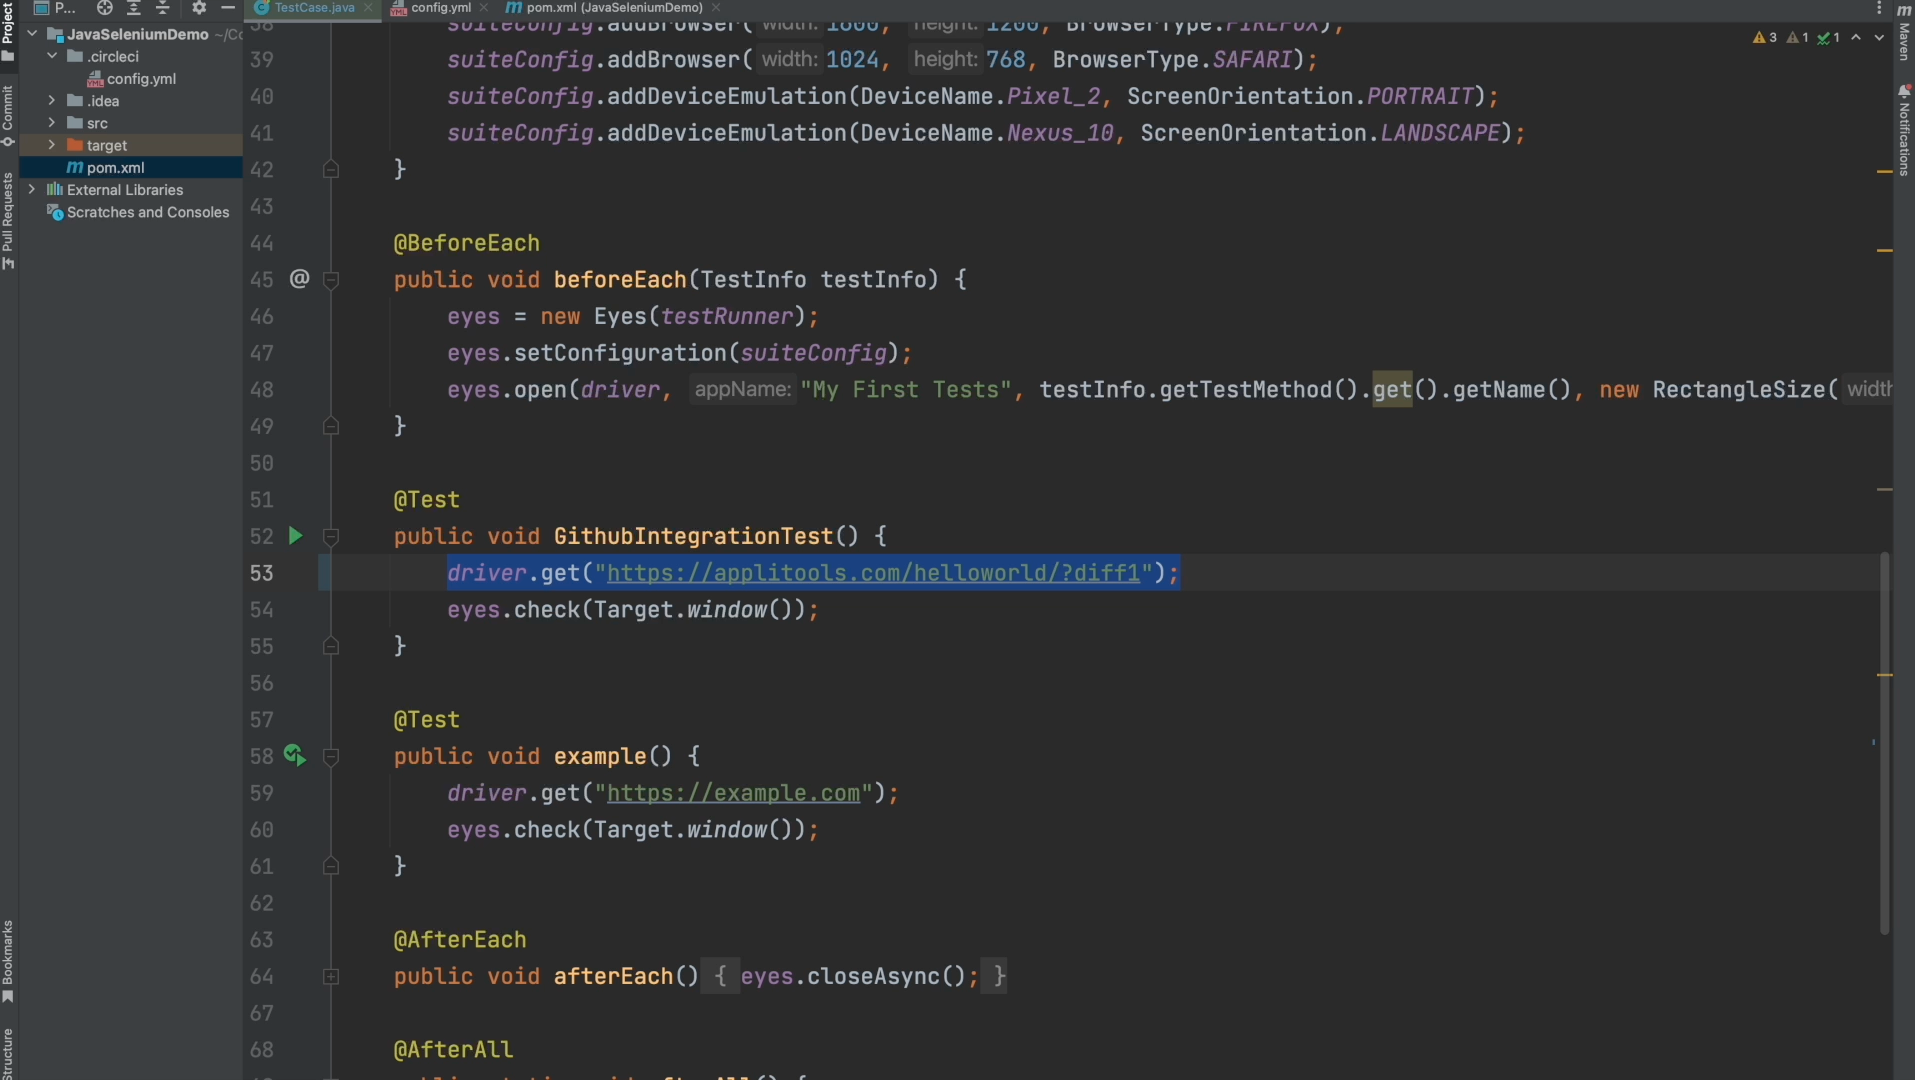
Now that we're on our feature branch, I've simulated a change to our application by adding ?diff1 to the end of our URL. After making this change, go ahead and push it up to Github.
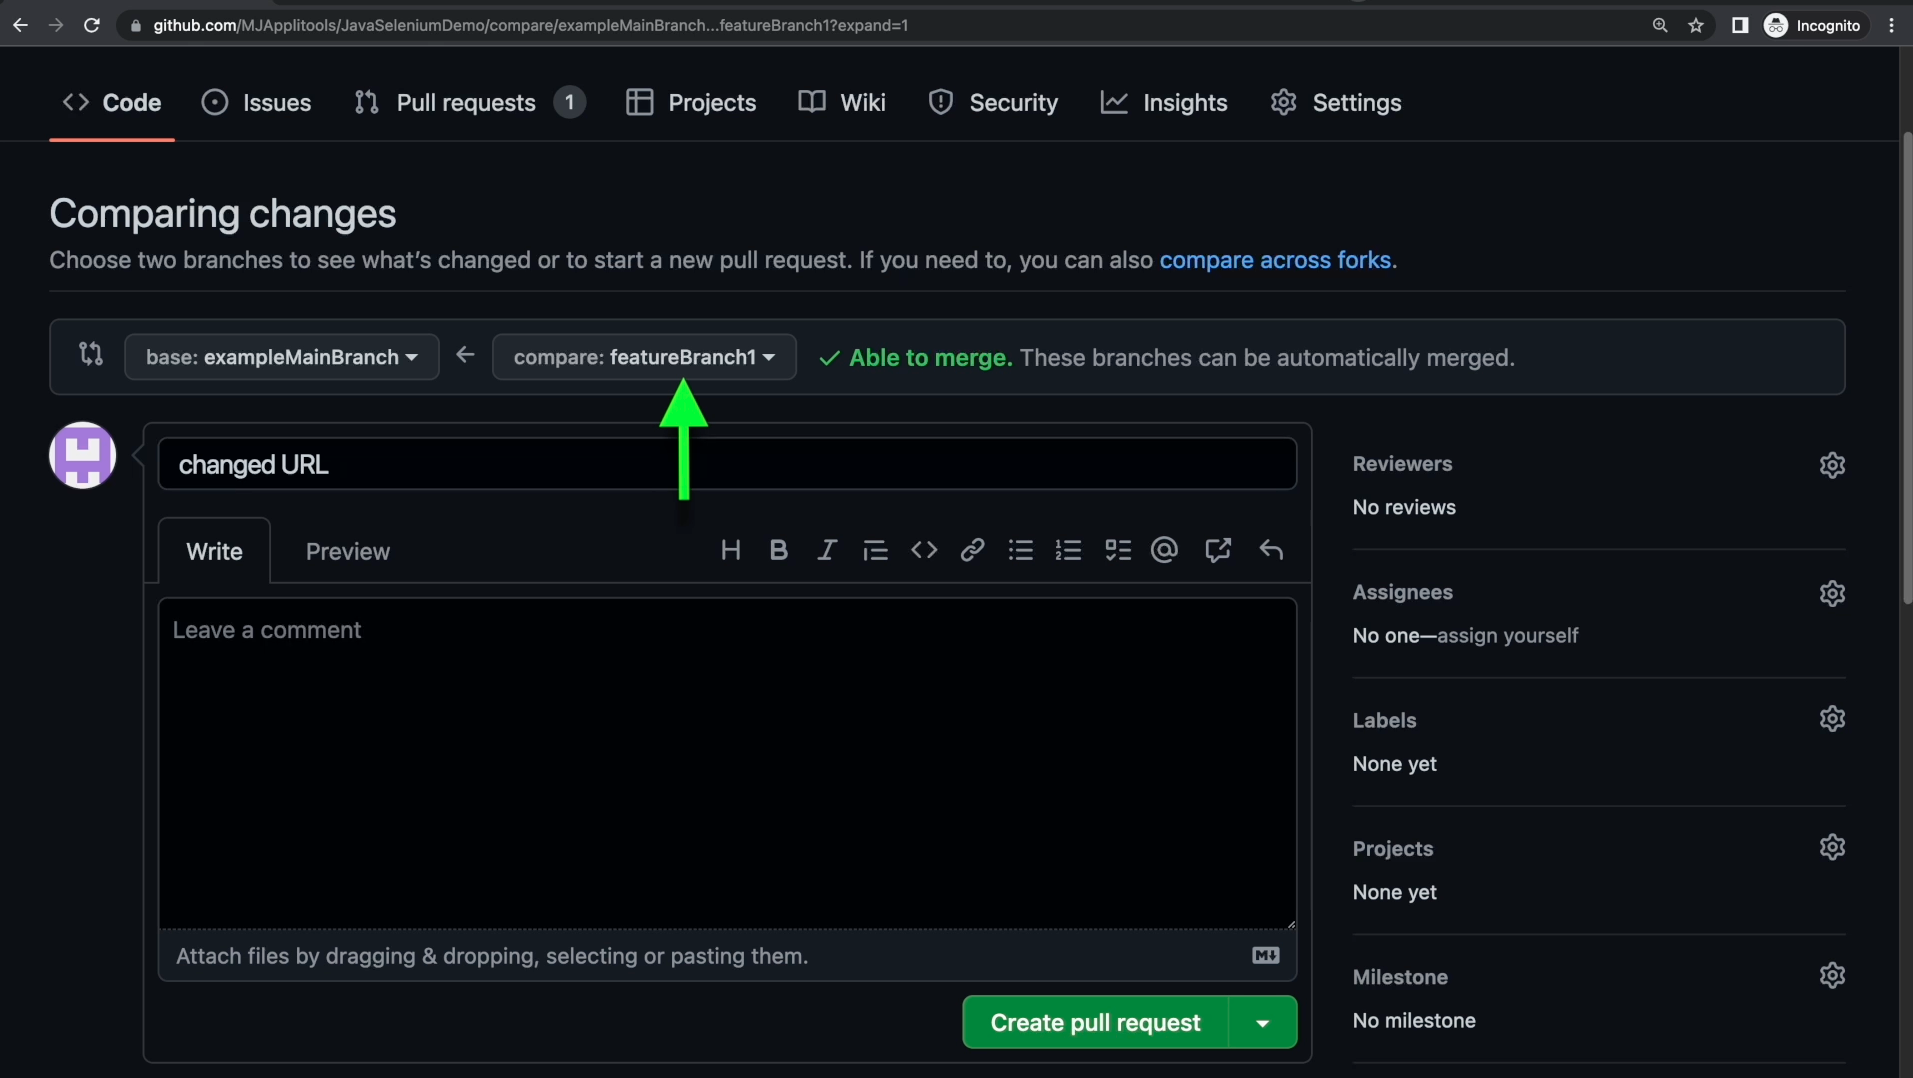
On Github, let's open up a pull request between featureBranch1 and exampleMainBranch.
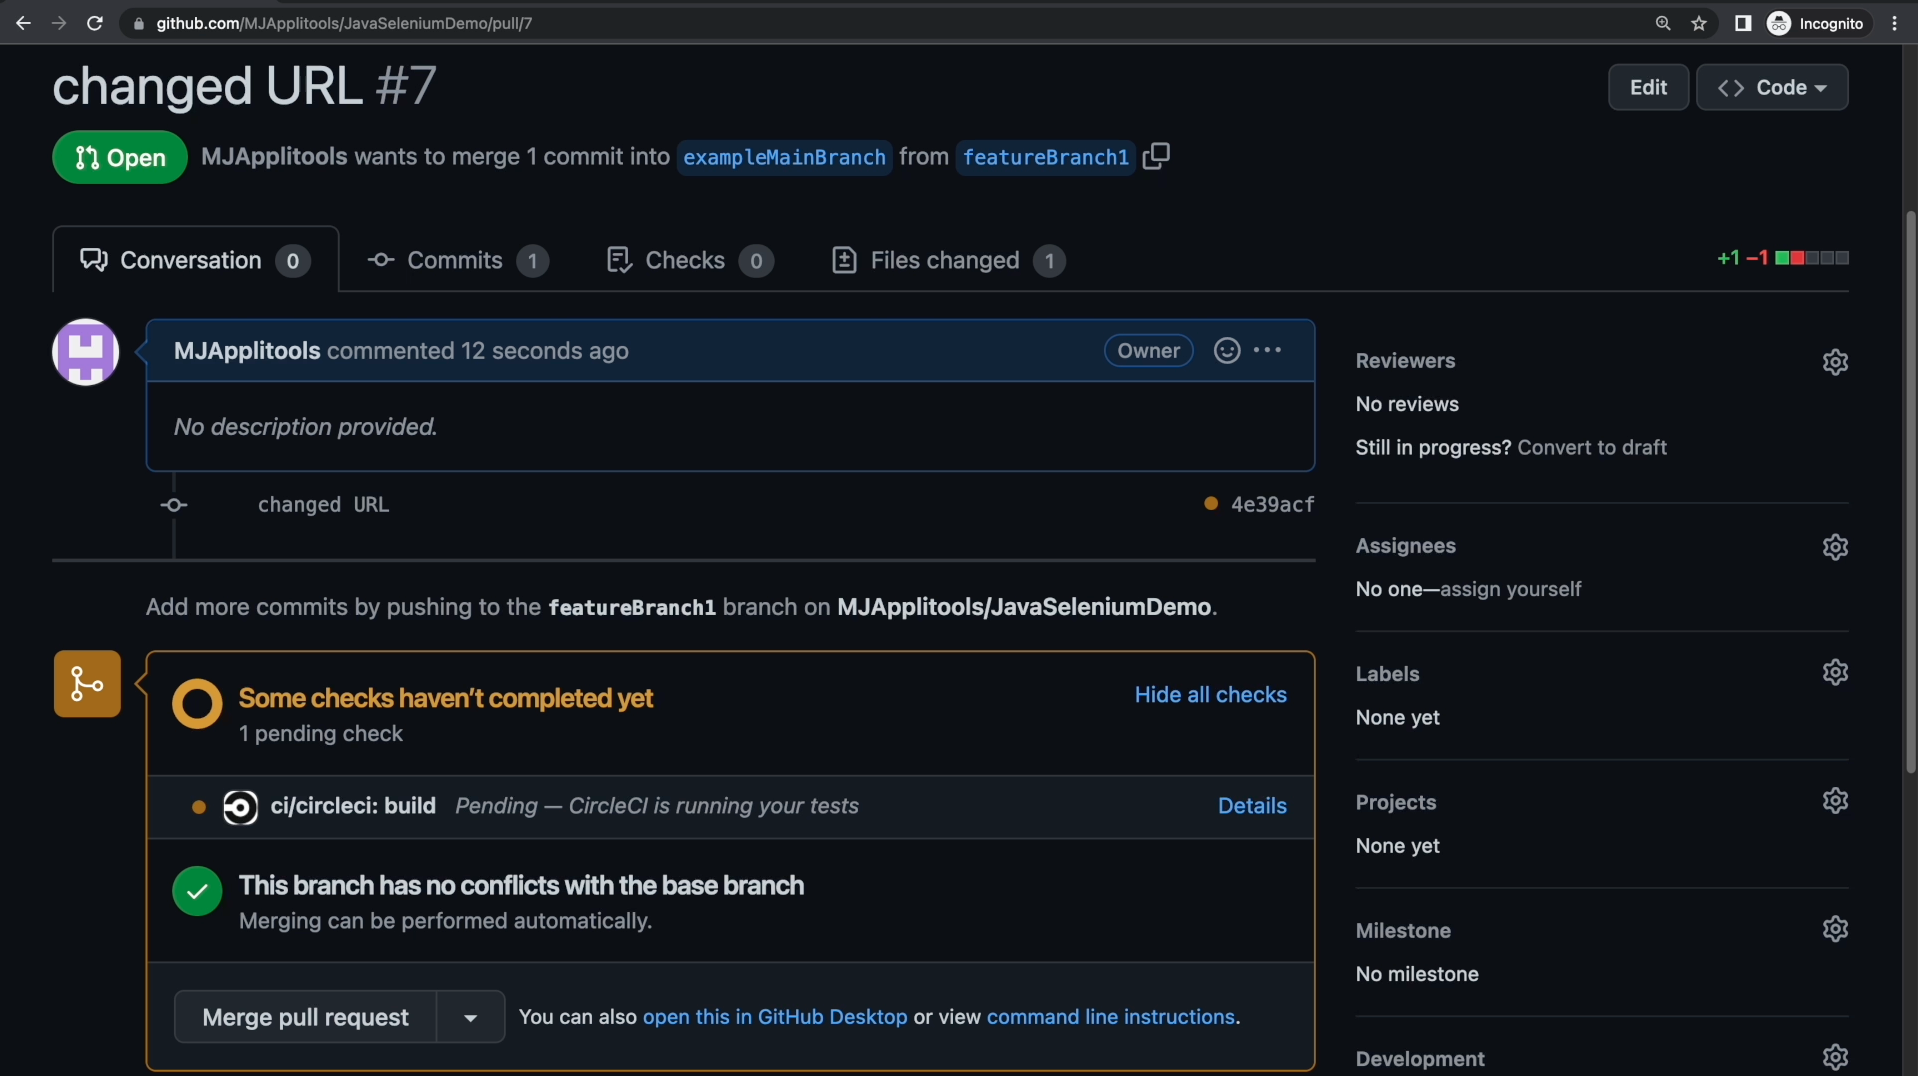
Once we open this PR, we can see that our tests have started running over on CircleCI. Let's wait for these tests to complete and then review the results.
On our Applitools dashboard, we see that we have some New tests from the CI pipeline that we just ran.
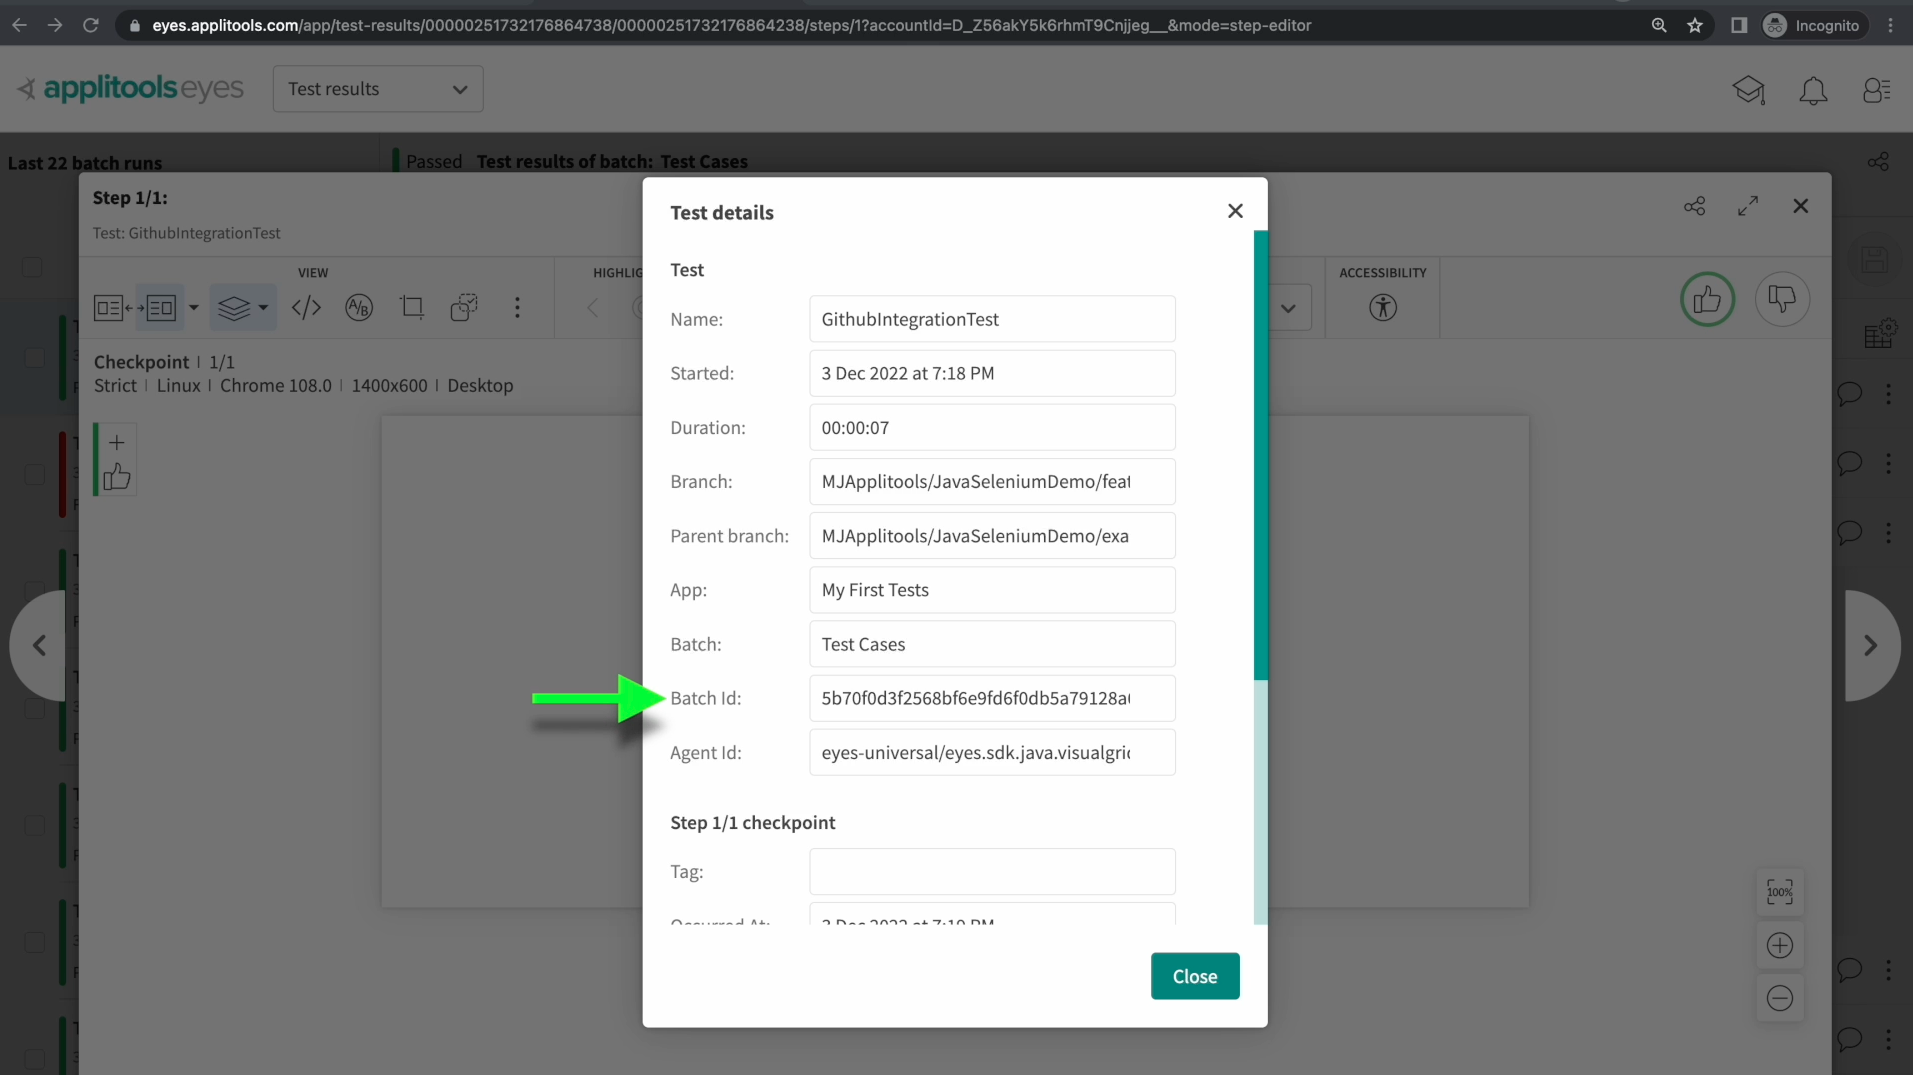
If we look at the test details for one of our tests, take note of the BatchID. As mentioned earlier, we set the batchID equal to the commit SHA from our PR. When we head back to Github we'll check out that value and see if it matches.
Also take a look at the branches. The Github integration has automatically set our branchName and parentBranchName and they correspond to the Pull Request that triggered this test run.
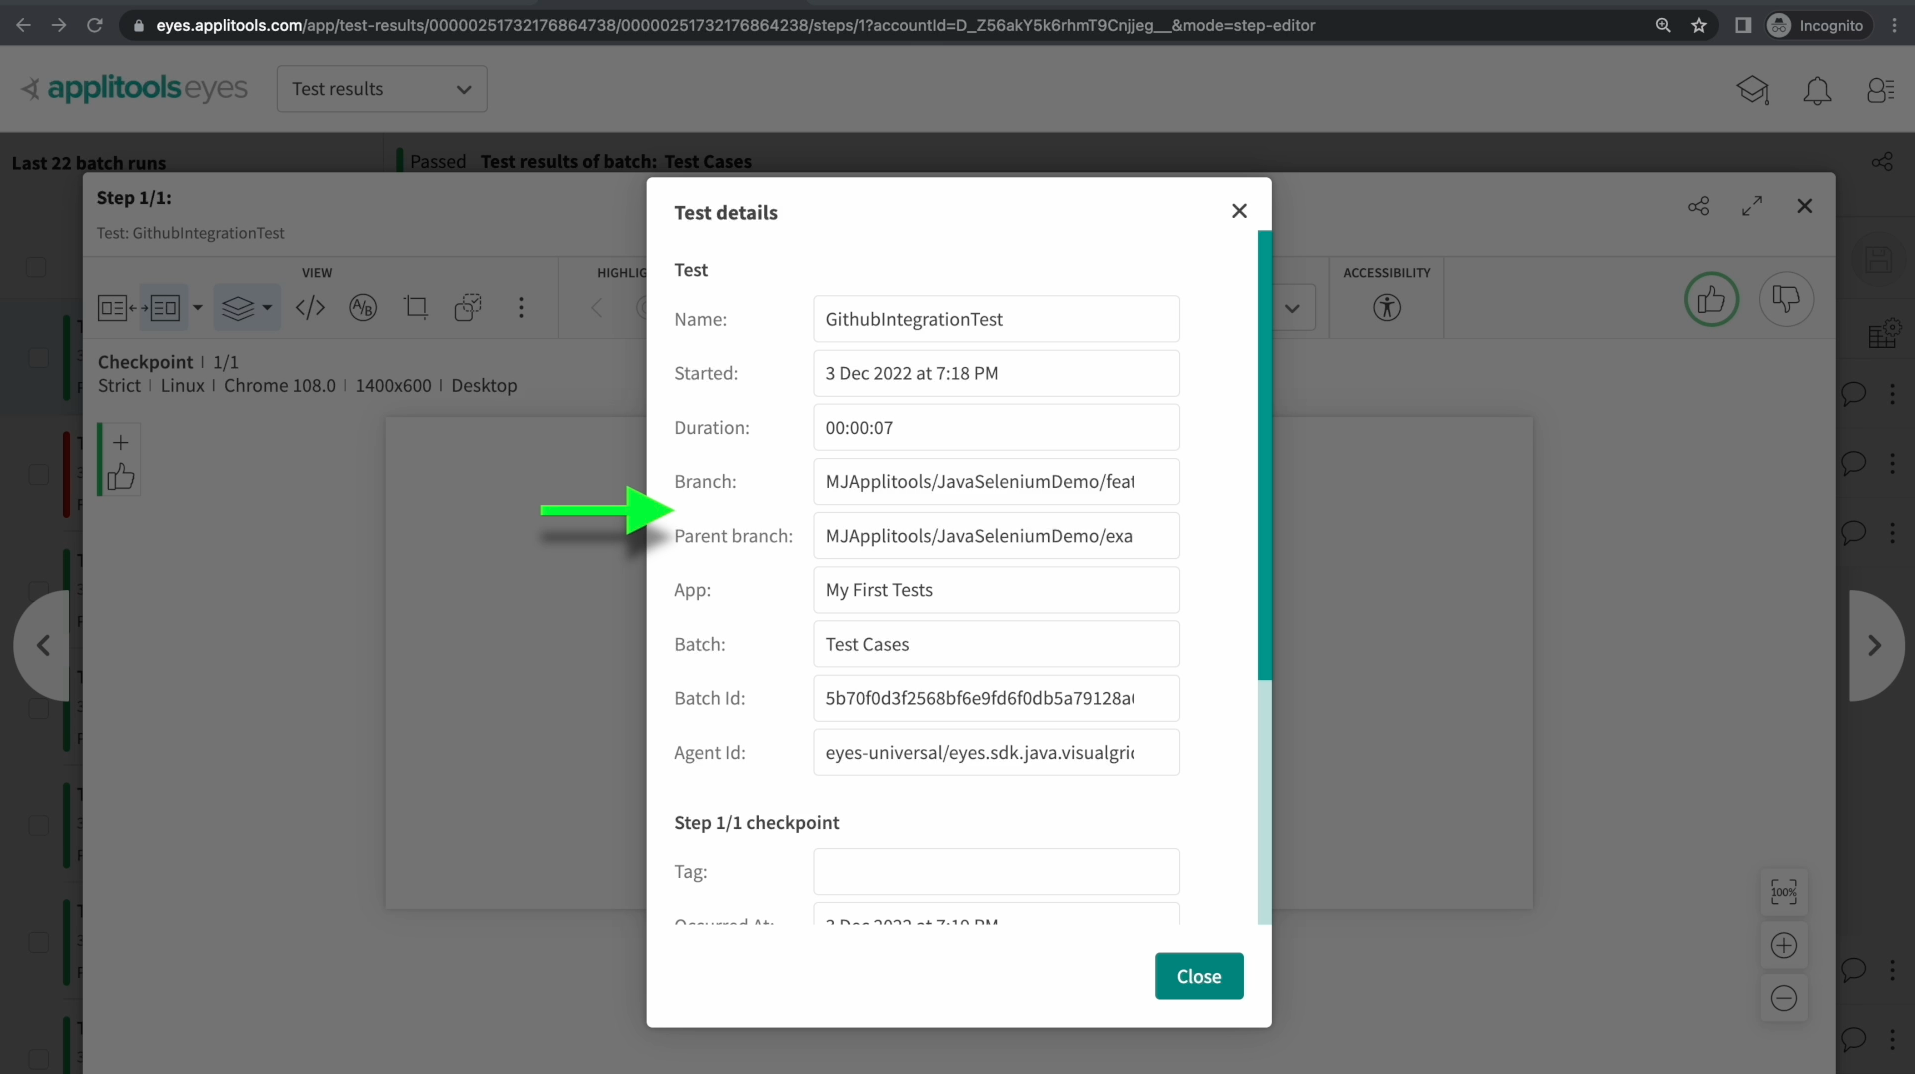
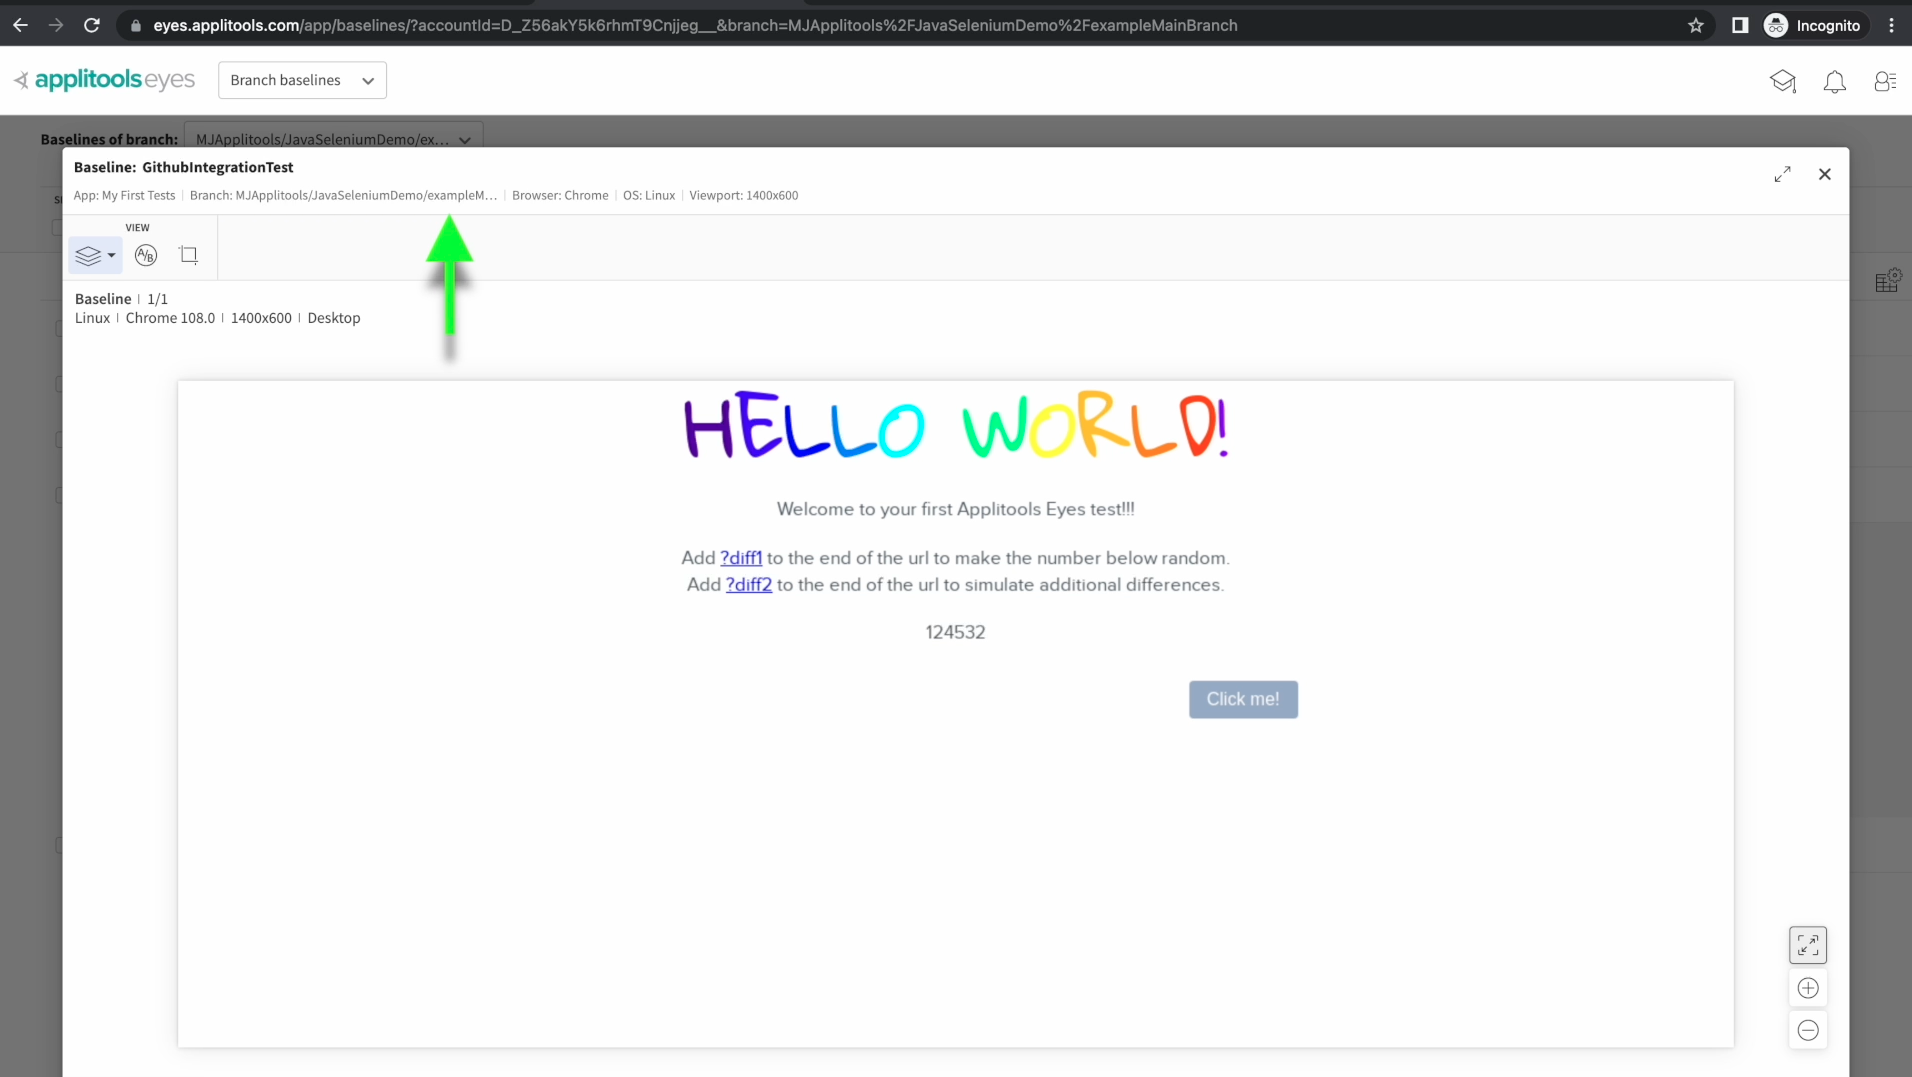
If we check out featureBranch1 on the Branch Baselines page, we can see that these baselines have been created on featureBranch1. Let's now head back to our Pull Request.
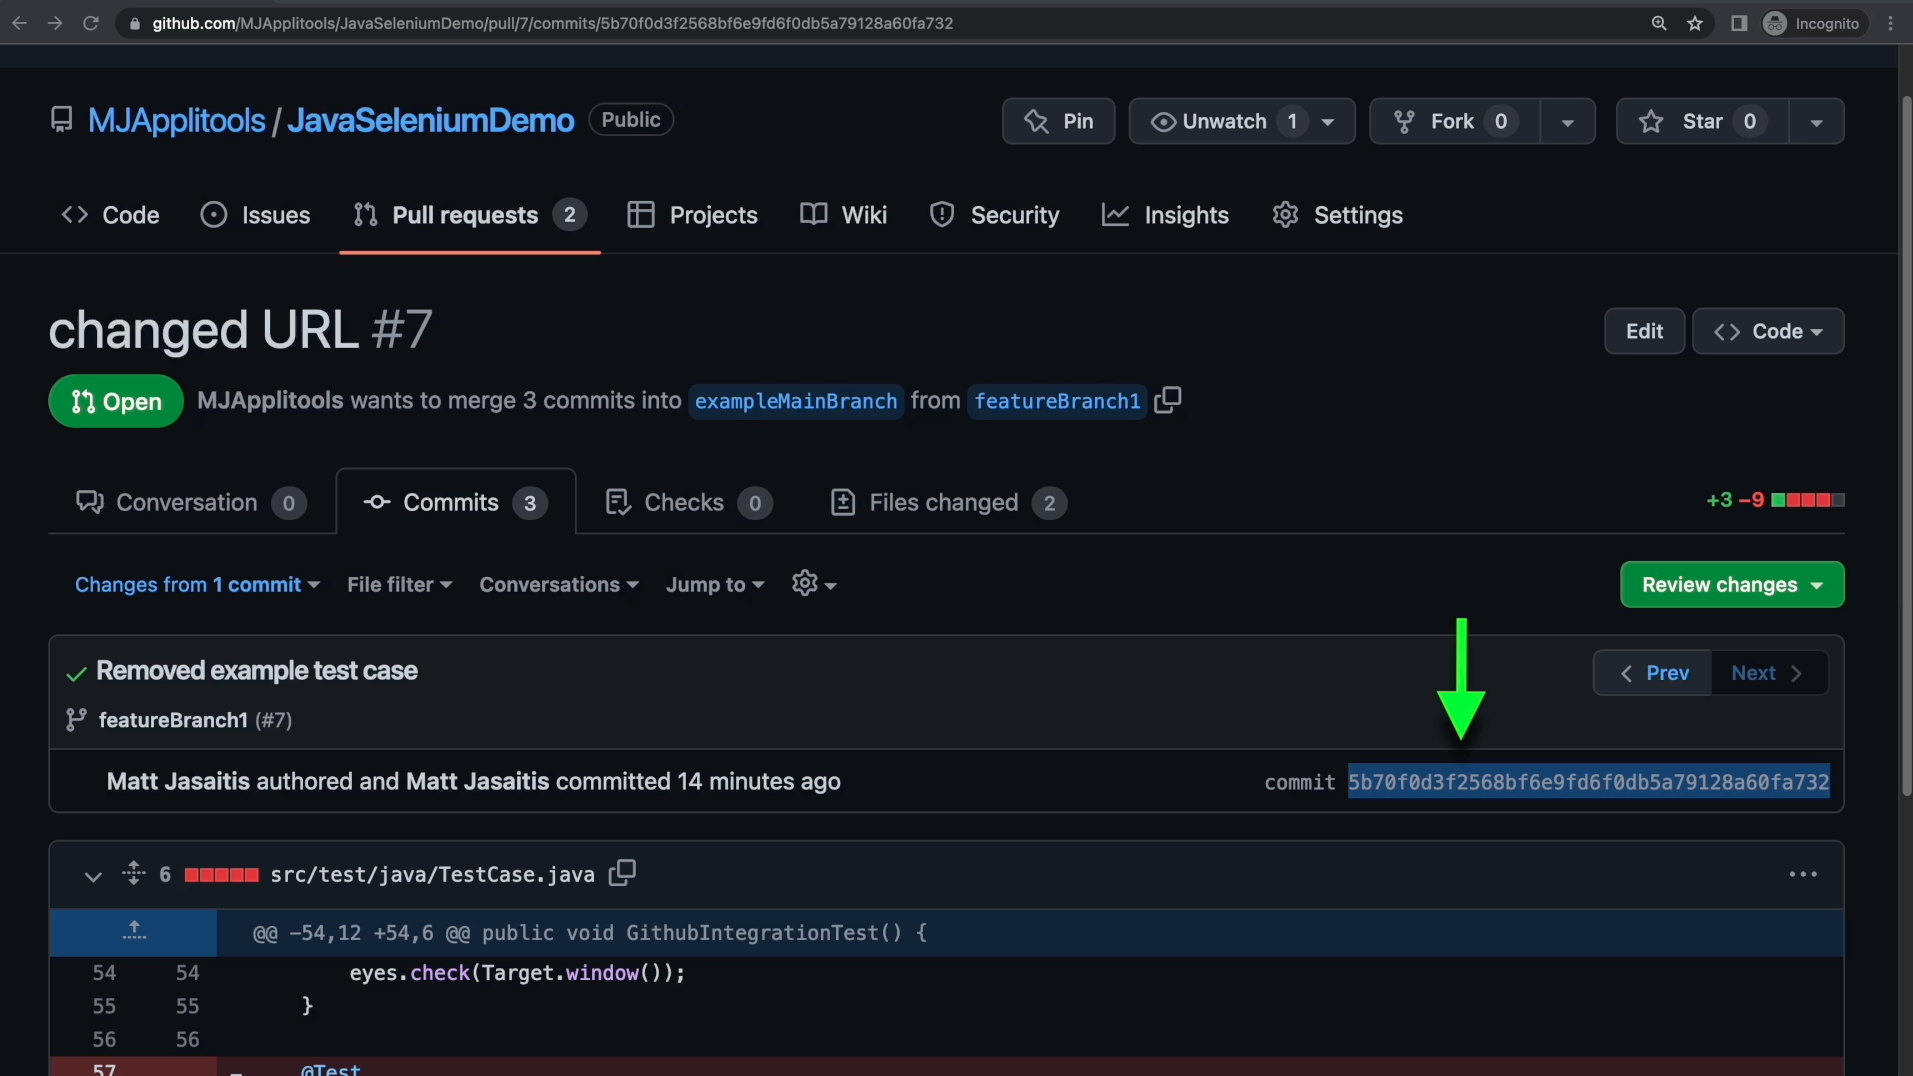
If we check out the latest commit from our pull request, we can confirm that the latest commit SHA corresponds to our BatchID. This is a great way to double check that the integration is set up properly. If this value doesn't match the batchID over on your Applitools dashboard, then something must be misconfigured.
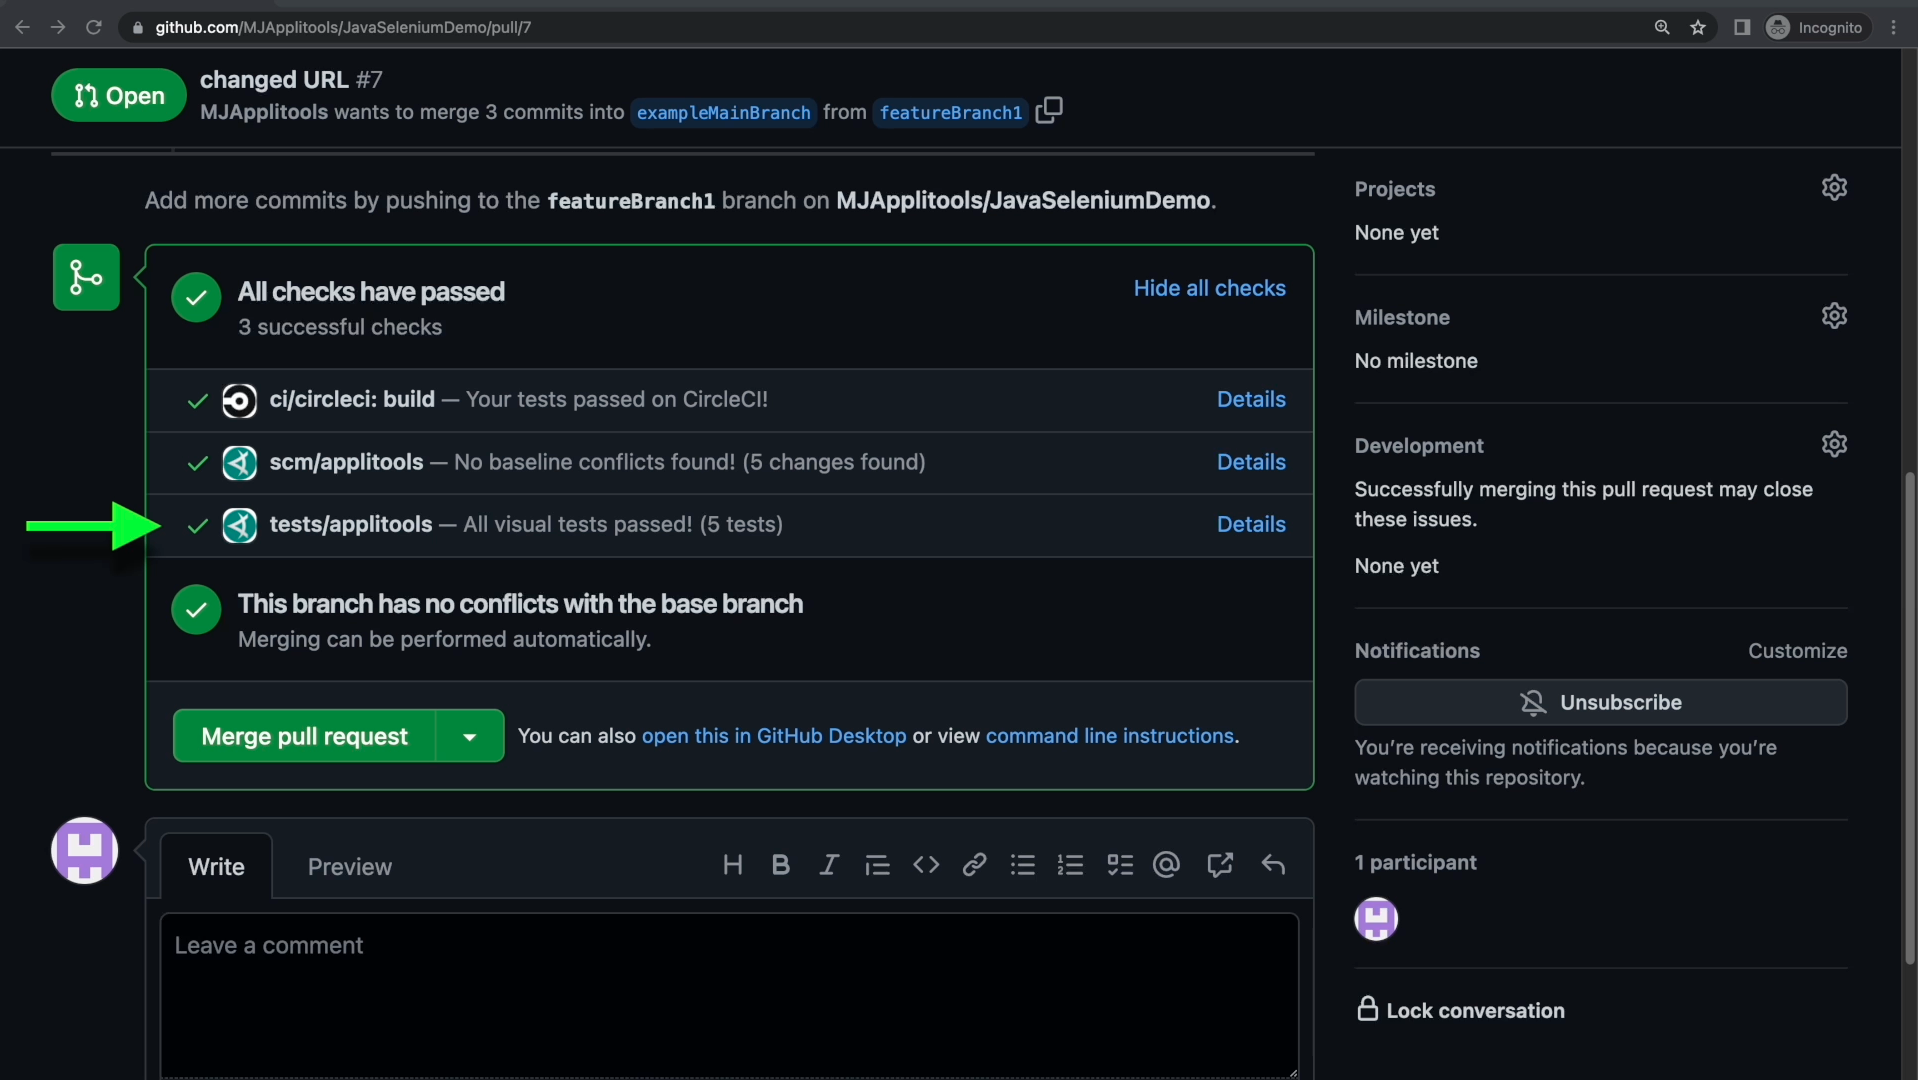
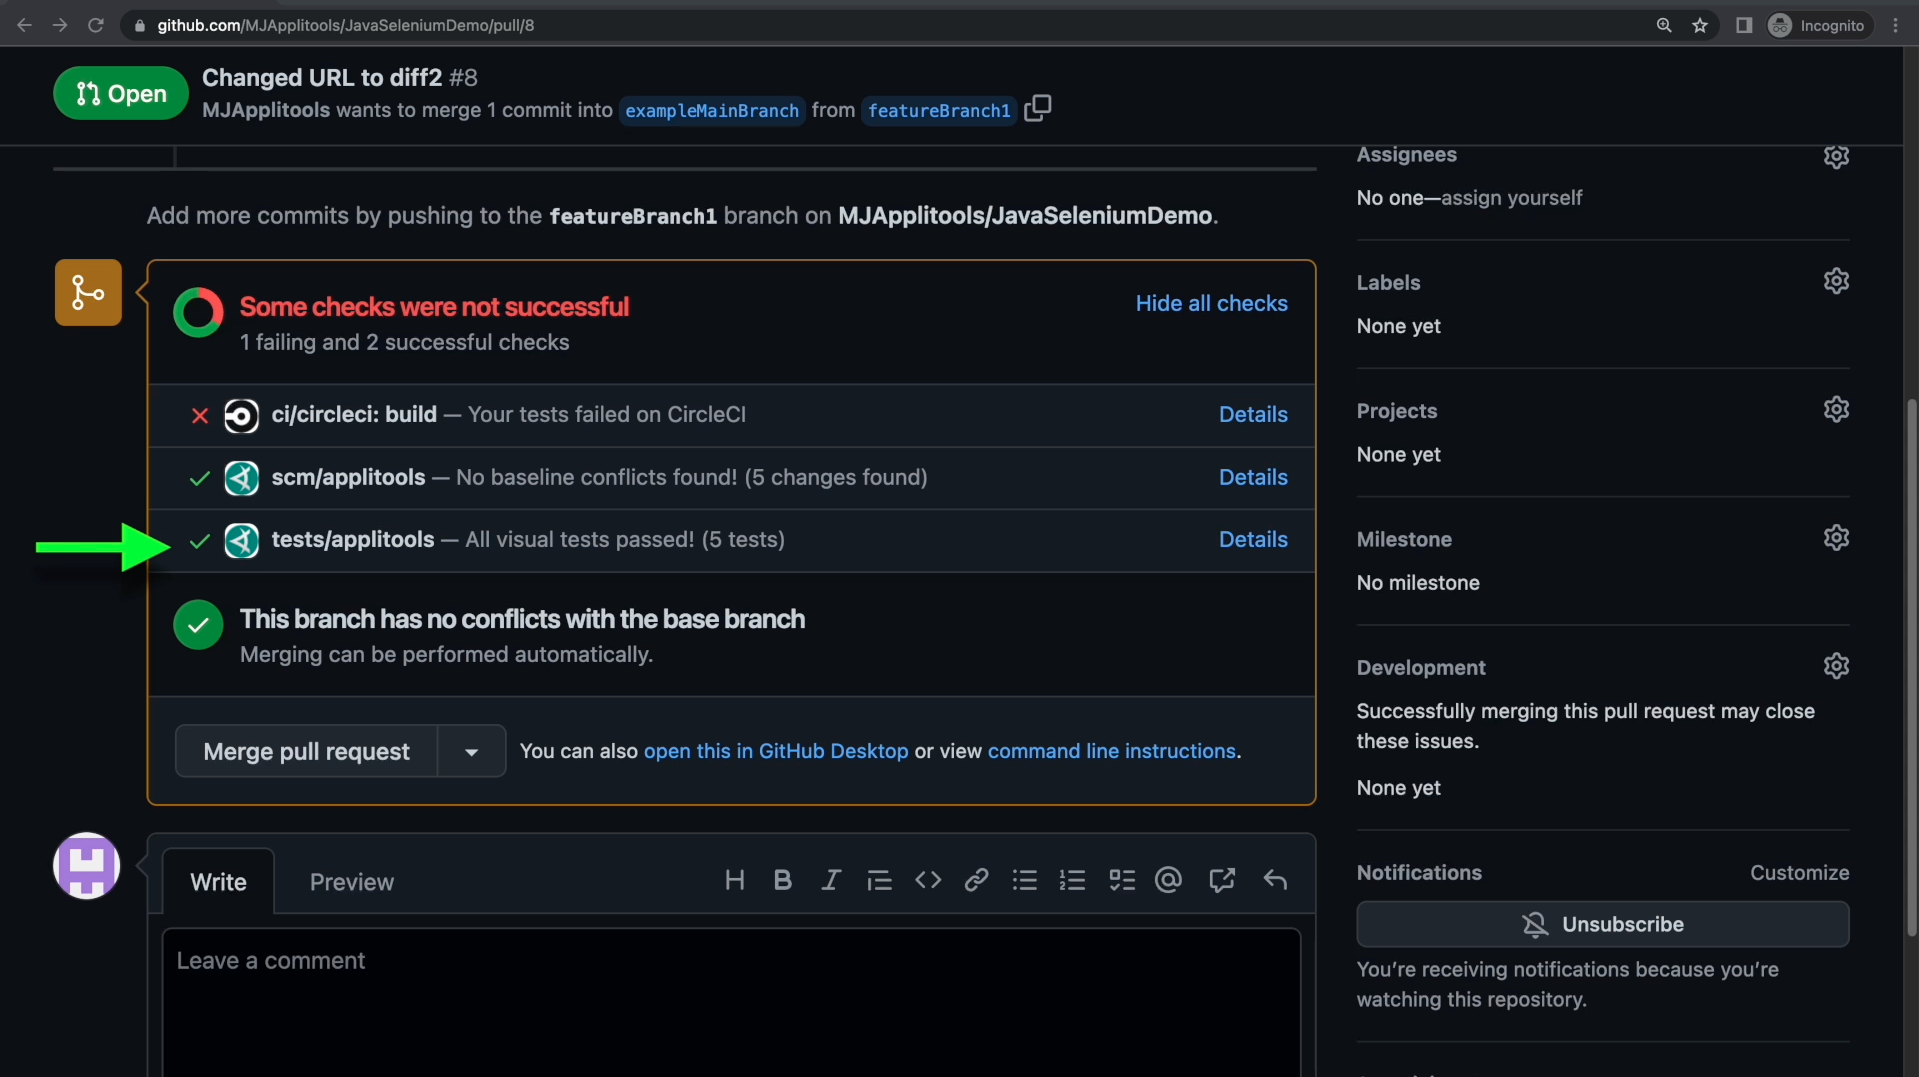
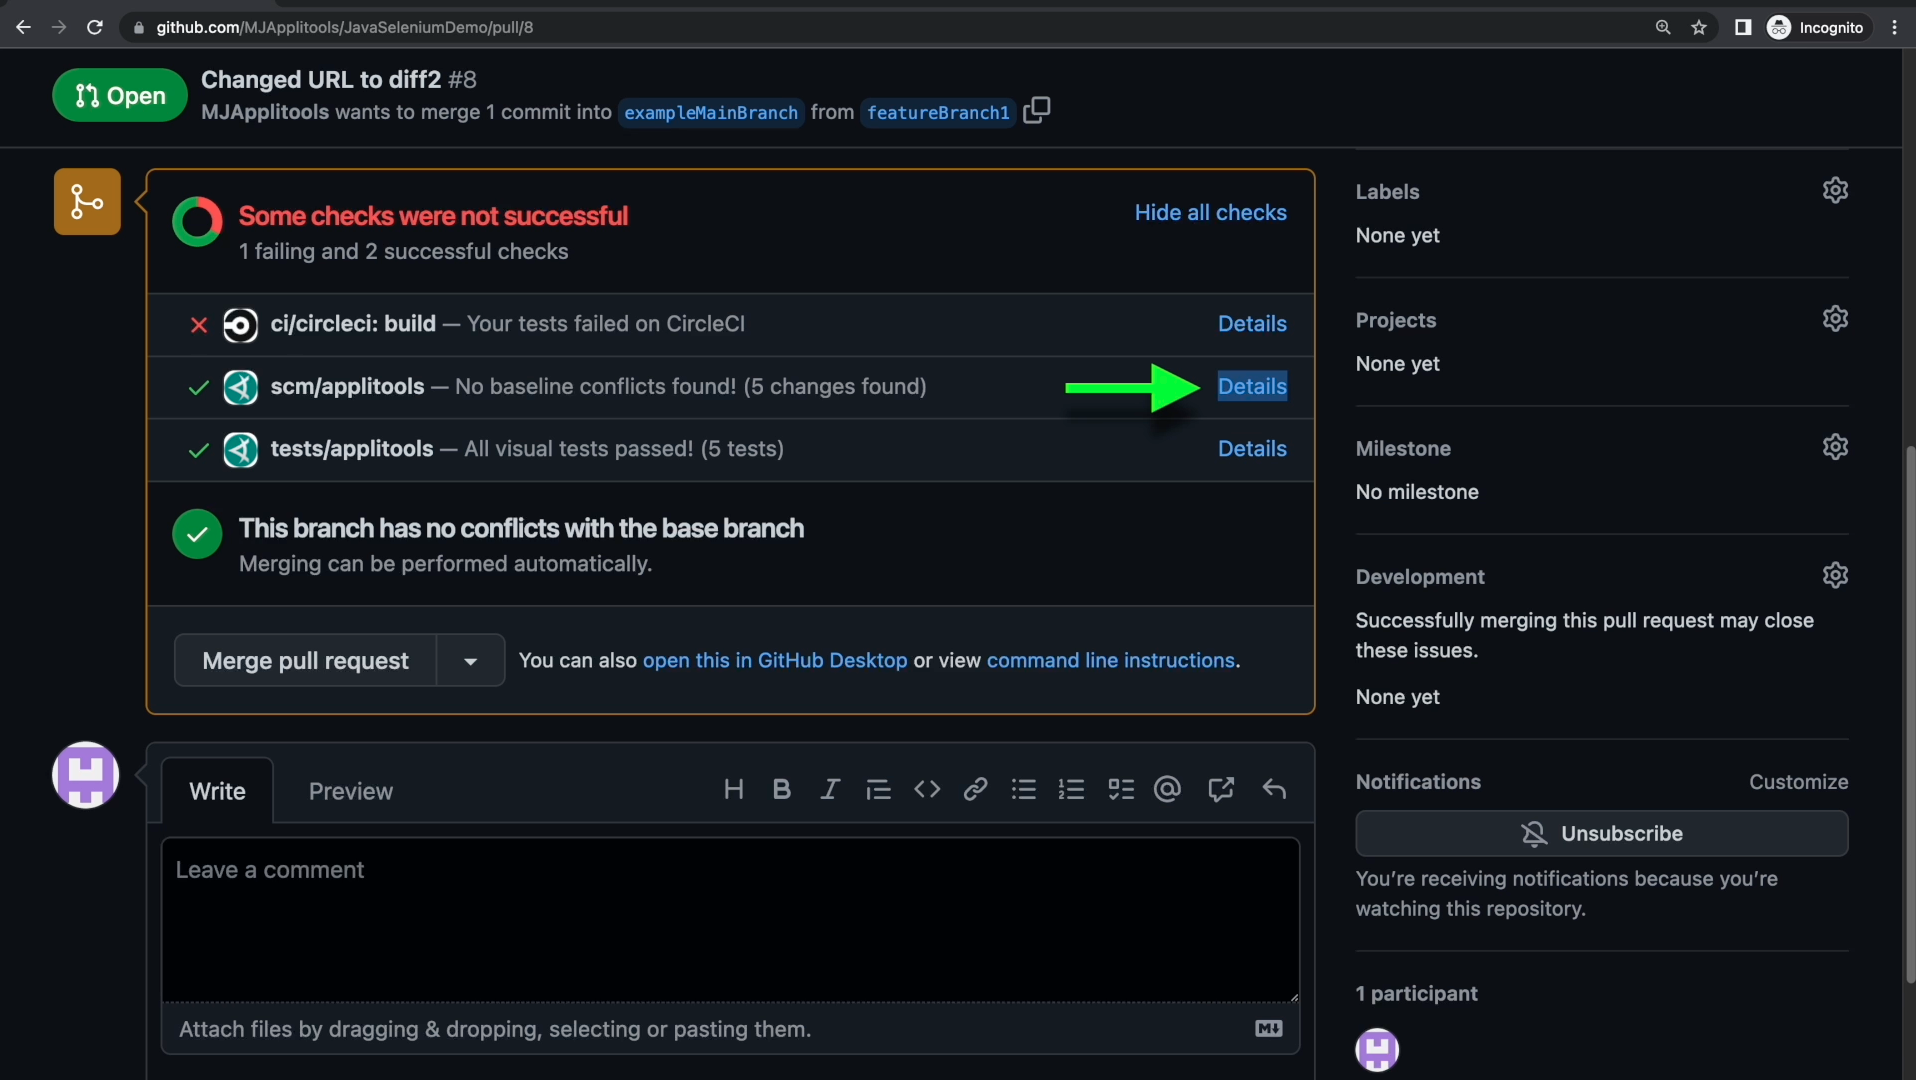
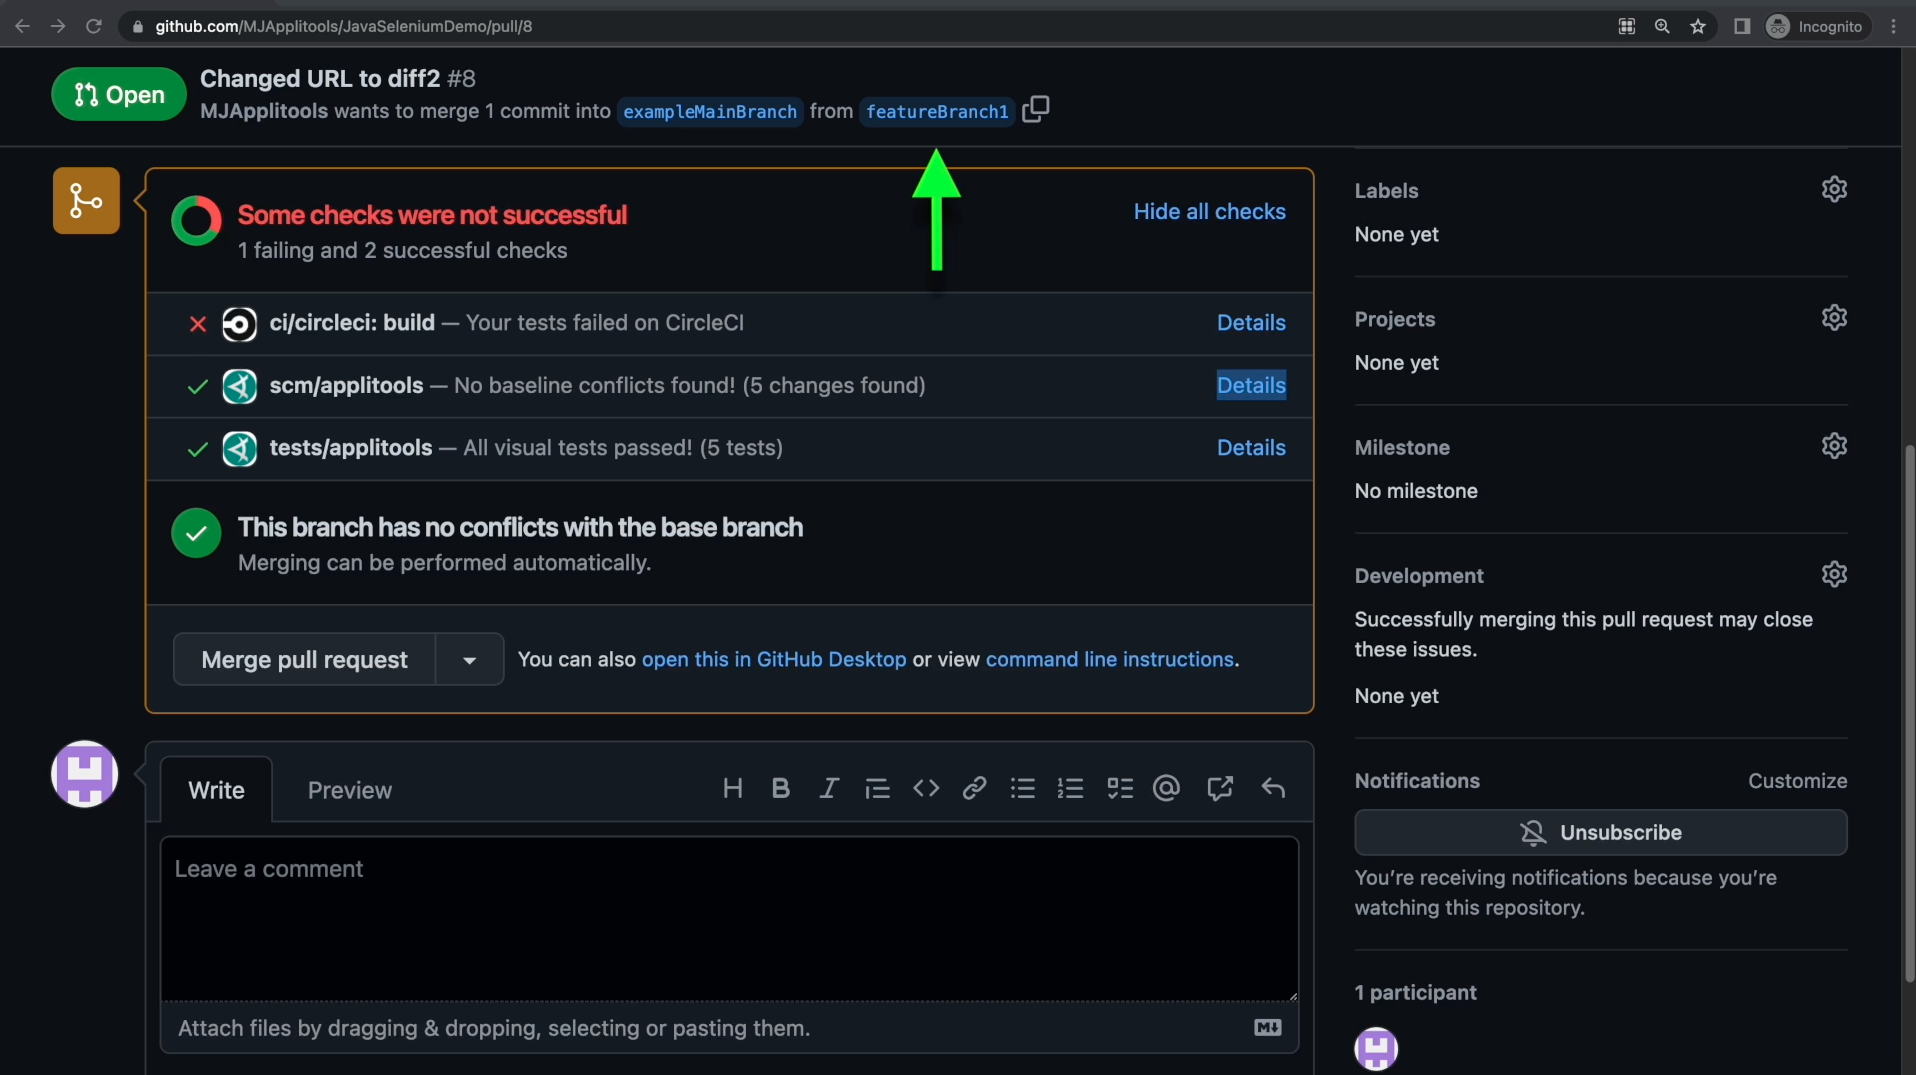
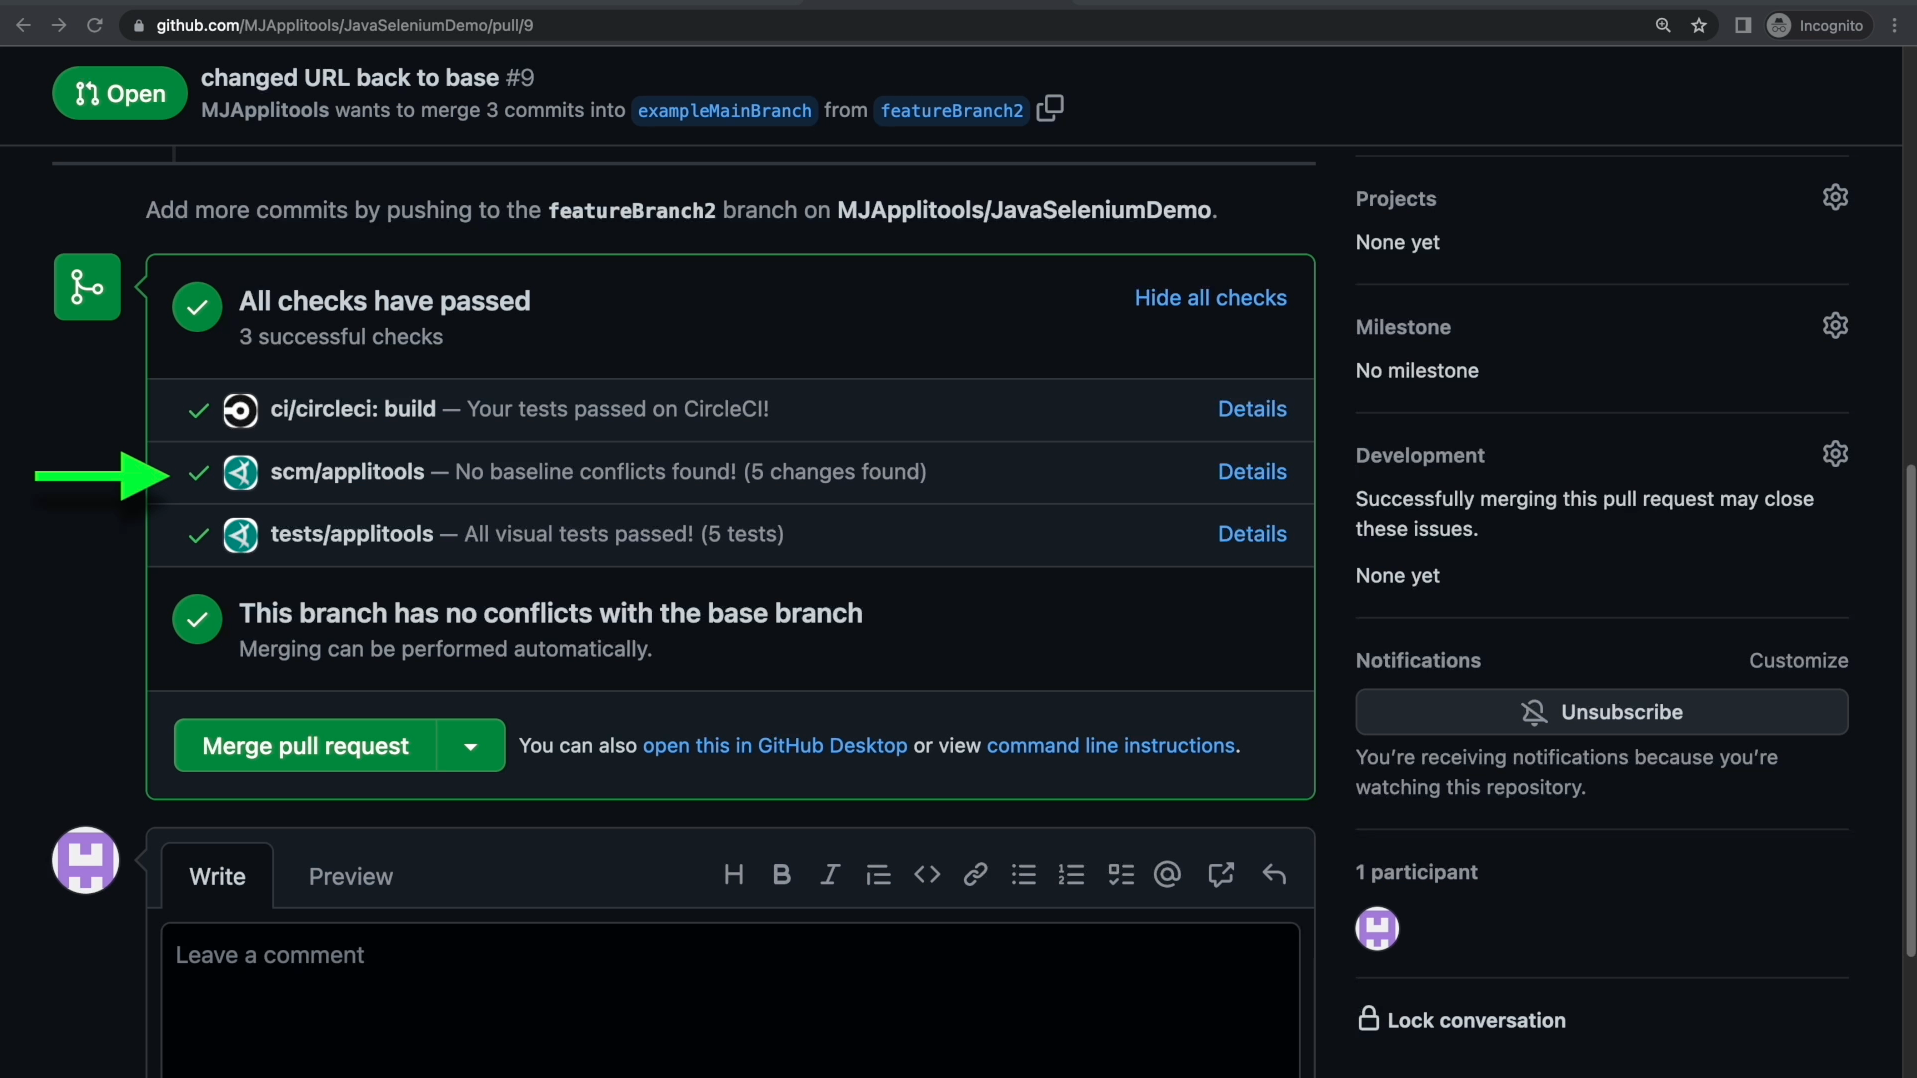
On the Pull Request itself, we see that we have two Applitools checks that have run. The tests/applitools check reflects the results of our visual tests and lets us know if they passed or failed. Clicking on the Details link will take us to the test results on our Applitools dashboard.
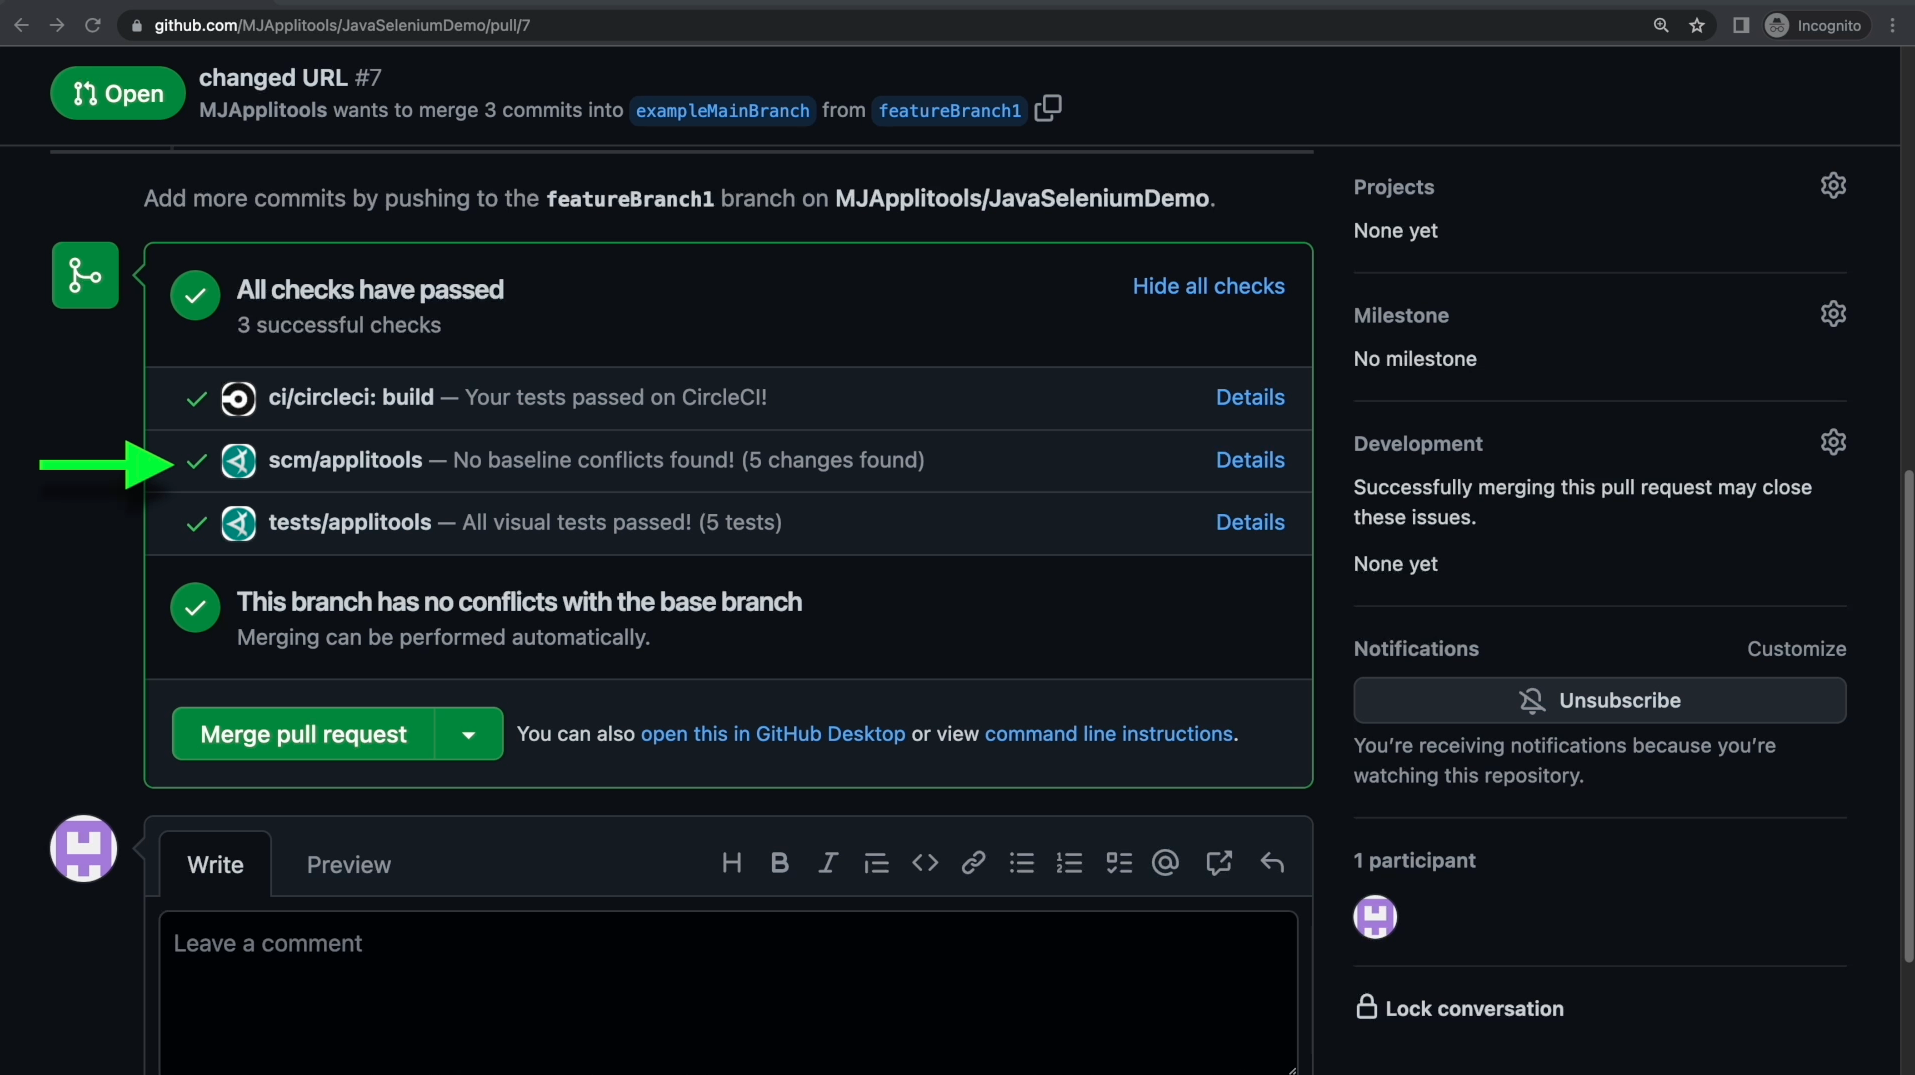
The other one is the scm/applitools check. This check compares the baselines between the target branch and the source branch and lets us know if we're clear to merge or if we have a conflict.
If there was a conflict, we would need to handle that conflict just like we did it in the last chapter. Clicking on the details link for this check will take us to the branch comparison page that we also saw in the last chapter.
In this case, all of our tests passed and we don't have any branch conflicts. We are good to go to go ahead and merge this Pull Request.
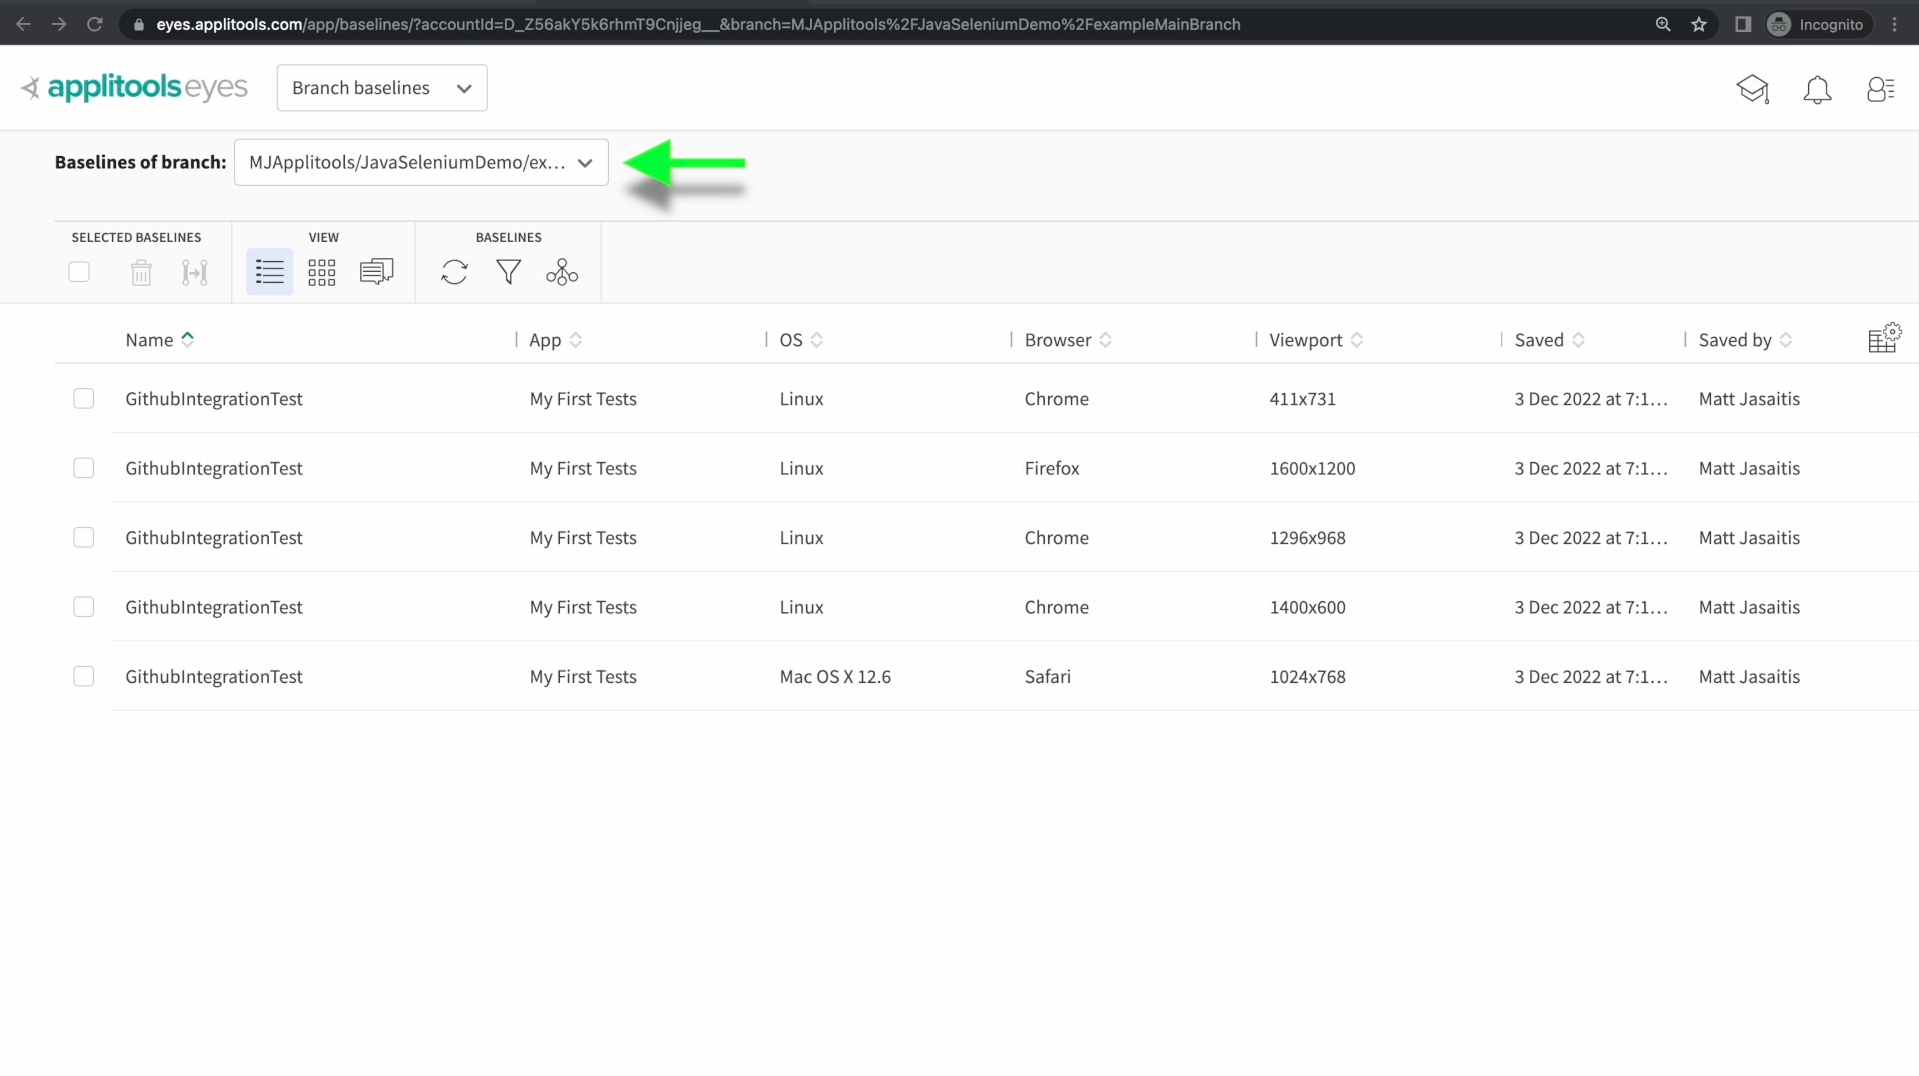
Once we've merged our Pull Request let's confirm that our branches were also merged on the Applitools side. If we head back to the Branch Baselines screen, and check out the exampleMainBranch, we can see that our baselines were in fact merged in. This shows how the integration automatically syncs up your Git branches with your Applitools branches.
Let's run through one more example that is slightly more complicated. Working on featureBranch1, I've changed our URL to diff2 instead of diff1. After making this change, go ahead and push it up to Github.
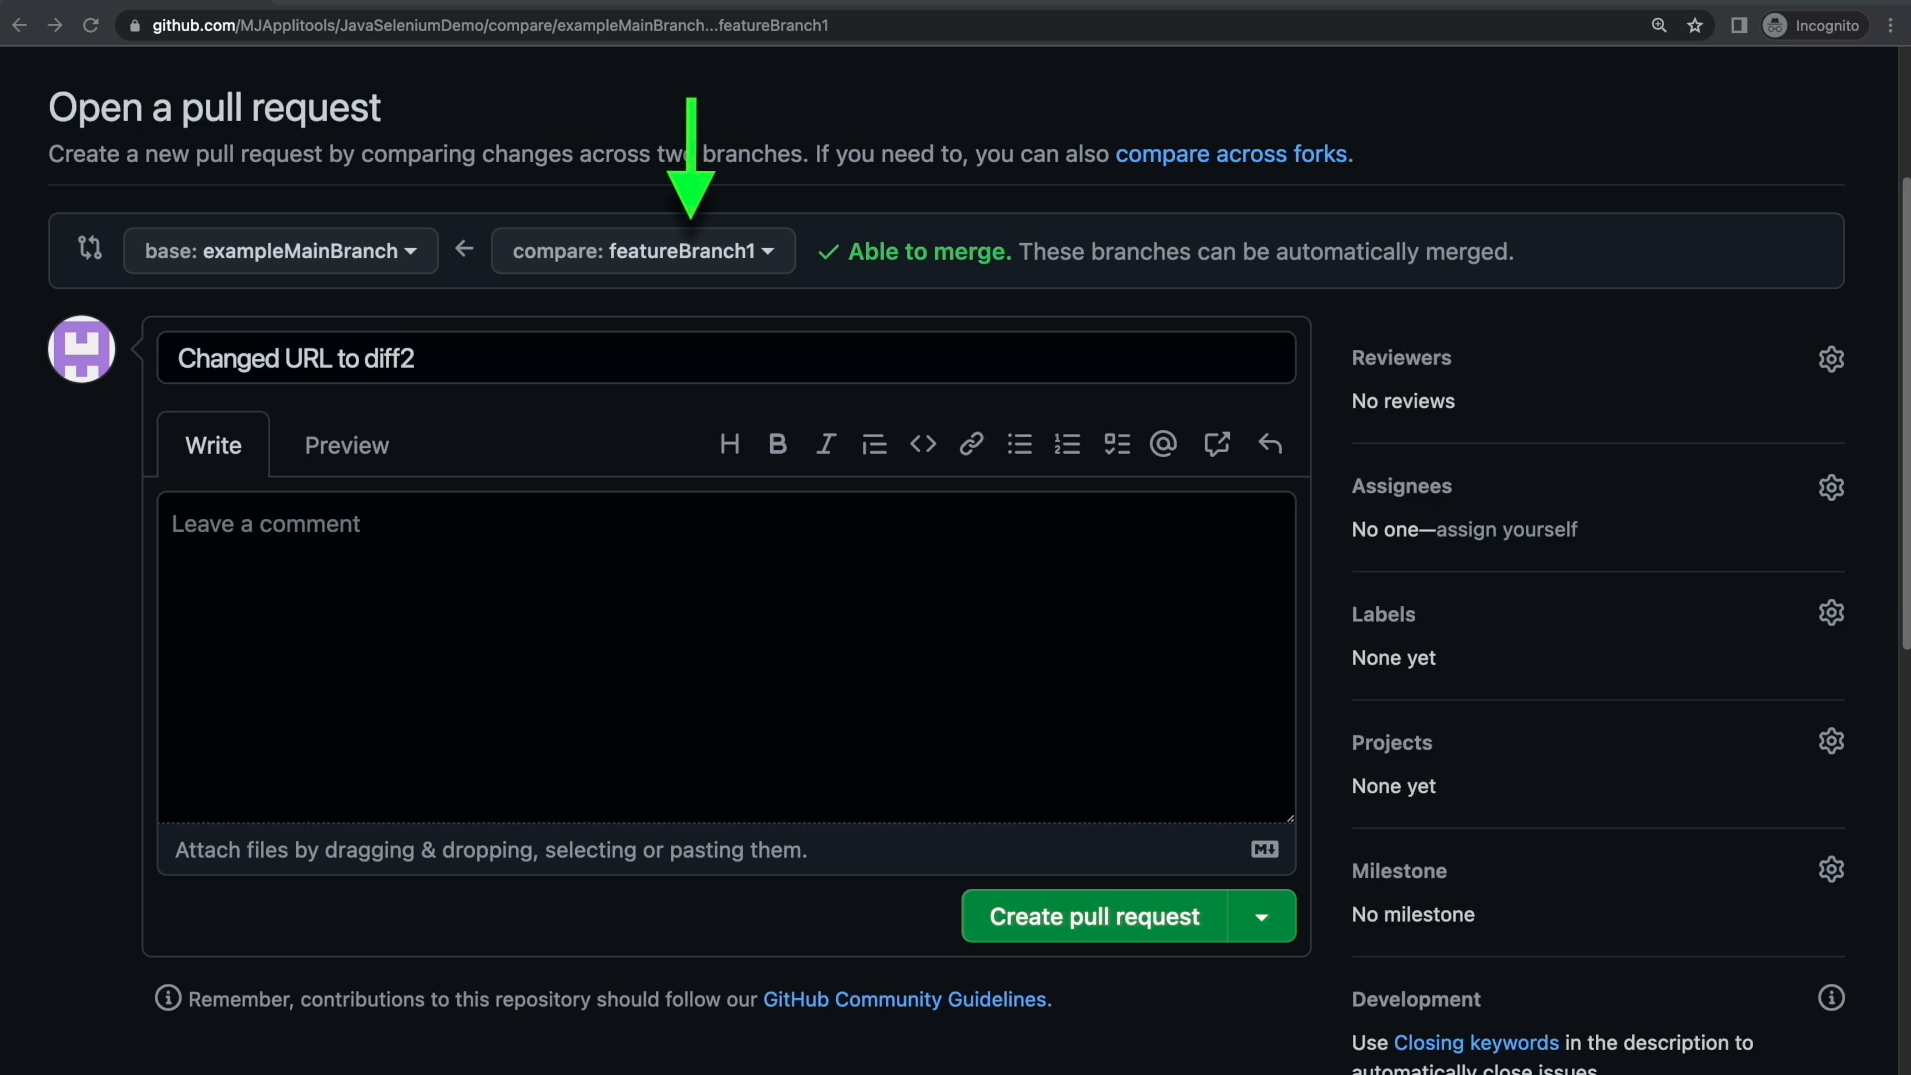
Once again, let's open a PR between featureBranch1 and exampleMainBranch which will cause our tests to run.
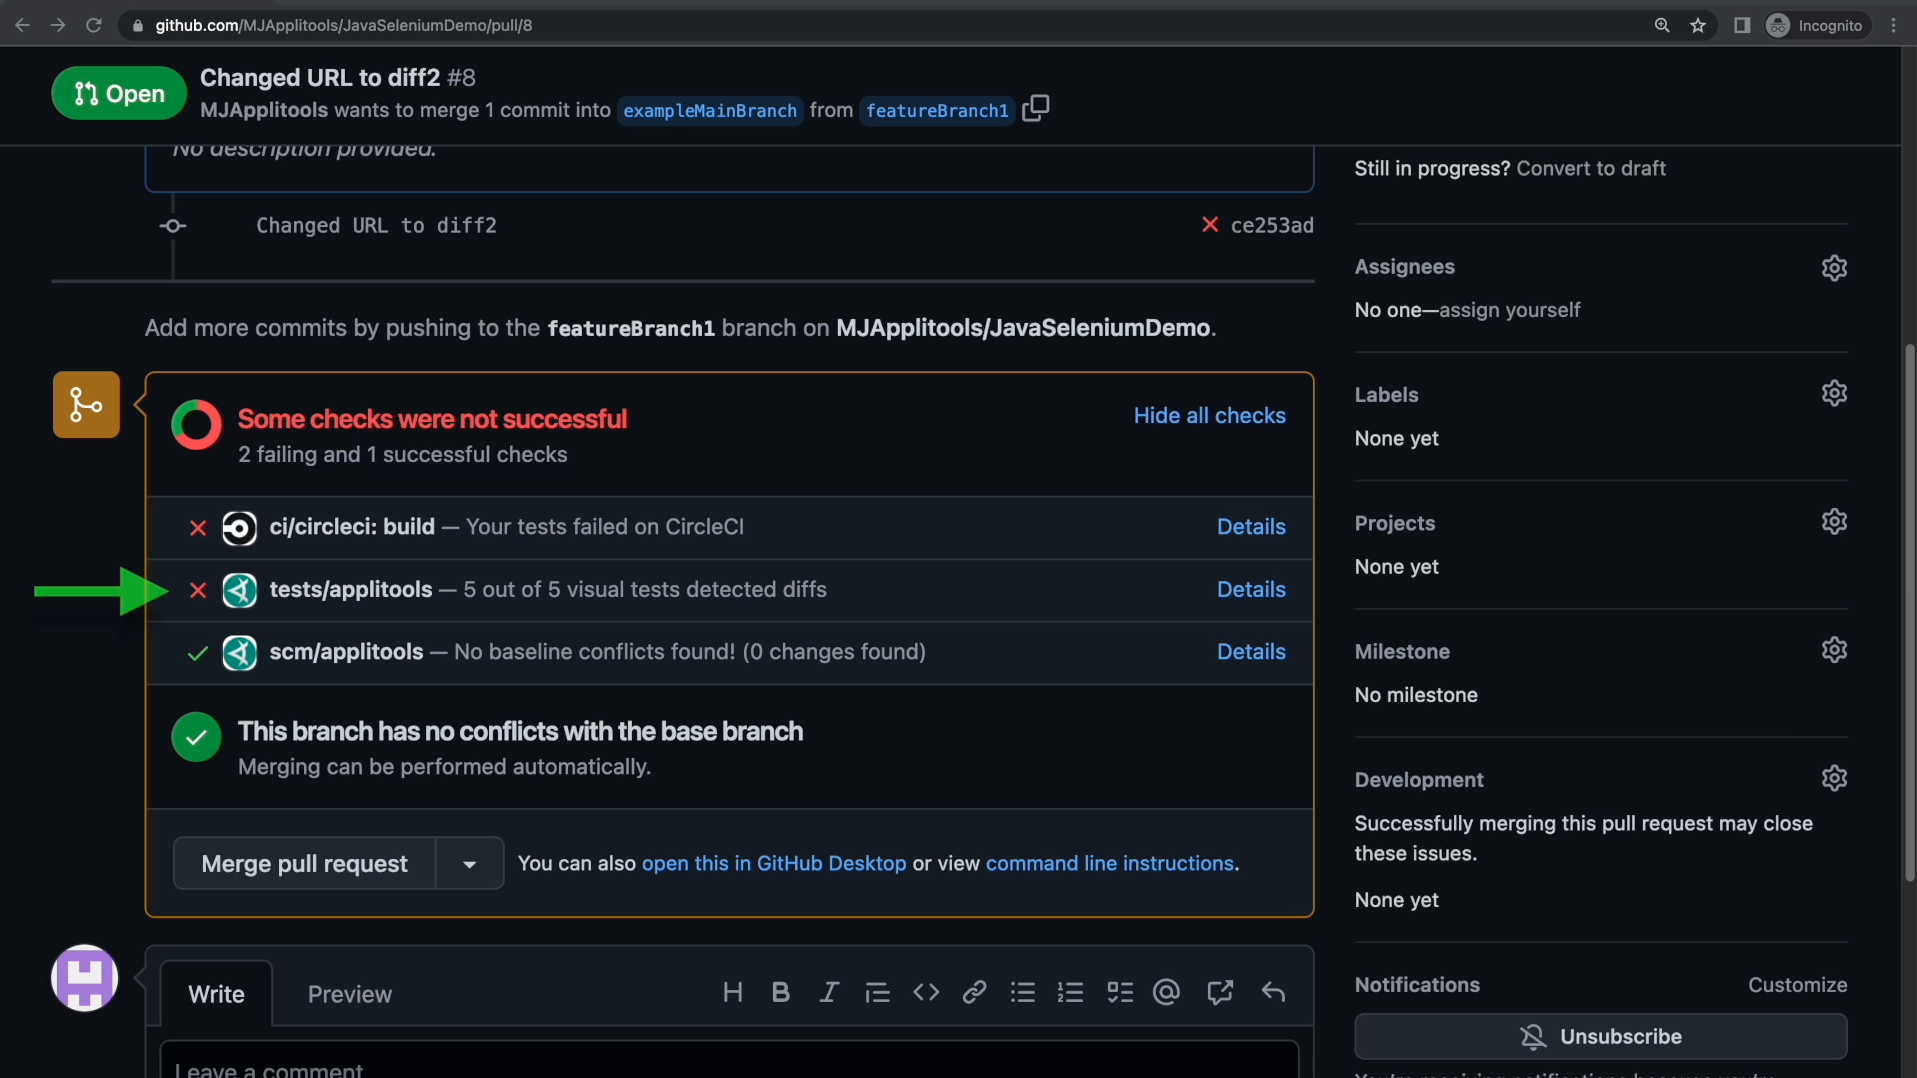
This time, we see that our visual tests check failed. Let's click on the details link and review our results on the dashboard.
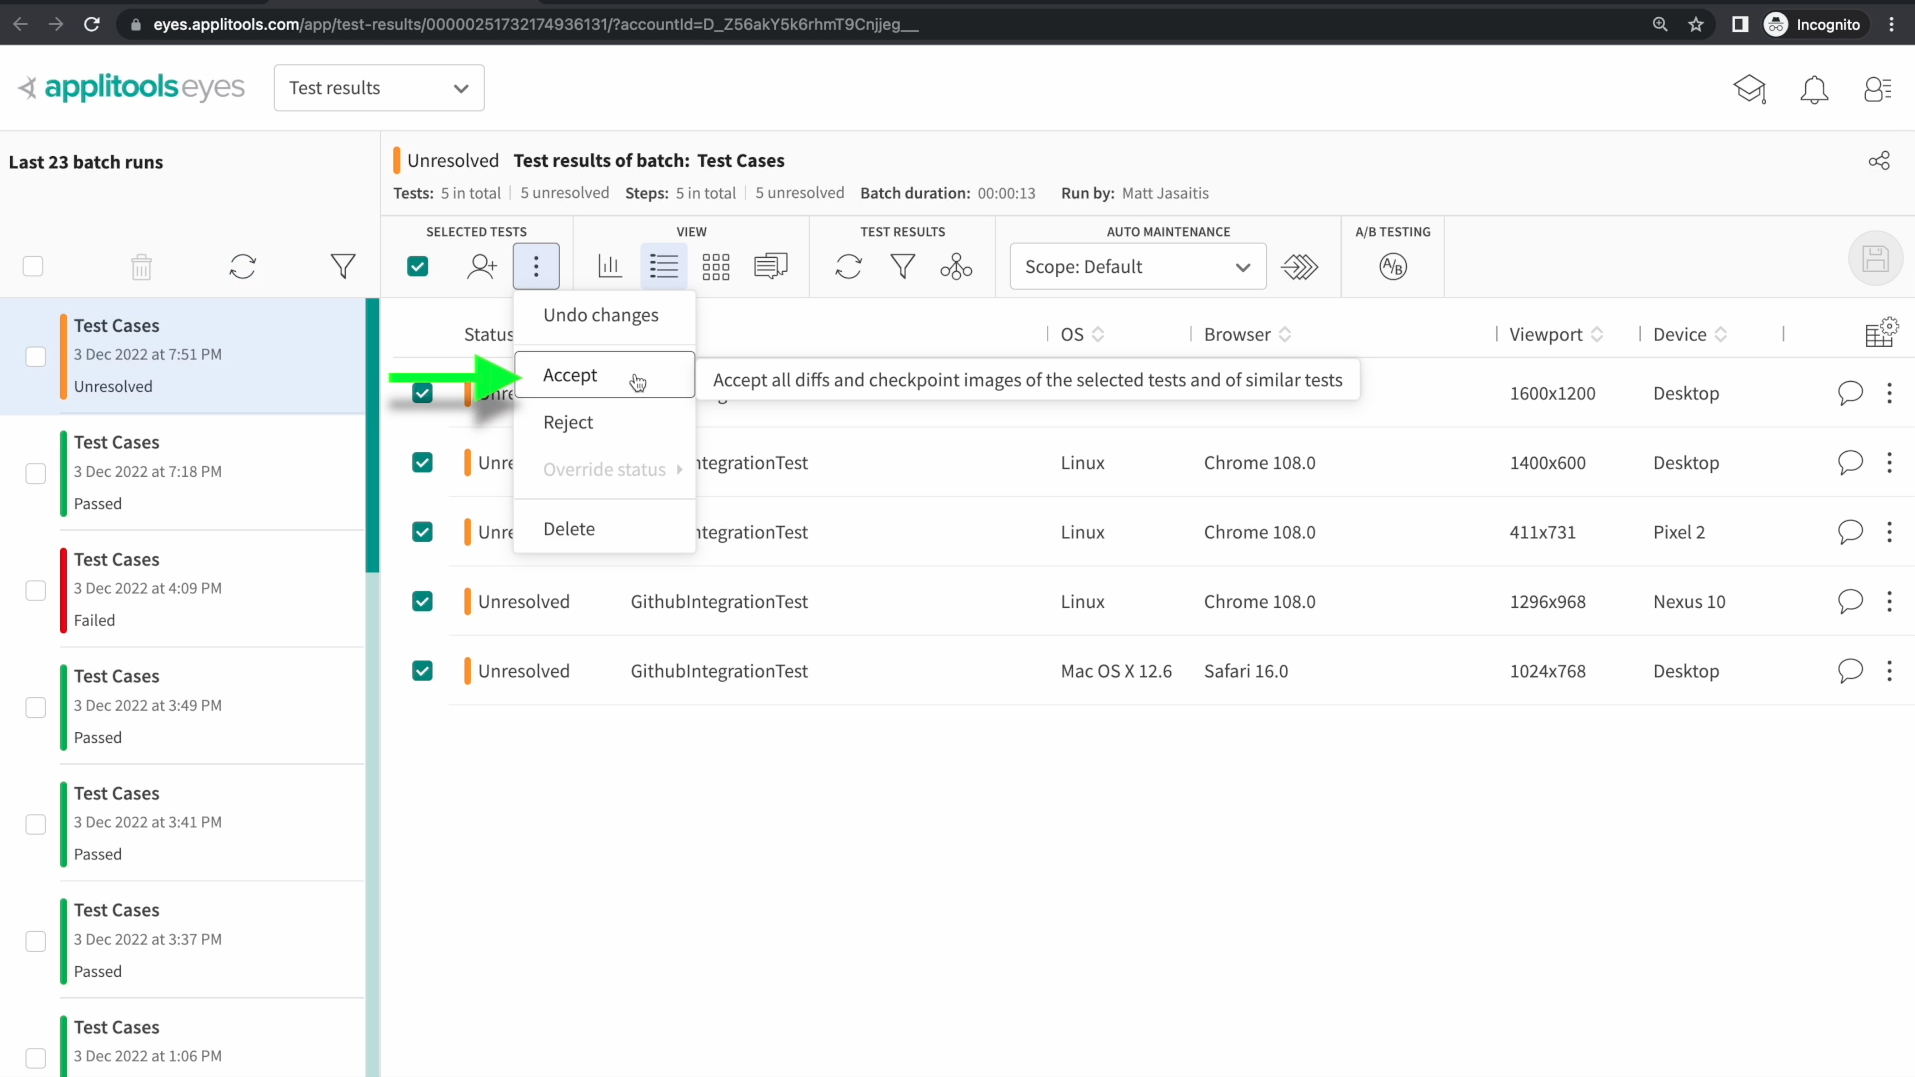
On the dashboard, let's accept and save these differences and update our baseline.
After accepting the differences on our Dashboard, we can see that our tests check was automatically updated and is now good to go. However, let's hold off on merging this PR in for now.
Back in our code, let's assume that at the same time we've been working on featureBranch1, another team has been working on another feature on a different branch. To simulate this, let's first checkout exampleMainBranch and then create another new branch called featureBranch2.
Working on featureBranch2, let's change our URL back to the base URL and then push it up to Github.
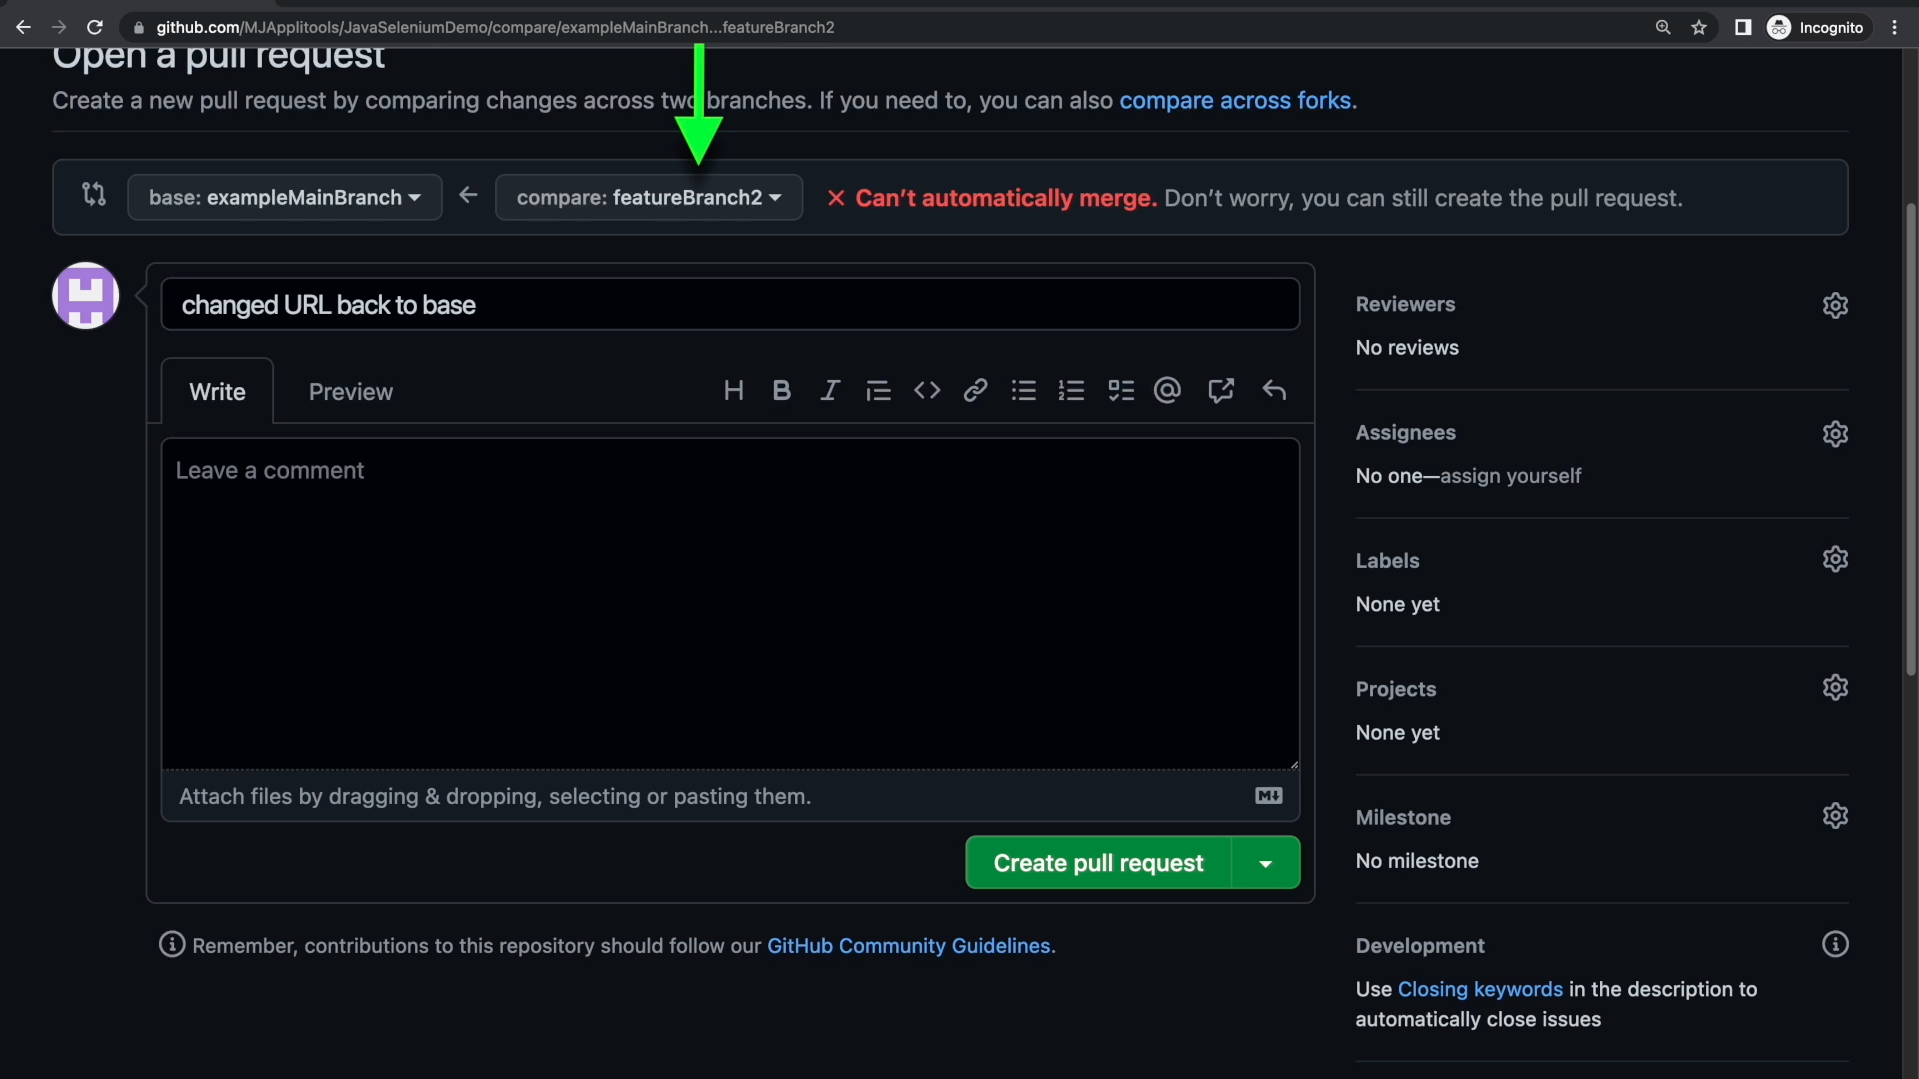
On Github, let's open a PR between featureBranch2 and exampleMainBranch causing our tests to run once again.
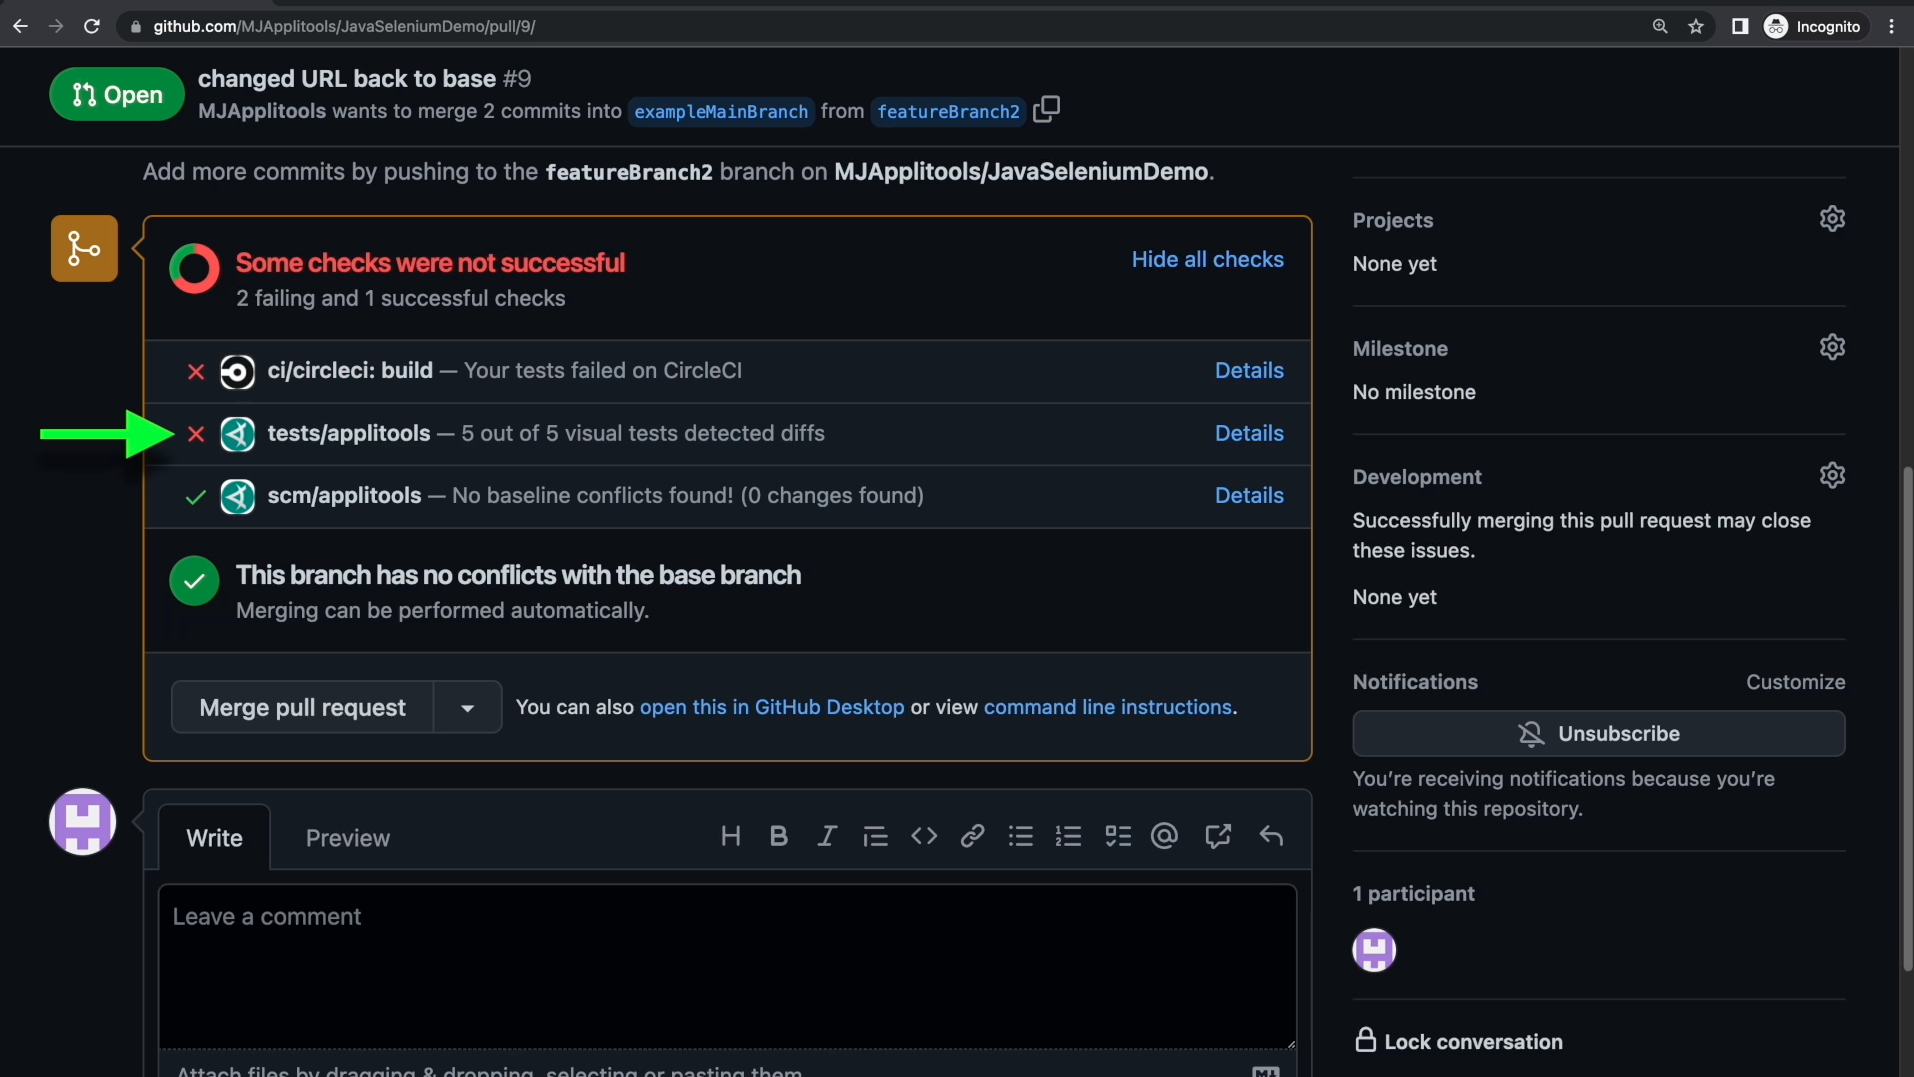
Our visual tests failed once again so let's click the details link and over to our Applitools dashboard.

Just like our other PR, let's go ahead and accept and save these differences.

And once again, our tests check was updated automatically and we're now able to merge. Before we do that, let's head back to our other PR first.
Back on our Pull Request for featureBranch1, Before merging, let's click on the Details link next to the scm/applitools check.
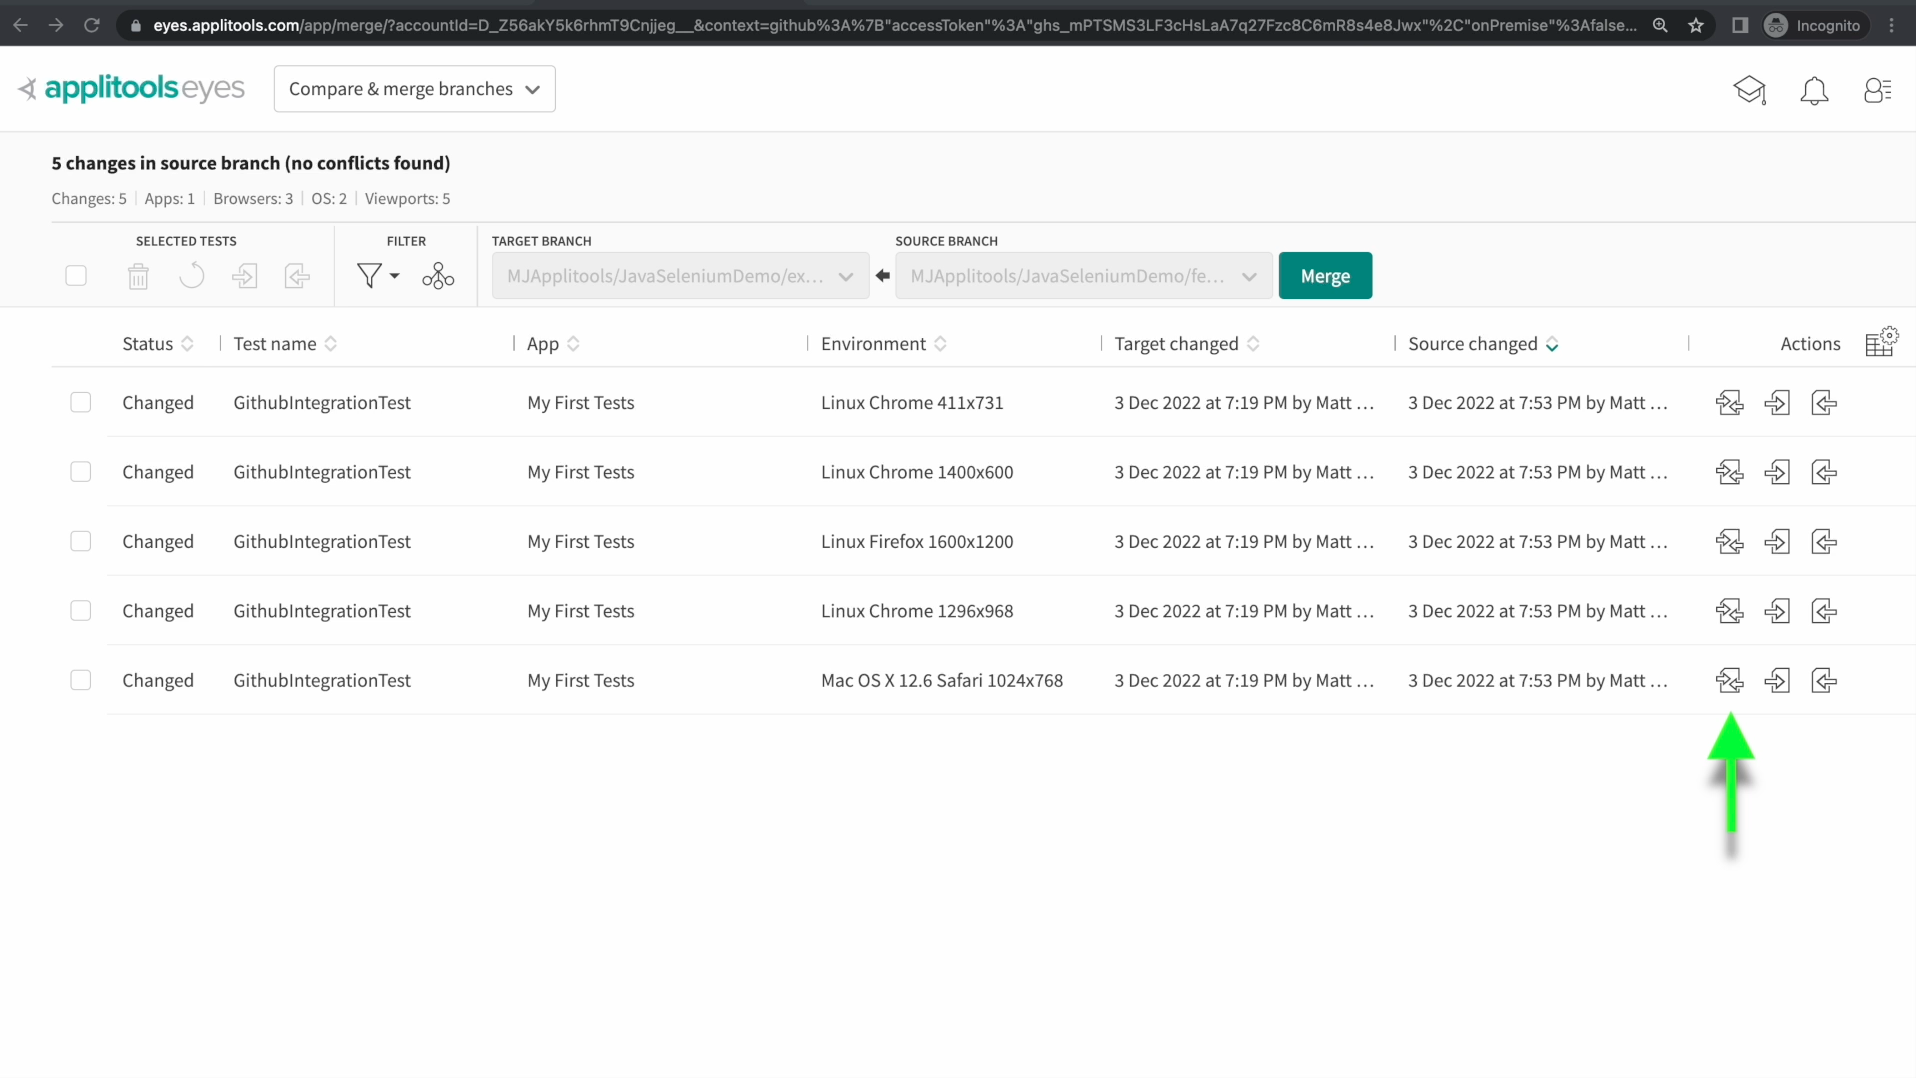
As I mentioned, this link takes us to the compare branches screen. Let's click on one of these compare buttons on the right and check out our images before merging.
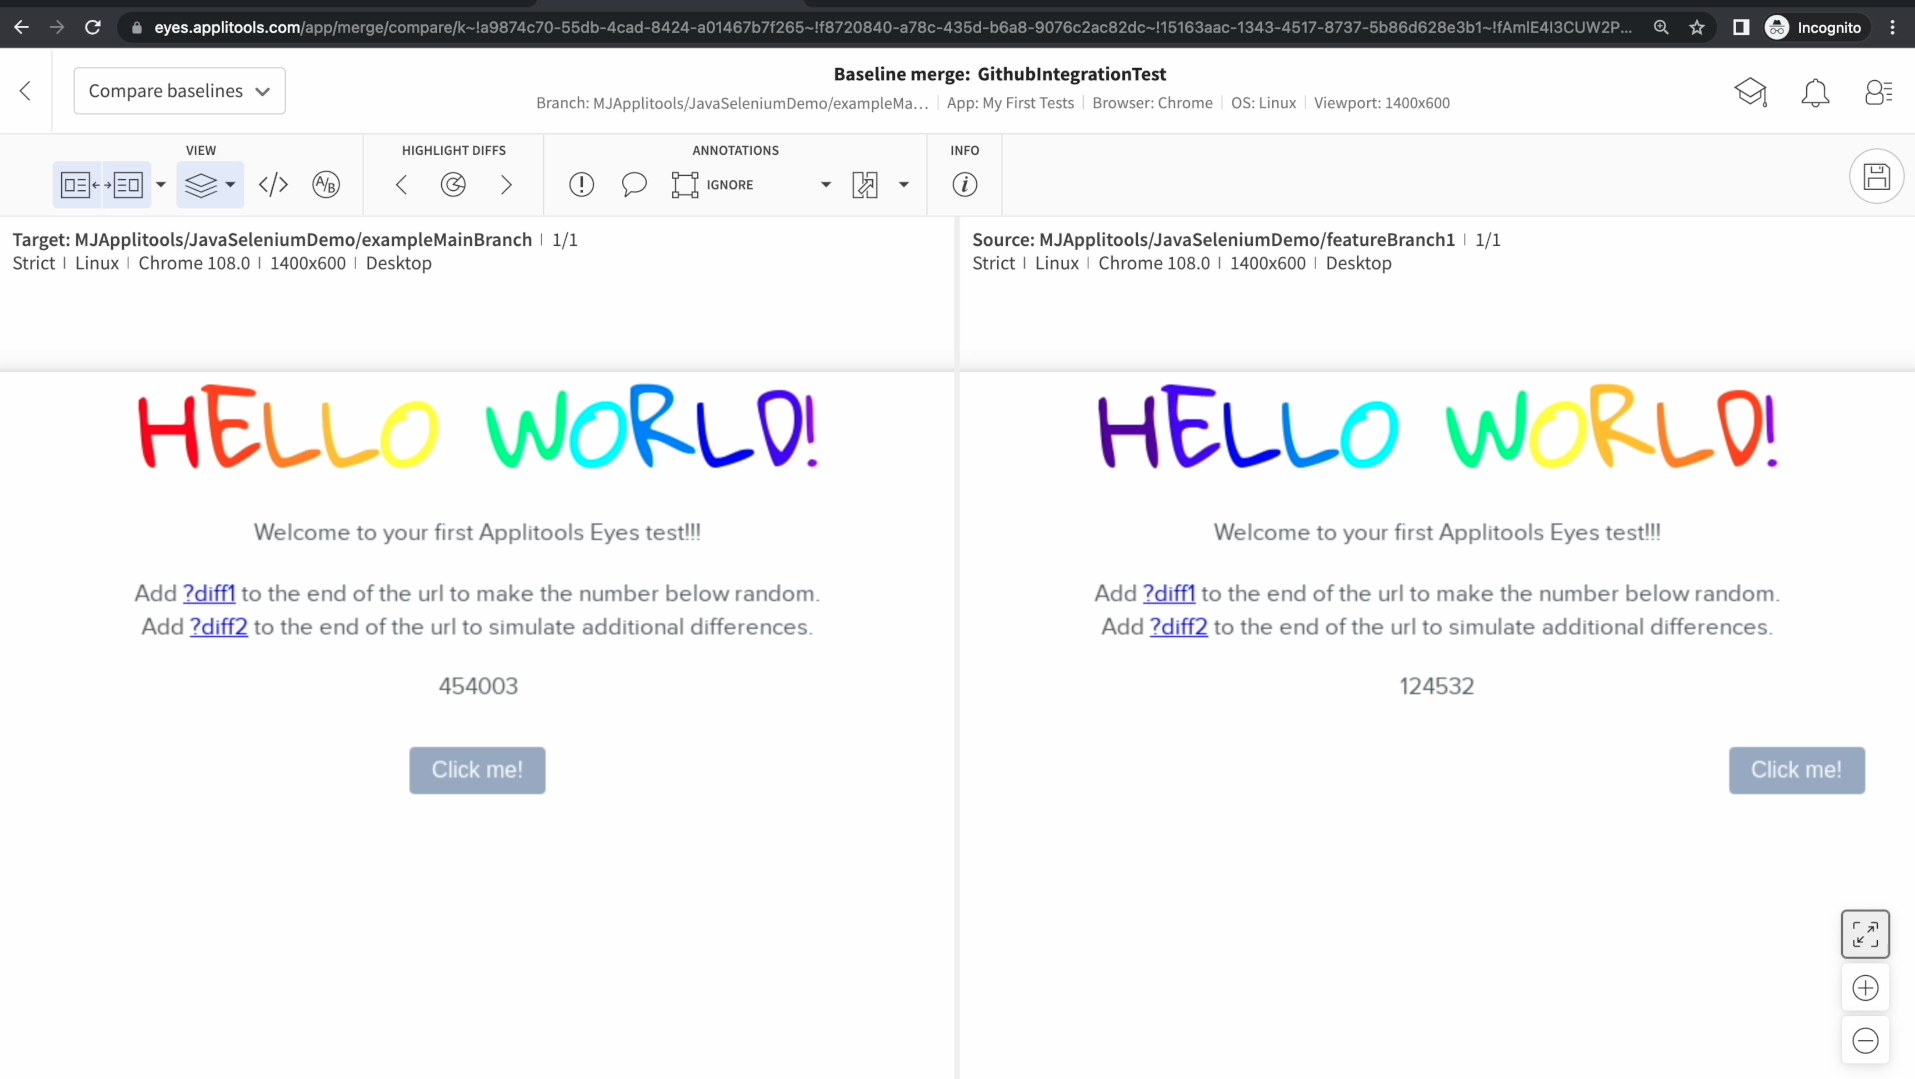
On the left side , we have the baseline in exampleMainBranch and on the right side we have the baseline in featureBranch1. Notice the difference in the numbers and the position of the button. Let's now head back to our PR.
Back on our Pull Request for featureBranch1, let's go ahead and merge it in.
After the merge, let's check the images on the Branch Baselines screen for exampleMainBranch. We see that the baselines have been updated once again and the changes from featureBranch1 were automatically merged thanks to the GithubIntegration. Let's now head back to our pull request for featureBranch2.
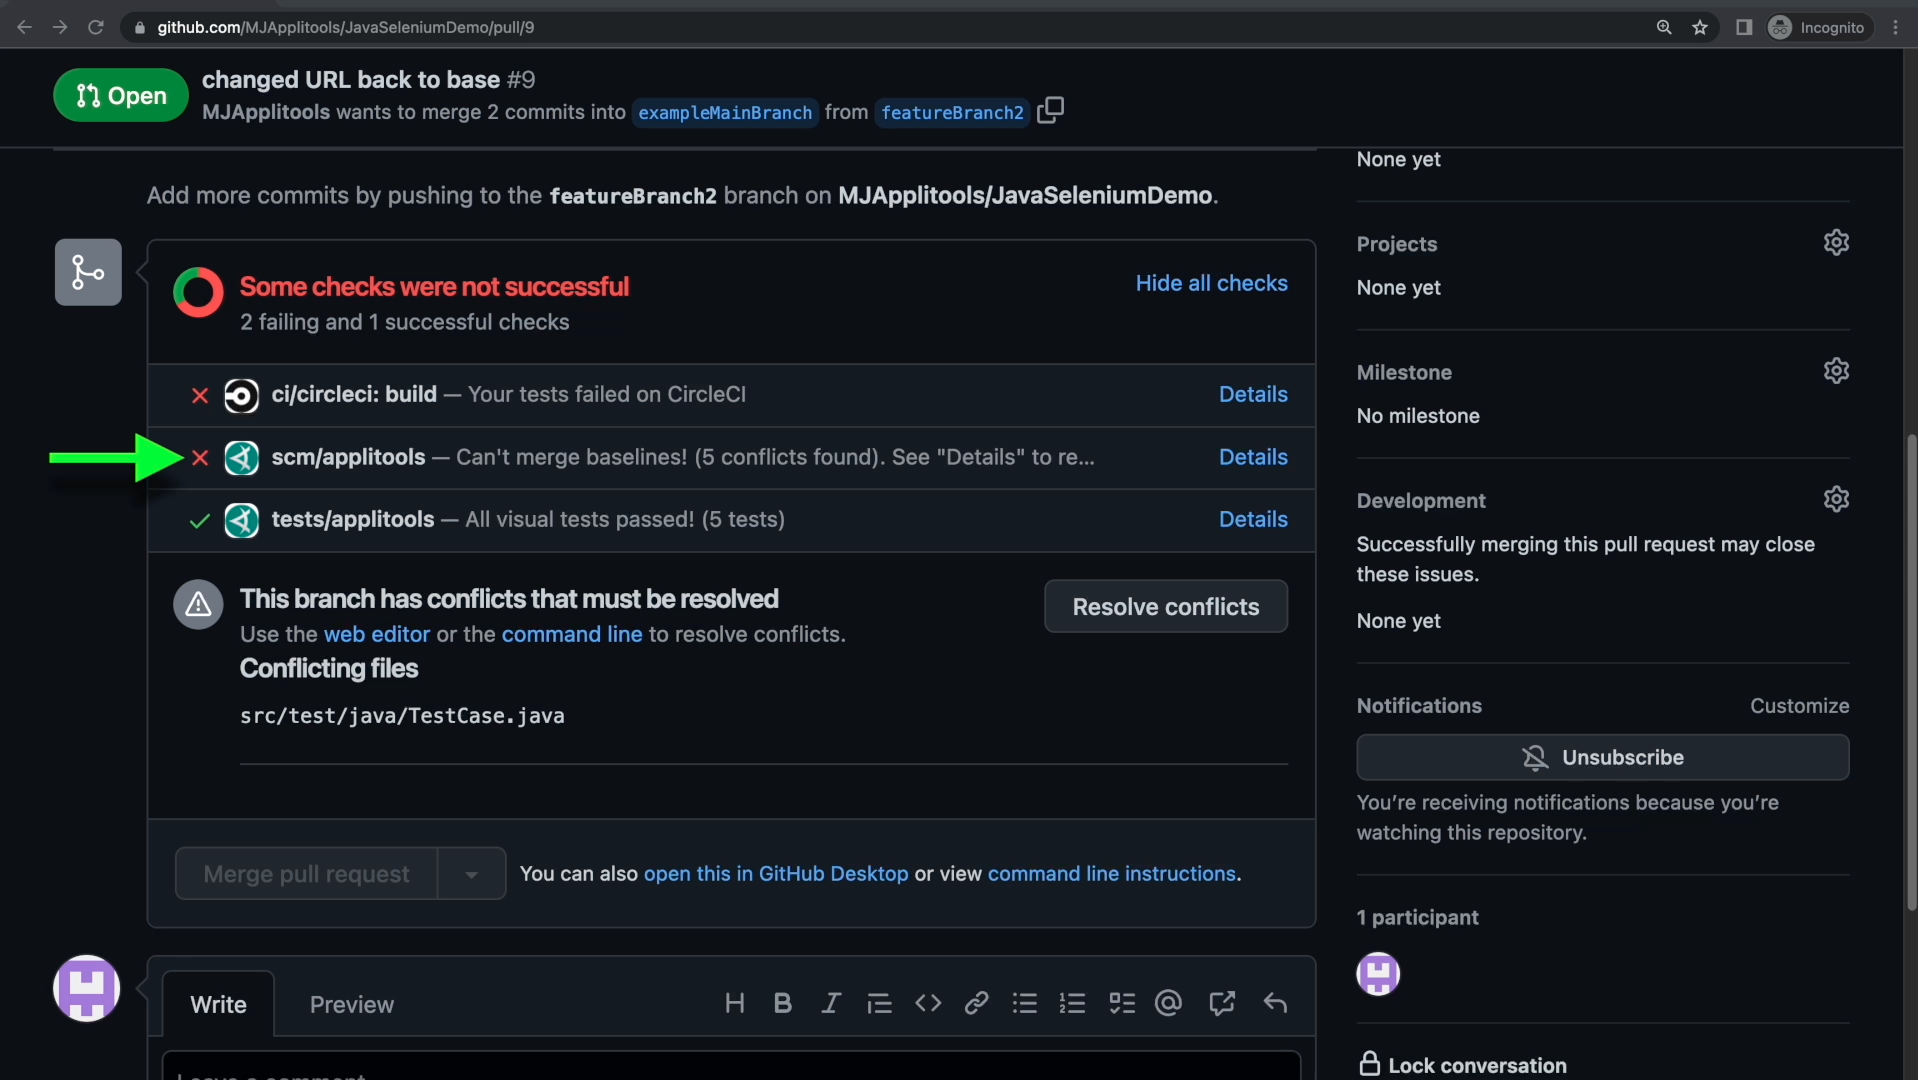
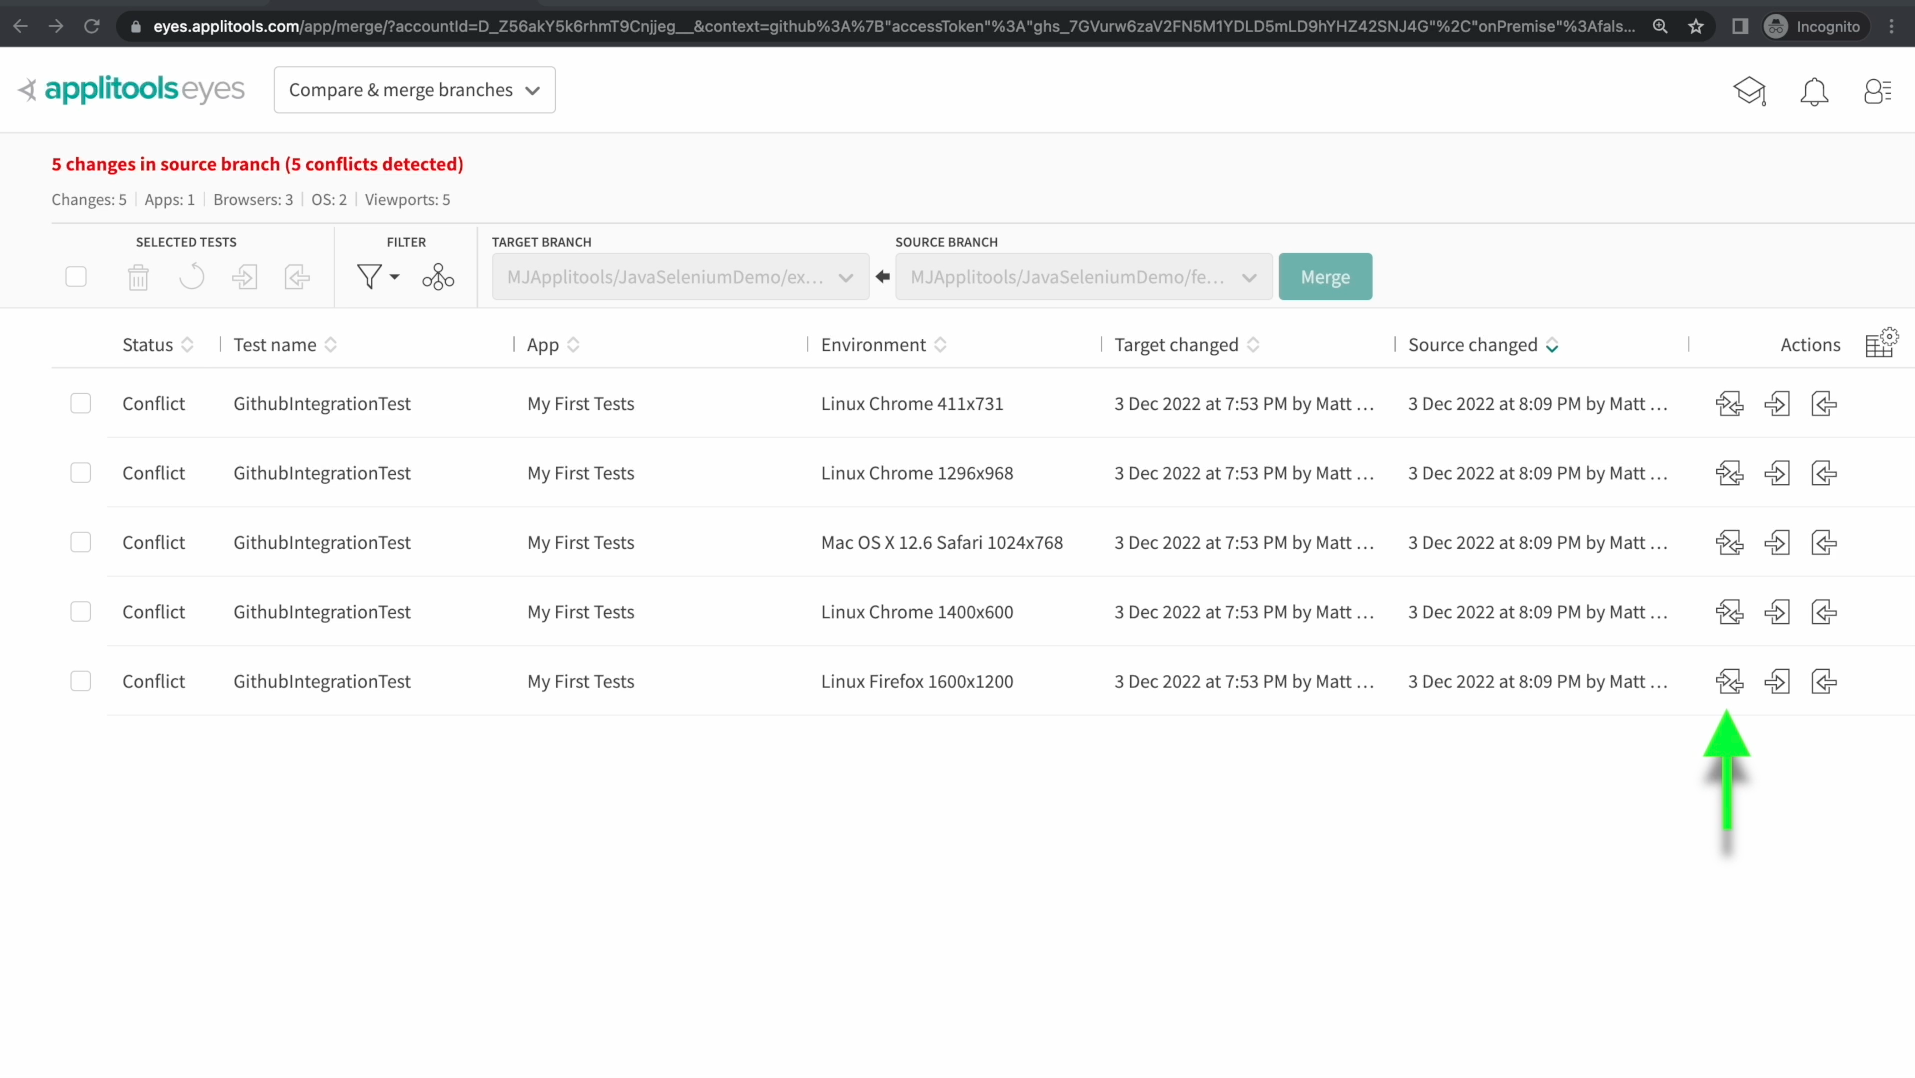
On our PR for featureBranch2, we're now seeing that the scm/applitools check is not ready to merge. It is notifying us that our baselines are in a conflict state. Let's click on the Details link and head over to our dashboard to check this out.
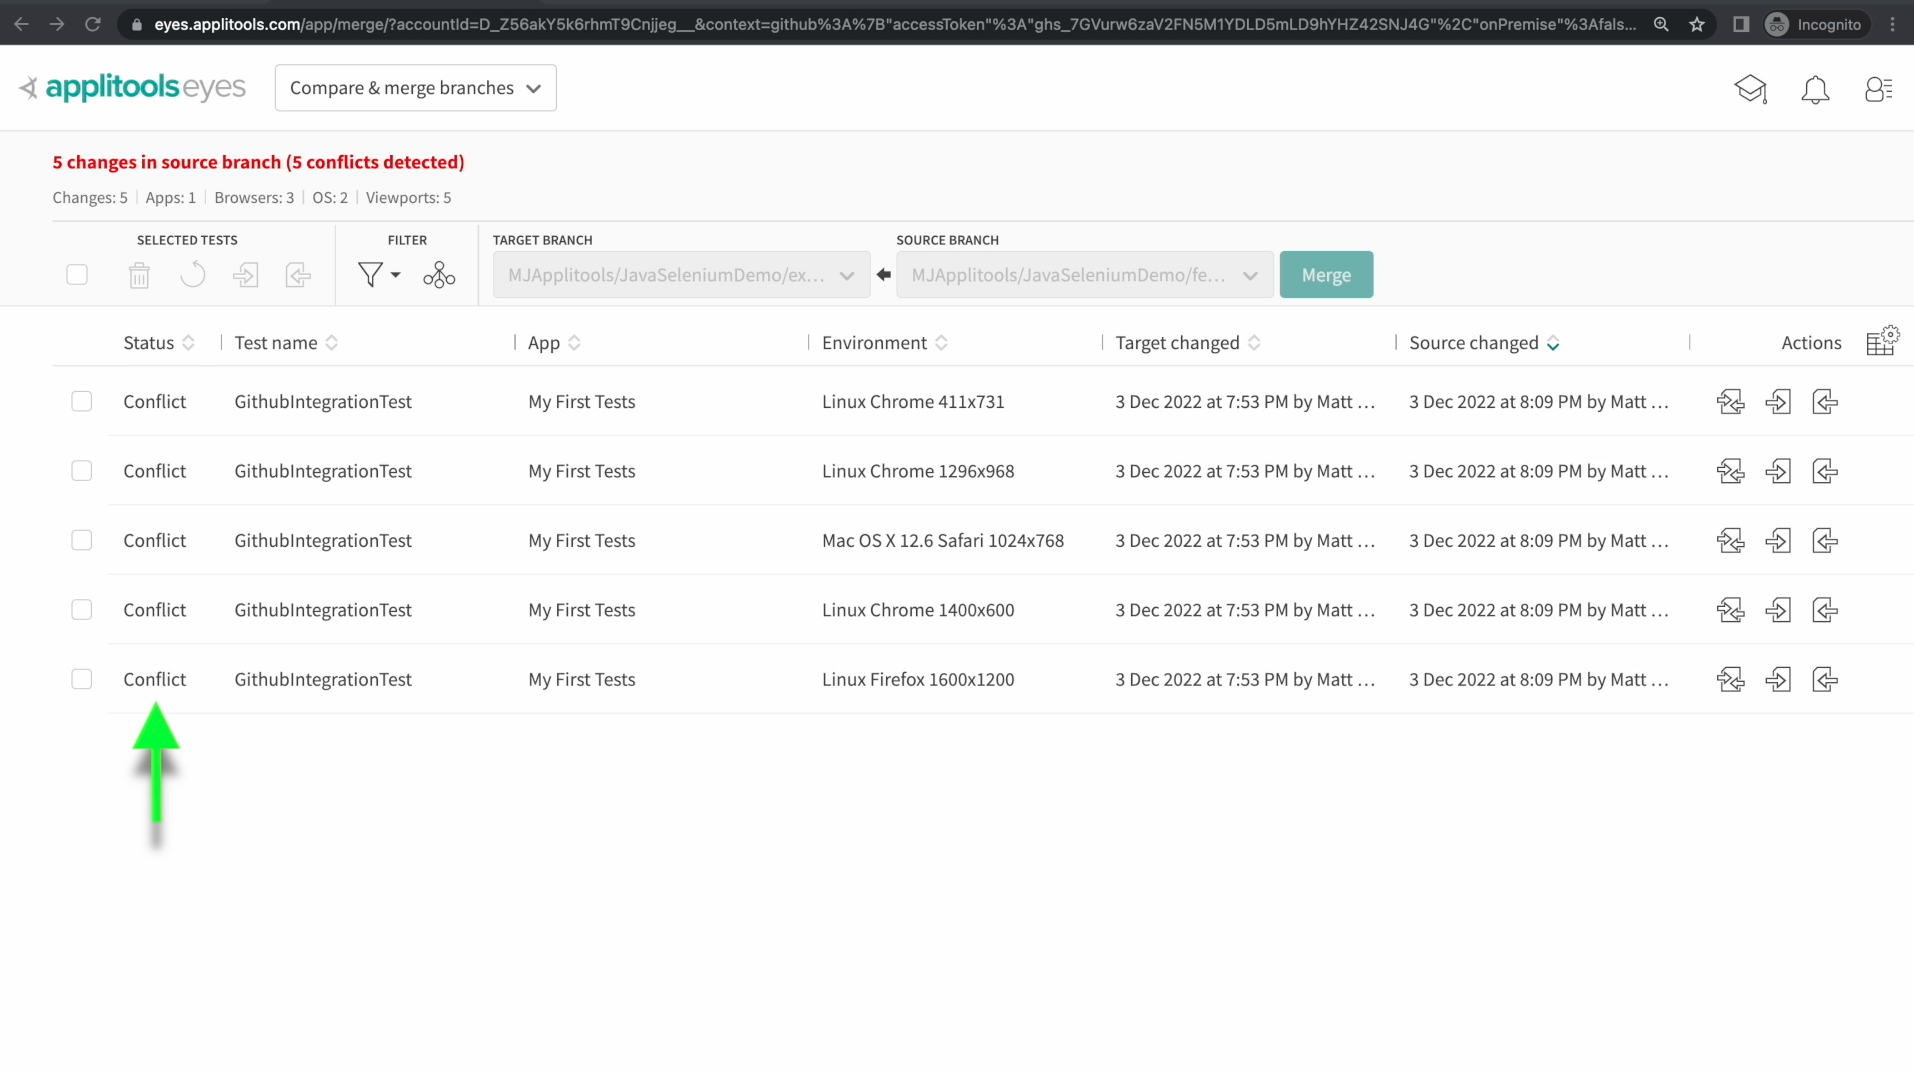
In the compare branches screen, we see that all of our baselines have a status of Conflict. This is because we updated the baseline in exampleMainBranch with the baseline from featureBranch1 after we had already created featureBranch2. Now, just like in the last chapter, we need to decide if we want to keep the baseline currently in exampleMainBranch or take the baseline from featureBranch2.
Before we make that choice, click on one of the compare buttons on the right so we can check out the images.
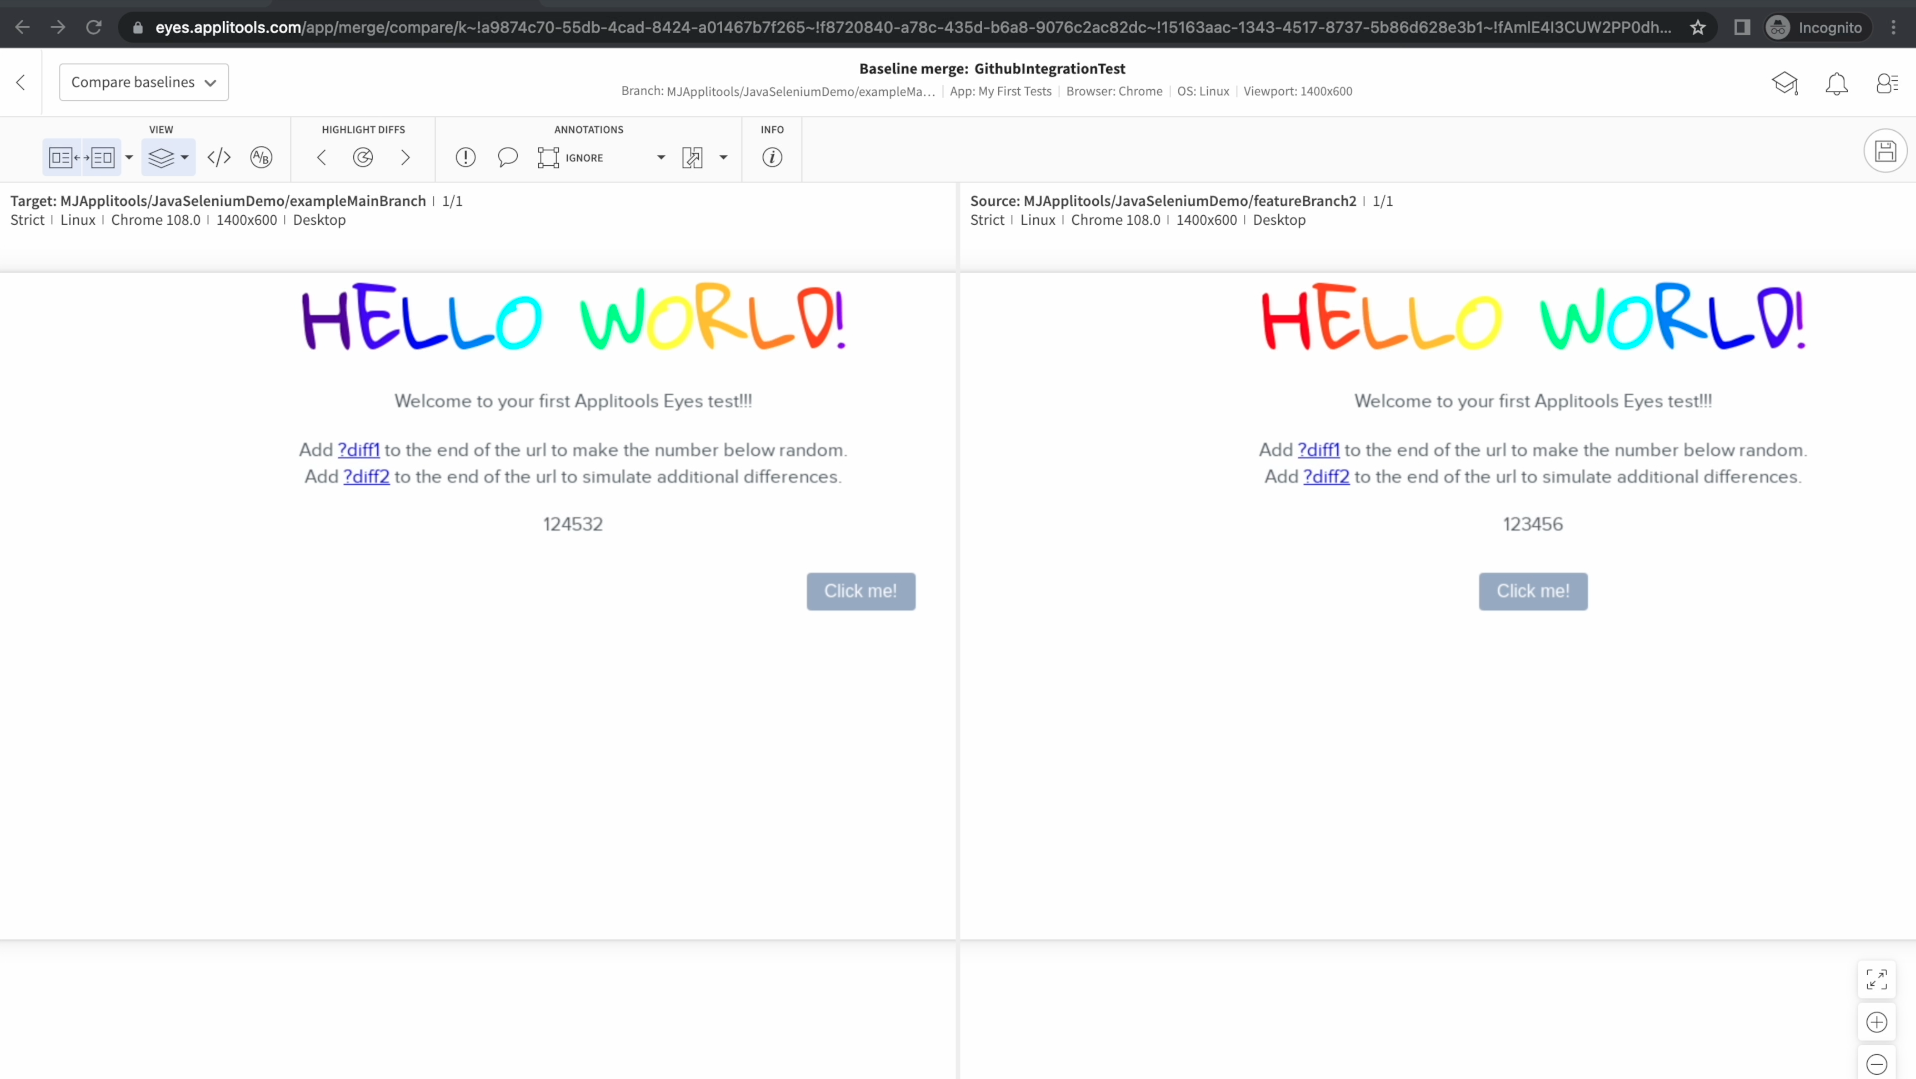
This time we have exampleMainBranch on the left and featureBranch2 on the right. Take note of the differences between the two images and decide which version you'd like to take.
I've gone ahead and made my choice using the buttons on the right side of the screen.
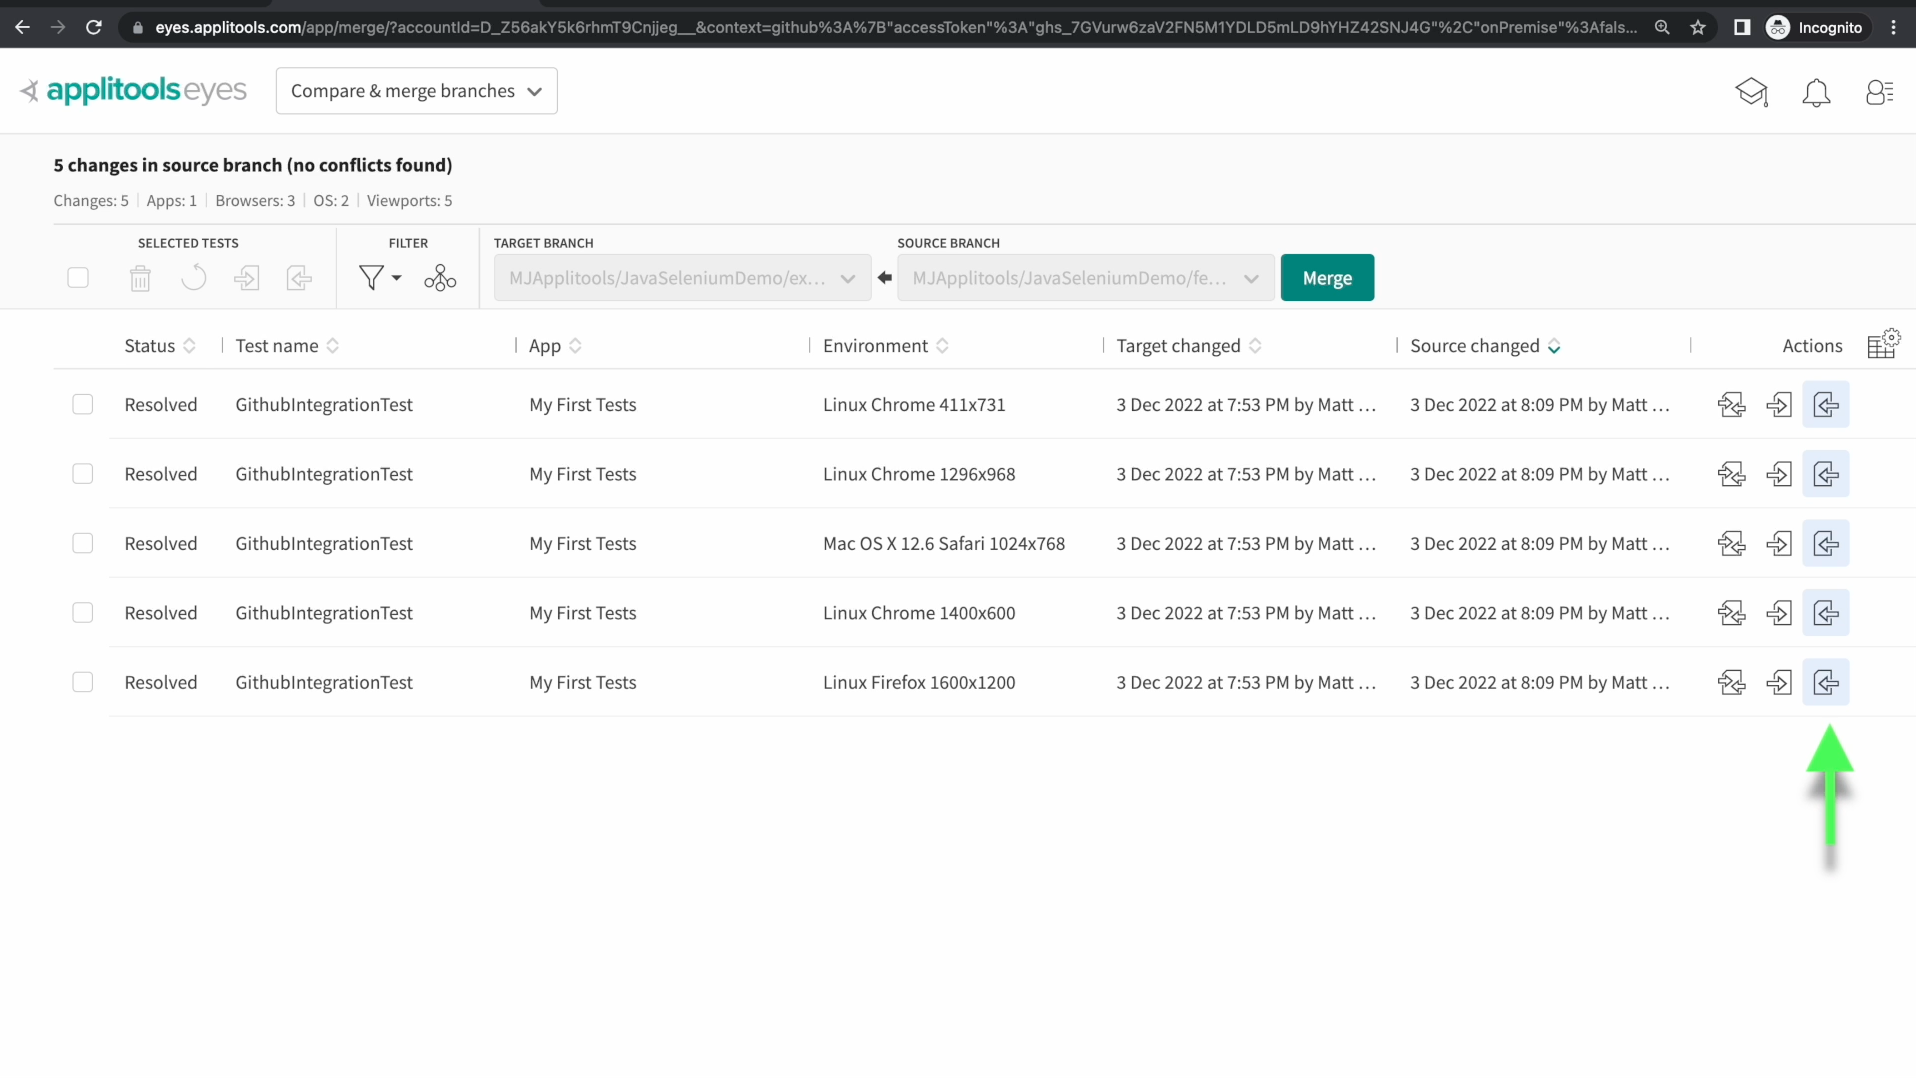
Checking the status column on the far left shows us that our conflicts have now been resolved. Let's head back to Github.
Since we've resolved all of our conflicts on the Compare Branches screen, our scm/applitools check is now giving us the all clear. We can go ahead and perform the merge.

After the merge, let's check the images on the Branch Baselines screen for exampleMainBranch once again. As expected, the changes were automatically merged in from featureBranch2 to exampleMainBranch thanks to the Github Integration.
Great job working through this chapter, let's recap what we learned. We first walked through the setup of the Github Integration by installing the Github App and changing our code.
We then ran through a couple examples that showed us how the integration worked and we also saw how branches were kept in sync with Github.
That's it for the 2nd course in this series! In this course, we introduced some new features and took a closer look at some features that we saw in the first course. We learned about the types of screenshots that you can take, the other Match Levels besides Strict, advanced techniques for reviewing your test results, batch sequences and batch notifications, branching and finally the Github integration. This was a ton of information so please don't hesitate to reach out to our support email or the TAU Slack channel for assistance. It's been a pleasure working with you and I'll see you next time.
Resources
- Github Integration Docs: https://applitools.com/docs/topics/integrations/github-integration.html
- Setting Up CircleCI: https://circleci.com/docs/getting-started/
- BrowserTools Orb: https://circleci.com/developer/orbs/orb/circleci/browser-tools
- Docker Image: https://circleci.com/developer/images/image/cimg/openjdk
- Other CI Configurations for BatchID: https://applitools.com/docs/topics/integrations/github-integration-ci-setup.html
