

Transcripted Summary
Let's now take a look at the interactions.
In my test, I want to open the board, which I'm already doing, and then I want to click on this input and create a new list.
After that, I'm going to click on "+ Add another card", and create a new card.
That will be the end of my test. Let's now delete that and move on.
Now, I can use my selector playground to find the list input element.
Notice that as I click away from this "+ Add a list", the input would disappear.

It is really important to understand what's going on in the application.
For example, when I open my board and there are no lists inside, this input field will automatically appear, and that would be our case.
We will open the board and we can be sure that our list input will actually be visible.
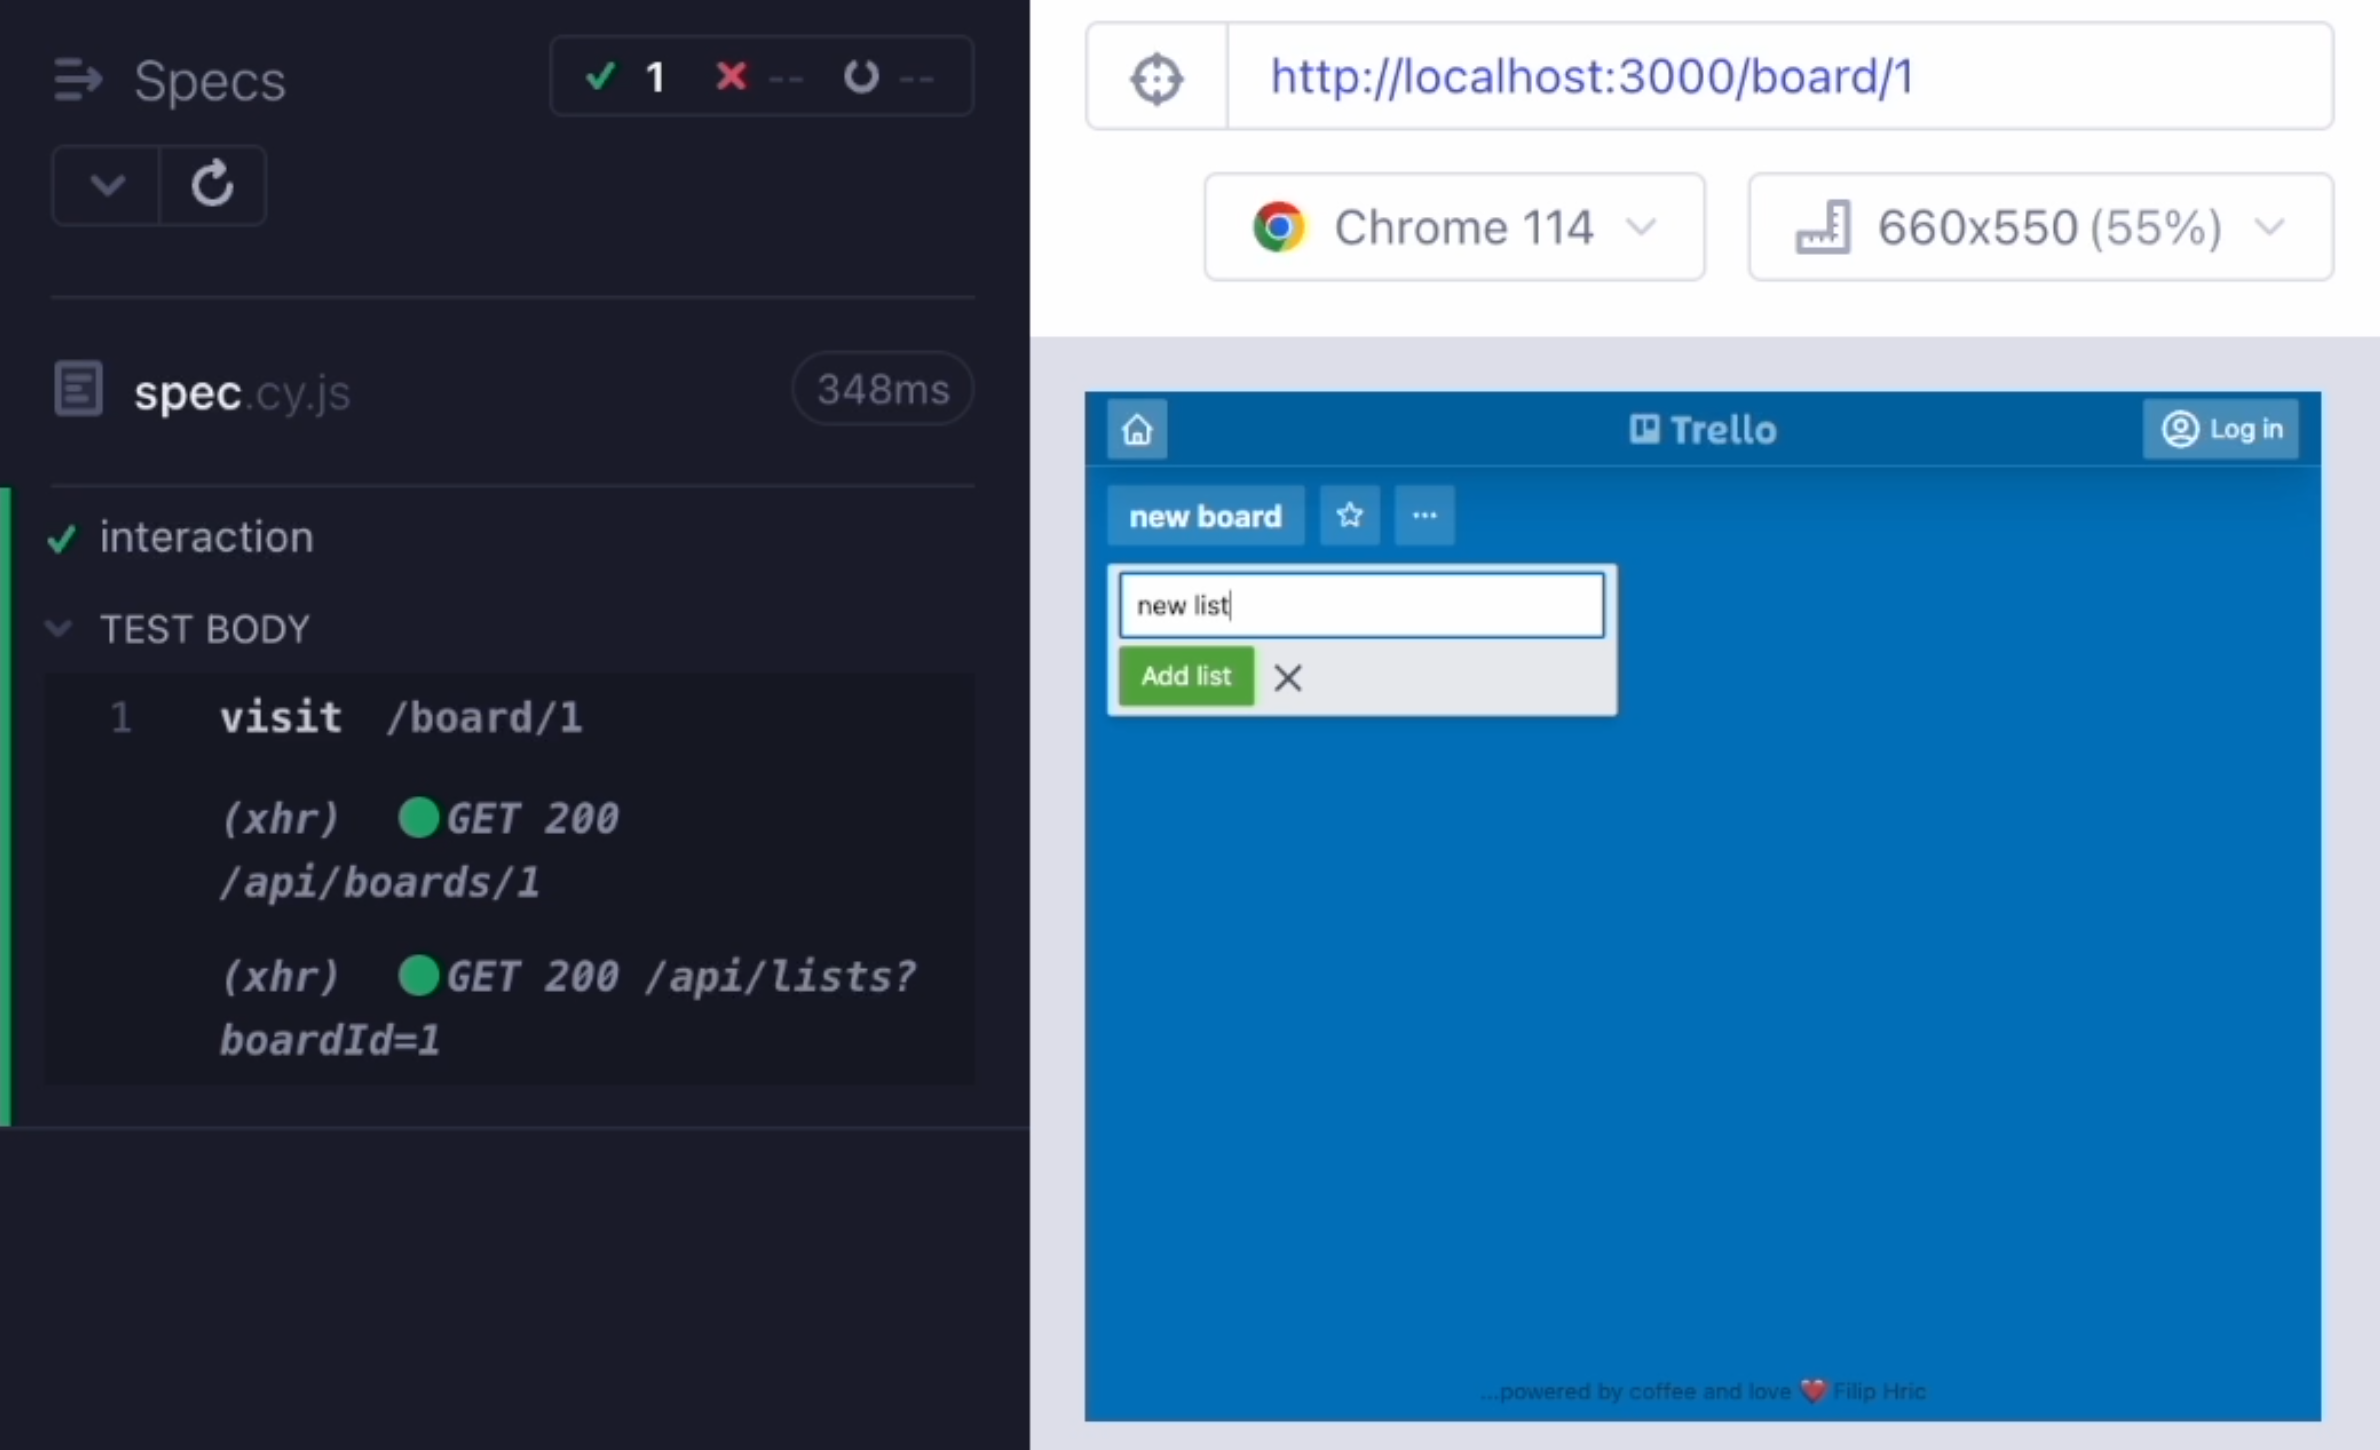
Let's now type new text into that and for that I'm going to use the command type().
As an argument of this command, I will type 'new list' because that's the text we want to enter.
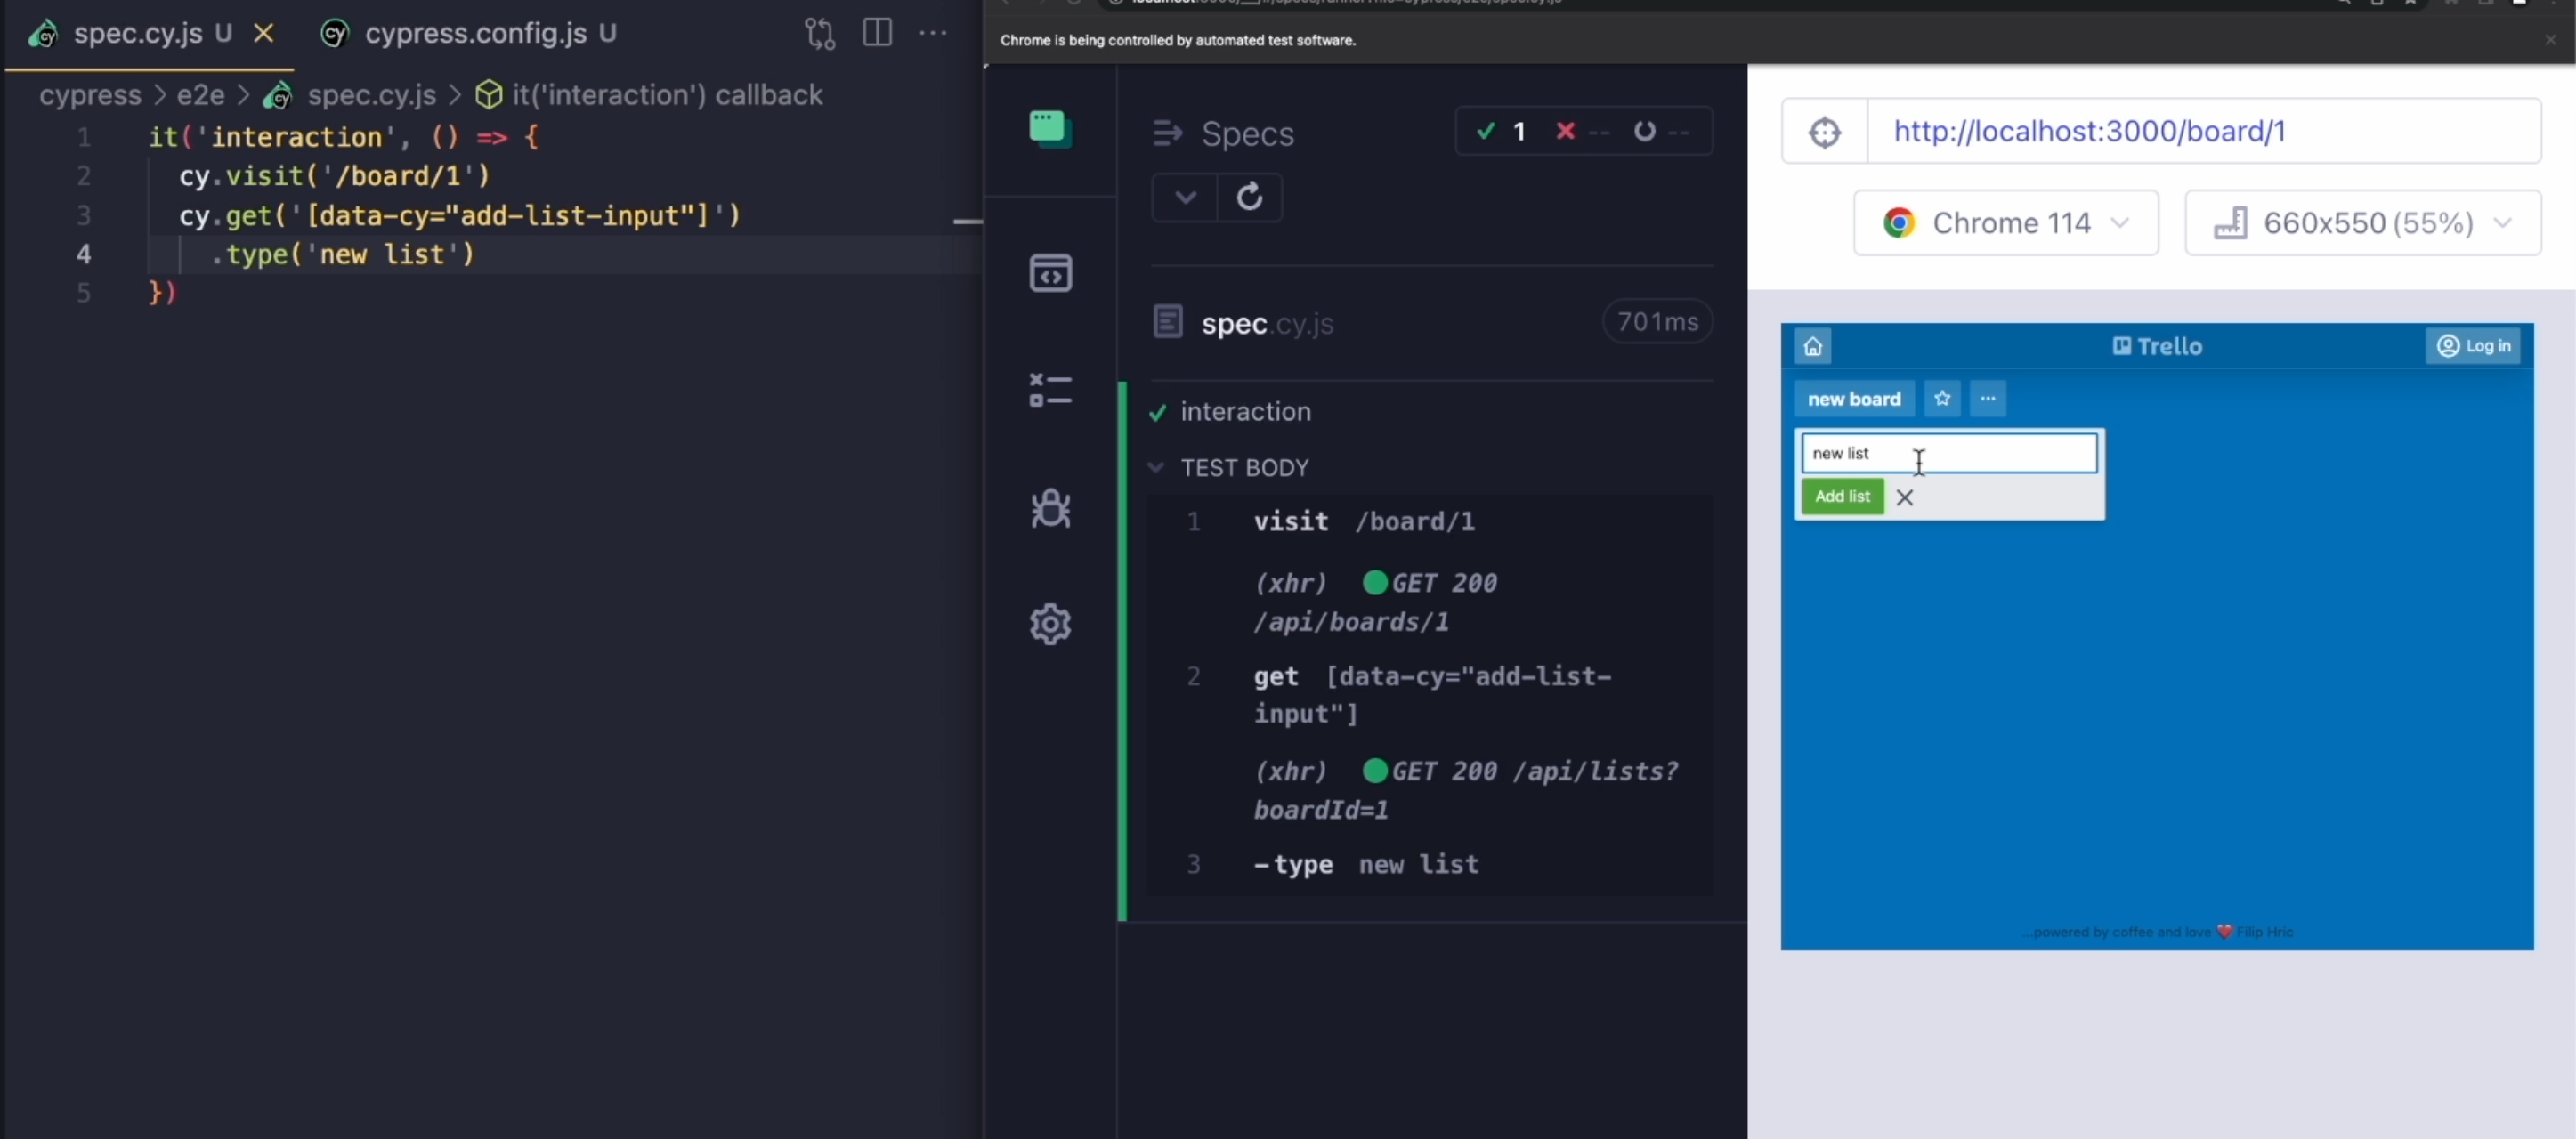
it('interaction', () => {
  cy.visit('/board/1')
  cy.get('[data-cy="add-list-input"]')
    .type('new list')
})
As soon as I save my test, it's going to rerun, and I can see my new list text appear.
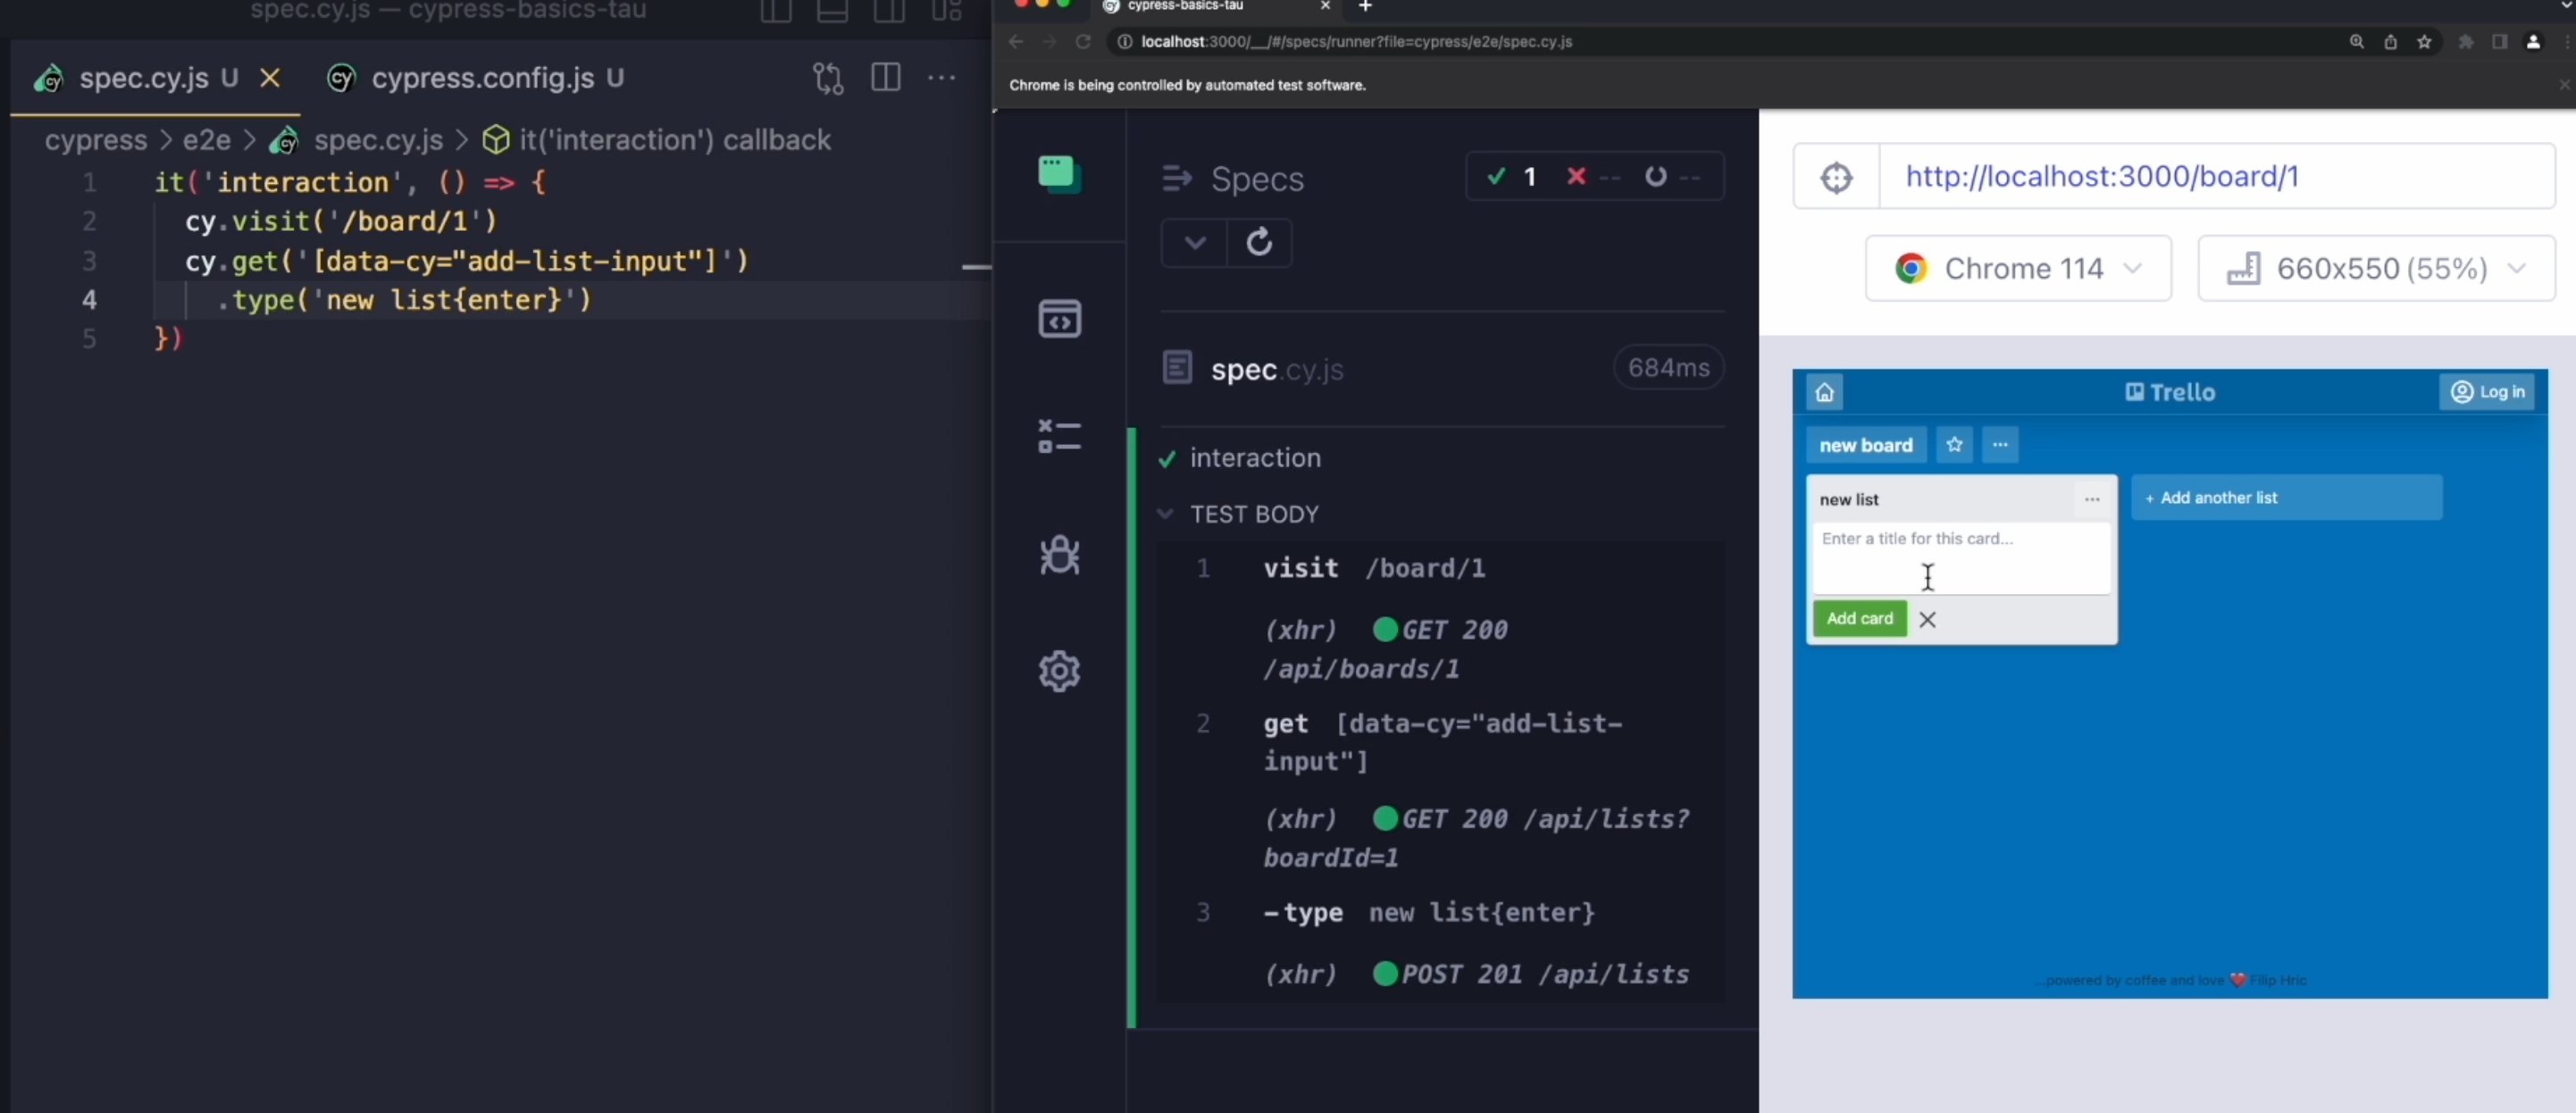
But to confirm creation of the list, I need to hit "Enter".
To hit "Enter" in Cypress, I'll just make it part of the type command argument and wrap it in these curly brackets.
it('interaction', () => {
  cy.visit('/board/1')
  cy.get('[data-cy="add-list-input"]')
    .type('new list{enter}')
})
There are many different special characters you can type this way, and you can find reference to them in the documentation.
I'll save my test now, and now we have successfully created our new list.
To continue with our test, we want to select this "+ Add another card" element and then click on it to reveal the input for adding another card.
To mix it up, we can type cy.contains() and type 'Add another card', and to click on this element, we'll type click.
it('interaction', () => {
  cy.visit('/board/1')
  cy.get('[data-cy="add-list-input"]')
    .type('new list{enter}')
  cy.contains('Add another card')
    .click()
})
I'll delete the list and save my test to run it again and as you can see so far, we're looking good.
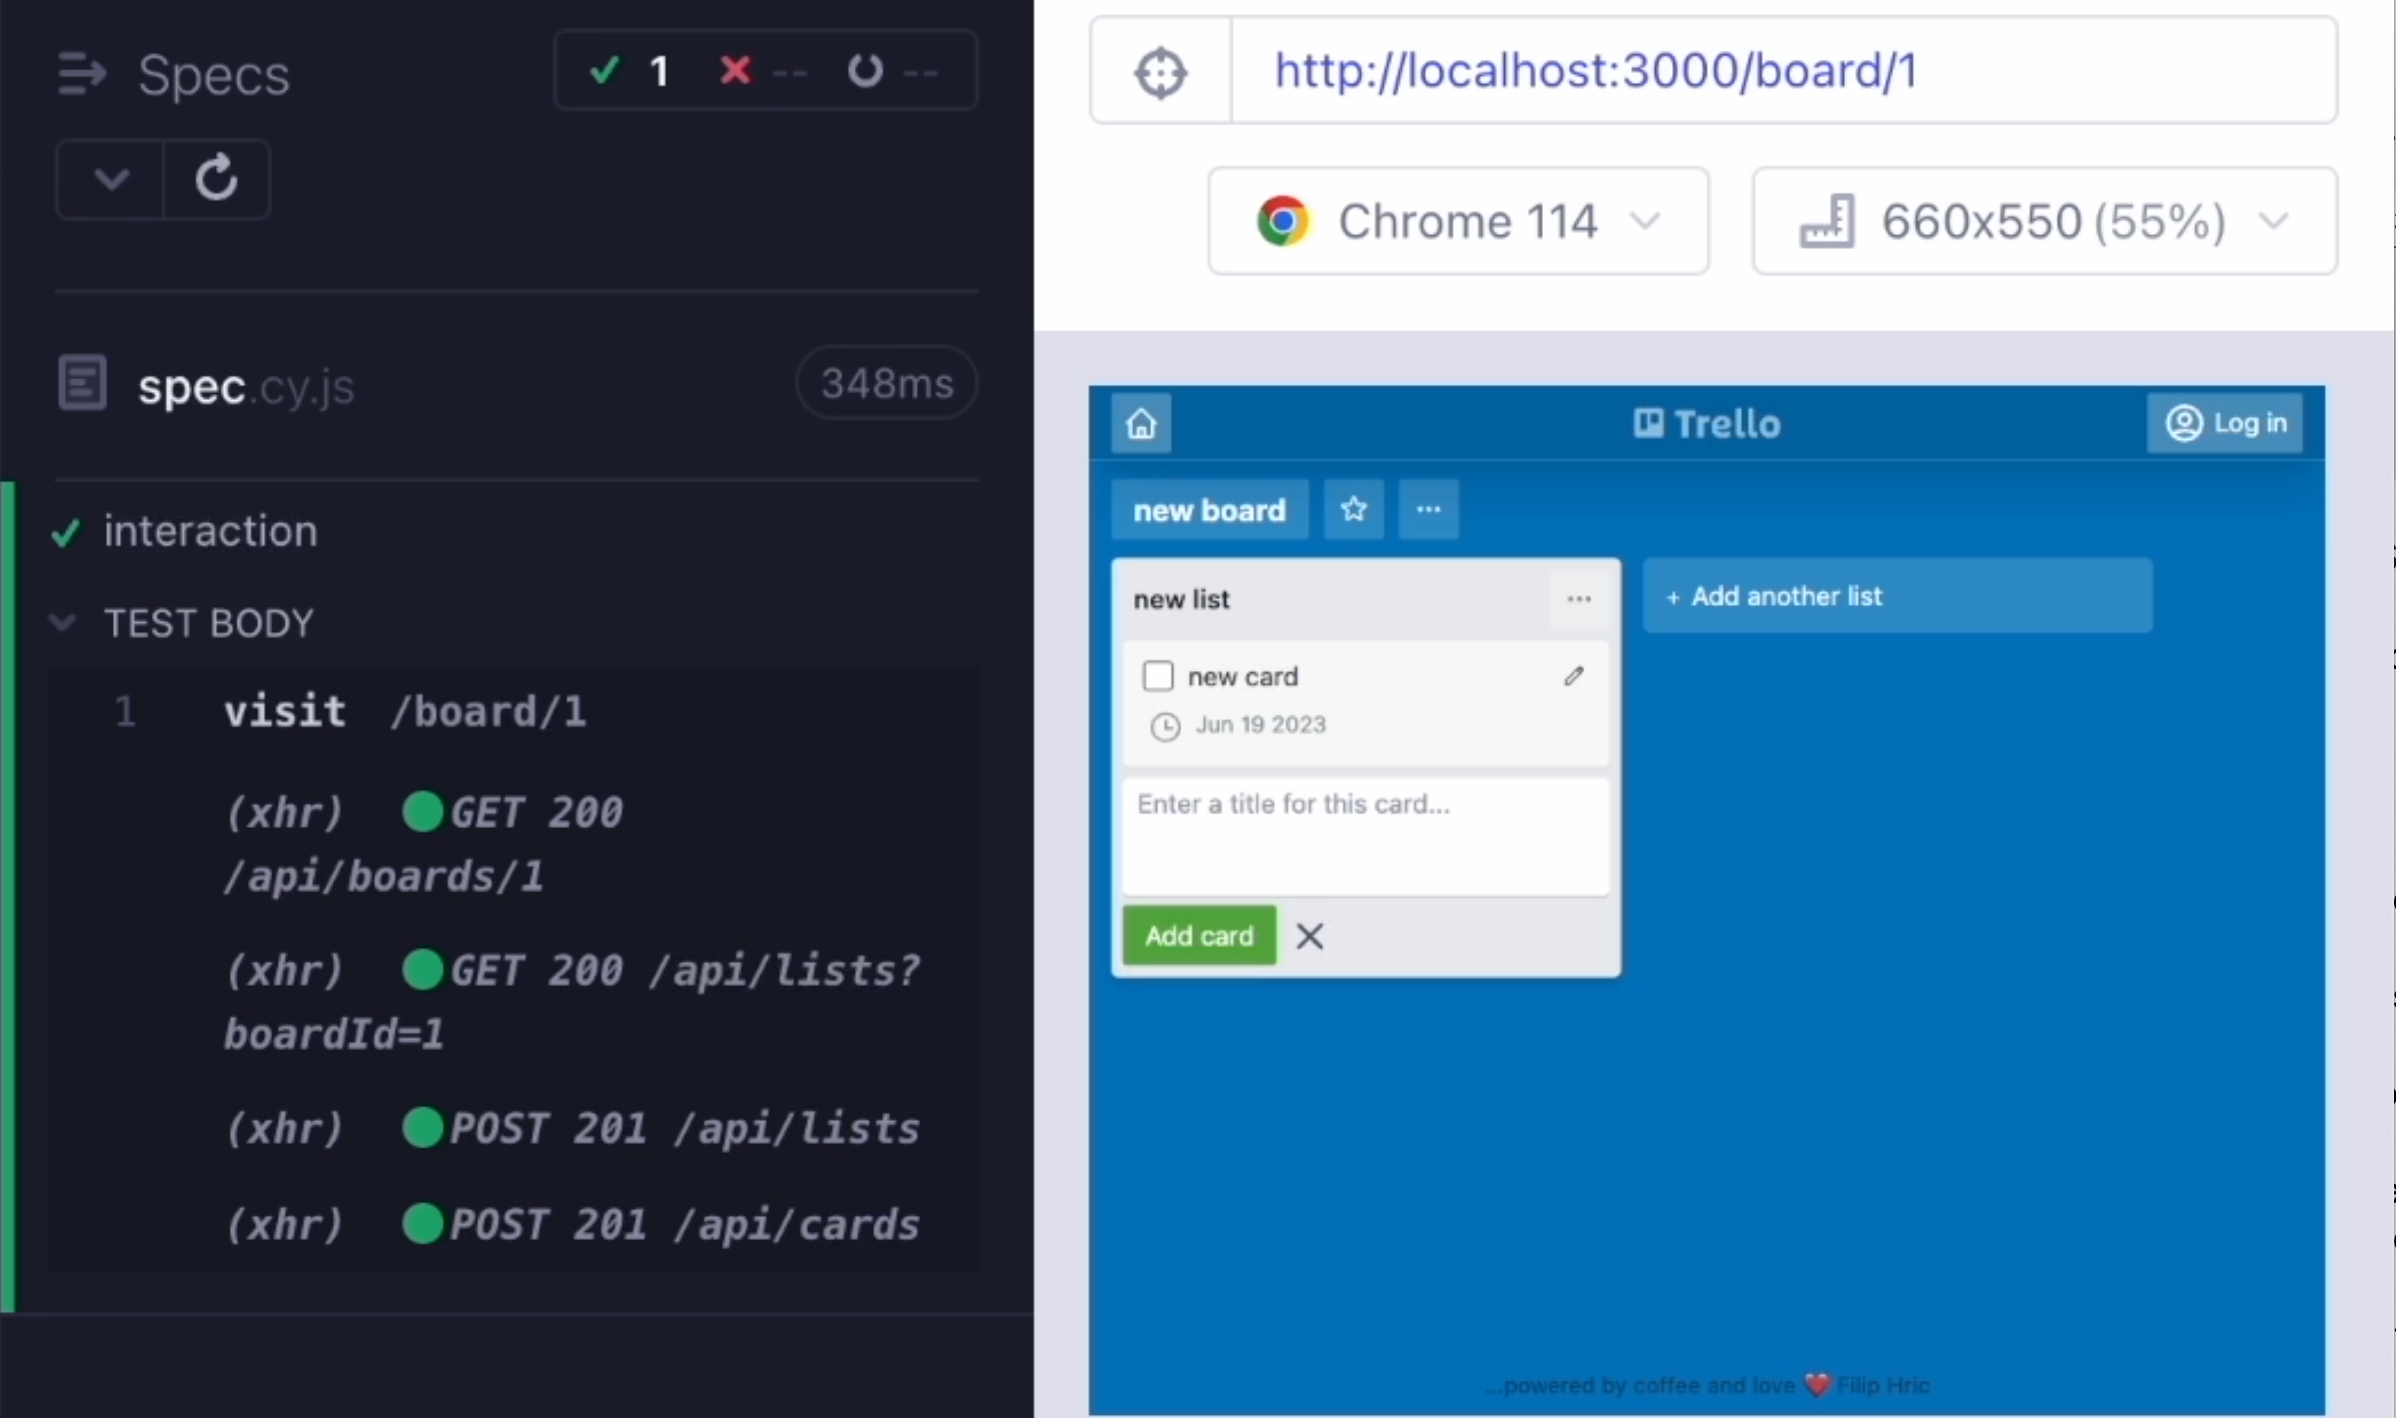
Let's now target our card input element, copy that to the clipboard and paste it into my test, and again we will be typing.
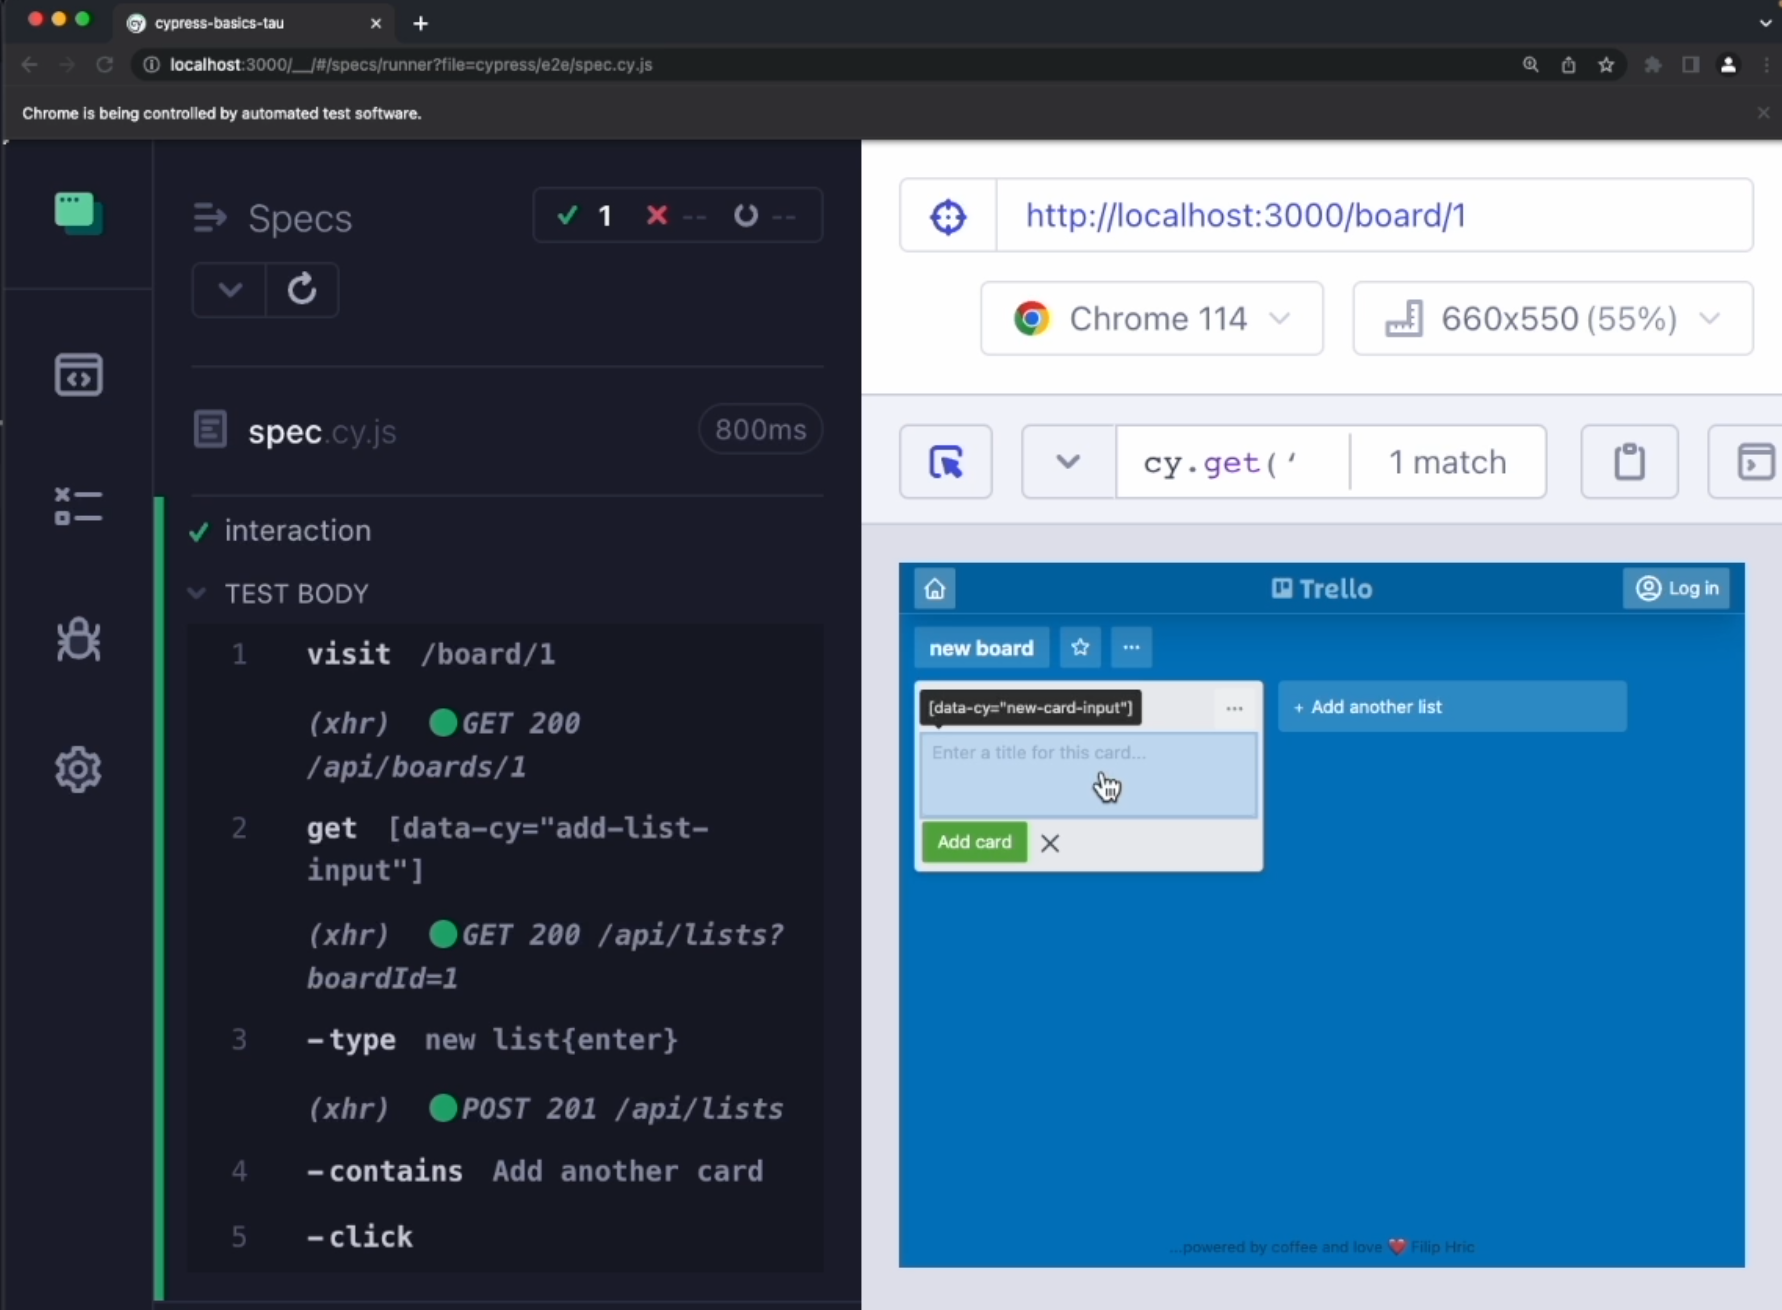
Let's do type and let's add 'new card{enter}' - confirm that with the "enter" key.
it('interaction', () => {
  cy.visit('/board/1')
  cy.get('[data-cy="add-list-input"]')
    .type('new list{enter}')
  cy.contains('Add another card')
    .click()
  cy.get('[data-cy="new-card-input"]')
    .type('new card{enter}')
})
I'll delete the list, save my test, and our interaction is complete.
I will now rename this test to be more descriptive - I'll name it 'creates a new list and a new card'.
As soon as I save my test, it's going to fail, and the reason for that is because I didn't delete my list.
Now, data management is a huge part of testing so this is something we need to think about - if we want to make the test repeatable.
So far, I have been manually deleting my list, but I have built some tools into this application.
If you hit the "F2" key on your keyboard, or if you're on a Mac, then you need to type the "fn" key and "F2".
These nice little tools will pop up which can help you reset your application.
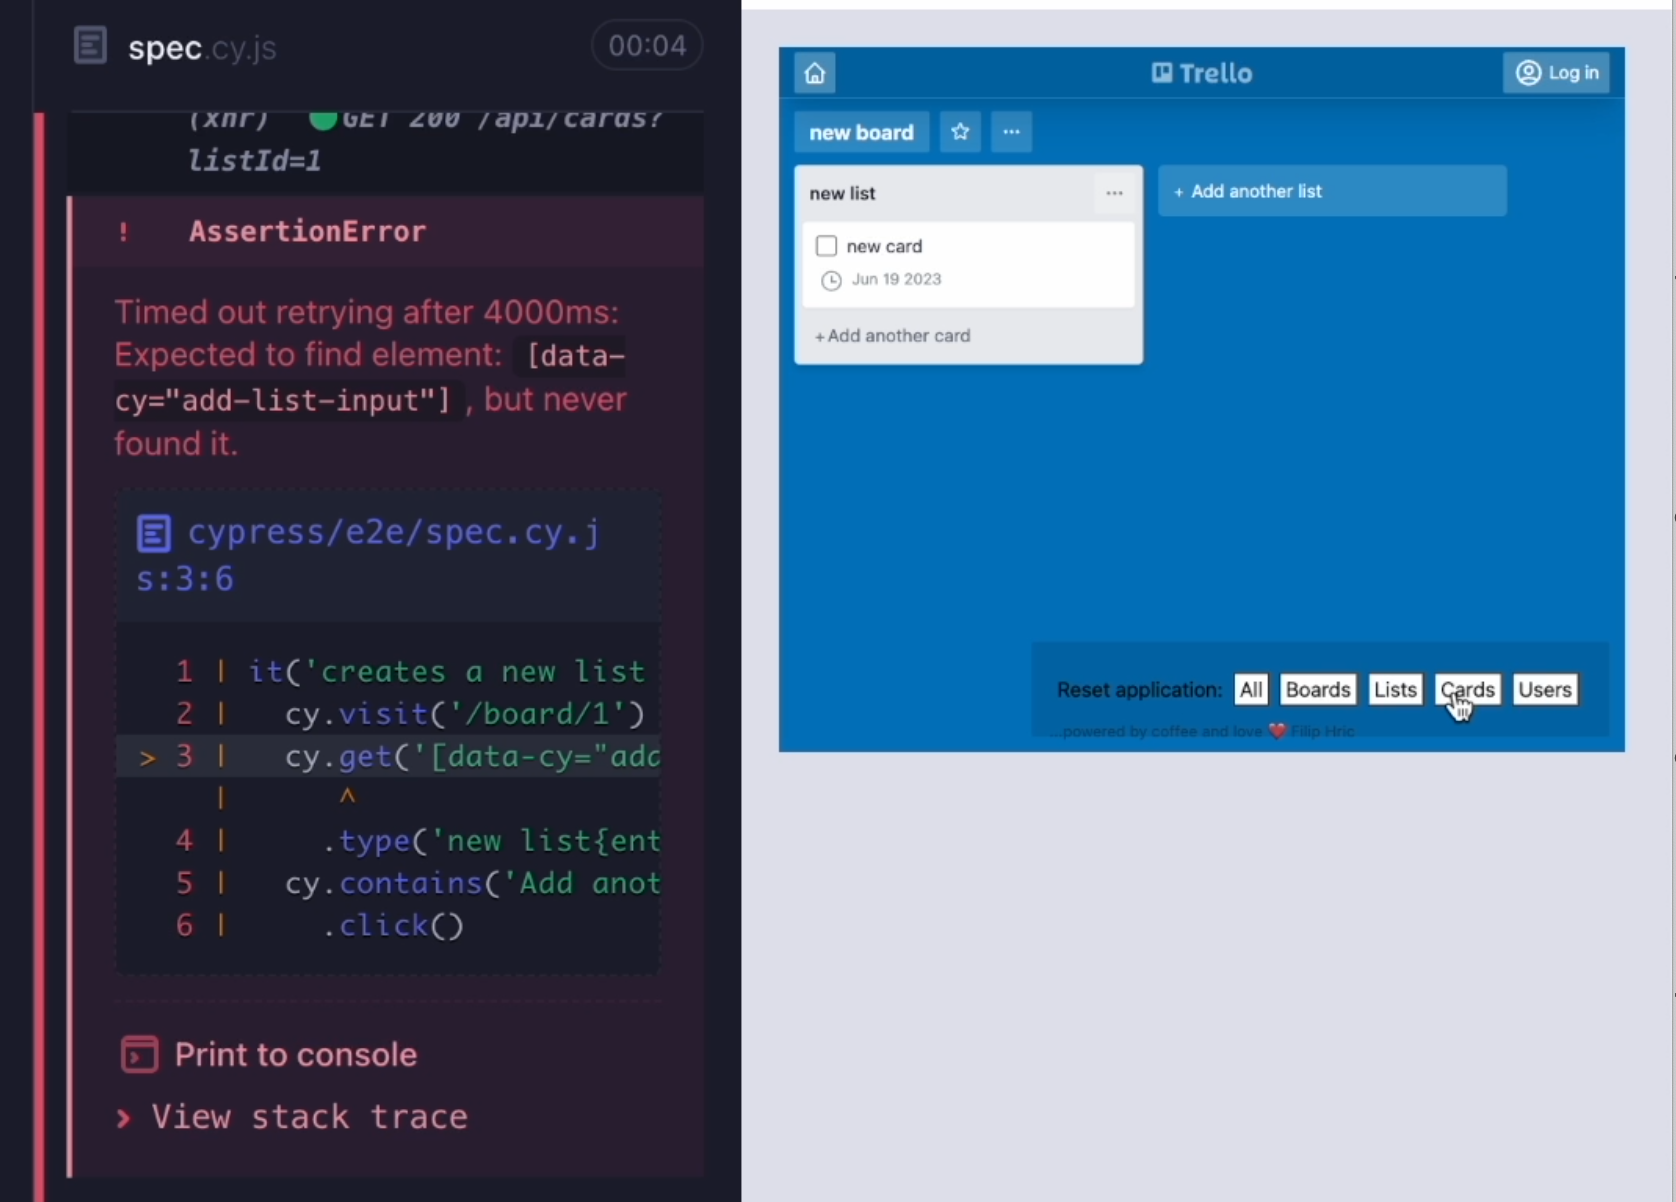
You can either delete all of the cards, all of the lists, or all the data in the application.
This will make the data management slightly easier for you.
Let's now create another test, and I'll just call it 'new test' for the moment.
This means now I have two tests in my spec file.
it('creates a new list and a new card', () => {
  cy.visit('/board/1')
  cy.get('[data-cy="add-list-input"]')
    .type('new list{enter}')
  cy.contains('Add another card')
    .click()
  cy.get('[data-cy="new-card-input"]')
    .type('new card{enter}')
})

it.only('new test', () => {

})
If I want to run just a single one, I can do it.only and this will run just my new test, and it will skip the first one.
In this test, I want to visit my application and then I'm going to click on this star element to make the "new board" my favorite one.

In order to do that, I'm going to get an element, and we can take a look through the "Inspect" panel and find a selector of our own.
Let's find it and I'm going to take a look into the "board-item" and here is our data-cy=star element, which contains the star icon.
I'll put that into my get command, wrap it in the square brackets, and then use the click command to click on it.
it('creates a new list and a new card', () => {
  cy.visit('/board/1')
  cy.get('[data-cy="add-list-input"]')
    .type('new list{enter}')
  cy.contains('Add another card')
    .click()
  cy.get('[data-cy="new-card-input"]')
    .type('new card{enter}')
})

it.only('new test', () => {
  cy.visit('/')
  cy.get('[data-cy="star"]')
    .click()
})
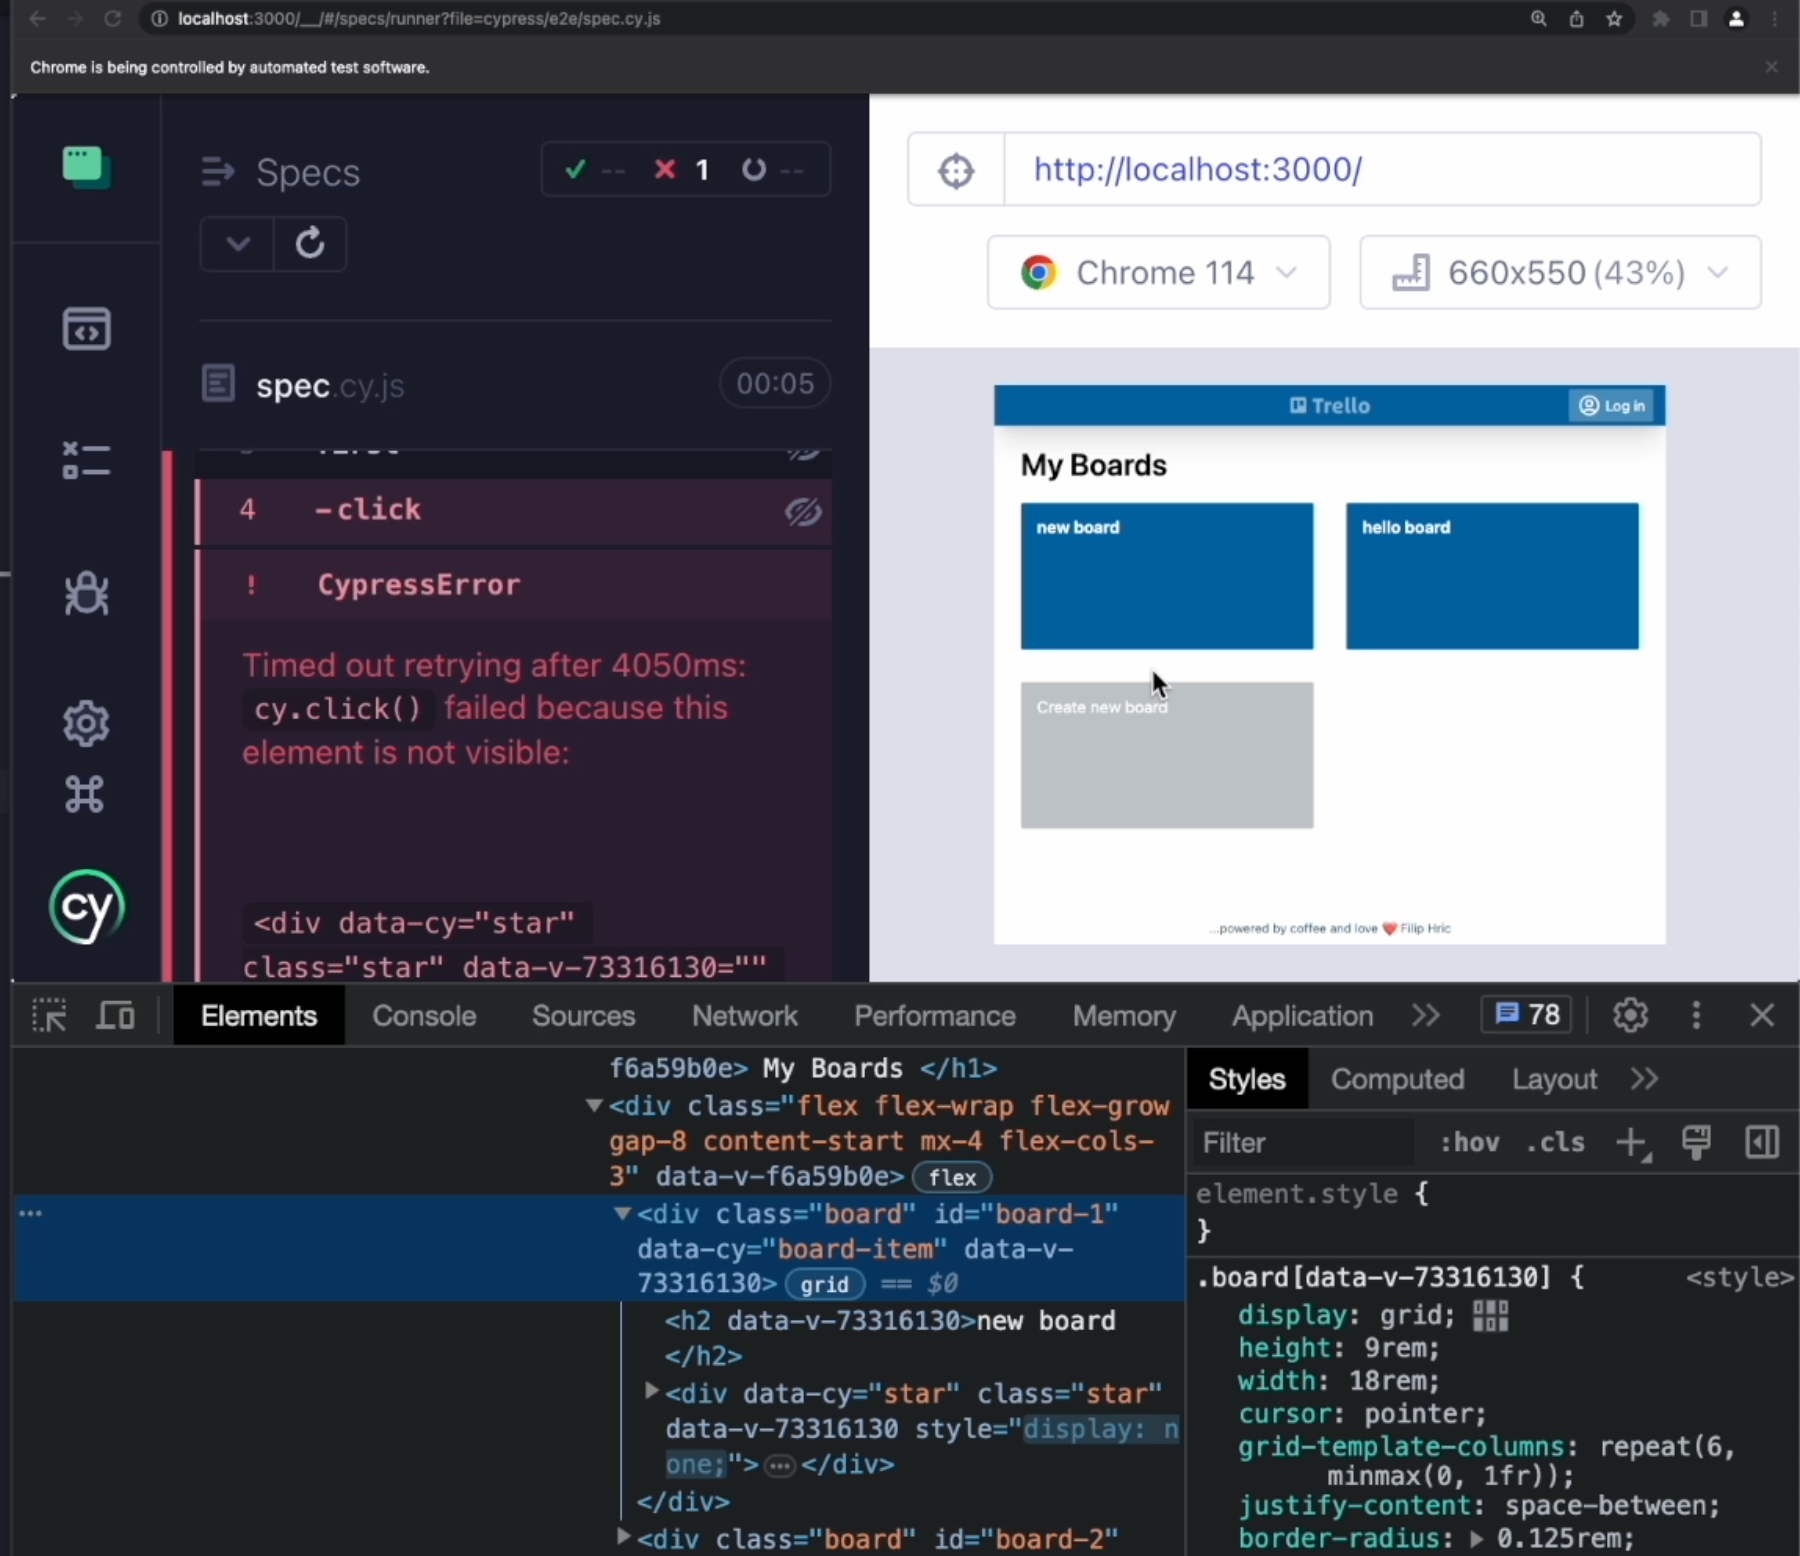
I'll close the Console, save my test, and as I run my test, you can see now that it has failed.
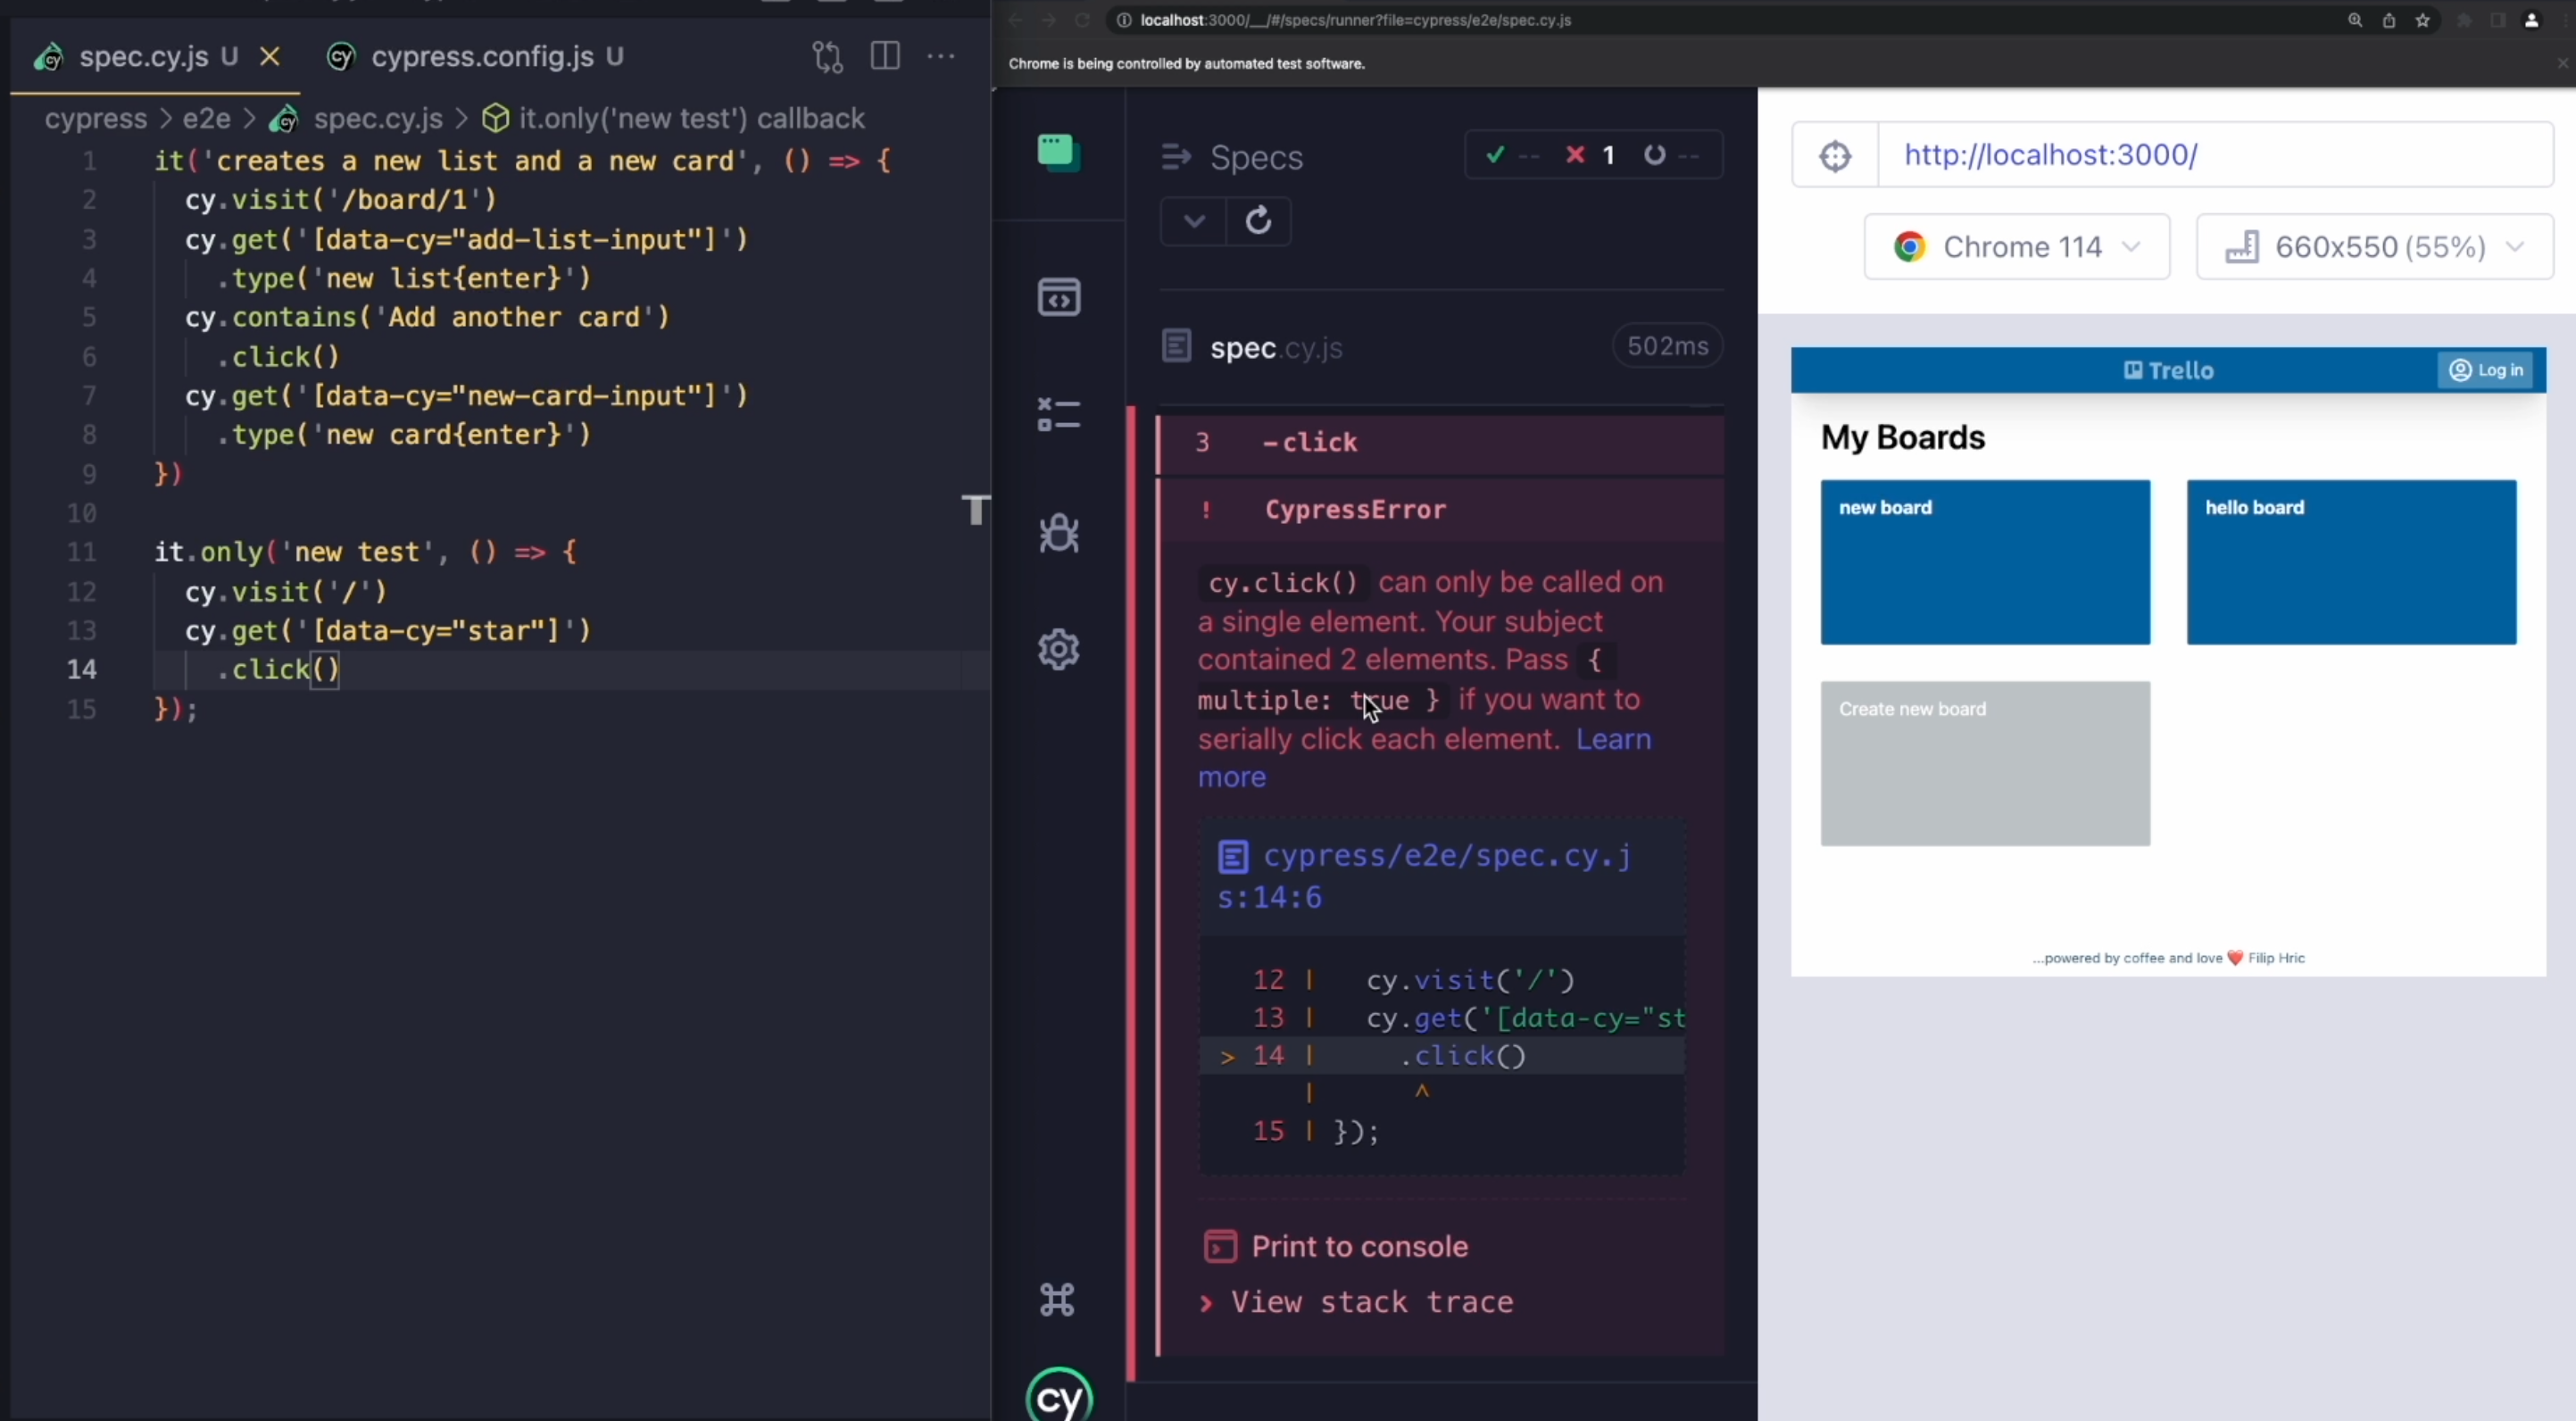
Cypress will actually try to behave as a real user.
Since a real user would not be able to click on two elements at once, Cypress is preventing us from doing that as well.
As you can see in the error, Cypress is telling us that our click command can only be called on a single element, but we have passed two elements.
If we scroll up our timeline, we can now see what's the problem.
Our data-cy="star" selector has found two elements, which makes sense because we have two boards over here.
We already know that we can filter them by using one of the query commands.
Let's now use the first command and create this nice chain of commands that will first find all of our stars, then filter out the selection to the first one and then click on that one.
it('creates a new list and a new card', () => {
  cy.visit('/board/1')
  cy.get('[data-cy="add-list-input"]')
    .type('new list{enter}')
  cy.contains('Add another card')
    .click()
  cy.get('[data-cy="new-card-input"]')
    .type('new card{enter}')
})

it.only('new test', () => {
  cy.visit('/')
  cy.get('[data-cy="star"]')
    .first()
    .click()
})
I'll save my test now and you can see that my test is still failing, and that's because of another check that Cypress is doing in the background.
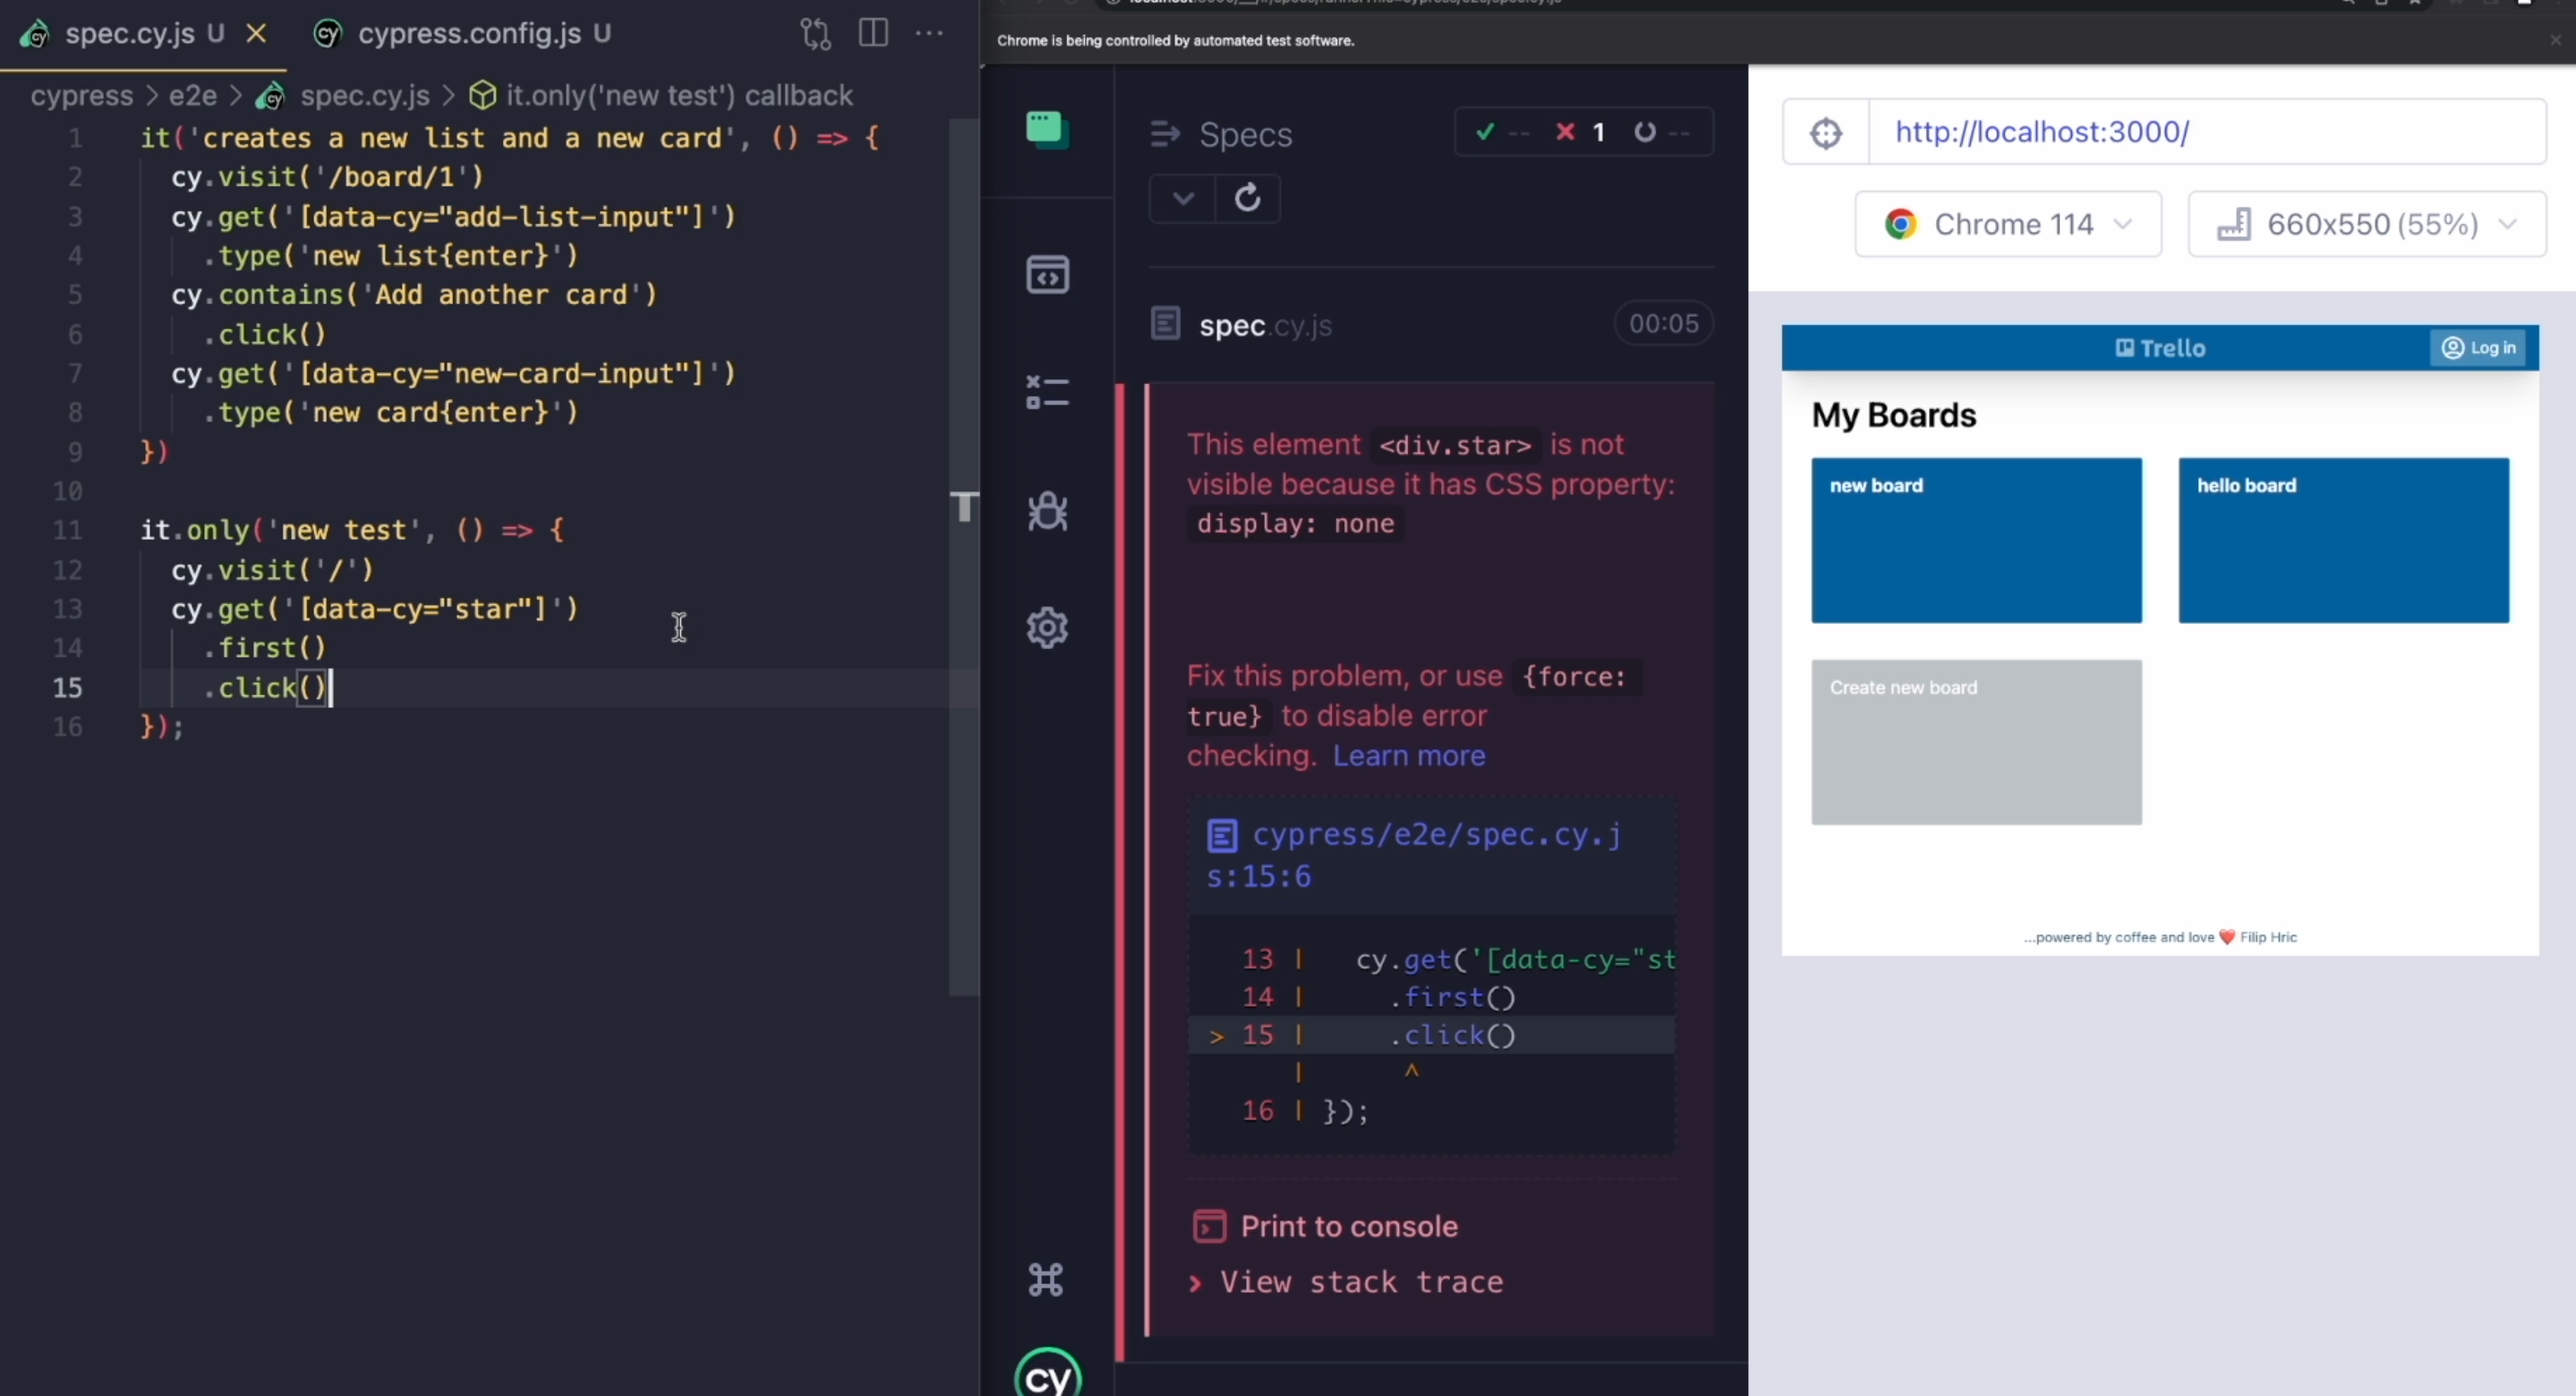
Cypress will not click on an element that's not visible, covered by another element, or any disabled element.
That's what it says in the error.
We have selected the data-cy="star" star element but this one has the property of display: none.
If we open our "Elements" inspector and take a look at our star element, we can see that this display property appears and disappears as we hover over our board element.
One thing you need to know about Cypress commands is that they are triggered by JavaScript.
This unfortunately means that we cannot really simulate a hover element.
To be more precise, we cannot simulate a hover element that's handled by a CSS property.
When a user hovers with their cursor over an element, the animation or interaction can be either handled by CSS properties or by JavaScript.
I'm not going to dive now into the differences between these two methods, but even though Cypress doesn't really have a hover command, it is a problem that is easily solvable.
One solution is mentioned in this error message.
We can skip checking whether the element is visible, disabled or not interactive by passing the force:true option into our click command.
it('creates a new list and a new card', () => {
  cy.visit('/board/1')
  cy.get('[data-cy="add-list-input"]')
    .type('new list{enter}')
  cy.contains('Add another card')
    .click()
  cy.get('[data-cy="new-card-input"]')
    .type('new card{enter}')
})

it.only('new test', () => {
  cy.visit('/')
  cy.get('[data-cy="star"]')
    .first()
    .click({force: true})
})
If I do that and save my test, you can see that now I was able to click on that element.
The important thing to remember is that Cypress is doing a lot of checks for us.
If, for whatever reason, these checks are too strict, you can bypass them by using the force:true option.
Resources
- Docs for .type() command
- Special characters for .type() command
- Docs for .click() command
- Explanation of Cypress actionability checks
