

Transcripted Summary
In this lesson, we’ll learn how to access elements in the page, and interact with them.
Finally, time for our first real test. What shall we test?
Hmm… Let’s see. Basic functionality. Let’s test that adding a todo actually adds it to the list.
Let’s see how we build our test, incrementally, Cypress style.
But first, I want to turn off the “watch” functionality, to ensure that our tests run only when we ask them to.
We’ll open the file “cypress.json”.
The cypress.json file is a configuration file that you can use to configure Cypress. Let's add the turning off the watch functionality.
{
    “watchForFileChanges”: false
}
Okay, we added the configuration to turn off the watch functionality, now let’s get back to the test.
Let’s get back to the test.
First step: change the test name! Very important.
We’ll change the test name to “should add a new todo to the list”.
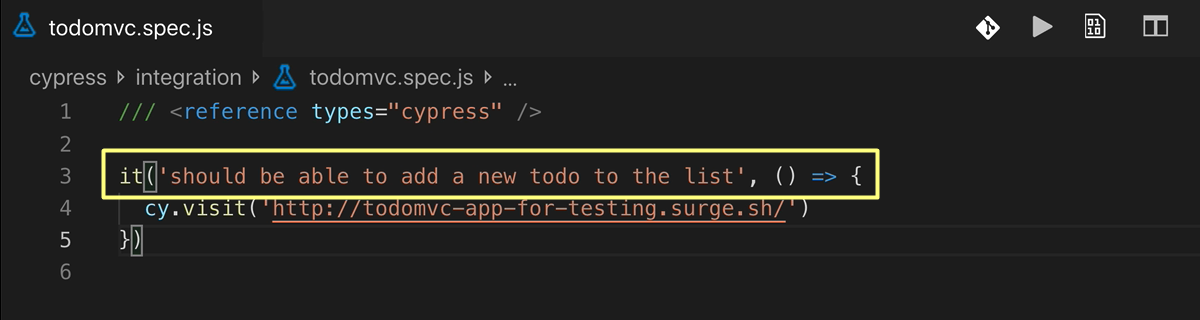
Second step: we need to “get at” the element.
We’ll see how we can use the interactive capabilities of Cypress to write the test a whole lot faster.
We need to get at the “new todo” element, so we need a selector for that element. And while we can figure it out manually, we can use Cypress’ help.
Let’s run Cypress, as usual:
npx cypress open
Now we’ll run the test to completion, and then add what we need.
[Run the test, click on the “selector locator” and click on the “new todo”]
If we click on this little widget here (I call it the "interactive element locator"), we can point to the element on the screen that we want to get the selector for.
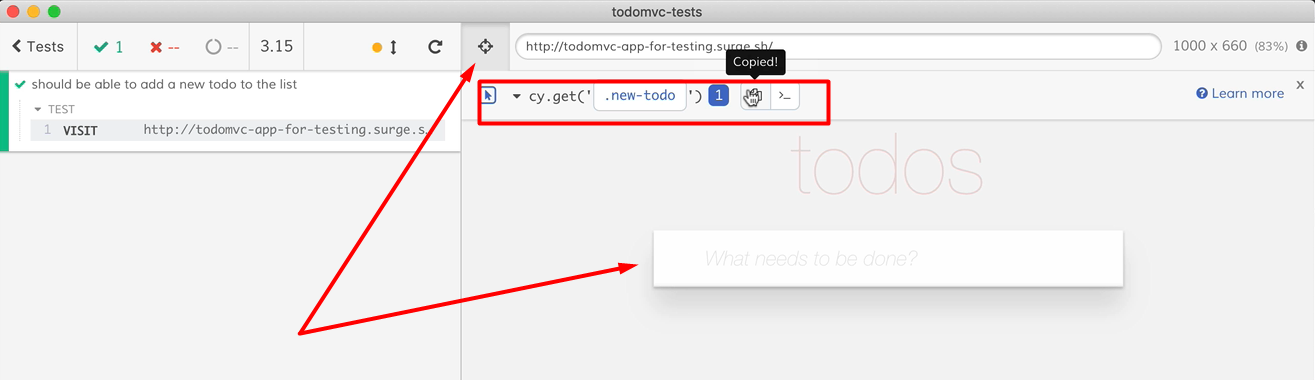
When we click on it, we get not only the selector, but also the command in Cypress that is used to “get” the element.
[Click on the “copy to clipboard”, and then paste it to the test.]
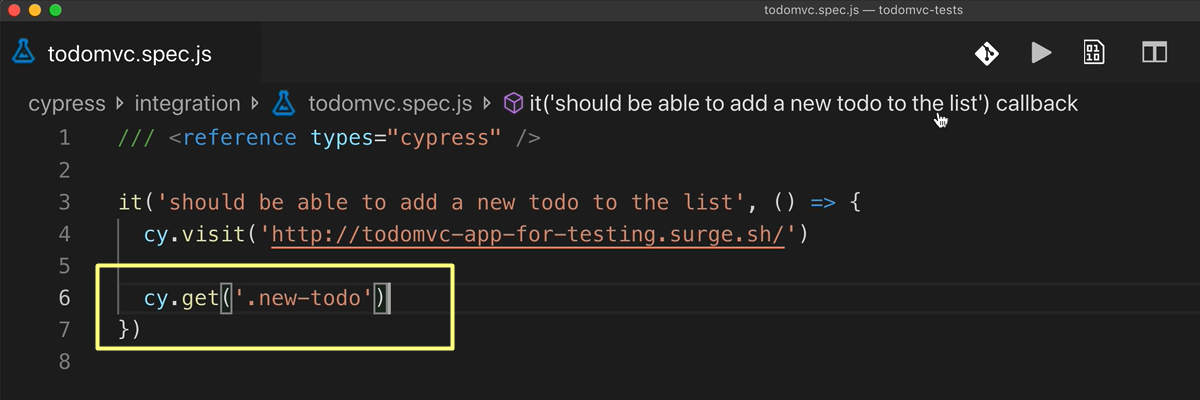
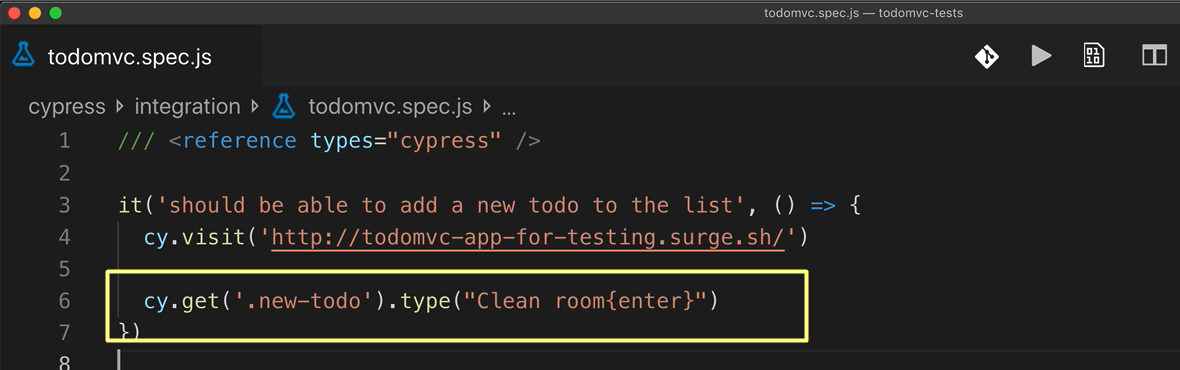
We pasted the command:
cy.get('.new-todo')
Now let’s run the test.
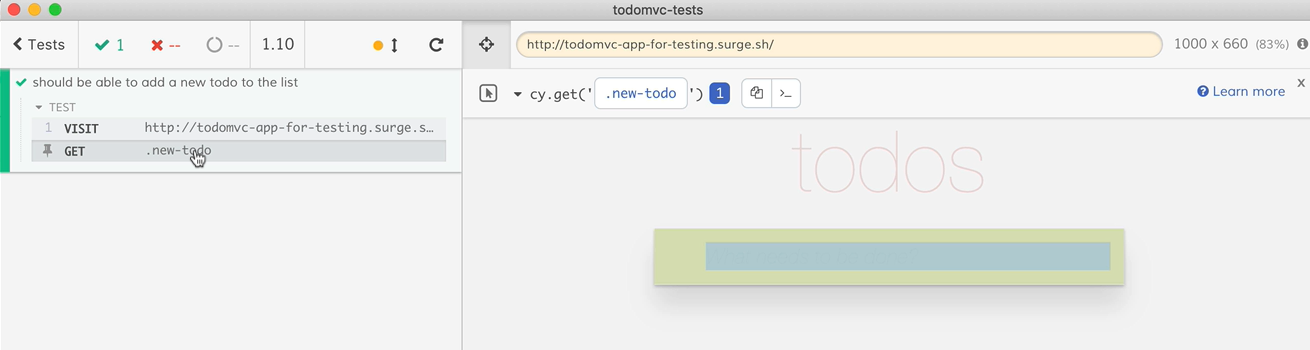
The test passes!
Notice how we now have two commands on the left of the screen, and even more interesting: hovering over the “GET” command will show exactly which element that GET [.get] located. Sweet!
Now, let’s add that todo by typing into the “new todo” element.
So, I add a .type() command immediately after the .get.
This is called “command chaining”.
cy.get('.new-todo').type('Clean room{enter}')
It chains the type command to the get command, so that type will type whatever we want into the element thatget got.
Note the “curly braces enter” [{enter}] in the String that indicates that Cypress should type an “enter”, so that the todo will actually be added.
Let’s run the test..
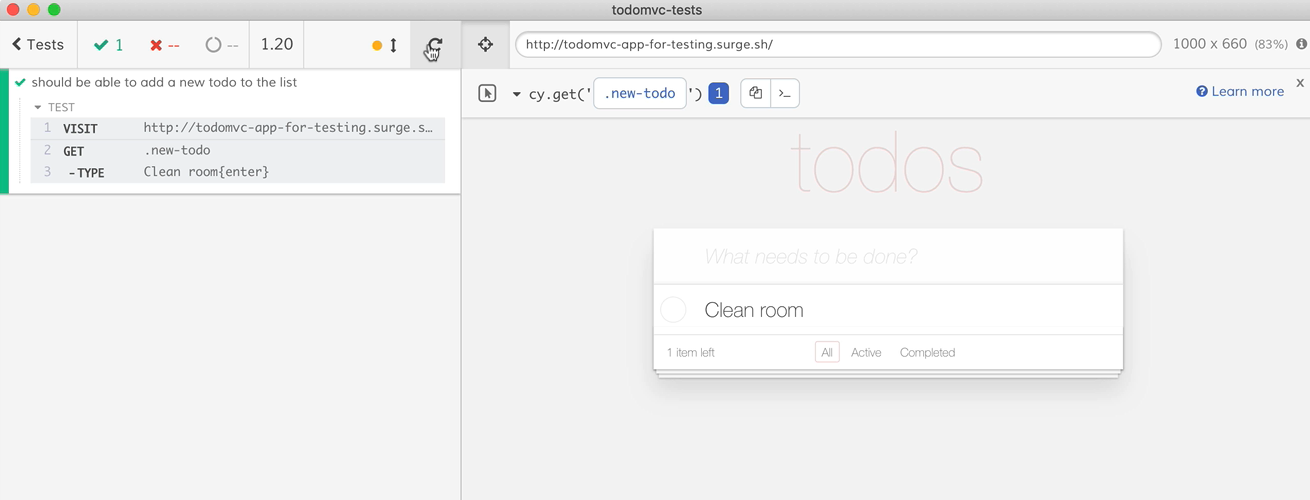
Yup, it runs! And finally, the test is useful.
What we should be doing now is validating that the action we did (creating a todo), actually worked. But we’ll leave that to the next lesson, which will be all about validation. In this lesson, we’ll concentrate on the actions we can do on the page.
But let’s change the selector a bit — let’s make it fail to see some more Cypress magic.
Let’s change the selector to ‘.old-todo’ and run the test to see it fail.
We changed the selector to a non-existent selector and ran the test. As we expected, it failed.
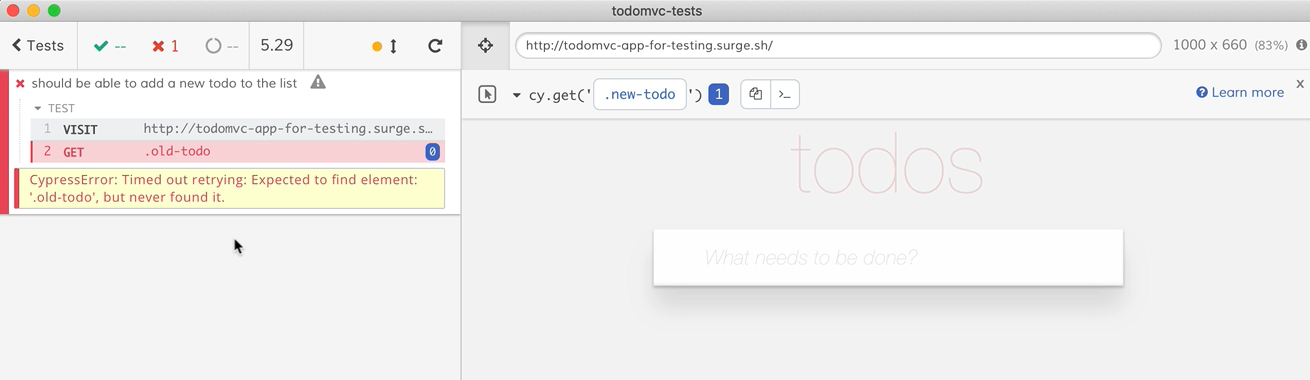
But notice that Cypress waited a bit before failing the test.
Why is that? Because Cypress will wait for the element to appear for a bit until it fails. This is part of the reason Cypress is branded as a “non-flaky test tool”.
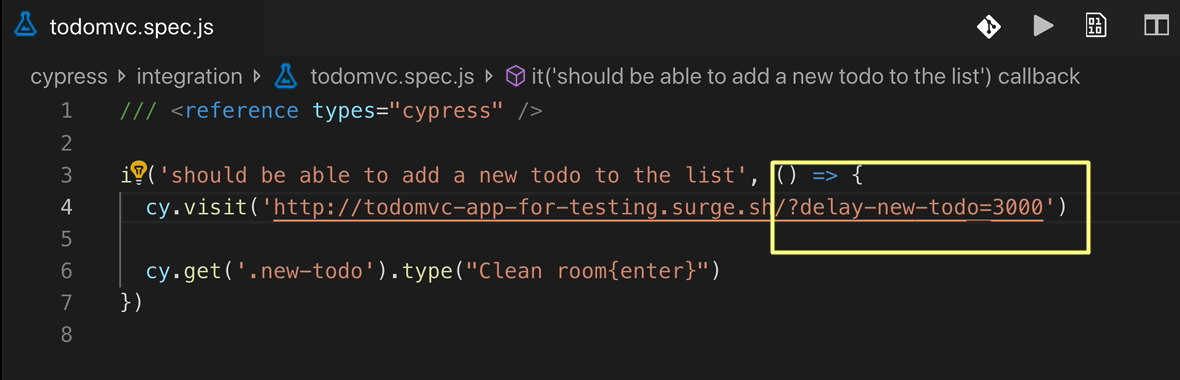
Let’s revert to a working test but add a small delay to the time it takes for the “new todo” element appears.
The way we do that is I have this little functionality in the app — ?delay-new-todo=# — which if I add this parameter to the URL, it will delay the new todo by whatever I want.
Let’s make it 3 seconds (3000 milliseconds), so that it’s within the timeout Cypress has before it fails. (which is, by the way, 4 seconds): ?delay-new-todo=3000
Let's run.
As you can see, the new todo doesn't yet appear until after 3 seconds and boom, the test passes, which makes sense.
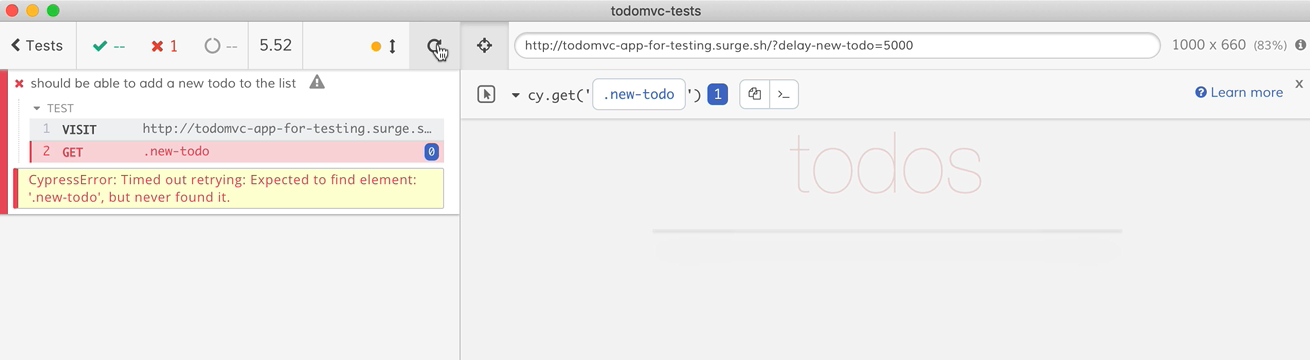
Now let's change it to 5000 milliseconds, which is 5 seconds, which is above the Cypress default 4 second time out.
cy.visit('http://todomvc-app-for-testing.surge.sh?delay-new-todo=5000')
Let's run.
As you can see, the test failed in this case, but the test failed because it's above 4 seconds.
But in some cases, this is a true scenario: things take time to appear.
Can we change the timeout?
We can.
Let's go to the .get and add an option timeout — you can see that there's documentation on that — cy.get has a second parameter with options.
cy.get('.new-todo', {timeout: 6000}).type('Clean room{enter}')
This is a regular pattern in the JavaScript world. Some APIs have a last parameter, which is an “options” parameter, where you pass various options as a JavaScript object. In this case, we pass a timeout of 6 seconds.
Let's run a test and even though there's a delay of 5 seconds, which is above the default of 4 seconds.
The test passes because of the option we added. Yay.
So, cool, we've learned how to get at an element on the page, and we've learned about timeouts and how Cypress waits for elements, let's add some more stuff onto the test.
But first, let's not forget to remove that delay here in the app, we don't really need it anymore. We can keep the timeout, it doesn't bother anything. It's okay.
Let's click on the todo to mark it as completed.
Let's use the selector finder again.
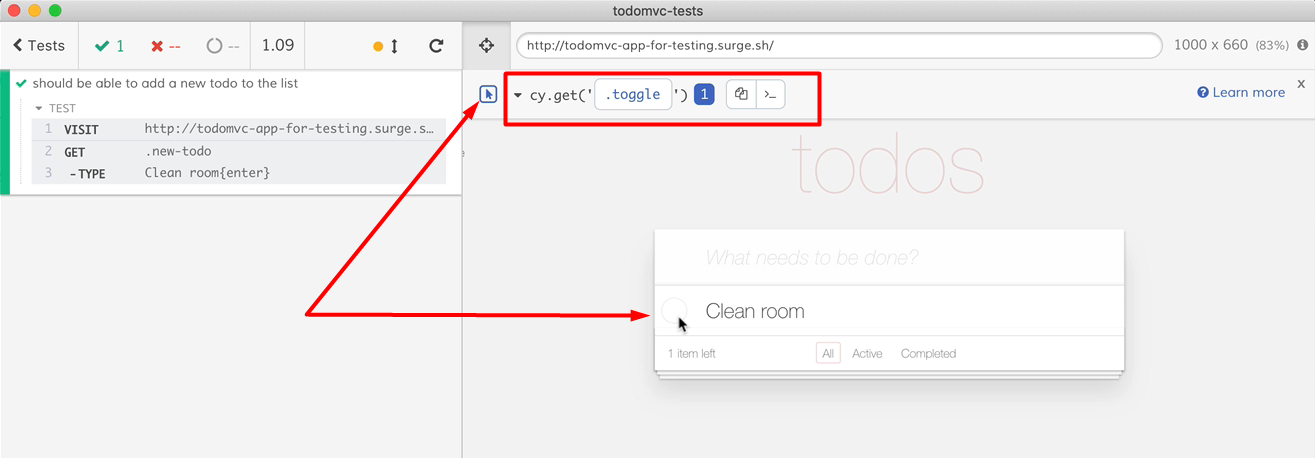
Click on the selector finder and click on this [the completed radio button]. There we have the cy.get command.
In a real-world test, this selector .toggle would be a bit naive, but for now, it's good enough.
I pasted the .get command.
Now let's click on that element. Easy as adding .click.
cy.get('.toggle').click()
Now let's run the test.
Et voila, it works. The button was clicked and the todo was marked as completed.
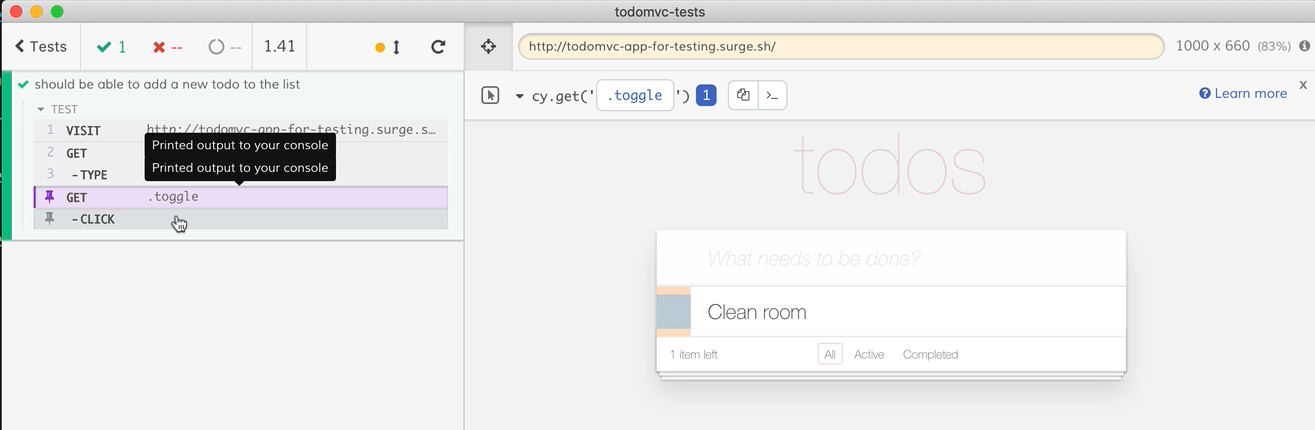
Notice in the UI, something remarkable.
Clicking on each command shows us how the page was at the time of the command. It's a history of all the actions and their effect on the page. Wonderfully good for troubleshooting.
So, we've learned how to execute commands on elements and most of the time, you will be using click, get, and type.
We'll see a few more later, but I want to concentrate on another way to access an element, cy.contains.
Let's add something to the test. Something that clears all todos using “clear completed”.
Let's run the test again to see that clear completed.
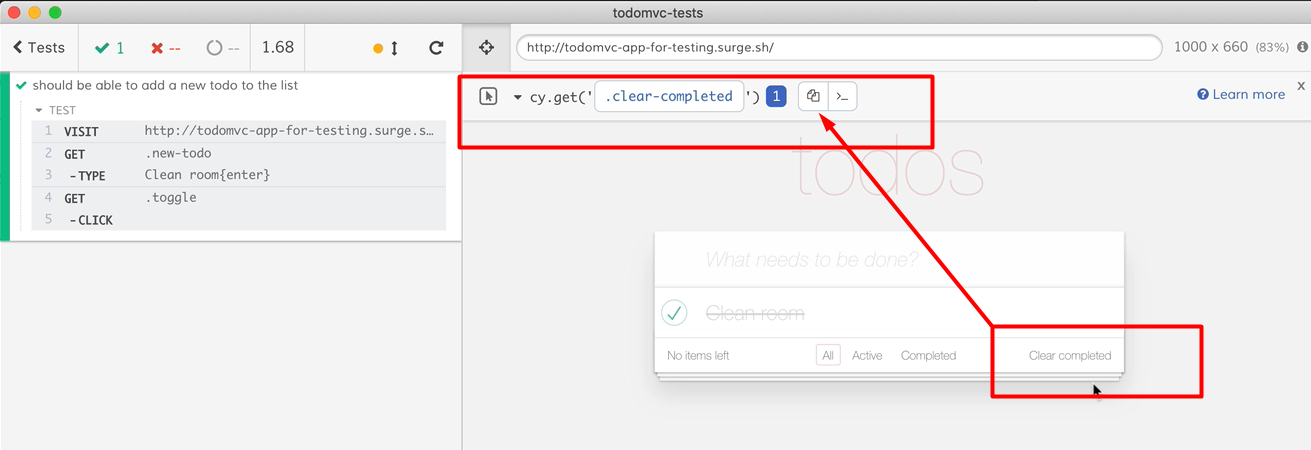
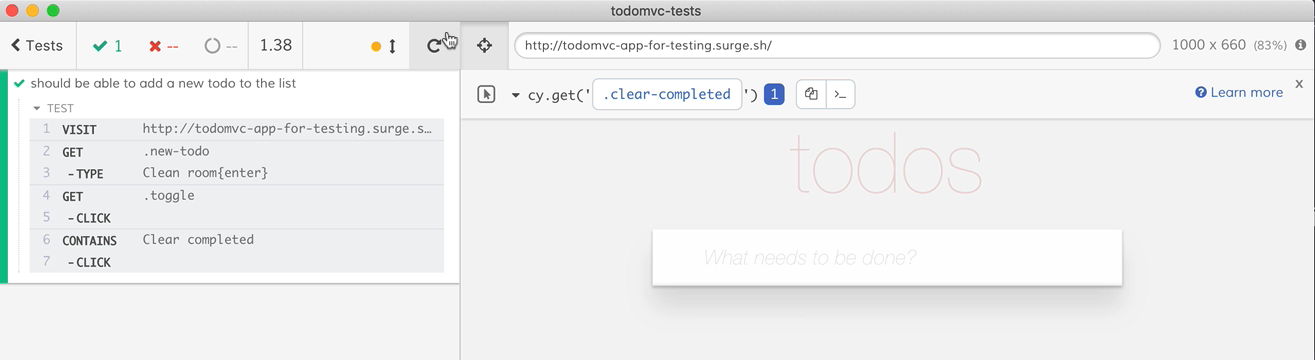
What we want is to click on this element here, “Clear completed”.
So, I go here and I say, instead of cy.get, I say, cy.contains('Clear completed'), and I'll click on it.
# todomvc.spec.js
/// <reference types="cypress" />

it('should add a new todo to the list', () => {
  cy.visit('http://todomvc-app-for-testing.surge.sh/')
  cy.get('.new-todo', {timeout: 6000}).type('Clean room{enter}')
  cy.get('.toggle').click()
  cy.contains('Clear completed').click()
})
Let's run the test. There we go.
The test ran and it worked.
We can also, instead of writing clear completed, just write “clear”
cy.contains('Clear').click()
Let's run the test. There we go, and it worked — cy.contains doesn't need the whole text. As its name applies, we can give a partial String and it will find it anyway.
That's about it.
We've learned how to access elements using cy.get and cy.contains. And we've learned how to interact with those elements using .click and .type. But Cypress has a whole slew of functionality around accessing elements and interacting with them and the documentation around them is wonderfully good.
# Cypress Documentation
So, before we continue onto the next lesson, which is all about validation, let's tour the documentation a bit and see how we can find out more commands that access elements and interact with them.
Let's go to the documentation. It's Cypress.io and we click here on the right side of the top navigation on “Docs”.
The docs tab on the Cypress IO website is your entry point. Let's look at ways to interact with elements.
We'll go to “Core concepts” and click on Interacting with Elements.
As you can see, we can see all the commands and actionability that interact with elements.
Let's click on .click().
As you can see, what we've learned on .click is only the tip of the iceberg in terms of capabilities.
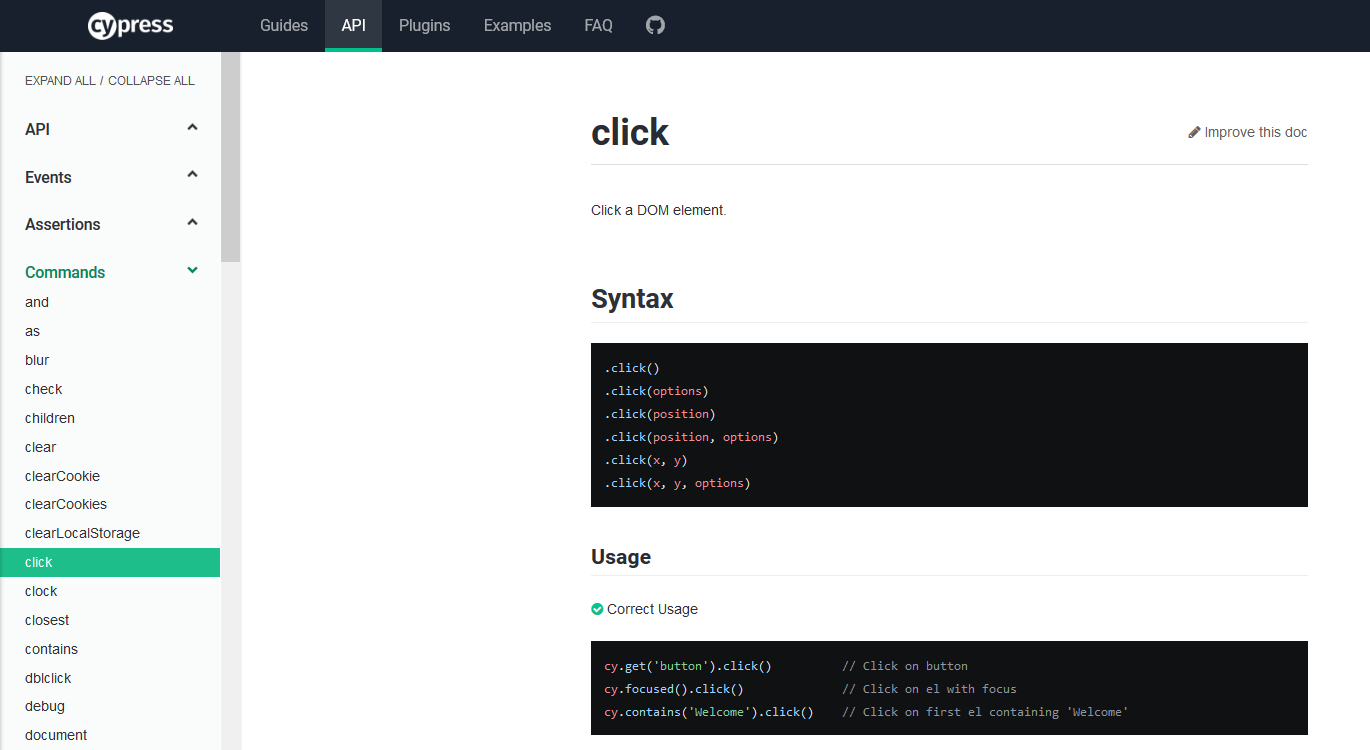
Feel free to browse and learn about its advanced capabilities later.
Unfortunately, a guide on all the commands that can be used to access elements does not exist in Cypress, but we can go to the full list of commands, clicking on API, and then clicking on “Commands” will give us a list of all commands.
So, for example, we can click on get and see all the things we can do with .get.
As you can see, just like .click, what we've learned is just the tip of the iceberg. But don't worry, you don't have to learn it all to start using Cypress.
Start simple and learn your way towards advanced use.
In the next lesson, we'll finally start validating those actions, creating a whole real test that this time actually tests something.
