

Transcripted Summary
This will be our last lesson.
We’ve already seen how we can do functional validation in Cypress. Using .should enables us to validate that whatever we thought happened, happened.
For example, we validated that a todo was added by checking the number of lines in the todo list, and by checking that the text of the todo was what we expected.
This is called functional validation because we’re validating the functionality of the application. We’re checking how it functions.
But to misquote a Steve Jobs quote: “Design is not only how it works, it’s also how it looks like”!
# Can we use Cypress to do visual validation?
Can we check that the application looks OK, and not just functions OK? We can! Cypress doesn’t give us this functionality out of the box, but you can easily add this using external plugins.
We’ll be using Applitools Eyes for this, which you’ll see is easily installed, easily used, and gives us powerful functionality.
To use Applitools Eyes, we’ll need to first register at Applitools. So, let’s go to https://applitools.com/users/register
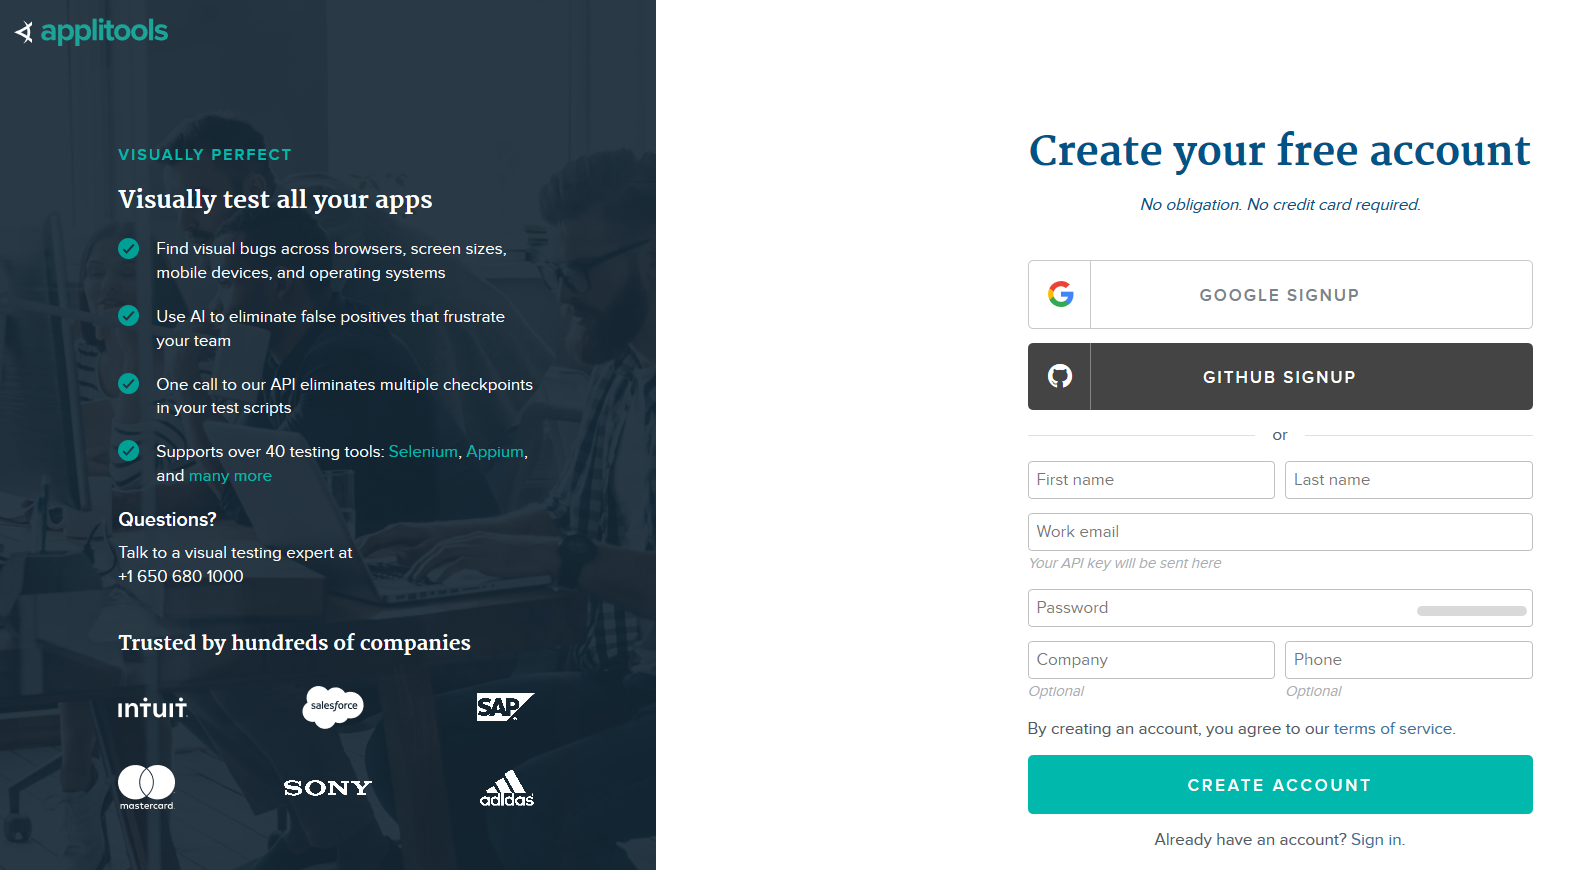
When you register (it’s free!), you will in the end be led to the Applitools Test Manager at https://eyes.applitools.com, which is where you will see the results of the visual tests.
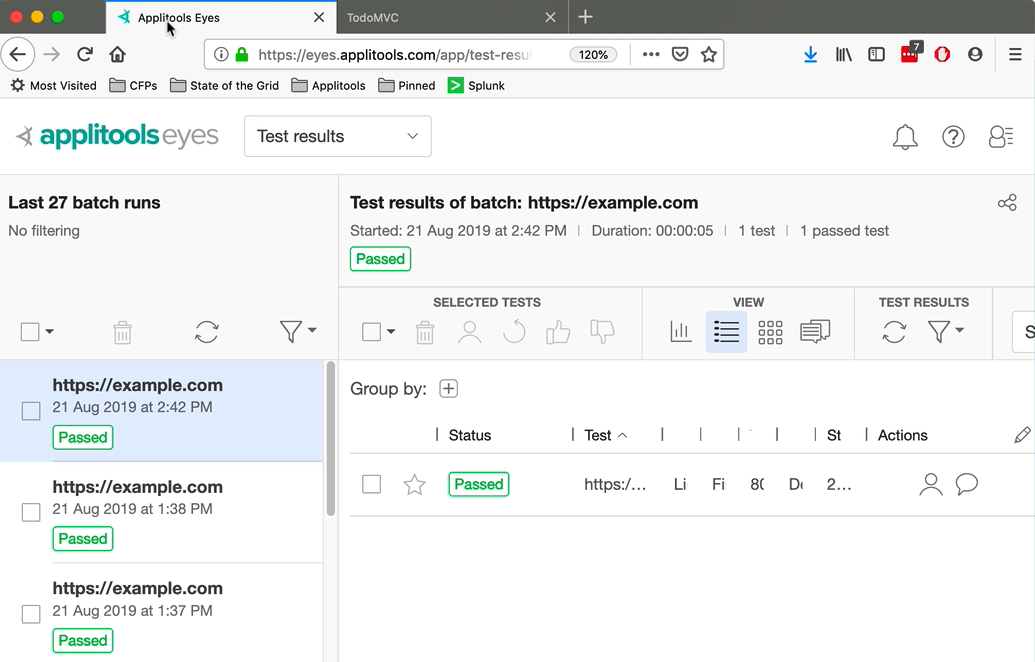
Your page will probably be empty. Mine already has some tests in it.
There! We’ve registered ourselves, so we can use Eyes Cypress.
Let’s get back to the code.
We first need to install the Eyes SDK for Cypress. As usual in JavaScript land, we start with an npm install:
npm install @applitools/eyes-cypress@3
The package name is called @applitools/eyes-cypress, and we’re specifically installing version 3, so that this course will always work. If you want the latest version, which you usually do, remove the @3 at the end.
Note that it’s only by chance that the current version of Cypress and the current version of Eyes Cypress are both 3. They can, and probably will in the future, be different.
Eyes Cypress [eyes-cypress] is a Cypress plugin, and as such, needs to be recognized by Cypress by modifying various files in the cypress folder.
While we can do it manually (and there are directions for it in the documentation for Eyes Cypress), we can also run a script supplied by Eyes Cypress that does it automatically for us:
npx eyes-setup
This you need to do just once after installing eyes-cypress.
OK! We are ready to add some visual validations.
Visual validation is easy! In some ways, it’s easier than functional.
You just navigate to a page, do some actions, and have Eyes take some screenshots. That’s it!
Eyes will take screenshots but will also compare them to the previous good screenshot. If they’re the same, all is well, and the test passes.
So, let’s write a test that:
- Takes a screenshot of the empty todo list
- Takes a screenshot after adding two todos
- Takes a screenshot after marking one todo completed
Let’s create a new file with the test code: todomvc-visuals.spec.js
We’ll add the usual Mocha preamble:
/// <reference types="cypress" />

describe('visual validation', () => {

})
Let’s write the test first, without the visual validation.
First, in the before, we’ll navigate to the TodoMVC app.
Remember, we have a page module with lots of nice page functions. Let’s use them. And while we’re at it, let’s see another way of importing functions from a module:
import * as todoPage from '../page-objects/todo-page'
We’ve imported the todoPage functions, but we put them in the “namespace” todoPage.
This is not a class, so no need to new it.
Now let’s use it to navigate in the before:
before(() => todoPage.navigate())
Perfect.
See how I used the todoPage namespace to access the functions in the module, in this case navigate?
Now let’s write the test itself — remember it should add 2 todos and mark one as complete.
  it('should look good', () => {
	todoPage.addTodo('Clean room')
	todoPage.addTodo('Learn javascript')
	todoPage.toggleTodo(0)
  })
Let’s run the test
npx cypress open
We'll wait for Cypress to open and we'll run “todomvc-visuals.spec”. Remember we're not doing any visual validation as of yet. We're just running a test.
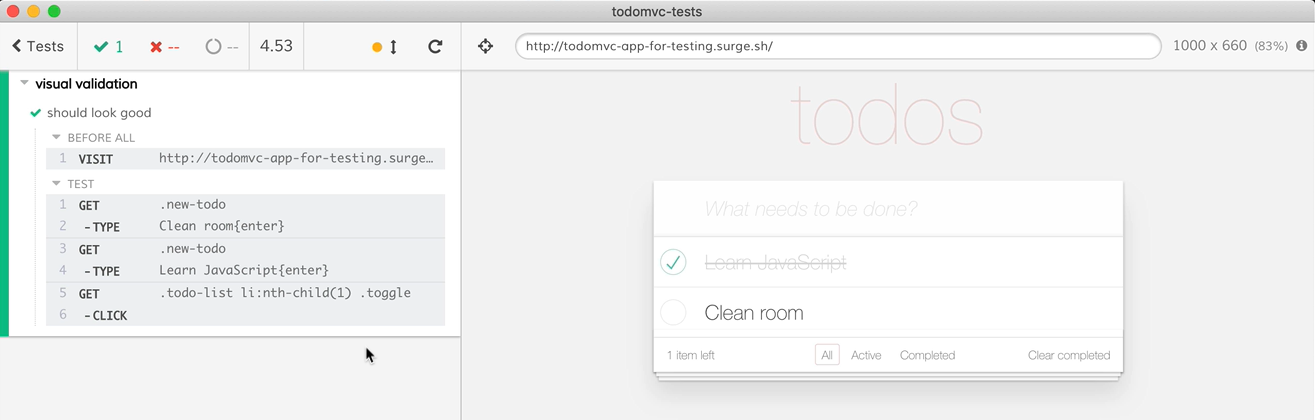
There we go. It works.
# Adding Applitools API Key
Because we’re using Applitools Eyes, we need to do one more thing: tell Applitools who we are, and in which account to show the results.
To do that we need an API Key, which we get from the Applitools Test Manager.
Let’s open it.
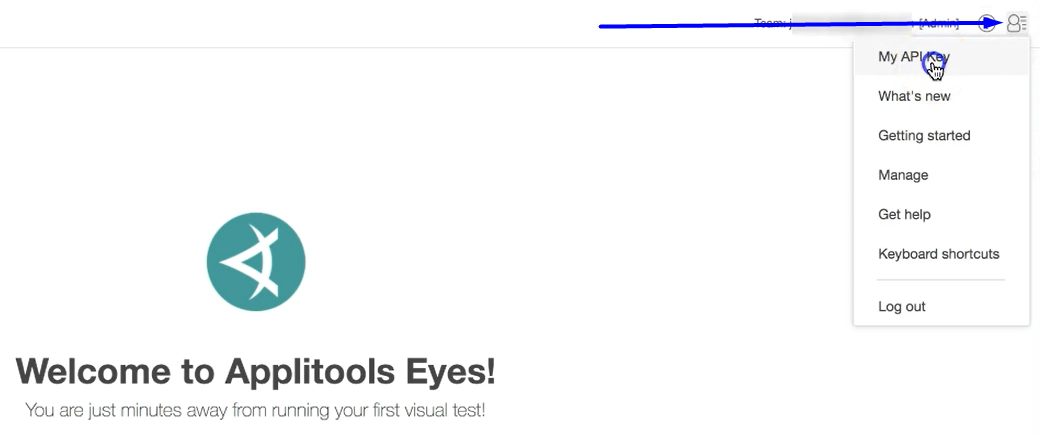
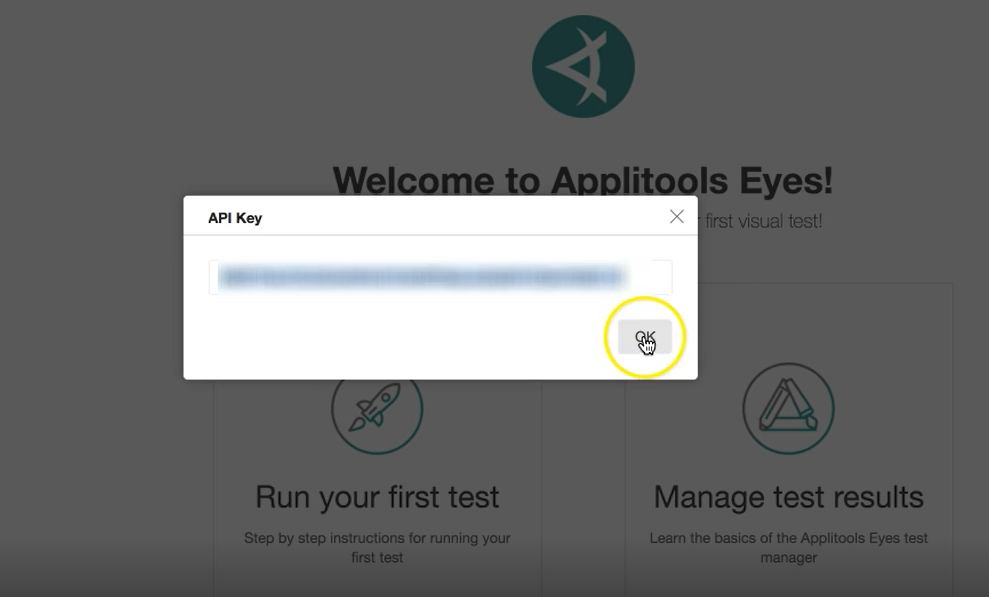
To find the API key, we click on the top right menu and choose “My API Key”.
I just copied it to the clipboard using the “copy clipboard button”.
Now I can use it in my test.
While we can add it into the code of the test, this is not the recommended way, as you do not want to commit “secrets” like the Applitools API Key to your code. These things are better relegated to environment variables.
Let’s see how.
Open your terminal and write:
export APPLITOOLS_API_KEY= {yourAPIKey}
We’ve just created an environment variable with the name APPLITOOLS_API_KEY and put our API key there. The eyes-cypress package automatically uses that environment variable without us needing to tell it to.
set APPLITOOLS_API_KEY= {yourAPIKey}
Now we’re ready to use Applitools Eyes for visual validations.
# Adding Visual Validations to Our Test
Now let’s add visual validations. Remember we need to check that:
- An empty todo list looks good
- Two todos added looks good
- Marking a list of to-do as completed looks good
We’ve installed eyes-cypress, so now we can just use it.
Let’s add the first screenshot check before the first action of adding the two todos:
cy.eyesCheckWindow('empty todo list')
That’s it!
This line calls into the Eyes Cypress plugin, using eyesCheckWindow, which will take a screenshot, name it “empty todo list” and compare it to a baseline screenshot that was generated the first time the test runs.
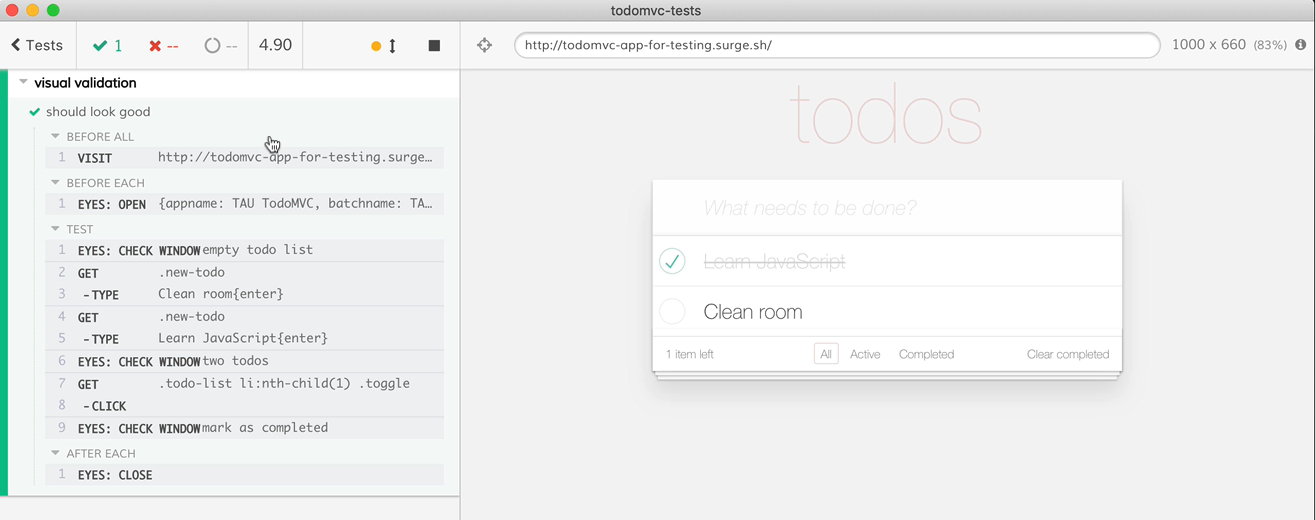
Let’s add the rest of the visual validations:
  it('should look good', () => {
    cy.eyesCheckWindow('empty todo list')
    todoPage.addTodo('Clean room')
    todoPage.addTodo('Learn javascript')
    cy.eyesCheckWindow('two todos')
    todoPage.toggleTodo(0)
    cy.eyesCheckWindow('mark as completed')
  })
Perfect.
But we still need two more commands: one to open an Eyes test and one to close the Eyes test.
We’ll add them in a beforeEach and a afterEach section:
beforeEach(() => cy.eyesOpen({appName: 'TAU TodoMVC', batchName: 'TAU TodoMVC'})
afterEach(() => cy.eyesClose())
We’re done.
We’ve written a test that opened an Eyes test, closed it, and between them, took 3 screenshots and let Eyes compare them to the base screenshots.
Let’s run it!
It passes!
Note that a few seconds pass between the time Cypress finishes the steps and the time the test passes. This is when the Eyes server processes the images and looks for screenshot differences.
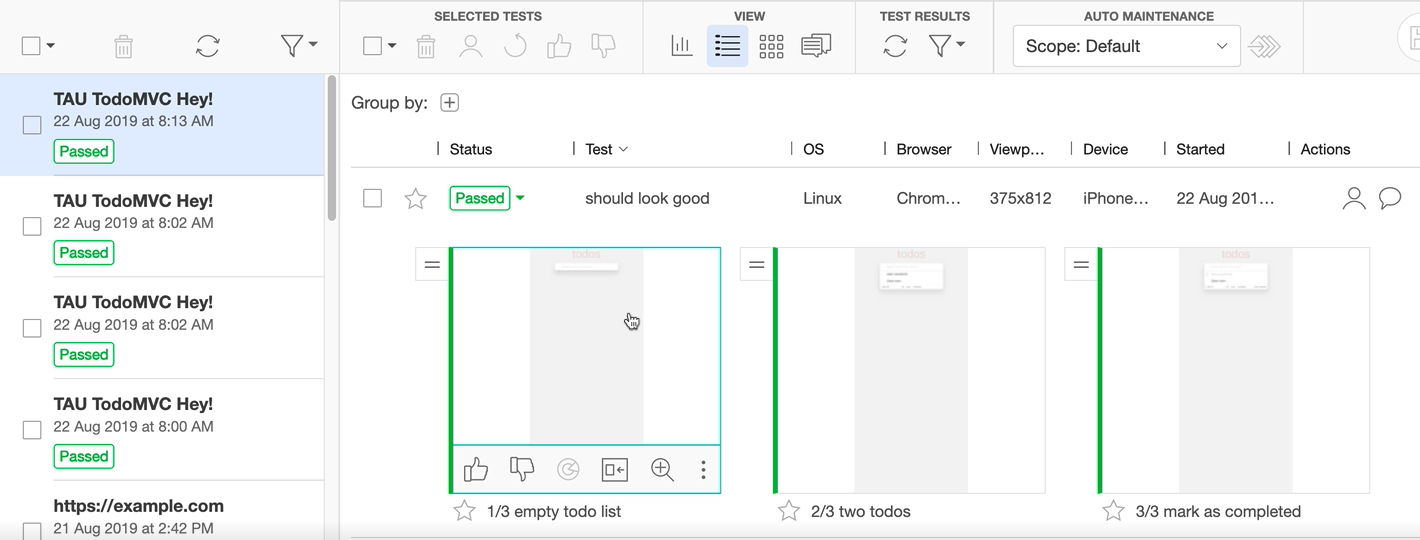
Let’s look at the test in the Eyes Test Manager:
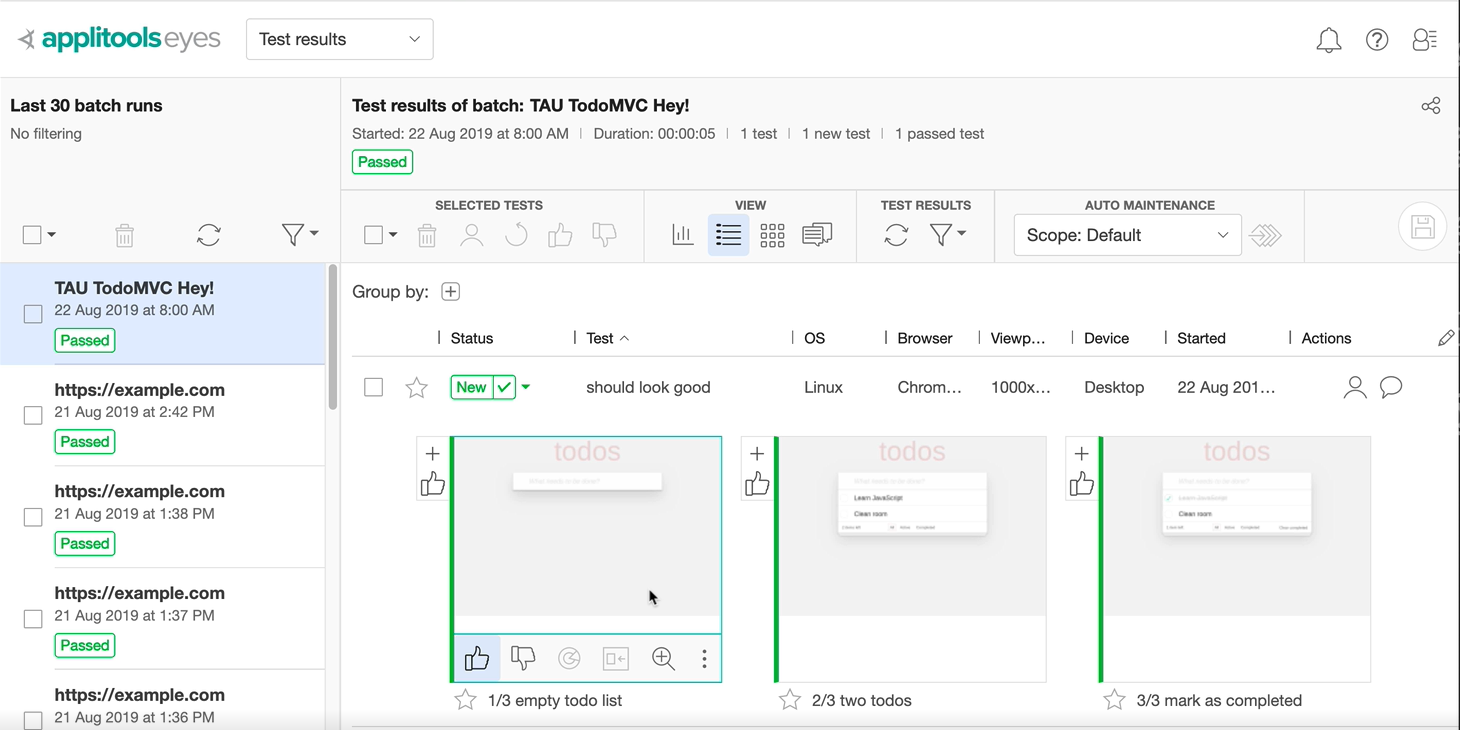
You can see the test! And the screenshots.
Notice that the status of the screenshots are “New”, which means that this is the first time that the test is run, and so Eyes automatically accepts those screenshots as OK.
Let’s run it again. It should pass, right?
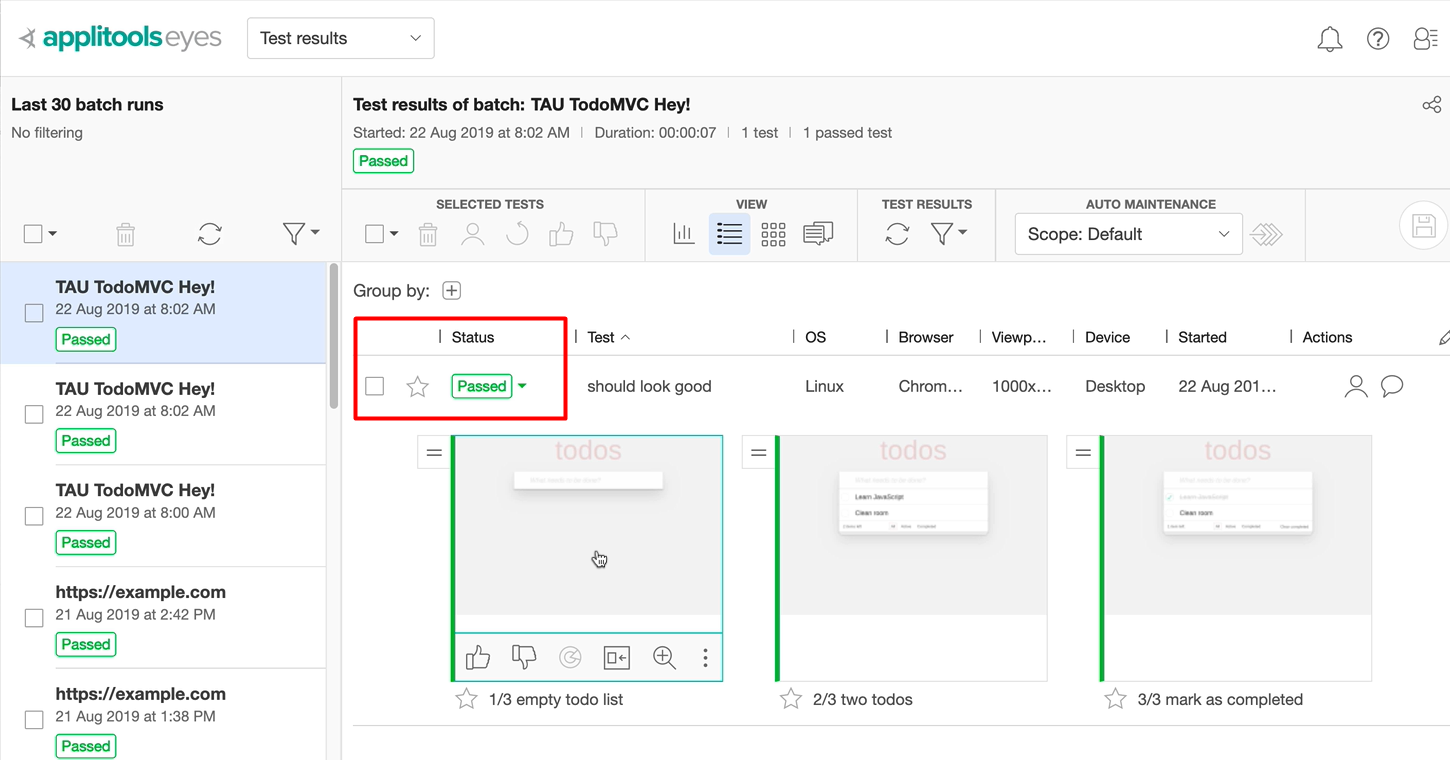
It passes! This time, the status is ”Passed”:
Eyes compared this test’s screenshots to the baseline screenshots generated in the first test and found no difference.
Let’s generate a difference and see what happens when a “bug” is introduced.
Unfortunately, we don’t have access to the TodoMVC’s apps code, so we can’t change anything, but I added something to the app that will simulate a bug.
Let’s see:
This is the regular app — http://todomvc-app-for-testing.surge.sh/
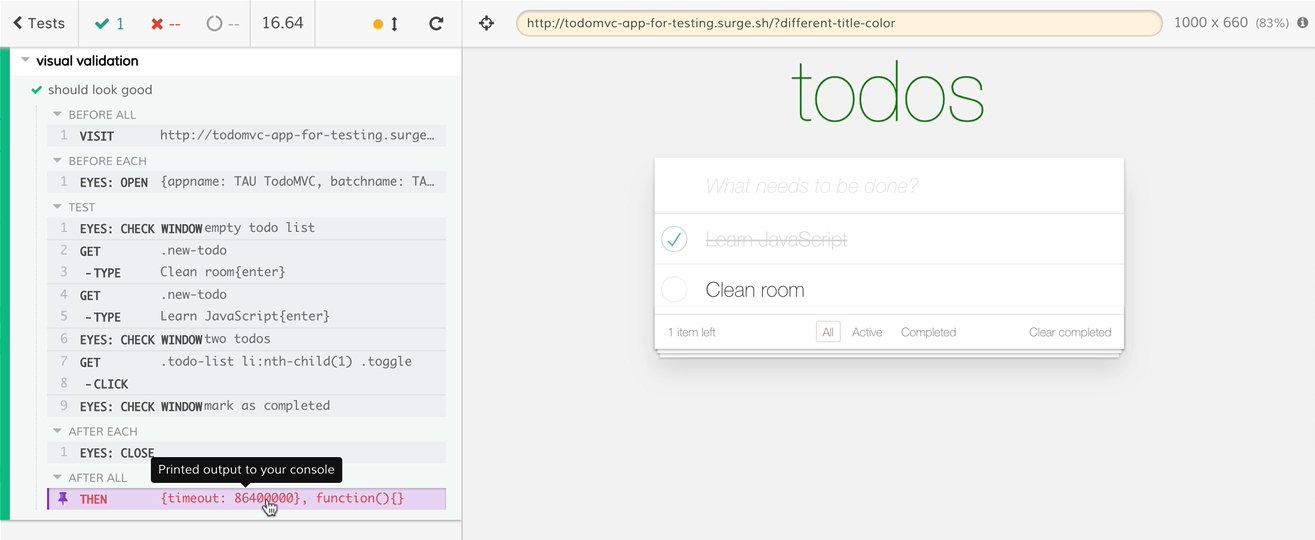
Let’s add something to the URL — http://todomvc-app-for-testing.surge.sh/?different-title-color
See?
The title color just changed to green, to simulate a bug in the CSS of the app.
Let’s use that to simulate a change.
describe('visual validation', () => {
  before(() =>  cy.visit('[http://todomvc-app-for-testing.surge.sh/?different-title-color](http://todomvc-app-for-testing.surge.sh/?different-title-color)'))
})
This line will simulate the bug.
Let’s run the test. Notice that the title is green.
We're running and the Eyes server is testing and processing the images. Notice that basically it doesn't really matter how many checkpoints you have. It will probably be around the same amount of time because it's parallel processing all those images.
There we go. We have an error.
Let's go and see that error [in the Eyes Test Manager].
You can see that Applitools Eyes just highlighted the difference and we can see the difference between both the baseline and the check point.
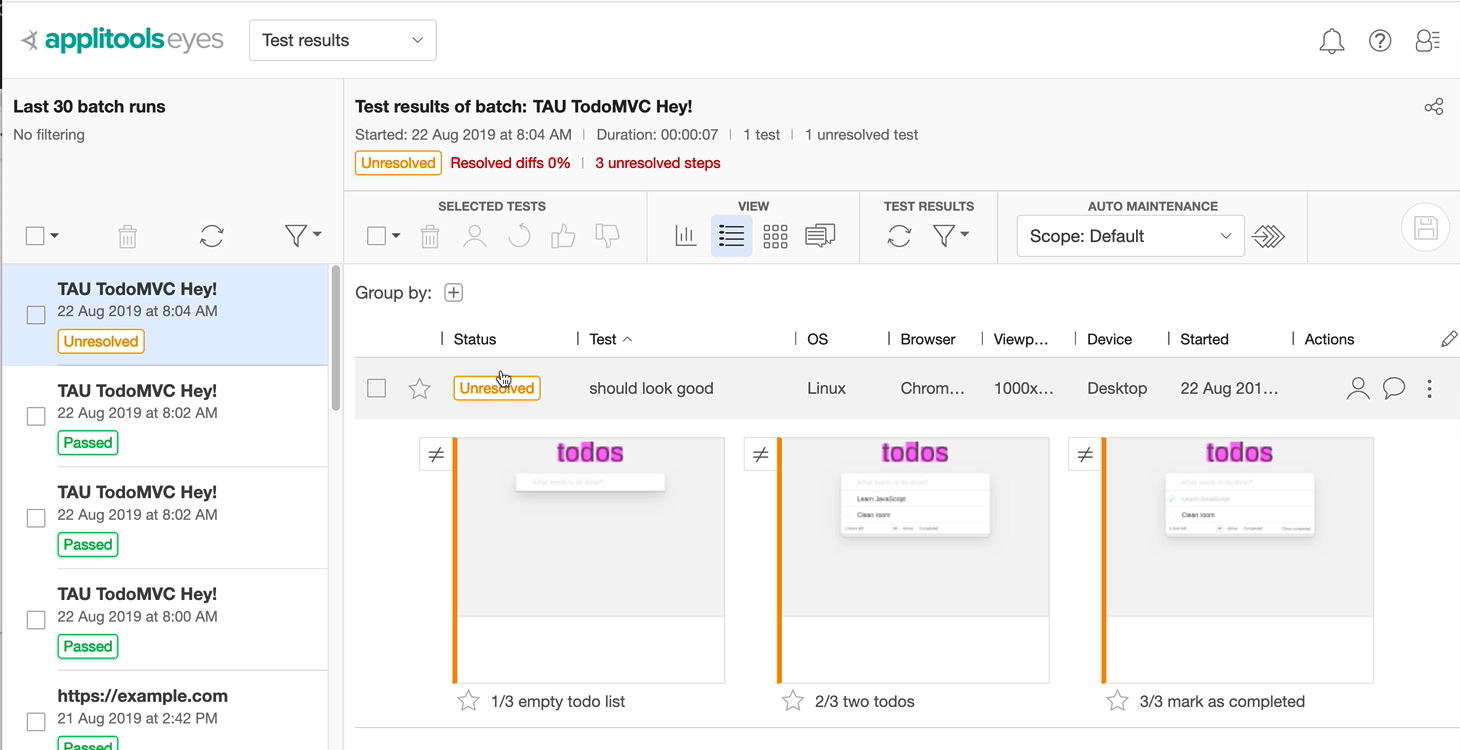
See that “Unresolved” status? This is Applitools Eyes telling us that it found a diff.
Why is it “unresolved”?
Applitools Eyes has very complex algorithms for figuring out whether the diff is a real diff and not just some noise due to differing environments where the browser is running. But those algorithms can’t tell whether the change is a bug, or whether that change is actually a feature. Is the change of title color a bug in the CSS, or is it a welcome change?
Eyes doesn’t know, and it defers the resolution to the user.
While we can mark it as a bug in all 3, we can actually have Applitools group them all the changes into one and mark all of them as failed. Let’s mark the change as a bug by clicking the thumbs down icon.
What would have happened if we had marked the bug as a correct change, by using the “Like” [thumbs up] button?
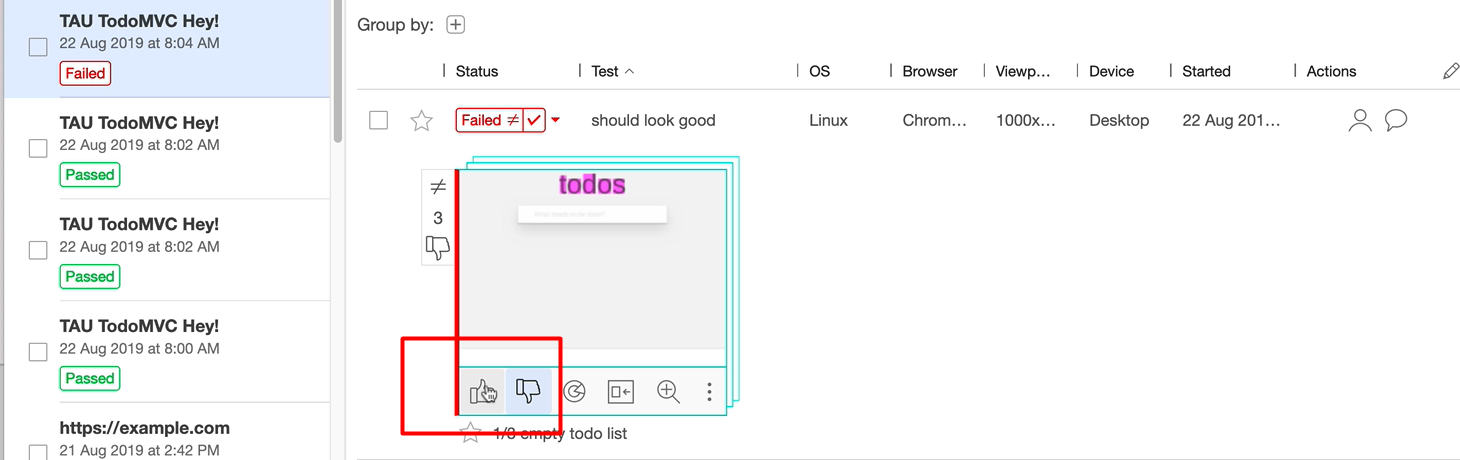
If we had done this, then these screenshots would have become the new baselines, so that the next tests run will compare against the new, corrected screenshots.
Last thing: we’ve just checked it in one browser, and in one browser width.
But in this wide world web of responsive design, where your app can run under various devices, each with its own resolution, how is running a visual test only under one browser and one resolution any use? Well, it isn’t.
Which is why we can add more browsers and more resolutions to our result.
Let’s get back to our test code and do that.
In the eyesOpen, we specify an array of browsers and resolutions, which will enable Eyes to generate the screenshots on various browsers and resolutions, without us needing to run the test multiple times with different browsers.
# todo-visuals.spec.js
/// <reference types="cypress" />

import * as todoPage from '../page-objects/todo-page'

describe('visual validation', () => {
  before(() =>  cy.visit('http://todomvc-app-for-testing.surge.sh/'))
  beforeEach(() =>
    cy.eyesOpen({
      appName: 'TAU TodoMVC',
      batchName: 'TAU TodoMVC',
      browser: [
        {name: 'chrome', width: 1024, height: 768},
        {name: 'chrome', width: 800, height: 600},
        {name: 'firefox', width: 1024, height: 768},
        {deviceName: 'iPhone X'},
      ]
    })
  )

  afterEach(() => cy.eyesClose())

  it('should look good', () => {
    cy.eyesCheckWindow('empty todo list')
    todoPage.addTodo('Clean room')
    todoPage.addTodo('Learn javascript')
    cy.eyesCheckWindow('two todos')
    todoPage.toggleTodo(0)
    cy.eyesCheckWindow('mark as completed')
  })
})
The Applitools Visual Grid will generate those screenshots with a grid of thousands of browsers at its disposal. For more information on the Visual Grid, please see the resources section.
Let’s run the test.
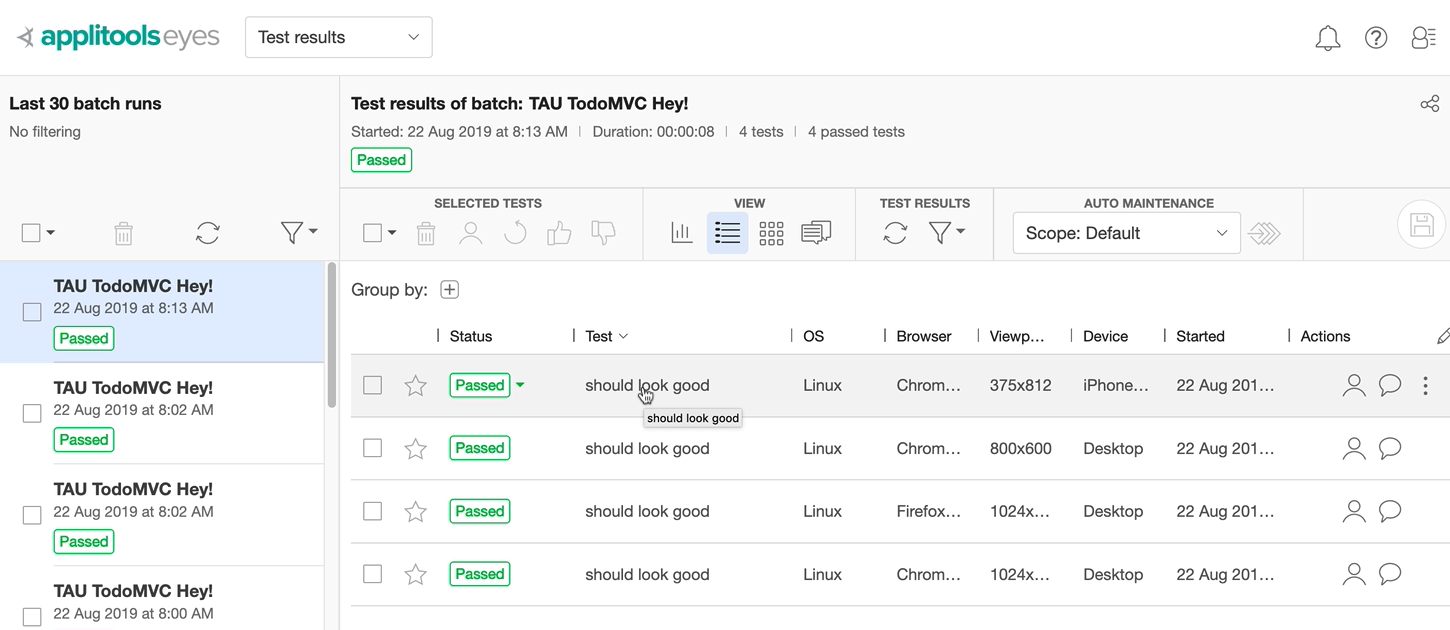
It ran and passed!
And as you can see, we have not 3 screenshots, but 12: 3 for each browser we specified.
And notice how it was around the same time as the other test, which generated screenshots only for one browser and resolution. This is because all the screenshots were generated and tested in parallel.
So, we’ve seen how to do Visual Testing with Cypress and Applitools. Pretty simple, given the simplicity of Cypress, and the ease with which Visual Testing is done with Applitools
Hey, y’all!
We’re done with the lesson, and we’re done with the course. I had a wonderful time recording this, and I hope you’ve learned something here. All I can say is: Cypress is a wonderful tool.
Start small, build a simple test, and continue building on that using Cypress wonderful documentation.
Go forth and Cypress!
