

Transcripted Summary
In this chapter, we'll learn about API interactions, ways to make requests and check responses directly in the API within our tests.
First, we'll see the APIRequestContext, which is the Playwright object to make that possible.
Second, we'll see the three main things that an APIRequestContext requires, which is the HTTPS method, the request option, and the request URL.
Next, we'll see how to identify an API call, and use the Swagger docs.
Fourth, we'll see how to execute a request dynamically, so you don't need to rewrite it every single time.
Fifth, we'll learn about how to handle errors in our application through the API, so you understand what's going on every single time. I hope you enjoy it.
To learn about HTTPS requests, we are going to use the book-with-fixture-and-api-spec.ts which is under specs, and the delete-books-collection.ts, which is under api/requests.
# The APIRequestContext
The first new thing we see here is the APIRequestContext.
This is a Playwright object that allows us to make the connection with the API.
In our beforeAll method, we are then creating a new connection using playwright.request.newContext, passing the baseURL, and the extraHTTPHeaders.
Here, we are using Authorization: Basic passing the userName and password, and Accept: 'application.json'.
Another way of doing this is using the apiToken if your application supports that.
As soon as this command is called, it will create a connection with the API, and from that, we can execute any command that we need.
In our test.describe, we already see that we are using the fixture bookPage, and inside the method cleanBooks we see the deleteBookAPIRequest, deleteAllBooksByUser.
test.describe('Books - Fixture & API', () => {
    // The scope of use is file or describe
    test.use({ isDupe: false });
    test('Add brand new book', async ({ page, bookPage }) => {
        await cleanBooks(userId, page);
        await bookPage.goto(userData.books.new);
    });
});
async function cleanBooks(userId: string, page: Page) {
    await deleteBookAPIRequest.deleteAllBooksByUser(apiContext, userId);
};
This method is passing the apiContext and the userId, and this is the method that we use to call our API.
Going to the method in delete-books-collection.ts, we have normal imports, and this is the method we created.
import { APIRequestContext } from '@playwright/test';
import { buildUrl } from '../../utils/apiUrlBuilder';
import { executeRequest } from '../../utils/apiRequestUtils';
import endpoints from '../../utils/apiEndpoints';
import methods from '../../utils/apiMethods';

async function deleteAllBooksByUser(apiContext: APIRequestContext, userId: string) {
  const method = methods.delete;
  const requestOptions = {};
  const requestUrl = buildUrl(endpoints.books.delete, userId);
  const response = await executeRequest(apiContext, requestUrl, method, requestOptions);
}
Again, saving the apiContext and the userId.
Here, you see a sequence of four commands that will actually do everything for us.
First, we are defining the method of the API call - in this case, it is a delete.
I have a file here apiMethods.ts mapping all the methods that we have.
Second is the requestOptions. In this case, for deleteAllBooksByUser, it's empty, but we could be passing a parameter, as we'll see here.
The fourth is the requestUrl, that is actually the URL the endpoint will call, and here we are using buildUrl, passing the endpoint, and the userId.
Finally, the command executeRequest will execute the request .
Here I created a method that is actually doing everything for us, and we'll take a look at it in one minute.
By doing these four commands, you can see that you can copy that same standard for every single method, and it can be easily replicated.
# How to identify an API call and use Swagger
Now, let's see how to identify what methods we want to call for each scenario.
For this specific test, we are cleaning the books - meaning, deleting all the books and then going to the bookPage, passing a book's new ID.
Then inside the fixture, we do a bookPage.addToYourCollection.
So, in this case, we are cleaning all the books of a given user, going to a book page - a specific one - and adding this book to their account.
In our application demoqa.com, we'll go straight to the "/login" page and sign in.
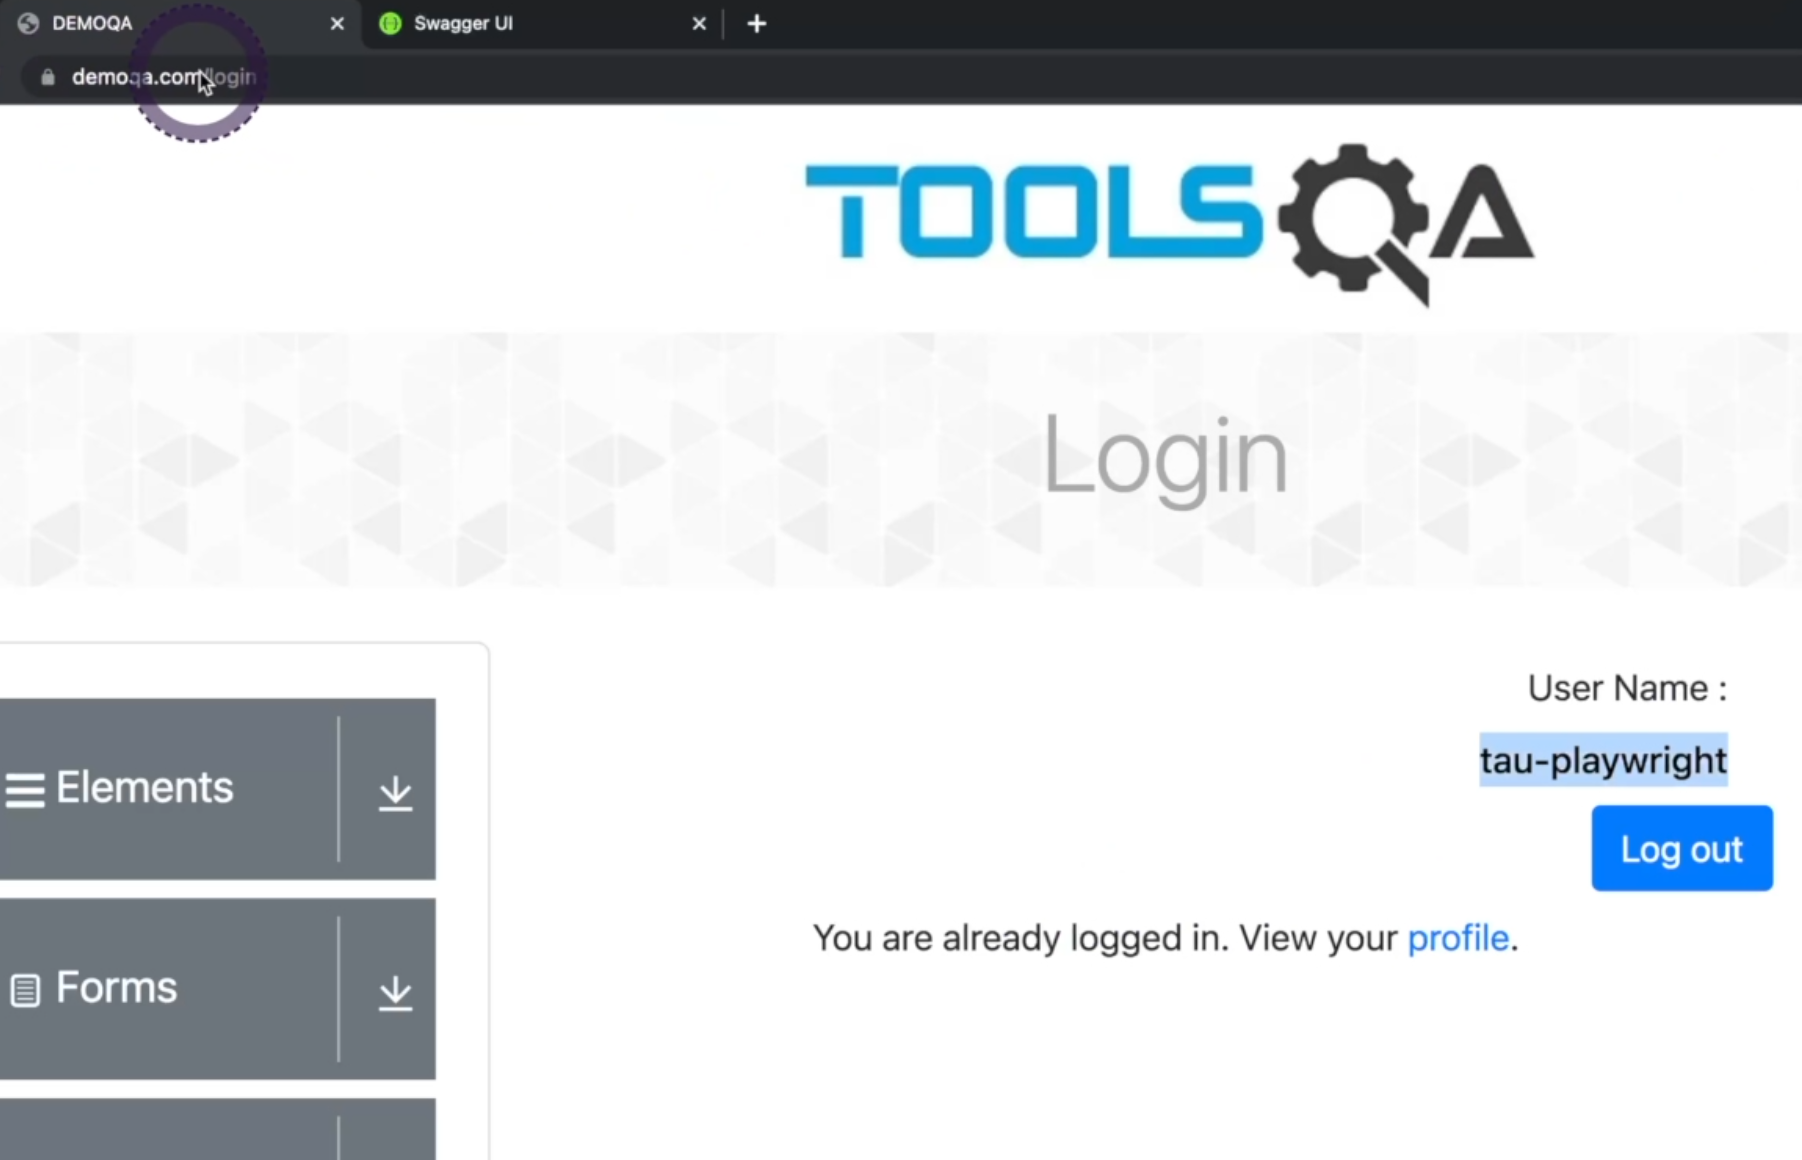
I'm using this user for our training, and then we go to the "Profile" page.
In the "Profile" page, we see a list of books added to the collection of this user.
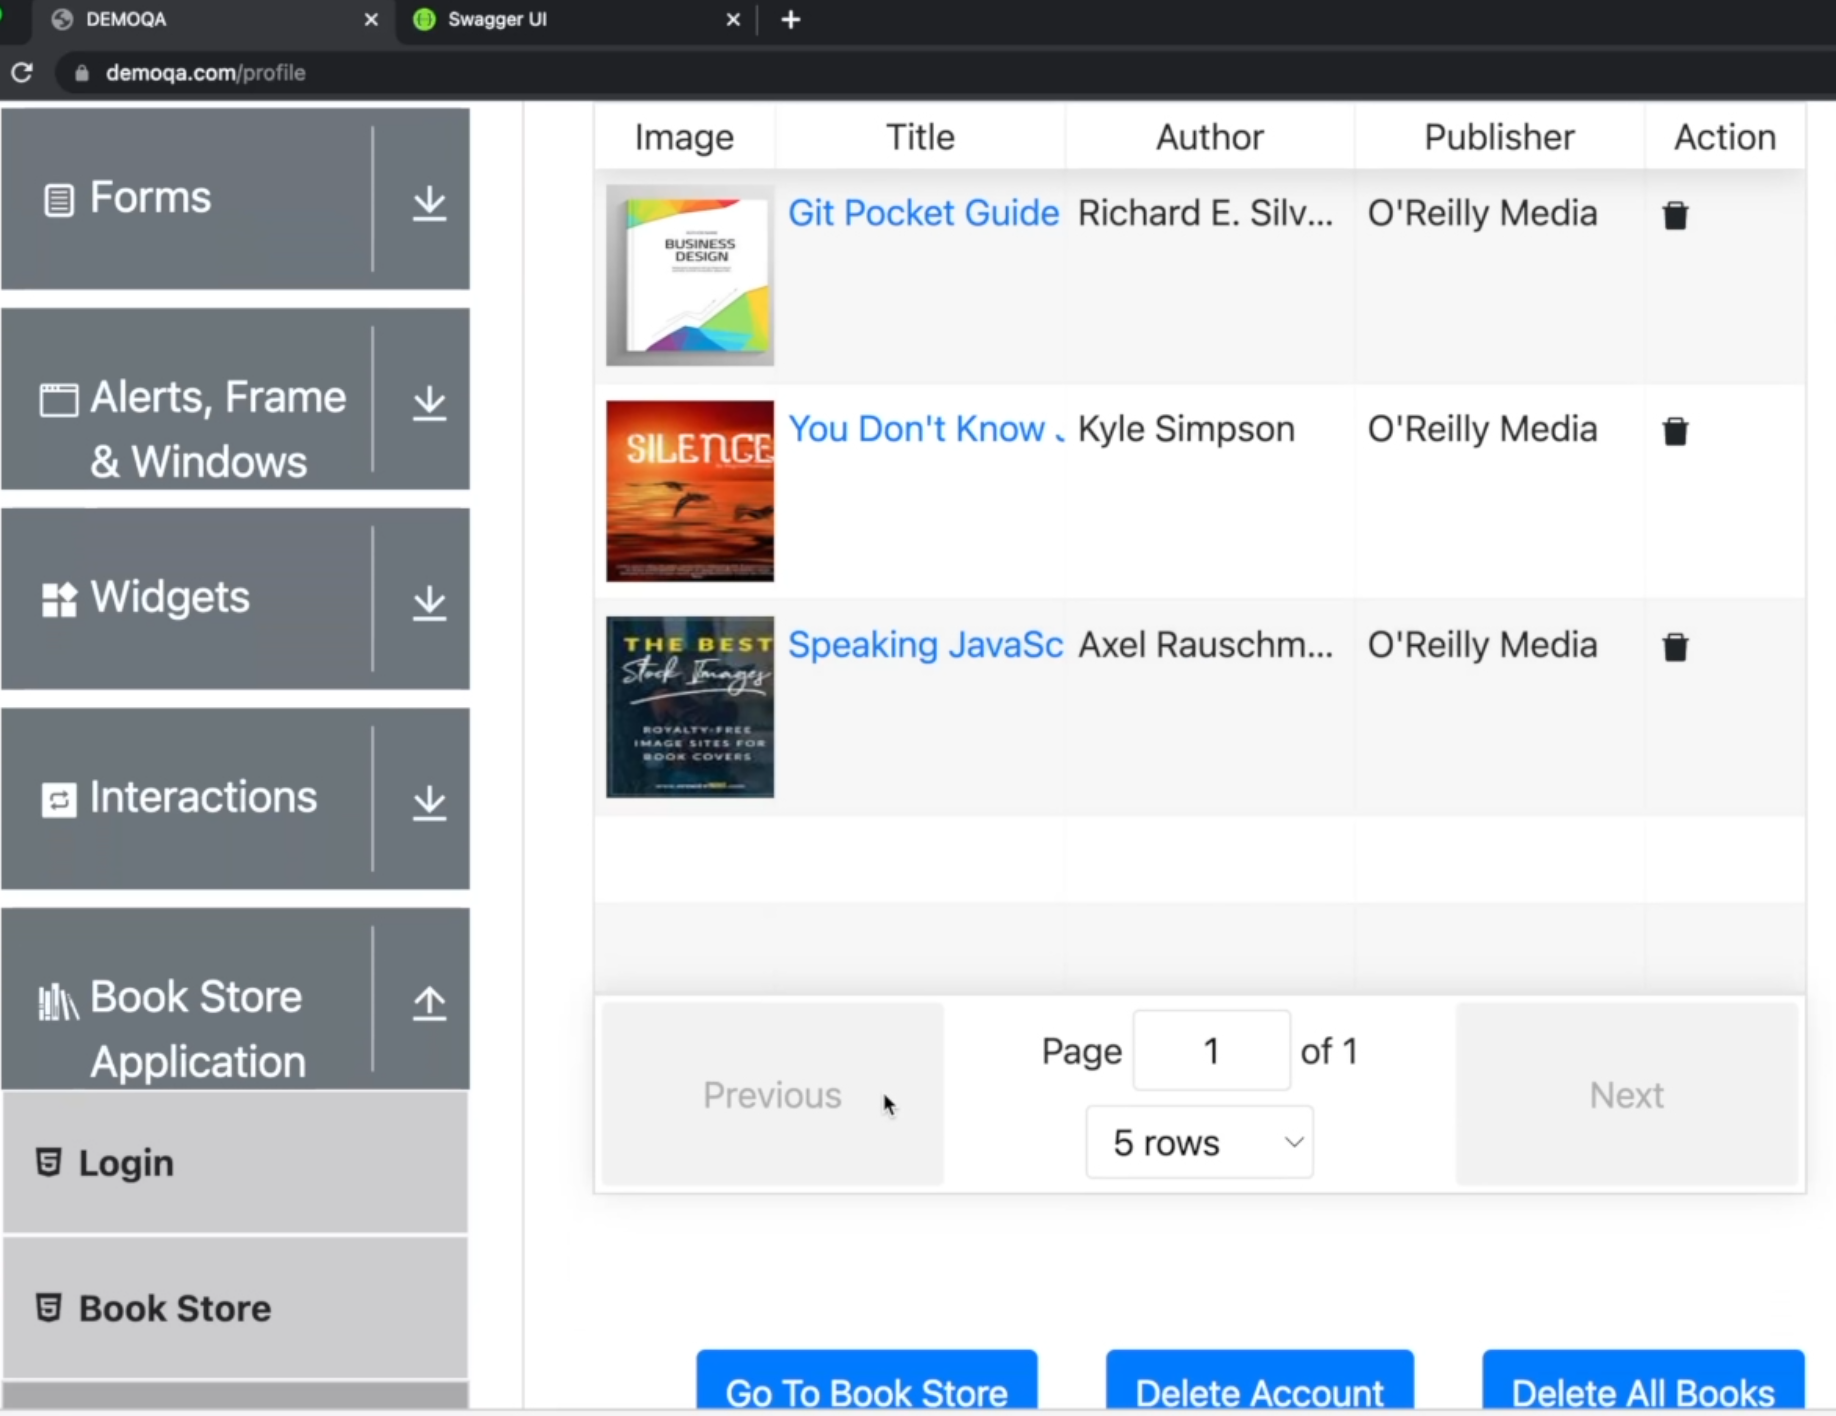
And if you go to the "Book Store", you can add more books - by clicking on the book, it'll go to the book's ID page, and then you can add to your collection.
In the profile page, you have the option to delete each book or "Delete All Books", and this is exactly what we are doing in our test.
We want to delete all books to have a clean session, and then we can add the new book again.
Because the new book is always the same, we need to clean the state of this user before running the test.
Otherwise, the test won't pass because it'll have the book already added to the collection.
Let's go ahead and open the network tab in our browser, and here you can filter the requests by "Fetch/XHR", and the name of the request.
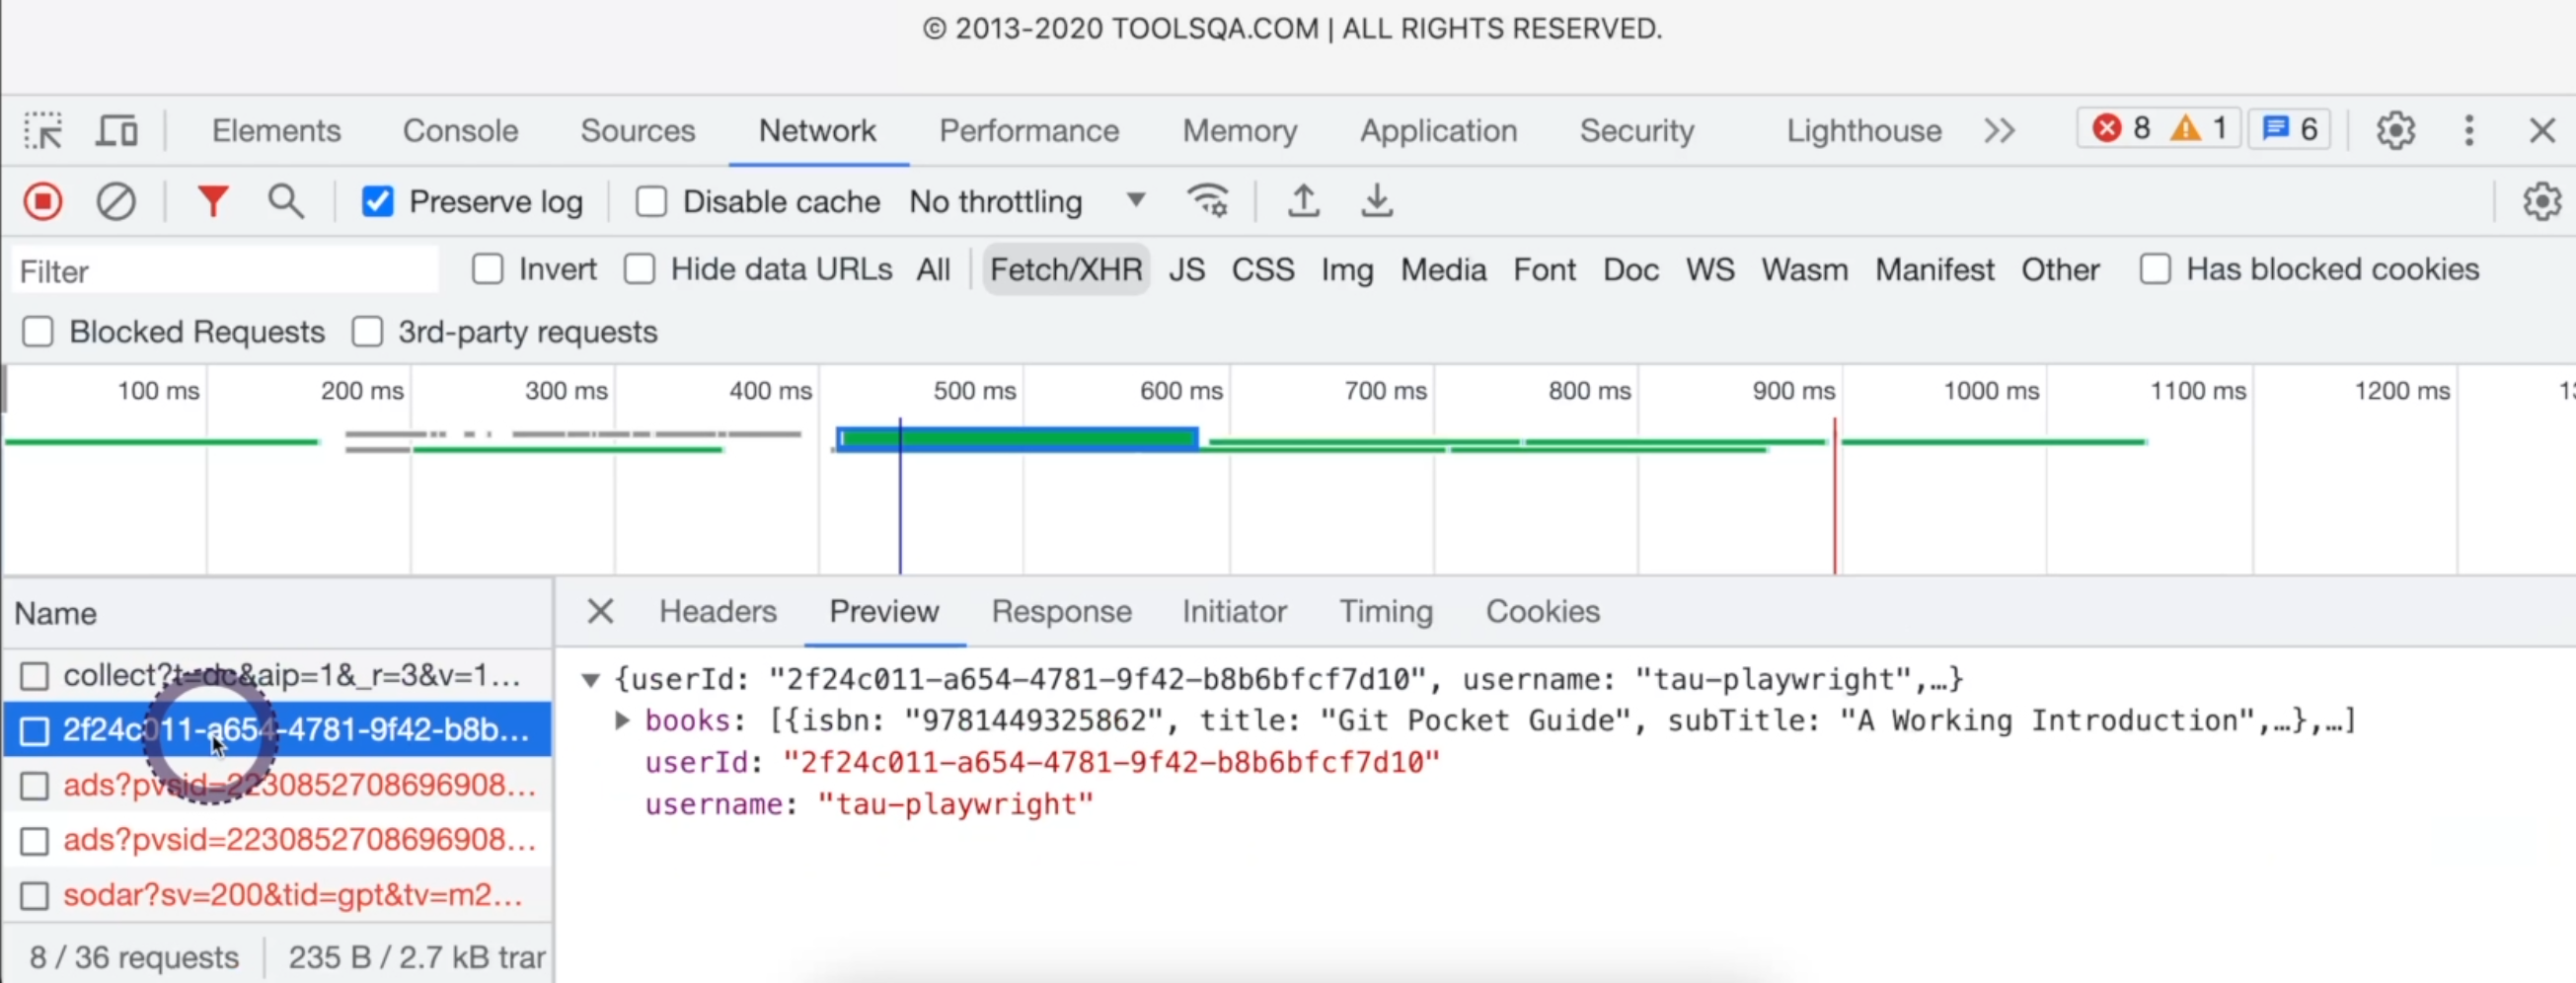
In this case, I'm not going to filter, I'll just reload the page, and this is exactly the request we want for the books.
We see that in the "Headers", we have the "Request URL", which is this one.

We have the "Request Method" which is "GET" - in this case we got a 304 because we just reloaded the page, and the response is this one, the list of books with the "userId" and username.
So, this is one way to identify requests in the application.
Usually, you can type the name of the page, or something related to the flow that you're using to be able to find the call that you want.
However, it's also common to have the API documentation.
In this application, you can go there by clicking "Book Store API".
It'll open the Swagger docs page, and Swagger is one common way to document APIs.
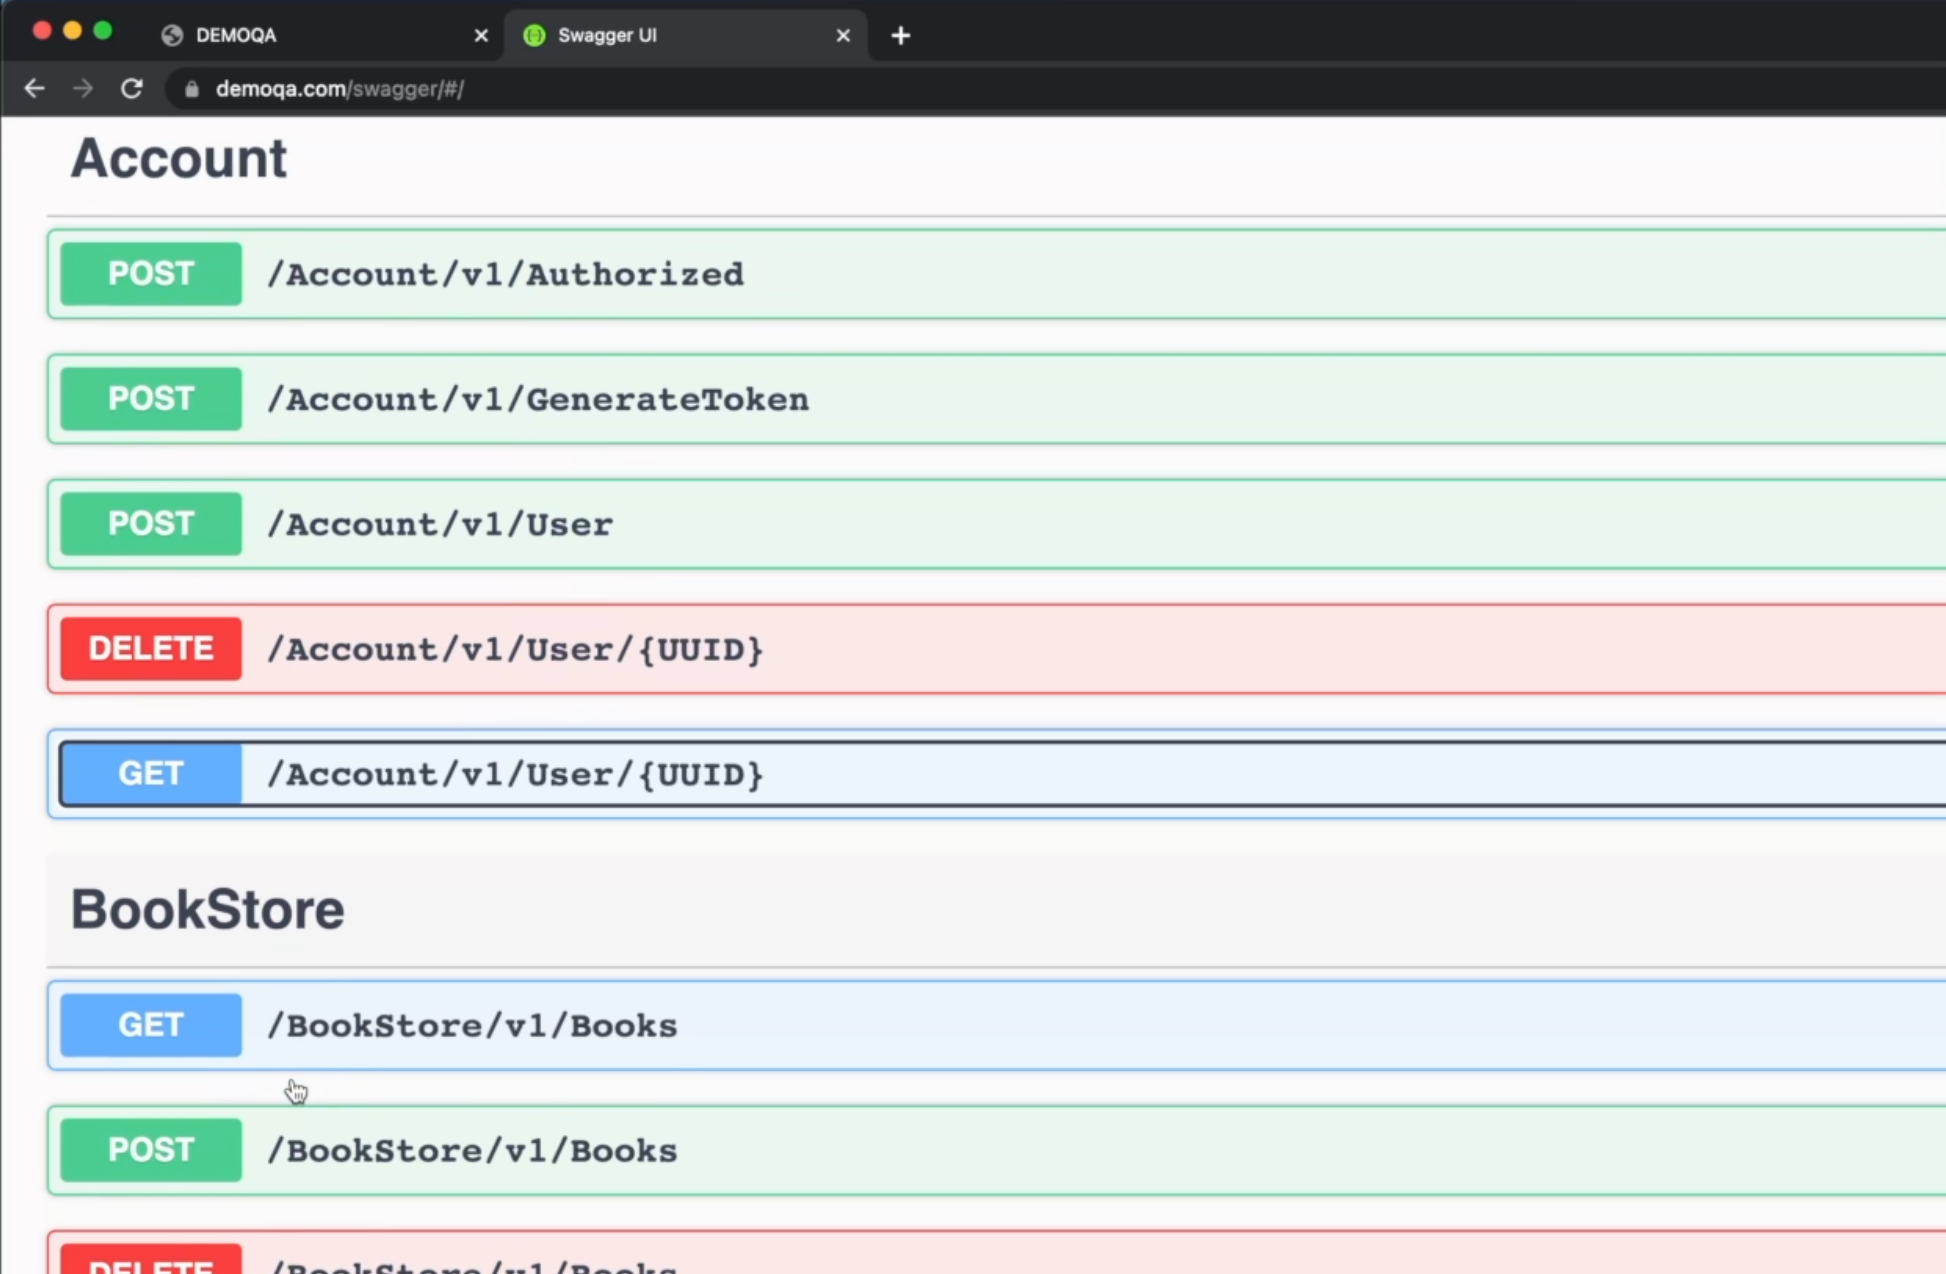
Here you see a list of methods for the "Account", and for the "BookStore", and although we don't know a lot about the APIs, you can guess what they are.
"GET" methods usually get the information from the database.
"DELETE" usually deletes.
"POST" usually updates the information.
In that case, we saw that we performed a GET passing the UserId, and here is an example of the response it gives to us.
In our case, we are looking for a "DELETE" method which can delete all books.
This is to delete one book per user, and this is probably to delete all books per user because you pass the UserId.
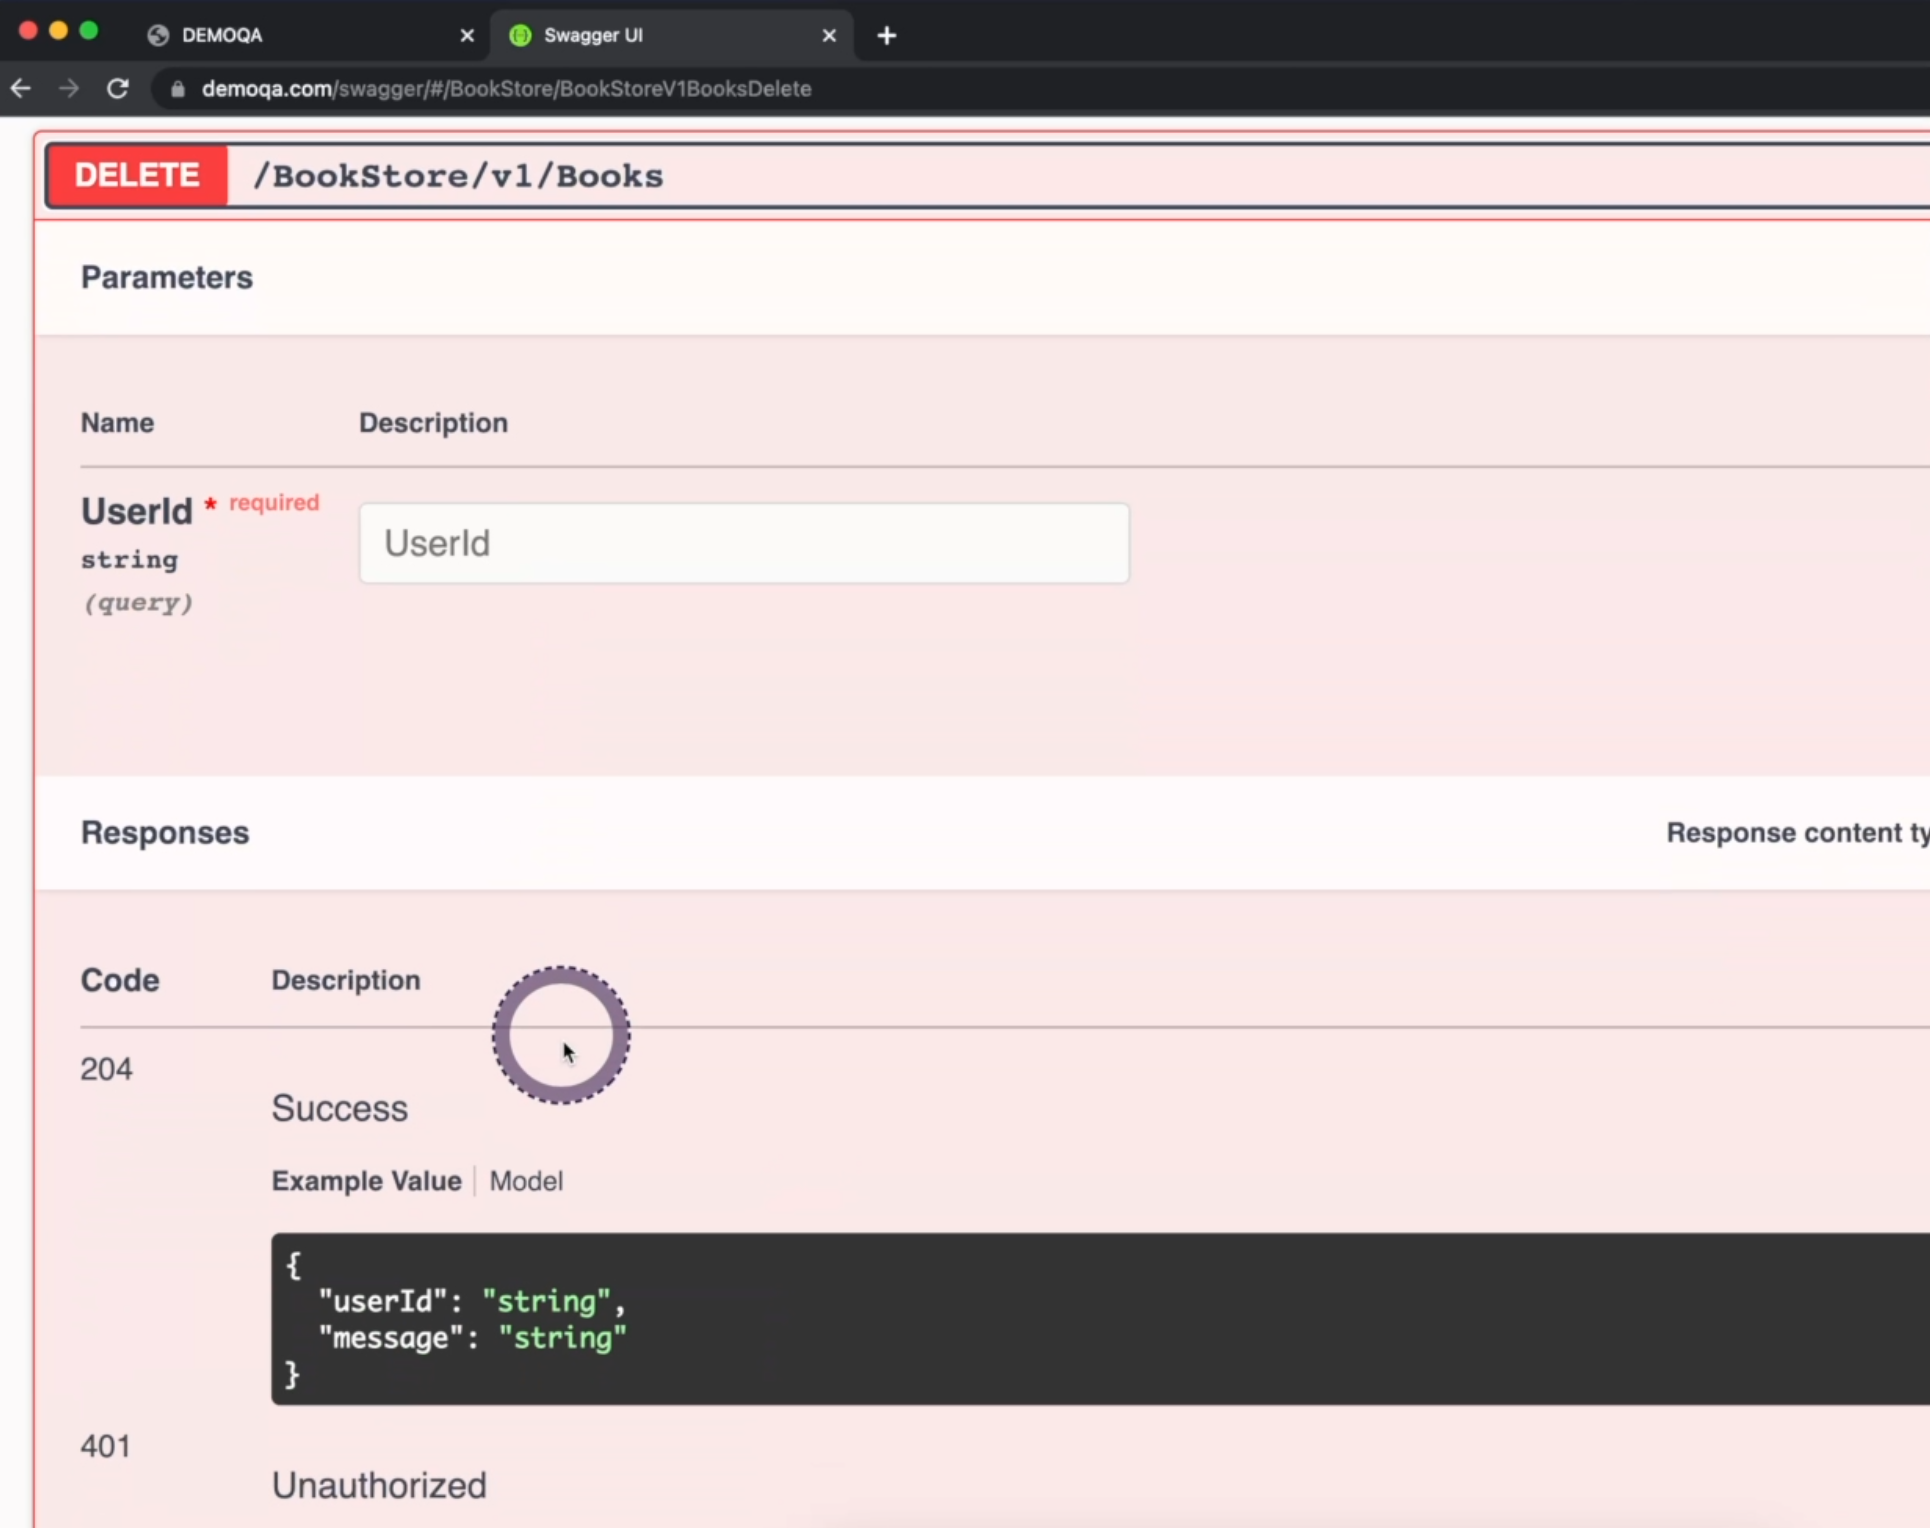
So this is the one we are looking for - /BookStore/v1/Books/UserId will return the userId and message - 204 in Success case, and 401 as Unauthorized.
This is the endpoint we are going to implement in our application.
Before going to the code, we are going to execute it here, and see how it looks.
If we click "Delete All Books", it'll pop up a message, we'll click "OK", and we'll see the call right here in the "Network" tab.
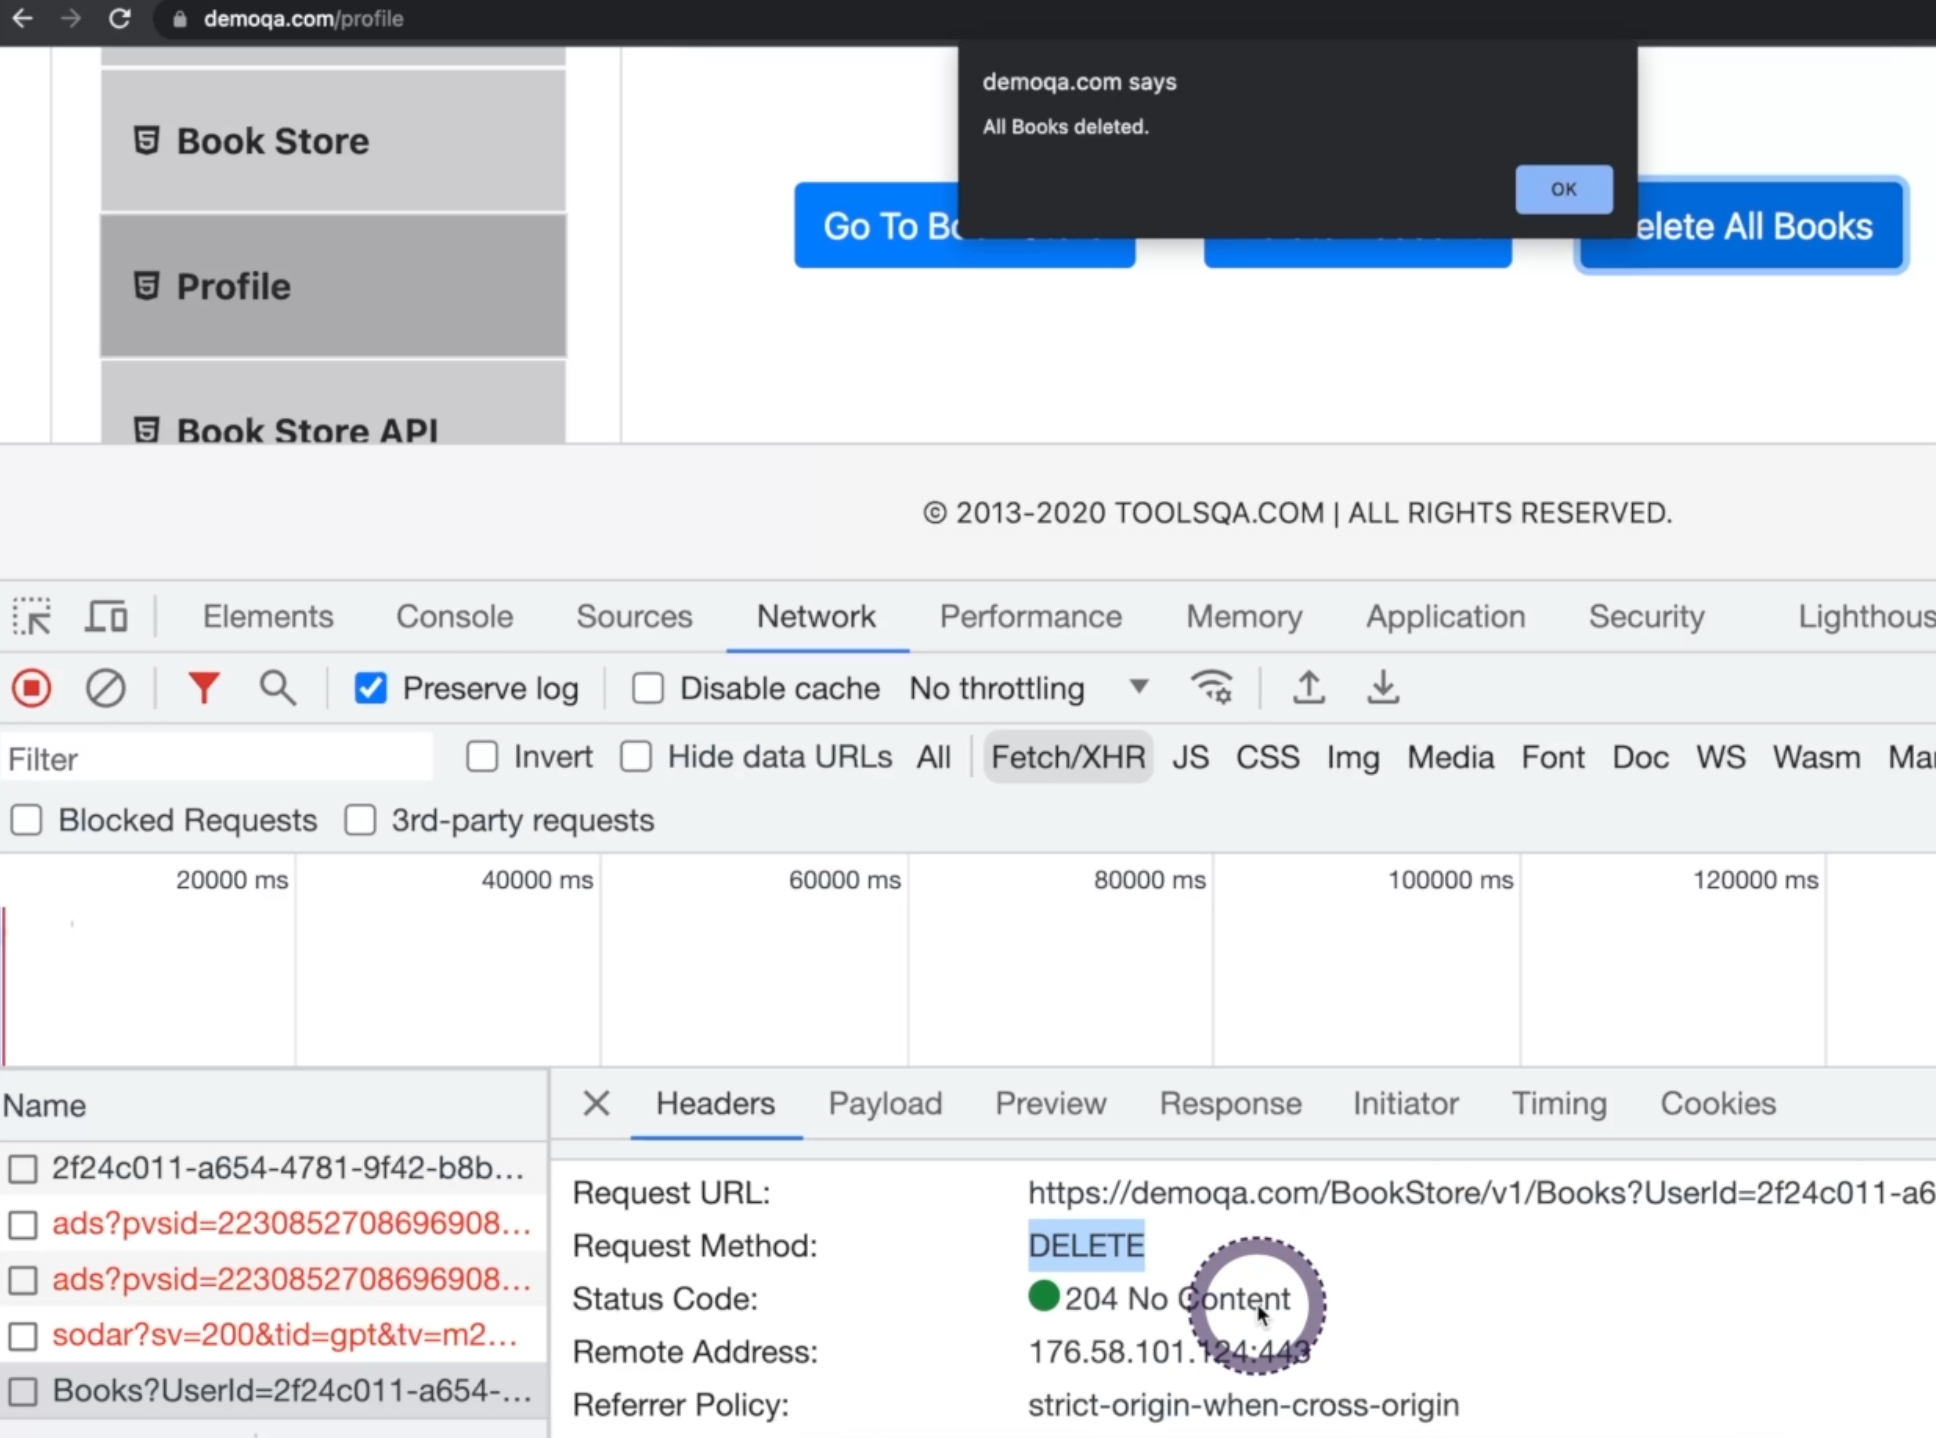
We'll see that it has "Headers", which is exactly what we just saw in the Swagger - the endpoint passing the UserId, a DELETE, and a 204 saying that there is No Content.
The payload is empty - it's basically just the Query String Parameters, and we don't have any response, which is empty - meaning that there are no books for that user anymore.
Now that we saw in the application how it works, let's go back to the code and understand it.
# Execute a request dynamically
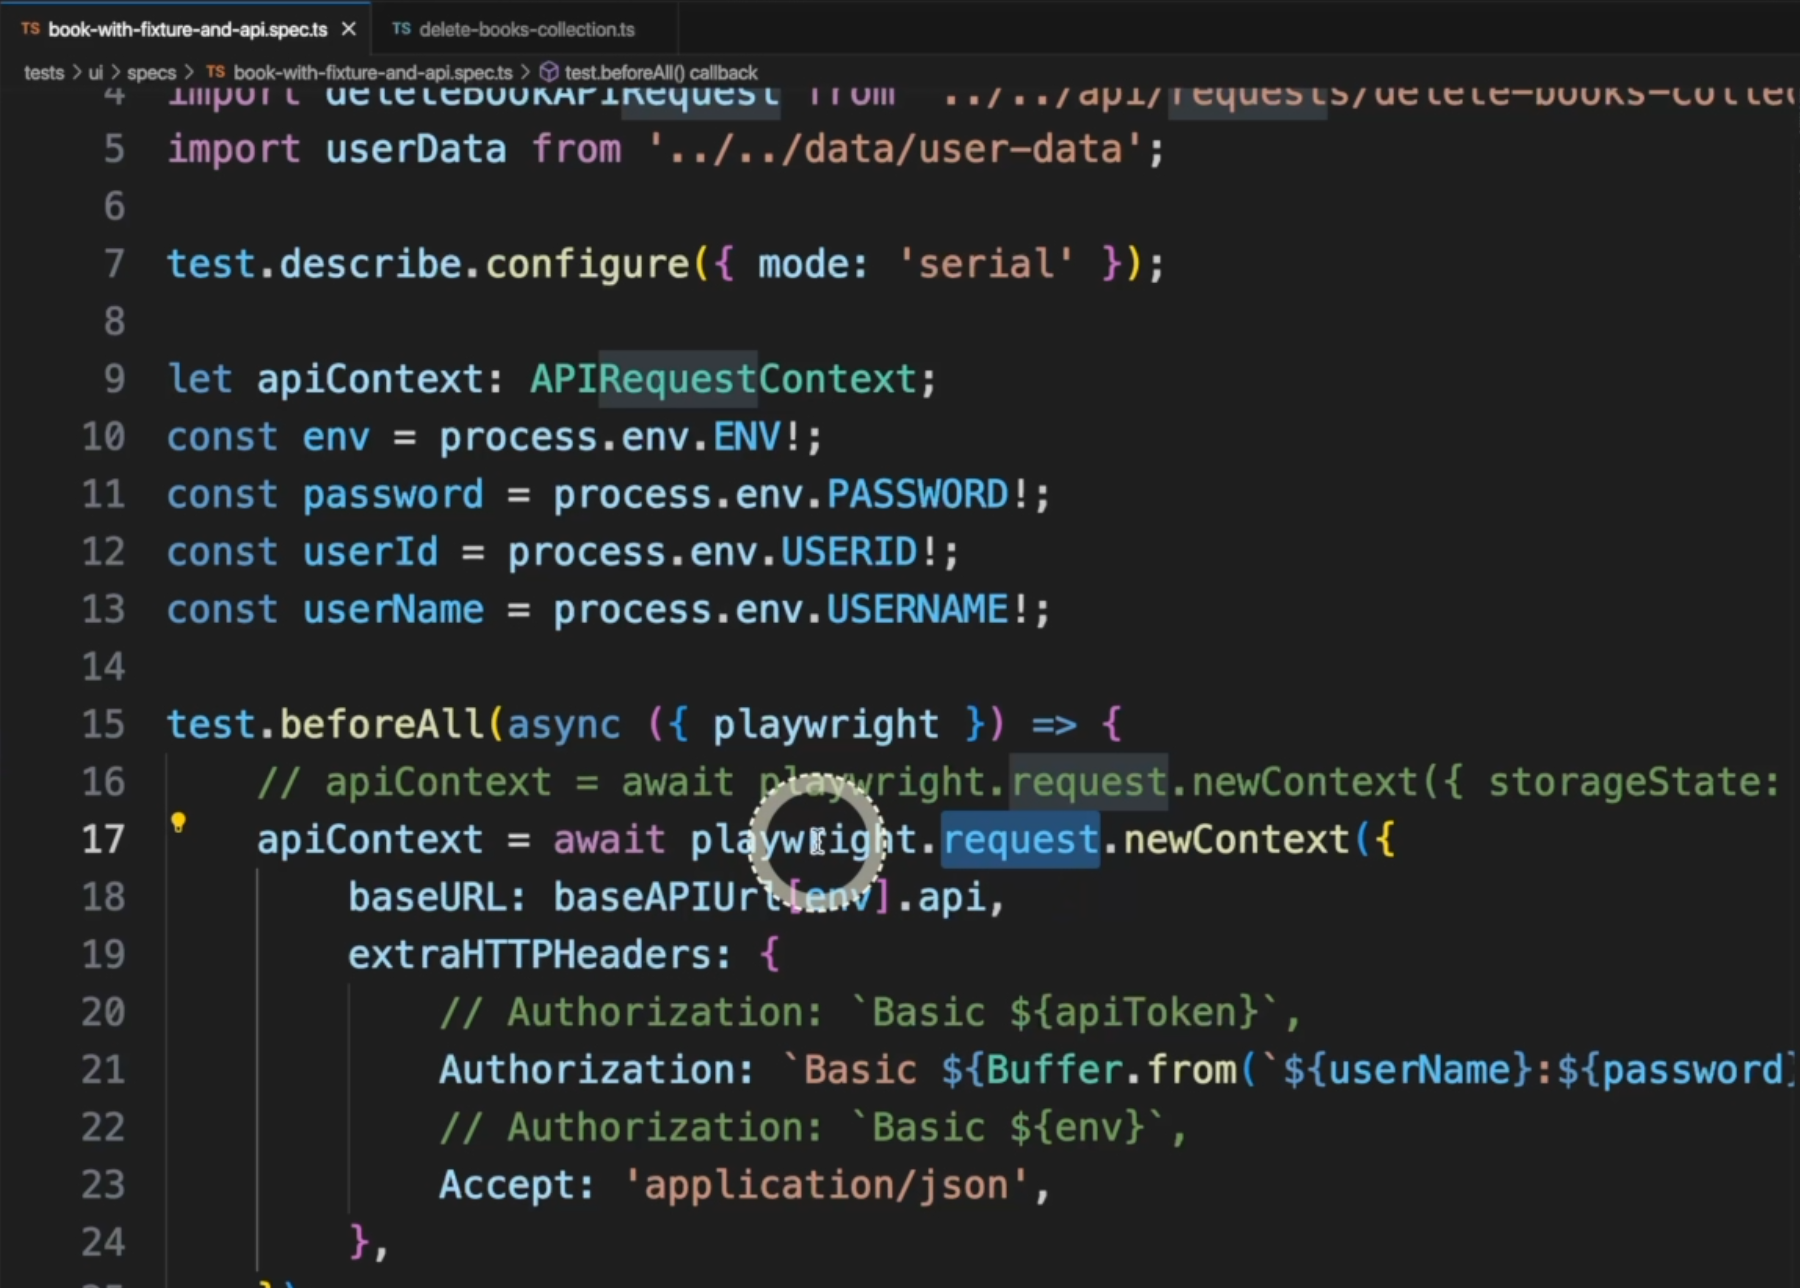
We created an apiContext, which is the connection to our API, passing the userName and the password.
test.beforeAll(async ({ playwright }) => {
    // apiContext = await playwright.request.newContext({ storageState: 'storageState.json' });
    apiContext = await playwright.request.newContext({
        baseURL: baseAPIUrl[env].api,
        extraHTTPHeaders: {
            // Authorization: `Basic ${apiToken}`,
            Authorization: `Basic ${Buffer.from(`${userName}:${password}`).toString('base64')}`,
            // Authorization: `Basic ${env}`,
            Accept: 'application/json',
        },
    });
});
With that, we'll have the connection authorized, and we can perform more calls - get, post, delete, whatever.
In our test, we do have a method called cleanBooks that will call deleteAllBooksByUser.
If we go there, we see that we are mounting the request.
async function deleteAllBooksByUser(apiContext: APIRequestContext, userId: string) {
  const method = methods.delete;
  const requestOptions = {};
  const requestUrl = buildUrl(endpoints.books.delete, userId);
  const response = await executeRequest(apiContext, requestUrl, method, requestOptions);
}
method is the method.
For requestOptions, we saw that we don't need anything.
requestUrl will build the URL, passing the userId, as we can see here, and finally, it will execute the request for us.
Let's take a look at the buildUrl method in apiUrlBuilder.ts.
export function buildUrl(endpoint: string, userId?: string, isbn?: string) {
  const env = process.env.ENV!;
  const url = [
    bindUrl(endpoint, env, userId, isbn),
    searchParamsForUrl(endpoint, userId),
  ]
  .filter(Boolean)
  .join('?');


  return url;
}
Similar to the UI URL builder, you need to find a pattern to implement code that will capture all the URLs that you need.
In our Book Store we have two - one is 'bookstore/v1/books', and the other one is accounts.
So, it's simple to do it. I'm using two methods - bindUrl and searchParamsForUrl - in case we do have params like this UserId.
Inside bindUrl, we are getting the endpoint, the env, userId, and isbn in case it exists - those last two are not mandatory.
If we look at apiEndpoints.ts, this is how I'm structuring the endpoints.
export default {
  books: {
    delete: 'api.books/delete',
    post: 'api.books/post',
    put: 'api.books/put',
  },
  account: {
    get: 'api.account/get',
  }
};
I know with the endpoint I get the api URL.
books is going to be books or account, and after the slash is going to be the method.
Back to the bindUrl, we are mapping these parts, then mounting the URL, adding the userId in case it exists, or adding the ISBN, in case it exists.
function bindUrl(endpoint: string, env: string, userId?: string, isbn?: string) {
  const parts = endpoint.replace(/\/.+$/, '').split('.');


  const endpointParts = parts.map((part) => {
    switch (part) {
      case 'api':
        return baseAPIUrl[env].api;
      default:
          return apiPath[part] ?? '/';
    }
  });


  if (endpoint === endpoints.account.get) {
    endpointParts.push(userId);
  }
  if (endpoint === endpoints.books.put) {
    endpointParts.push(isbn);
  }

  return endpointParts.join('/');
}
Then, we join everything with a slash.
Again, the searchParamsForUrl method params will bind the parameters, in case they exist.
function searchParamsForUrl(page: string, userId?: string) {
  let queryParams;

  switch (page) {
    case endpoints.books.delete:
      queryParams = { UserId: userId };;
      break;
    default:
      queryParams = {};
  }

  return new URLSearchParams(queryParams).toString();
}
For our books.delete endpoint - we do have that - so it'll go here.
Down below, you have an example of how each part would look like for this books/delete endpoint.
/**
  * endpoint  api.books/delete
  * parts  [ 'api', 'books' ]
  * endpointParts  [ 'https://demoqa.com', 'BookStore/v1/Books' ]
  * endpointParts join  https://demoqa.com/BookStore/v1/Books
  * queryParams { UserId: '1117e3d4-9f6e-45a7-a8a9-db3ecf7b9603' }
  * url  https://demoqa.com/BookStore/v1/Books?UserId=1117e3d4-9f6e-45a7-a8a9-db3ecf7b9603
 */
Here we have the "endpoint".
Here we have the "parts".
Here we have the "endpointParts", and then the "join", the "UserId", and finally the "url".
This is exactly what's going to be used in our buildUrl - that's going to be our endpoint.
When we go to executeRequest, we are receiving the parameters.
export async function executeRequest(
  apiContext: APIRequestContext,
  requestUrl: string,
  method: string,
  requestOptions: object
) {
  try {
    const response = await apiContext[method](requestUrl, requestOptions);
    const responseCode = await response.status();
    const responseOk = await response.ok();

    if (!responseOk) {
    // if (responseCode !== 200) {
      const errorStatus = `Code: ${responseCode} \r\n`;
      const responseStatus = `Status: ${responseOk} \r\n`;
      const errorResponse = `Response: ${await response.text()} \r\n`;
      throw `${errorStatus} ${errorResponse} ${responseStatus} `;
    }

    return response;

  } catch (error) {
    const errorRequestUrl = `Request url: ${requestUrl} \r\n`;
    const errorRequestMethod = `Method: ${method} \r\n`;
    const errorRequestOptions = `Request options: ${JSON.stringify(requestOptions)} \r\n`;

    throw new Error(
      `Invalid request! Failed on \'executeRequest\' method. \r\n ${errorRequestUrl} ${errorRequestMethod} ${errorRequestOptions} ${error}`
    );
  }
}
This first line is exactly the execution of the endpoint.
const response = await apiContext[method](requestUrl, requestOptions);
It'll call the apiContext, passing the method, the requestUrl, and the requestOptions.
# Error handling
We are storing the responseCode and the responseOk here, and we create an !if condition to make sure the response is okay.
If it's not, we will log the response, and if there is an error, we will catch that too, printing our console and in our report everything about this error.
That's how we handle the errors in the application.
We could simply have this line in our requests, but because we want to create reusability, we have this file, and we implement all the error handling here so it can be reusable by every single method, as we can see here in this example.
I forced an error by changing the user ID to an invalid ID, and here is what we got.

You see the message here - "Error: invalid request! Failed on 'executeRequest' method."
You have the Request url, the Method that was used, the Request options, the Code, the Response message "User Id not correct", and the Status false.
It's pretty useful to have that error handling because it helps you to find the issue really, really fast.
In one more example using the same strategy, but now with two requests to the API, you can find in the file book-with-fixture-and-api-isolated-auth.spec.ts.
This file is also under the specs folder.
We see here the same file structure with the beforeAll opening the API connection, and in our test, we have an addBooks method.
In this addBooks method, we see two API calls.
async function addBooks(userId: string, isbn: string) {
  await deleteBookAPIRequest.deleteAllBooksByUser(apiContext, userId);
  await createBookAPIRequest.addBookToCollection(apiContext, userId, isbn);
};
The first one is the one that we just saw - deleteAllBooksByUser - and the other one is addBookToCollection.
Let's take a look at this one in create-books-collection.ts.
async function addBookToCollection(apiContext: APIRequestContext, userId: string, isbn: string) {
  const method = methods.post;
  const requestOptions = { data: { userId: userId, collectionOfIsbns: [ {isbn: isbn} ] }};
  const requestUrl = buildUrl(endpoints.books.post, userId, isbn);
  const response = await executeRequest(apiContext, requestUrl, method, requestOptions);
}
In addBookToCollection, we receive a few parameters that are pretty similar.
We have the same method structure with the method, requestOptions, requestUrl, and response.
The difference here is that in our requestOptions, we do have some data and we pass a userId and isbn as parameters.
So the executeRequest method will take the requestOptions, and execute the request for us.
Congratulations one more time. This is half of the training, and I hope you've enjoyed it so far.
As always, good luck with the quiz, and don't forget to take a look at the extra resources and exercises. I'll see you in chapter four.
