

Transcripted Summary
In this chapter, we are going to learn about visual regression with Applitools, which is a tool that enables visual testing.
First, we will learn how to implement a test.
Second, we will learn about using different check settings for different applications and how that can make our tests more reliable.
Third, how to interpret the results for those different scenarios. I hope you'll have fun.
To exemplify visual regression with Applitools in our application, first we need to install Applitools via a npm command applitools/eyes-playwright.
Once you've done that, you are able to start using it throughout your tests.
# How to implement a test
For this example, we will use visual-regression.spec.ts.
We have the imports, and here we can see some important imports for the Applitools to work.

All these objects are required for the visual regression tests.
We can see here that we are using the ultrafast grid as true and we are defining the other variables.

In the beforeAll method, we will create some new variables.
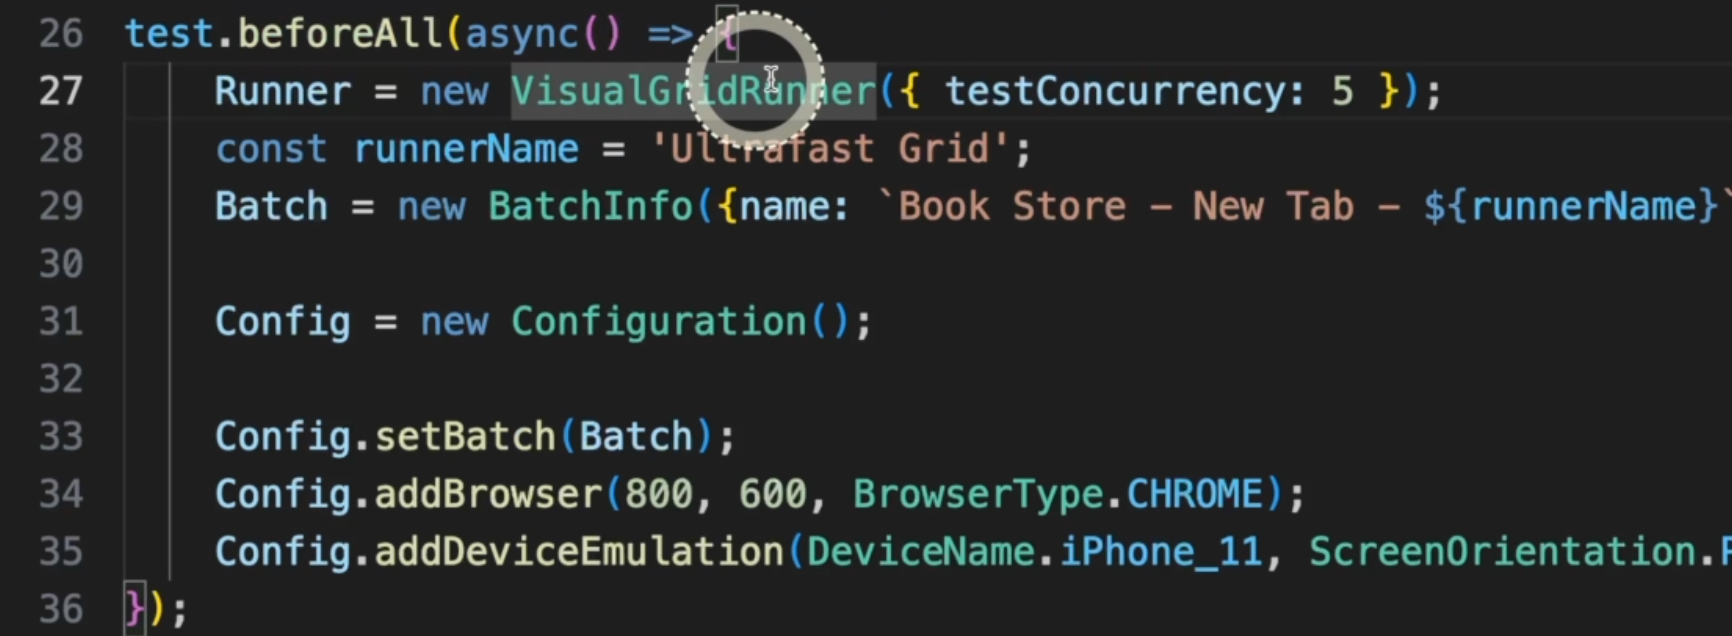
Here, we define the new VisualGridRunner and here we can define how many sessions in parallel it will use.
A reminder that for the free version, it doesn't run in parallel.
Here, we have the runnerName.
Here, we have the BatchInfo, which is the group of tests, the new Configuration, and in the Config we can define the browsers.
To simplify, we are using Chrome and iPhone and you can add as many as you'd like.
In the beforeEach method, we are creating the eyes and we are opening the eyes.

That will actually create the connection with Applitools.
We can name our eyes, and provide some other information here.
This is the Playwright driver, this is the test title, and this is the window size that we are going to use.
We are creating a new page object profilePage and a menuPage.
In the afterEach, we need to make sure we are closing the eyes so that the test execution is completed in Applitools.

In the afterAll, if you want, we can log the results in our console.
I am keeping the test here as skip so it doesn't run with our CI.
The free version of Applitools has a limitation per month, so we don't want to waste that.
# Different check settings
What we want to explore here in this test is the different check settings.
Check settings will dictate how precise you want the image comparison to be - if you want it to be pixel perfect or if you have some room for changes.
For example, in an application like our demoqa.com, we can have different books here every time, because people are adding and removing books constantly or because of our tests, maybe.
If we want to use a more flexible way and check only if the layout is working, that's totally fine.
Another example would be our testautomationu.applitools.com website.
We are constantly having new instructors here and new courses, so it doesn't really matter if the content changes for us.
What we want to make sure is if the layout is not breaking.
In some other cases, we will need to be strict about that and we want to make sure everything looks exactly as the baseline.
For this example, we are using the Swagger page where we don't expect any layout change or any content changes.
Back to our test, this is what we are doing here.
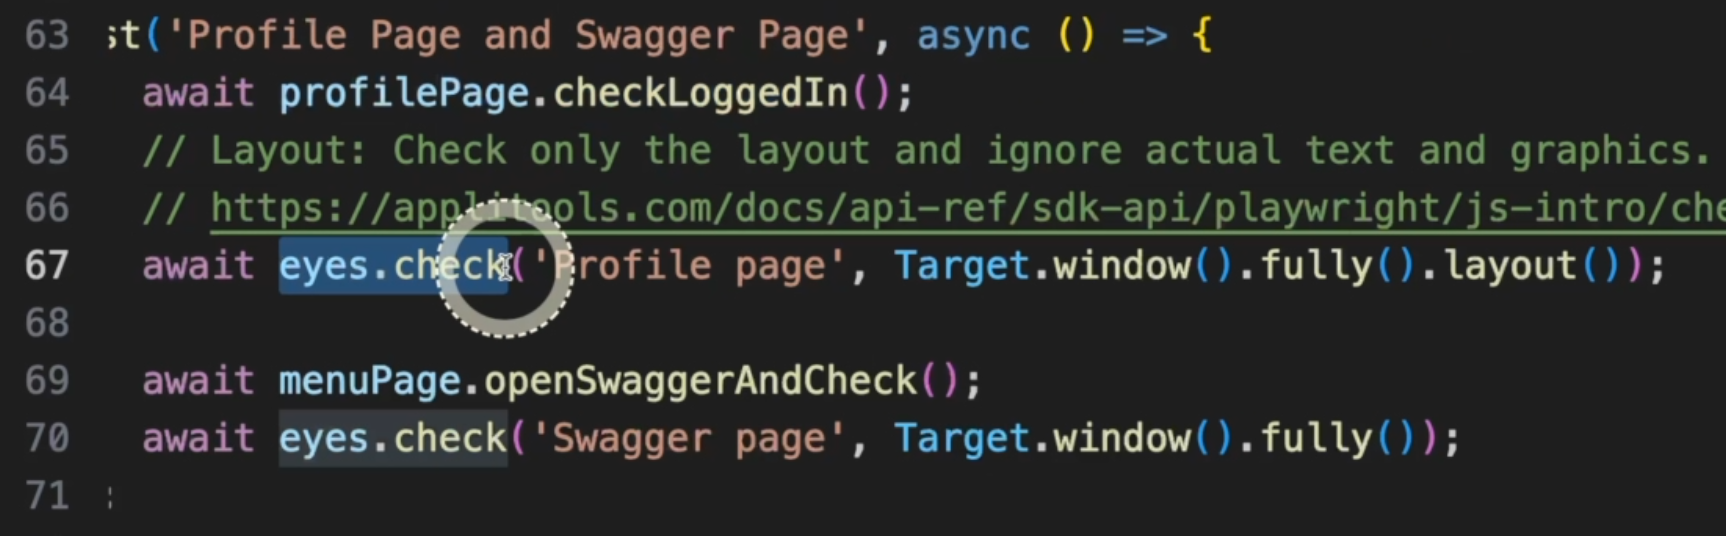
We are calling the profilePage and checking if it's logged in.
Right after, we are doing a eyes.check.
At this moment, Applitools will take a screenshot and compare it to the previous baseline.
For this comparison, we are using Target.window().fully().layout(), meaning that for this scenario, the content doesn't matter.
We will be verifying only the layout of the application.
In the second example, we are going to the Swagger page and do another eyes.check.
For that, we are taking a different approach - we are using Target().window().fully().
That will consider the content of the page as well.
# Interpreting the results
When we run the test, we can go to the Applitools dashboard and open our test execution.
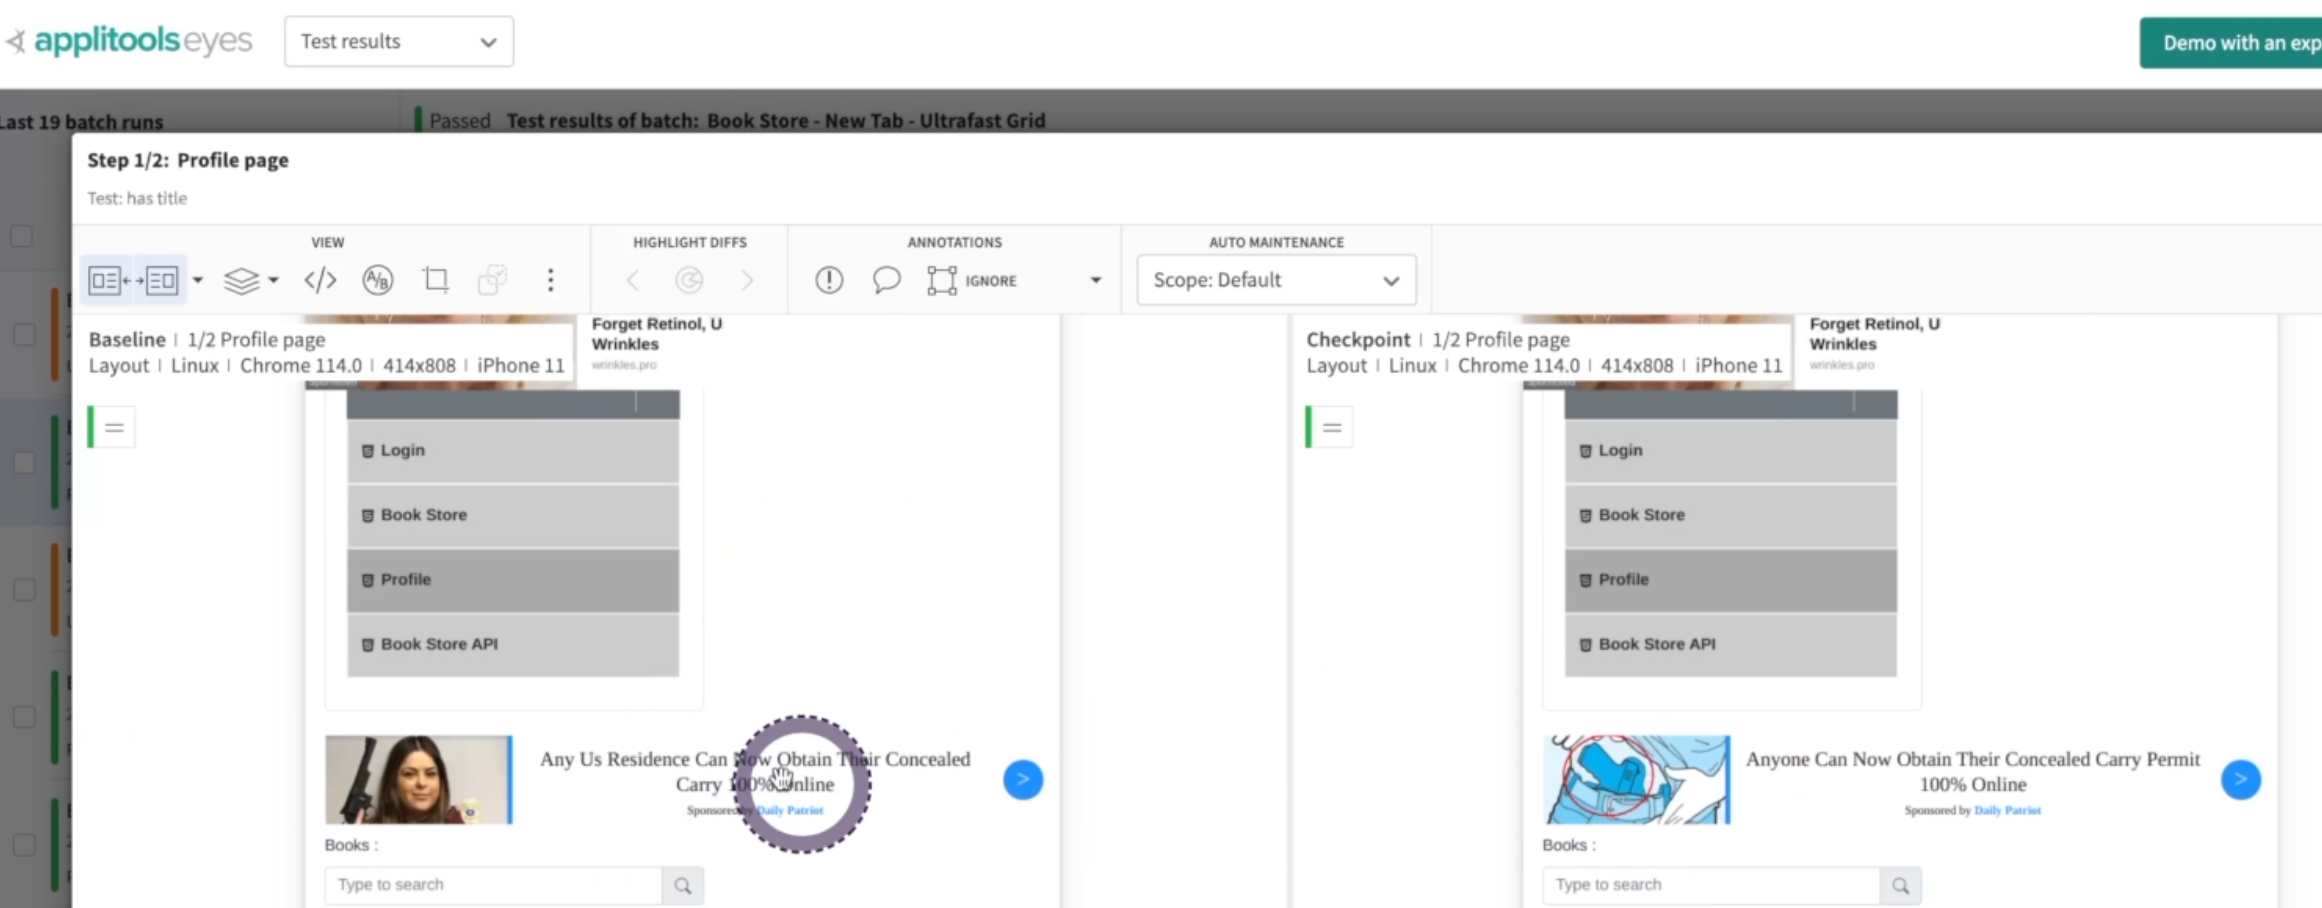
If we go here, we can see that although there were differences in the page with my ads enabled, the test did not fail because we are using the layout.
It's important to remember here that if the content changes the layout, the test will fail.
For example, here we see a message "No rows found" because this user didn't have any books added.
If we add a book and run the test again, the content will change the layout because this "No rows found" will not be displayed anymore.
This is a layout change, hence the test will fail, so it's important to understand your application and understand at what moment you will do the eyes.check to make sure your tests are working correctly.
In the other example, we didn't have any changes, as expected, so the test passed as well.
If you had any content change here - for example, if you wanted to intercept the API response and change any UI content here, the test would fail because we are using the strict mode.
We can see here in the documentation there are a lot of options for you to deal with your applications, so make sure to understand them all because for sure they will be very useful for your tests.
This is the end of Chapter 5. Congrats. We only have one more chapter to complete this training. How exciting.
A friendly reminder to take a look at the Resources links and I wish you good luck with the quiz. I'll see you in Chapter 6. Happy testing.
