

Transcripted Summary
Hi, welcome to Chapter 2.
In this chapter, we are going to see the playwright.config.ts file - the file that has many of the options to configure how the tests are going to run in your test project.
Also, how the test runner commands are created and the package.json scripts to make your typing easier.
And finally, writing your first test. I hope you enjoy it.
# Understanding the Playwright config
The first file we are going to see is the playwright.config.ts. This file has all the configurations for the tests that we are going to implement in our project.
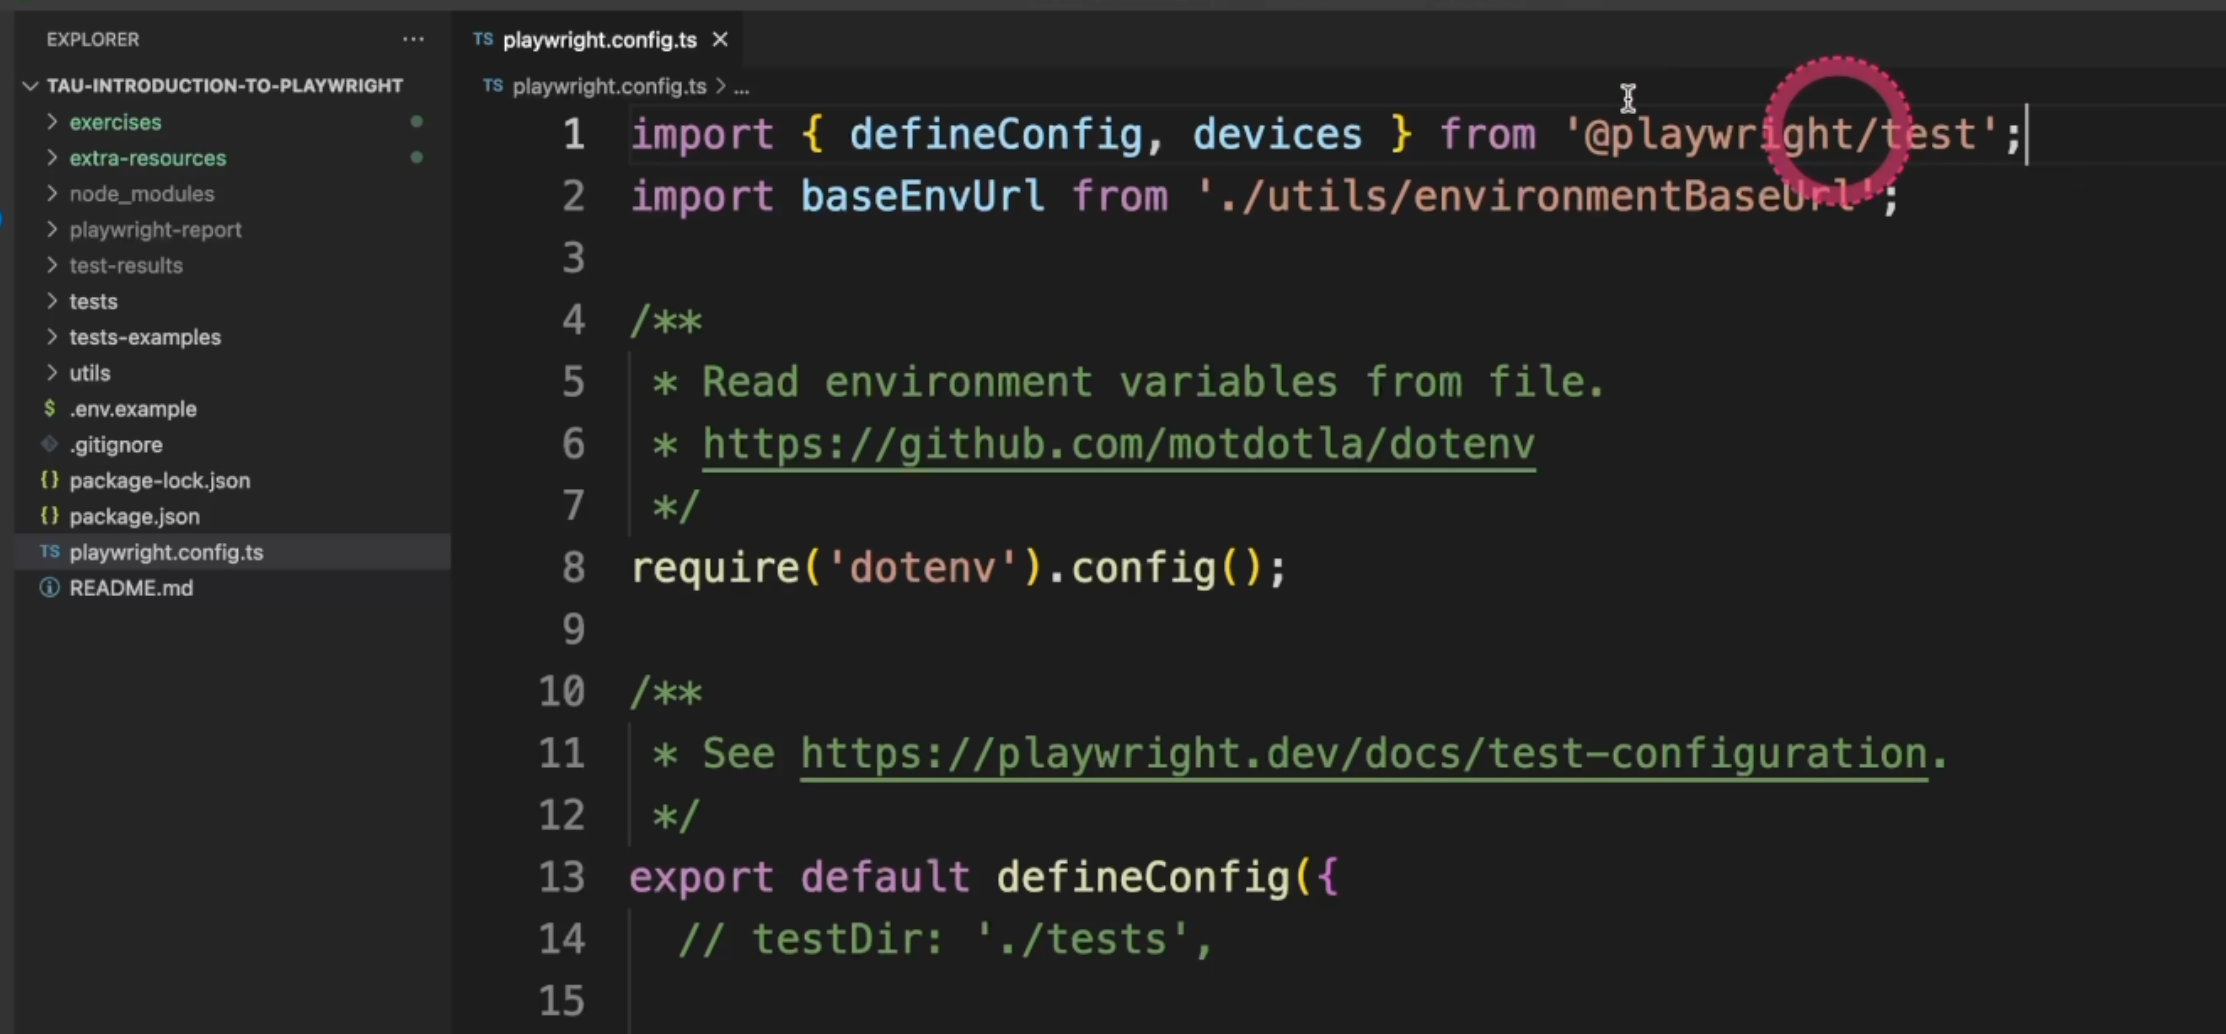
The first line has the first import.
It comes from @playwright/test, and it has the defineConfig, which is the object with all the configurations and the devices that we run the tests on - the browsers or the mobile devices - if we need.
Second, I have added here an import for baseEnvUrl. We are going to take a look at it in a minute.
Let's remove the comment for require('dotenv').config(). This will allow us to have the environment variables and set up the information there.
Also important to remember - you can mouseover the commands here, so it gives you all the docs for each command.

Now let's start this first block.
export default defineConfig({
  // testDir: './tests',
The first line we see is the tests directory.
We are going to comment it out for now because we are going to run all the tests.
Second is the definition of parallelism.
  /* Run tests in files in parallel */
  fullyParallel: true,
Here we see that we have true, as a default - Playwright has an ability to run all the tests within the file in parallel, so it's nice to have this command value set to true, so we can speed up the tests even more.
forbidOnly will fail your pipeline in case you forget a .only in each of your tests - we are going to understand this better in the future.
  /* Fail the build on CI if you accidentally left test.only in the source code. */
  forbidOnly: !!process.env.CI,
Here is the retries.
  /* Retry on CI only */
  // retries: process.env.CI ? 2 : 0,
  retries: 2,
Playwright also has a built-in feature to retry the test for you.
It comes with the commented line as the default. It means that if your environment variable CI is true, you are going to retry on the CI, but it's not going to retry locally or in any other environments.
For our test now we want to see the retries, so let's go ahead and set it as 2.
This is to define the number of workers, which is kind of the number of processes that we run in parallel.
/* Opt out of parallel tests on CI. */
  workers: process.env.CI ? 1 : undefined,
By default, it comes with one in the CI, meaning that it won't run in parallel, but locally, we want to have it undefined, so Playwright will take care of that for us.
Next is the reporter, and by default, we have html.
  /* Reporter to use. See https://playwright.dev/docs/test-reporters */
  reporter: 'html',
Playwright also has a complete report for us and it'll open in case the test fails.
If you want to change that, you can have this comment here as the always option:
// reporter: [['html', { open: 'always' }]], //always, never and on-failure (default).
If you want to change the output folder, you could also do it by using this comment:
// reporter: [['html', { outputFolder: 'my-report' }]], // report is written into the playwright-report folder in the current working directory. override it using the PLAYWRIGHT_HTML_REPORT
Remember that if we mouseover, we can see the list of all the reports available, and here you could also pick any other - 'dot' or 'list' - that you want.
  // reporter: 'dot',
  // reporter: 'list',
Let's see an example of the list execution.
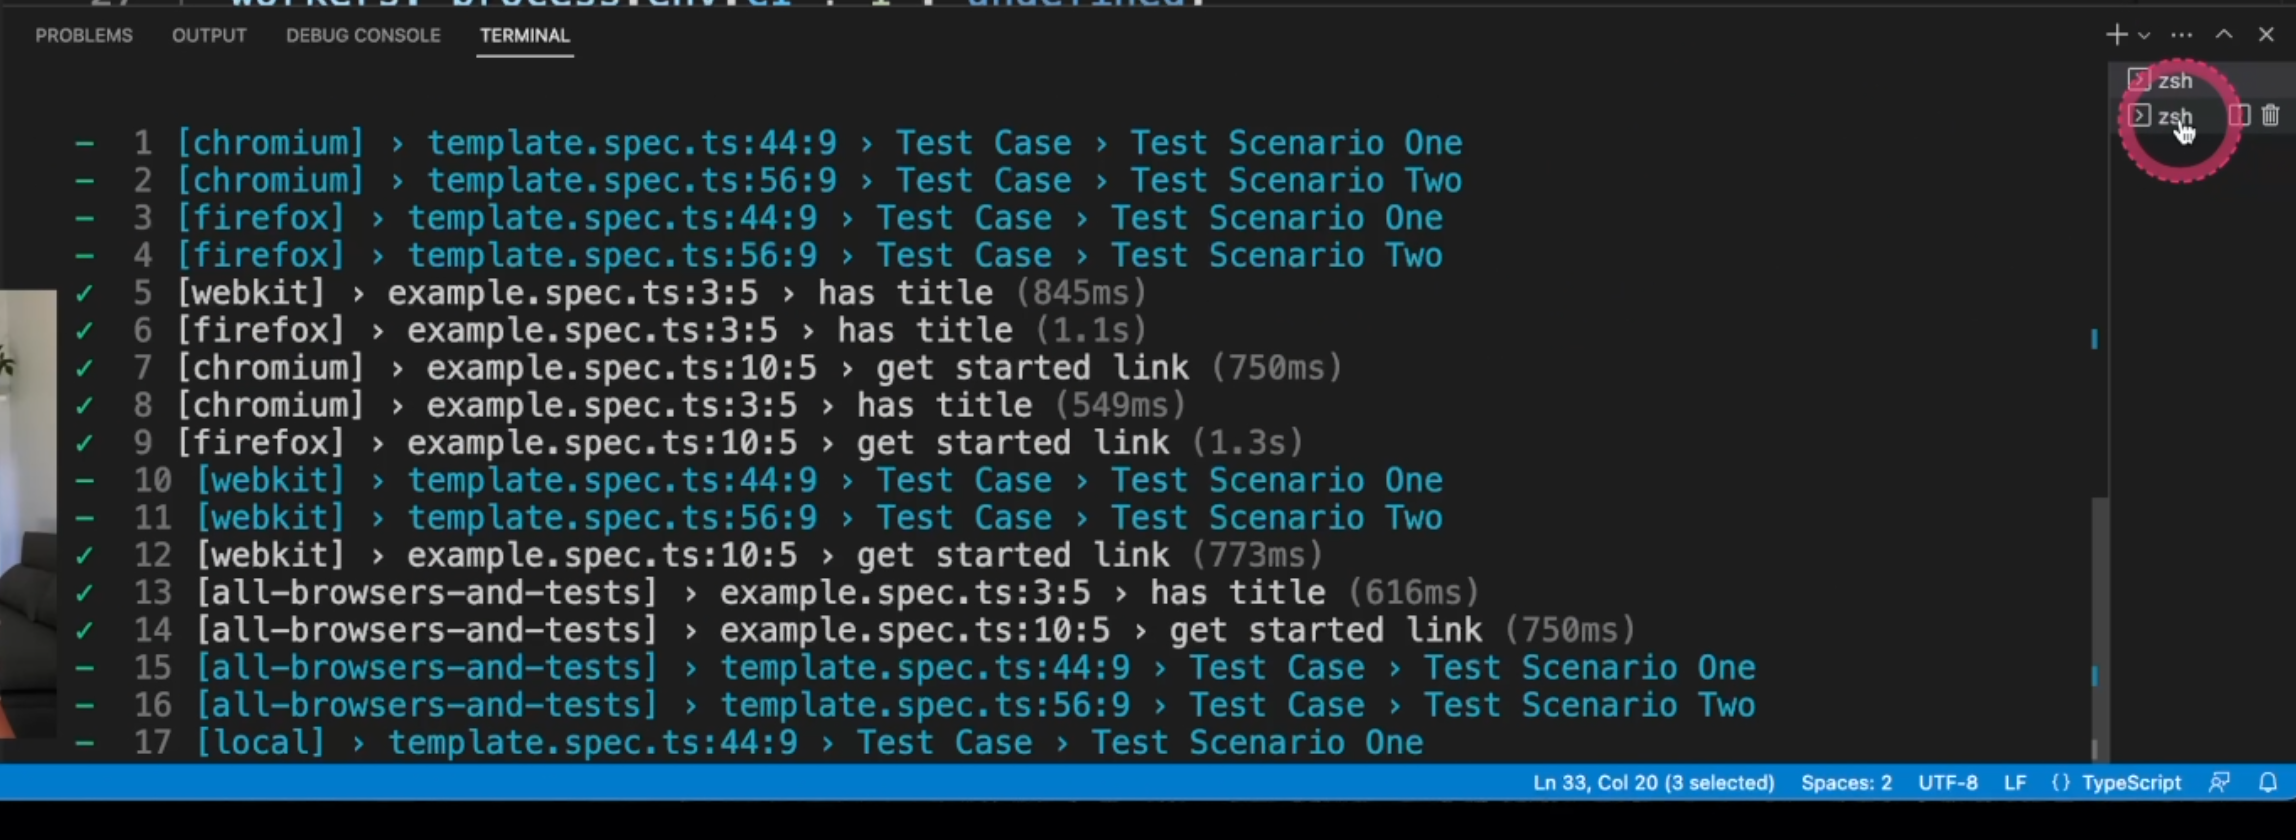
And another example of the dot execution.
Here you can also note the number of workers.
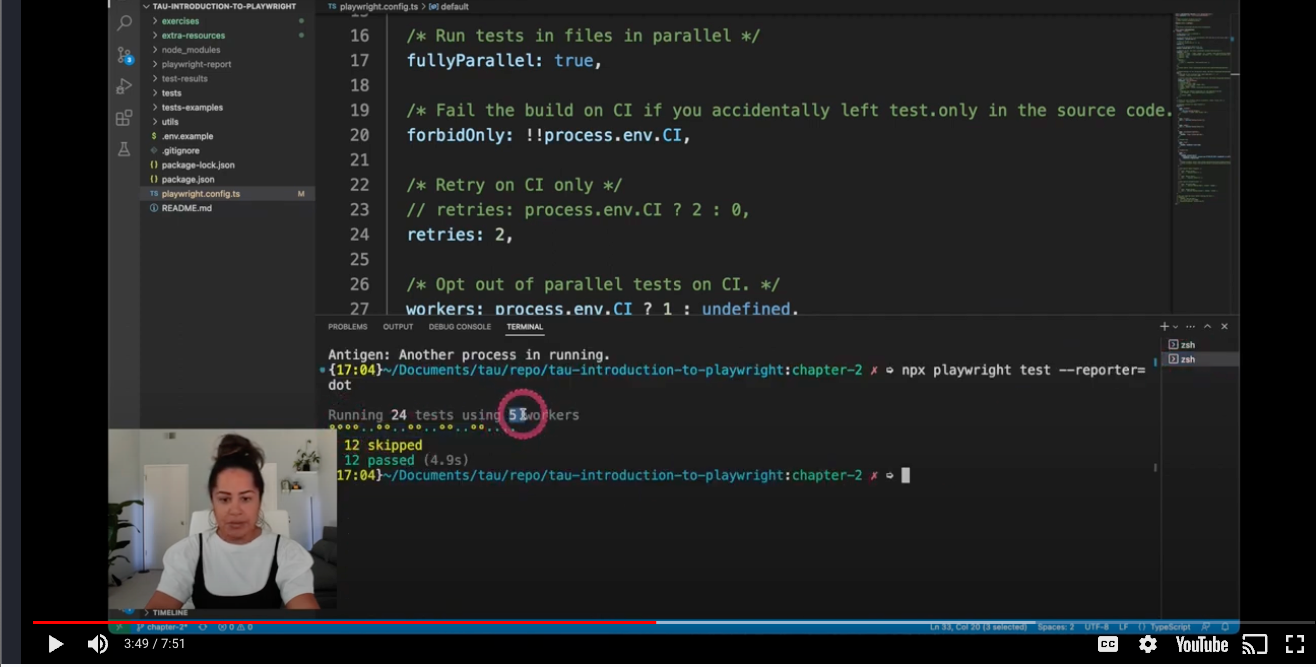
  /* Opt out of parallel tests on CI. */
  workers: process.env.CI ? 1 : undefined,
You could also have a combined list of reporters.
We can add as many as you want here, and of course, change the output file and also you can have custom reports - just take a look at this link and it'll guide you through.
Next, we are going to go to the use block.
  use: {
    /* Base URL to use in actions like `await page.goto('/')`. */
    // baseURL: 'http://127.0.0.1:3000',

    /* Collect trace when retrying the failed test. See https://playwright.dev/docs/trace-viewer */
    trace: 'on-first-retry',
    screenshot: 'only-on-failure',
    // headless: false,
    // ignoreHTTPSErrors: true,
    // viewport: { width: 1280, height: 720 },
    // video: 'on-first-retry',
  },
Here, we can find the baseURL - in case your application always uses the same URL, you can define it here.
You could also in your test, just have a simple command line like this one - await page.goto('/') - instead of having it duplicated into each of your tests.
trace will help us understand the failed tests and in this case it fails, it'll trace that on the first retry. You can also change this value to a few others as you can see here.
screenshot will take a screenshot only on failure. You can also change this value if you want - here are the values, and you can also have a few other options.
By default, Playwright runs on headless mode - you can turn it to false if you want.
In case your application doesn't have a valid certificate - for example, in internal environments - you could use ignoreHTTPSErrors and for any other needs as well.
You could define the viewport of your tests.
You could record a video if you want, and again, it takes the same parameters of trace and screenshot.
You can change the timeout for any command - for example, click - and also for the expect. They are two different parameters.
    // timeout: 30000, //https://playwright.dev/docs/test-timeouts
    // expect: {
      /**
       * Maximum time expect() should wait for the condition to be met.
       * For example in `await expect(locator).toHaveText();`
       */
      // timeout: 10000,
    // },
One quick correction here is that the timeout and the expect timeout are outside of the block use.
They are not inside, as I just showed. Just move them down.
The GitHub repo has the code up to date and from now on, if you need it, just consider it out of the block use.
You could also change the test results outputDir folder, and next we are going to see the projects.
  /* Configure projects for major browsers */
  projects: [
    {
      name: 'chromium',
      use: {
        ...devices['Desktop Chrome'],
        // viewport: { width: 1280, height: 720 },
      },
    },

    {
      name: 'firefox',
      use: { ...devices['Desktop Firefox'] },
    },

    {
      name: 'webkit',
      use: { ...devices['Desktop Safari'] },
    },
projects are a group of settings that your tests will run through.
By default, it comes with the browsers, which are Chromium, Firefox, and Webkit for Safari, but usually a better use of this is through environments.
    // Example only
    {
      name: 'local',
      use: {
        baseURL: baseEnvUrl.local.home,
      },
    },
In this example, we are using an external file, as we could see at the beginning, and if you open the file, you can see that we have different URLs for different environments here.
export default {
  ci: {
    prefix: 'https://dev-myapp-',
    suffix: '.mydomain.com',
  },
  local: {
    api: 'https://local-myapp.mydomain.com/api',
    home: 'https://local-myapp.mydomain.com',
  },
  production: {
    api: 'https://myapp.mydomain.com/api',
    home: 'https://myapp.mydomain.com',
  },
  staging: {
    api: 'https://staging-myapp.mydomain.com/api',
    home: 'https://staging-myapp.mydomain.com',
  },
};
This is optional, but I'm just showing you that you could do that.
And again, for the ci, you could also build a URL based on environment variables.
  // Example only
    {
      name: 'ci',
      use: {
         baseURL: process.env.CI
          ? baseEnvUrl.ci.prefix + process.env.GITHUB_REF_NAME + baseEnvUrl.ci.suffix //https://dev-myapp-chapter-2.mydomain.com
          : baseEnvUrl.staging.home,
      },
GitHub and GitLab have a group of variables that you could use while running your test, so it's important to take a look at that and be familiar with the concepts.
     /**
       * GitHub variables: https://docs.github.com/en/actions/learn-github-actions/variables
       * GitLab variables: https://docs.gitlab.com/ee/ci/variables/predefined_variables.html#predefined-variables-reference
       */
    },
Another option you could use is to have mobile devices, and here are a few examples and branded browsers instead of Chromium and Webkit, you could use the real browsers, but they will just use a different channel as you can see here
    /* Test against mobile viewports. */
    // {
    //   name: 'Mobile Chrome',
    //   use: { ...devices['Pixel 5'] },
    // },
    // {
    //   name: 'Mobile Safari',
    //   use: { ...devices['iPhone 12'] },
    // },

    /* Test against branded browsers. */
    // {
    //   name: 'Microsoft Edge',
    //   use: { ...devices['Desktop Edge'], channel: 'msedge' },
    // },
    // {
    //   name: 'Google Chrome',
    //   use: { ..devices['Desktop Chrome'], channel: 'chrome' },
    // },
You could also run your local server before starting the test by changing the webServer command here.
  /* Run your local dev server before starting the tests */
  // webServer: {
  //   command: 'npm run start',
  //   url: 'http://127.0.0.1:3000',
  //   reuseExistingServer: !process.env.CI,
  // },
This is the end of the first section of Chapter 2. We'll continue with a few more videos, but you can take a look at the quiz right now and you can leave the extra exercises to the end of the whole chapter. I'll see you in the next video.
Resources
- Introduction to Playwright - GitHub repository - Branch 2
- Chapter 2 - Extra Exercises
- Chapter 2 - Extra Resources
Quiz
The quiz for this chapter can be found in 2.3.
