

Transcripted Summary
Welcome to Chapter 4.
In this chapter, we are going to learn what visual testing is, and what Applitools - a tool that supports visual testing - can do for us.
We will learn how to implement a visual regression test with Playwright using the test that we have been working on, and how to run and interpret the results from this test.
Also, how to accept and reject a baseline in a visual regression test.
I hope you have fun.
Until now, we learned how to test an application from its functional perspective - we want to check if the functionality was working right.
But what happens when we need to check if the visual is right?
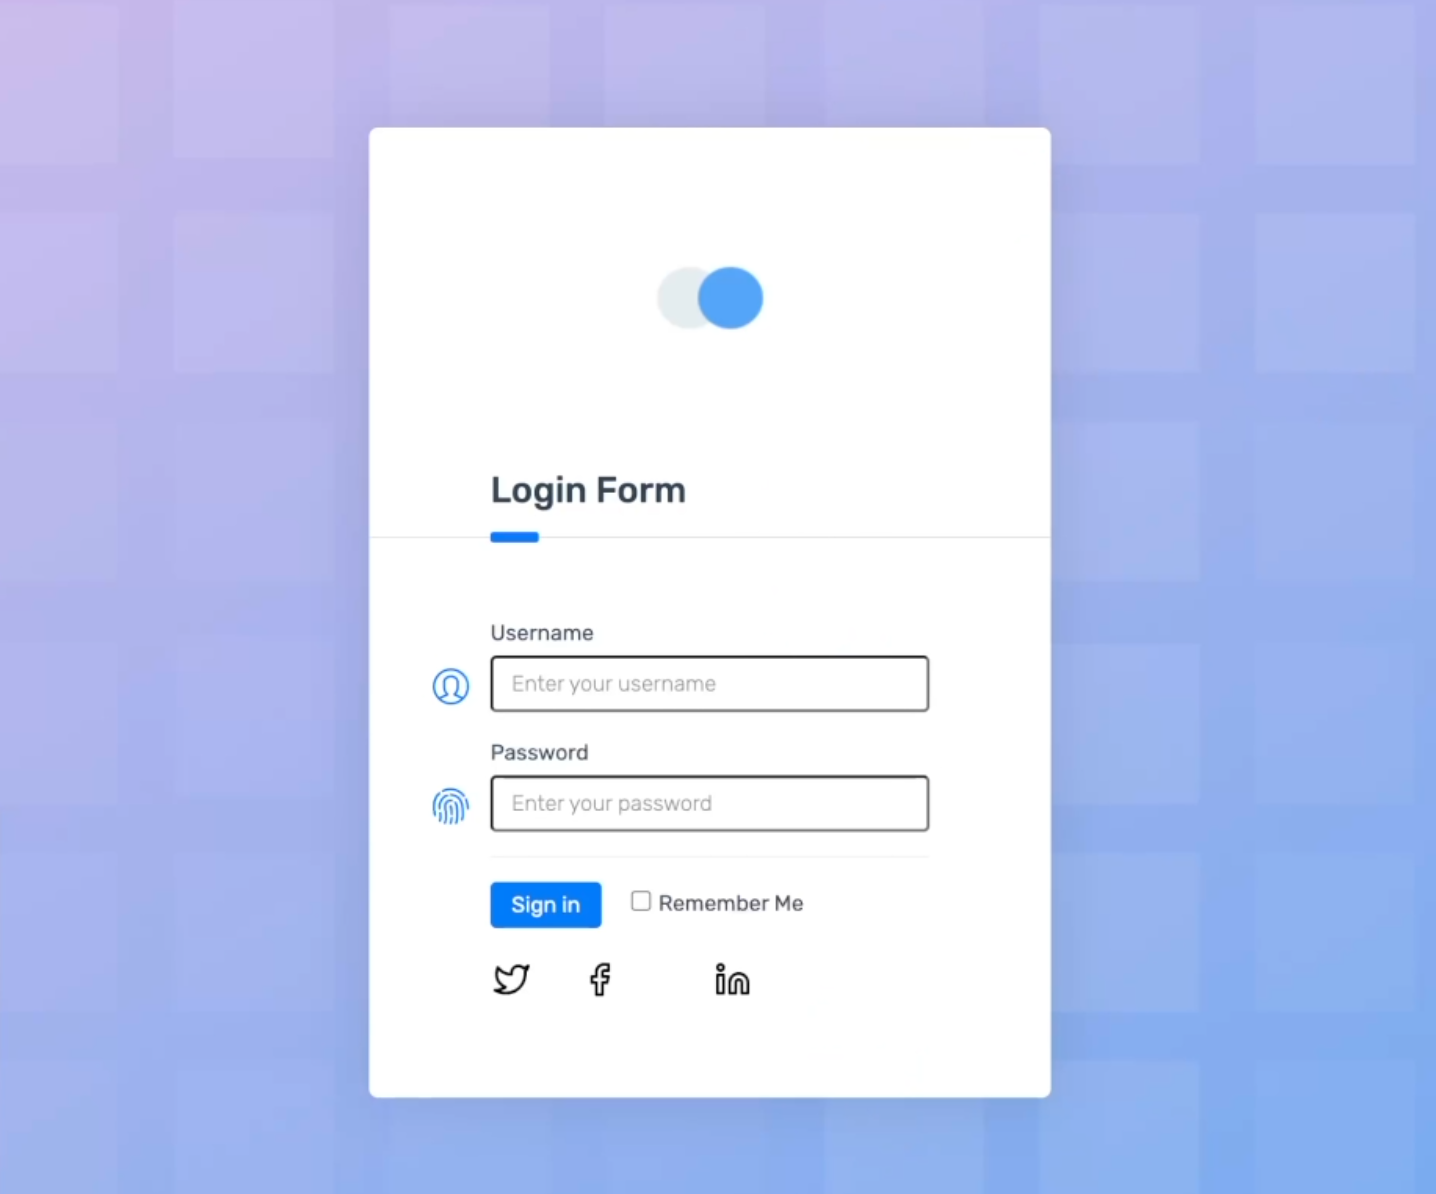
In this example, we see two applications that were supposed to be the same, but we can see that there are differences between them.
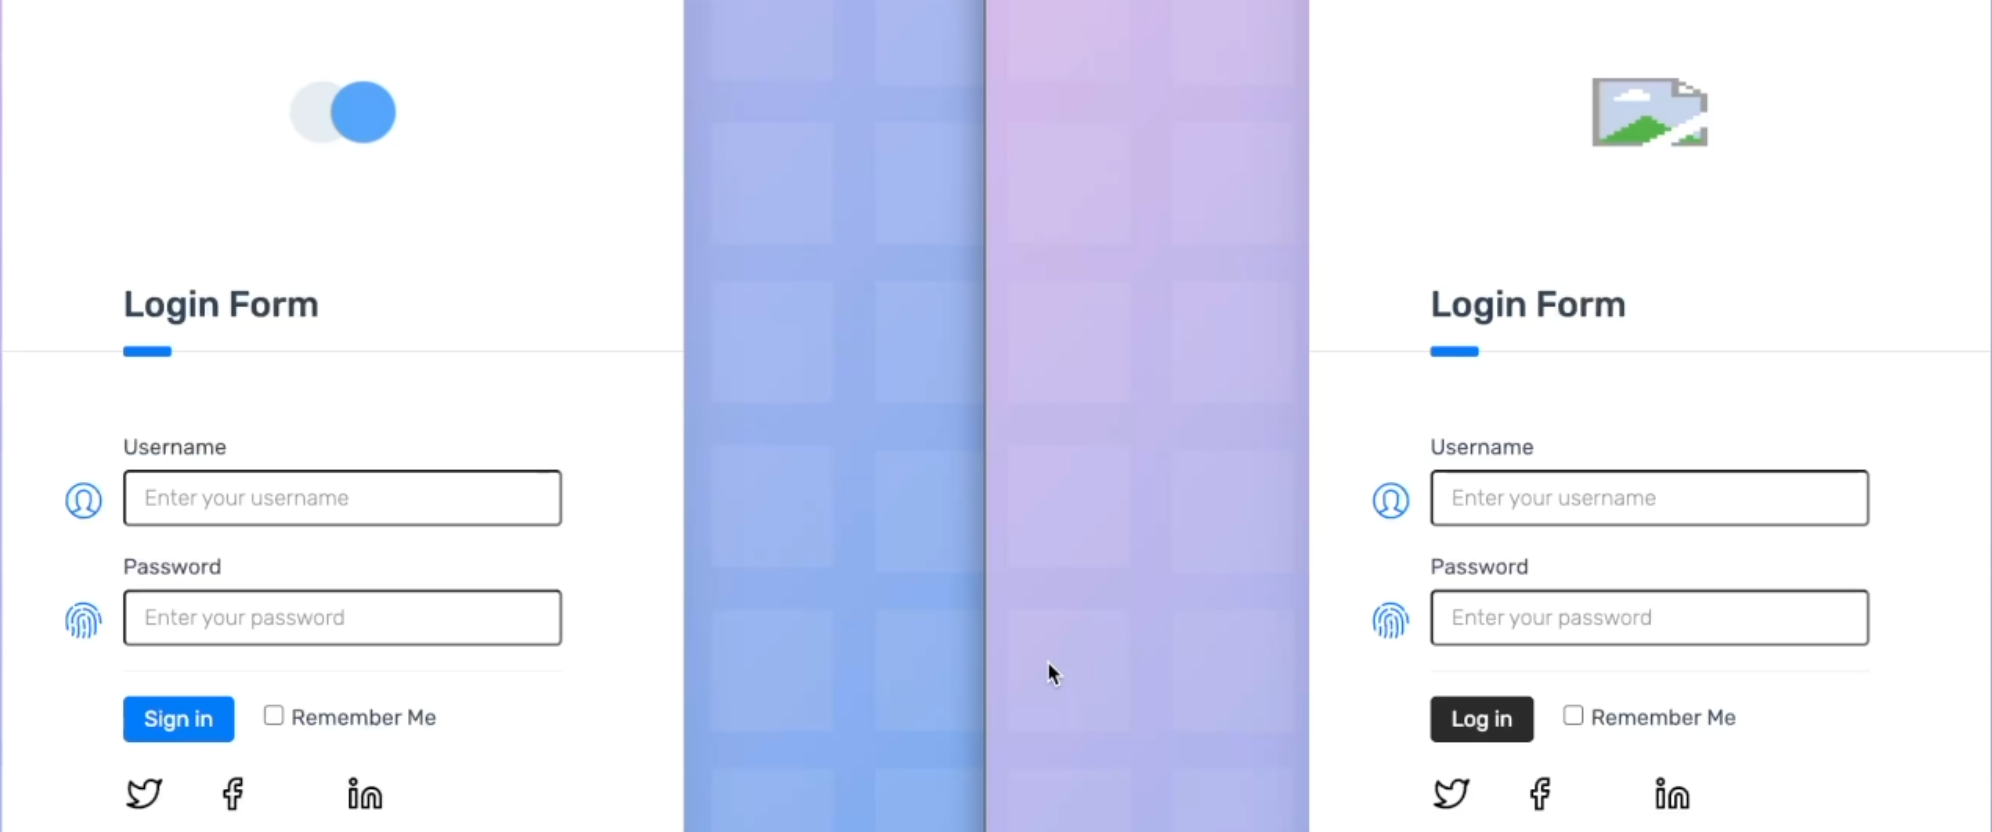
We can see on the left side there is an image, and on the right side, the image is not loading.
We also see the difference in the 'Sign in' button.
On the left side, it is blue and says 'Sign in', and on the right side, it's black and says, 'Log In'.
For that, we use visual testing, or visual comparisons.
Playwright has the ability to produce and visually compare screenshots through the command - expect(page).toHaveScreenshot().
Back to our example, the left side image would be our baseline, which is the source of truth.
Anything different than this image would be a visual error.
For visual testing, instead of Playwright's native library, we are going to be using Applitools, which offers, among others, visual testing.
Applitools has a great tool to manage and update baselines to select areas to be ignored in a baseline, and to manage how much precision you want in an image comparison.
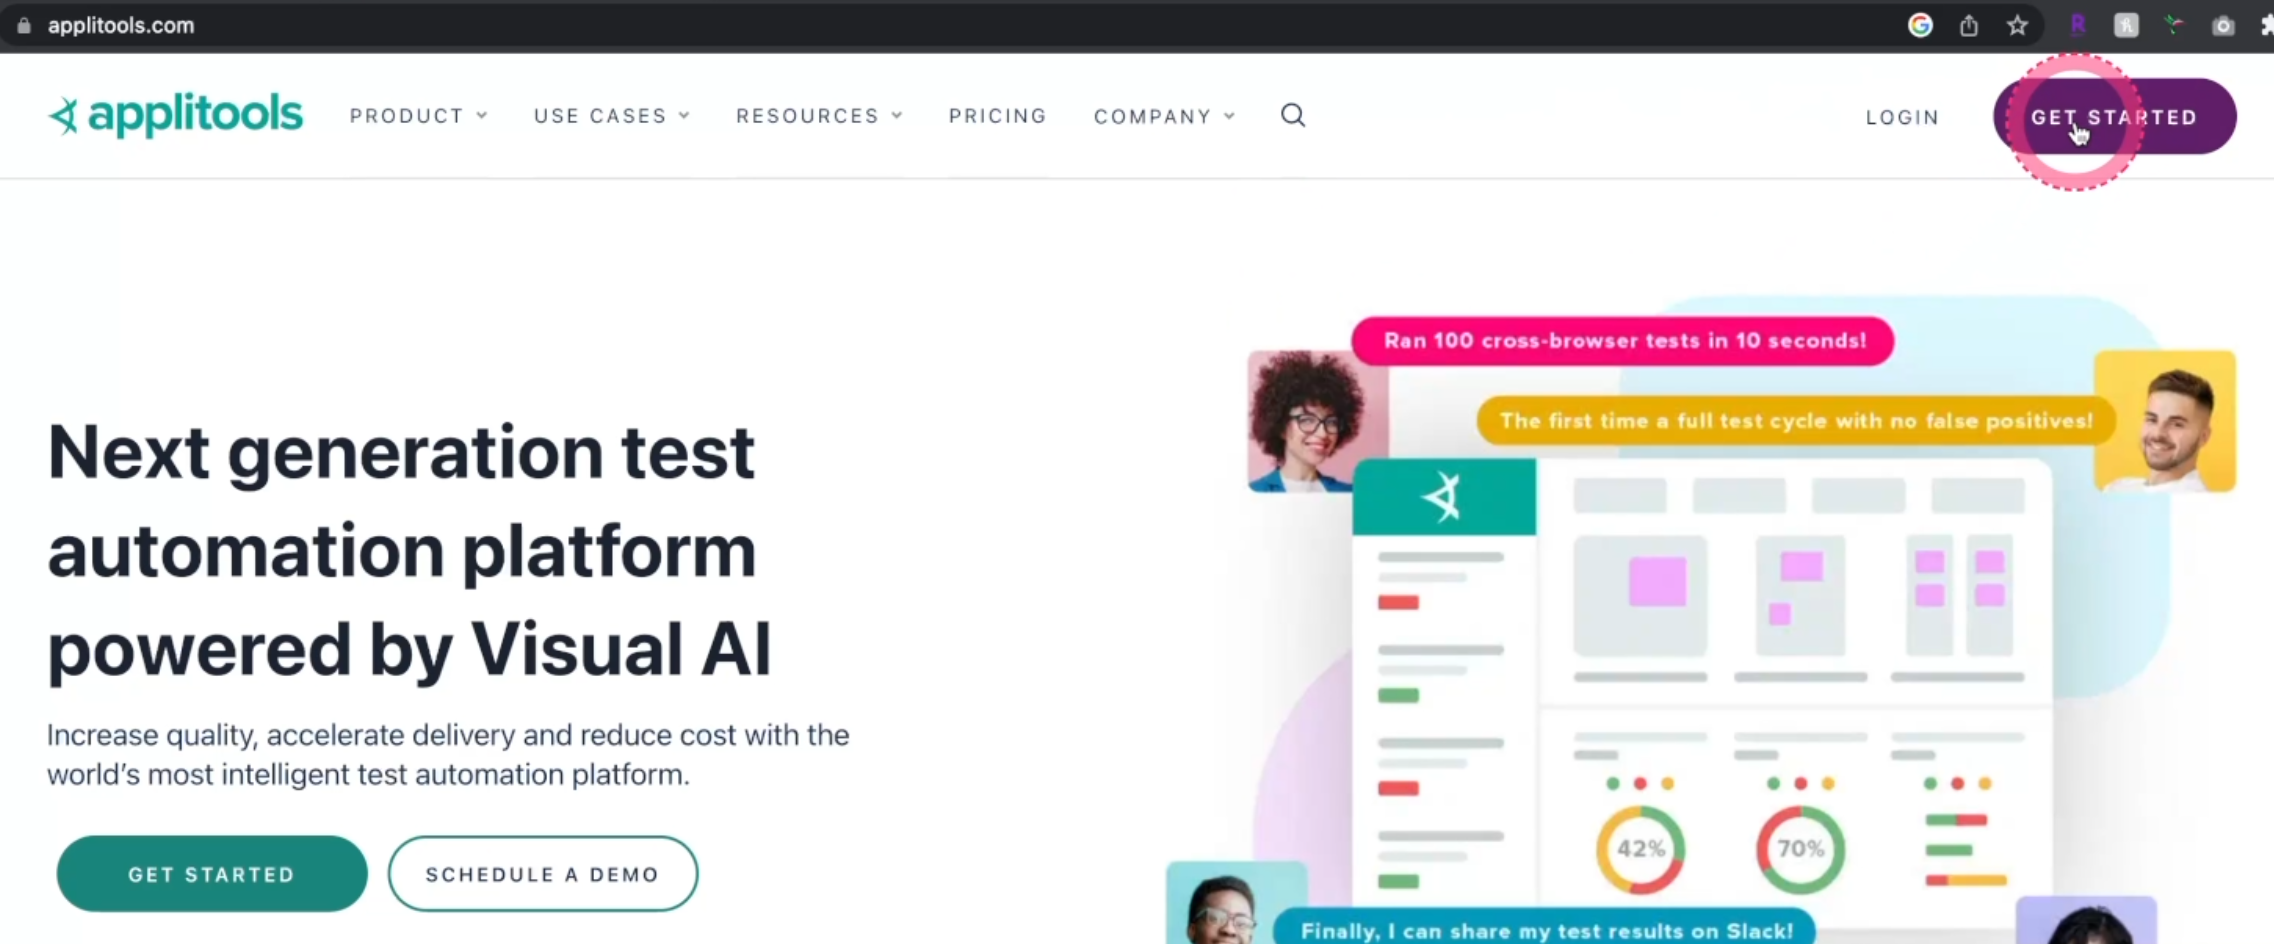
I invite you to click 'Get started' and create a new free account so we can do the test together.
And of course, Applitools already has an integration with Playwright, so we can go ahead and install via:
npm i -D @applitools/eyes-playwright
This will install the Applitools framework to connect with our Playwright tests.
You can go ahead and duplicate the example2.spec.ts file that we just saw, or simply open example3.spec.ts from the GitHub repository.
Here, we can see that we start by importing the classes from eyes-playwright that we just installed.
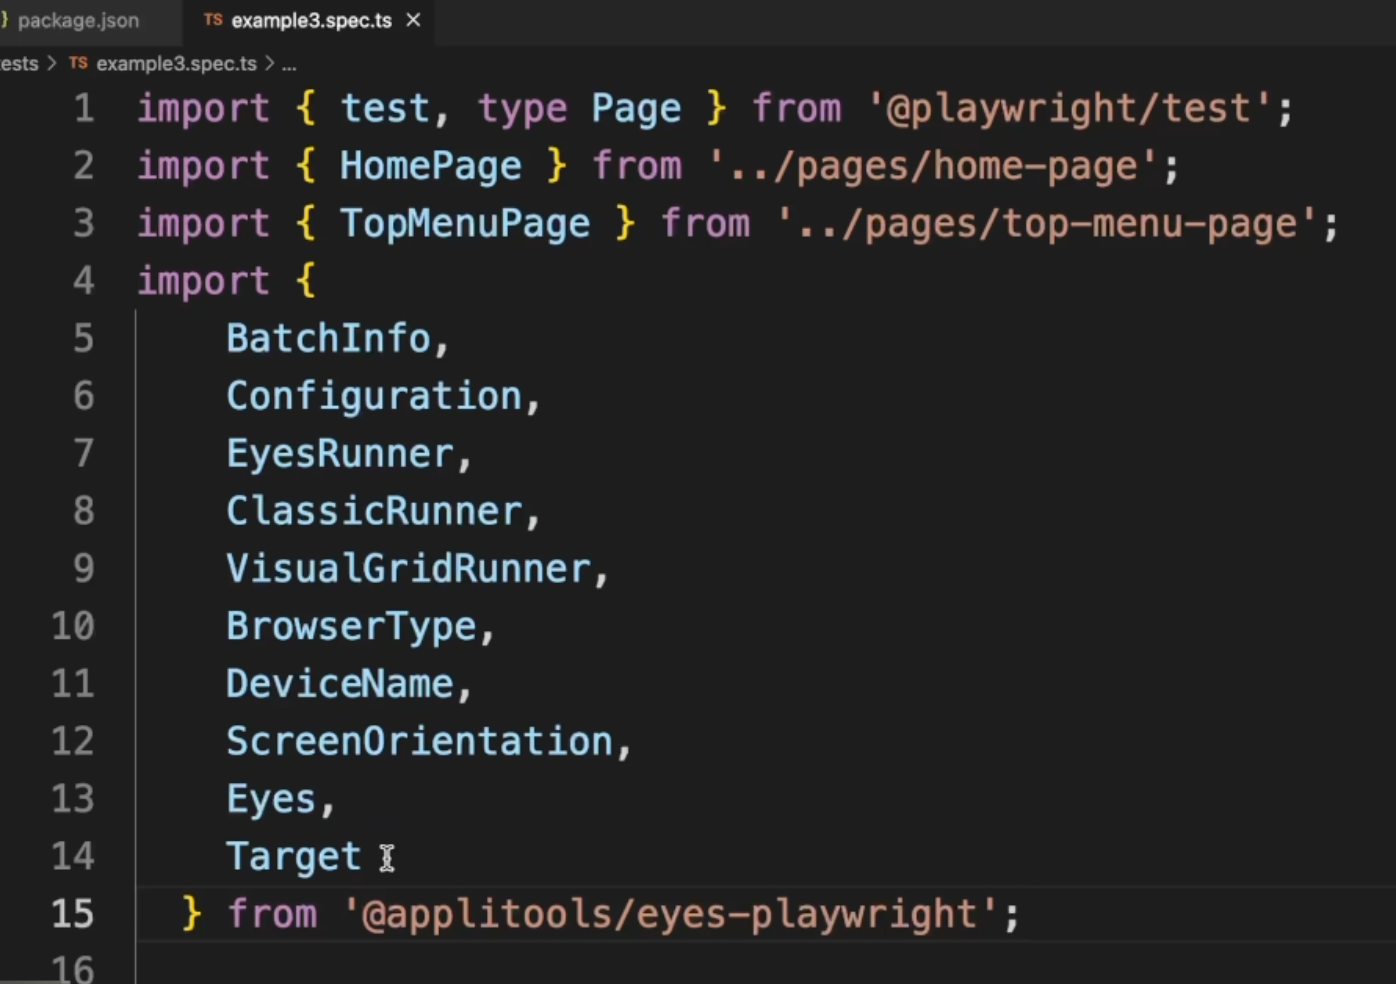
Those classes will be important to execute and manage every single check that we need to do with Applitools.
We need to define a few variables.

The first one is USE_ULTRAFAST_GRID - that is defined by false right now.
Of course, you can name it as you want, but I left the two lines here so we can easily switch between them.
This will define which runner Applitools we use.
It has mainly two runners - one is the Ultrafast Grid and the other one is the Classic Runner and we'll understand the differences between them in a little bit.
There are a few other important variables that we need to create here, and the most important one is eyes.
eyes** is the class that will actually perform the screenshot check for us whenever we need.**
Inside the beforeAll method, we'll have a bunch of commands for Applitools.
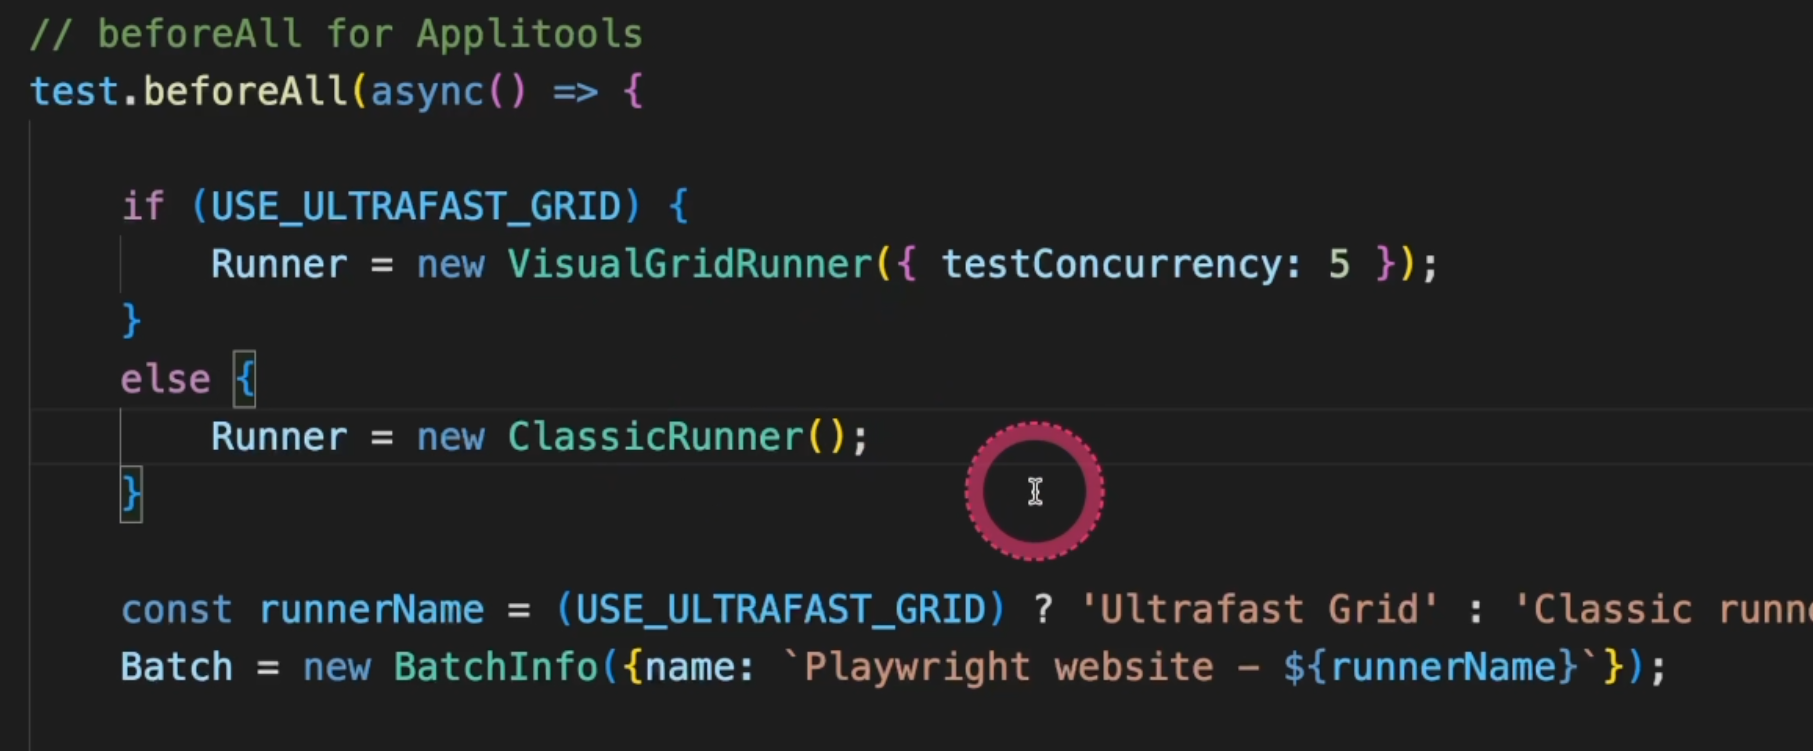
As we saw, we defined if we are going to use the Ultrafast Grid or not.
And for that, we can create two different runners.
If you are using VisualGridRunner, you'd go ahead and use this class, and you can set how many tests in parallel you want to run.
For the free version, you are allowed to run only one. But if you have a paid version, you can have more.
For the ClassicRunner, you need to manage everything locally, so you don't pass any parameters. This is a good opportunity for us to understand those differences.
**The Ultrafast Grid will manage all the test execution in the cloud first, so if you want to run more browsers and devices, you can use that and Applitools will take care of everything. **
In the ClassicRunner, you need to run every single browser or device in the local machine.
So, this is more time-consuming because you need to download and install every single browser, and you need to manage the parallelism locally.
With VisualGridRunner, Applitools will do everything for us.
Next we'll define the runnerName - we will just use the variable to name whichever runner we decide to use.
Then, we'll create a new BatchInfo. A batch is a collection of checkpoints for each test suite.
For example, if we are using the VisualGridRunner, because Applitools does everything for us, it'll be one batch for all the configurations.
But if we are using the ClassicRunner, for each browser or device, it's going to be one group of batches, because locally we'll start and trigger every single test.
Next, we'll create the Configuration information for Applitools.
We'll set the batch that we just defined, and if we are using the Ultrafast Grid, as I mentioned, we'll add browsers and devices.
You can add different viewports and different browsers.
You can also add different devices and a screen orientation - if you want portrait or landscape.
This is a global configuration for all the tests.
For each test, we will want to create a new eyes instance, passing the Runner and the Config.
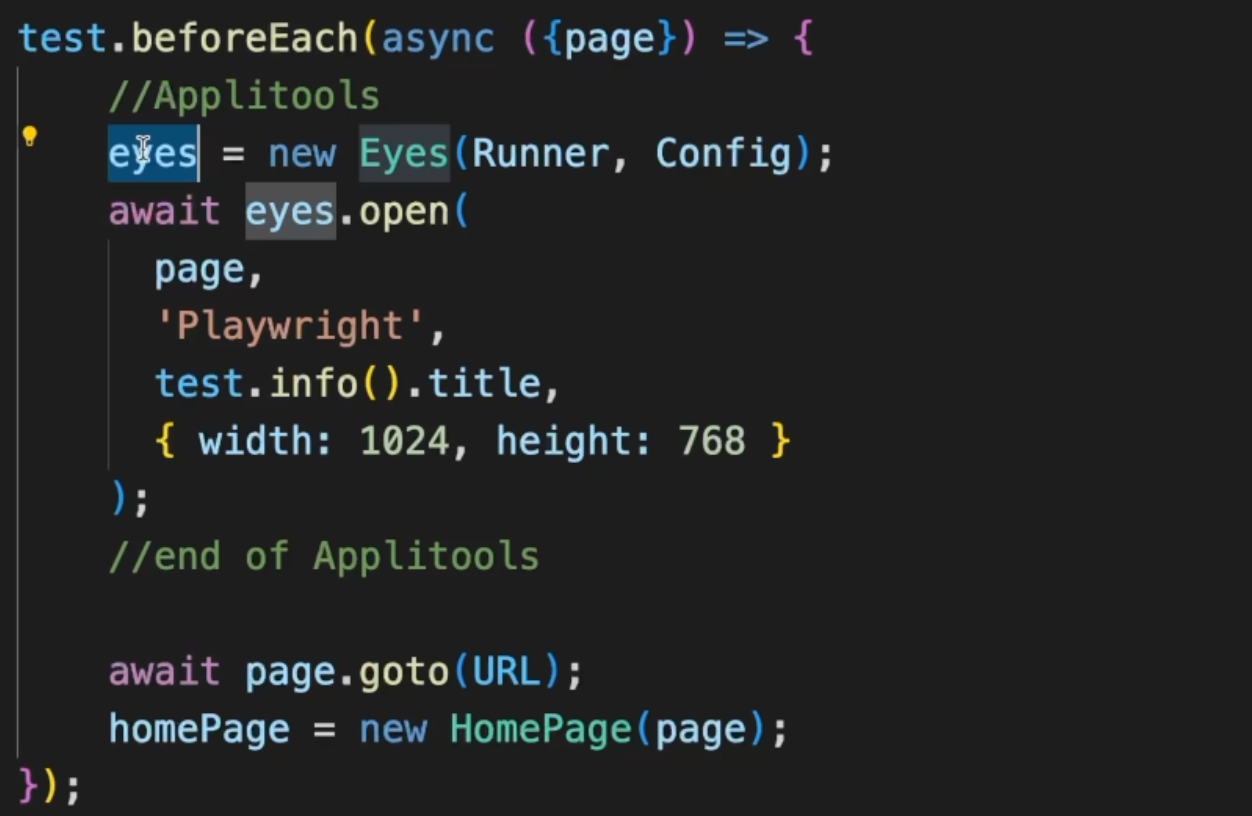
eyes.open will actually start the test execution in Applitools and you need to pass a few objects.
First, it'll be the driver - we'll use the Playwright driver page.
Next, an app name, then the test name, and lastly, the view port.
open also has a few other parameters that you can see by mouse-overing it.
After this, we are ready to start our test.
Just a quick look at the afterEach and the afterAll methods.
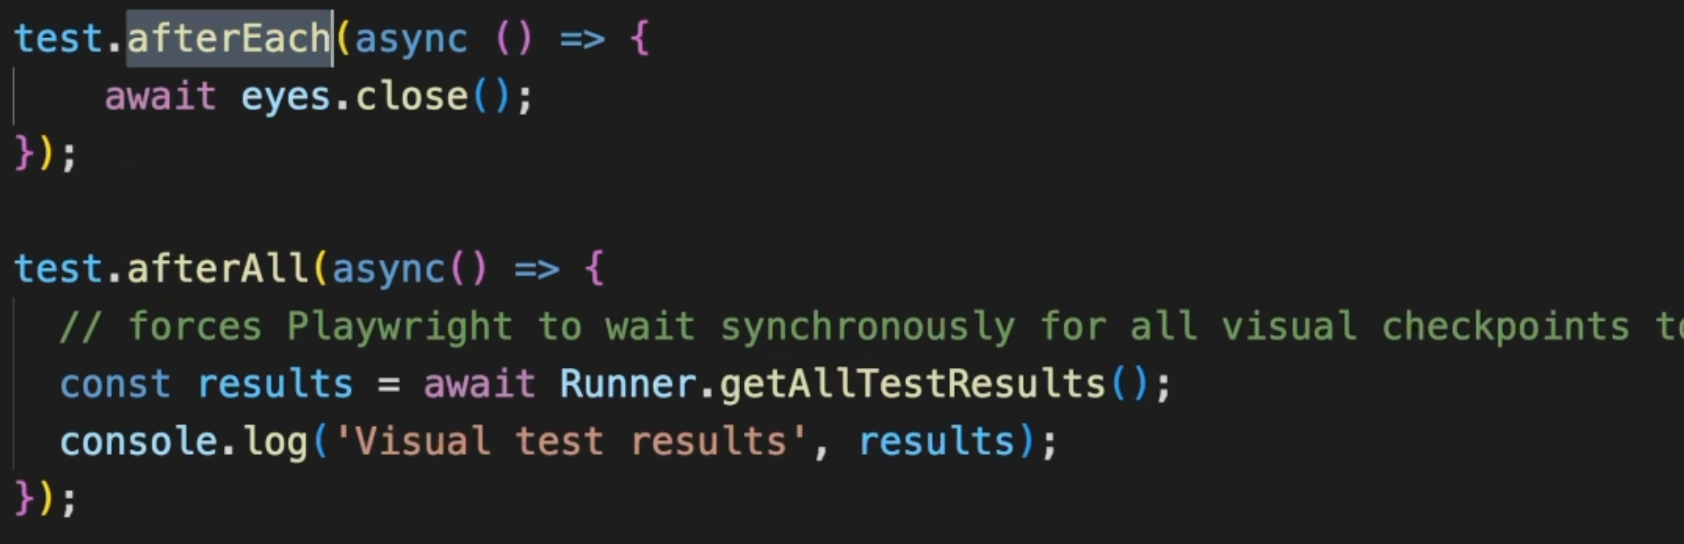
After each execution, as we opened eyes, we also need to close it.
This is a very important step to make sure the session is finished.
After all tests, you can use the runner to get all the results and log into our console.
Now that we have everything set up, let's see how we actually perform an image check.
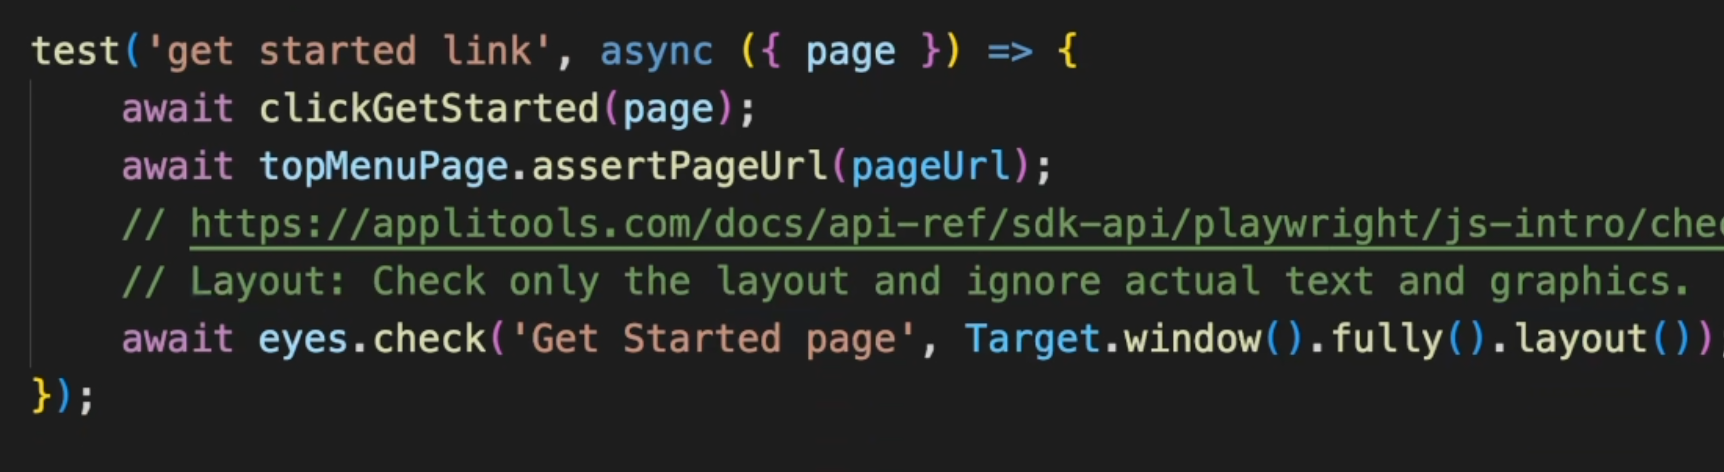
Here in our first test, I have added eyes.check.

You need to pass the page name and the target.
If you pass Target.window, it'll consider only the view port.
But if you pass .fully, it will scroll and take the screenshot of the full page.
You can check more check settings in this URL right here.
With this, Applitools will perform the visual check at exactly this point.
You can see on the next test that I have something similar.
Here, I have .fully().layout() - this will check the layout and it will ignore the content of it - text and graphics.
That's very useful for eCommerce applications where your products will change depending on the time.
Lastly, we also have .fully with ignoreColors.
In this case, it'll check if the layout matches the baseline, but it'll ignore color changes.
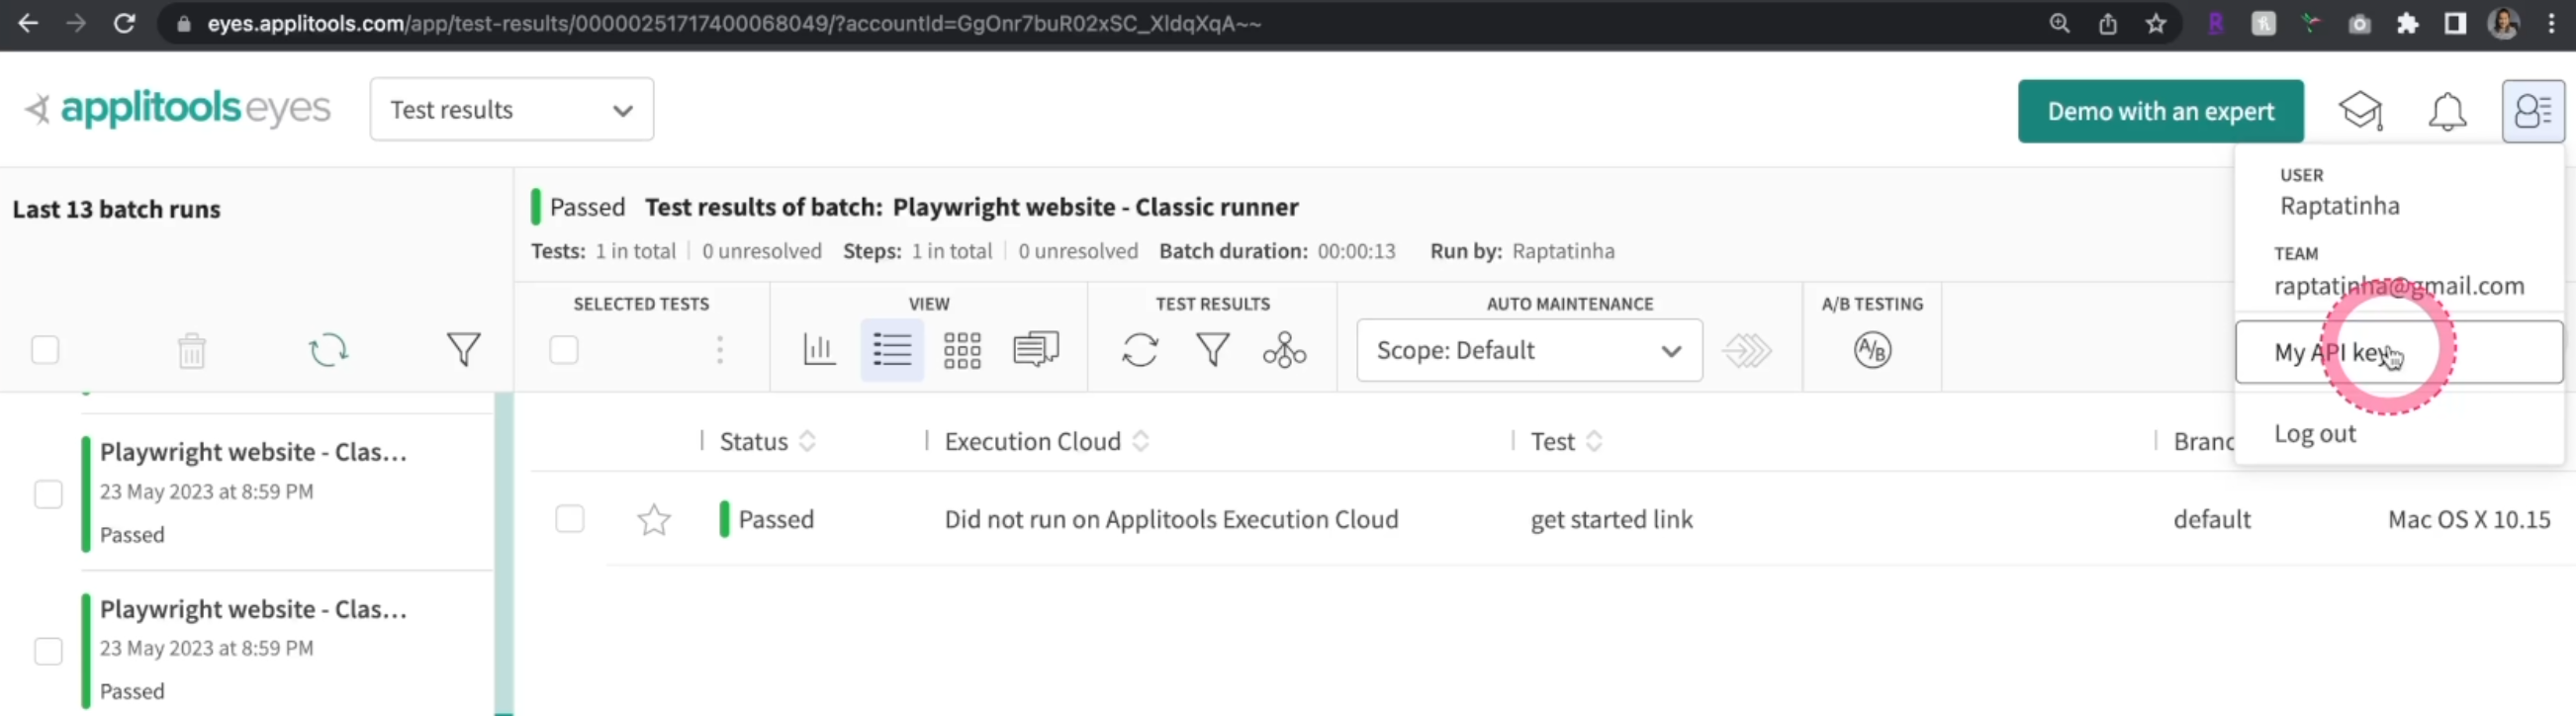
Before running the test, after creating your account, you need to go to your User and click "My API key" to grab your API key.
Once you got it, go to your .env file, create an APPLITOOLS_API_KEY and paste it right here.
Remember, this is a .env.example file, but you need to do it on your .env file.
This is a way to secure your sensitive data.
**Always have passwords and keys inside a **.env file and don't push that to your repository.
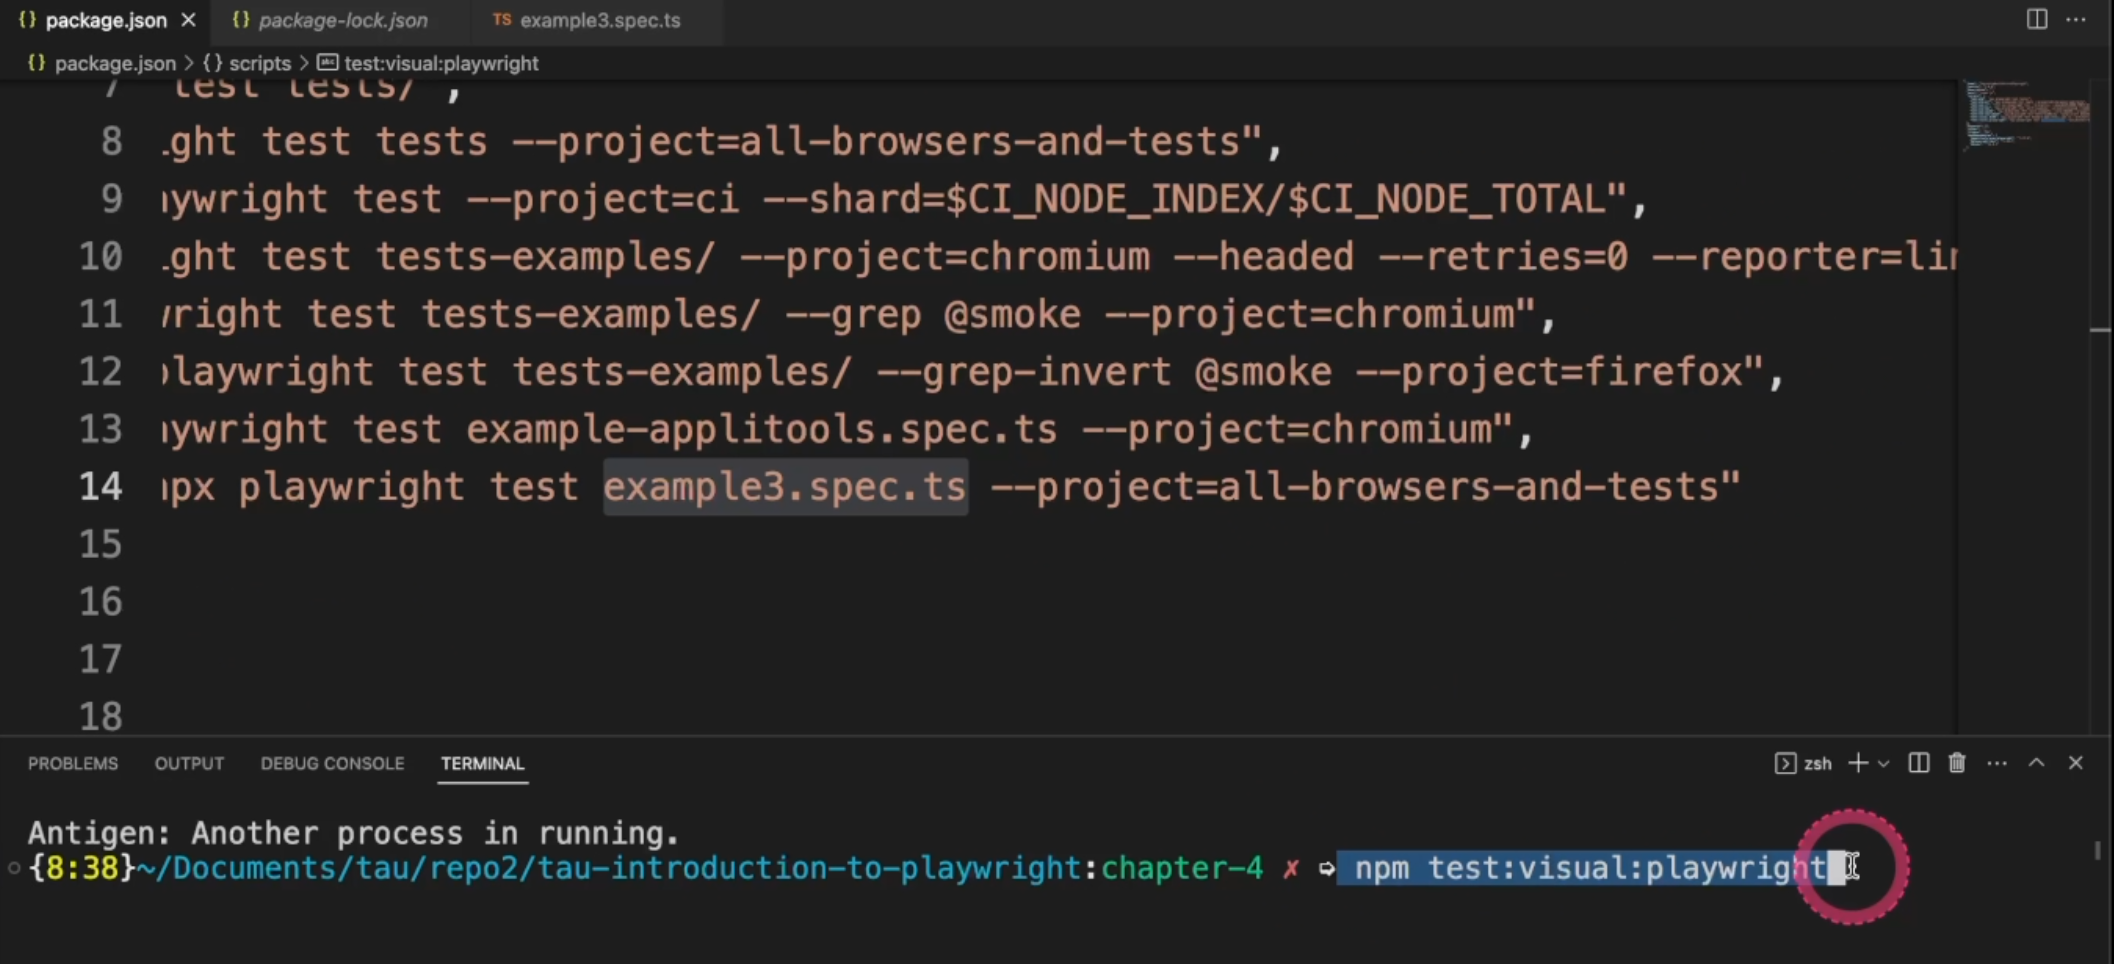
In our package.json, I have created a command test:visual:playwright to run the Applitools tests.
"test:visual:playwright": "npx playwright test example3.spec.ts --project=all-browsers-and-tests"
With that, we'll do npx playwright test, pass the file name, and we are running against all the browsers.
Just type the command in your Terminal, and you see the results in the Applitools Eyes test manager.
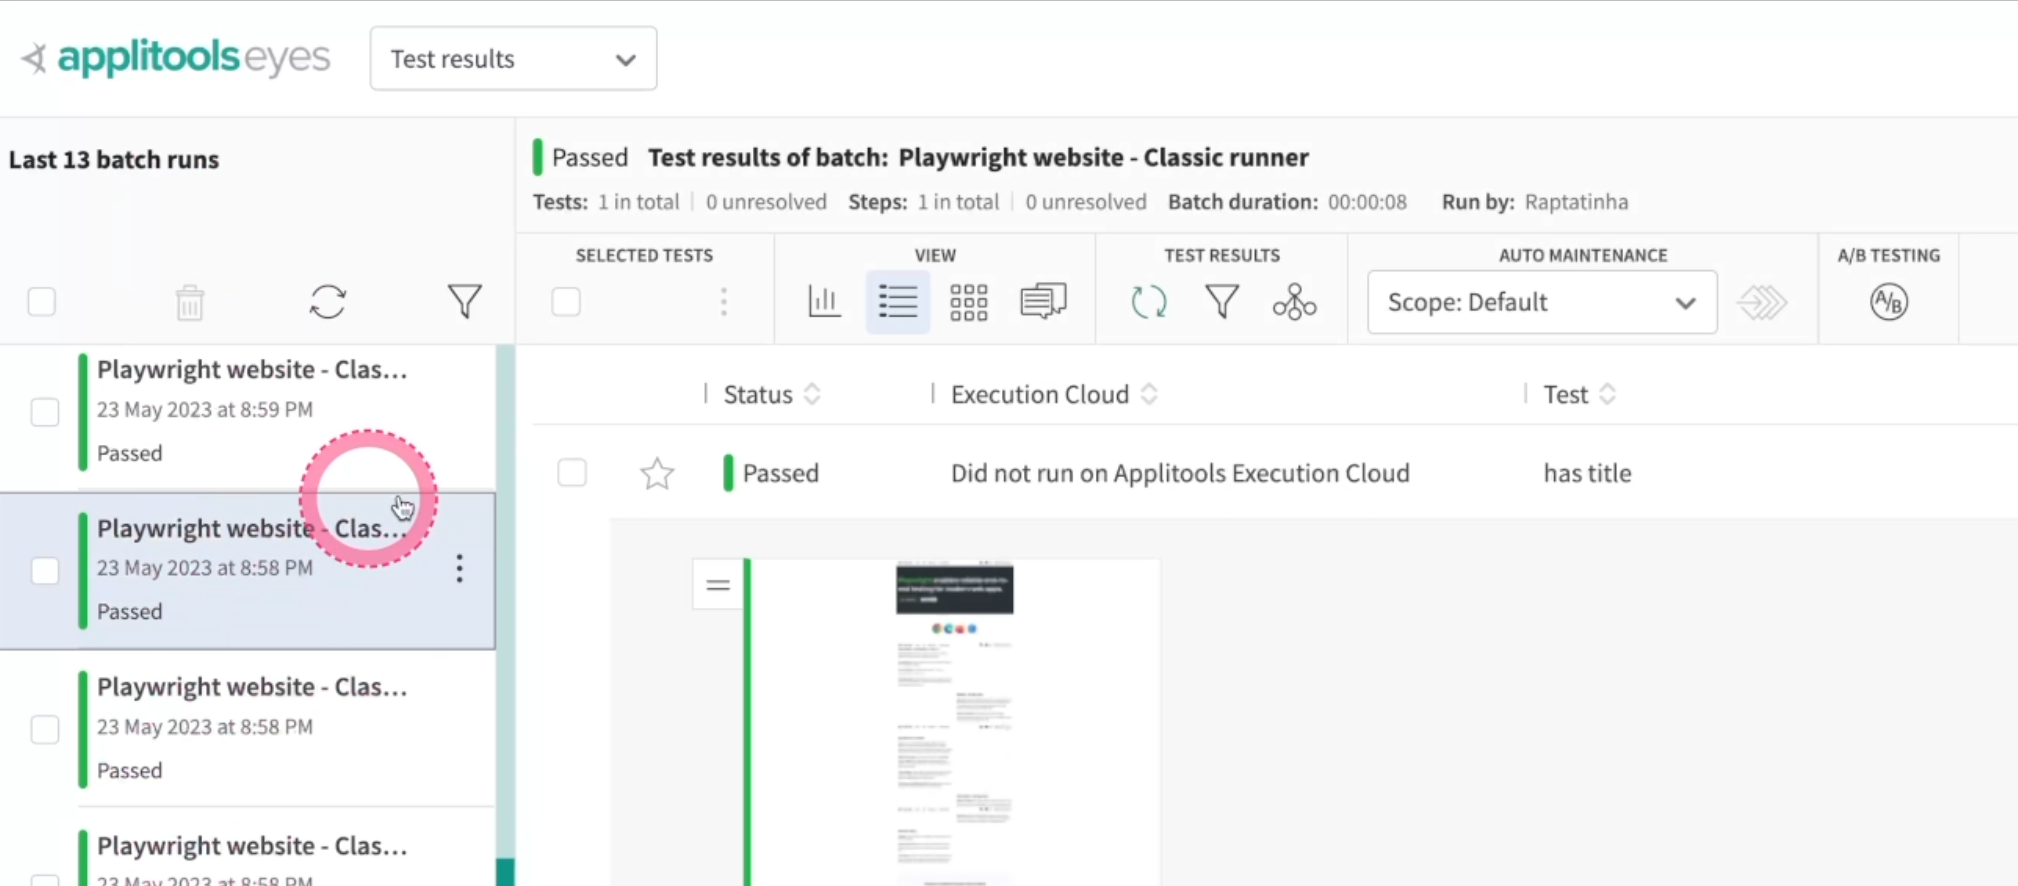
On the left side, you can click on each test execution.
You can see that it's using the "Classic runner", as you named it.
You see the baseline image that it took, and in case of failures, you see the difference here.
You can view by different options, and back to the test, you can see the browser that it took.
Because we are running against all the browsers set up in our Playwright config file, this is what is going to be shown here, and also the different view ports.
To simulate errors, I created the example-applitools.spec.ts file.
It has a similar implementation as we just saw, and we are going to use "demo.applitools.com" as a website to test.
In the test we have two checks - one on the login page, and one at the main page after signing in.
I'll show the application and we will see the results.
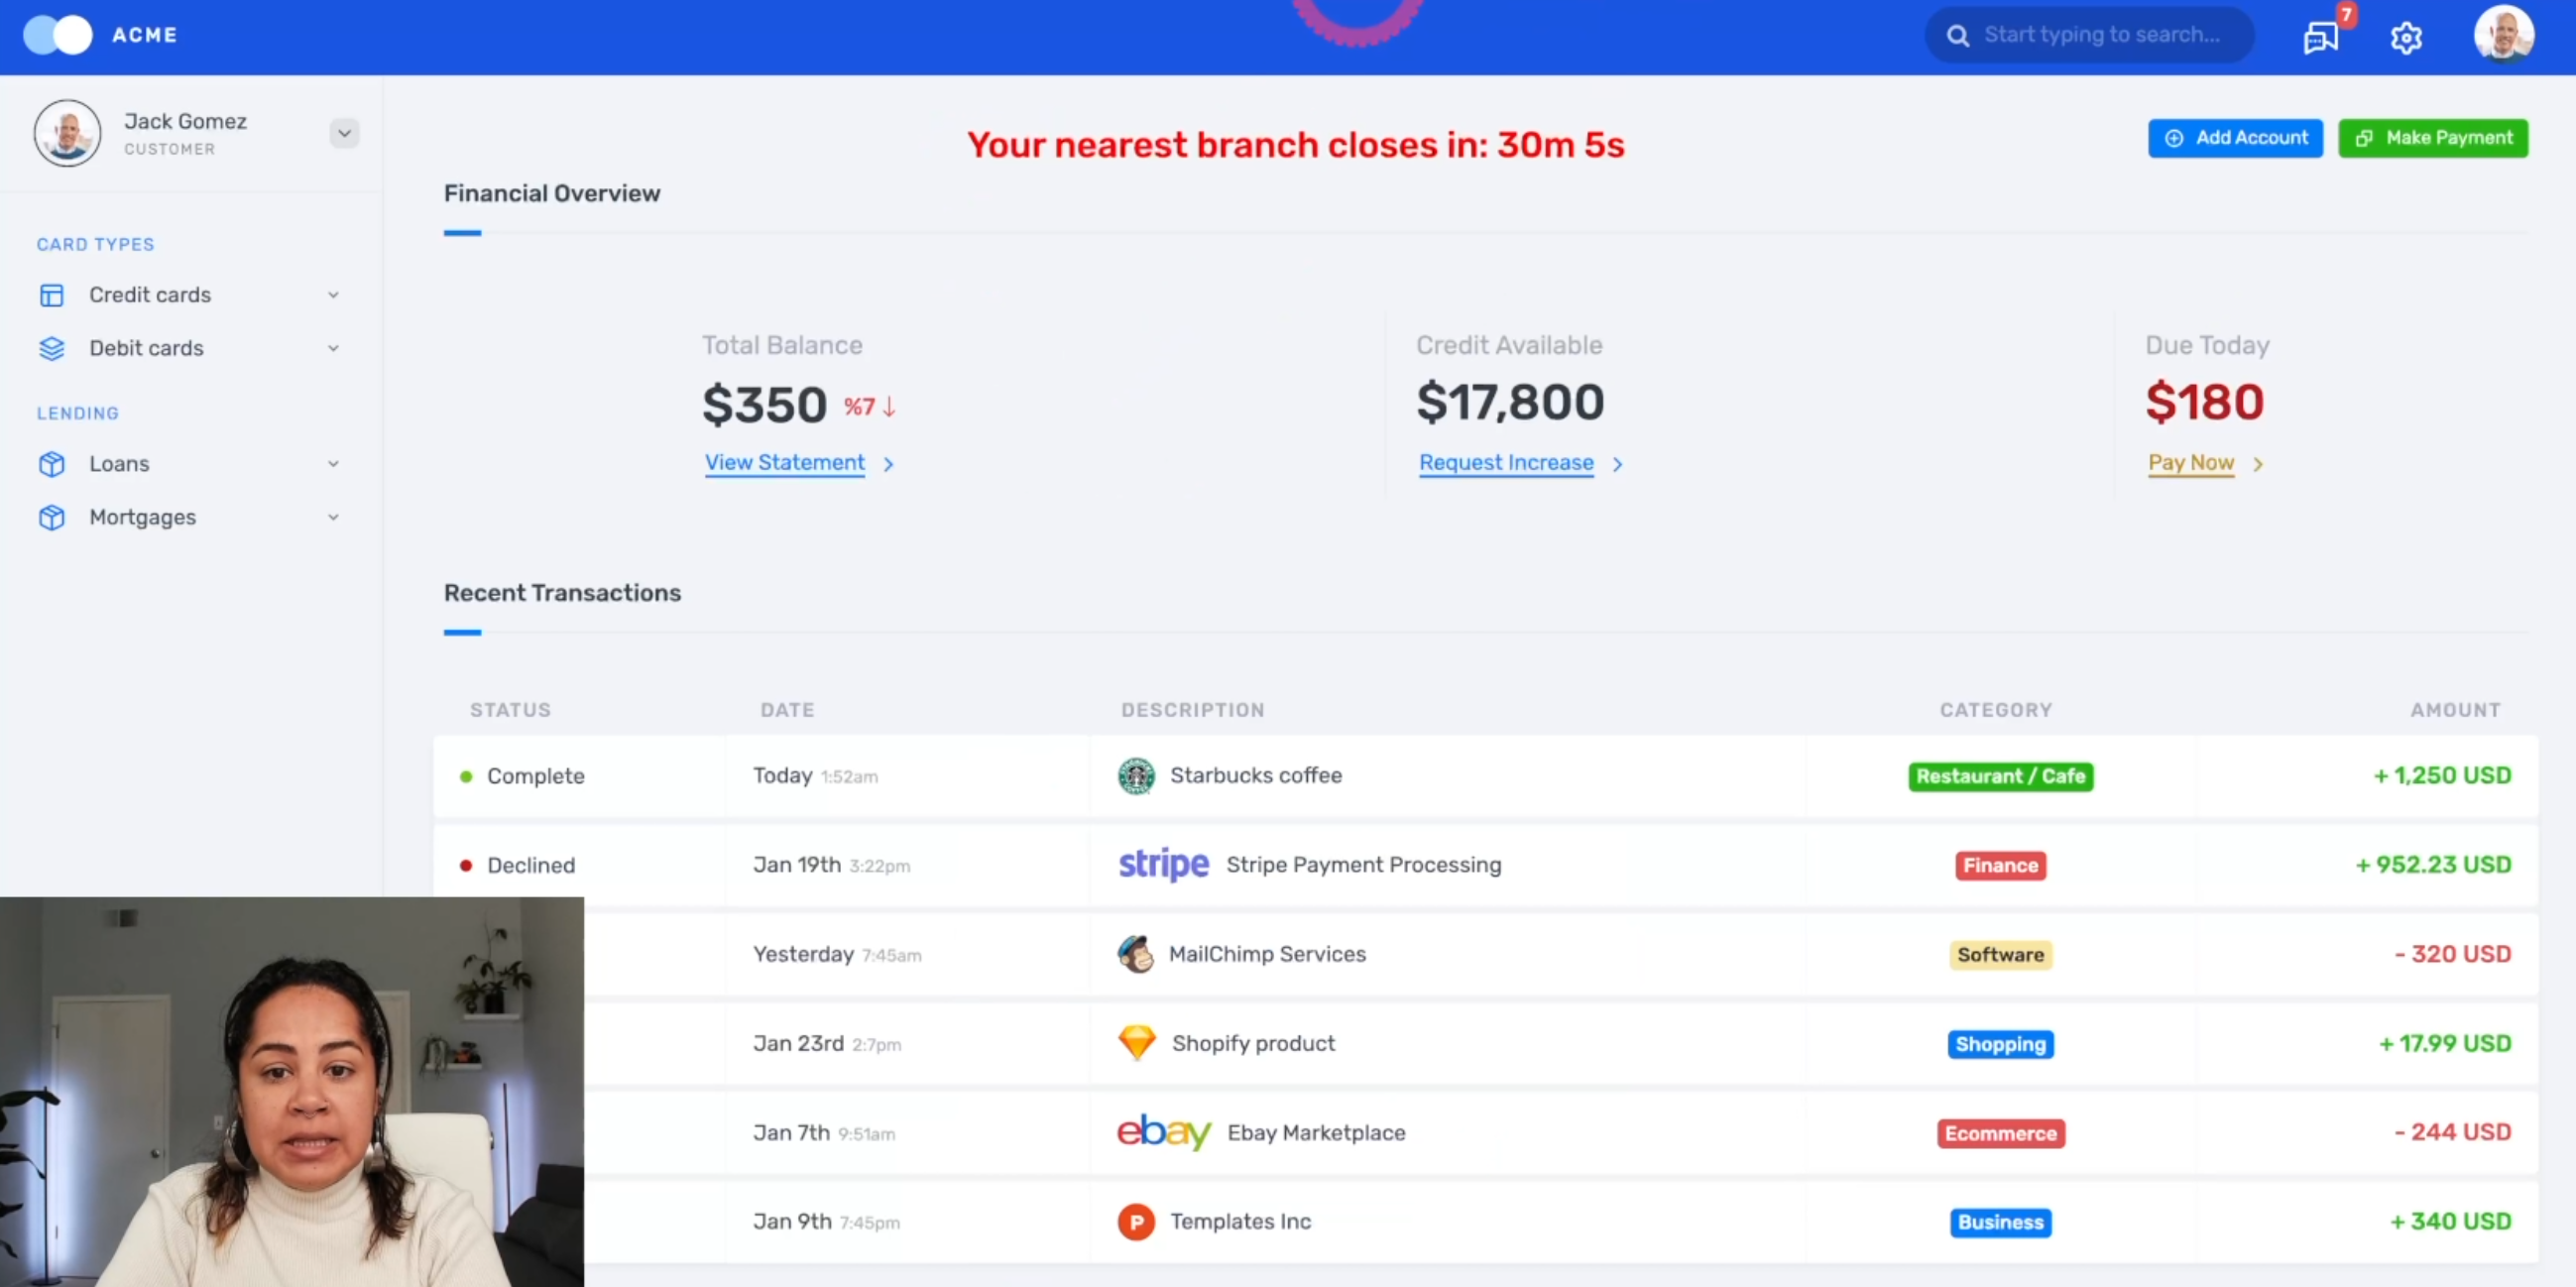
This is the login page of the demo application.
After you sign in, this is what you see.
There is a way to simulate errors on the "Sign In" page by adding "index_v2.html" to the end of the URL.
This way, we'll have a different image than the previous one.
That's what we will do here by changing the URLs.
So, the first time you'll use URL with "demo.applitools.com", and the second time, you'll use it with the "index_v2".
You can take a look at the package.json file and see that there is a new command for that, which is test:visual:acme, and this is running against the example-applitools.spec.ts file.
"test:visual:acme": "npx playwright test example-applitools.spec.ts --project=chromium",
For this test, although we are using the --project=chromium, because we have USE_ULTRAFAST_GRID as true, the test will run against all these browsers by default and Applitools will manage that for us.
Once you're ready, type that command in your Terminal and we'll see the results.
After running the test twice, once with the first URL, and second with the second URL, we'll see that the login page failed, as expected.
You can click on the image and you see why it failed, highlighted here.
You can even click the "Highlight Diffs" icon to make sure you see the differences.
You can see previous and after, compared to the baseline and you can even see both at the same time, so you know what the differences are.
If your application changed and you are ready to accept the new page, you can click the "thumbs up" and it will save the new baseline.
If it's really an issue, you can click "thumbs down" and it will consider it as an error.
Again, there is way more you can do in Applitools.
I invite you to explore all the functionalities and be familiar with everything that it has to offer.
I'm so happy we made it to this point. Congratulations, we are almost there.
Friendly reminder to take a look at the extra exercises and extra resources below and good luck with the quiz.
I'll see you in the next chapter. Happy testing.
Resources
- Introduction to Playwright - GitHub repository - Branch 4
- Chapter 4 - Extra Exercises
- Chapter 4 - Extra Resources
