

Transcripted Summary
In this final chapter, we're going to be talking about Newman, Postman's command line runner which we can use to generate automated test runs.
We can do that from the command line itself or through a CI/CD tool such as Jenkins.
If you want to know how to do that, please see Amber Race's Test Automation University course.
However, I know a lot of you will be doing this course without access to a CI/CD tool, so I wanted to show you how to set up GitHub actions to tell your tests to run each time code is updated on your GitHub repo.
We'll use GitHub actions to automatically run a Newman command that will execute any tasks in your Postman collection and output those to a report.
The great thing about the Postman tool is all the amazing community built add-ins that can be freely used.
So, the last thing we'll do on this course is update our GitHub workflow to use Danny Dainton's free HTML extra report, which is awesome.
You can gauge if this is something that you'd like to use in the future.
Now there is a bit of setup here, but as we've used GitHub in the earlier chapter, I'm hoping that you're reasonably familiar with it and have your GitHub account already set up.
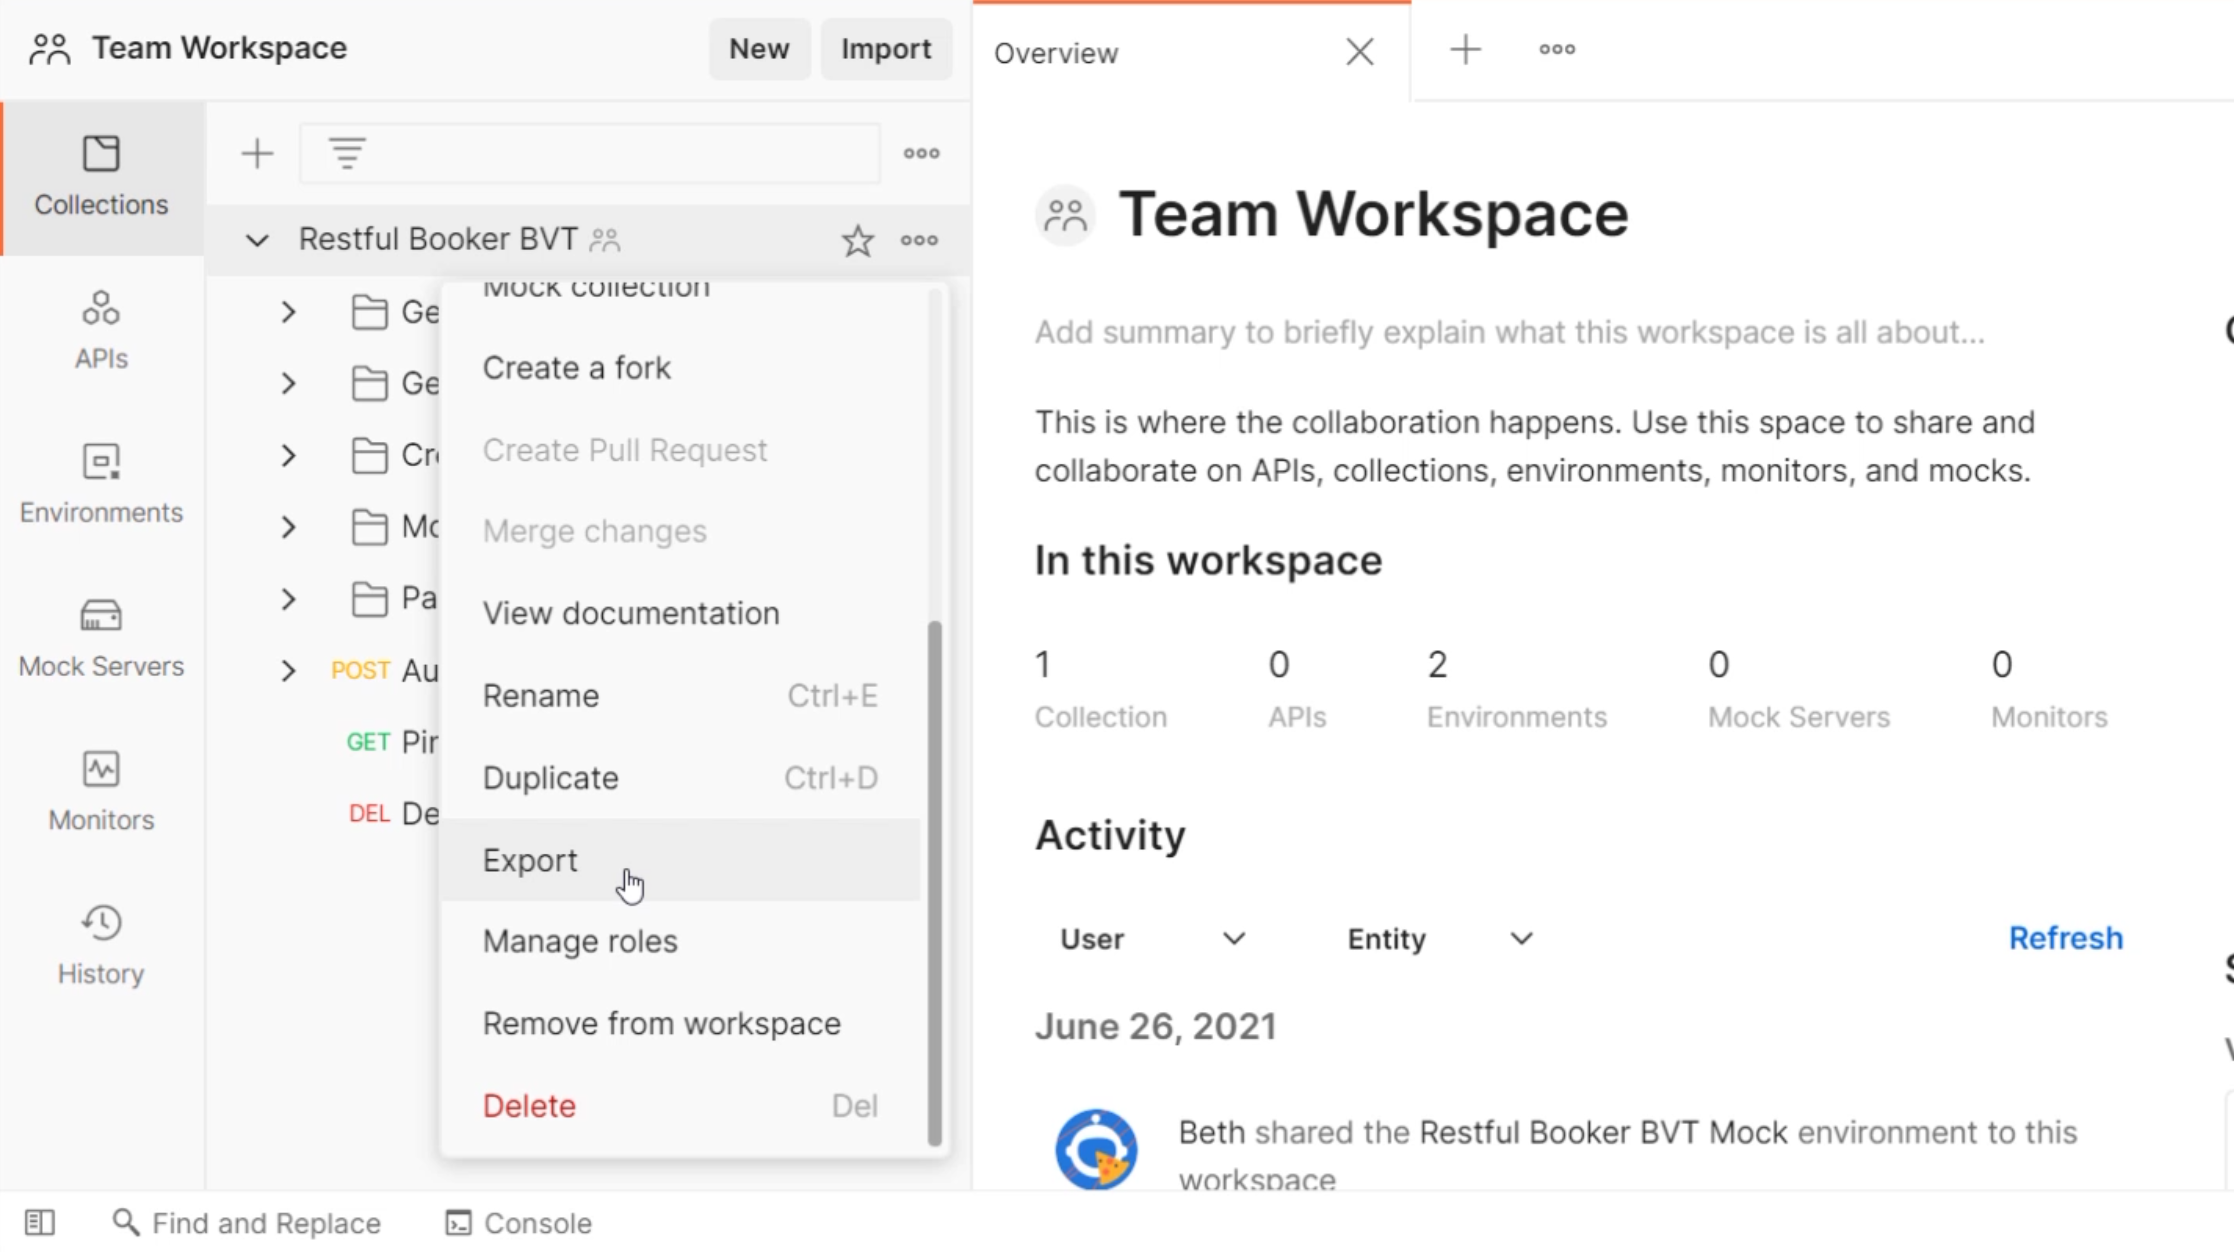
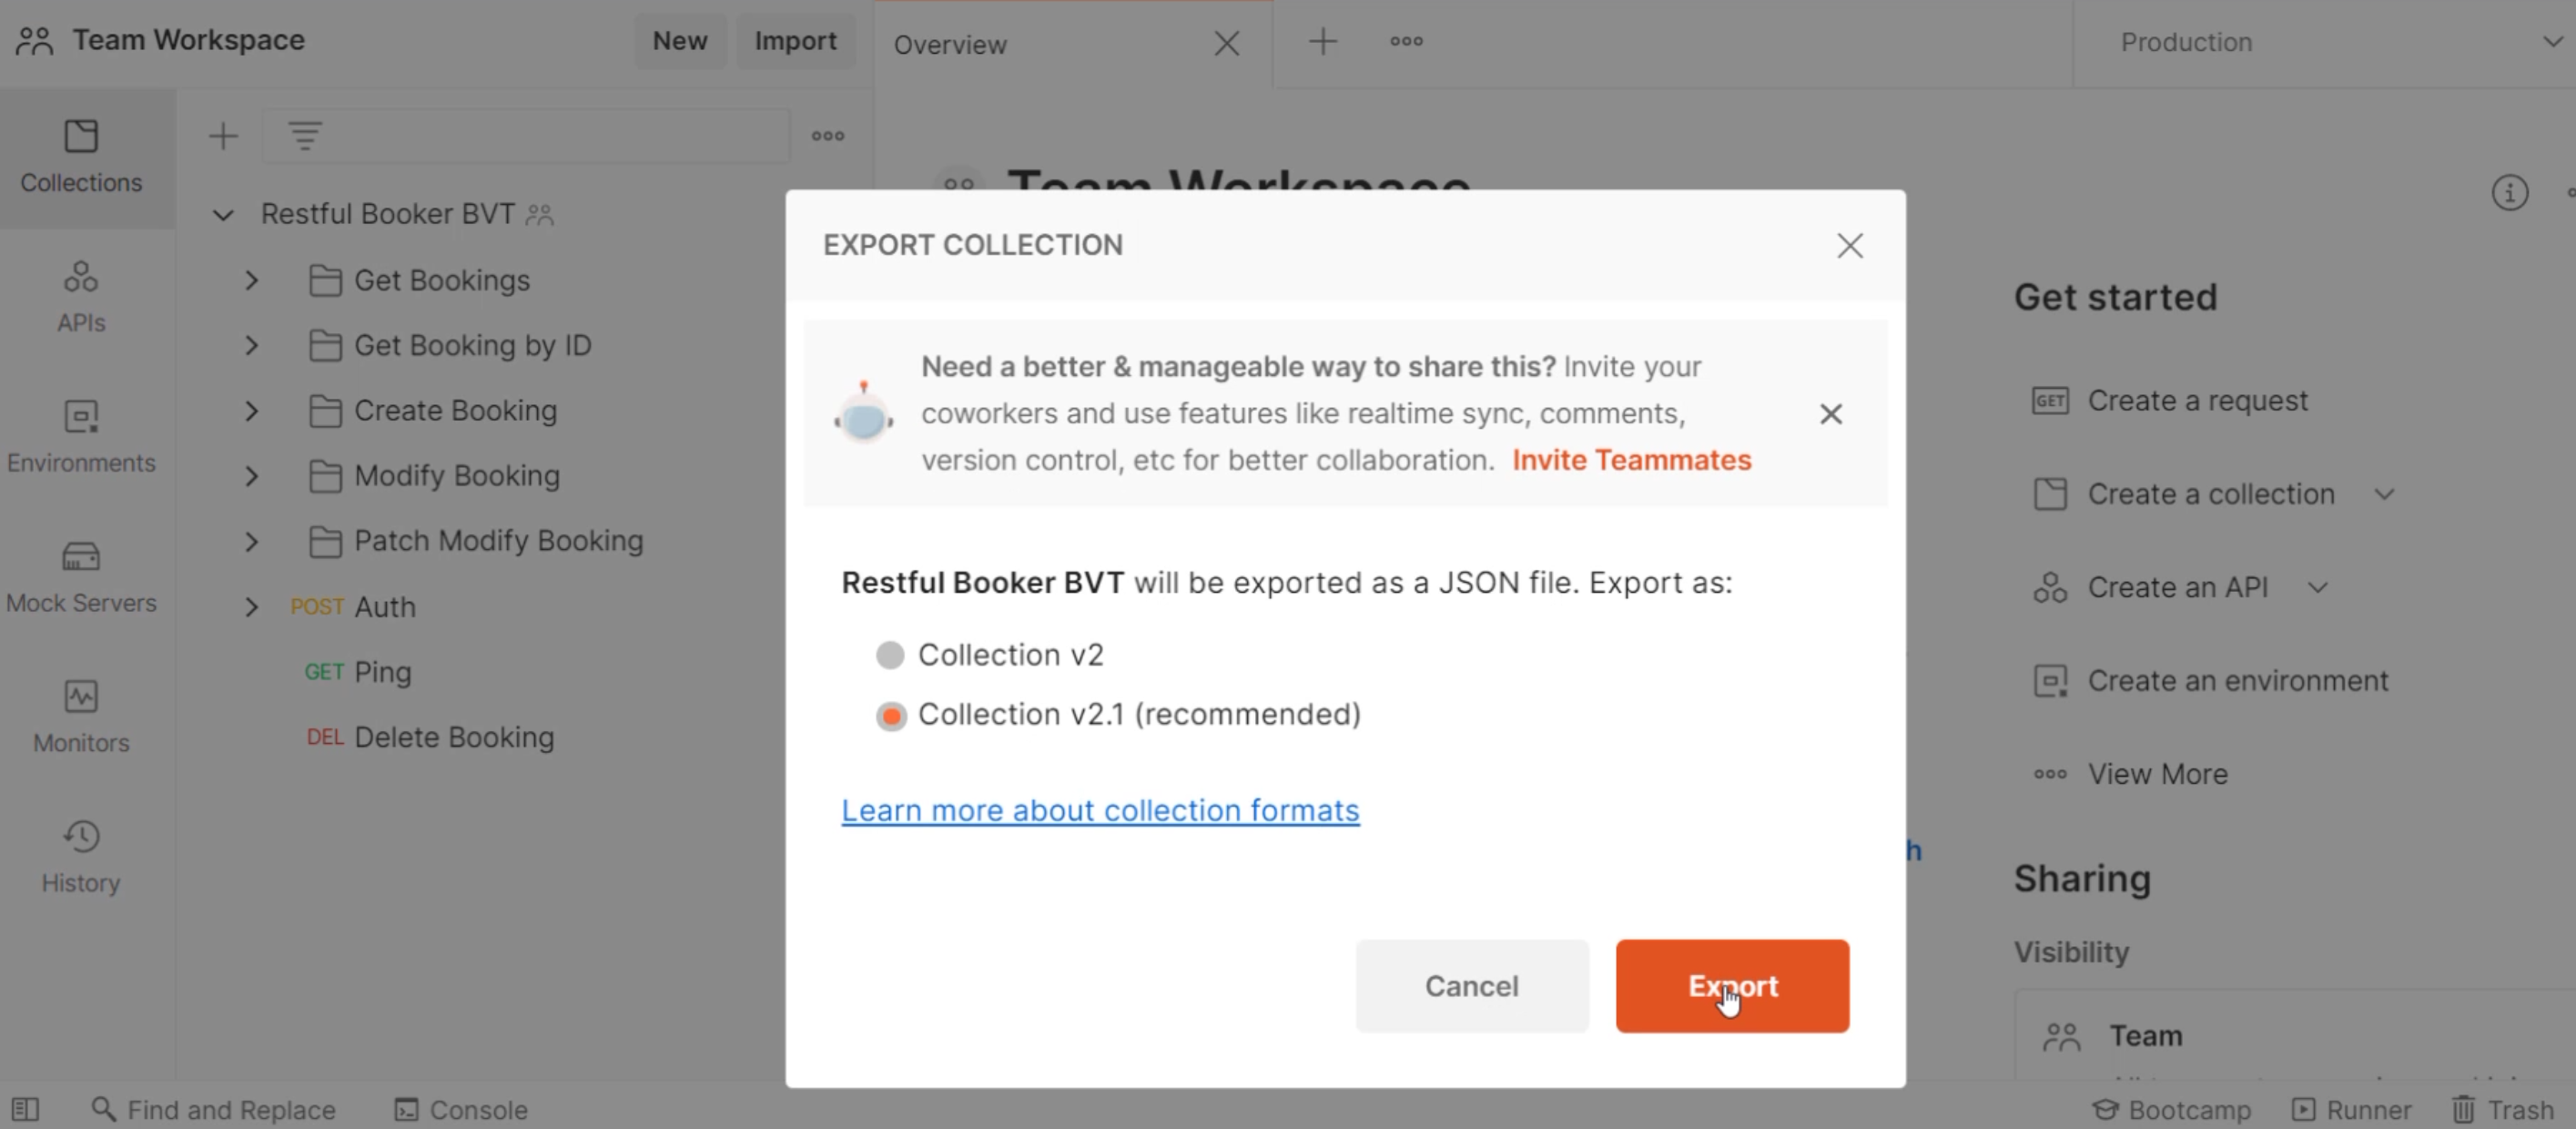
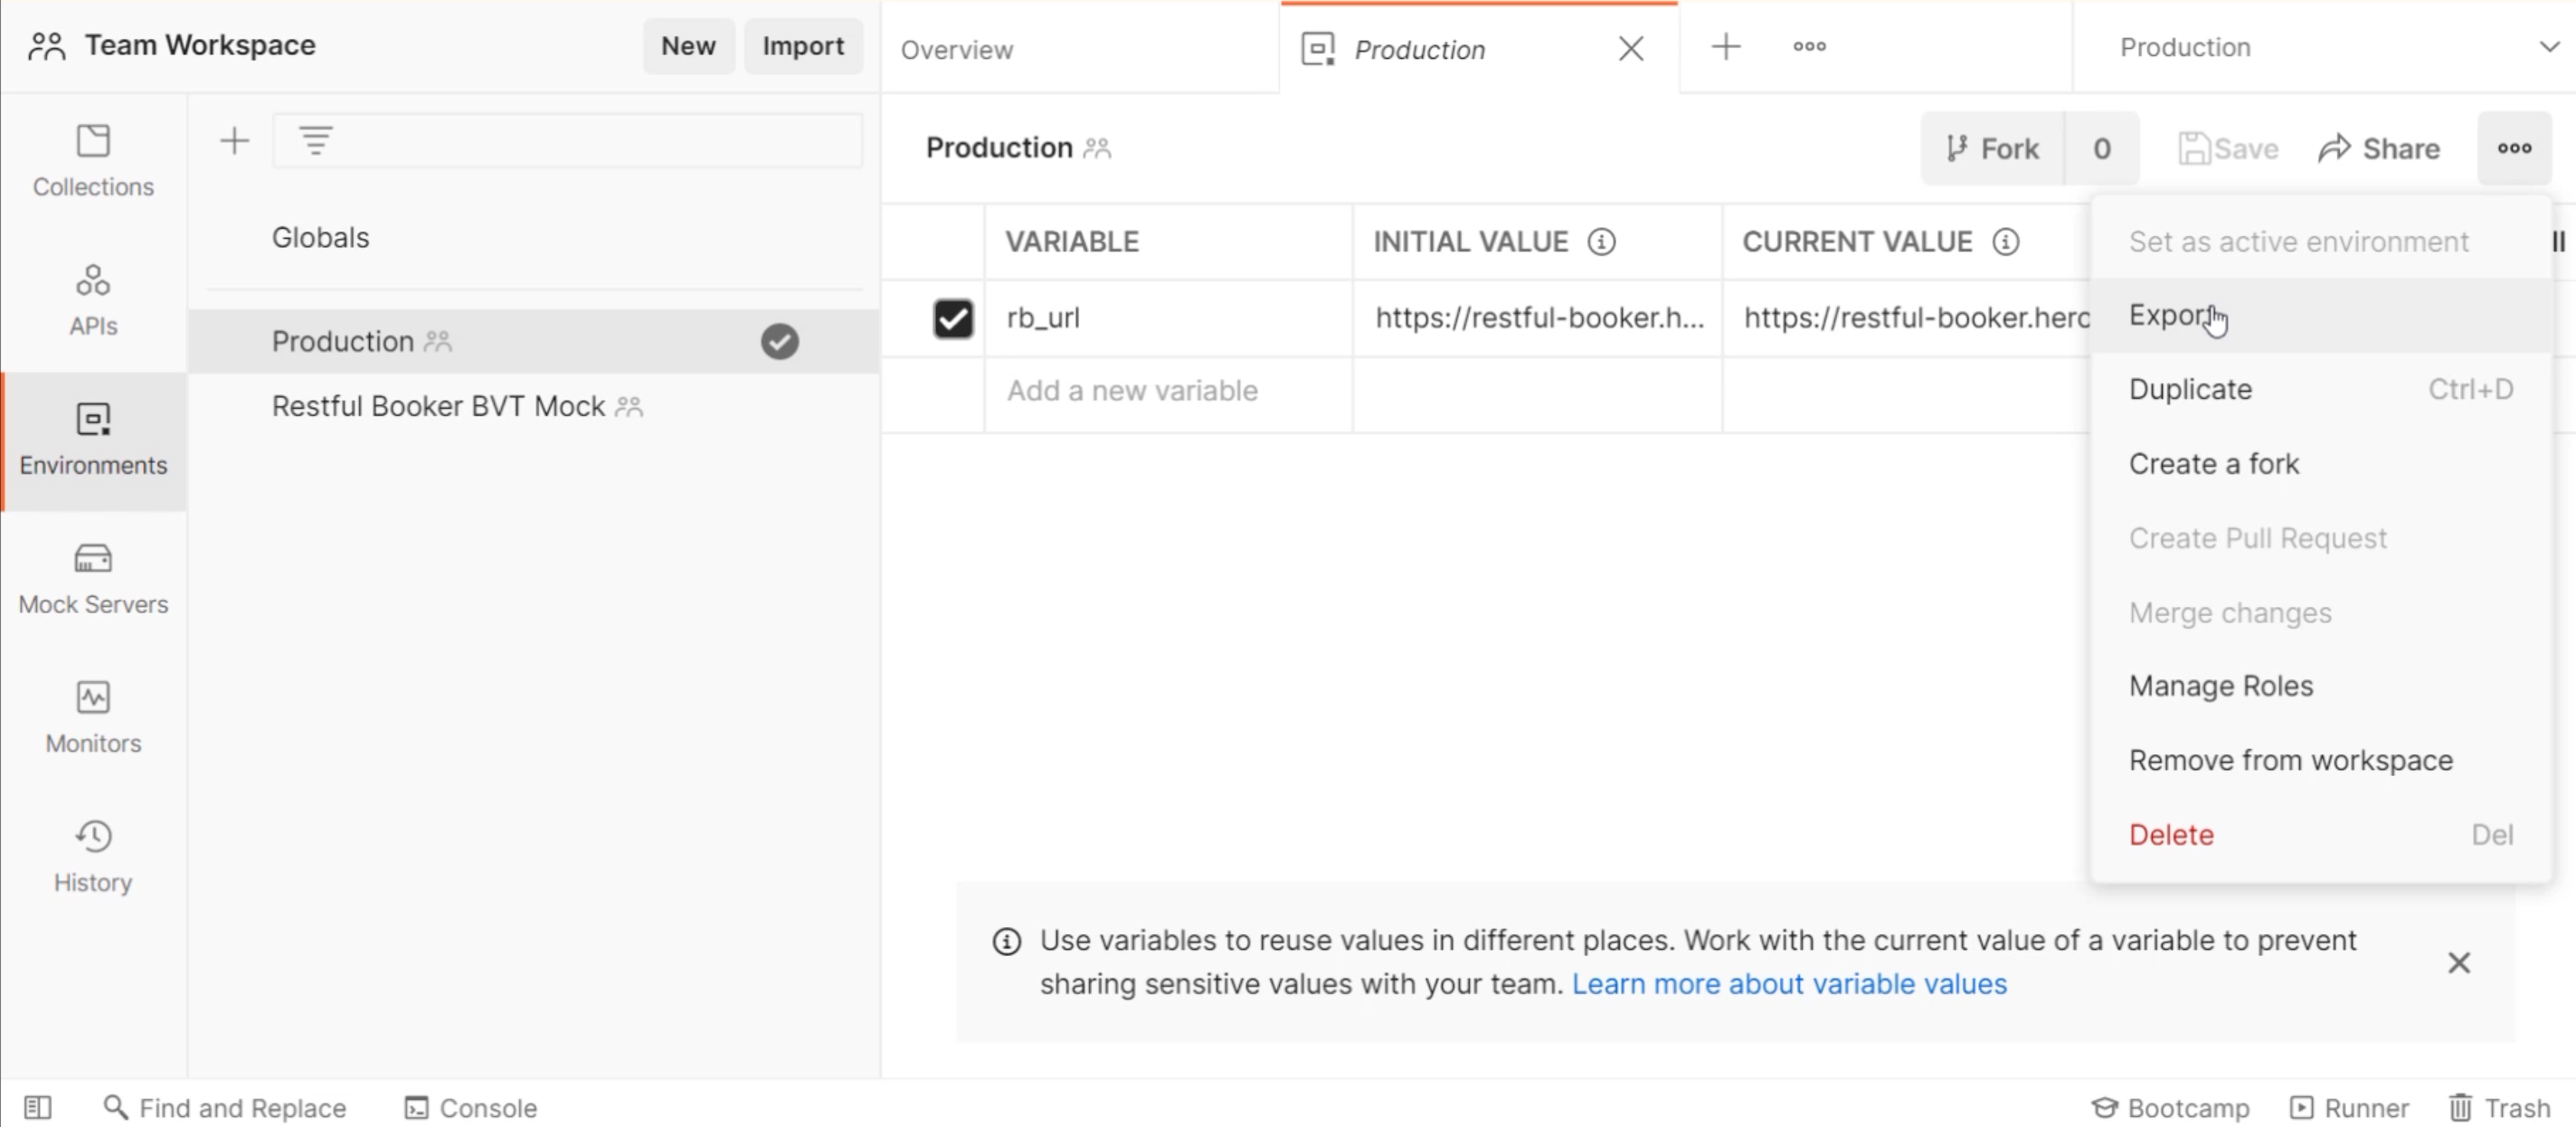
The first thing we'll need to do is add our Postman collection and environment into its own GitHub repo.
To do that, we export the Postman collection and environment, which we know from the earlier chapter, is now stored in our Teams folder in Postman.
Now, I use a free tool called GitHub Desktop, which, for someone who always prefers to use the UI like myself, it really takes the stress out of understanding GitHub for me.
You might want to pause this video while you download the GitHub Desktop app, which you can do for free from desktop.github.com.
But this isn't essential if you're comfortable using GitHub without it from the command line, for example.
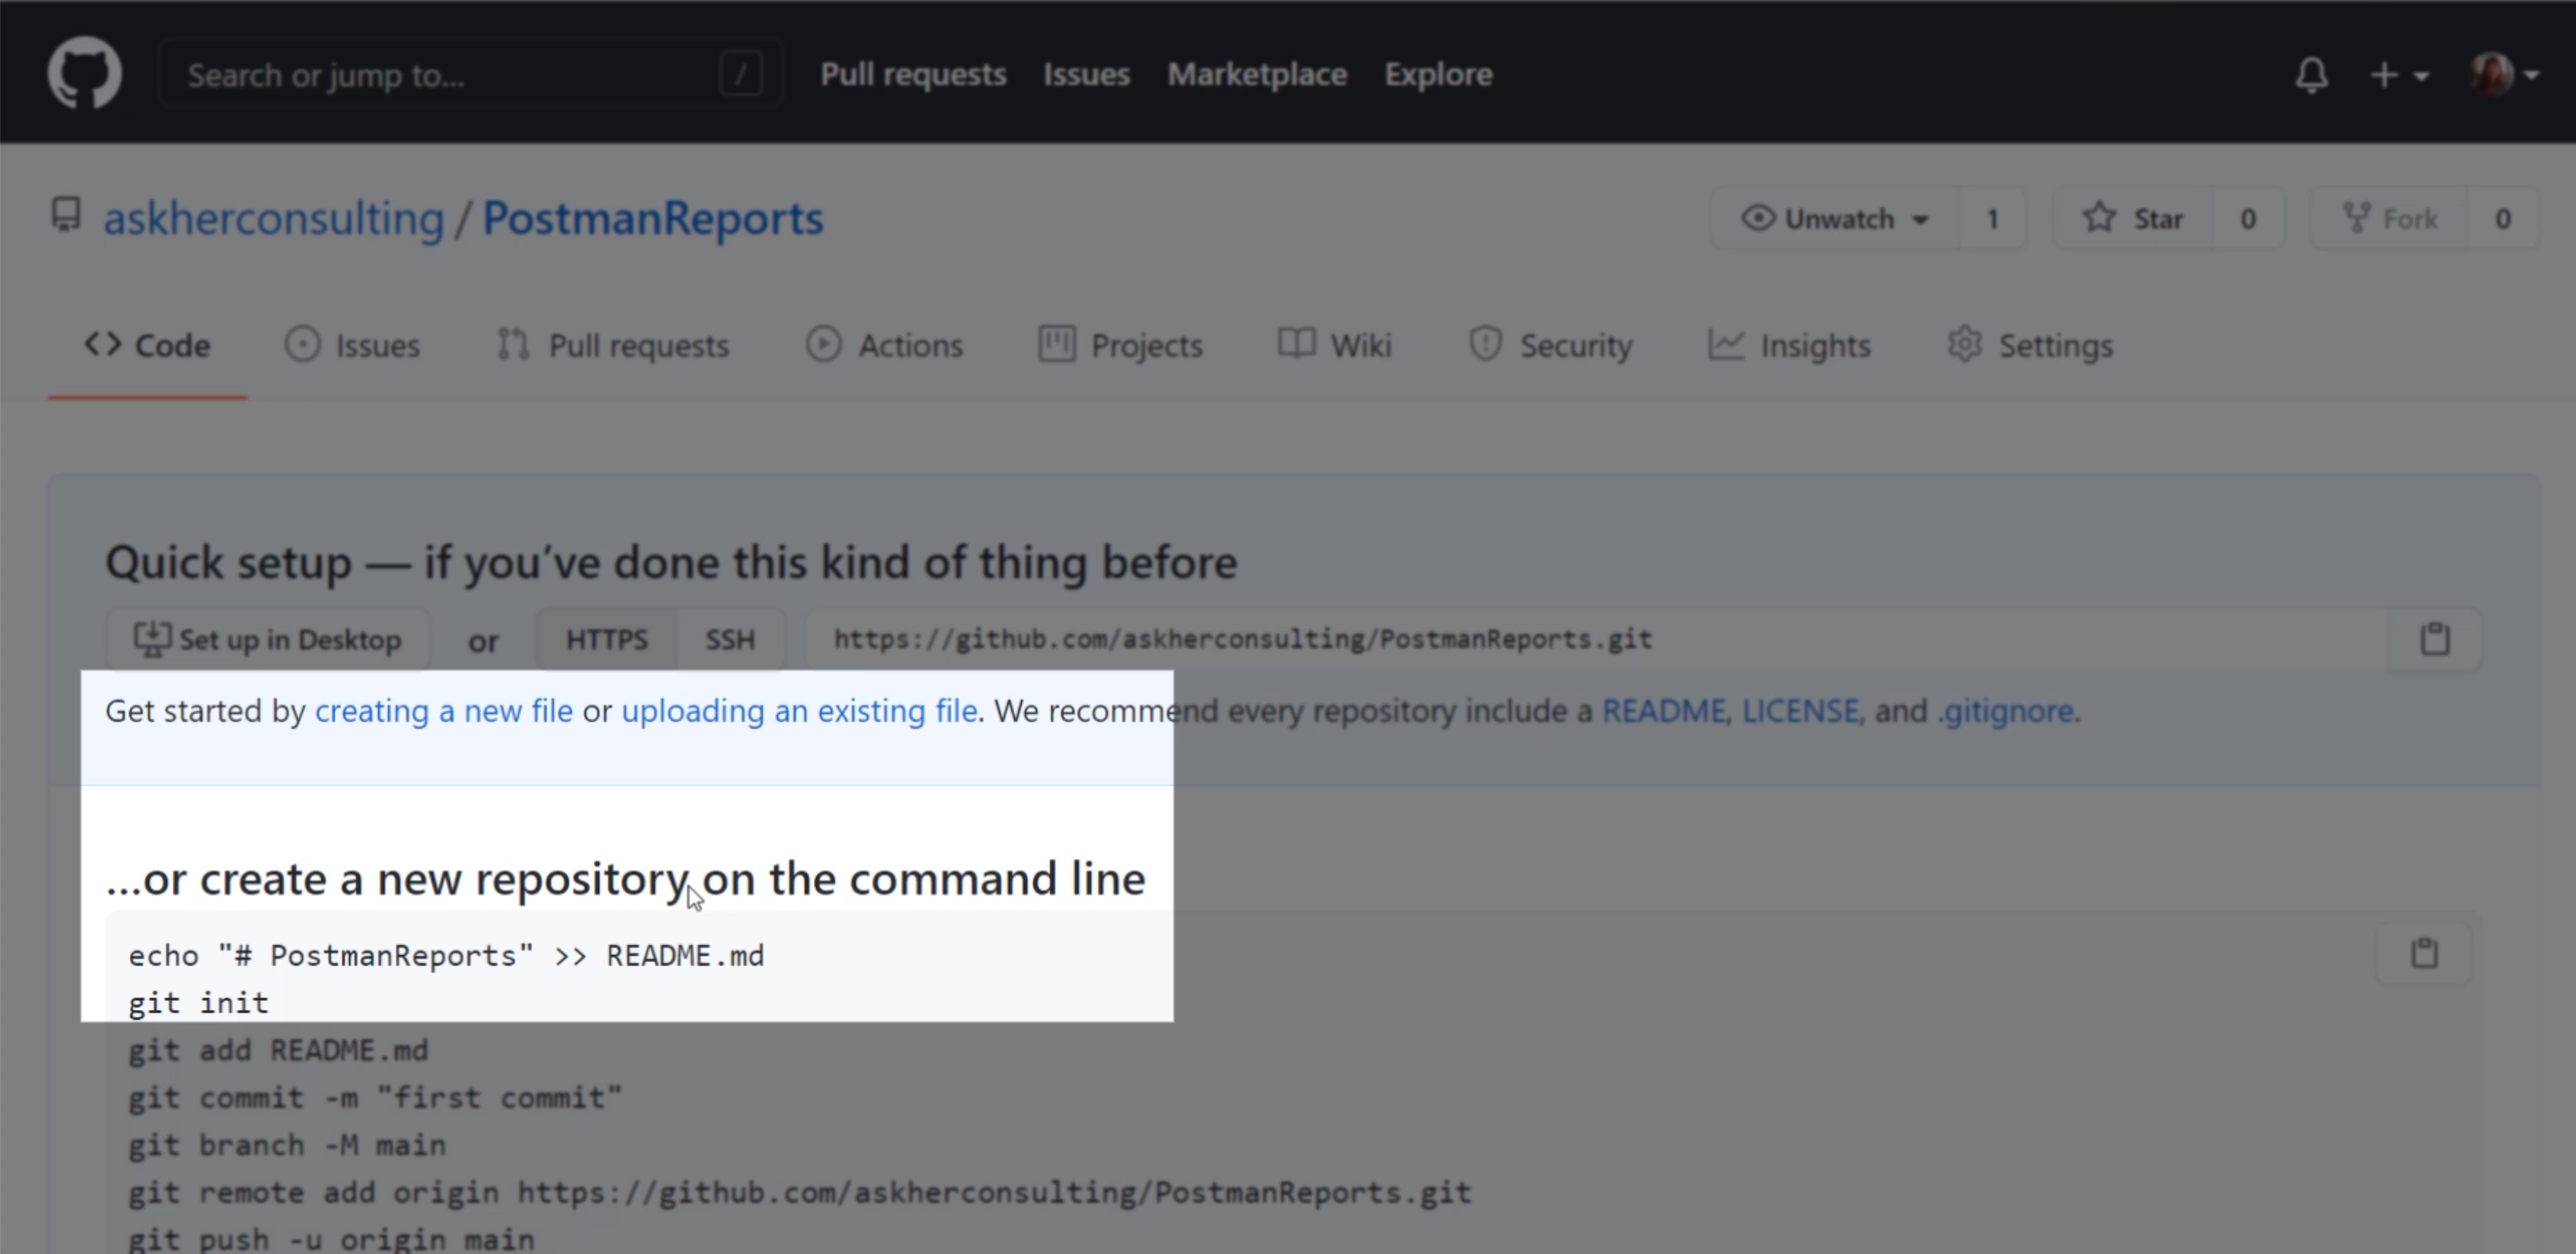
Once we have that, the next step is to go into GitHub and create a new repo.
Open your own GitHub account and go to "Repositories", click "New" and enter a name for your repo and add a description if you'd like one.
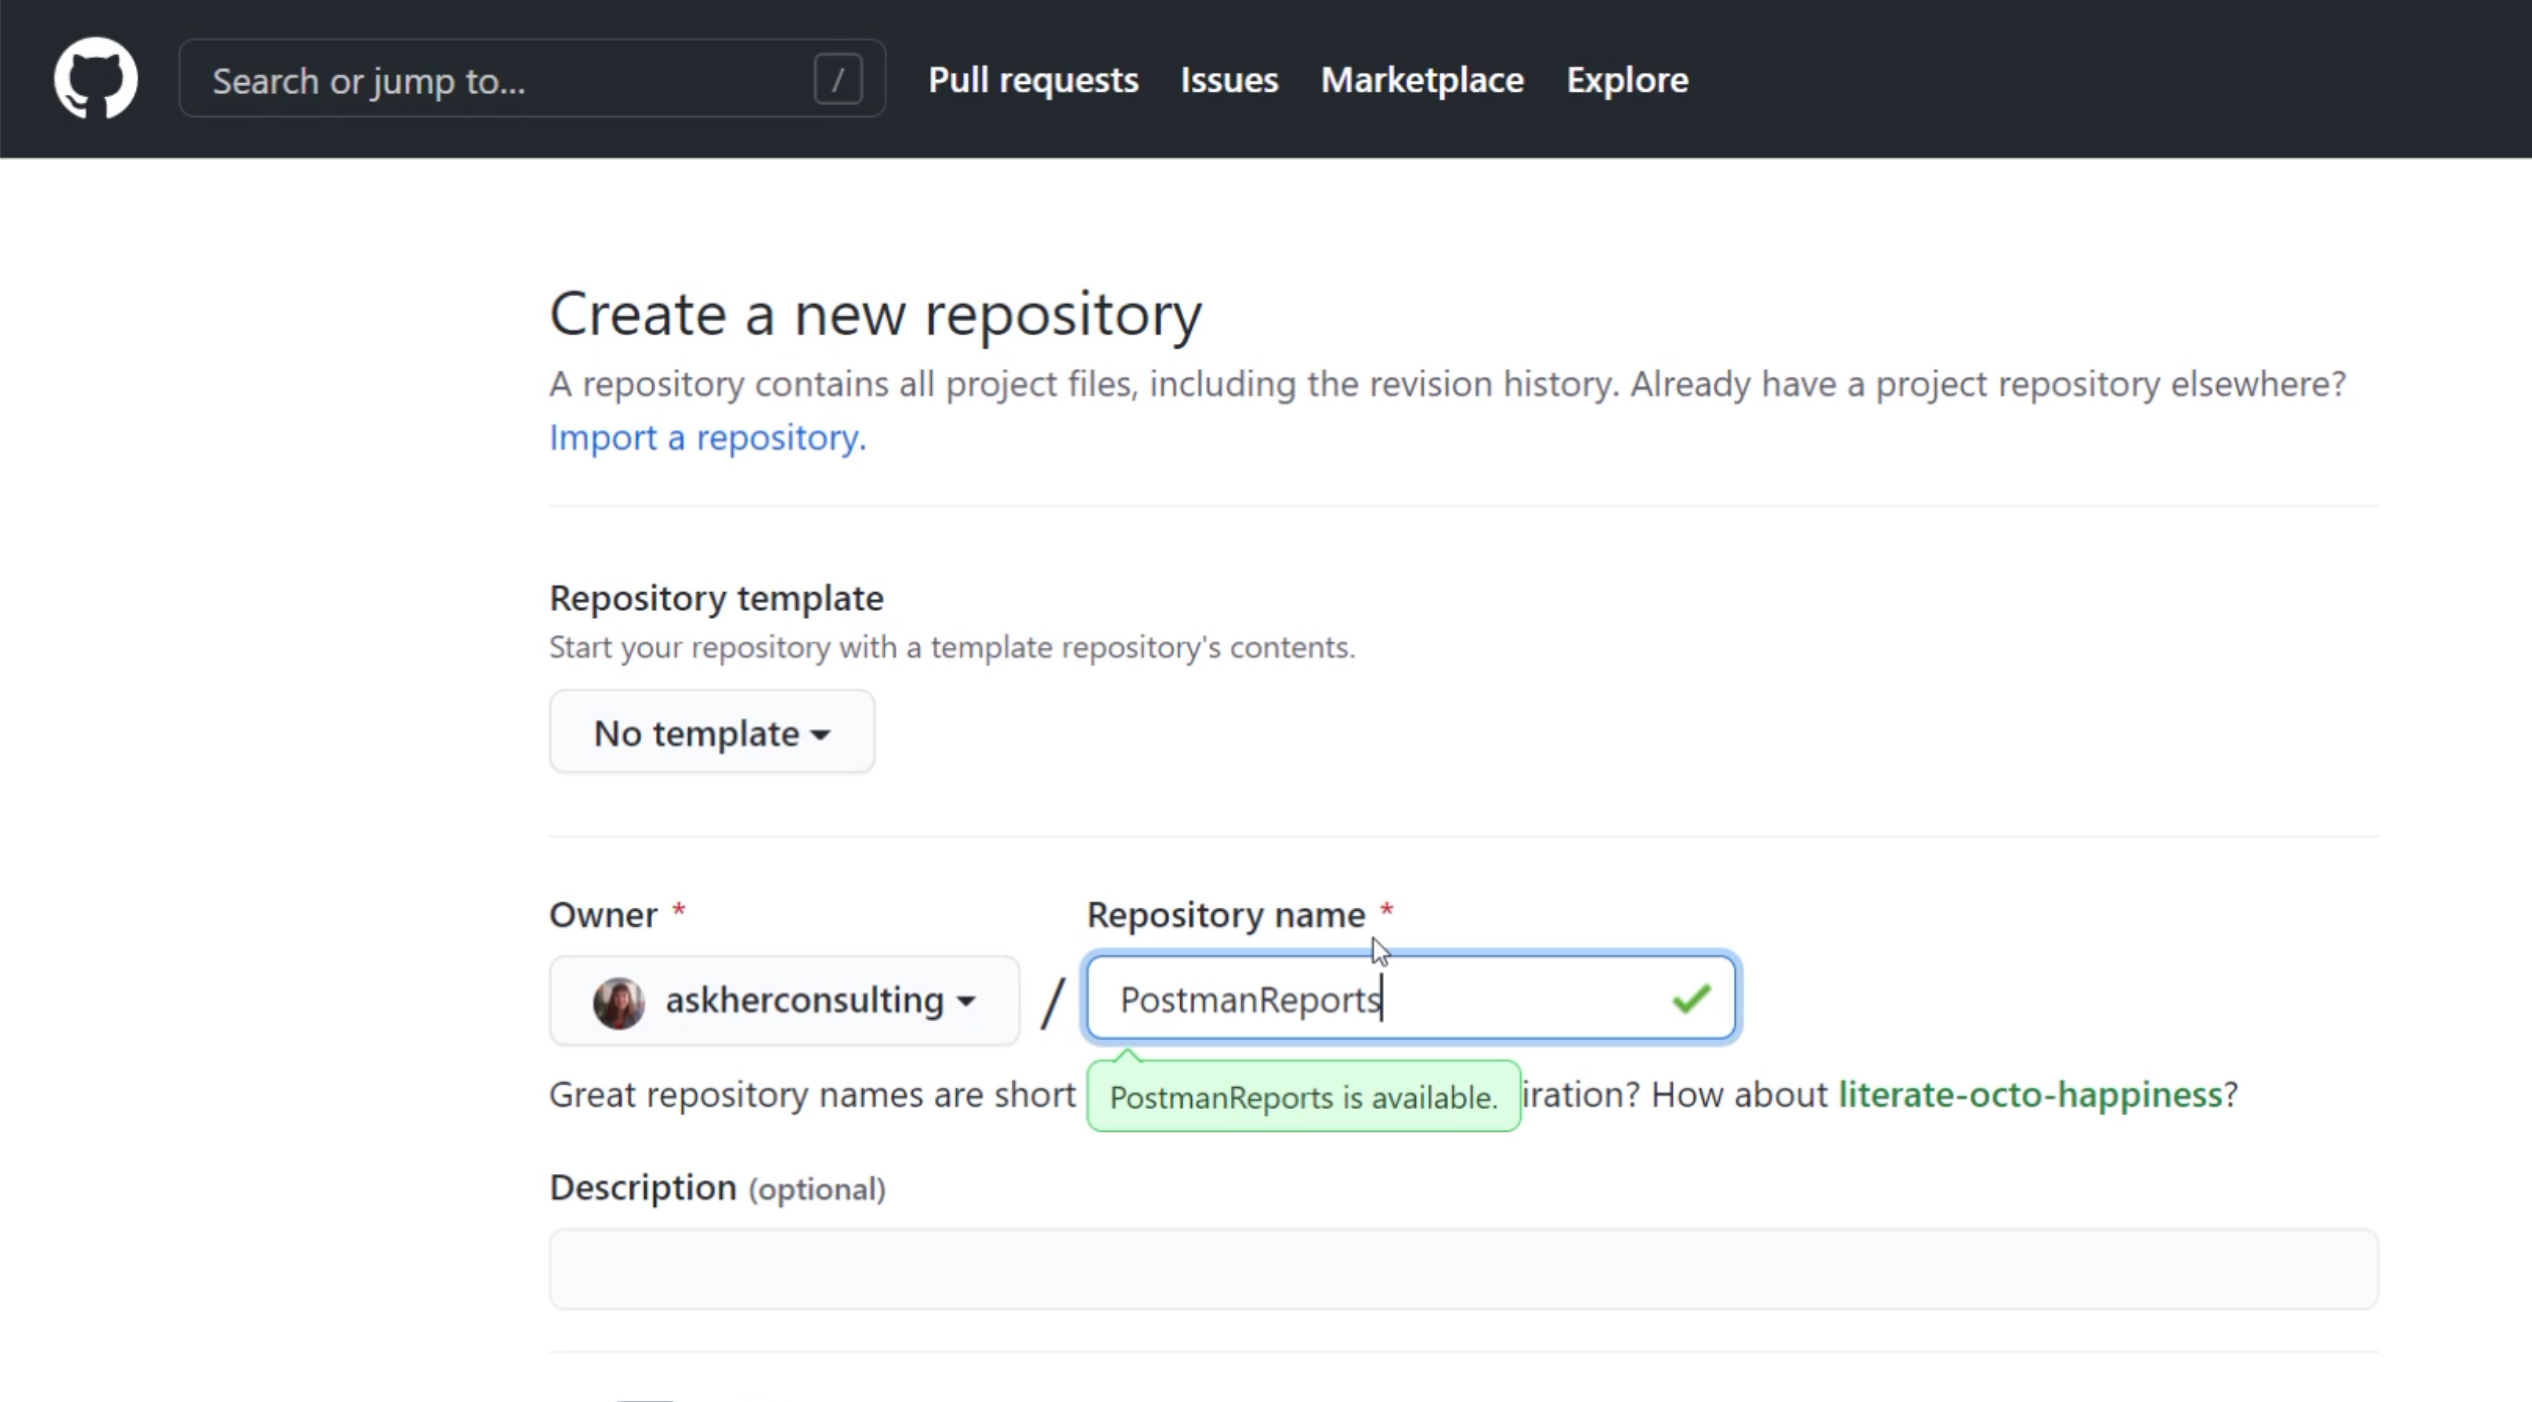
Generally, we tend to add README files to our repos, which I'd encourage you to do, but for speed, I'll just go ahead and click "Create".
Now, we have our template in GitHub and we need to create a new repo on our local machine.
As you can see, you can use the command line for this, but I'm going to use GitHub Desktop to do this the easy way.
Click the "Open GitHubDesktop.exe" button.
In the GitHub Desktop app itself, we can see the URL for our GitHub repo and the local path.
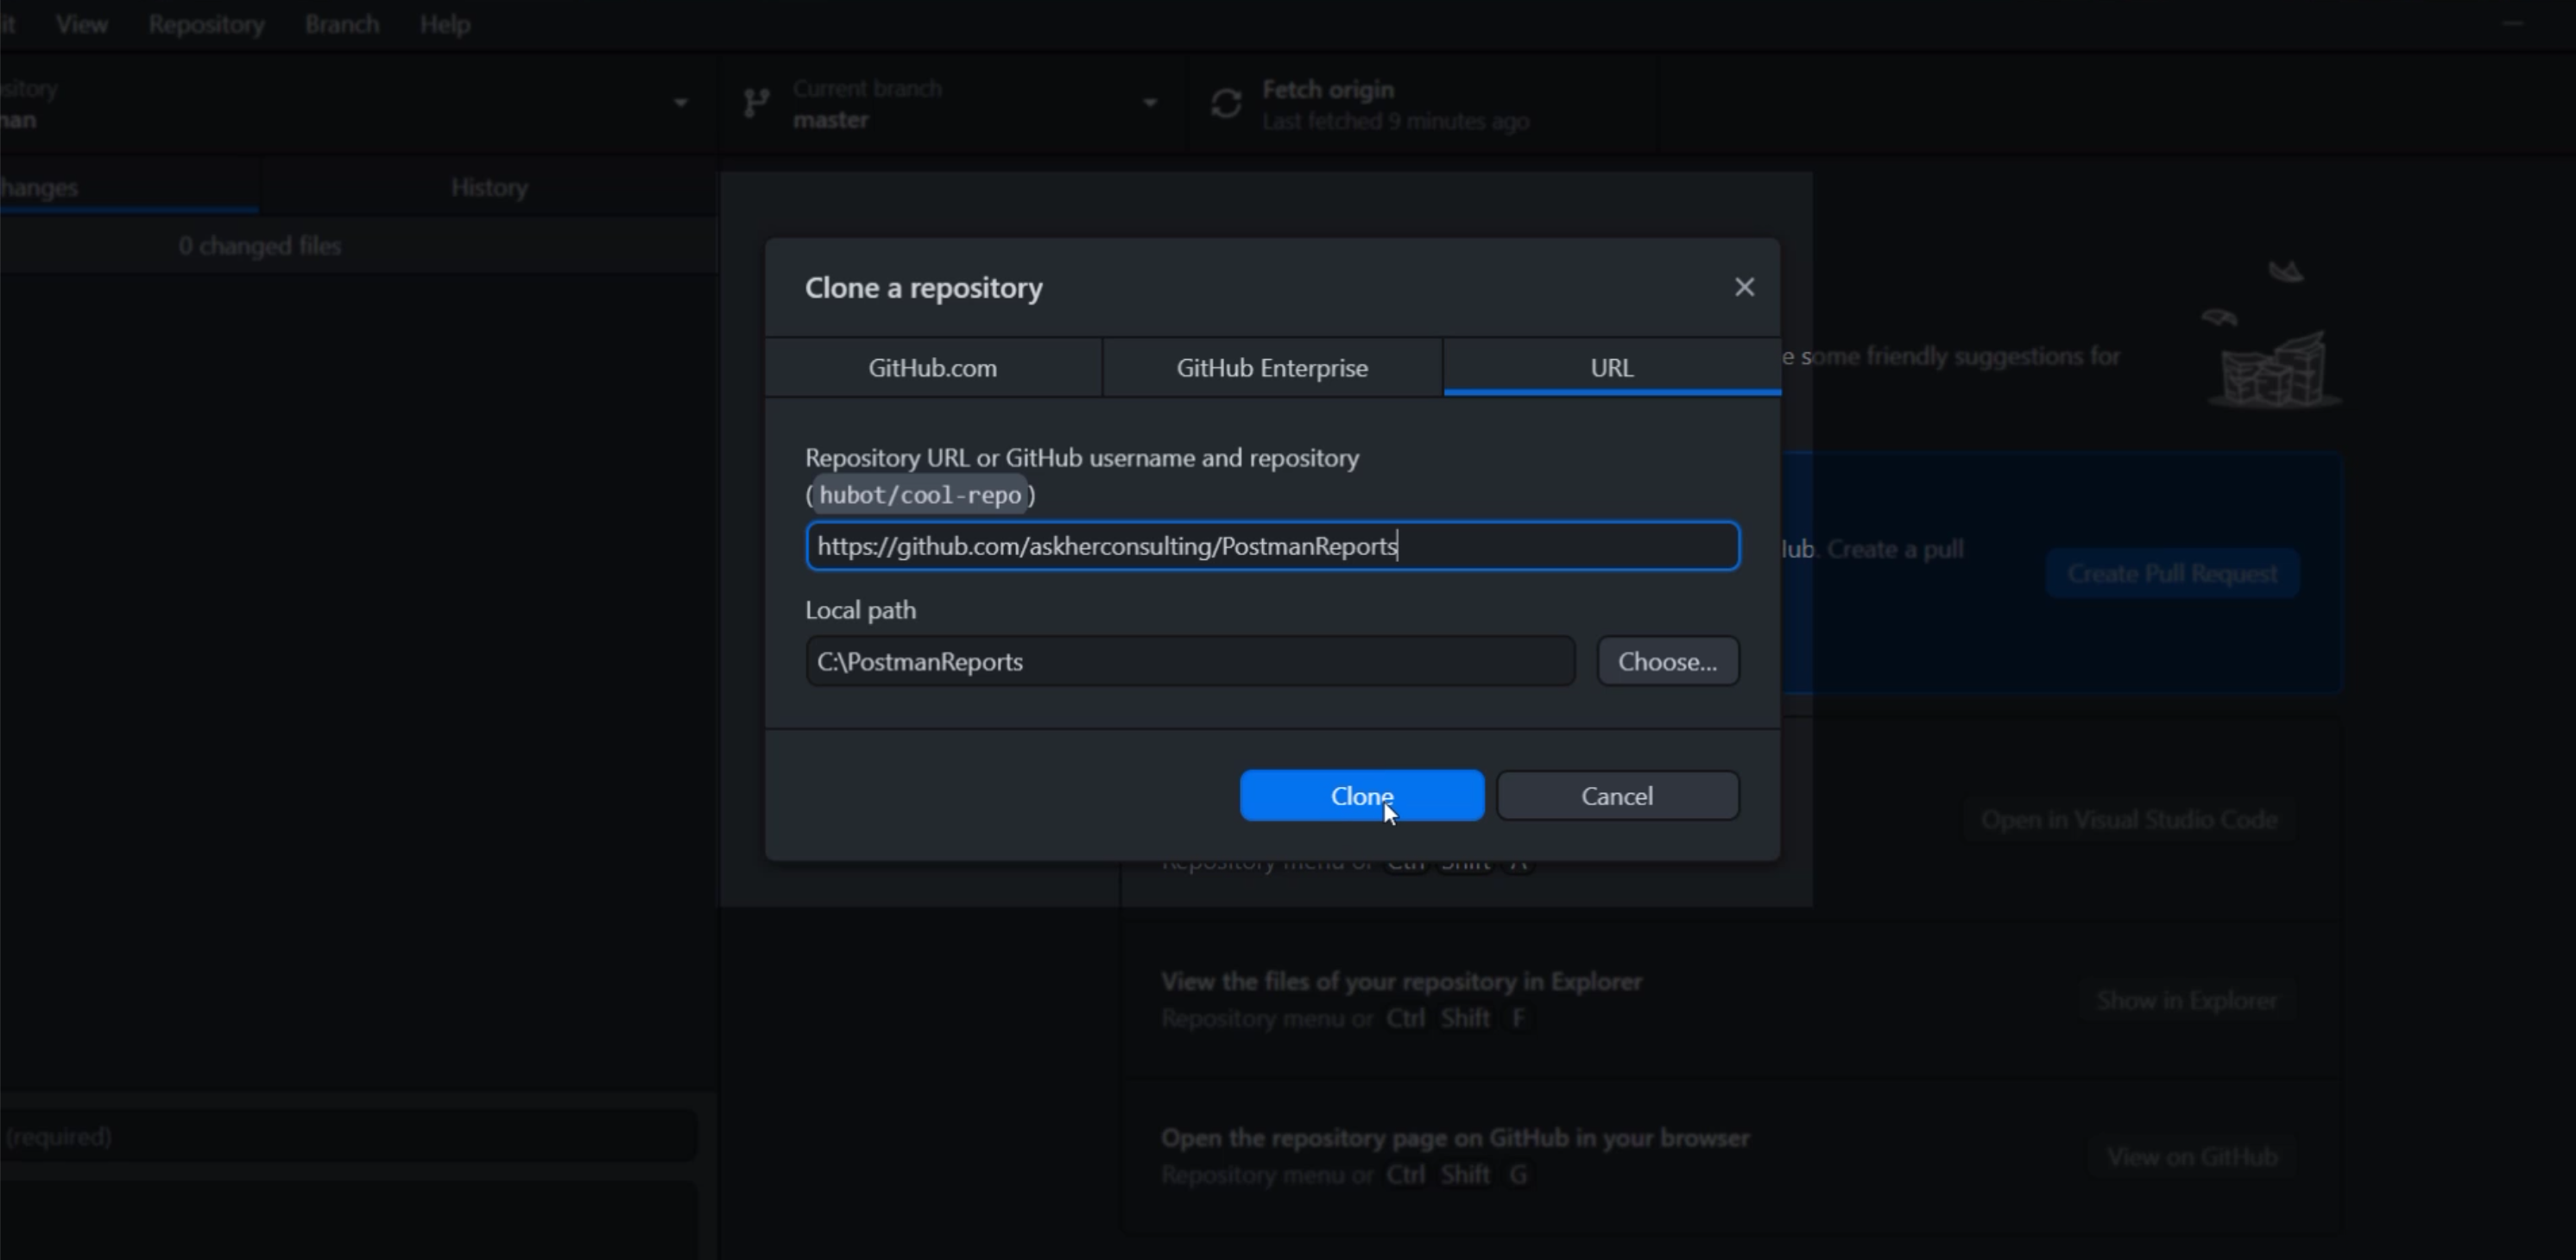
Make sure this is where you want it to be, then hit "Clone".
Now you have your local repo, which is synced to GitHub.
Click "Create Pull Request" to start interacting with the code.
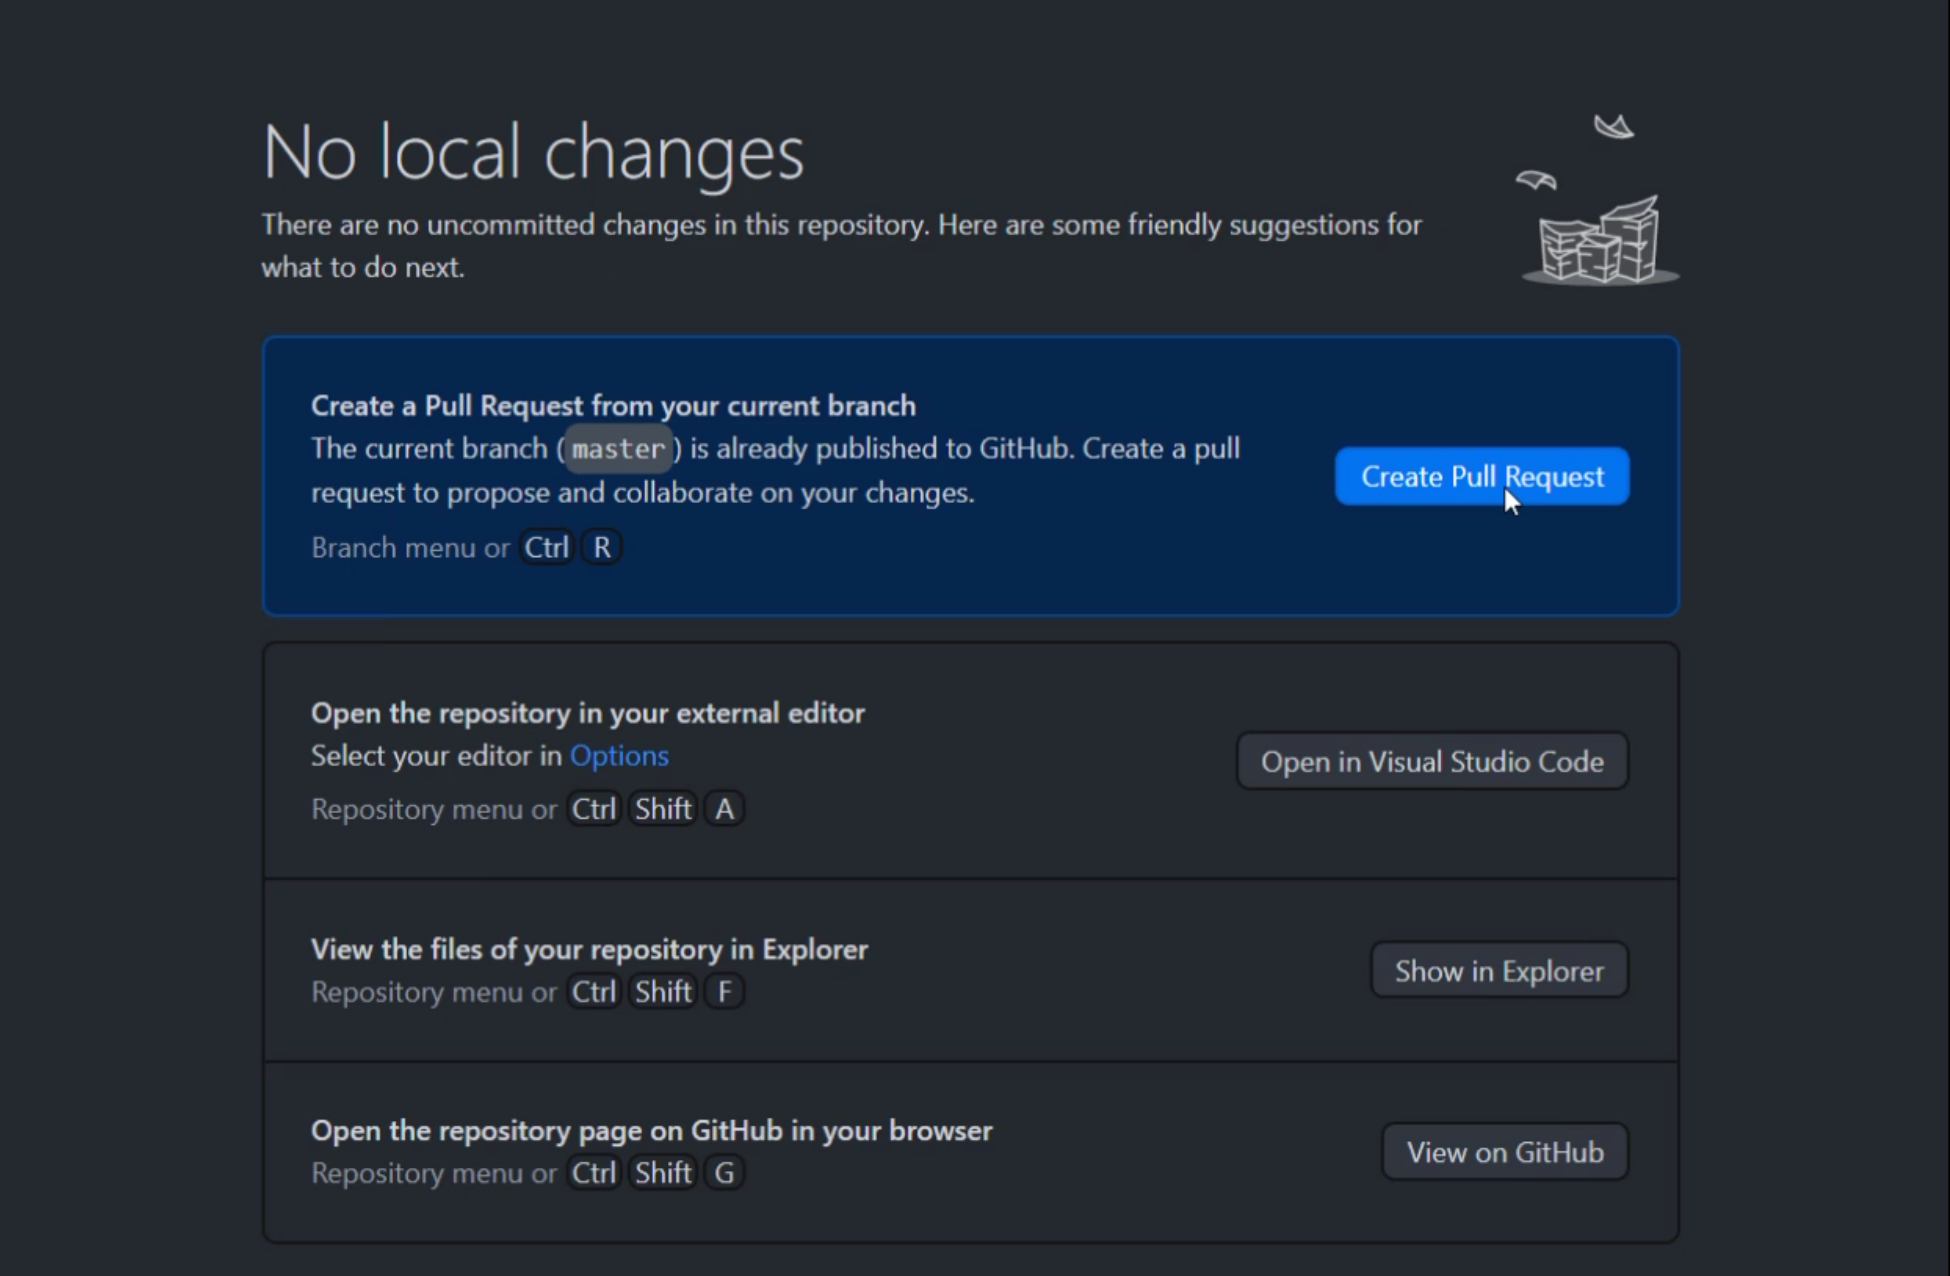
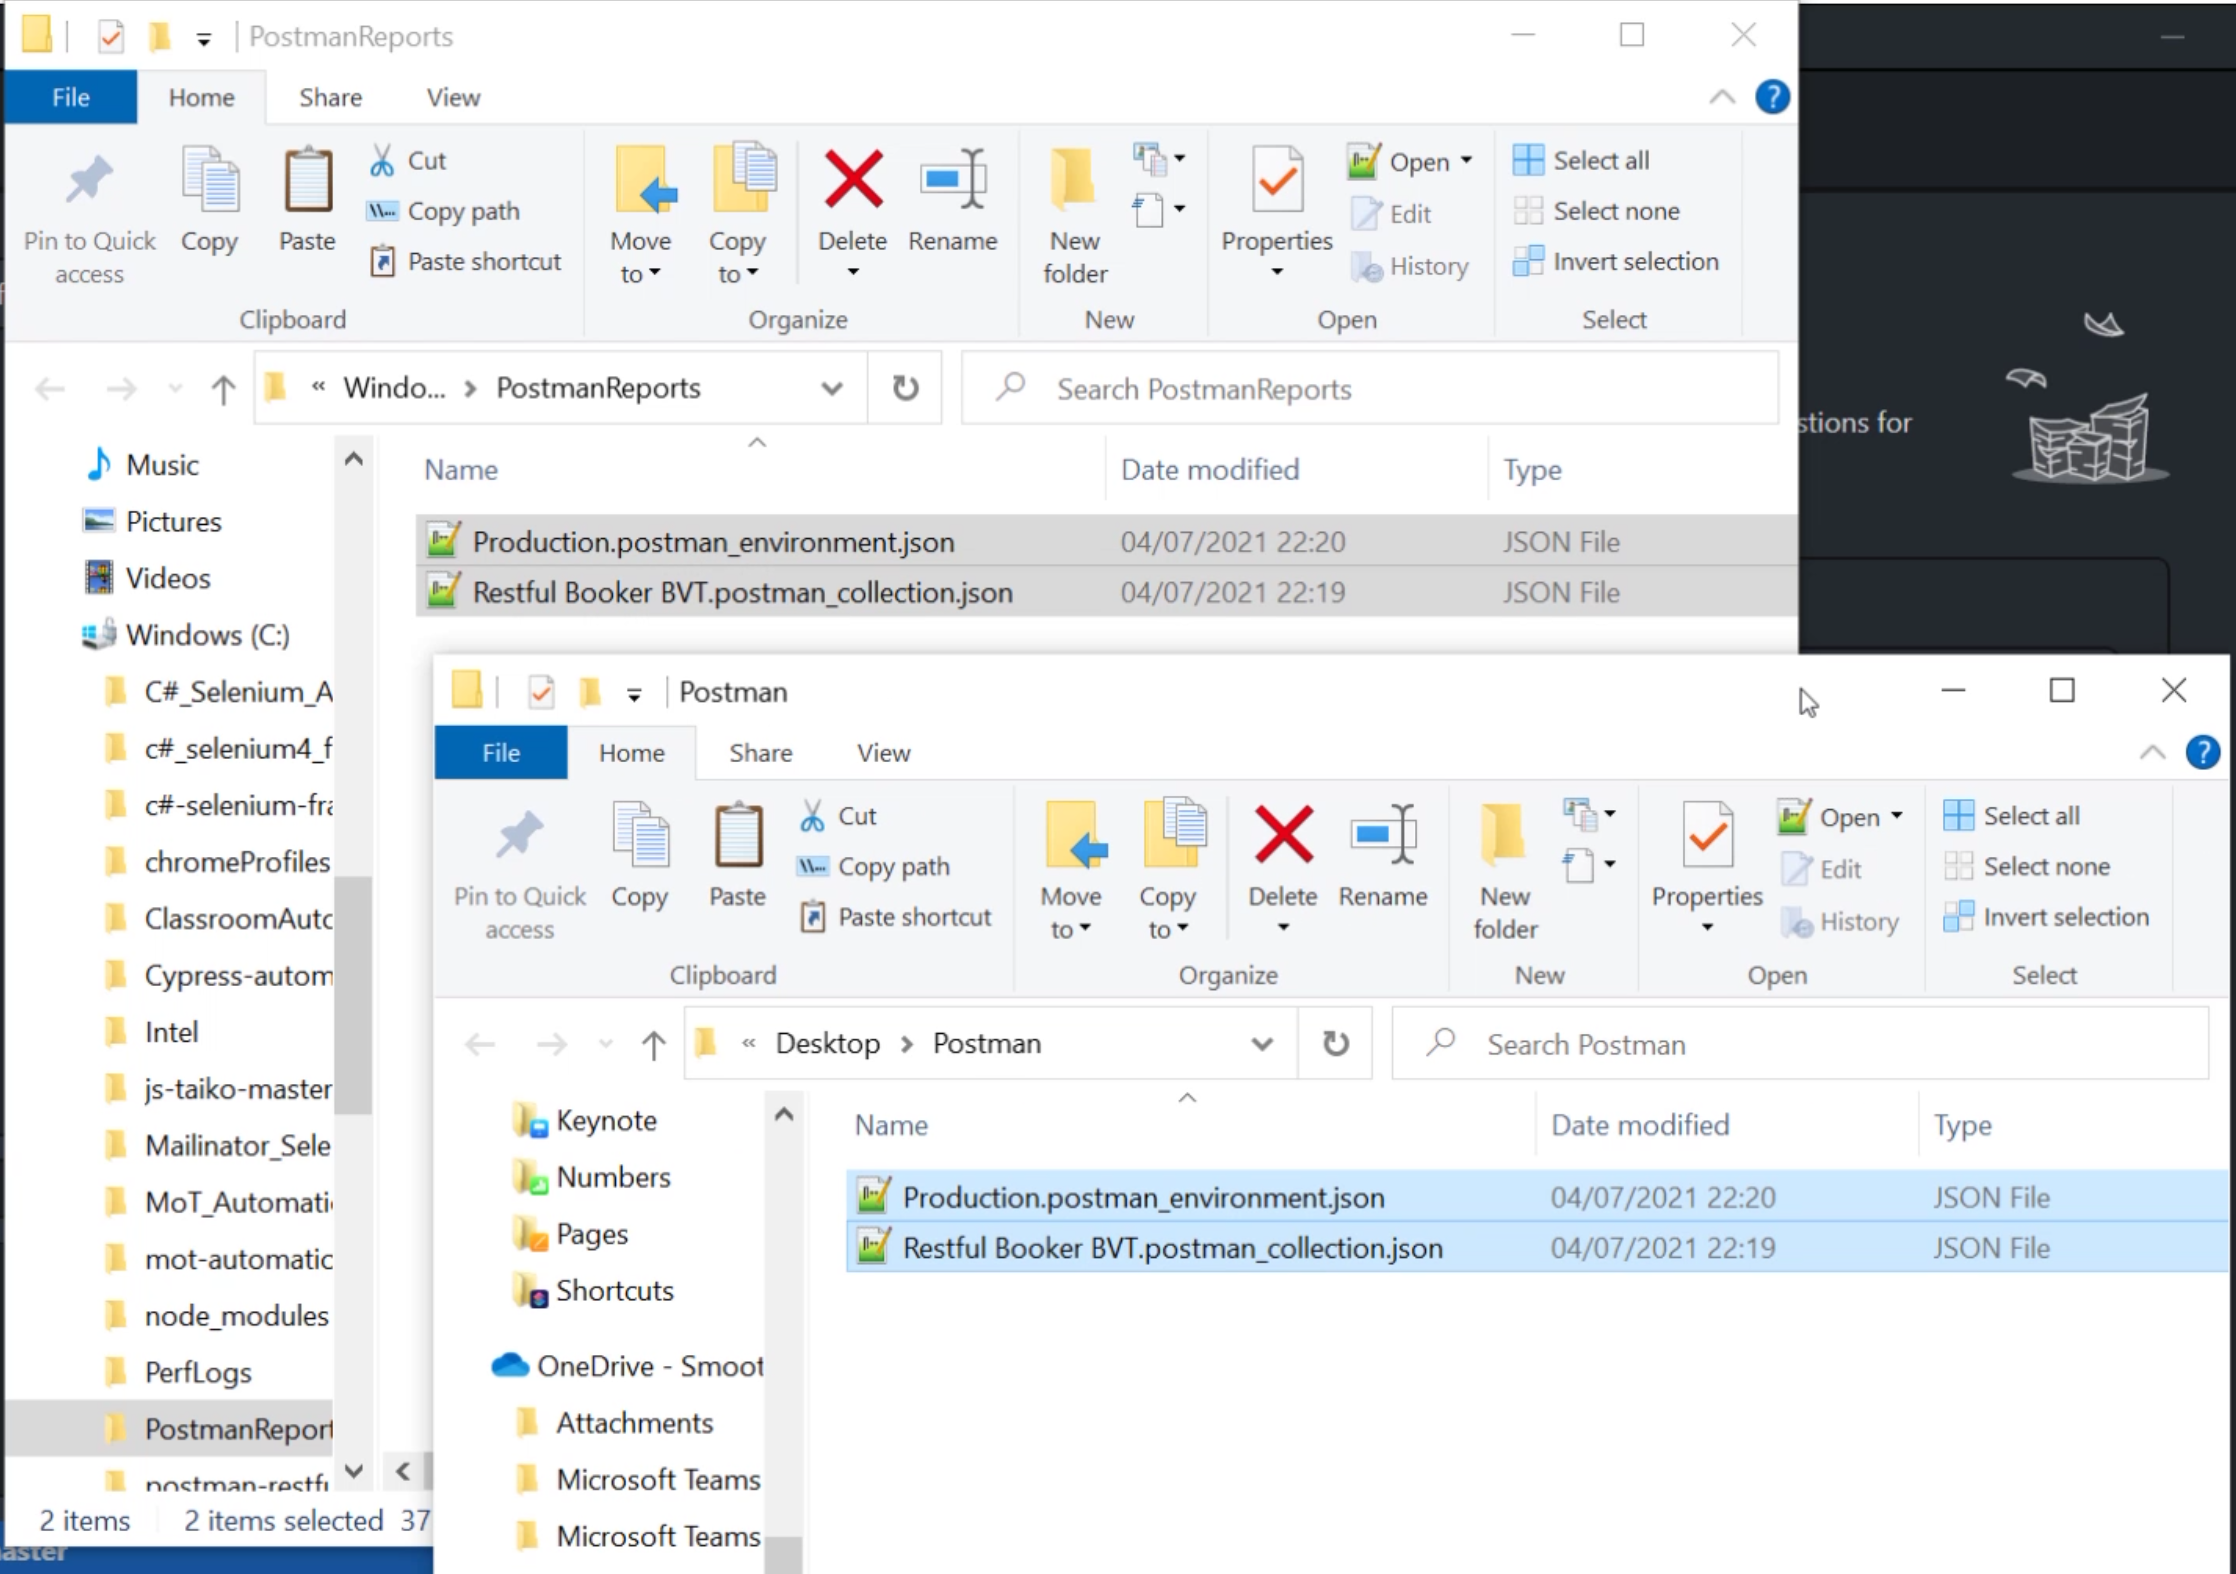
We can then hit "Show in Explorer" to view the local files to our repo and copy our exported Postman collection and environment variables.

We are nearly there for the setup, I promise.
When we add the files to the repo folder, we can see this is recognized in our GitHub Desktop app.
All we need to do is add a comment, commit to master, and publish the branch.
One last thing to mention before we get to run our Newman command and see those reports - you'll remember in chapter three, we added a few pieces of code in order to only run a subset of our tests in monitor.
That code is also used by Newman and it's still there in our code base.
So if you'd like to run the full set of tests in this collection, you'll need to remove any postman.setNextRequest() lines of code from the "Get All Bookings" and "Ping" endpoints.
However, this is fine for what we need to demonstrate here.
So let's go ahead and take a look at Newman.
# Newman Runner
To see the runner working, we'll go back into our newly created GitHub repo this time in GitHub itself.
Select the root file path in master and click "Add file", "Create new file".
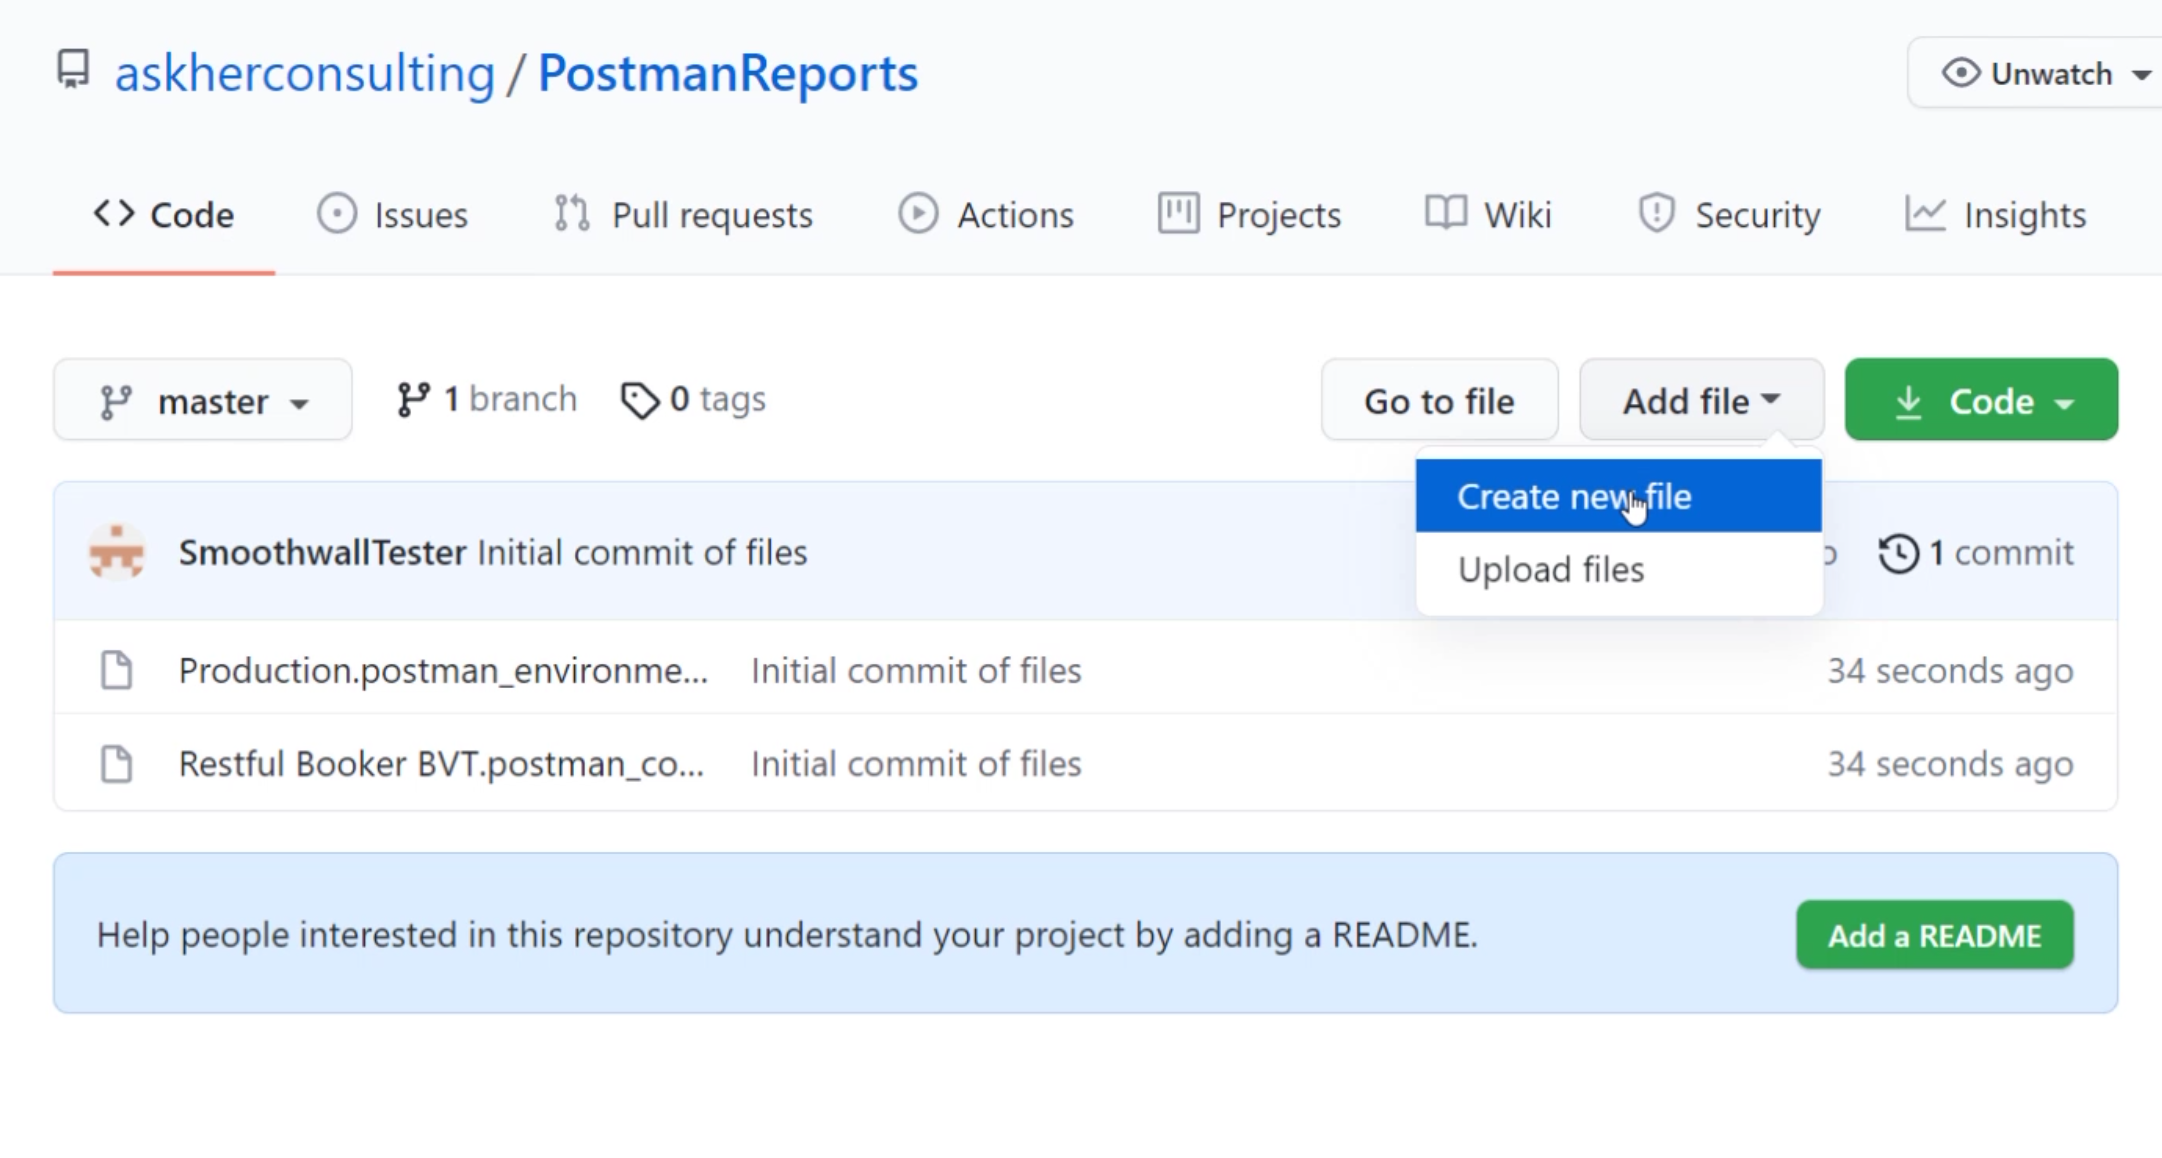
GitHub will only look for Actions which are stored under the following file path so make sure you enter the structure exactly.
Firstly, we type .github and then forward slash /.
After that, we type workflows/, then give our file a name ending in .yml, which is the correct format for an actions file.
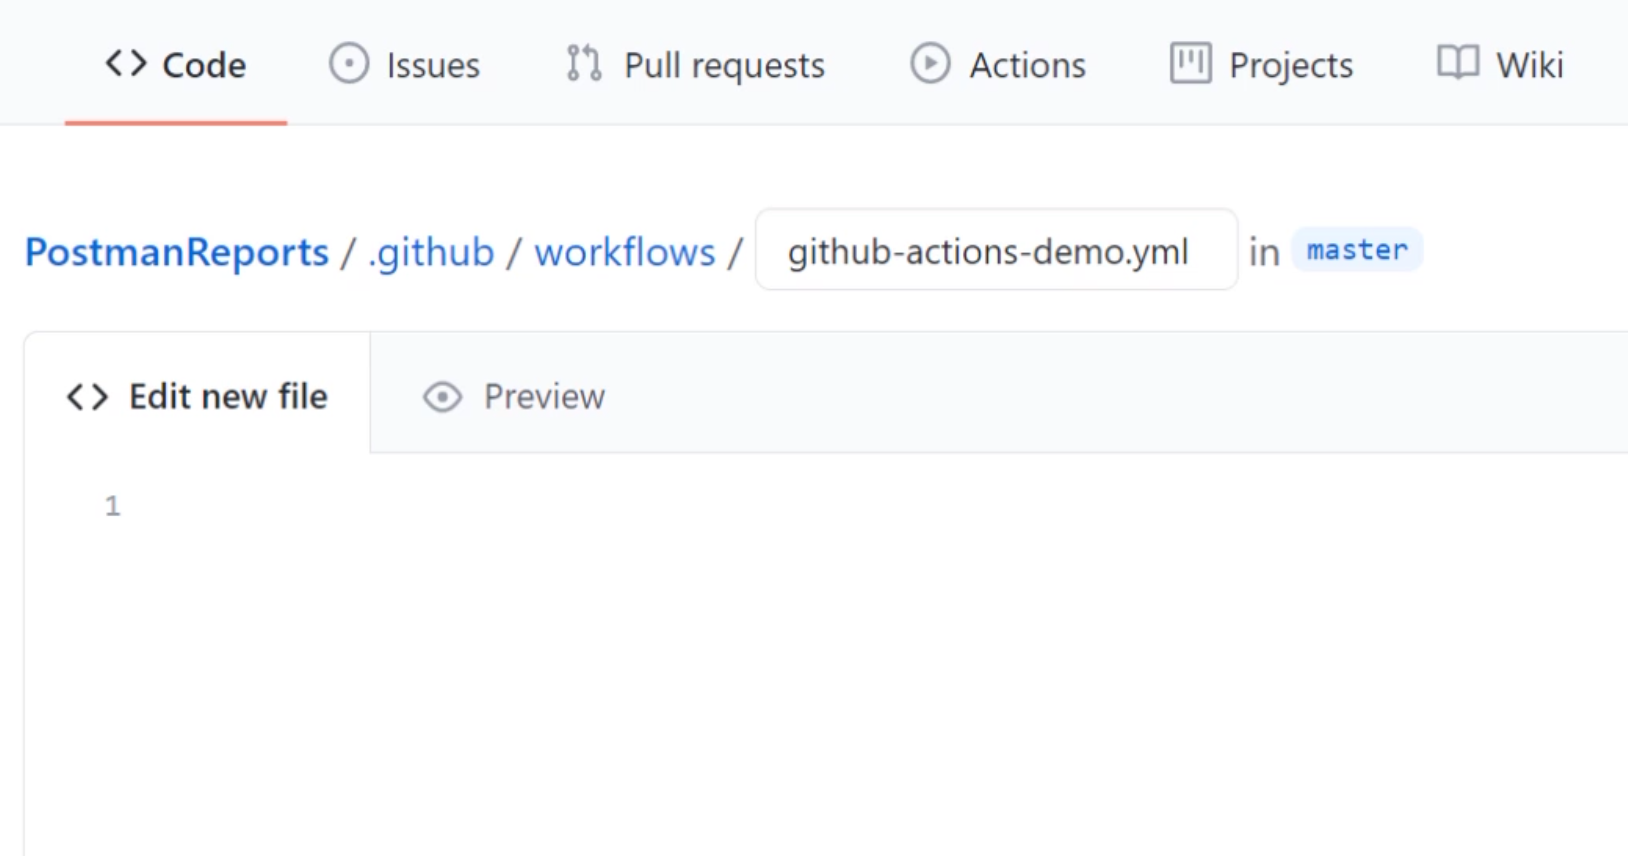
Now here's the fun bit.
You might want to pause the video here or copy and paste the code extract from the links.
There is a specific syntax for the commands that GitHub is looking for in a workflow file.
# This is a basic workflow to help you get started with Actions

name: "Newman Tests"
on: [push, pull_request]

jobs:
  build:
    runs-on: ubuntu-latest
    container:
      image: postman/newman
    steps:
      - name: Checkout
        uses: actions/checkout@v2

      - name: Run API Tests
        run: newman run "Restful Booker BVT.postman_collection.json" -e Production.postman_environment.json
Here we can see the name when the action will be run, and the jobs or actions which will be run.
The most interesting bit is the bottom line here, which is our Newman command.
This tells us to run our Restful Booker BVT Postman collection using the Production Postman environment, and that environment is indicated using the -e flag.
We could either rename the file to remove the spaces and push this up to Git for our collection file, or we can add comments around it so that Git can understand the full file name string. The choice is yours.
Finally, if you're ever reluctant to use a variable within your environment setup - some people, for example, feel funny sharing passwords - you can specify these within this command by using the --env-var flag.
But we don't need to use that in our collection, so let's go ahead and remove that and commit our GitHub yml file and see what happens.
At the bottom of the page, hit "Create a new branch for this commit and start a pull request" and click "Propose new file".
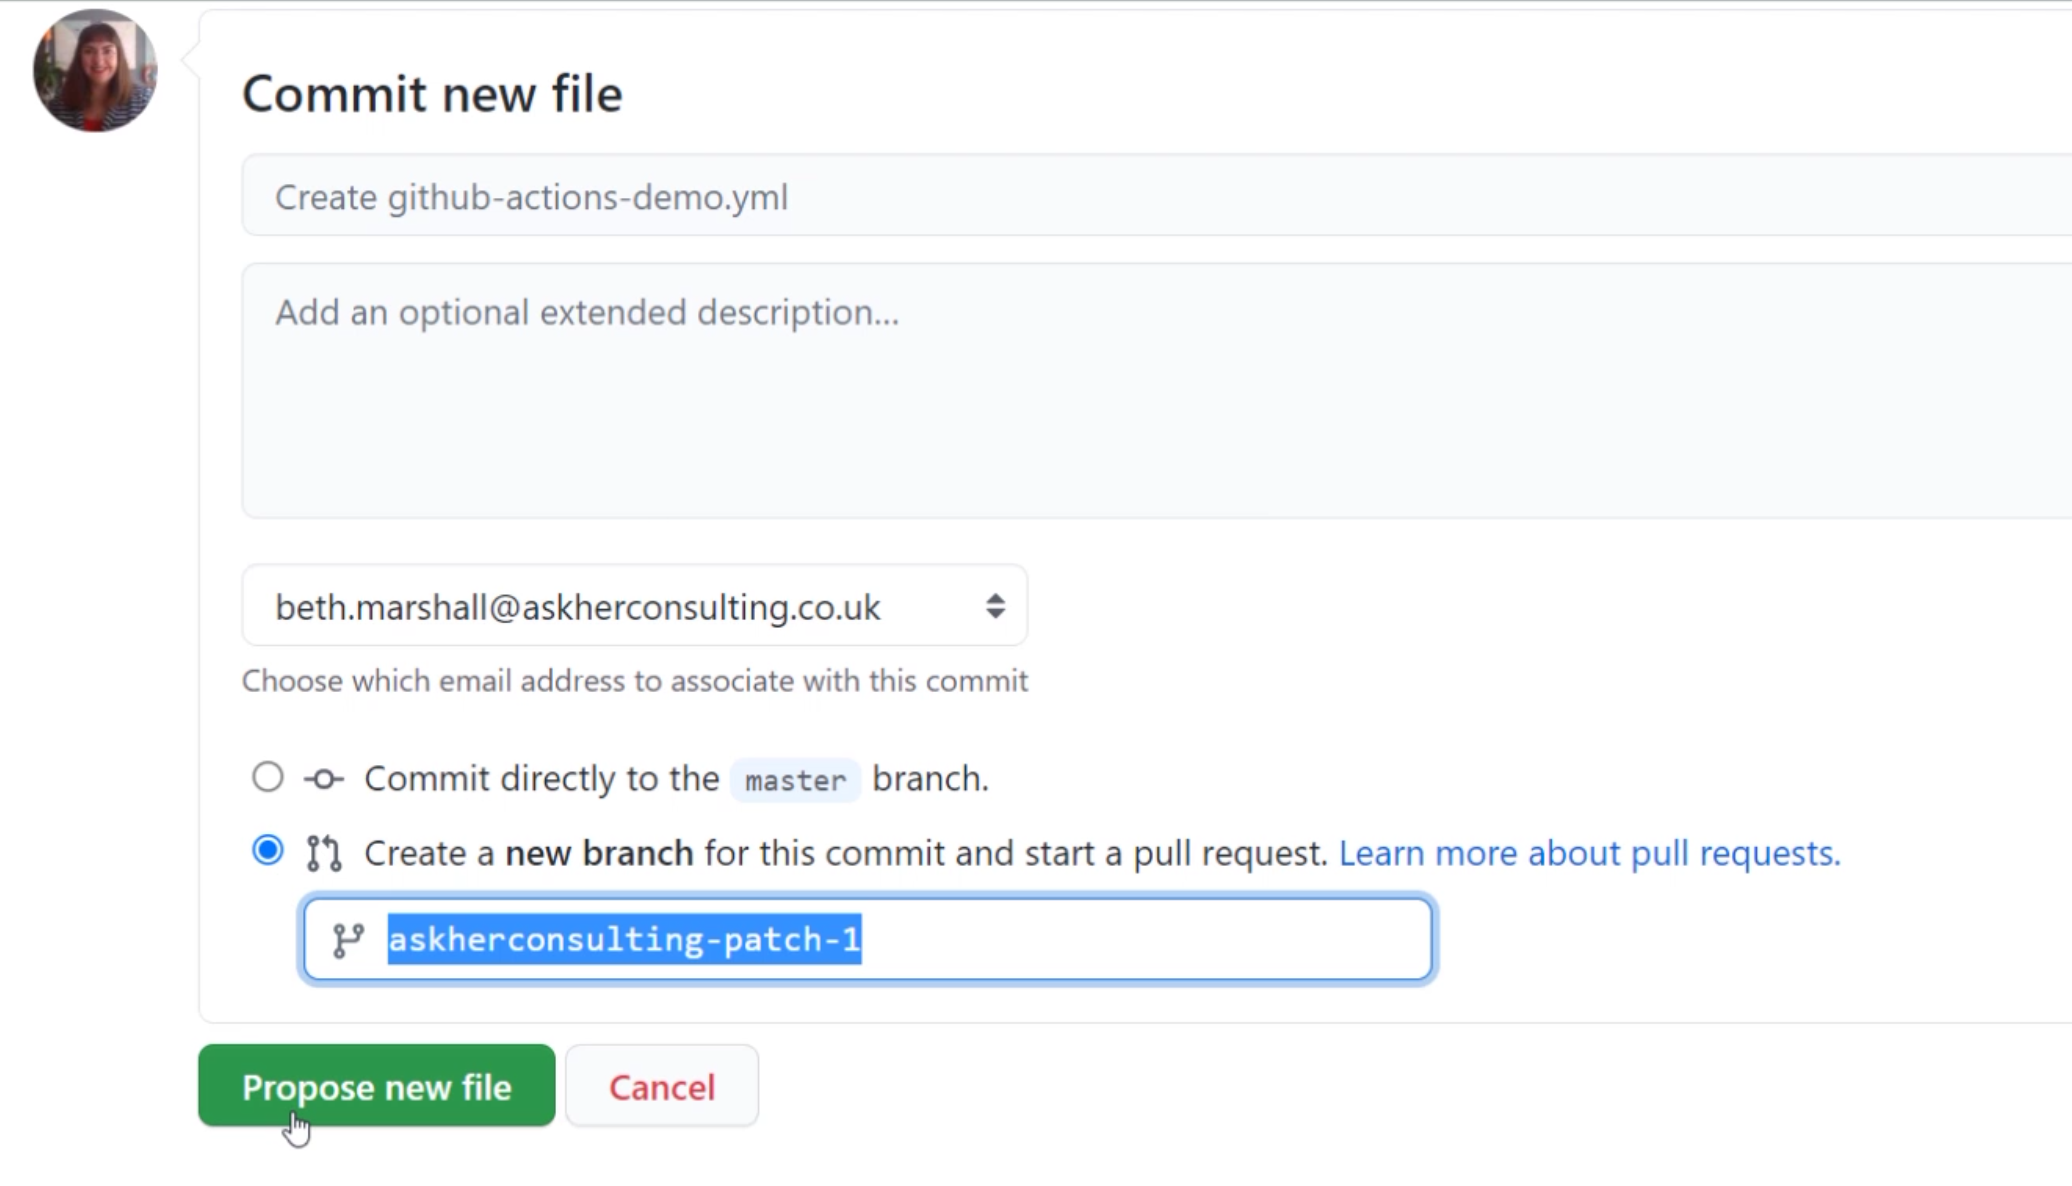
Then click "Create pull request".
Now that the code has been requested to be merged from your branch into master, we can now see this gold section here has appeared.
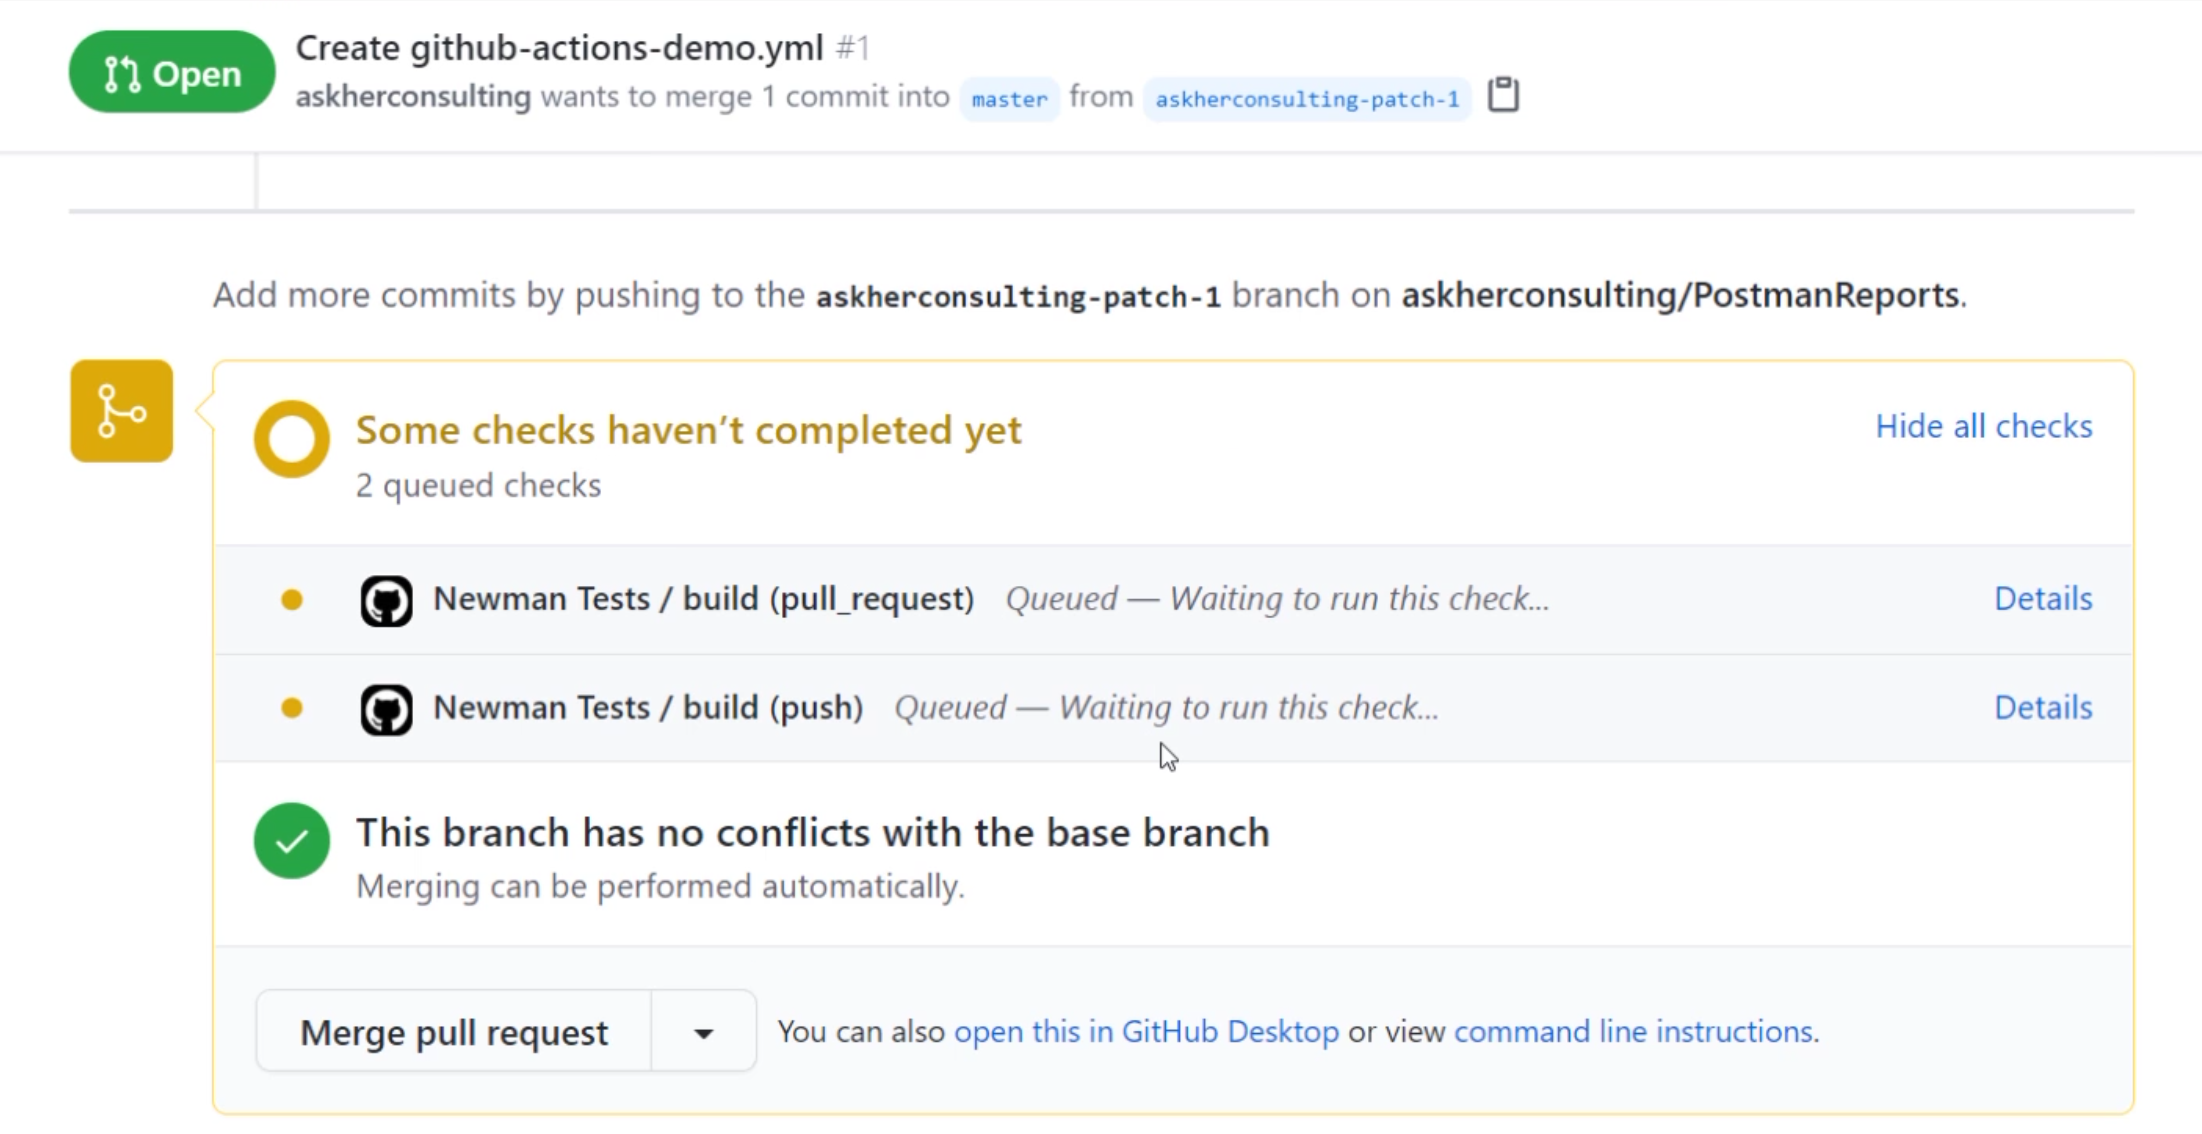
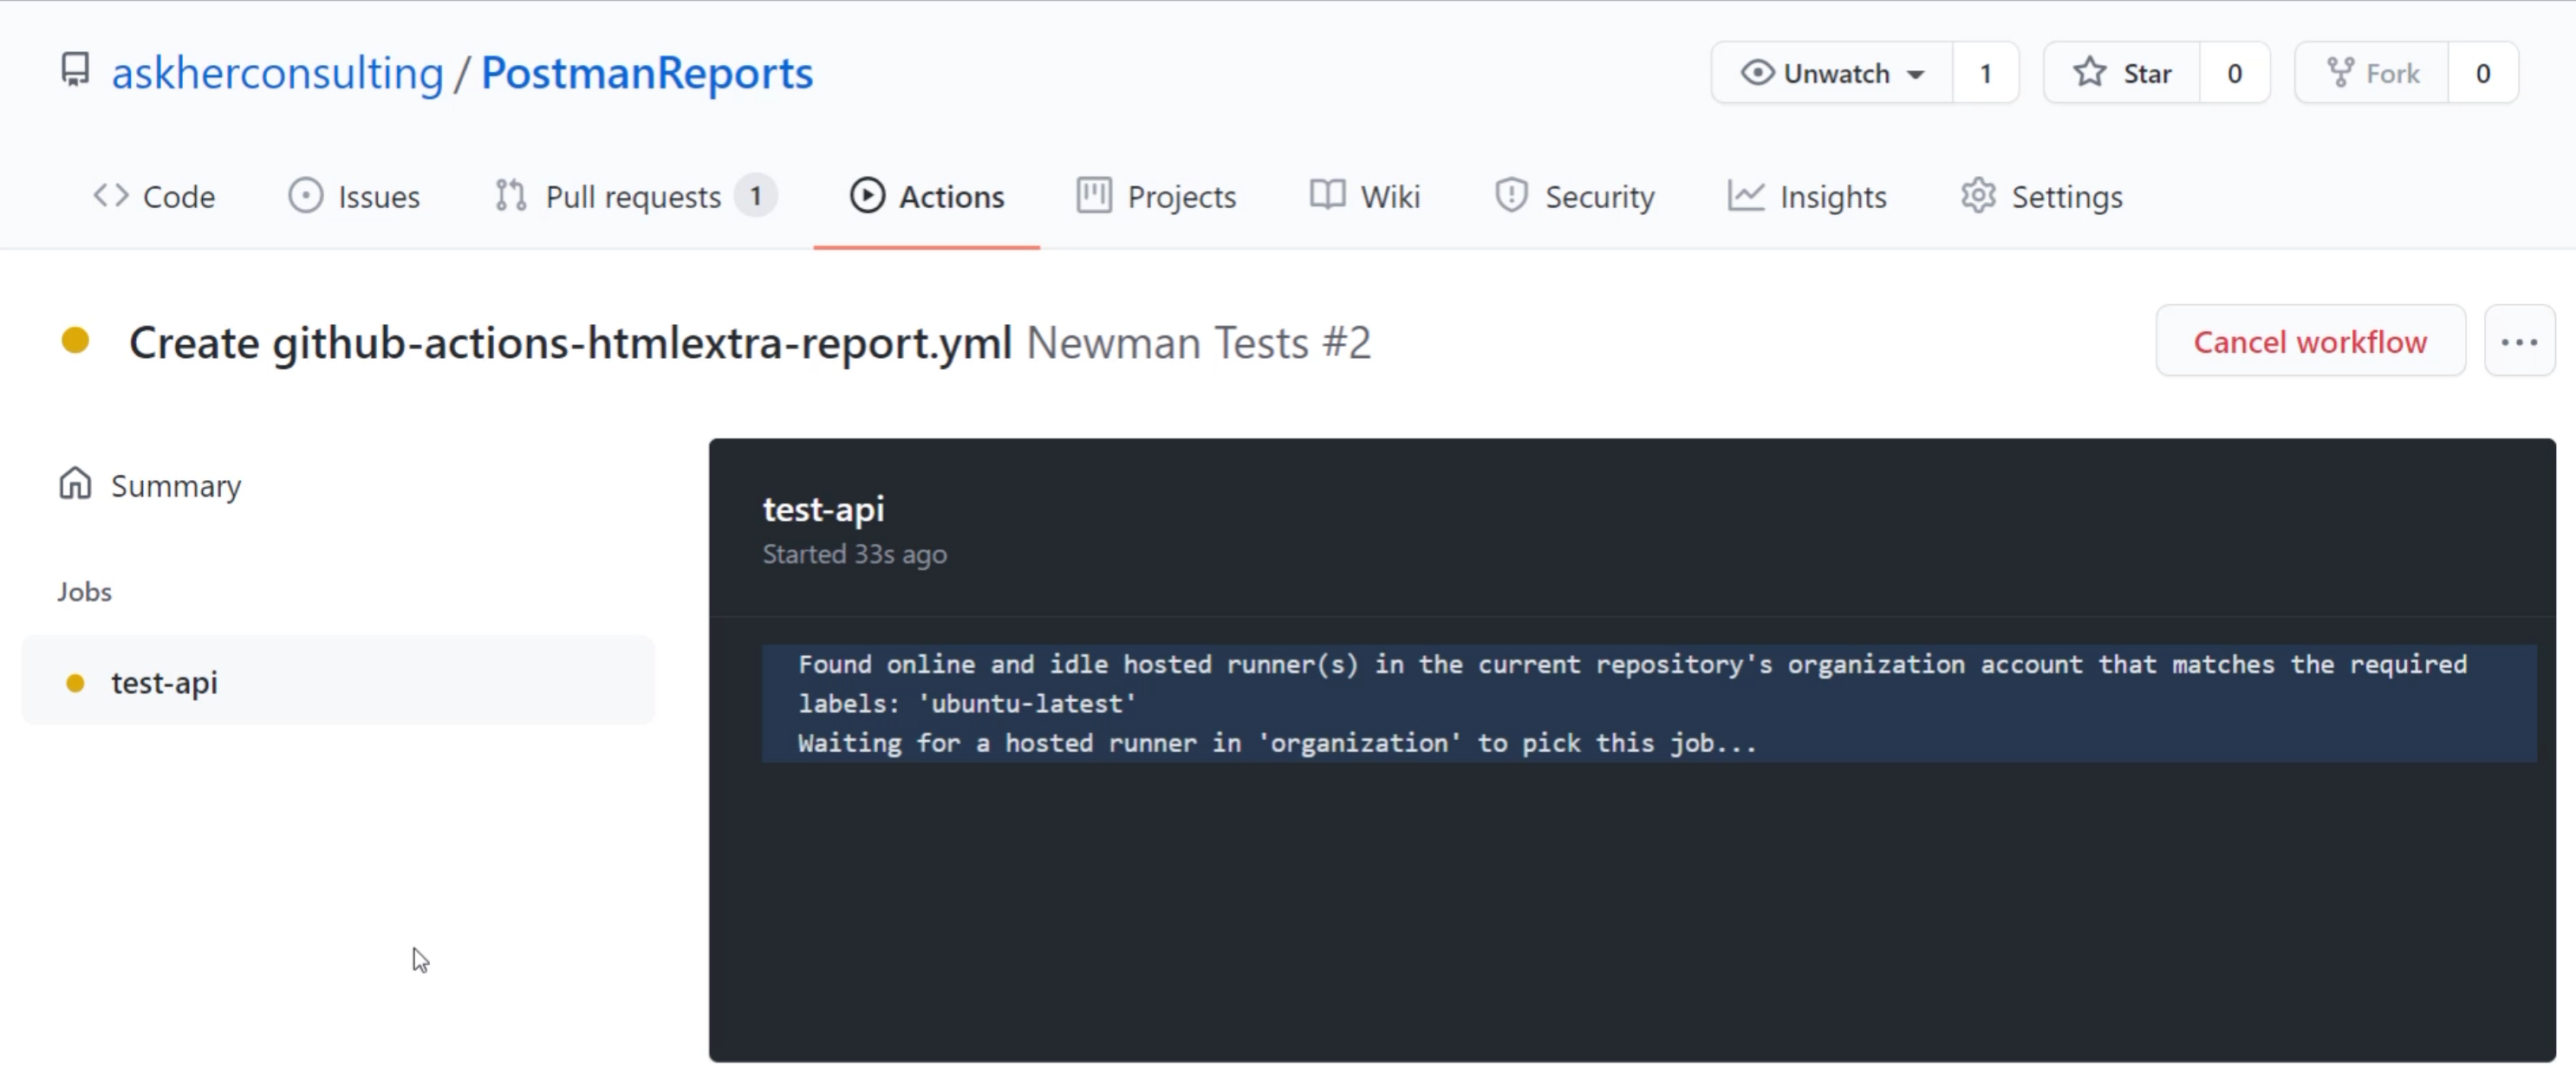
If we select "Details", we can see what's happening.
You can also do this from the "Actions" tab.
Before you merge the code, we can see that GitHub actions checks out our code and runs our tests for us.
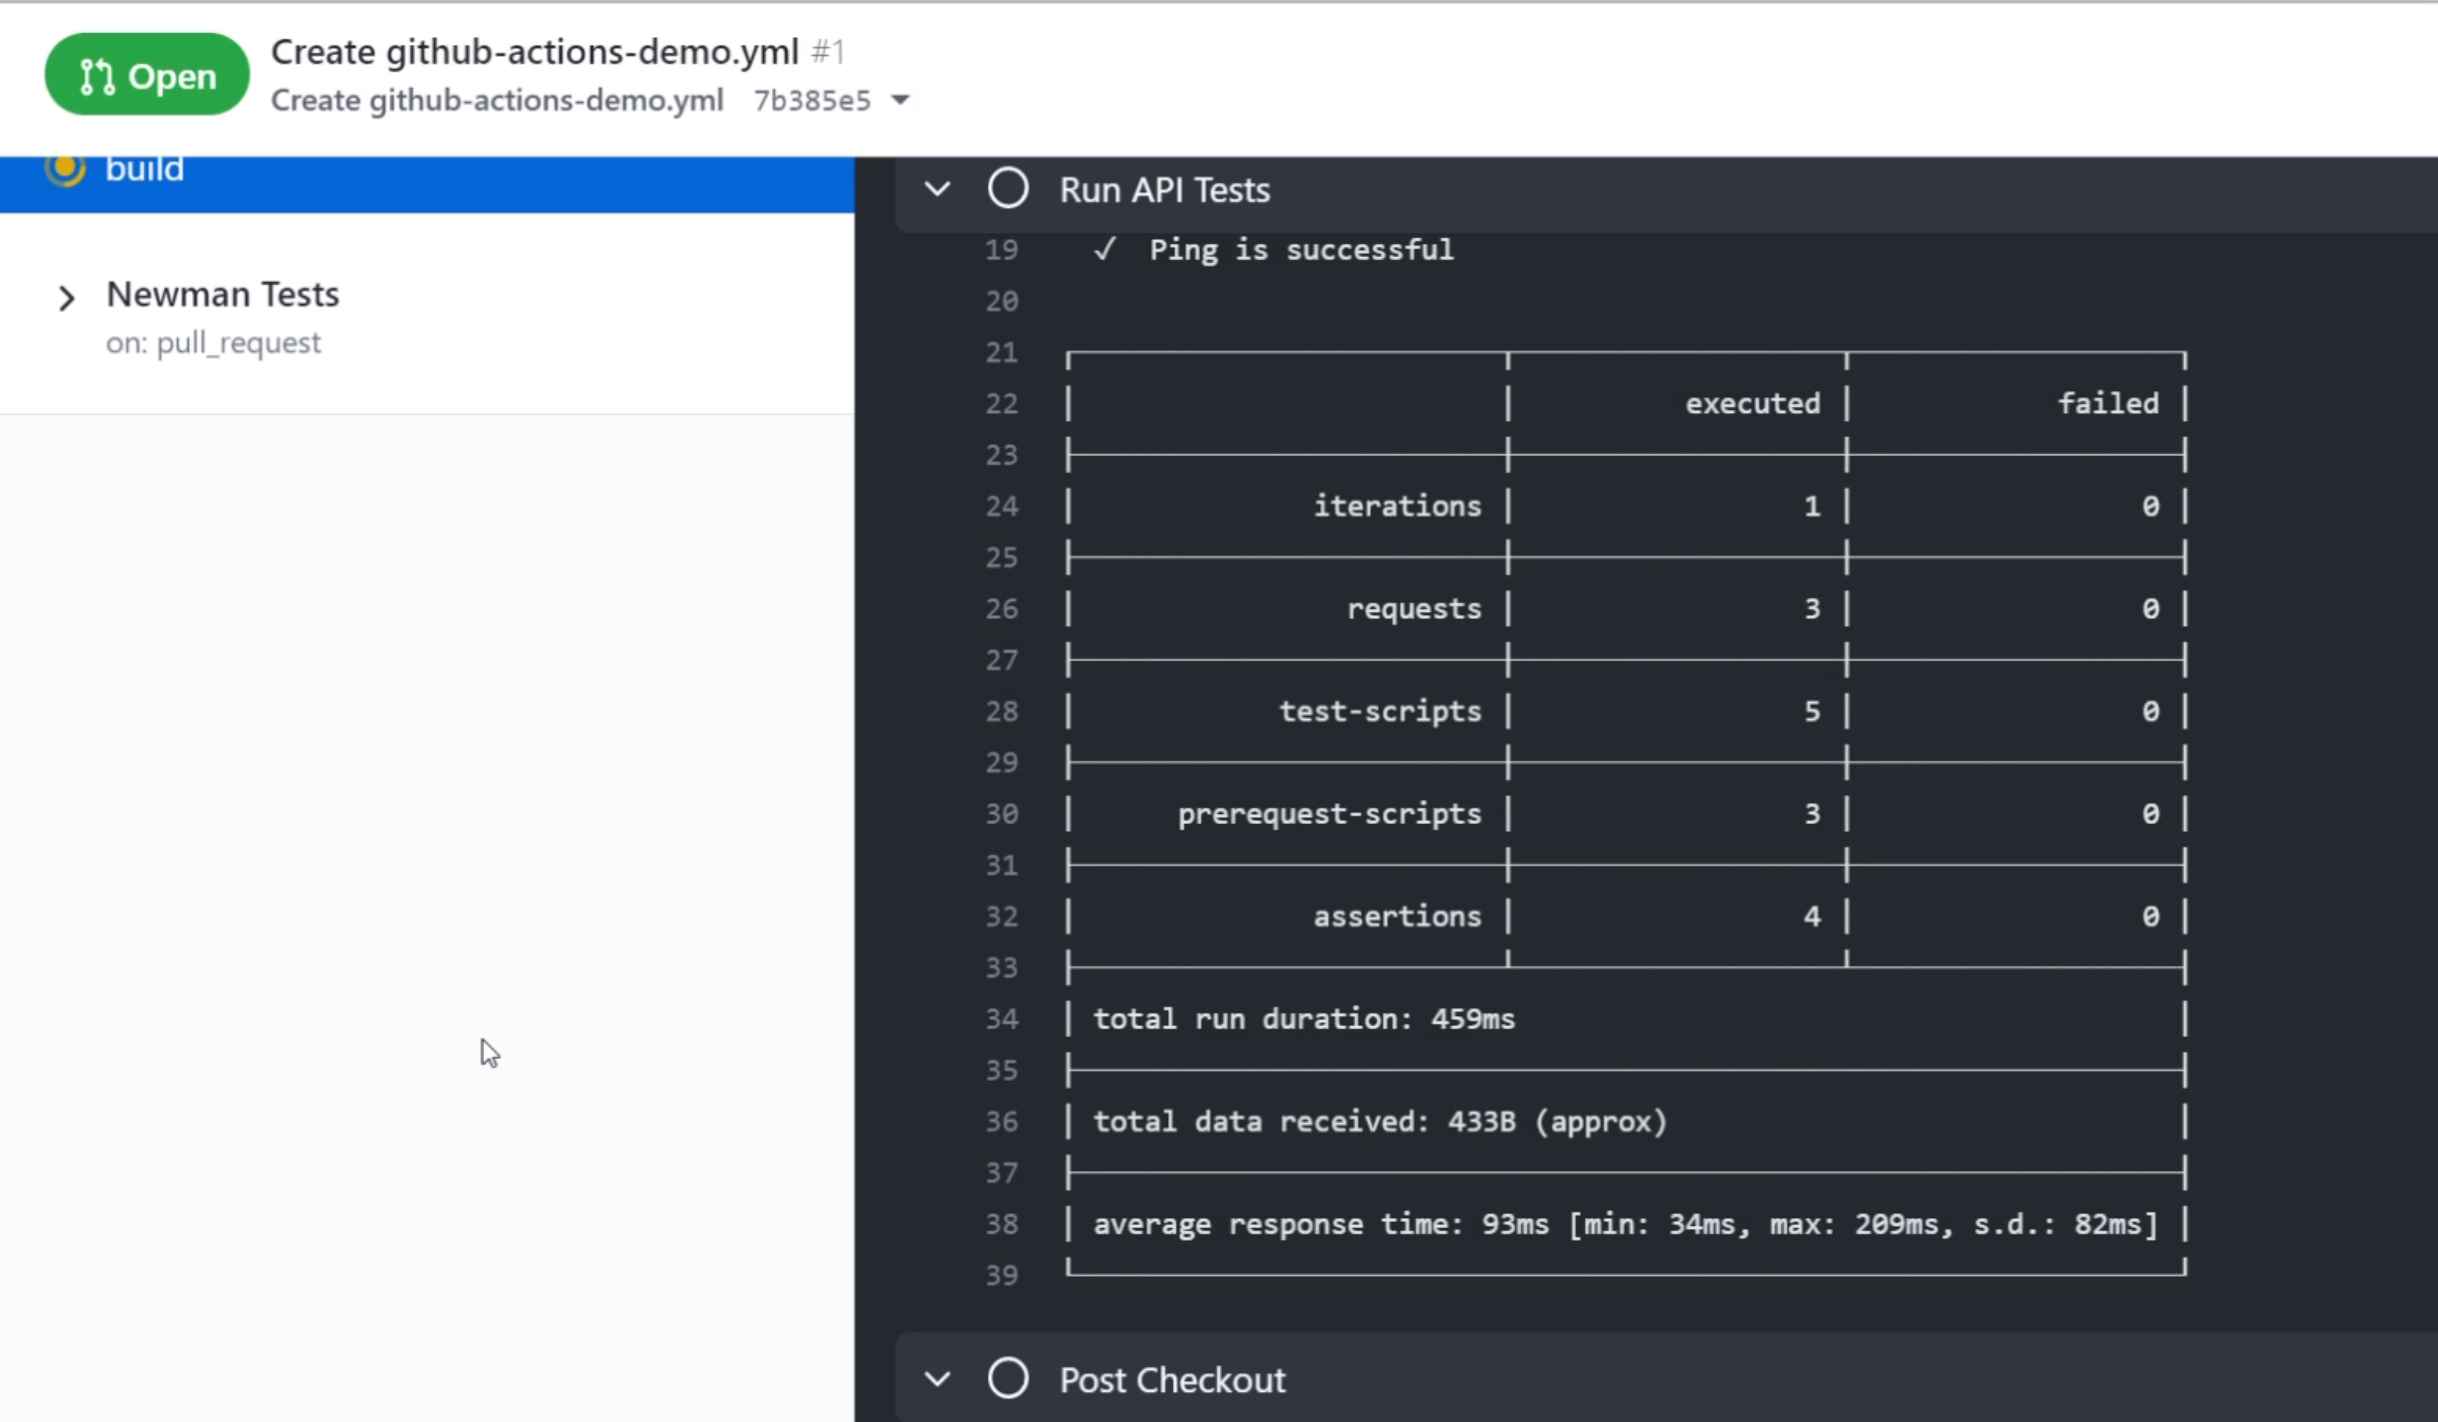
Here is the basic style test report.
If any of the tests fail, you will see a red notification to alert you before you merge that all isn't well.
We can see a nice green notification - that all our checks have passed.
So, let's merge the pull request and delete our branch.
# HTML Extra Report
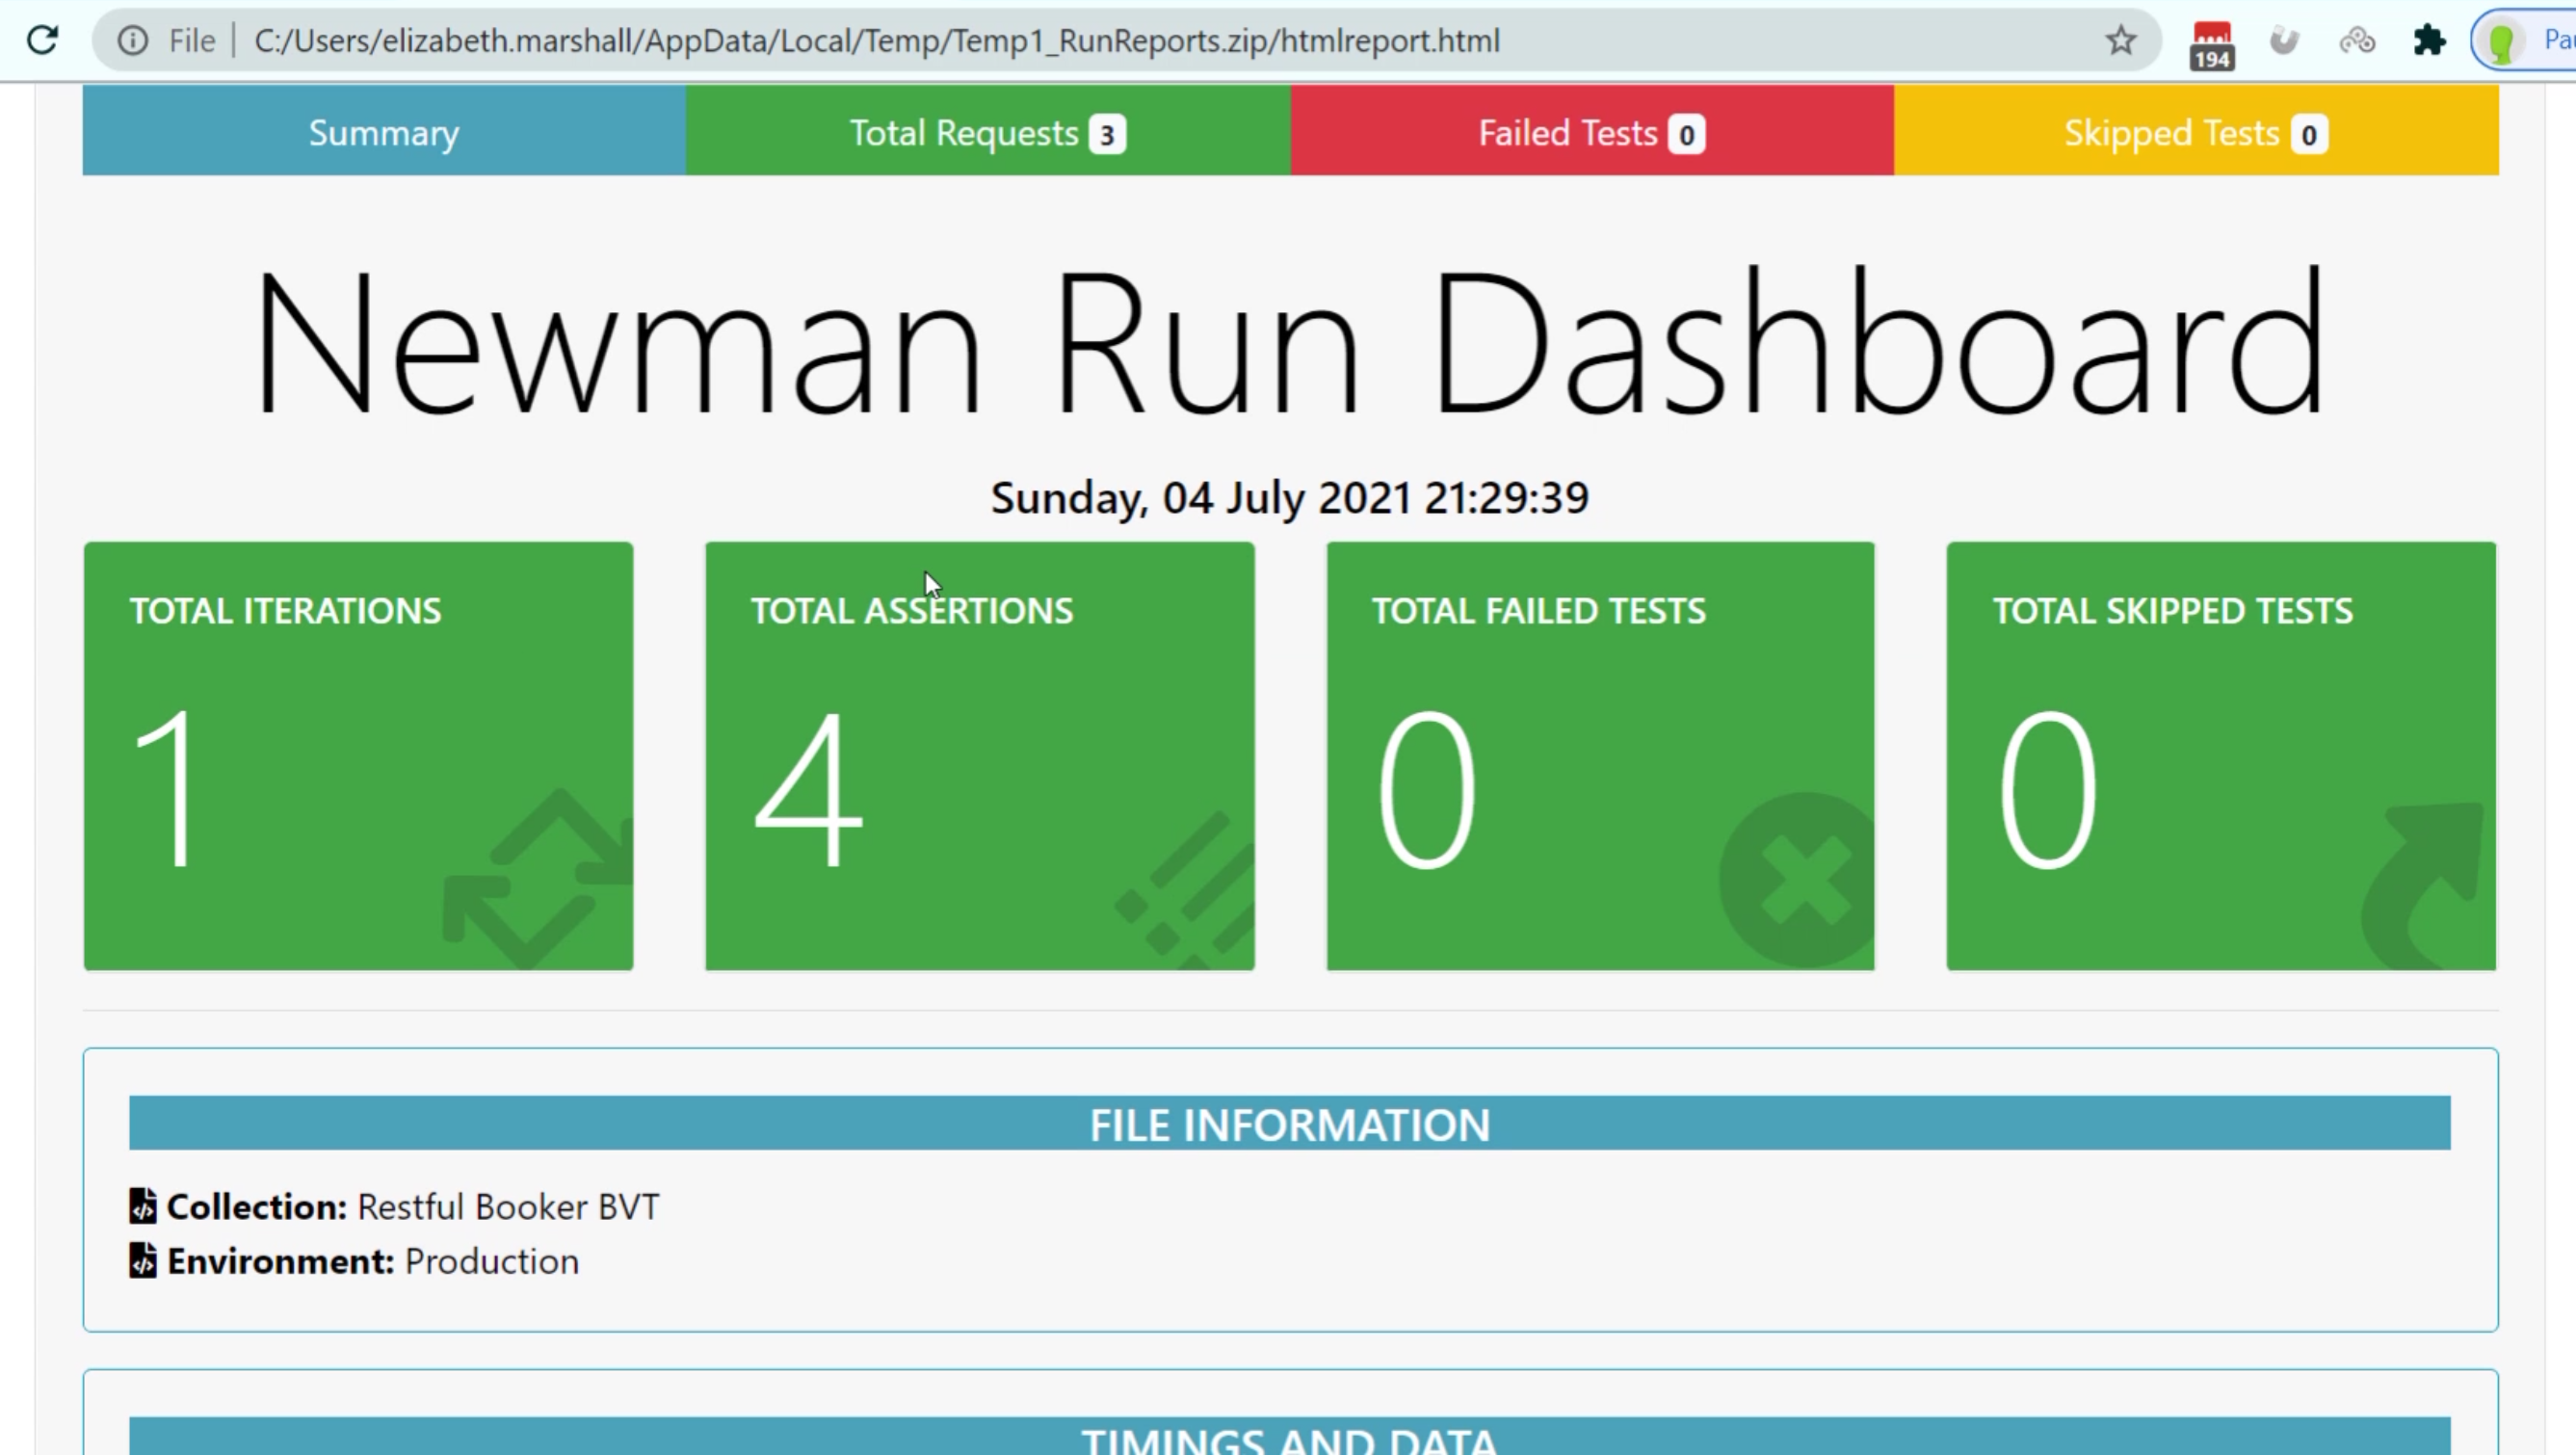
What if we want a more user-friendly report? Perhaps something we could share with our team.
Well, in that case, we can use the HTML Extra Report, which was created by the lovely Danny Dainton.
Here is how to use it. Go back into your root folder in GitHub and once more click "Add file", "Create new file" in the .github/workflows/ folder.
Again, this is a lot of typing, so I'd recommend copying the extract from the link section ensuring you've updated any versions mentioned where appropriate.
This github-actions-htmlextra-report.yml file will install Newman and Newman reporter HTML extra.
# This workflow will help you to produce an HTML extra test results report

name: Newman Tests
on: [push, pull_request]

jobs:
  test-api:
    runs-on: ubuntu-latest
    steps:
    # Checks-out your repository under $GITHUB_WORKSPACE, so your job can access it
      - uses: actions/checkout@v2

   # INstall Node on the runner
      - name: Install Node
        uses: actions/setup-node@v2
        with:
          node-version: '16.x'


    # Install the newman command line utility and also install the html extra reporter
      - name: Install newman
        run: |
          npm install -g newman
          npm install -g newman-reporter-htmlextra

    # Make directory to upload the test results
      - name: Make Directory for results
        run: mkdir -p testResults

   # Run the POSTMAN collection
      - name: Run API Tests
        run: newman run "Restful Booker BVT.postman_collection.json" -e Production.postman_environment.json -r htmlextra --reporter-htmlextra-export testResults/htmlreport.html

    # Upload the contents of Test Results directory to workspace
      - name: Output the run Details
        uses: actions/upload-artifact@v2
        with:
          name: RunReports
          path: testResults
This goes on to make a directory which will store the test results so that they can be exported and shared.
Let's see it in action.
So as before, "Create a new branch", "Propose new file", "Create pull request".
This time, let's go to the "Actions" tab along the top here and view the new workflow as it's running.
It takes a little longer because there are a few more steps, but afterwards you'll see the Artifacts folder has been created - this contains our HTML extra report.
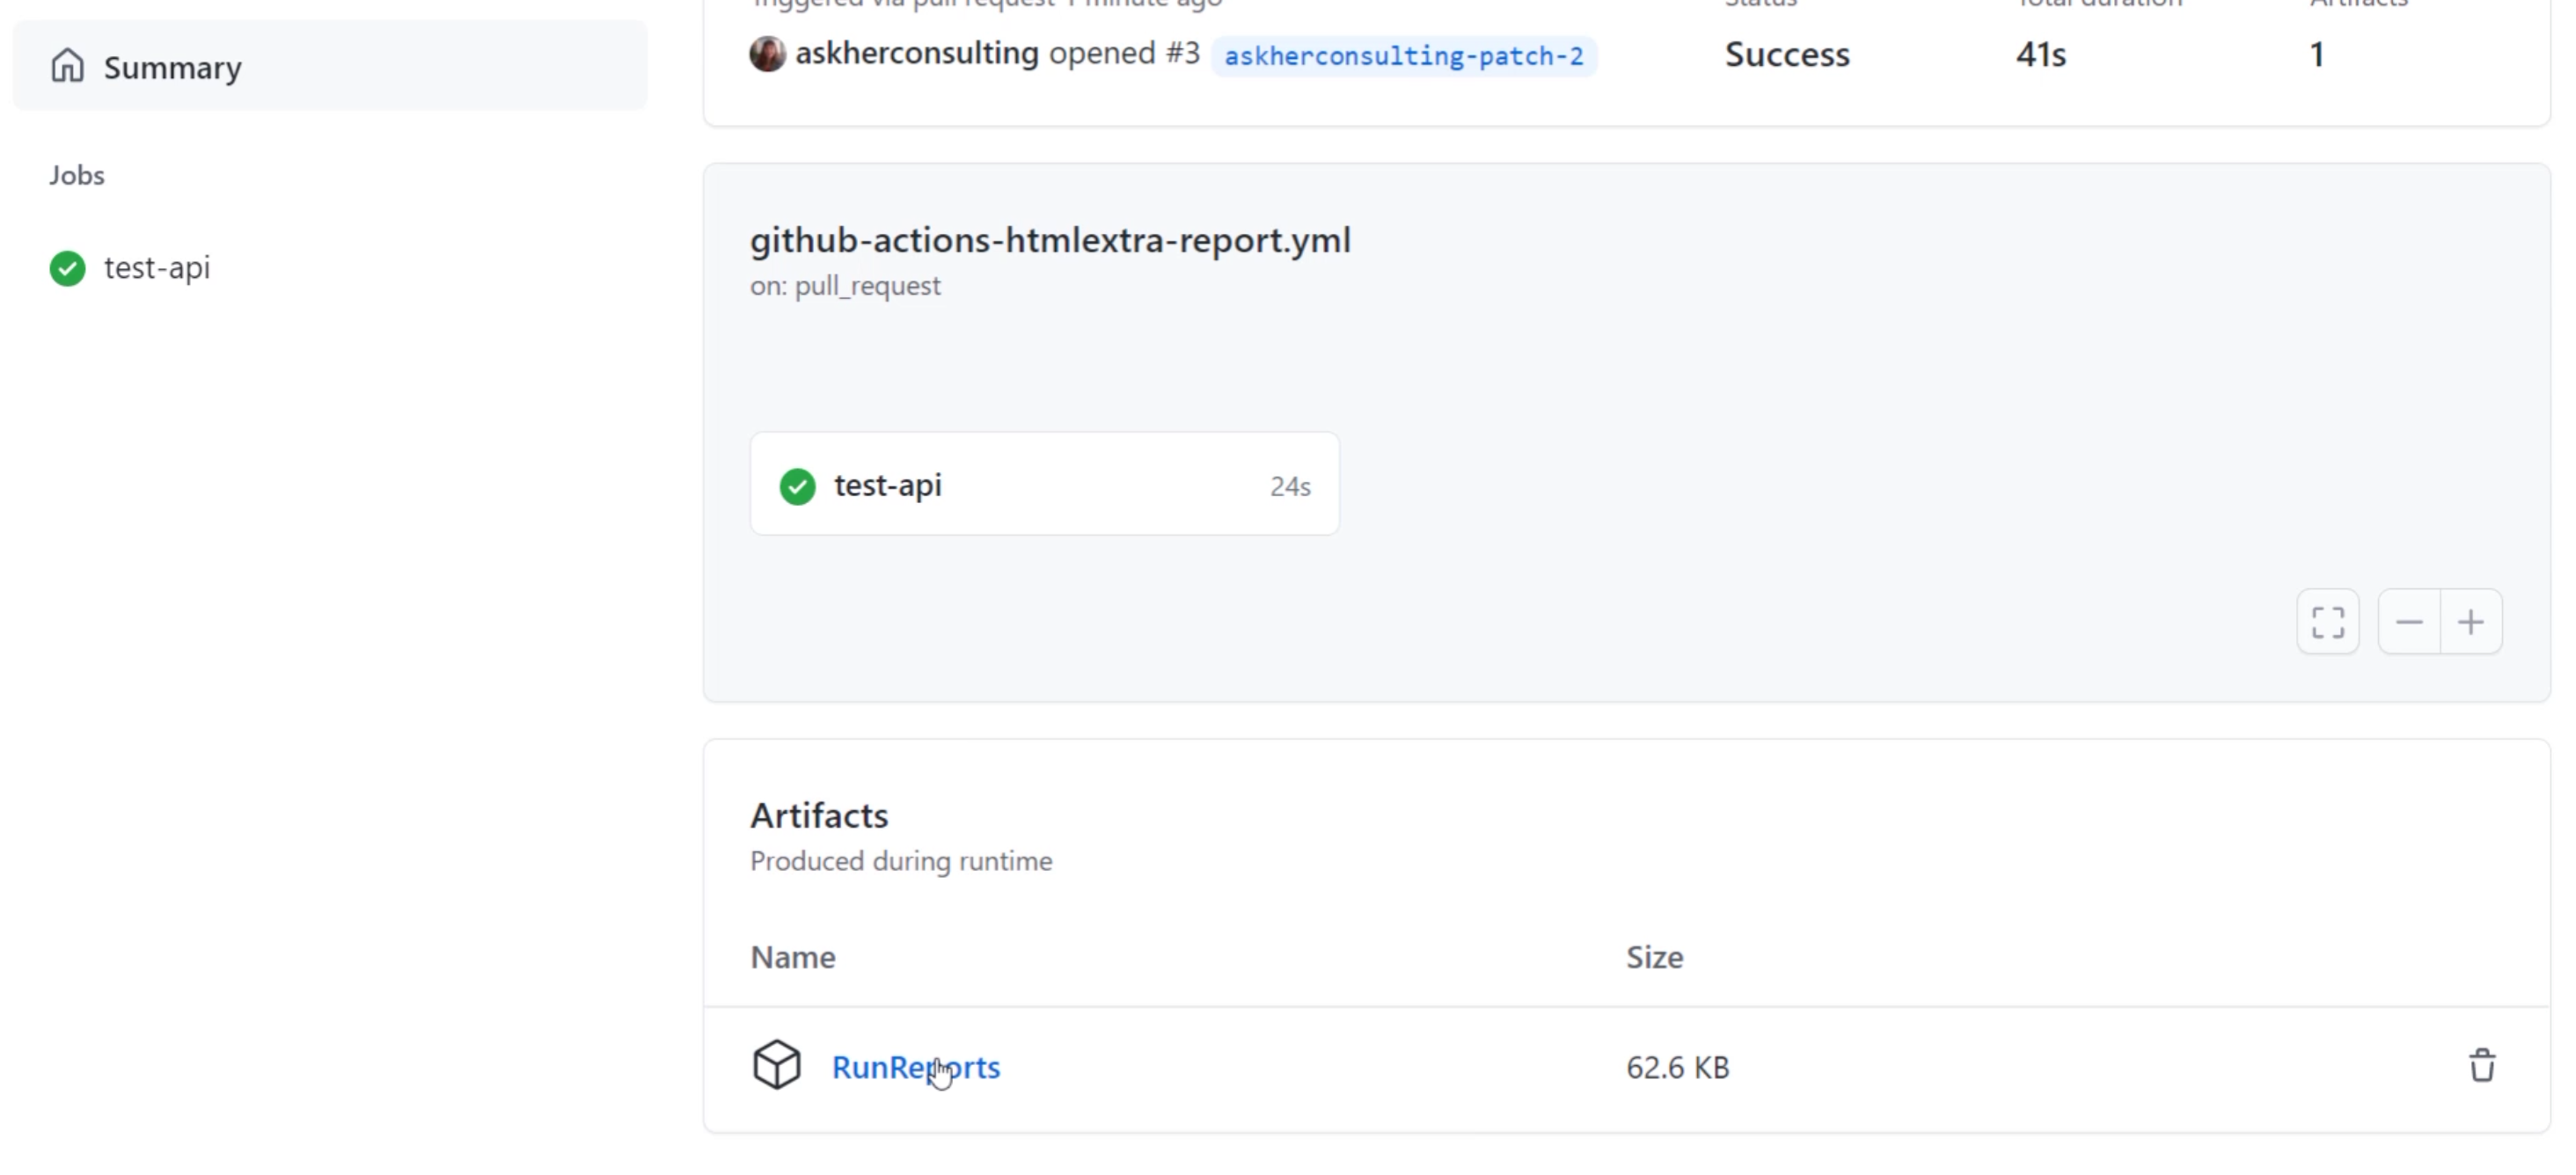
Download that and let's open it up.
Now you can see this is a much nicer report to look at and you can delve into the details here too - it even has a dark mode.
Congratulations for completing this course!
I hope you've enjoyed listening to it as much as I have enjoyed making it.
In taking this course, I hope you'll feel more knowledgeable about seeing Postman as more than just a tool for ad hoc exploratory API testing.
Through these few short chapters, you've been introduced to mocking, monitors, version control, shared and public workspaces, Newman, and more.
I hope this has whetted your appetite to learn and grow your skills even further using this amazing tool.
There are a list of useful community resources in the section below that will help you on this journey.
I'm always open to hearing your feedback on this course.
I'm available at @Beth_AskHer on Twitter. All the very best to you and happy testing.
