

Transcripted Summary
Selenium 4 provides 5 relative locators.
The purpose is to find 1 element or more than 1 element that is located above, below, near, to the left of, or to the right of another element.
Each relative locator is an overloaded method that receives a By parameter or WebElement parameter.
In this chapter, we will use the OrangeHRM demo as our AUT (application under test).

The first test would get user name: admin and password: admin123. The second test would get a list of web elements using a relative locator to find a list of the social media names.
# Test Set Up and Tear Down Configurations
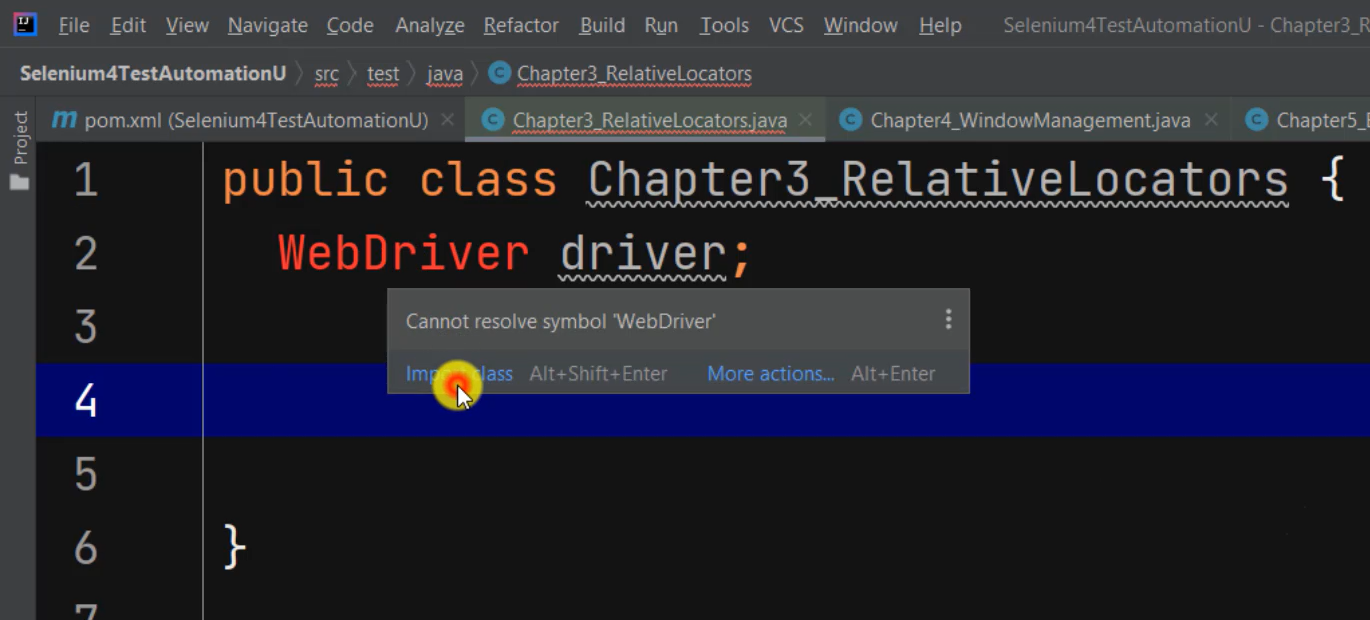
In the IDE we start by writing WebDriver driver and hopefully my typing goes good. Then, import WebDriver.
Next are the TestNG configuration annotations @BeforeMethod and @AfterMethod. The BeforeMethod would help us set up our test and the AfterMethod would help us tear down our test.
To set up, let's write:
  @BeforeMethod
  public void setUp() {
    WebDriverManager.chromedriver().setup();
  }
This statement helps us bypass writing System.setProperty() and passing in ChromeDriver file path.
Next, I would write driver = new ChromeDriver().
Now let's also maximize our window because at this point, we can automate our test scripts on Chrome. We maximize by writing driver.manage().window().maximize()
Now let's load the AUT by writing driver.get(""). Then we go back and copy the URL and paste the URL.
  @BeforeMethod
  public void setUp() {
    WebDriverManager.chromedriver().setup();
    driver = new ChromeDriver();
    driver.manage().window().maximize();
    driver.get("https://opensource-demo.orangehrmlive.com/");
  }
Now, we are finished with the BeforeMethod to set up the application.
Let's tear down our tests by writing:
  @AfterMethod
  public void tearDown(){
    driver.quit();
  }
The driver.quit will quit the browsers.
We are finished with our configuration annotations.
# Test #1 – Getting Username and Password
Let's get the text of username and password by going back to the AUT and inspecting the credentials.
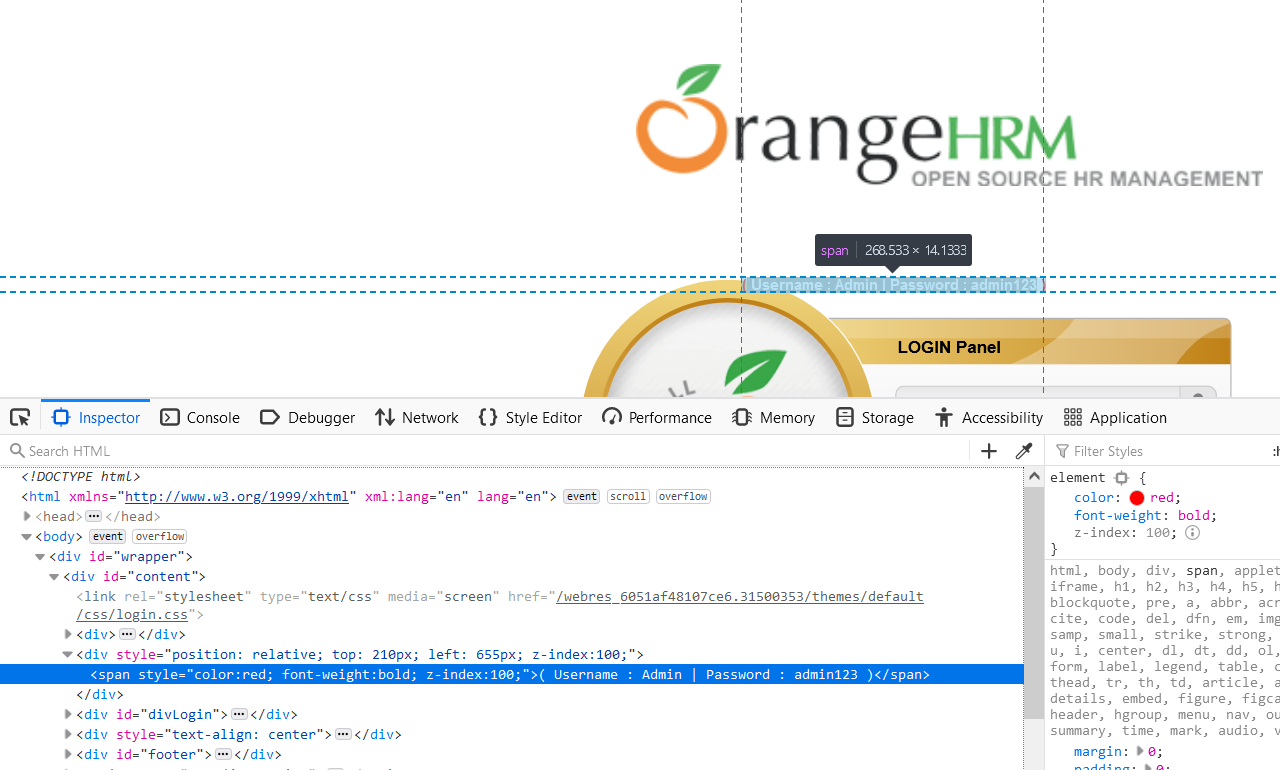
We see it has a span tag and only a style attribute. In my opinion, the style attribute is not sufficient.
Therefore, let's inspect the login panel.
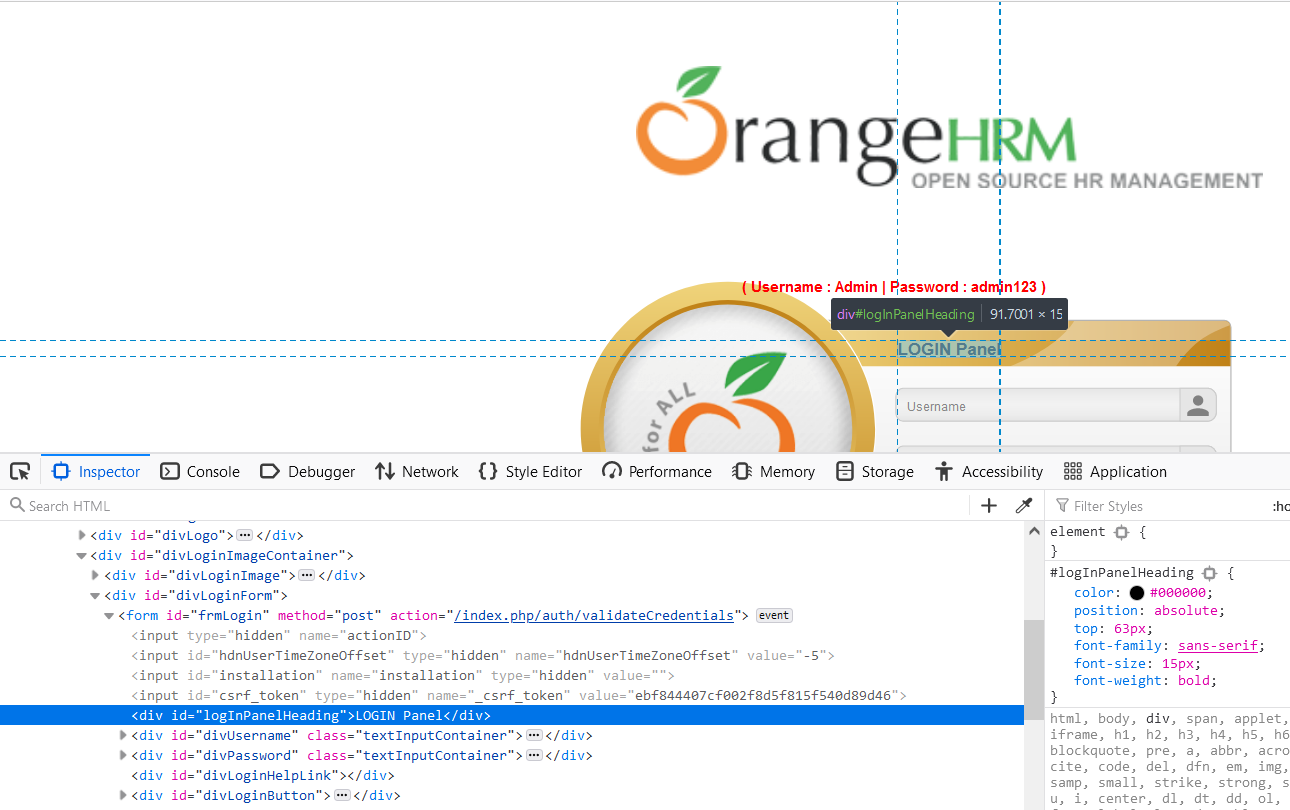
It has an id value of "logInPanelHeading". That's a good attribute.
The relative locator we are going to use is above, because the credentials are located above the login panel.
For this test, we need 2 pieces of information.
- The id value for login panel, and
- The span tag for username and password.
In the IDE, we write @Test to identify our test method. Then public void testRelativeLocator().
First, we locate the web element by writing var loginPanel = driver.findElement(By.id("logInPanelHeading")). And we pass in the value for id.
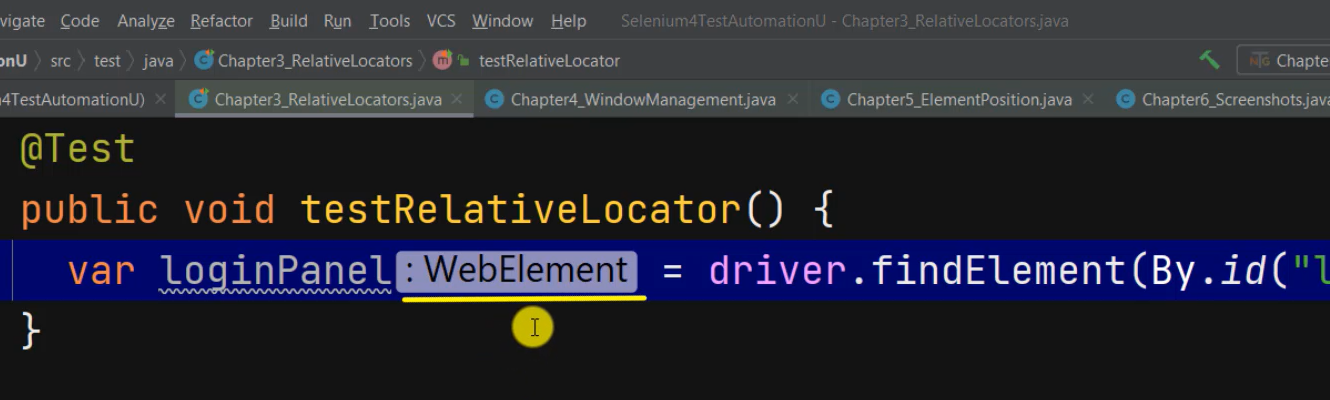
Since IntelliJ is writing “WebElement” for us, I'm going to change var to WebElement to make more room.
Either way is okay.
Now we must find the WebElement for “credentials” using driver.findElement().
Do you see how the “loginPanel” has the By class then id? For this next statement, we are going to write RelativeLocator..
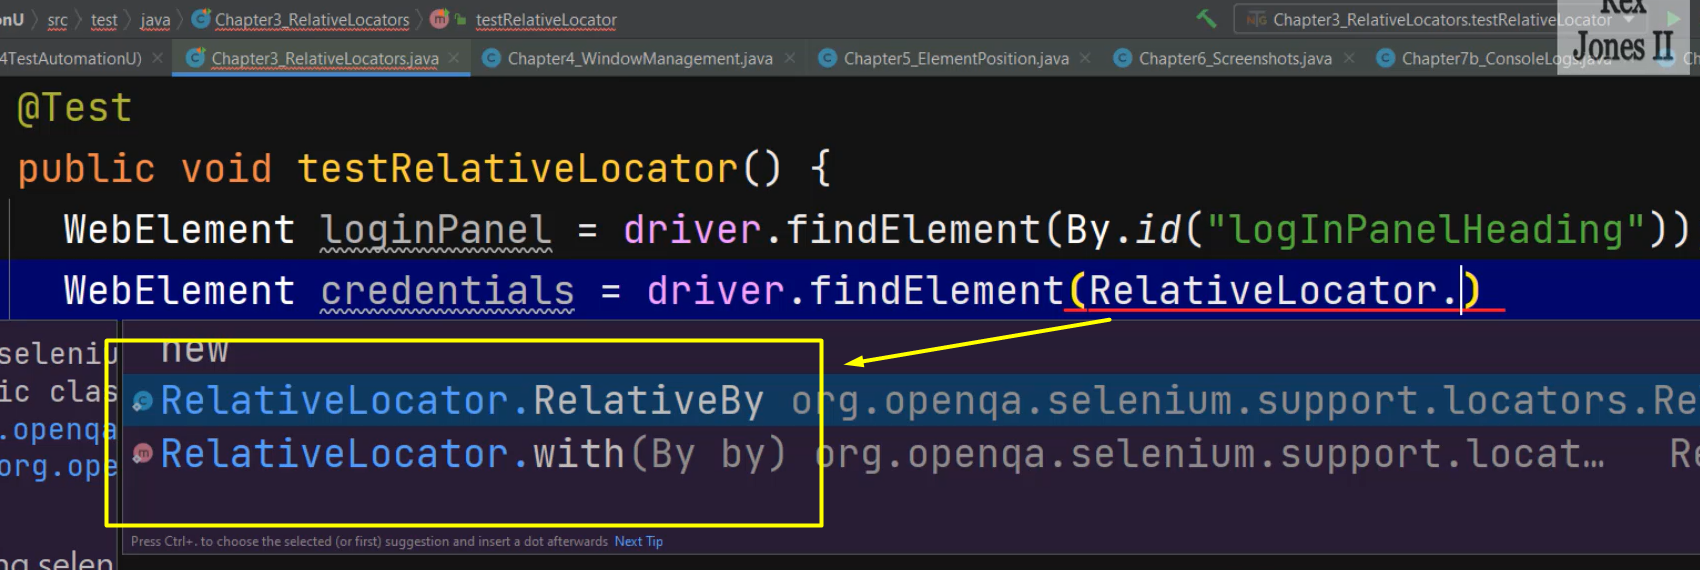
RelativeBy is a class that extends the Byclass.
We are going to use the new method with which is a member of the RelativeBy.
To finish this statement, let's write By., and we see a list of all 8 Selenium locators.
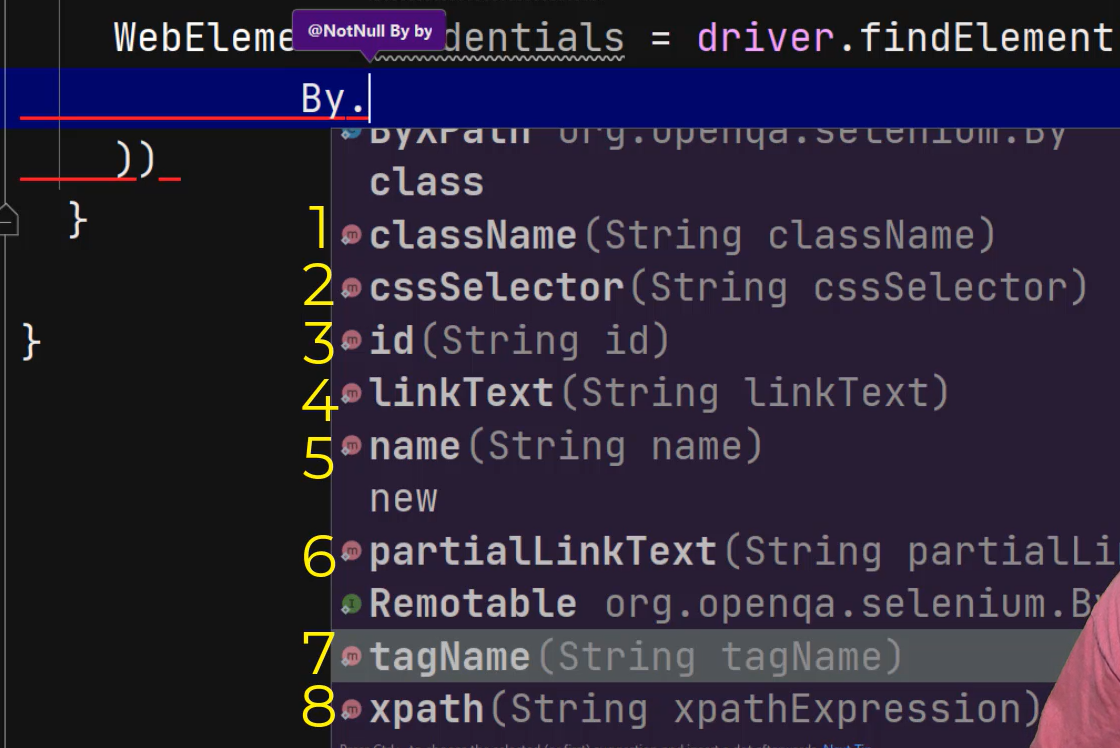
We are going to select tagName. The tagName for credentials was “span”.
This is where the RelativeLocator becomes important — the credentials are located above the login panel.
If I write .above, we see the By parameter and WebElement parameter for .above.
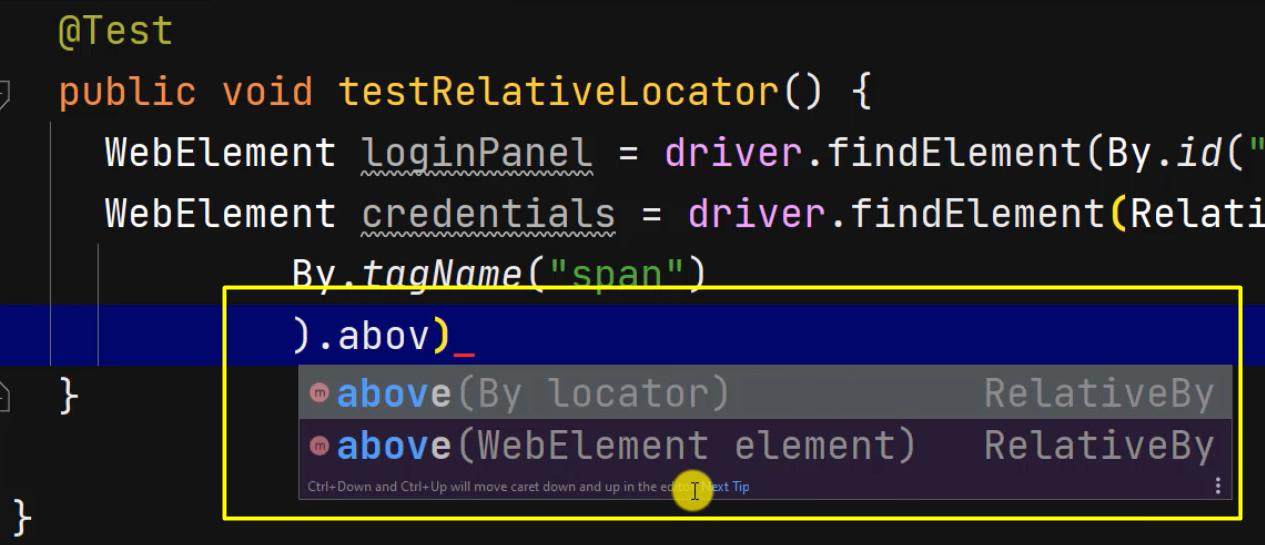
It's the same for below, near, toLeftOf, and toRightOf.
We will select above. Now, that's all we write for RelativeLocator because we can now pass in the loginPanel which is located above the credentials.
Depending on your scenario, you can also add another relative locator by writing another dot (.).
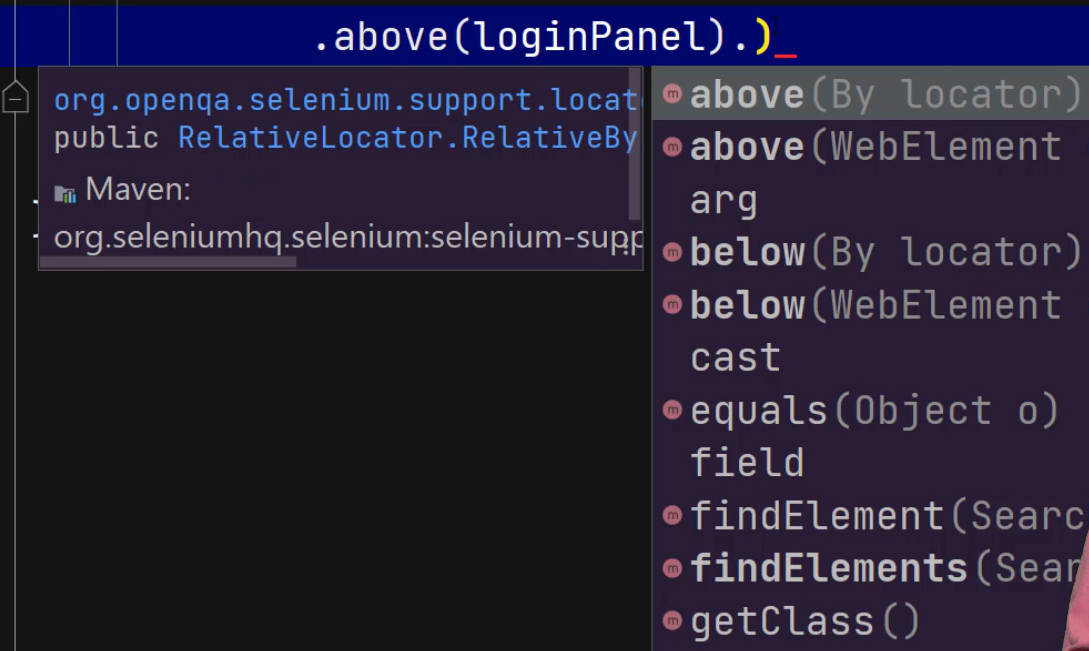
And we see the other relative locators again.
Now at this point, we'll finish writing our RelativeLocator and I want to print the credentials.
  @Test
  public void testRelativeLocator() {
    WebElement loginPanel = driver.findElement(By.id("logInPanelHeading"));
    WebElement credentials = driver.findElement(RelativeLocator.with(
            By.tagName("span"))
            .above(loginPanel));
    System.out.println(credentials.getText());
  }
Now let's run.
The test passed. It shows “Username : Admin” and “Password : admin123”.
# Test # 2 – Finding Social Media Elements
The next test will get each social media name for OrangeHRM.
Let’s inspect the LinkedIn element and see it has “LinkedIn OrangeHRM group”.
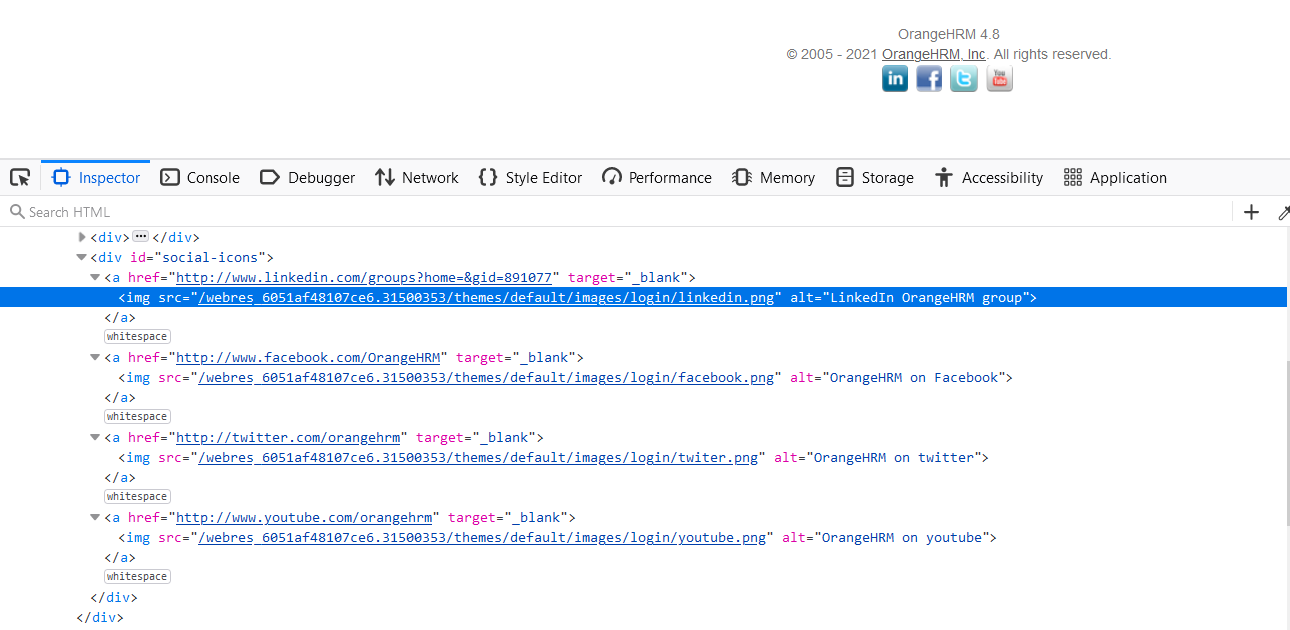
Scroll down to see Facebook (“OrangeHRM on Facebook”), Twitter(“OrangeHRM on Twitter”), and YouTube(“OrangeHRM on YouTube”).
I'm going to inspect the footer and it has an id value of “footer”.
We will use:
- The “img”
tagName, and - The
id“footer” value.
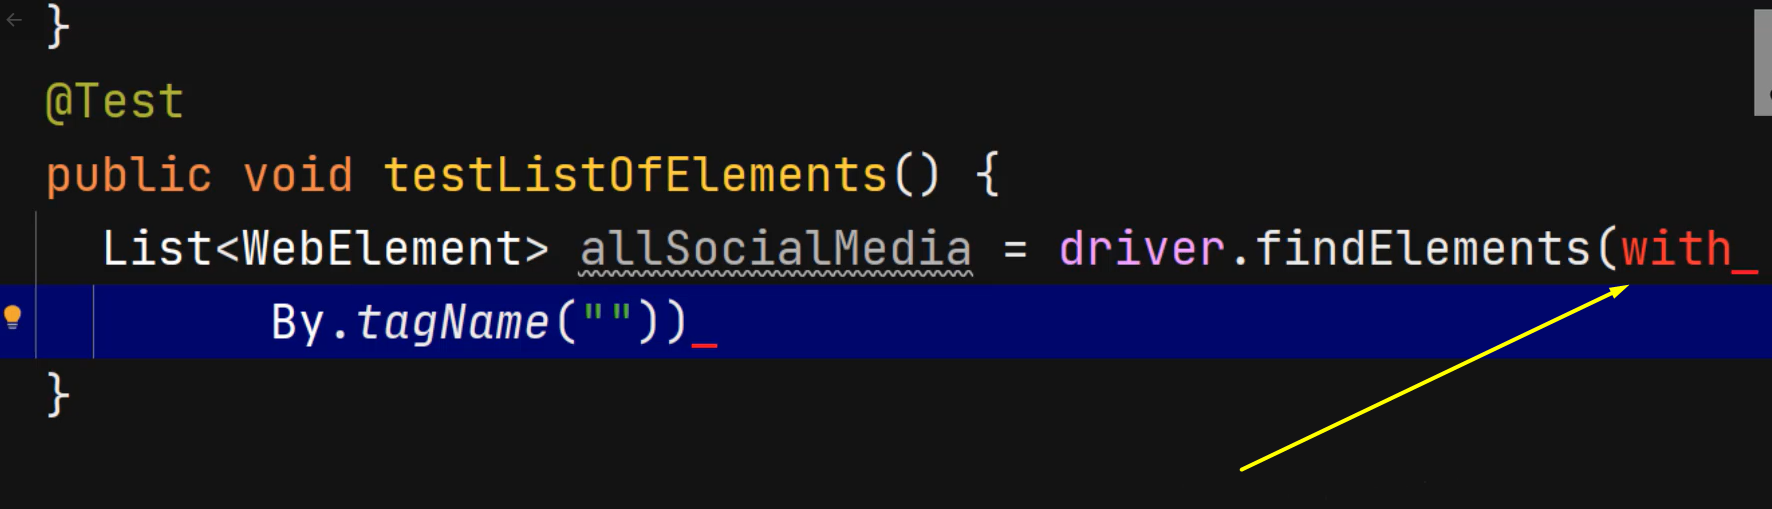
In the IDE for our next test, we are going to write @Test, public void testListOfElements(), then List<WebElement>.
The object reference will have a name of allSocialMedia = driver.. Since we are returning more than 1 element, we select findEements with an “s”.
There are 2 ways to write a relative locator.
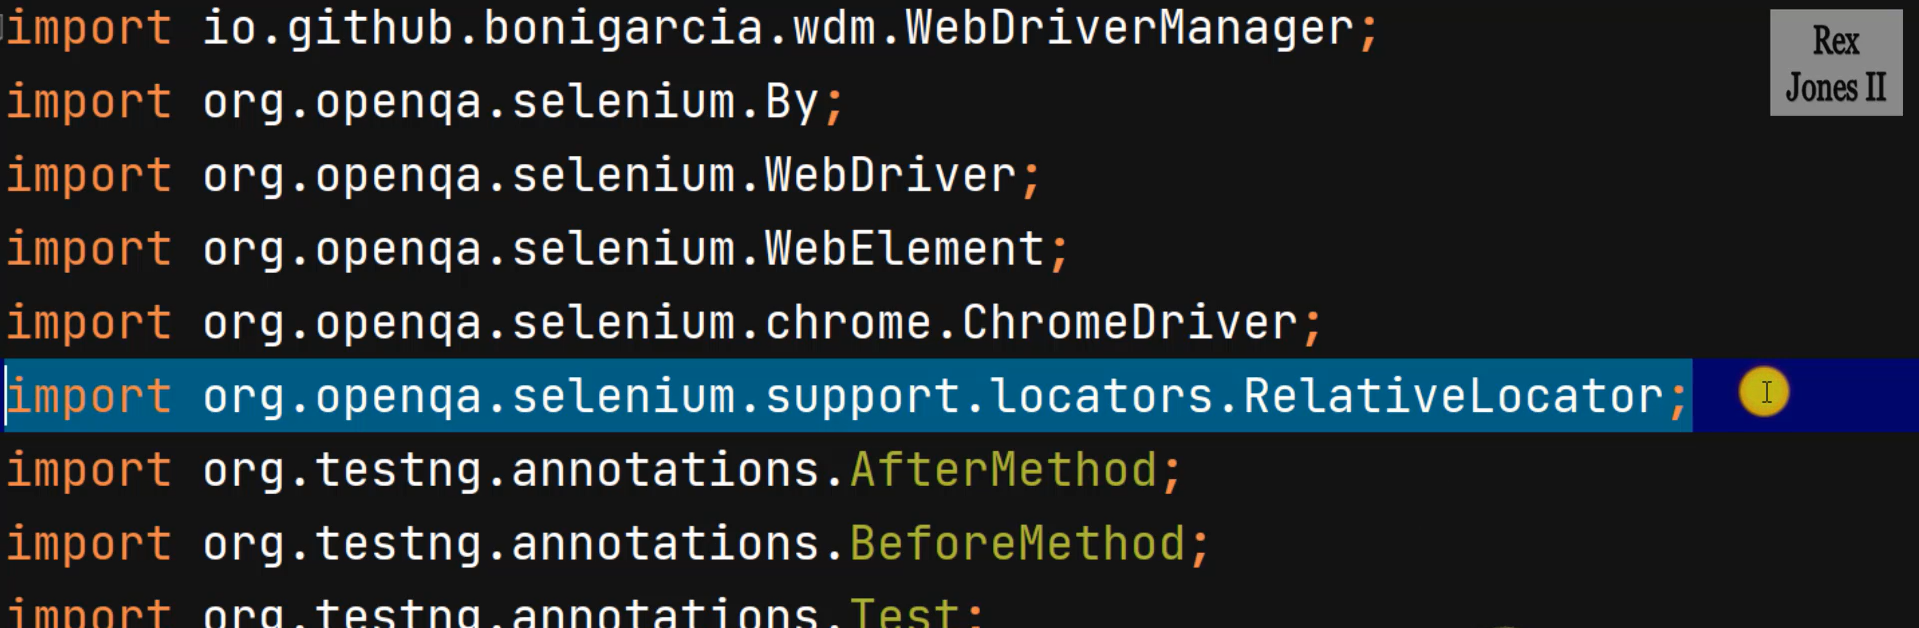
In the previous test we wrote RelativeLocator.with — with is the method name. This time we're going to skip writing RelativeLocator.
After I import the List class, I'm going to write with, skip a line, then write By.tagName.
Do you see the red writing for with? That's because we need to import the static package.
Scroll up and we are going to see how the relative locator does not include static.
And that's by default.
So, I want to copy and paste this line, then write “static” in front of “org” and finish with with at the end.
import static org.openqa.selenium.support.locators.RelativeLocator.with;
When we go back, we still see the red writing, but if I write the open parenthesis — with() — the red writing goes away.
So now, we can write our value for tagName(""). This here should be “img” for image because that's for the “allSocialMedia” information.
Now we are going to write the relative locator which is .near. And this time we're going to pass in the By parameter, which is By.id("") and that’s “footer”.
    List<WebElement> allSocialMedia = driver.findElements(with(
          By.tagName("img"))
          .near(By.id("footer")));
So, we did the By parameter for footer and the WebElement parameter for the login panel, so we satisfied both parameters.
That's how we return a list of web elements.
To print the values, we need to use the Java “for-each” loop.
And that's by writing for (WebElement socialMedia : allSocialMedia).
Know what? I need to go back and get the attribute for the social media. We see the value for the social media icons is “alt” that's how we get the values.
Now I'm going to write System.out and to print the values, let's write socialMedia.getAttribute("") and pass in the value of "alt".
  @Test
  public void testListOfElements() {
    List<WebElement> allSocialMedia = driver.findElements(with(
          By.tagName("img"))
          .near(By.id("footer")));

    for (WebElement socialMedia : allSocialMedia) {
      System.out.println(socialMedia.getAttribute("alt"));
    }
  }
Now let's run.
The test passes. Let's see the values.
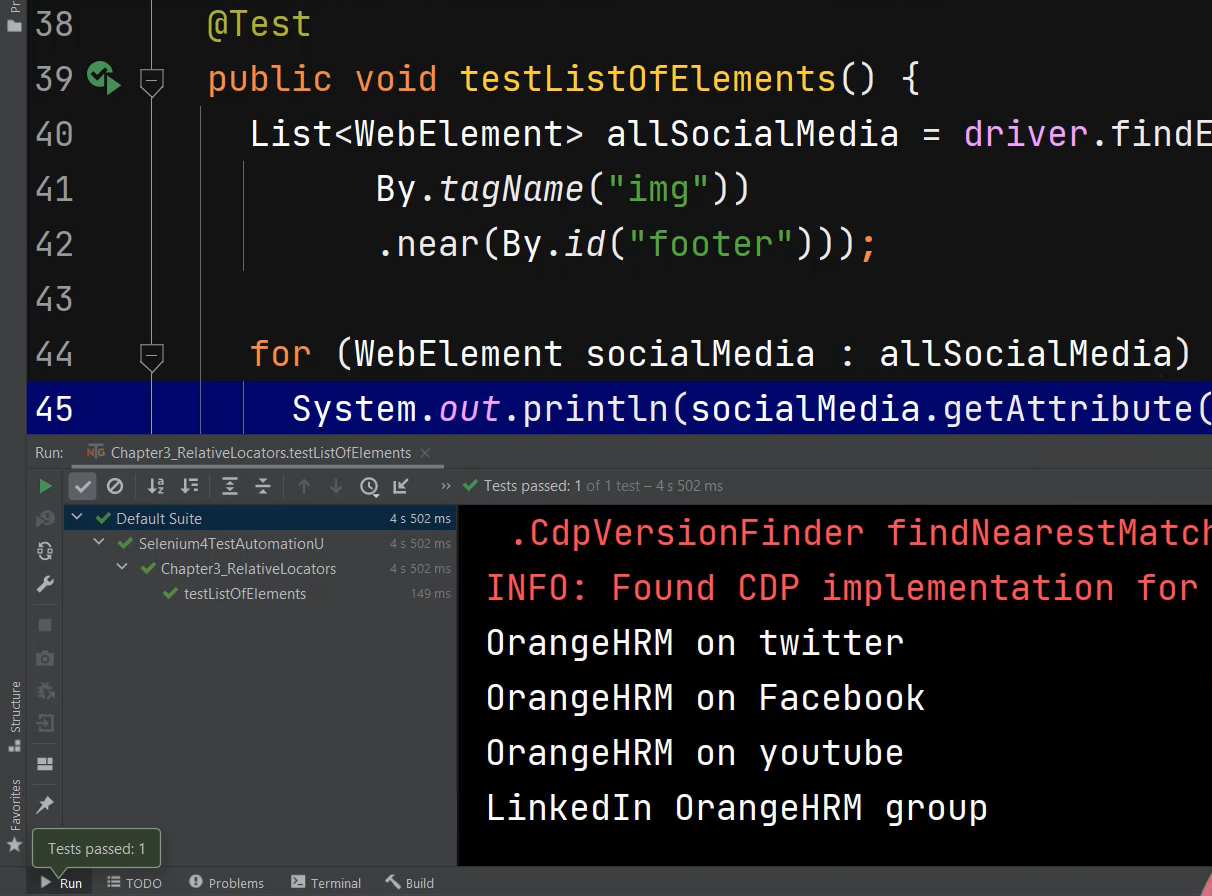
Yes. We see Twitter, Facebook, YouTube, and LinkedIn.
In Selenium, to find elements the relative locators work by using getBoundingClientRect() from JavaScript.
It looks within the DOM to return a DOMRect object, providing information about the position and size of an element. The properties are left, right, top, bottom, X, Y, height, and width.
For example, let's go back to OrangeHRM and inspect the login panel.
Then copy the id value, go to the console and type “document.getEleementById()” then paste the value of "logInPanelHeading". Then write .getBoundingClientRect() and hit enter.
As expected, we see the DOMRect` object.
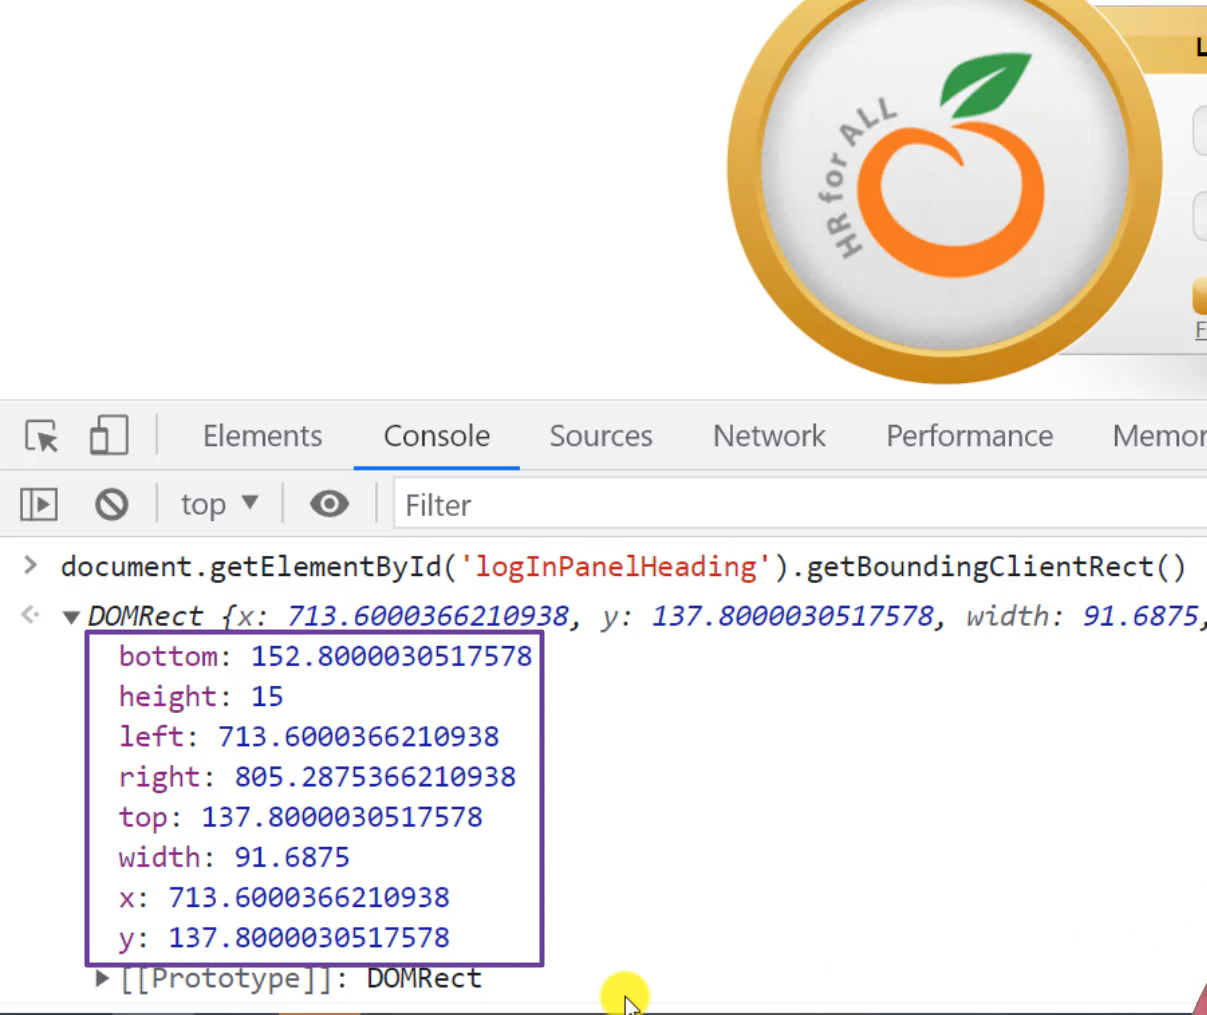
When we expand the object, then we see bottom, height, left, right, top, and width.
In relation to other elements, the relative locators find elements that are above, below, near, to the left of, and to the right of using these properties.
Next, we will manage windows and tabs.
