

Transcripted Summary
In the last chapter, we got up and running with our first visual test. The next step is to take a closer look at the Applitools dashboard. Before we get started on that, we'll need to learn about a core concept of Applitools called Baselines. We'll then show you the workflow we recommend for reviewing your test results. We'll go over all of the possible test statuses your tests can have and provide you with the steps to take in response. At the end of this chapter, you'll have all the fundamentals down for reviewing your test results.
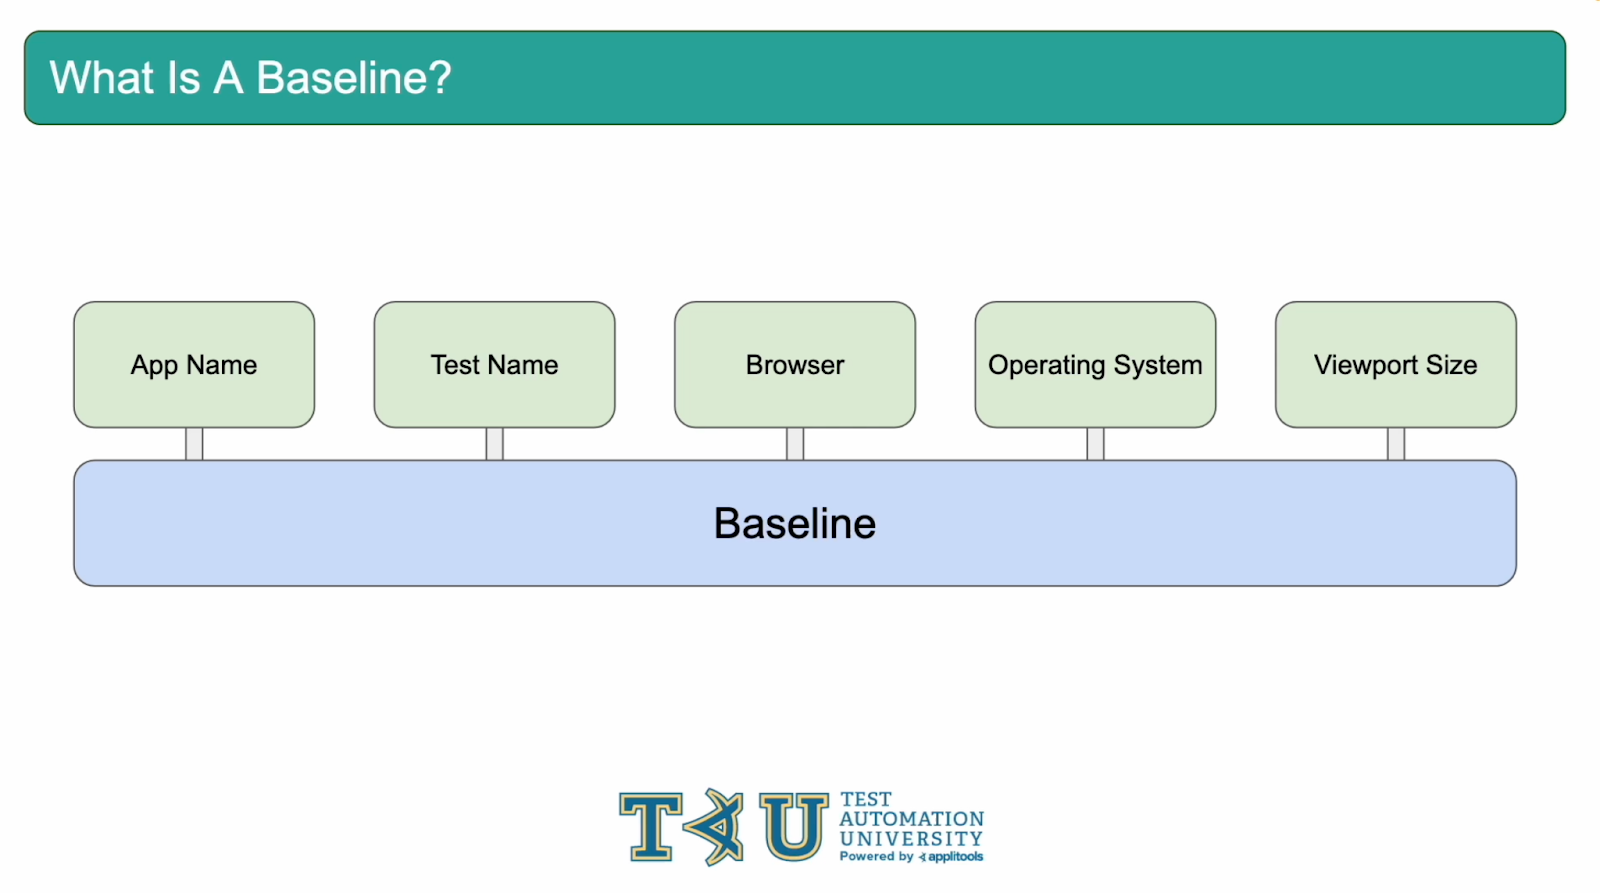
So, what is a Baseline? At its core, a baseline represents a test run. Each time a test is run, either a new baseline is created or that test is compared to an existing baseline. A baseline is defined by these 5 variables: App Name, Test Name, Browser, OS and Viewport size. Those paying close attention may recognize some of these variables as arguments to the eyes.open() method. When you run your tests, the Applitools server checks these 5 variables and searches for a match. If no match is found, your tests are marked as "New" and a new baseline is created. Otherwise, a visual comparison is performed against the existing baseline.
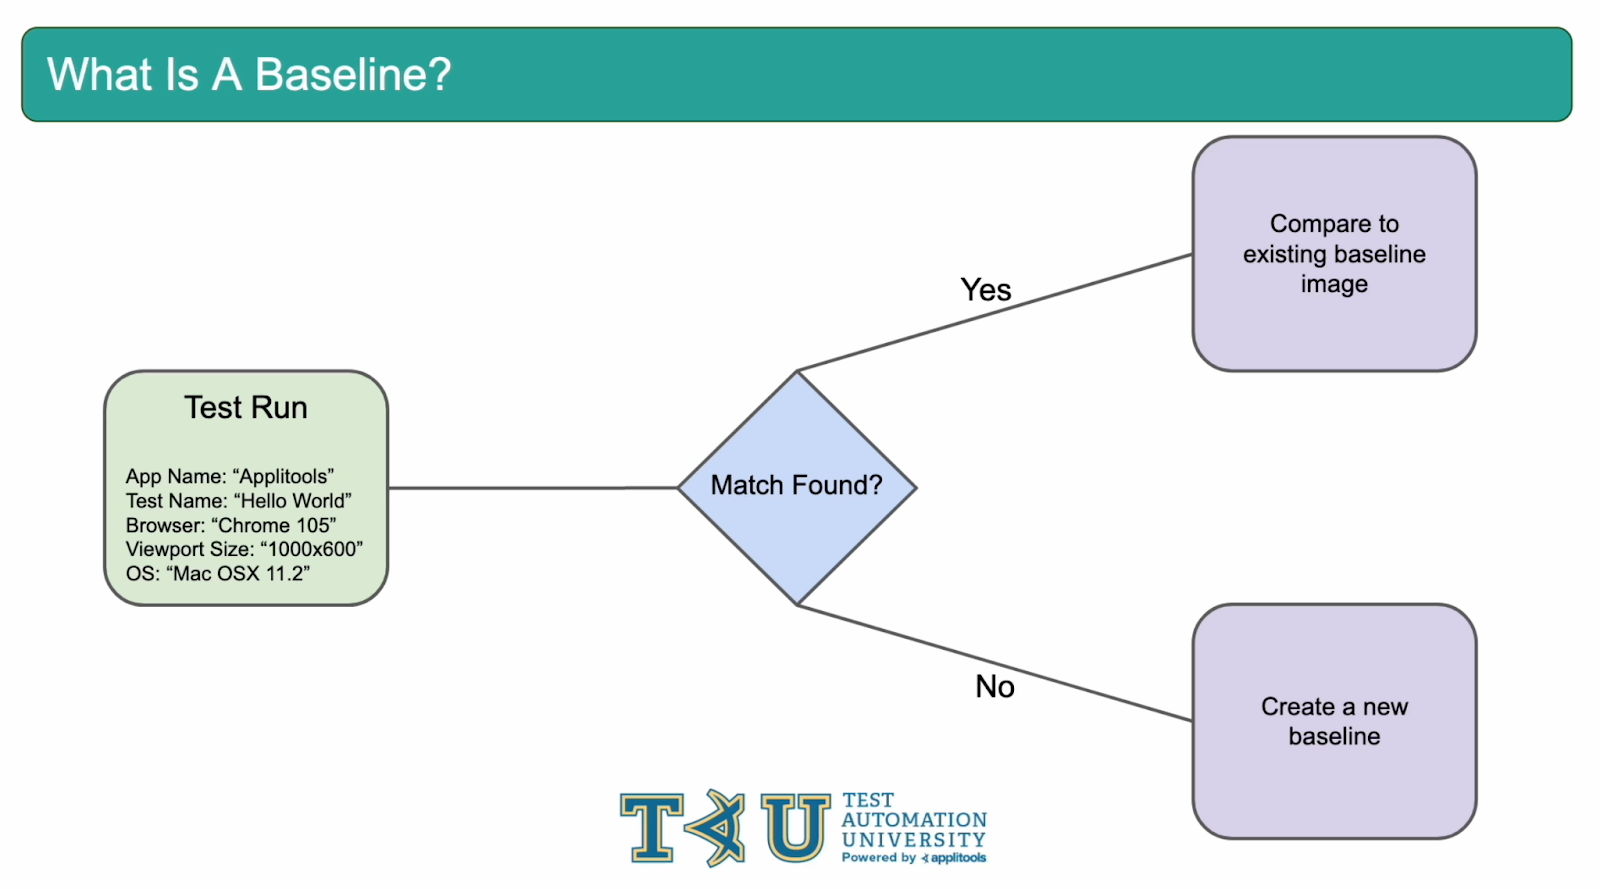
Baselines are so important to working with Applitools that we should drive this point home using a visual example. As mentioned, every time a test is run, either a new baseline is created or your test is compared against an existing baseline. Imagine that we have a test run that's been configured with the following baseline variables: the app name is Applitools, the test name is Hello World, the browser is Chrome, the viewport size is 1000x600 and the OS is Mac. The server will check these variables and look for a matching baseline. If a match is found, the Eyes AI will run visual comparison against the existing baseline image. If no match is found, the baseline is created and the test is marked as "New".
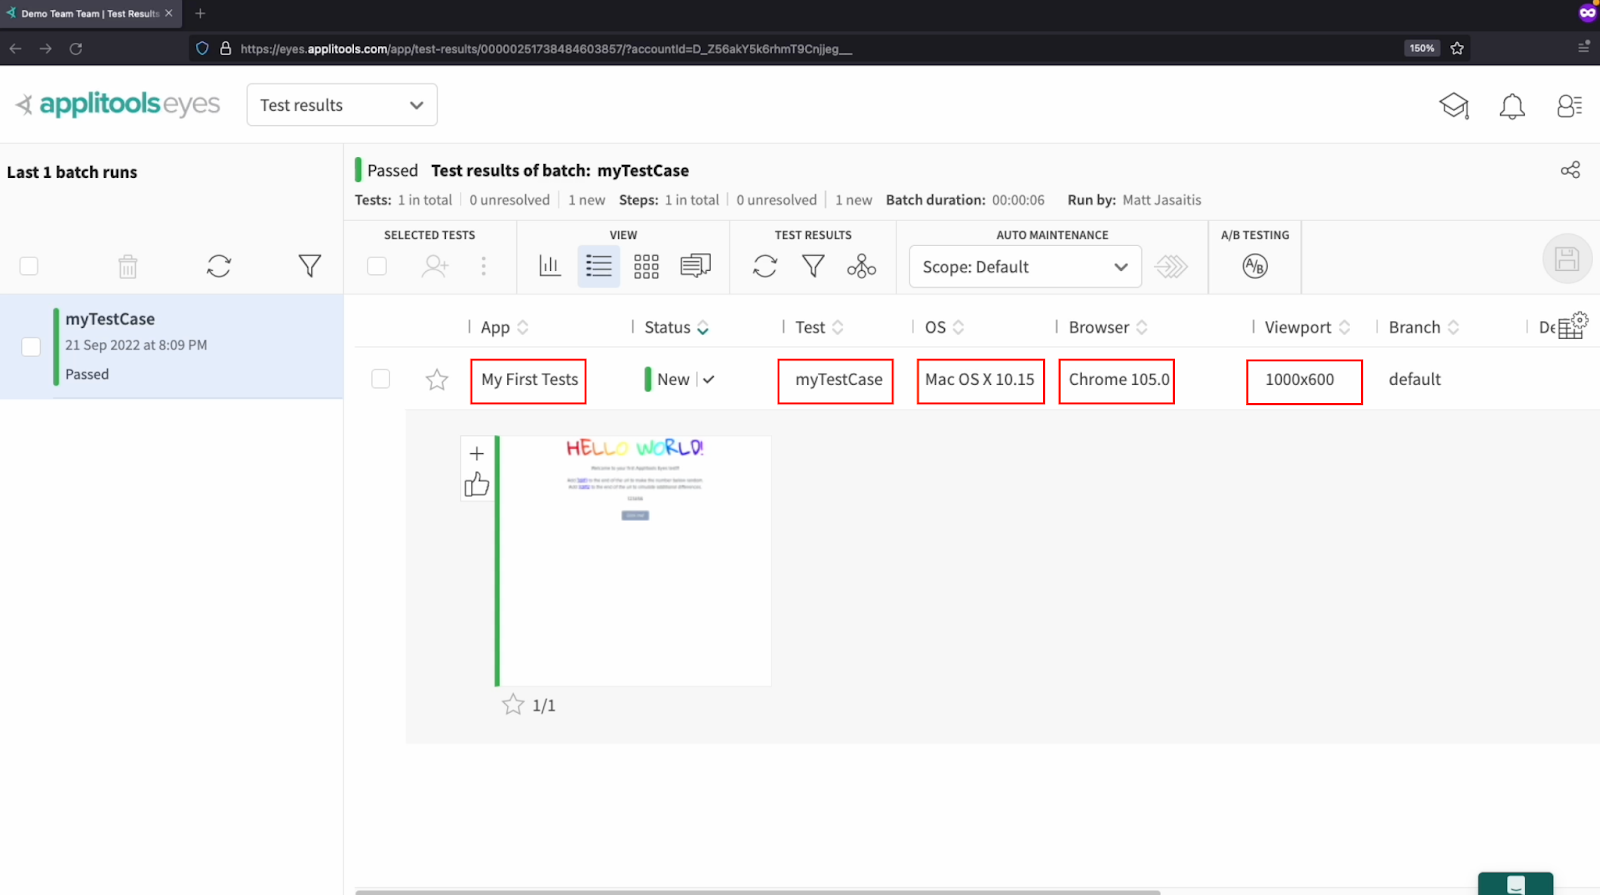
Here we are back on our Applitools dashboard. Let's look at that test run from earlier and identify the 5 baseline variables. We have the App Name, Test Name, OS, Browser and viewport size. Since this baseline did not yet exist in our account, a new baseline was created and this test has a status of "New". Let's go ahead and re-run our test and see what happens now that we have this baseline.
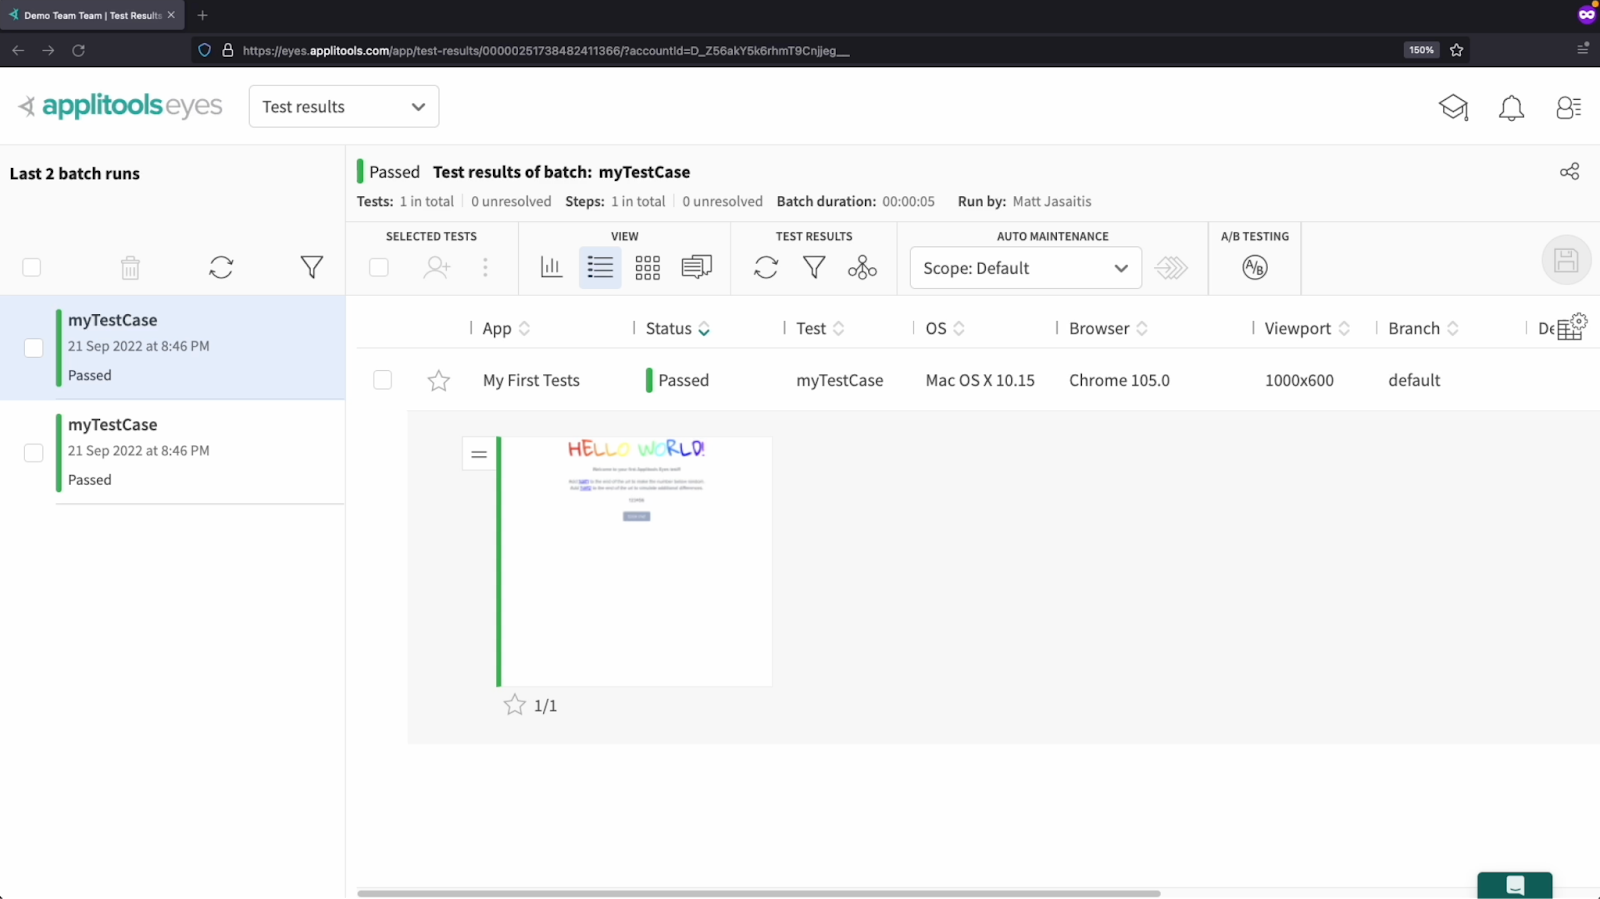
After running our test again, we see the status is no longer "New" and is instead "Passed". This is because our baseline already exists and the 5 variables that make up a baseline have not changed from our previous run. Therefore, we now get a visual comparison using the Eyes AI.
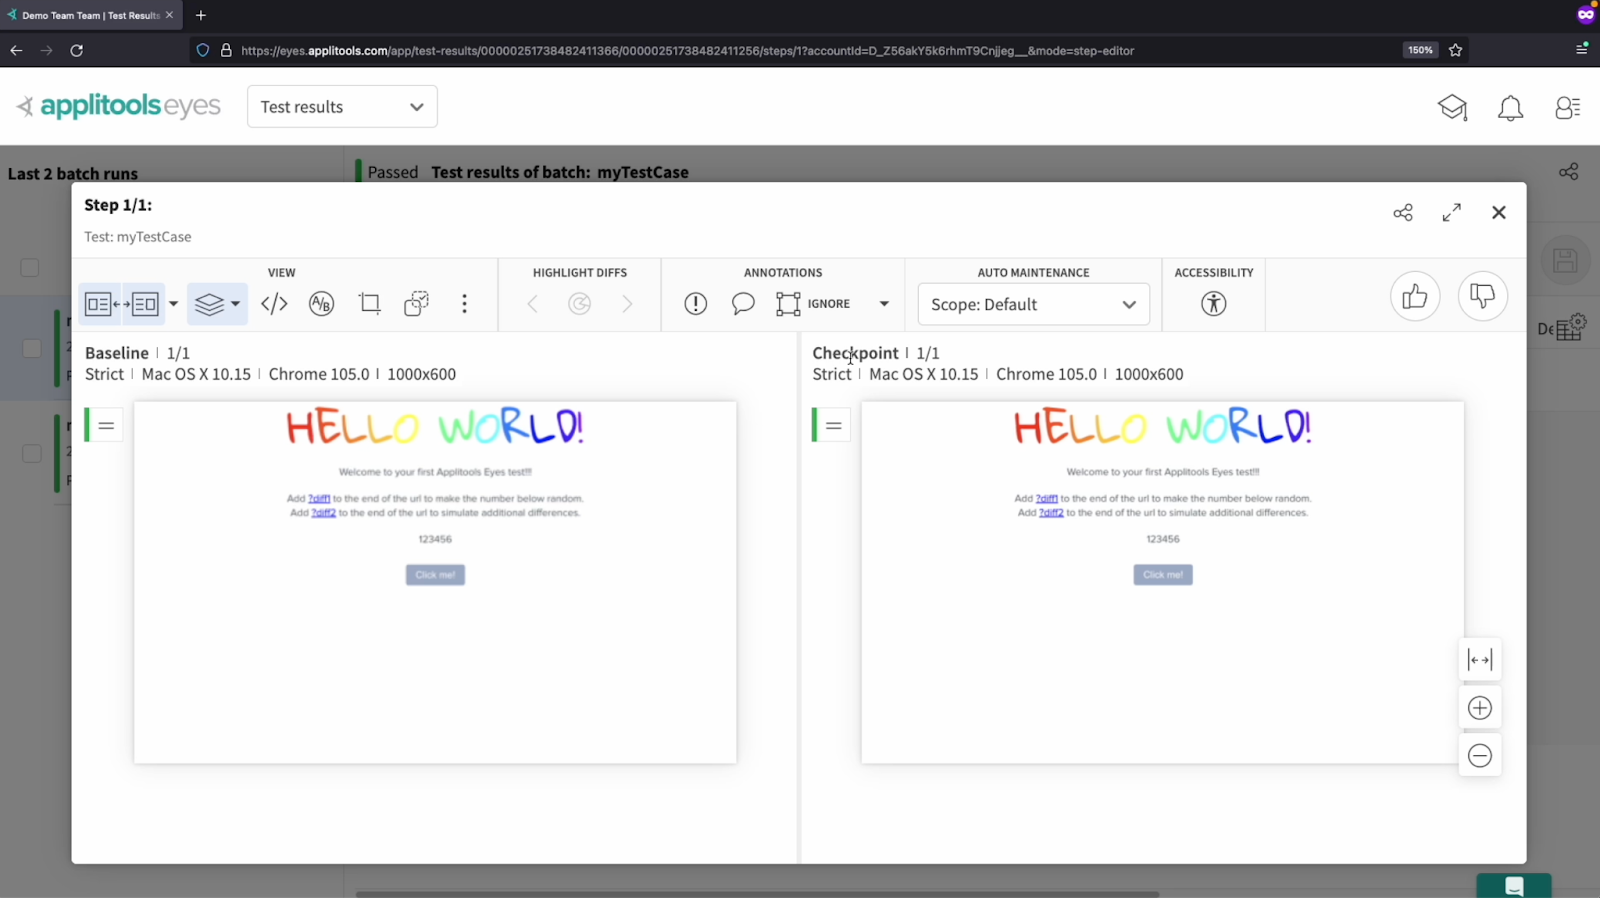
If we check out our image this time, we see that we still have the baseline image from our first run but we also have a checkpoint image from our 2nd run. The Applitools Eyes AI found no visual differences when comparing these images and the server has marked the test as "Passed". Now, let's see what happens when the Eyes AI detects a visual difference. Let's head over to our code and modify our test script.
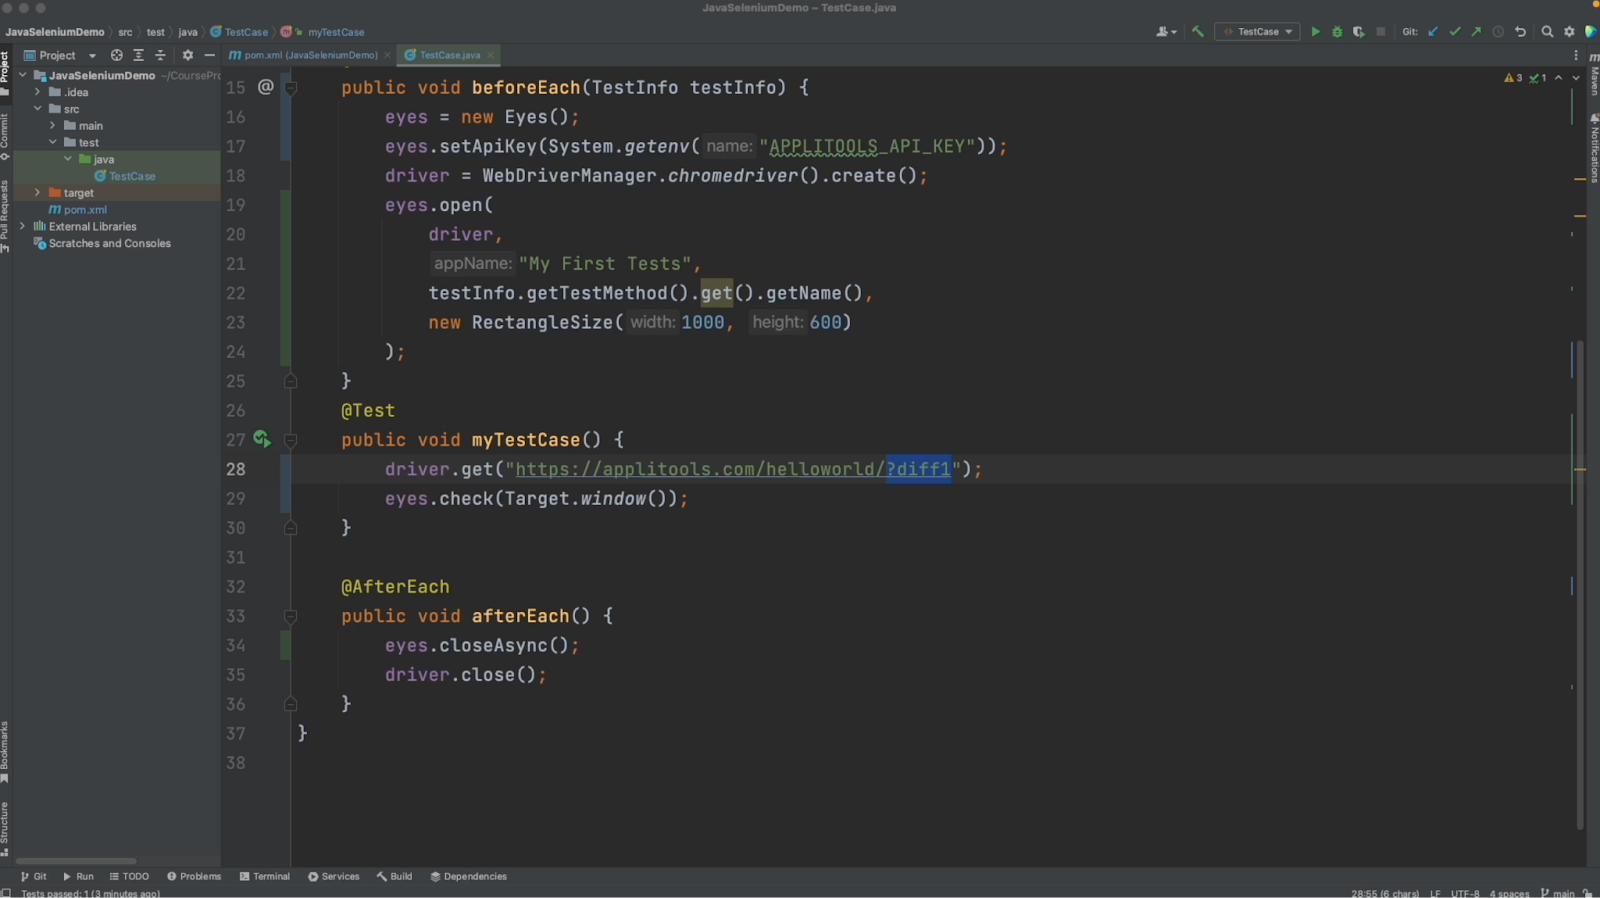
In our test framework, I made a simple change to generate a difference. I added "?diff1" to the end of the URL that we're navigating to. This will cause the page to change in structure thus generating a visual difference. After making this change, go ahead and run your test again then head back to the Applitools dashboard to review.
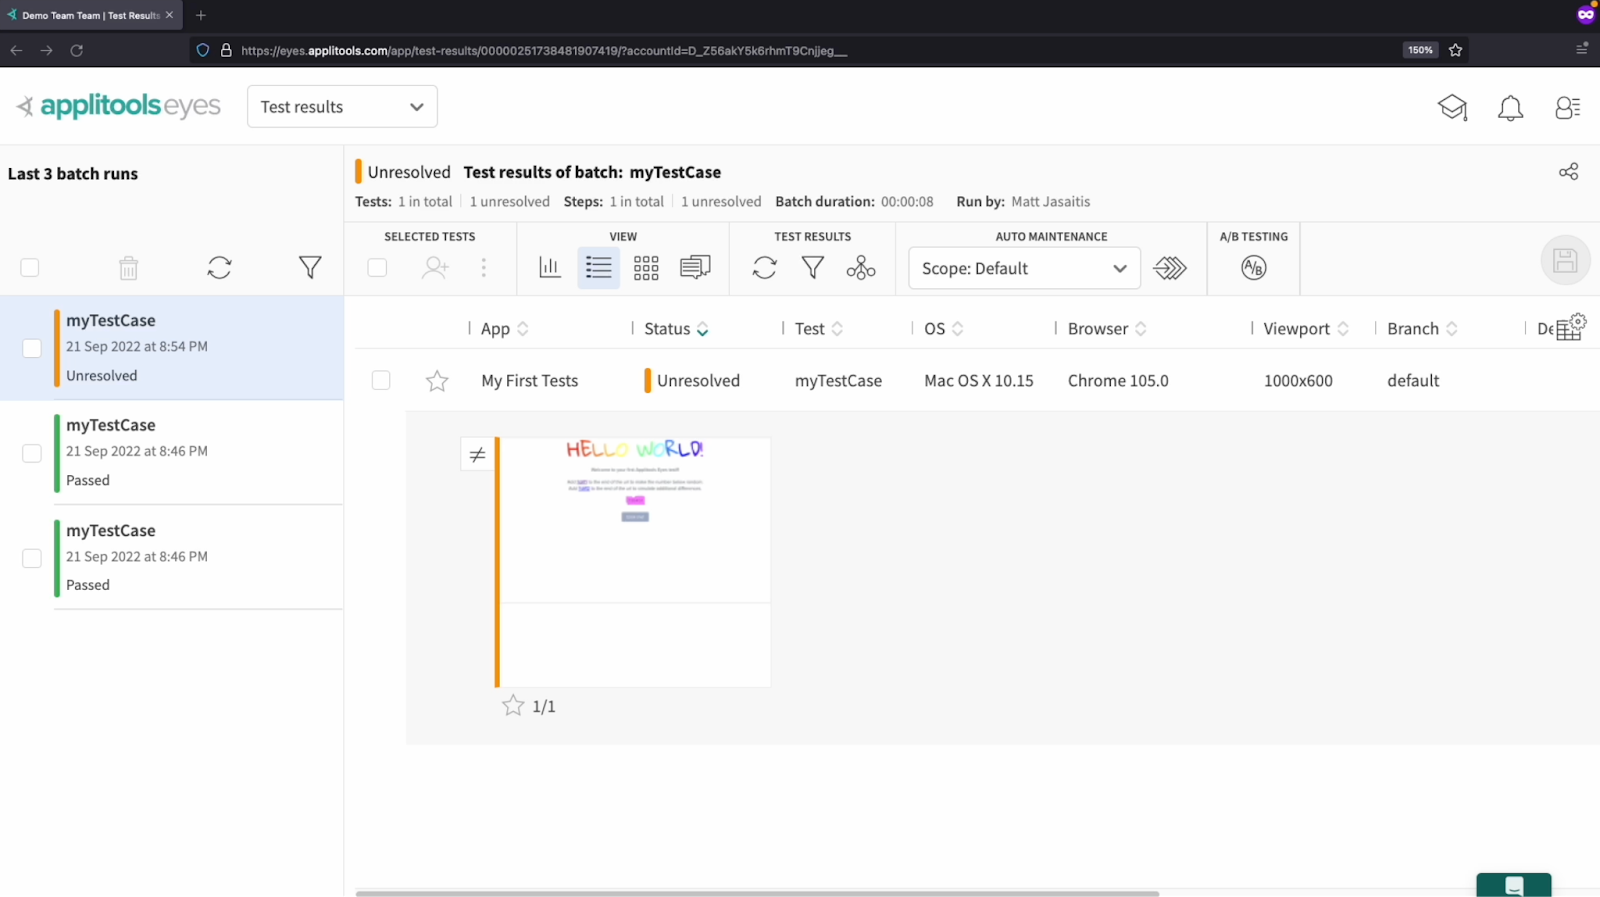
Back on our Applitools dashboard, we notice that we have a different test status. Instead of our test being marked as "Passed", it is now marked as "Unresolved". What this means is a couple of things: First, an existing baseline was found for this test run and the visual comparison was performed by the Eyes AI. Second, the Eyes AI detected a difference between the baseline image and our new checkpoint image.
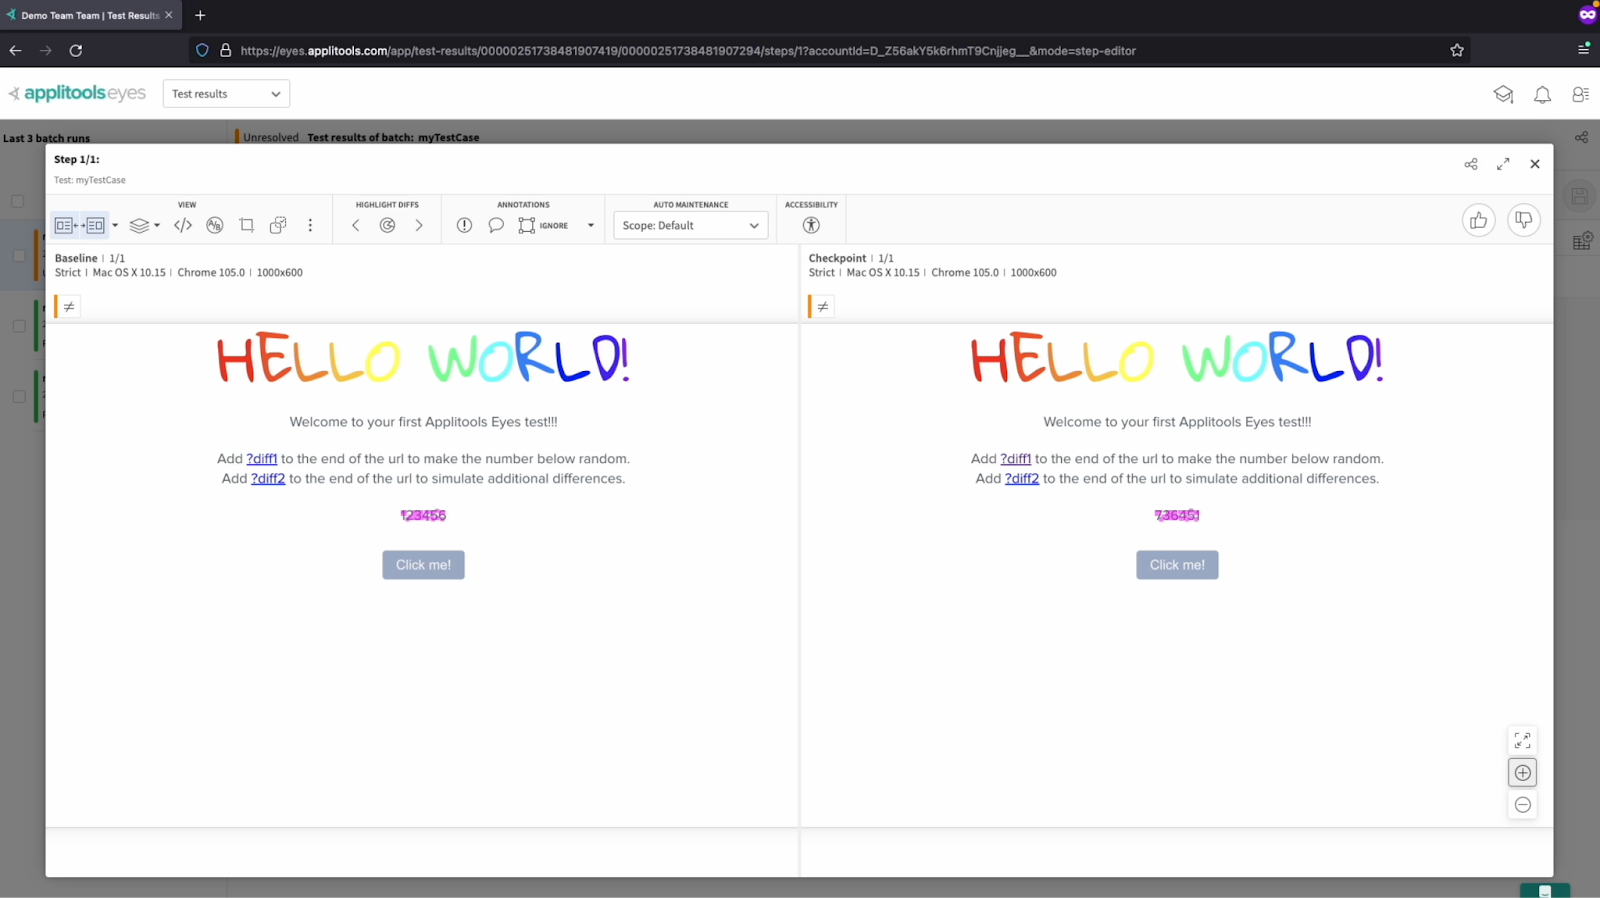
Upon inspection of this test result, we can see that the numbers have changed in the checkpoint image when compared to the baseline image. To quickly identify the differences found, you can click this button here to reveal them. So, what are we supposed to do when a test is marked as "Unresolved"? When a test is marked as "Unresolved", it is our job to review the differences flagged by the Eyes AI and determine if they are expected changes or visual bugs. If they're expected changes, we want to update our baseline and save the checkpoint image as the new baseline going forward. To do this, we should Approve this test by clicking the "Thumbs up" button followed by the save button.
After updating our baseline, every time we run this test, our baseline image will now be reflecting this new version of our webpage. Feel free to pause the video and run your tests again now that we've approved this image as the new baseline. You will see this image as the baseline going forward. However, if we decide that this difference flagged by the Eyes AI is not an expected change and it is in fact a visual bug, we should do the opposite and Reject this test result by clicking the "Thumbs down" button followed by the save button. This will prevent our baseline from being updated and will mark our tests as "Failed". If we run our test again, it will still be compared to the original baseline image. At this point, I encourage you to pause the videos and run your tests a few more times. Go through the same actions that we just did and either Approve or Reject the differences that Eyes finds. Watch the effects that it has on the baseline image.
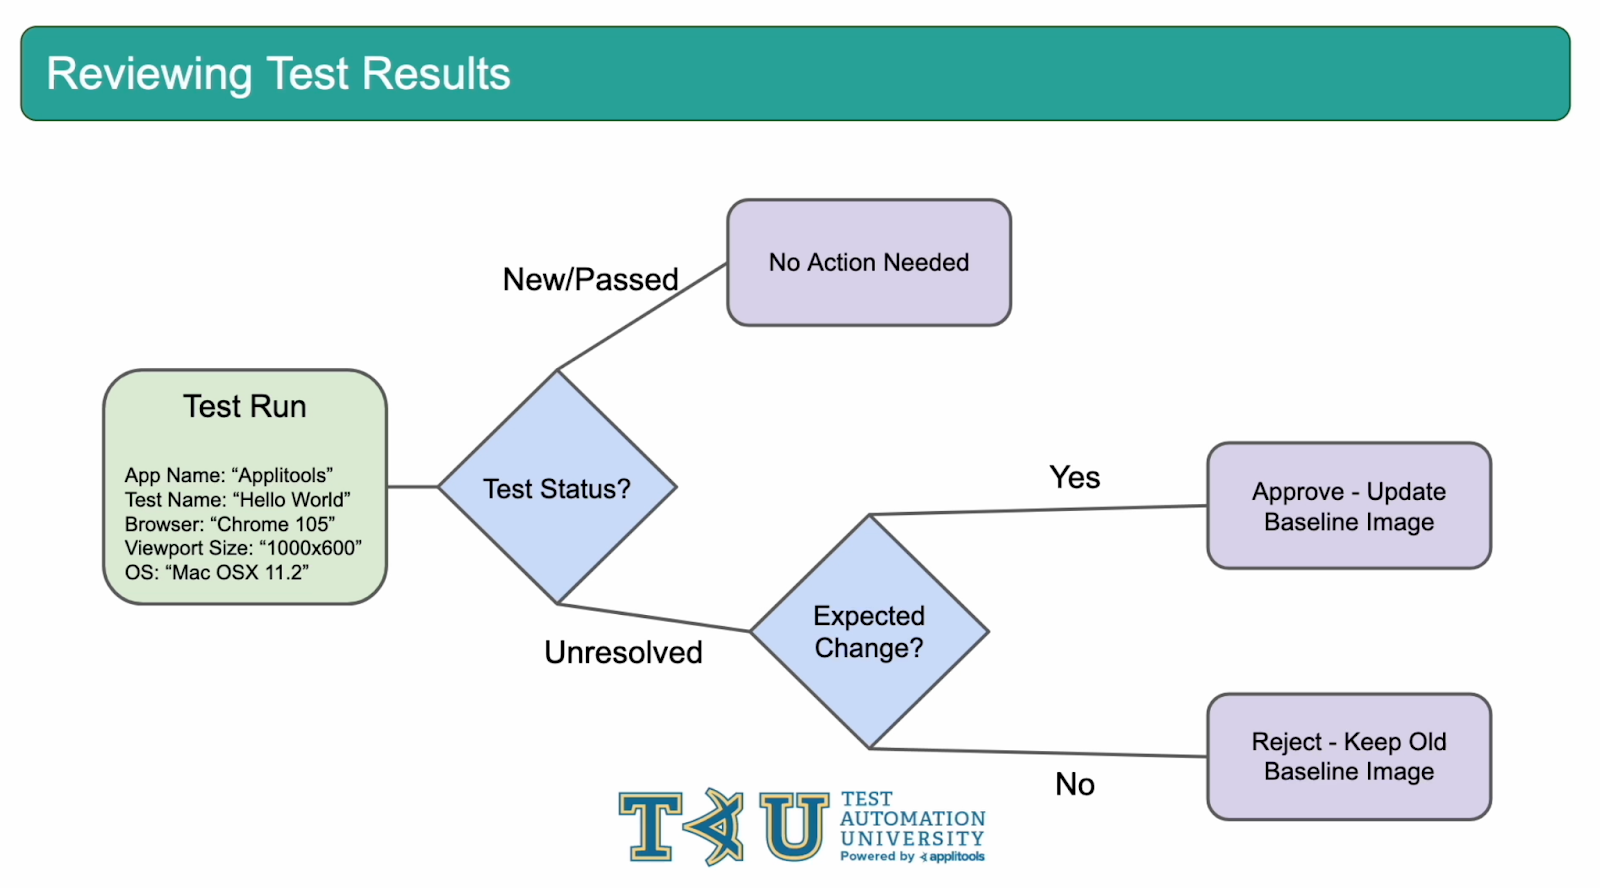
The exercise that we just performed is the core workflow for working with Applitools. To review, here's what we just did. We ran our tests and looked at what the test status was. If the test status was "New", that meant that a new baseline was created and no further action was needed from our end. If the test status was "Passed", the baseline did exist and visual comparison was performed but no visual differences were found by the Eyes AI. Therefore, no further action was needed here either. If the test status came back as "Unresolved", we then had a decision to make. We had to review the differences flagged by the Eyes AI and decide whether it was an expected difference or if it was a visual bug. If it was an expected difference, we approved the test by clicking "Thumbs Up" and then the save button. This updated our previous baseline image with the new checkpoint image. Every test we run after this will now be compared to the updated image. If it was a visual bug, we rejected the test by clicking "Thumbs Down" and then the save button. In this case, the baseline was not updated and the existing baseline image was preserved. At this point, we should discuss with our developers what was found and ensure that the visual bug is fixed. This flow chart represents the recommended workflow for working with Applitools test results. While this exercise was a simple case with just one test run, these same principles can be applied at scale when working with many more test cases.
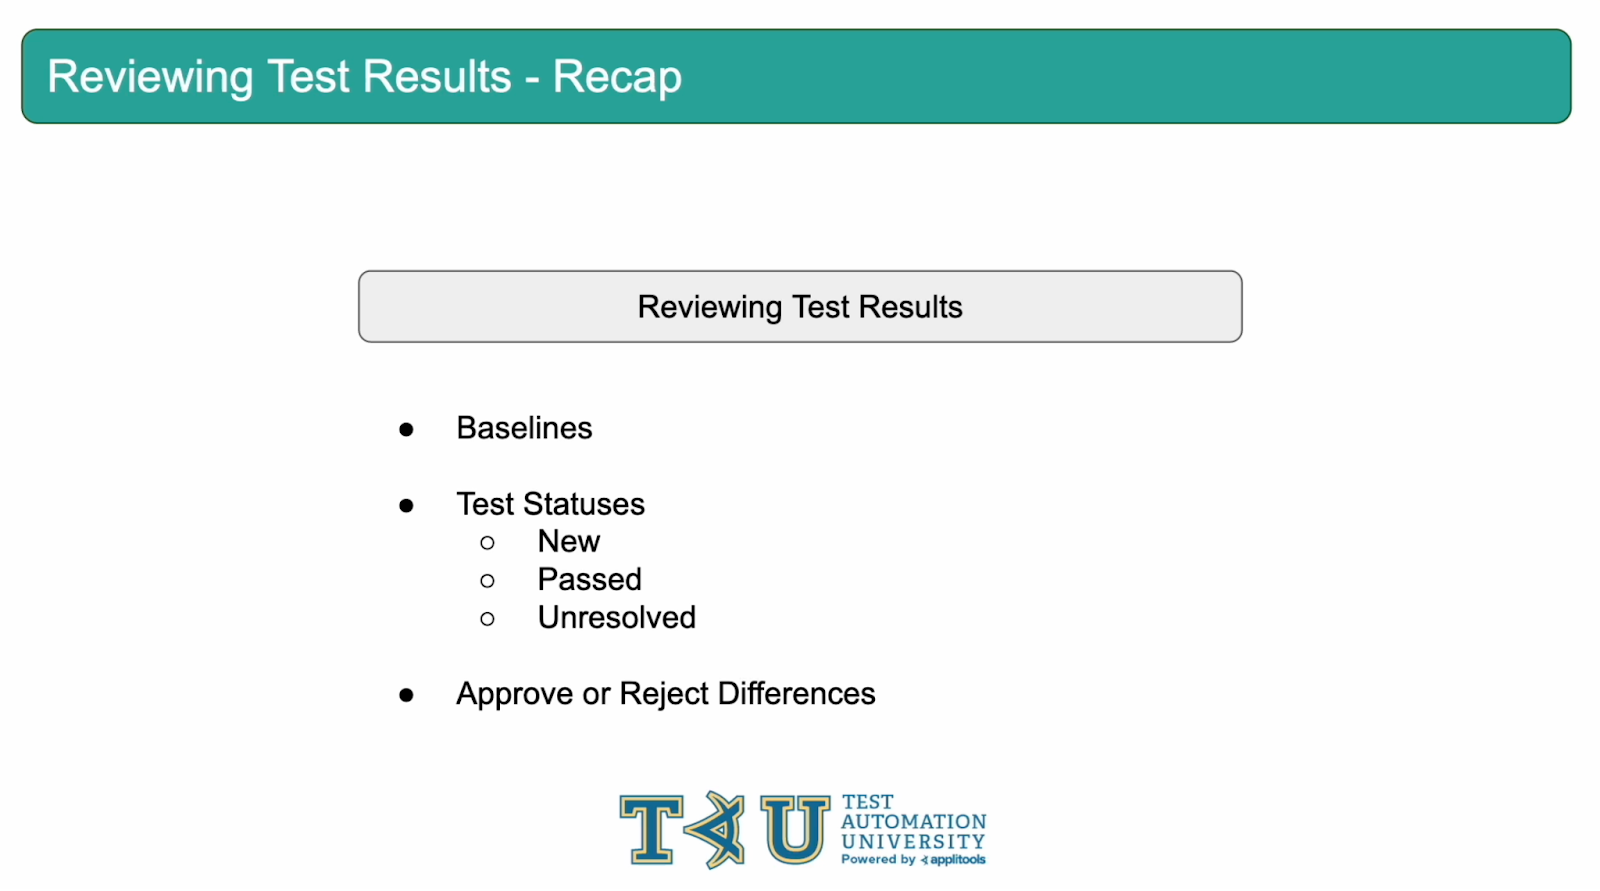
In this chapter, we learned about all the basics required for reviewing our Applitools Test results. We learned about Baselines and how, for each test run, a new baseline is either created or visual comparison is run against an existing baseline. We also learned about the various test statuses that we can have including "New", "Passed" and "Unresolved", and we learned what actions to take for each one. Great work following along in this chapter! Let's head into the next chapter where we'll dive into our code framework and implement some best practices.
