

Transcripted Summary

In this chapter, we're going to take an even deeper dive into the Applitools Test Manager Dashboard. We'll start out with an overview of the organization structure as well what roles and permissions are available for users. We'll then go through the admin panel and show you how to manage teams, users, API keys and more. We'll wrap things up showing you how to add custom properties to your test runs.
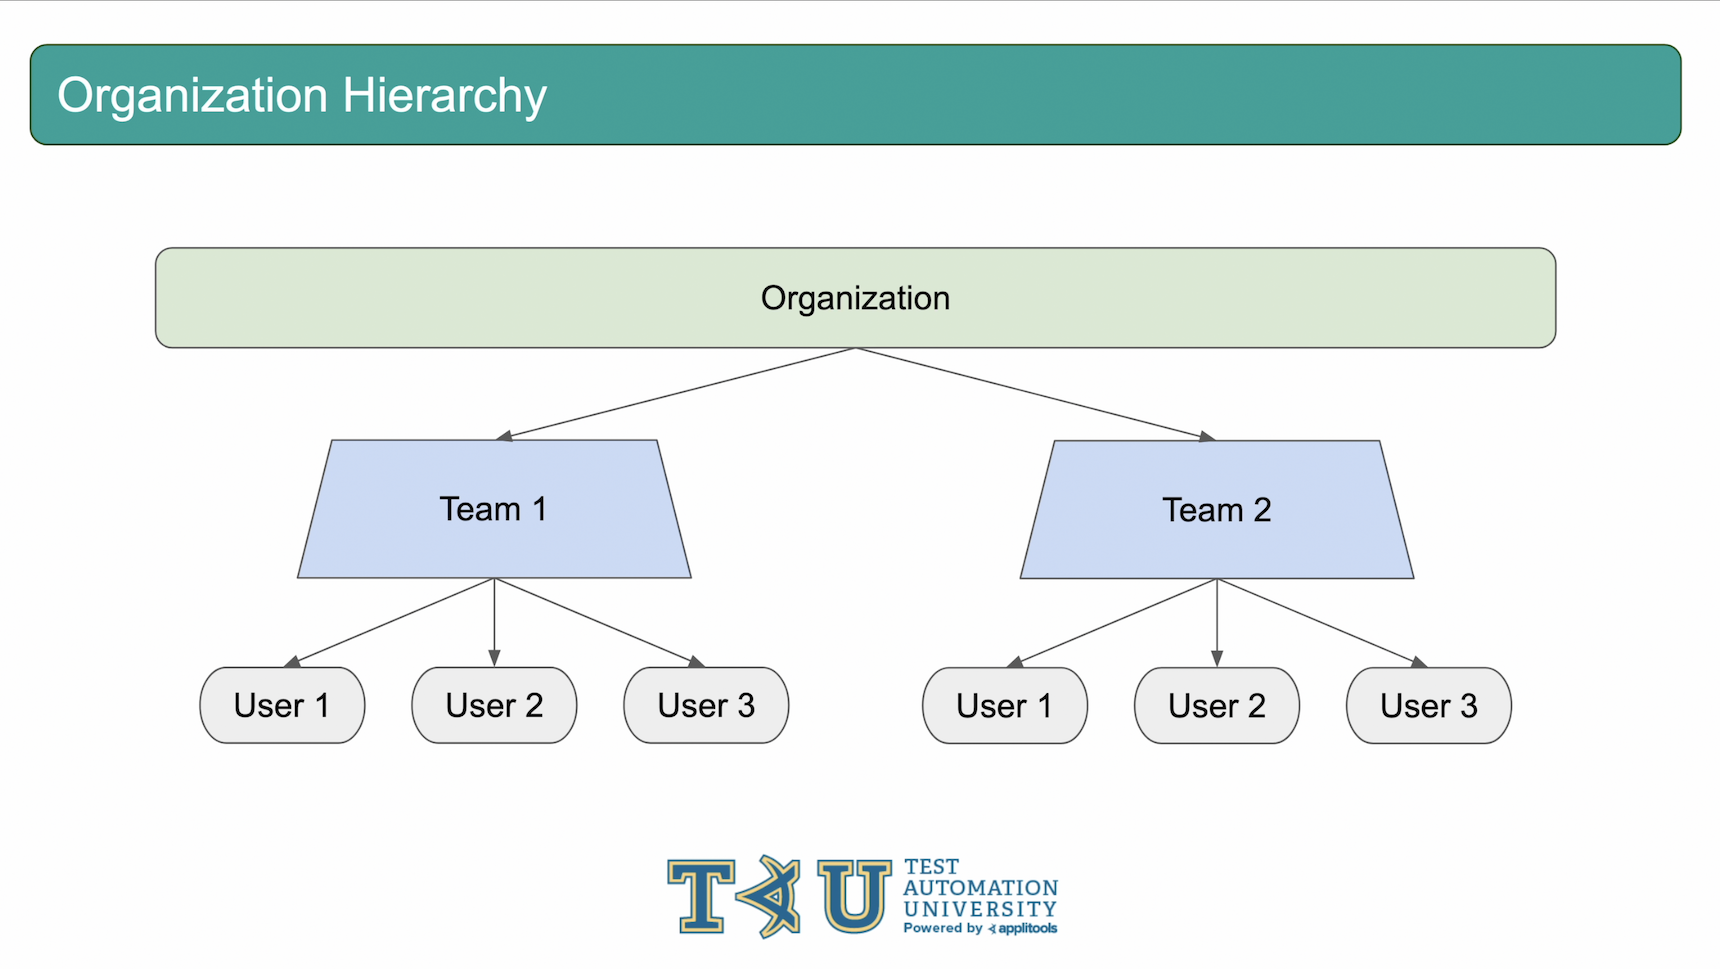
When you sign up for Applitools, an organization is automatically created for you. Within an organization, you have a number of teams. Each team has their own dashboard as well as their own set of users, integrations, test results, baselines and more. The dashboard we've been looking at throughout these courses can be thought of as a single team within an organization. A user within an org can be apart of any number of teams and have different roles for each one.
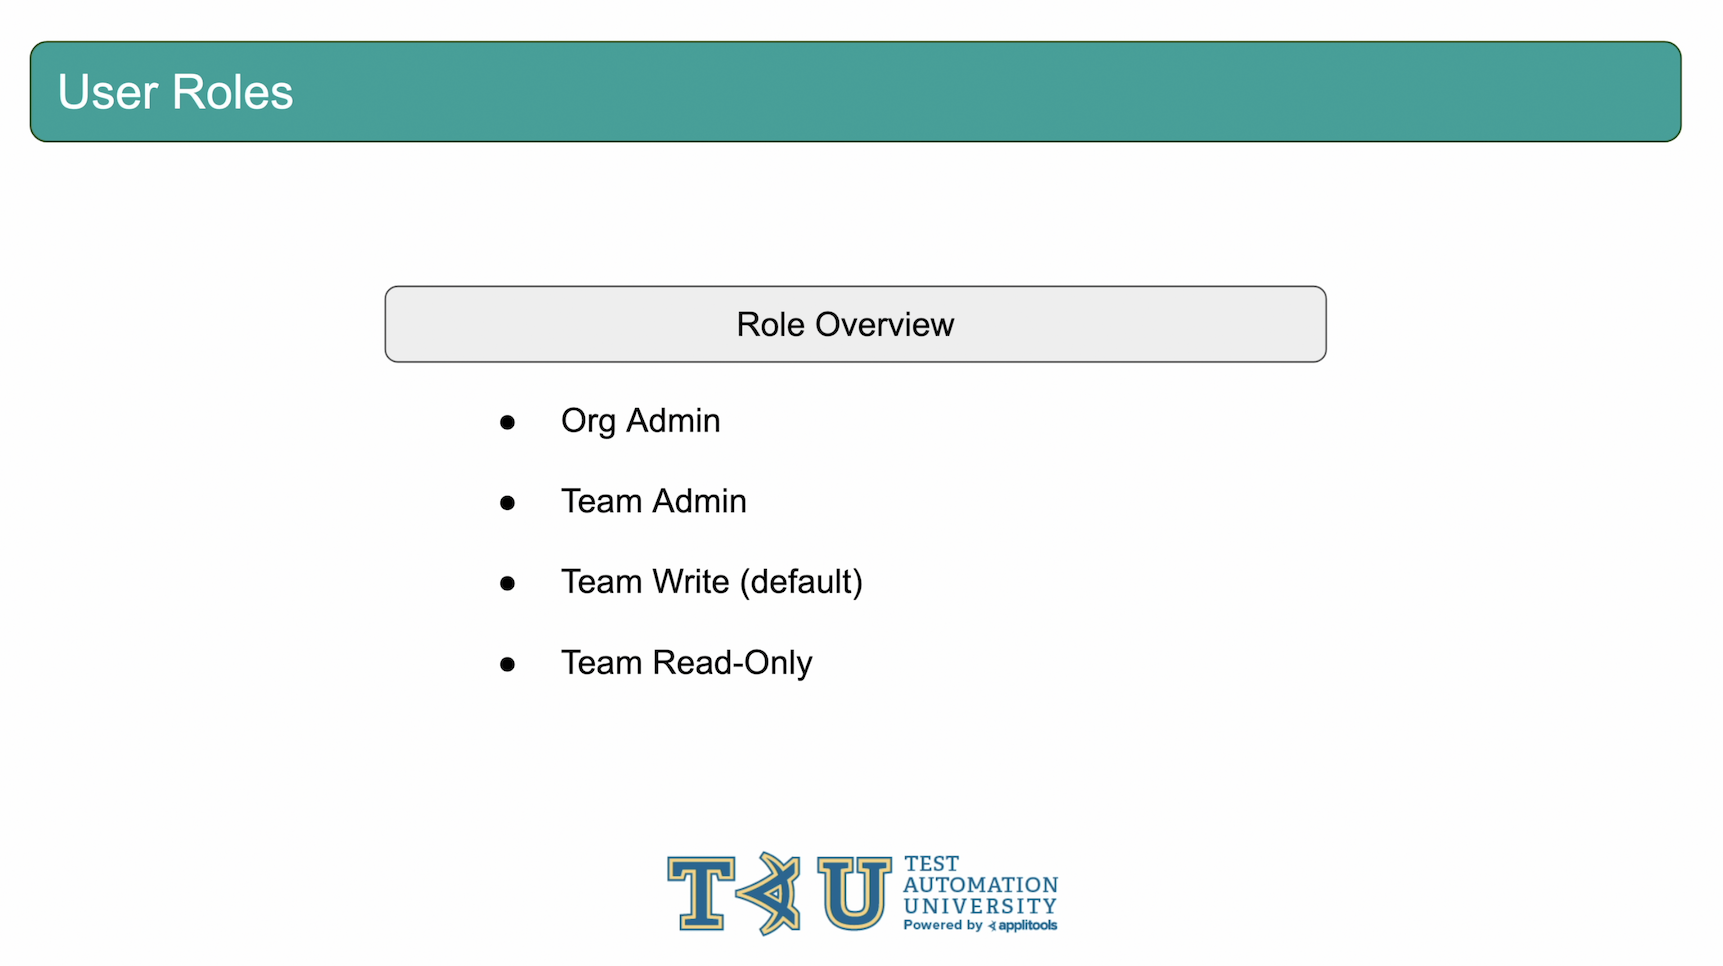
There are 4 main roles within an Applitools organization. An org admin is able to create and delete teams, add and remove users, manage API keys and more.
A team admin can manage users and permissions within their team only. They can set up integrations and manage the name of the team as well as other settings.
A write user is the default permission given to a user that is added to an Applitools team. They are able to approve or reject test results, make edits to baselines, add remark or bug regions etcetera but do not have access to the admin panel.
A team read-only user is able to view test results but cannot make any changes such as accepting or rejecting an Unresolved test run.
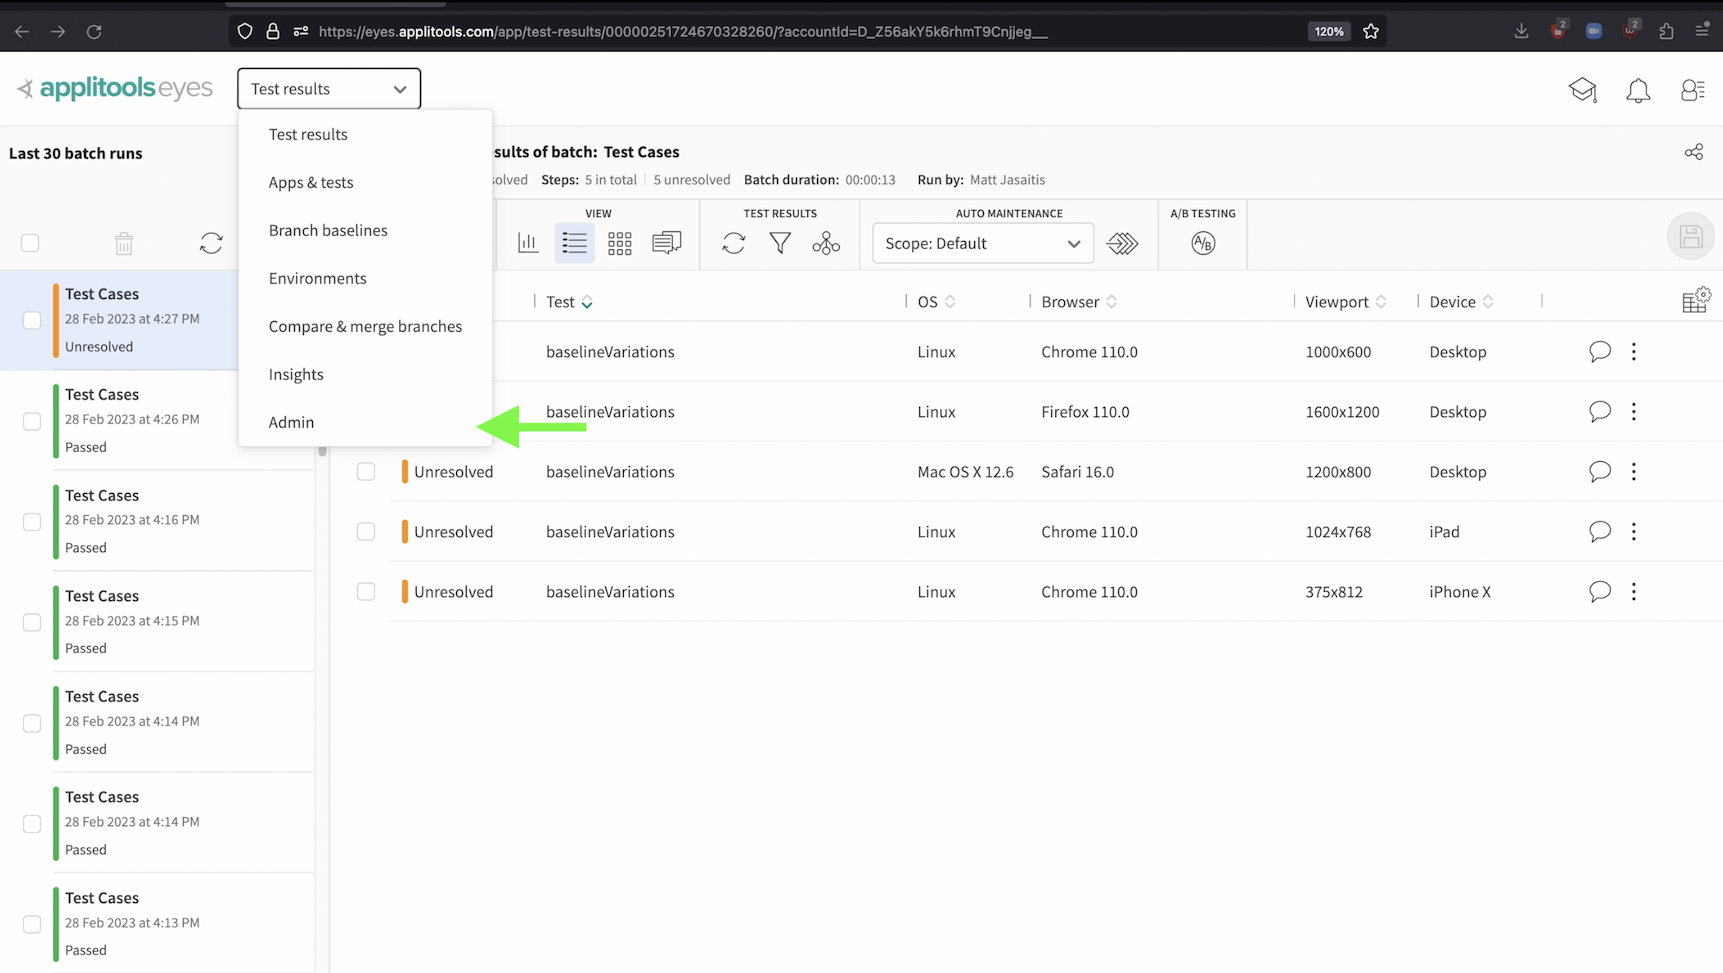
If you're an org admin or a team admin then you have access to the admin panel. To get to the admin panel, click on this dropdown at the top and then select admin from the list of options.

Once you're on the admin panel, there are a few options that you can review. The first thing we're going to look at is the account tab. Go ahead and click on this button here.

The account tab gives you an overview of your organization and shows you what plan you're currently on, how many checkpoints are available to you, how much concurrency you're able to run tests with and more. Also, if you're an org admin, you'll see your username listed here in the org admins section. Let's now click this button in the top left to head back to the admin panel.
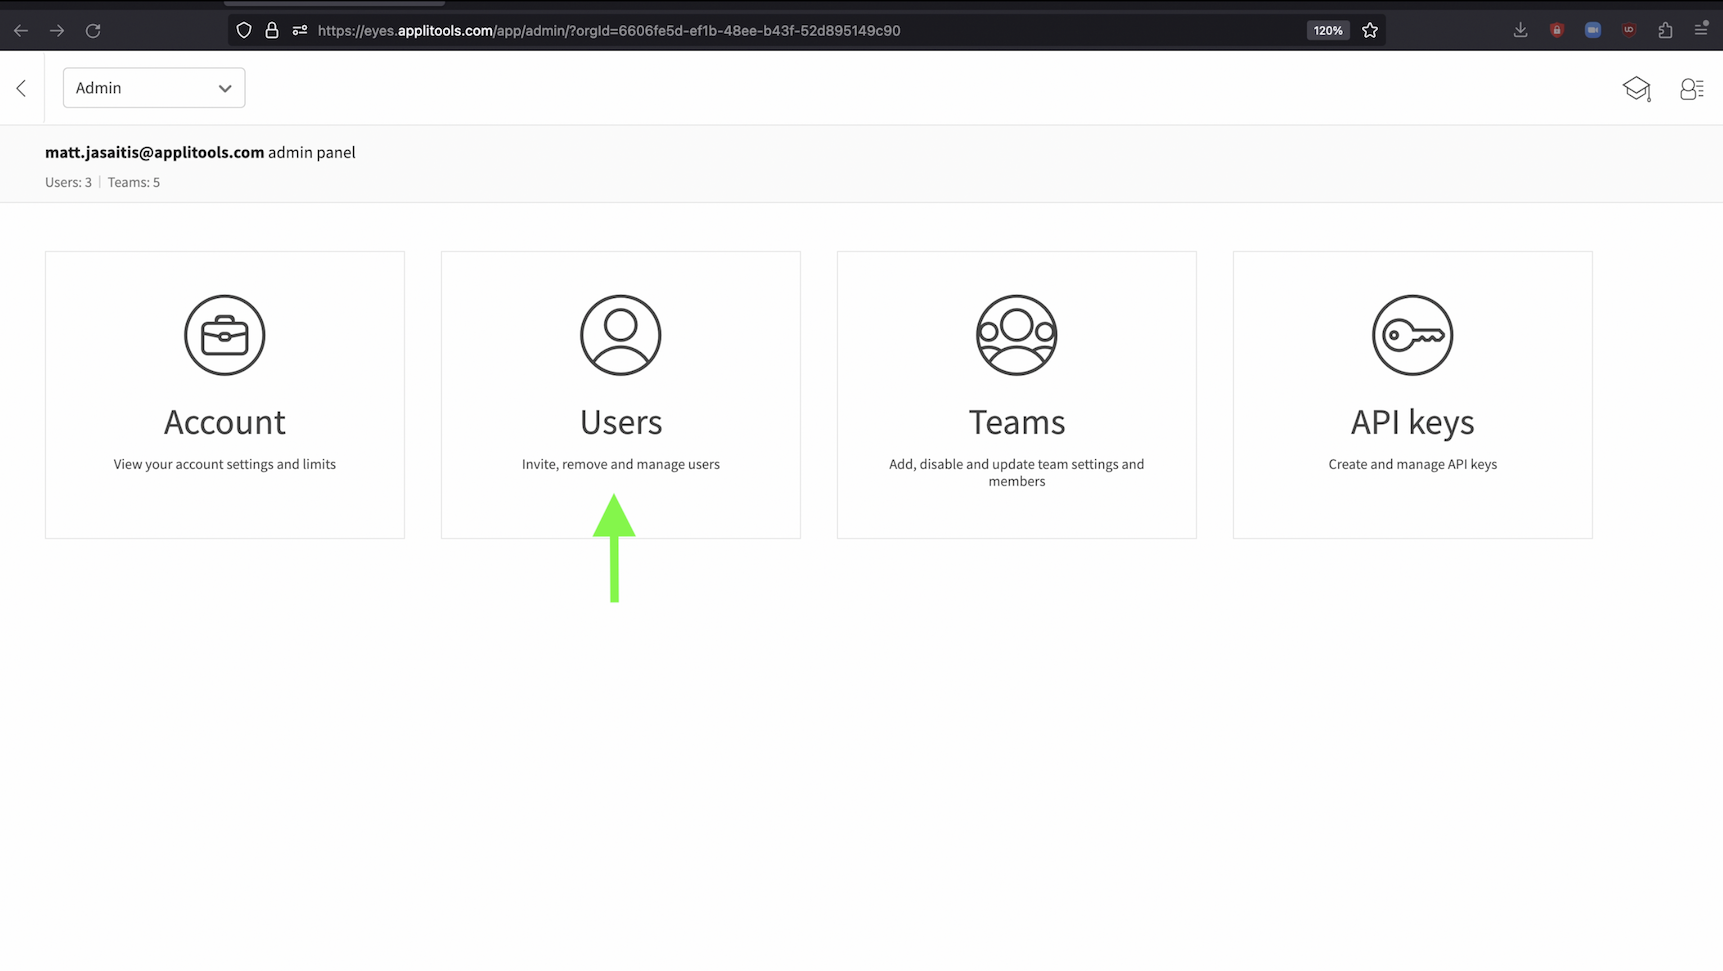
The next screen we'll look at is the Users view, click on this option here.
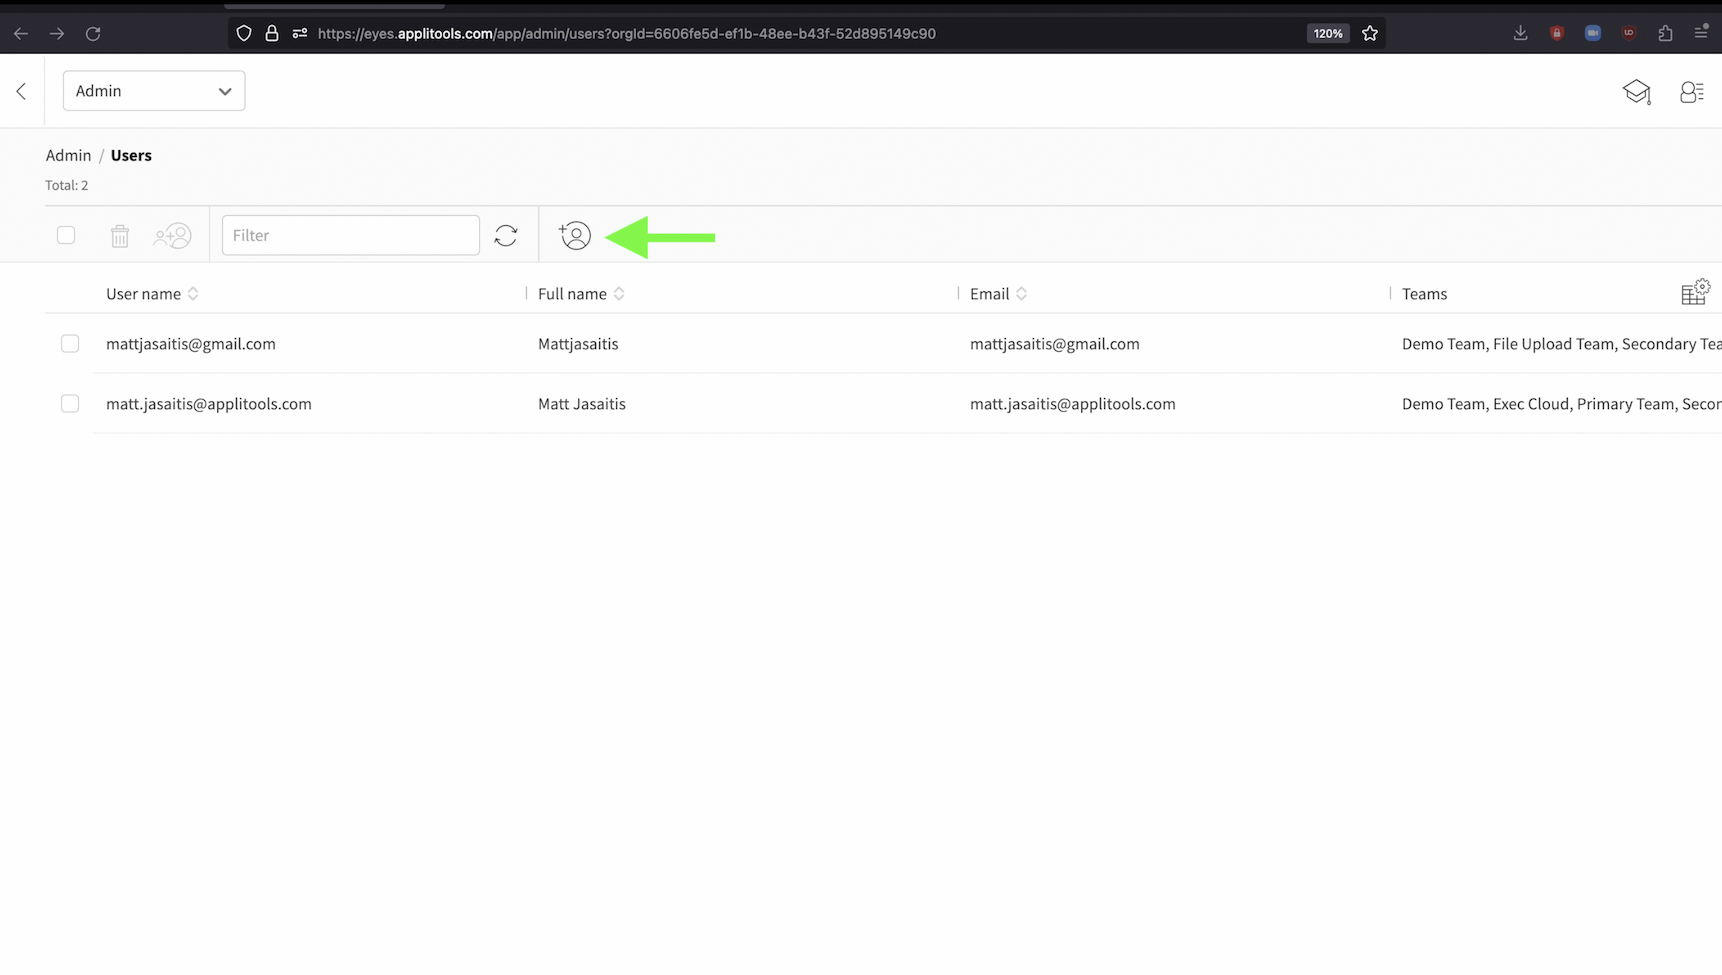
This screen shows all of the users that have been added to this org. For each user you can see the teams they're a part of as well as their email and username. If you're an org admin, you're also able to remove and add users directly from this screen using these buttons above the user list.
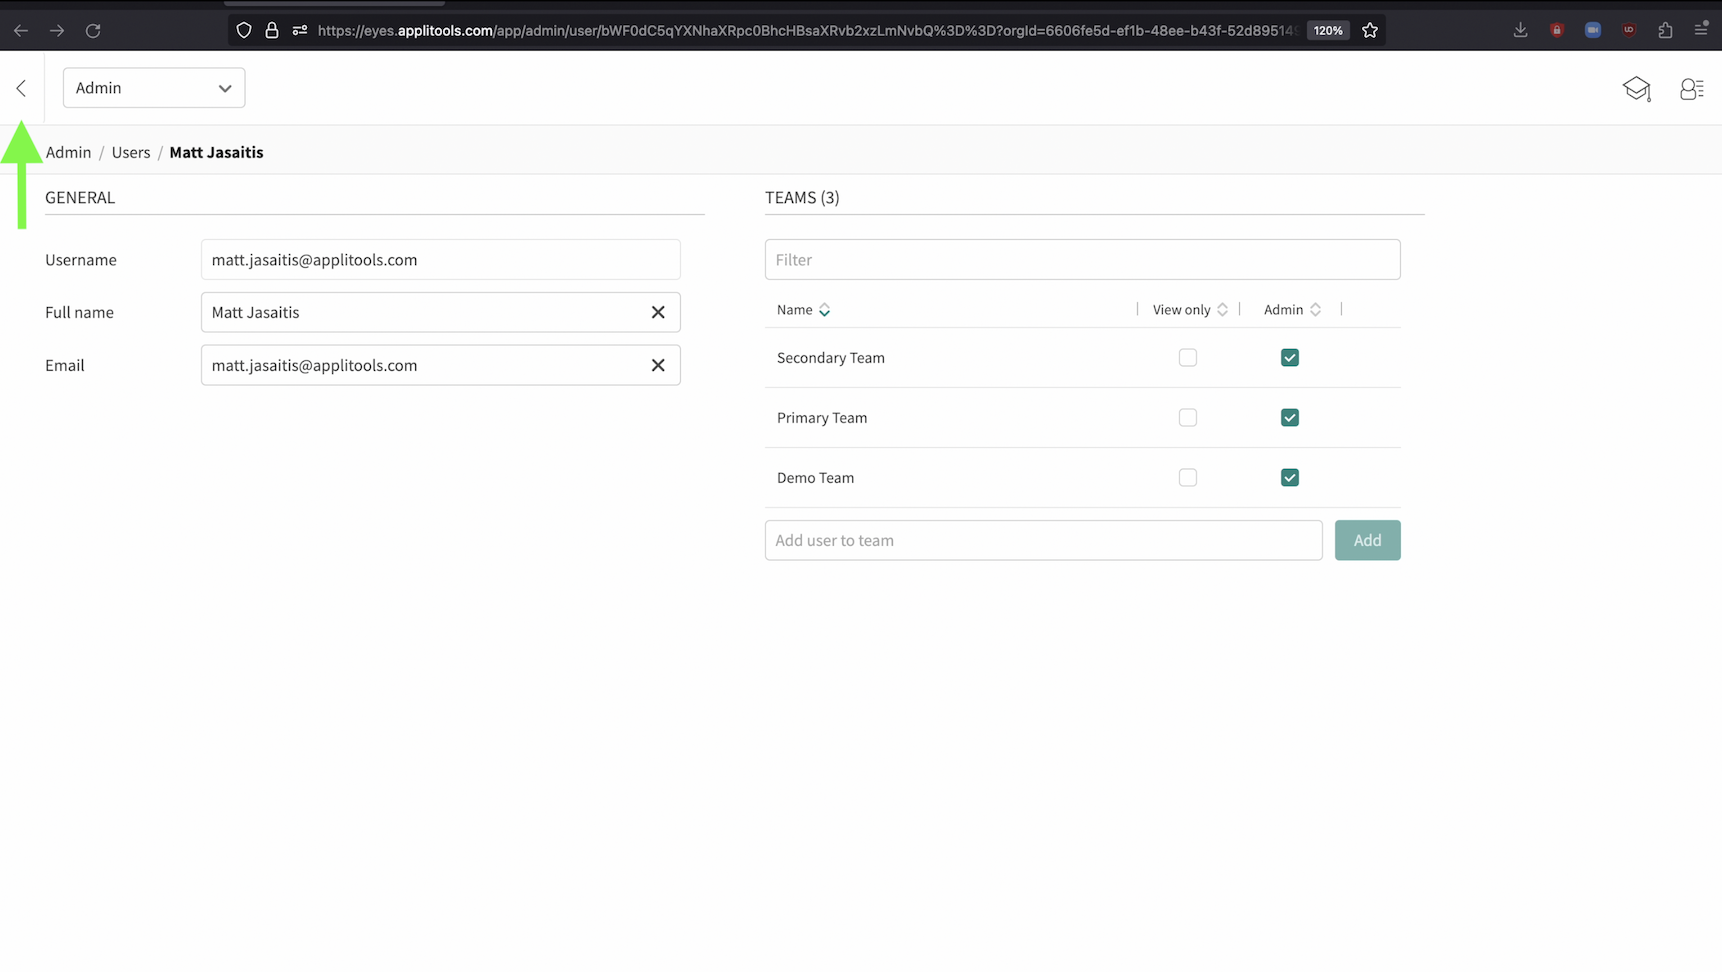
Selecting a user from the user list will take you to a more detailed view where, as an org admin, you can manage their permissions and team memberships. Let's now head back to the admin panel by clicking this button twice.

The next view is the Teams panel, click on this option here.
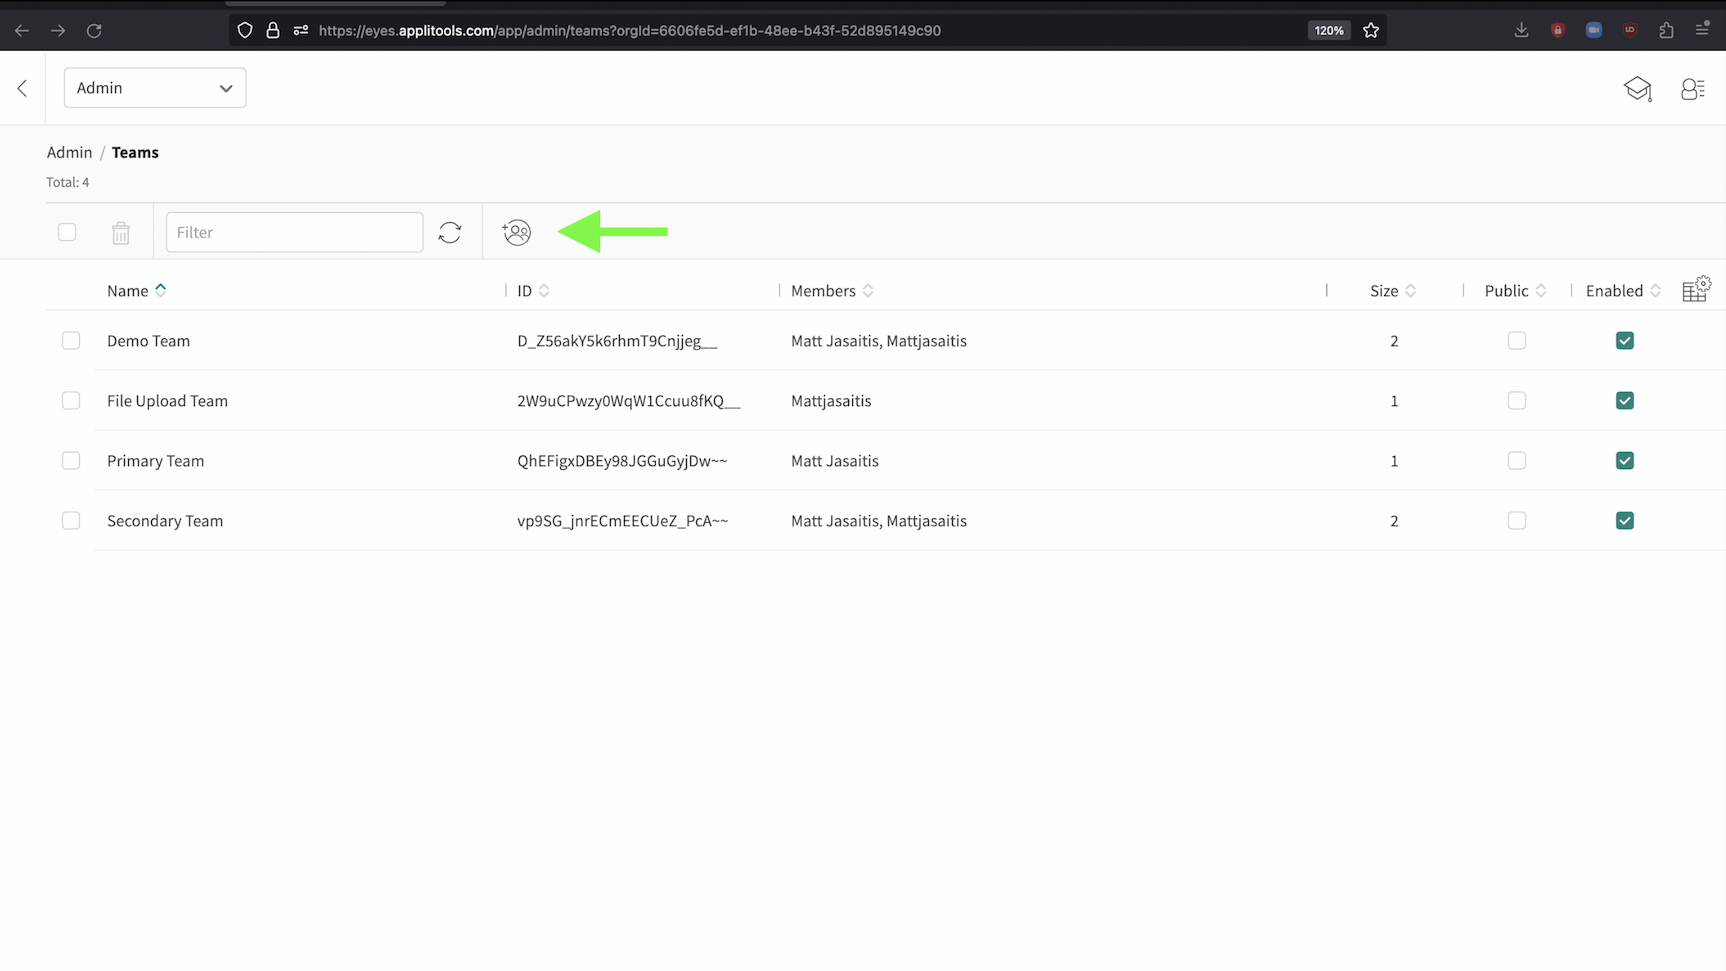
This view shows you all of the teams that are currently a part of your organization. If you're an org admin, you can add or remove teams using these options here.
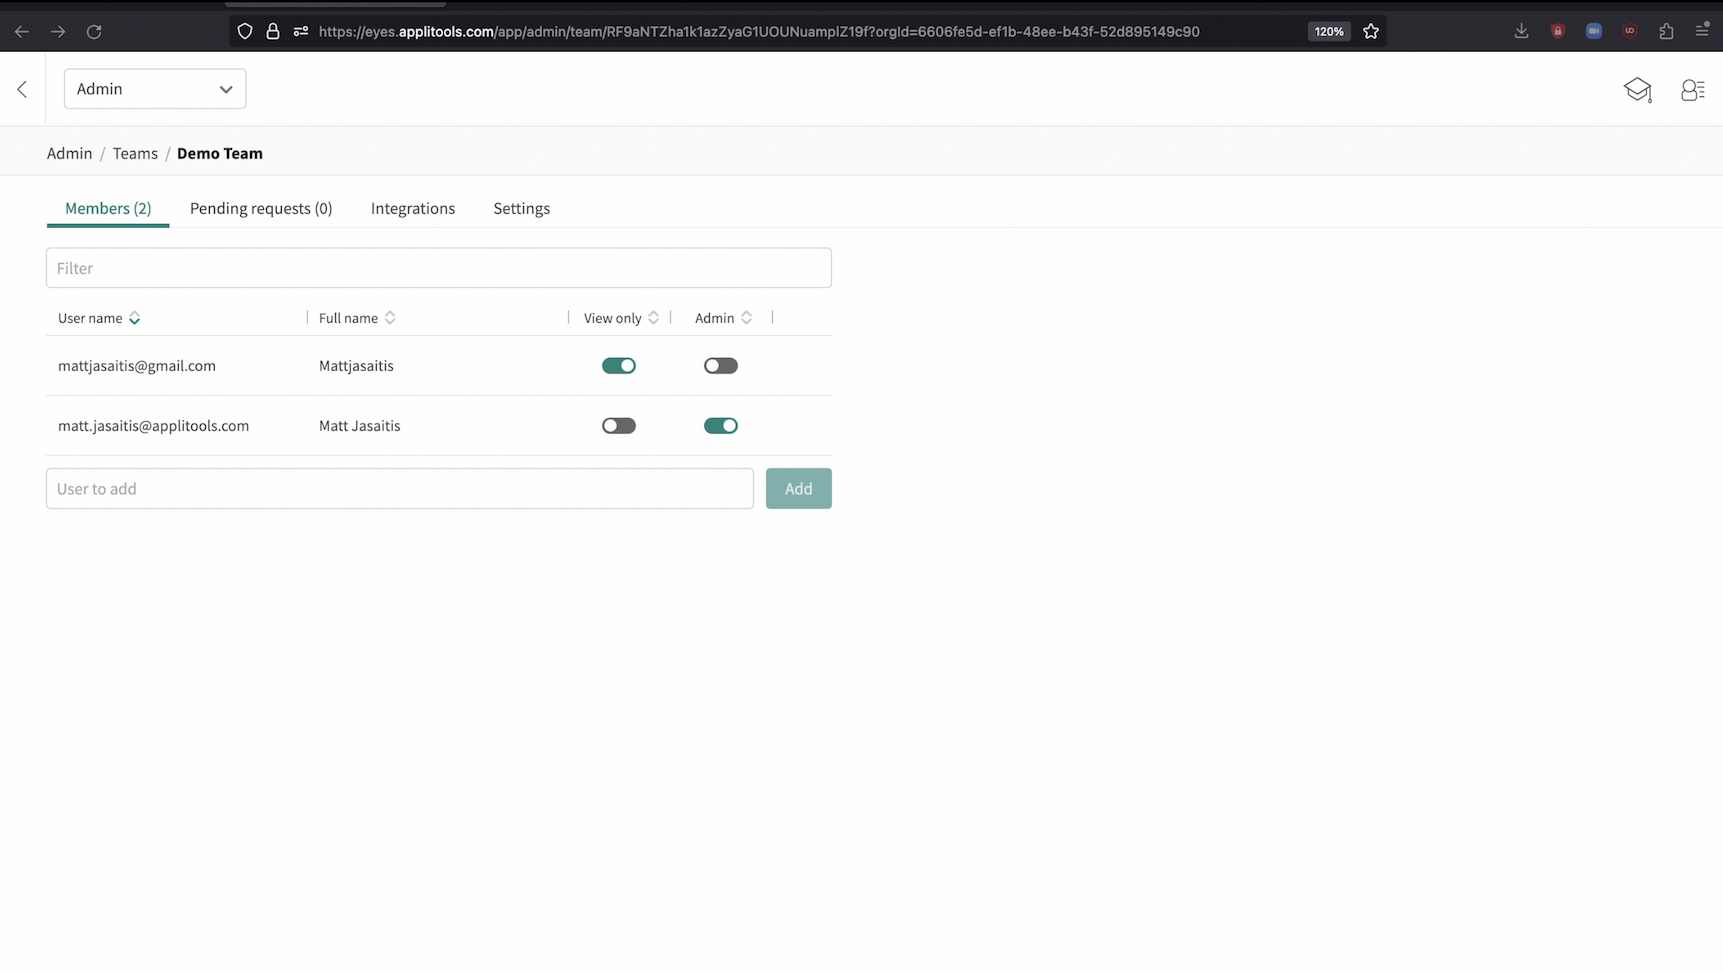
Selecting a team will take you to a more detailed view for that team, you may recognize this screen from previous courses. On this screen, if you're an org admin or a team admin for this team, you can add and remove users and manage their permissions.

Selecting the pending requests tab will show you a list of users who have requested access to this team.
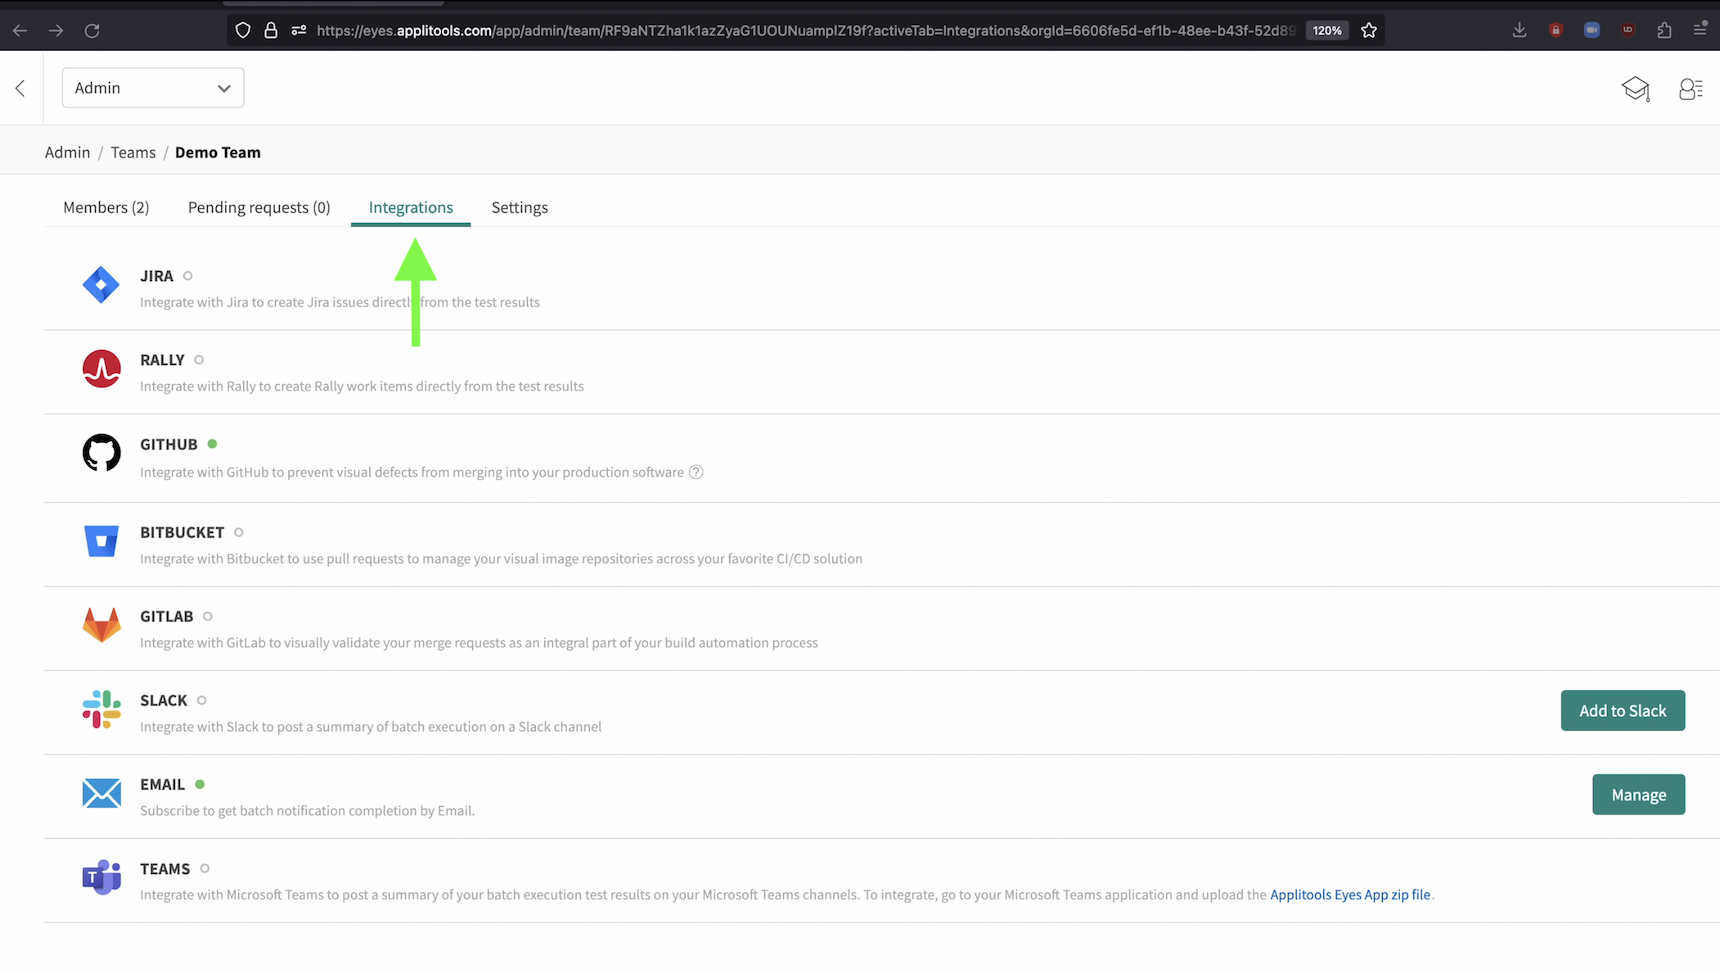
Selecting the integrations tab will show you all of the integrations that have been configured for this team.

Lastly, selecting the settings tab will allow you to edit the team name and some other options.
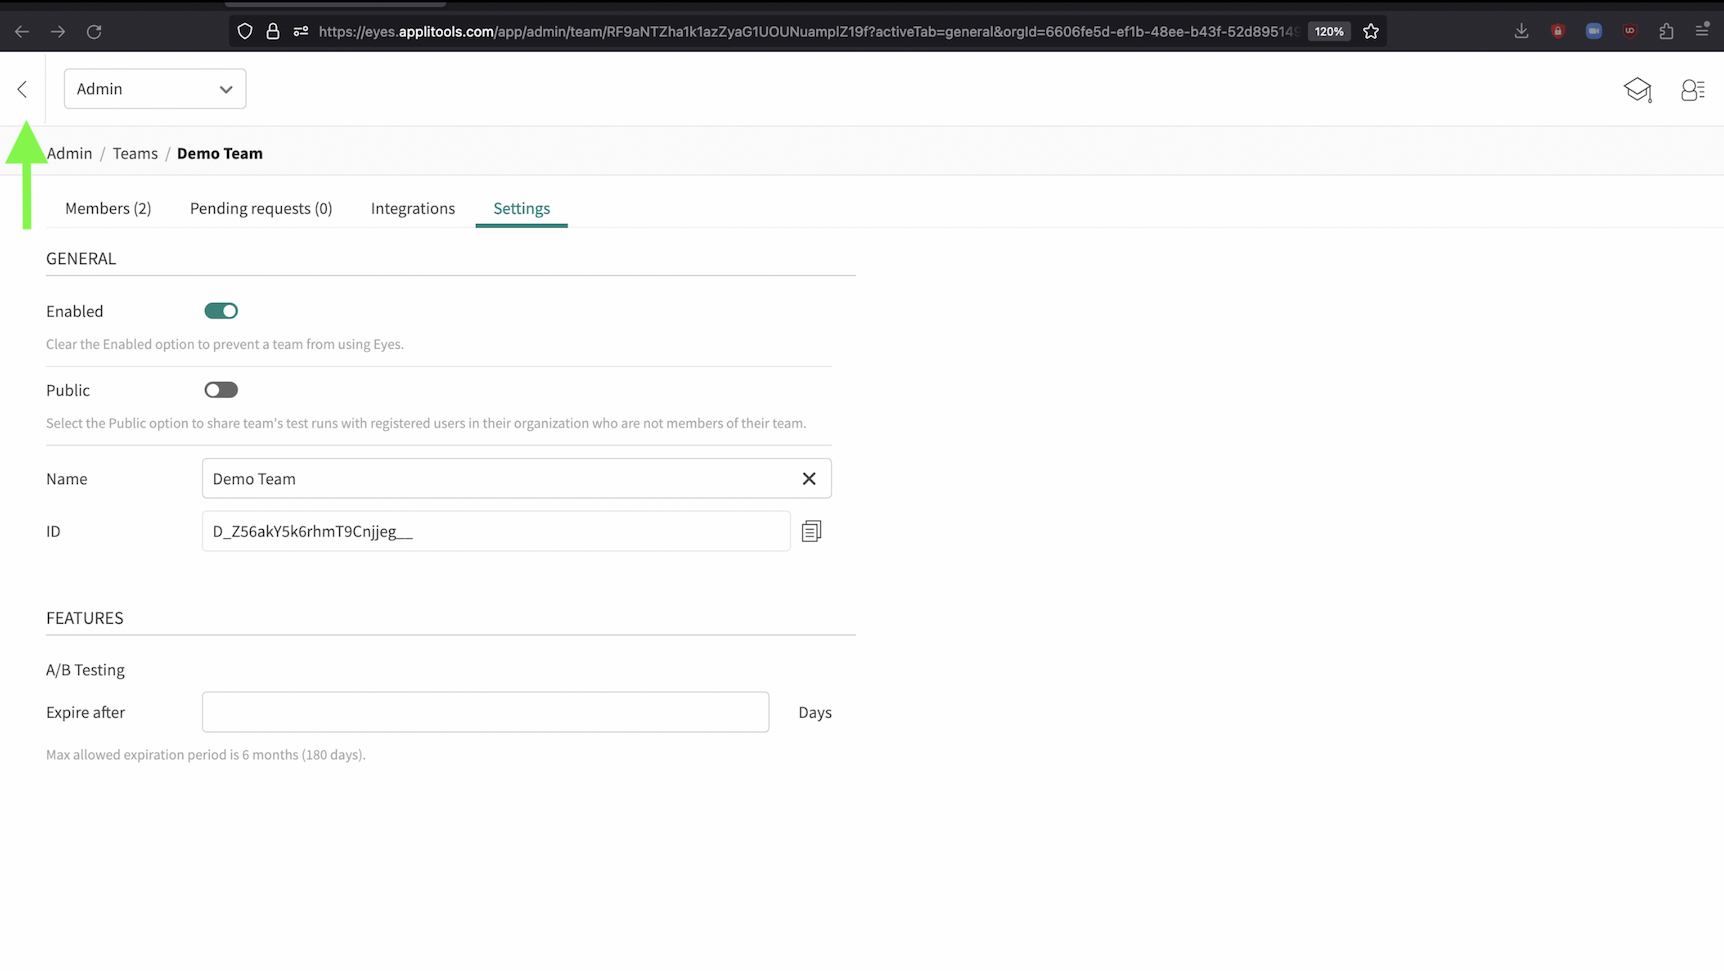
Let's head back to the admin panel by clicking this button twice.
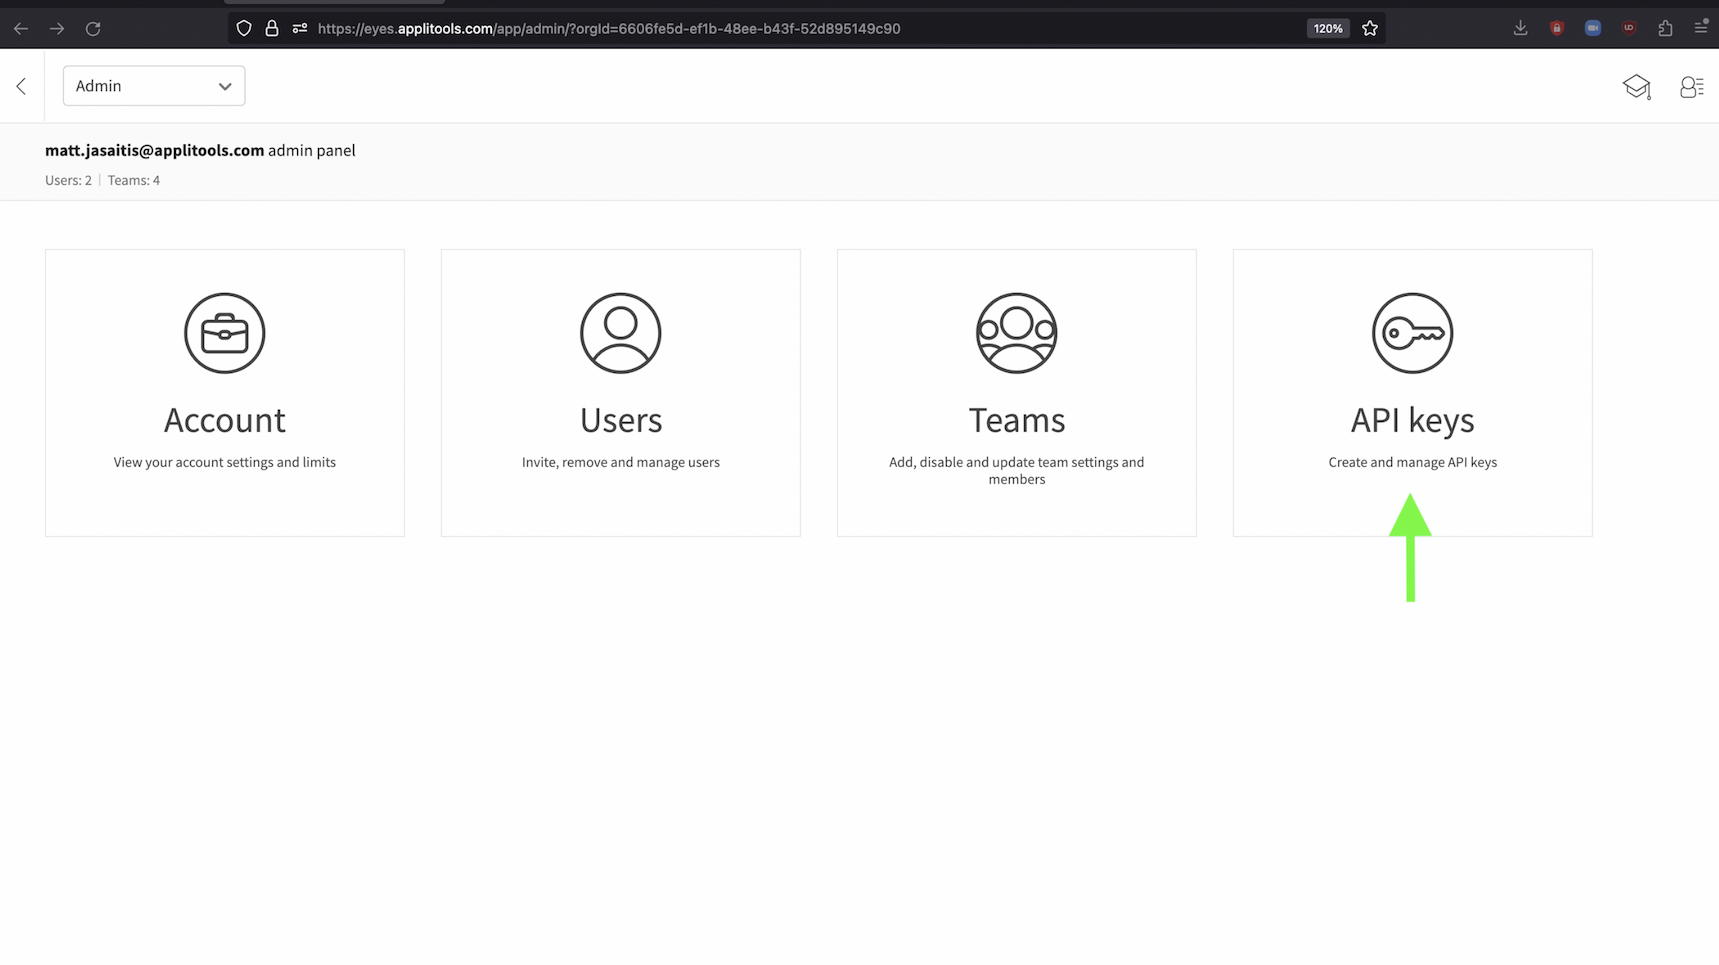
The final view is the API key panel, click on this option here.
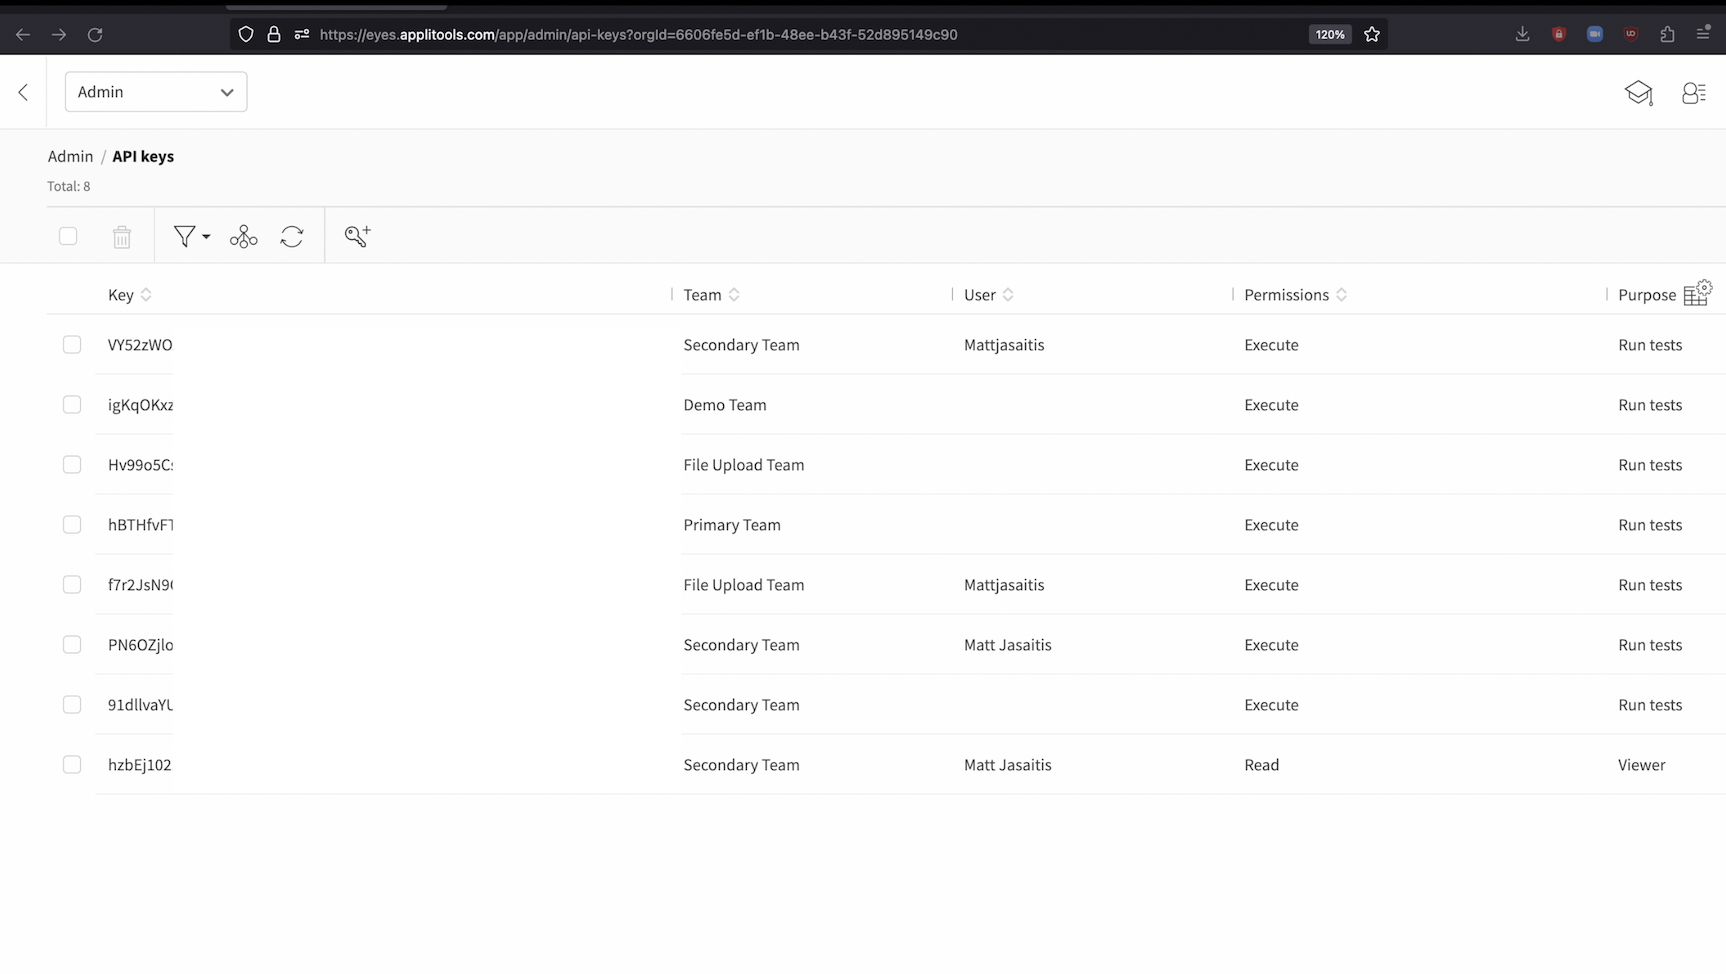
As an org admin, this view allows you to manage your API keys to create, delete and edit their permissions.

Selecting a key from the list will show this popup where you get a more detailed view of the key allowing you to edit the permissions and other options.
The following permissions are available to API keys: Read will allow you to perform API calls that fetch data, Write will allow you to perform API calls that update data, Execute will allow you to run tests and perform visual AI comparisons and Merge will allow you to merge two branches together. Most API keys will only need execute permissions but the others will be showcased later on in this course.

In the last section of this chapter, we're going to take a look at Custom Properties. The Applitools SDKs allow you to create custom properties and assign them to the batch object or the configuration object in your tests. Then, within the Applitools Test Manager, you're able to view these properties and perform filters based on these properties values.
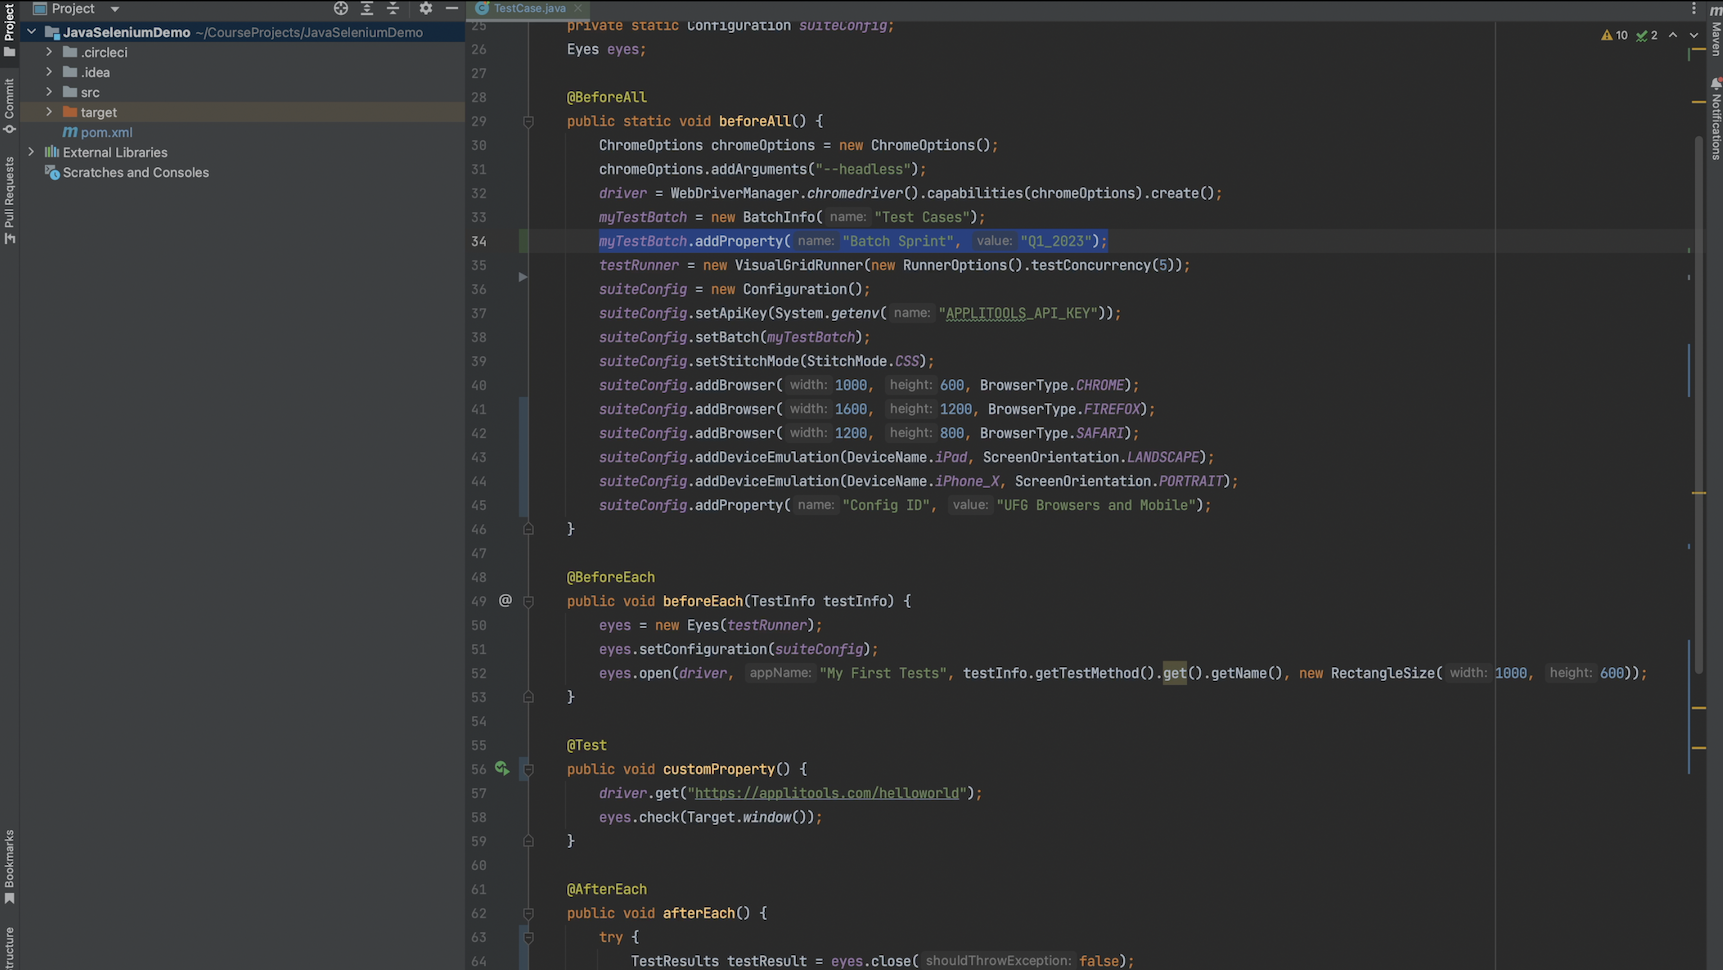
In the beforeAll hook, I've added this line of code which creates a property named "Batch Sprint" and gives it a value of "Q1_2023". Feel free to add any custom properties here that you'd like to the batch.
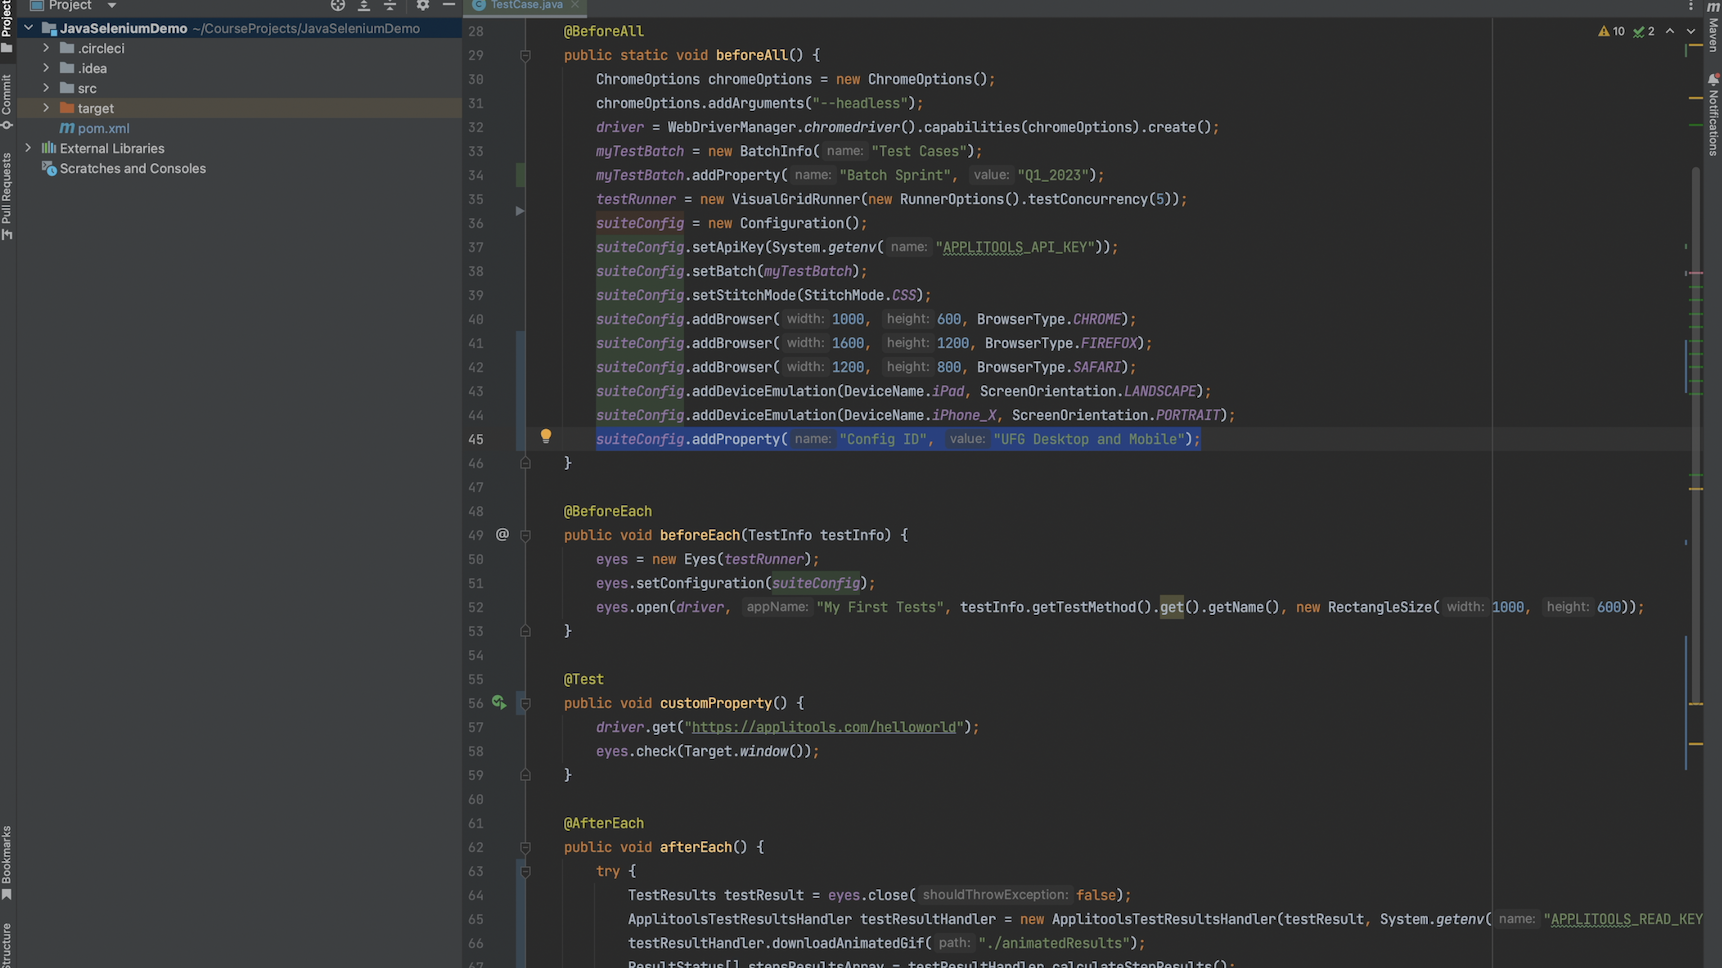
I also added a custom property to our configuration object called Config ID and passed a value of UFG Desktop and Mobile to identify this config.

Lastly, I changed the test name once again so that we get a clean baseline. Let's go ahead and run this test.
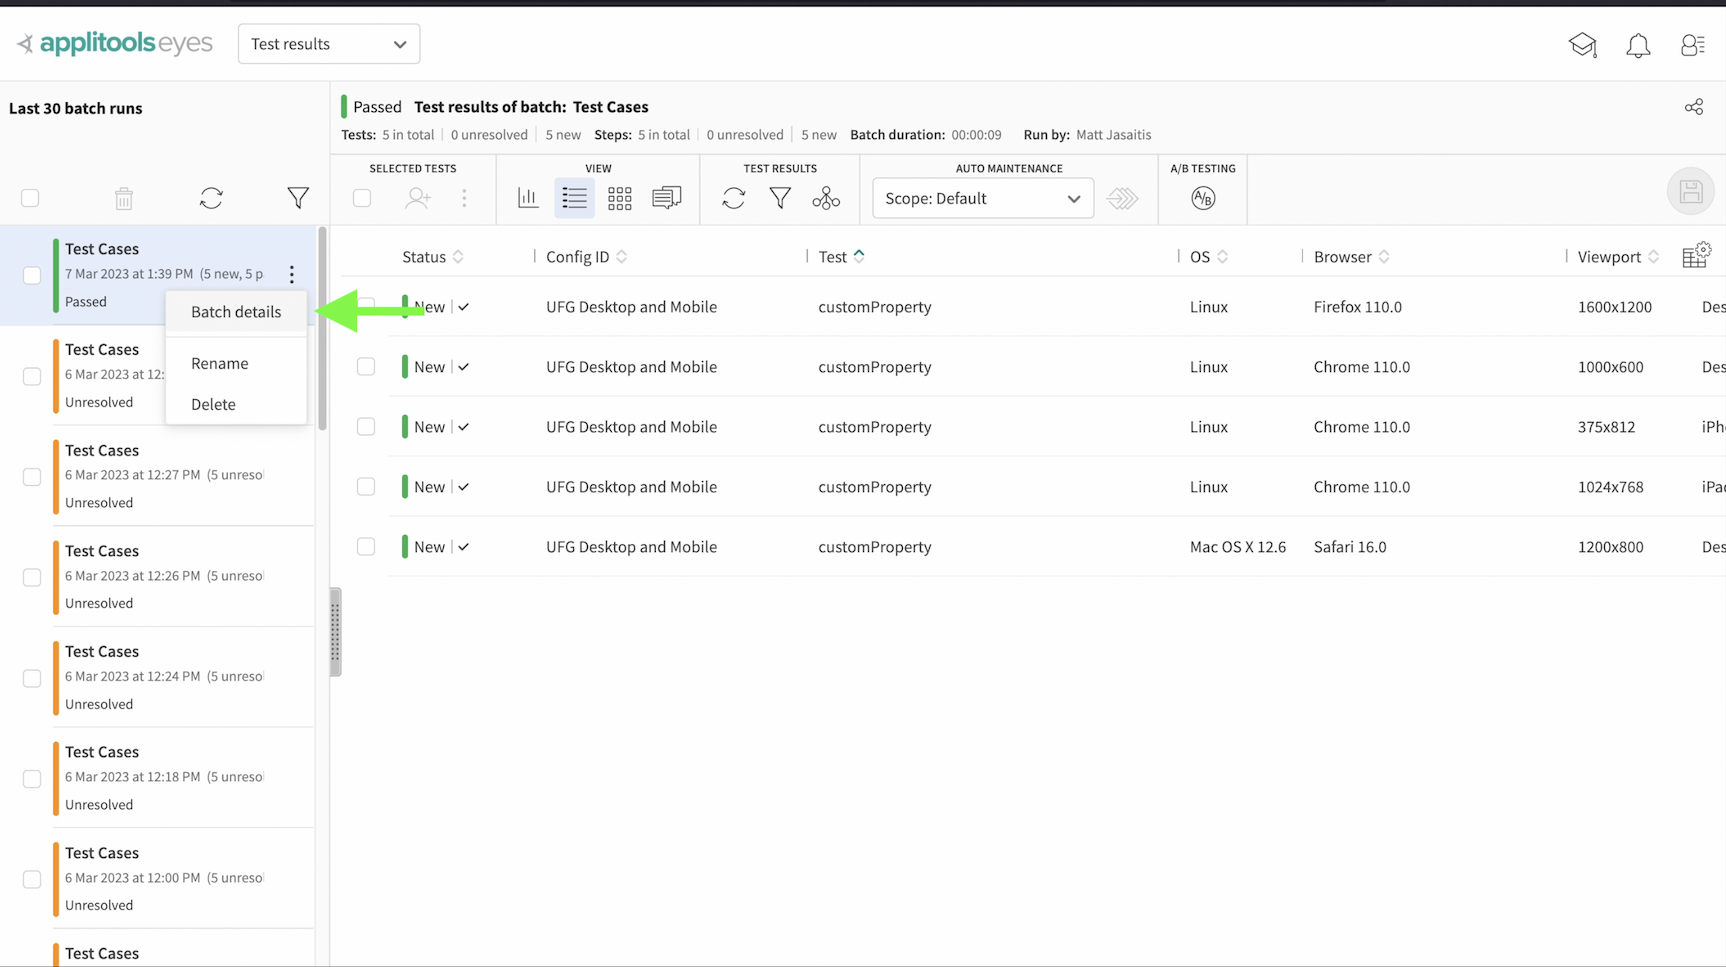
On the Applitools Test Manager, hover over the batch that we just ran and then select the 3 dots button followed by batch details.
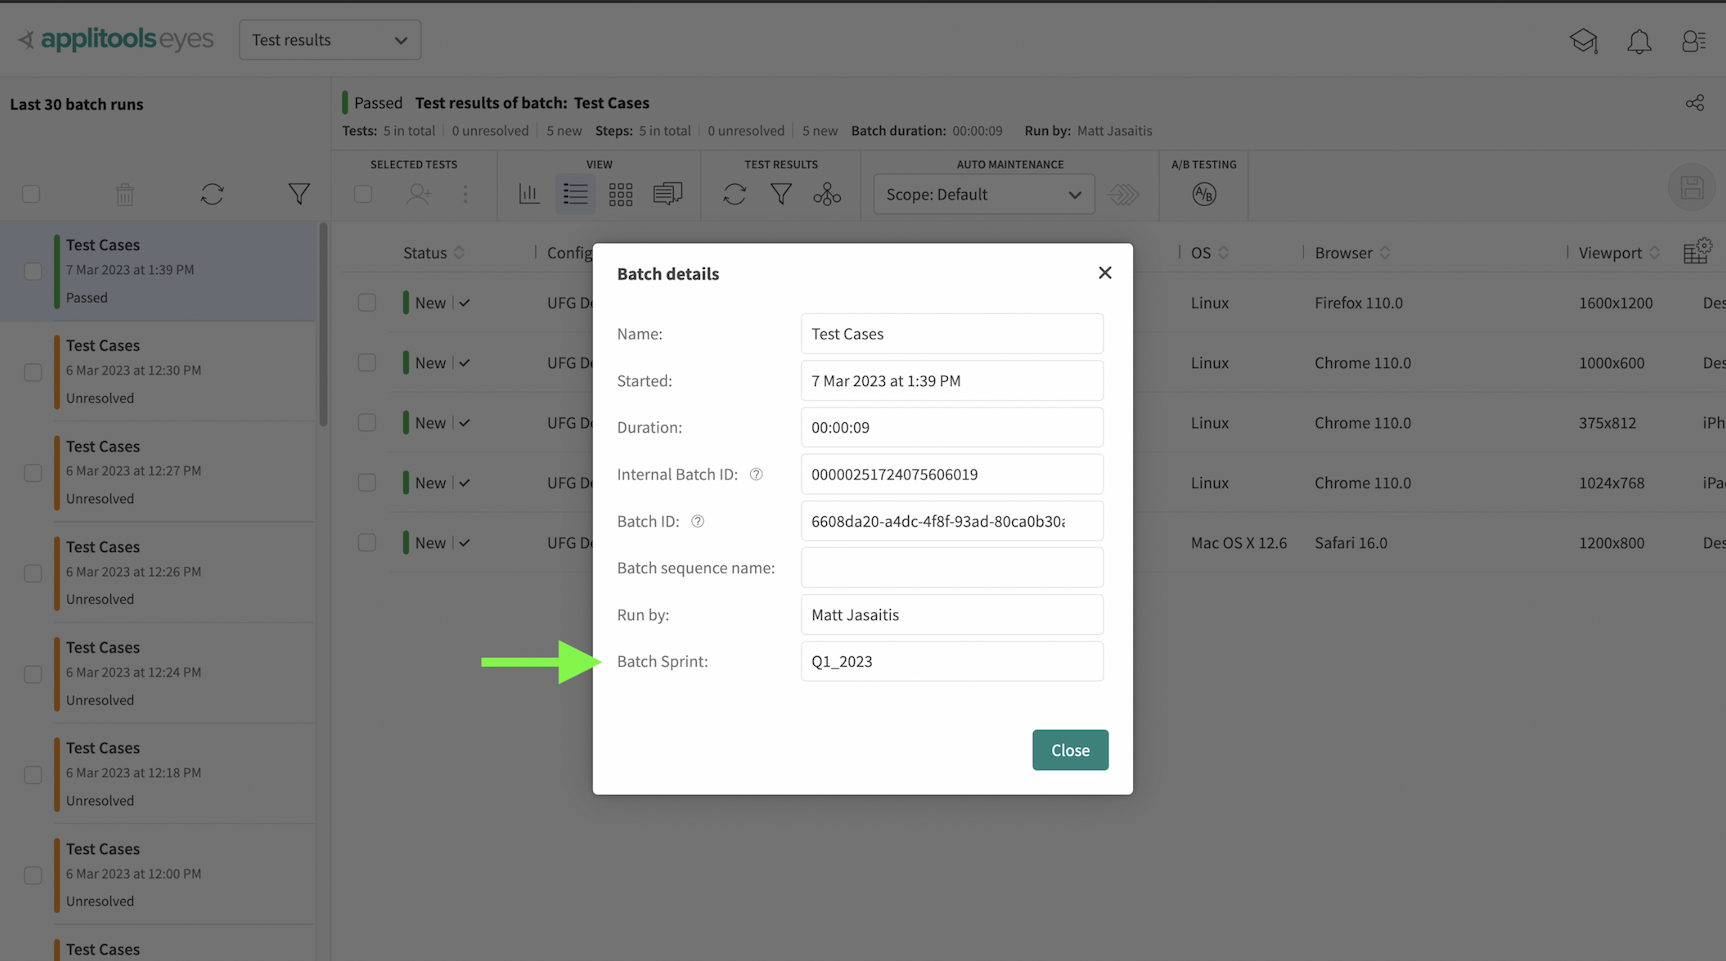
We're then presented with this popup. At the bottom, we notice that our custom property that was set in our code is shown here in this dialog.

We can now also filter based on this custom property. Select the batch filter icon shown here.

At the bottom of the filter dialog we see our custom property once again. Select the input box and then choose the values that you're looking for. Once done, click apply.
After applying that filter, we're only presented with batches that have our custom property set to the specified values.

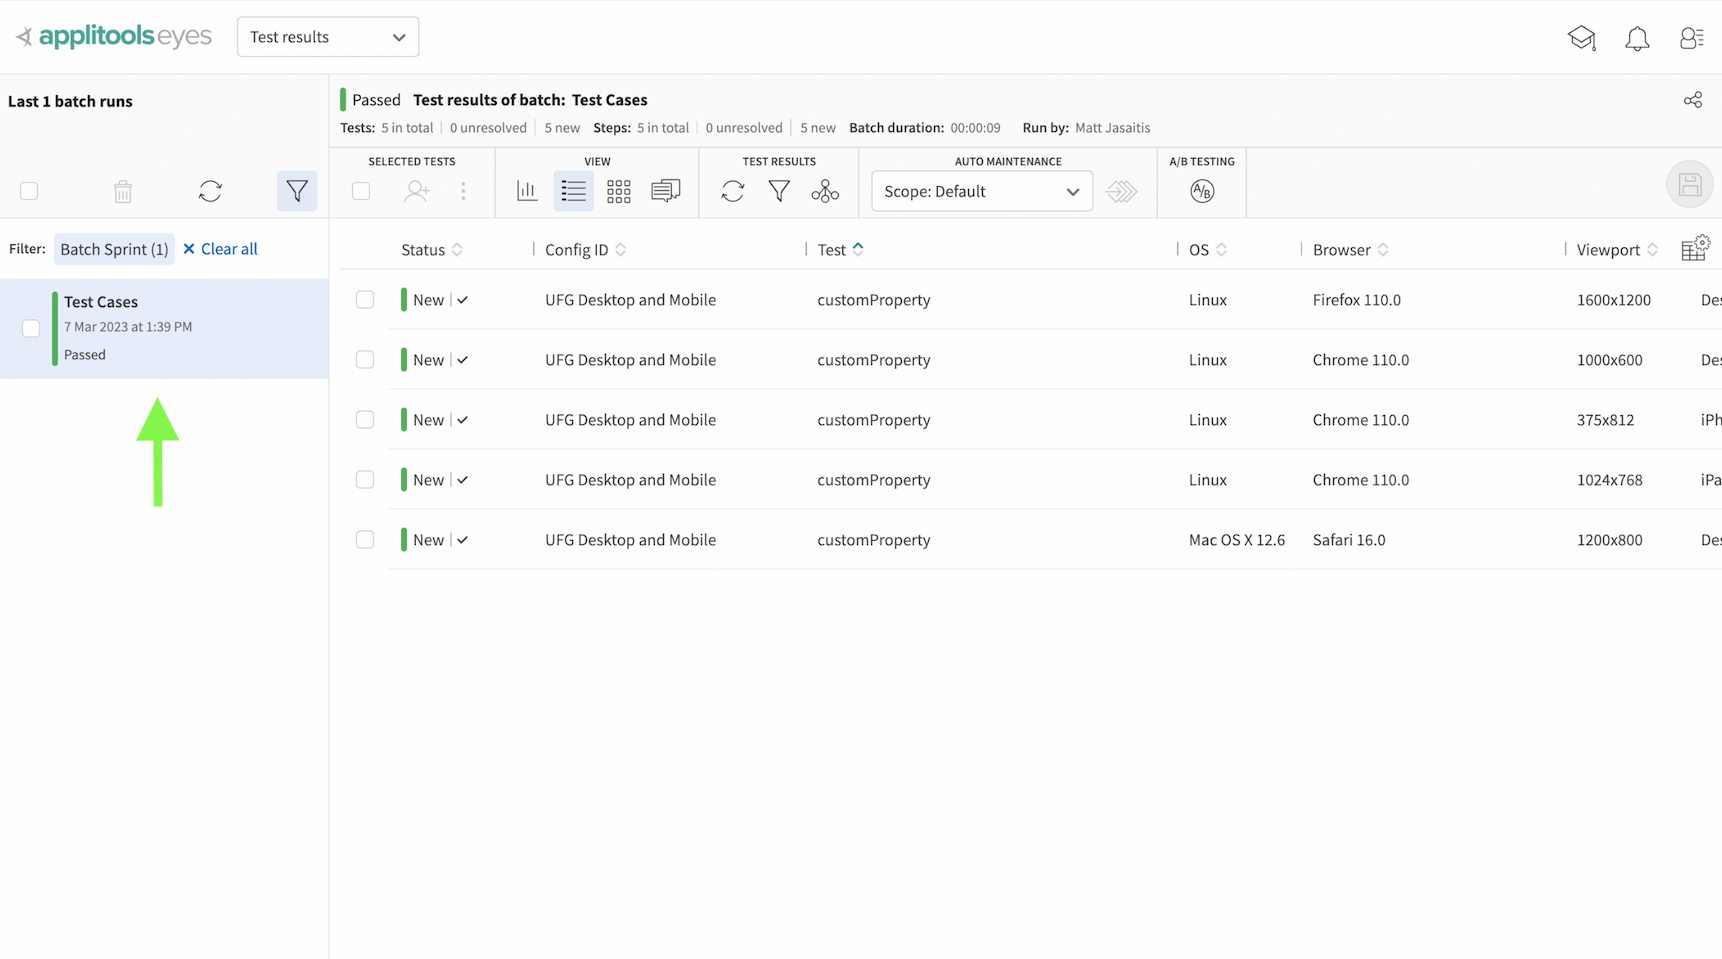
We can perform similar actions in our test results. If we select the table config icon over here, we see that our custom property is now available to be added to the table. After checking the box we can review our custom property directly in the test results table.

Another option is grouping our test results by custom property value. To group our results, select this icon here.

Then, in the popup, drag and drop the custom property over to the right side.
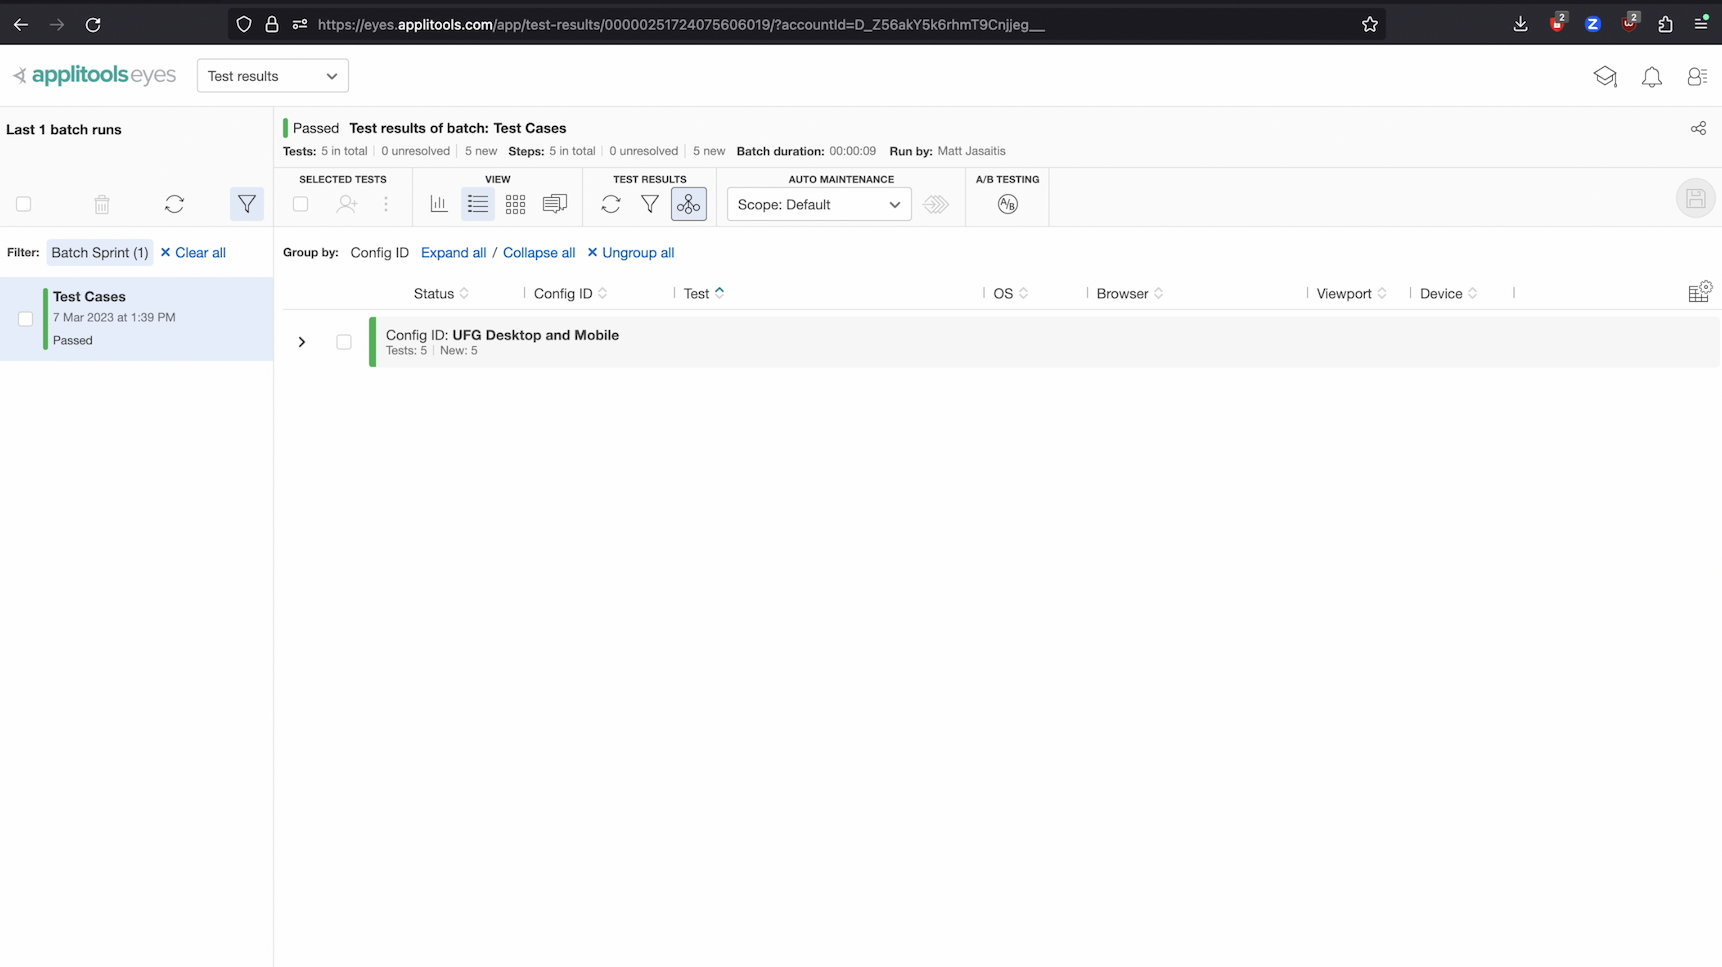
Now, our test results will be grouped based on the value of this custom property that we set up in our code.
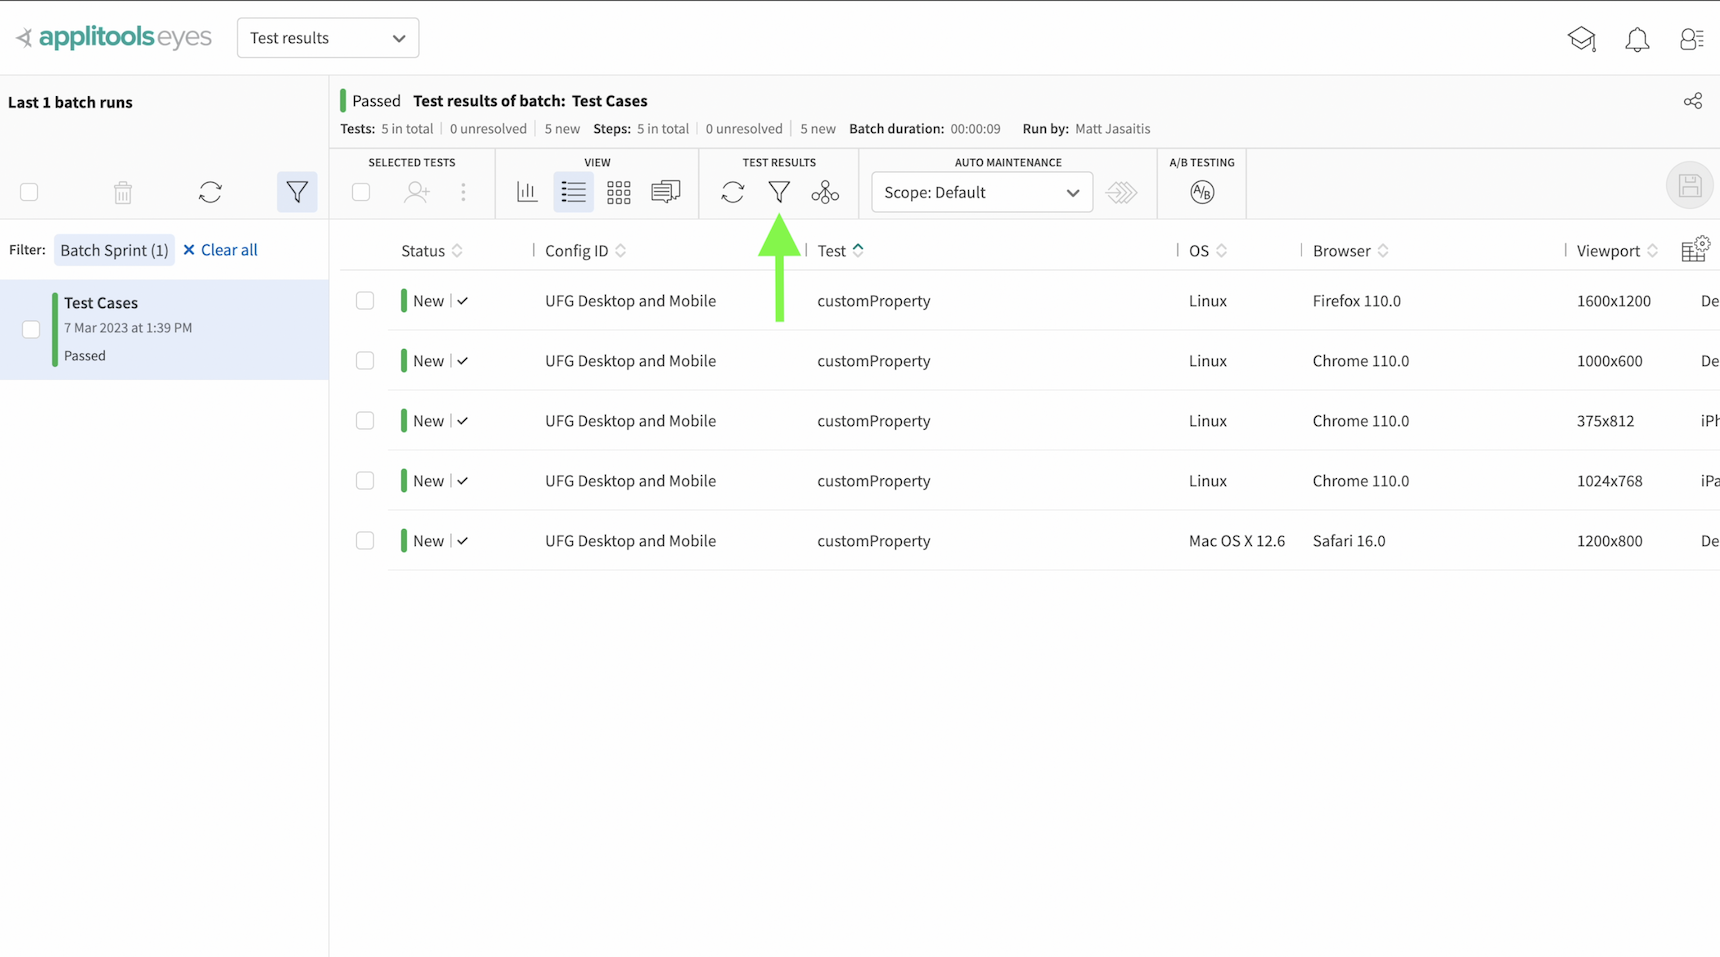
We can also filter test results based on this custom property. Select the filter icon shown here.
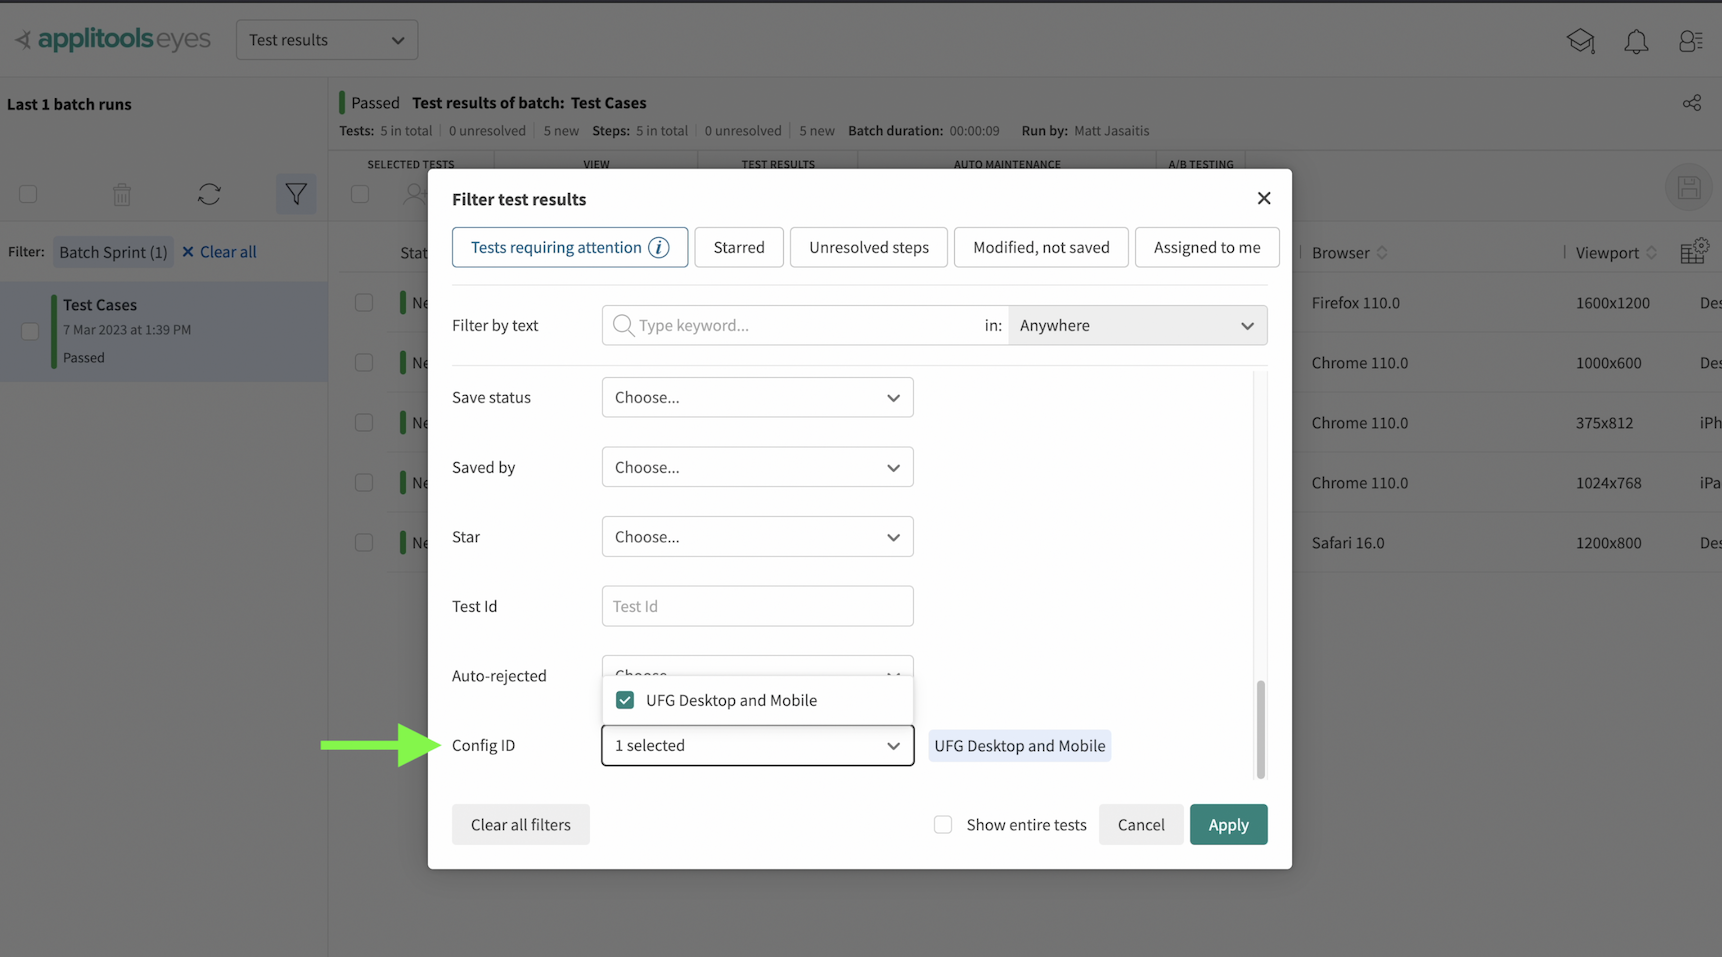
In the filter dialog, scroll down to where our custom property is listed and select the values you want to see. Once done, click apply.
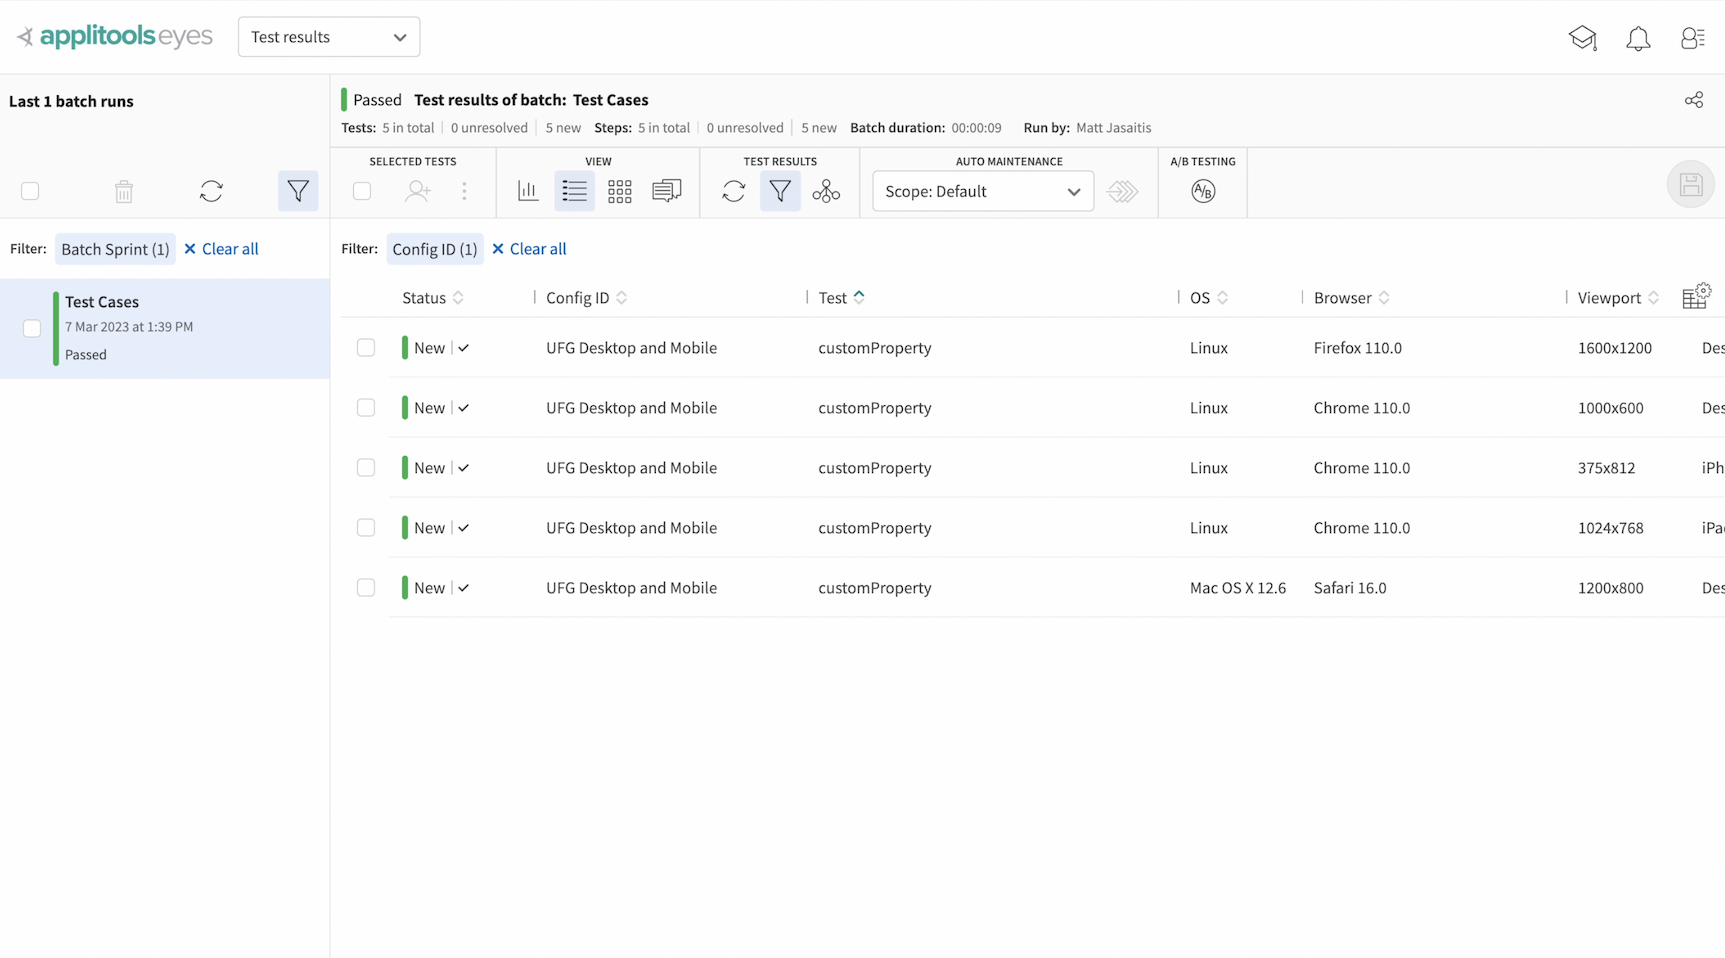
Only test results that match the value we selected will now show up. Custom Properties give you a lot of custom control for creating and attaching extra metadata to your tests that go beyond the test name, app name, browser, etc. If there's something else that you'd like to track on your test runs, you can do so using custom properties Then, you can filter your batches and test results based on those custom properties.
In this chapter, we took our deepest dive yet into a lot of the more powerful features that are offered to you on the Applitools Test Manager Dashboard. We first understood how Applitools organizations are structured as well as what user roles are available. Then, we reviewed the admin panel and saw what actions are available to admins for managing teams and users. Finally, we added some custom properties to our tests in order to track some extra metadata on our test runs.
