

Transcripted Summary

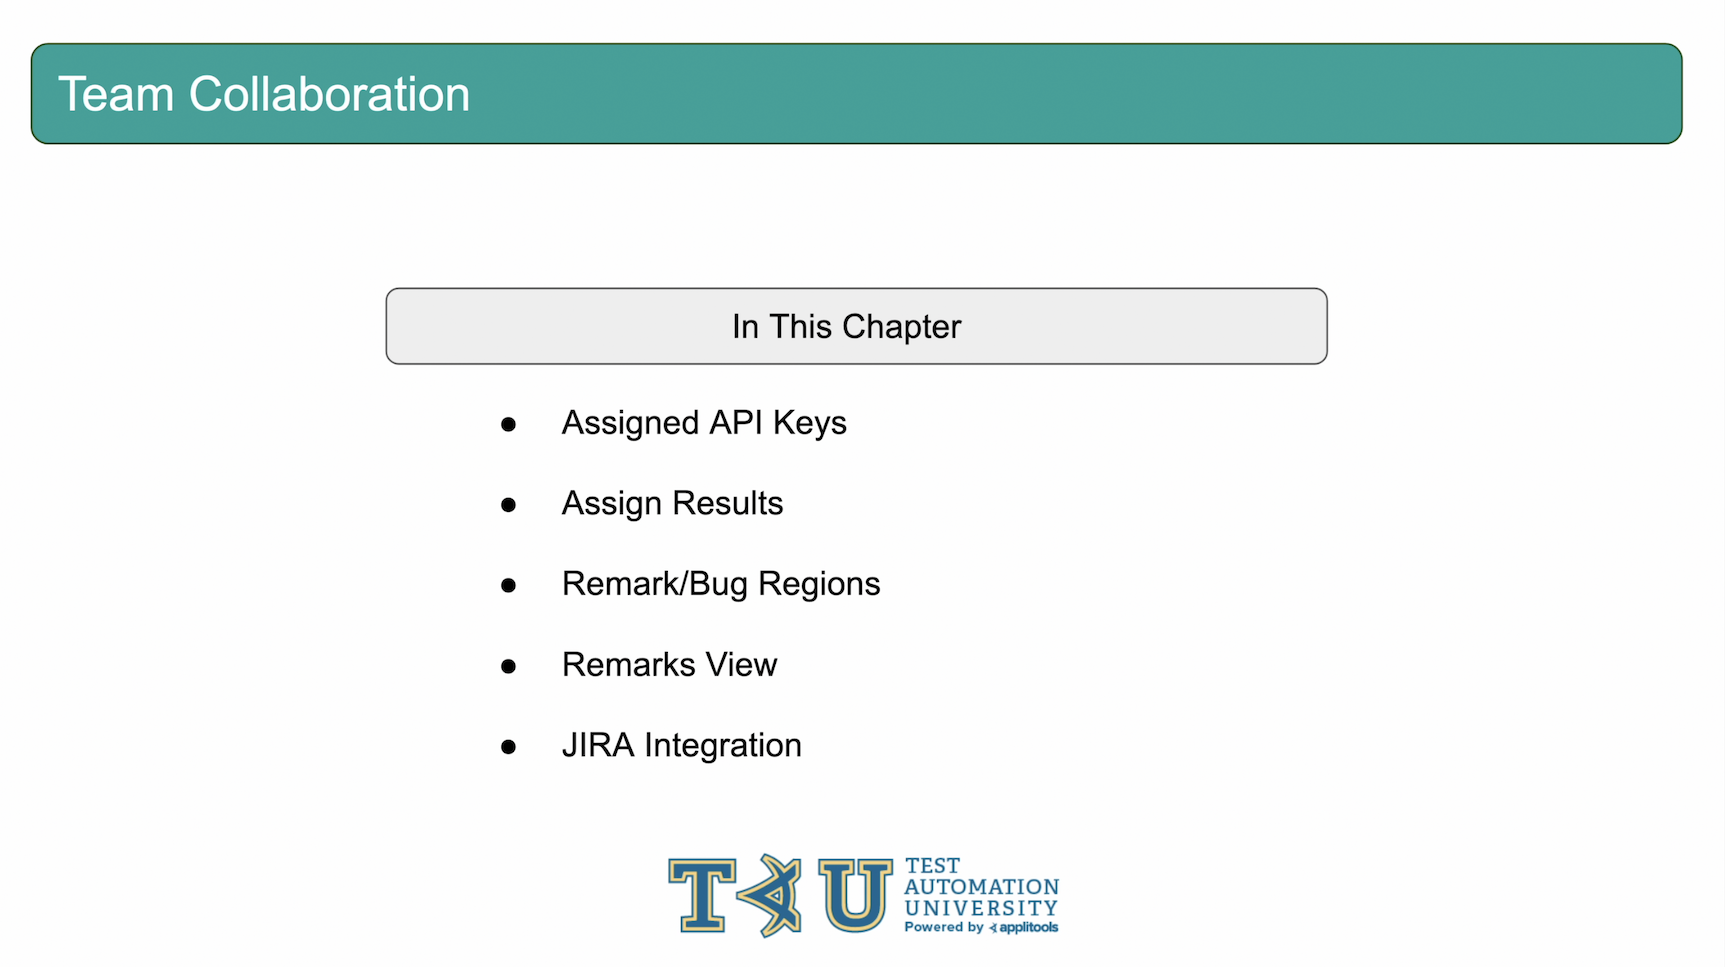
In this chapter, we're going to look at the team collaboration features that Applitools offers. These tools will help you stay in sync with the rest of your team and communicate about your test results all from within the Applitools Test Manager. We'll also take a look at how you can link issues in your test results to JIRA issues using our JIRA integration. Let's jump into our first topic, Assigned API Keys.

When you add a new member to an Applitools team, an API key is automatically created for that user's account. Every test that is run with that API key will be tied back to that user. Then, you can filter batches based on the user who ran the test and quickly find test results that you or another team member ran. This allows teams to track which users run which tests and helps them stay organized. Assigned API keys are also beneficial for handling users who leave the team or if an API key gets leaked. Instead of having to cycle all of your API keys when someone leaves or a key is leaked, all you'd need to do is decommission a single API key. Everyone else on the team will be able to continue working by using their own API key.
Let's head back to the API Keys view. If you're an org admin or team admin, click on the dropdown at the top of the page and select admin.
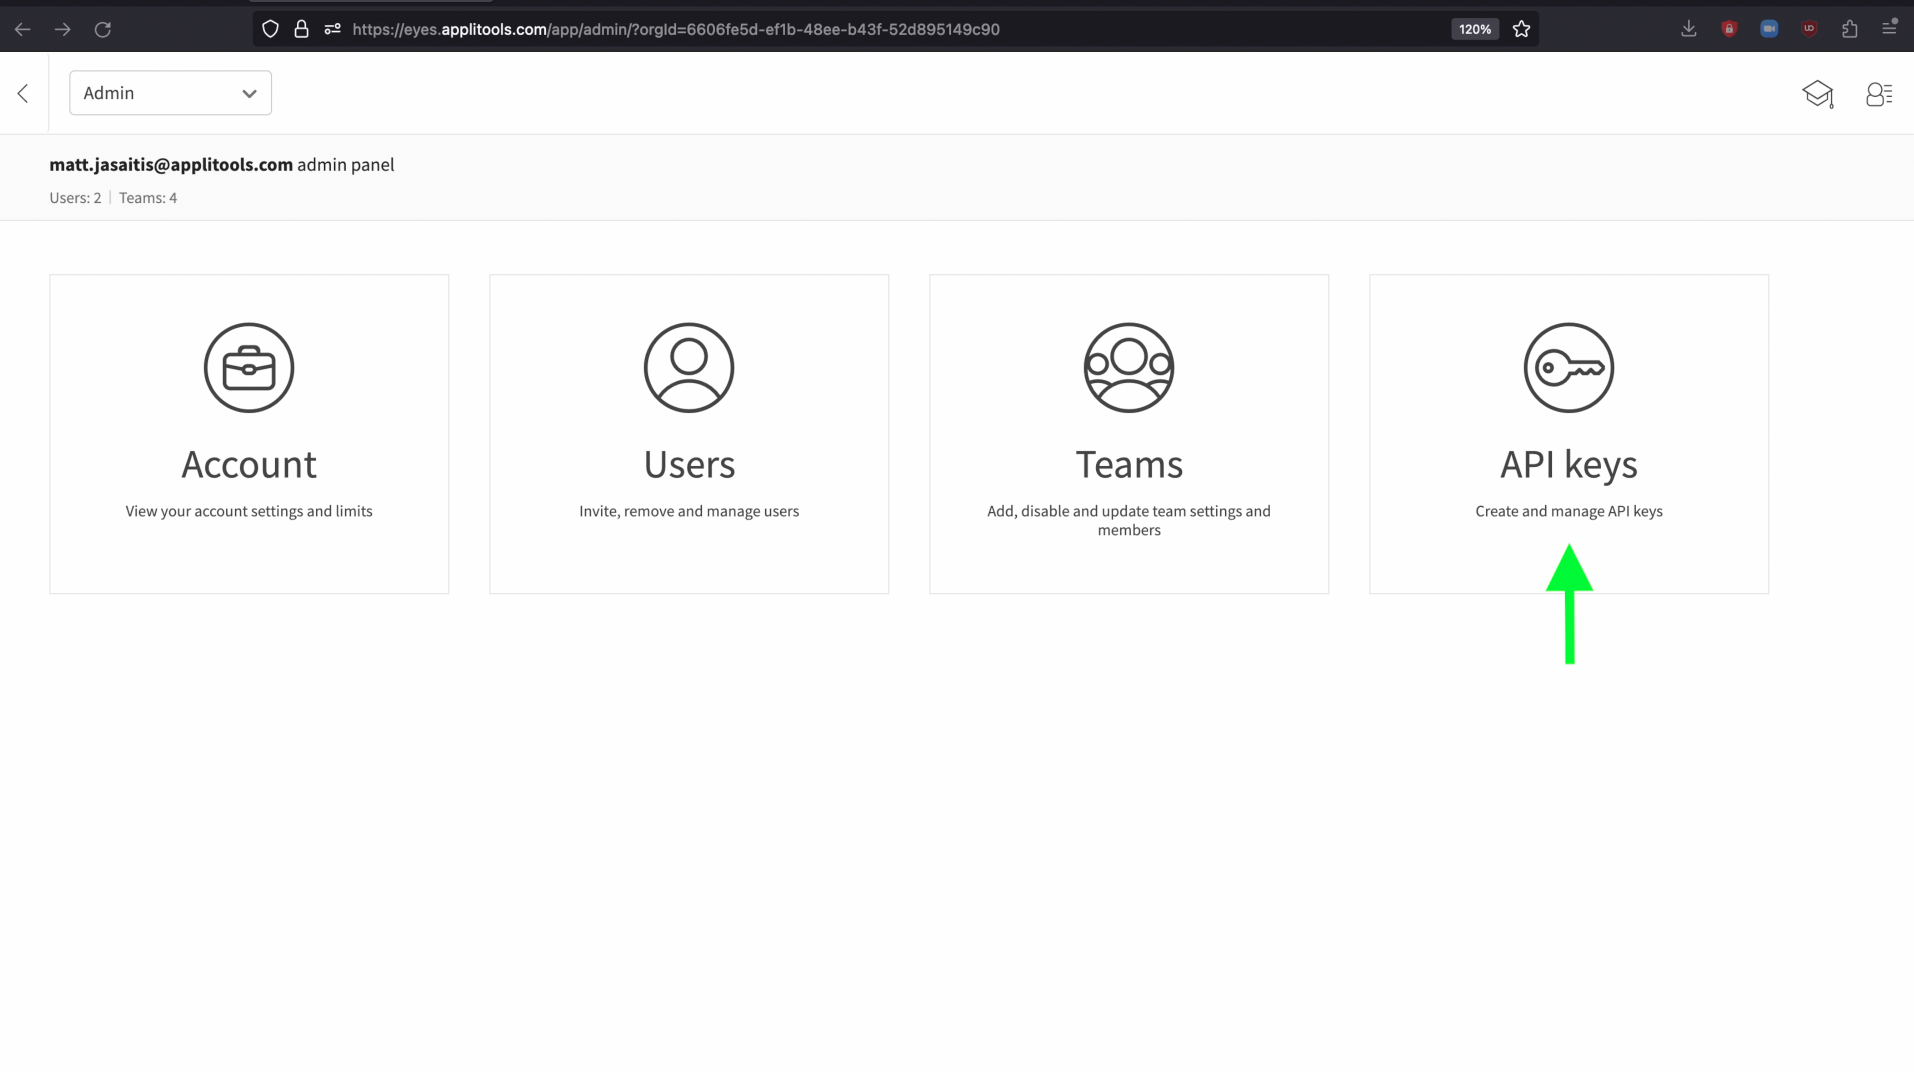
Then click API Keys.

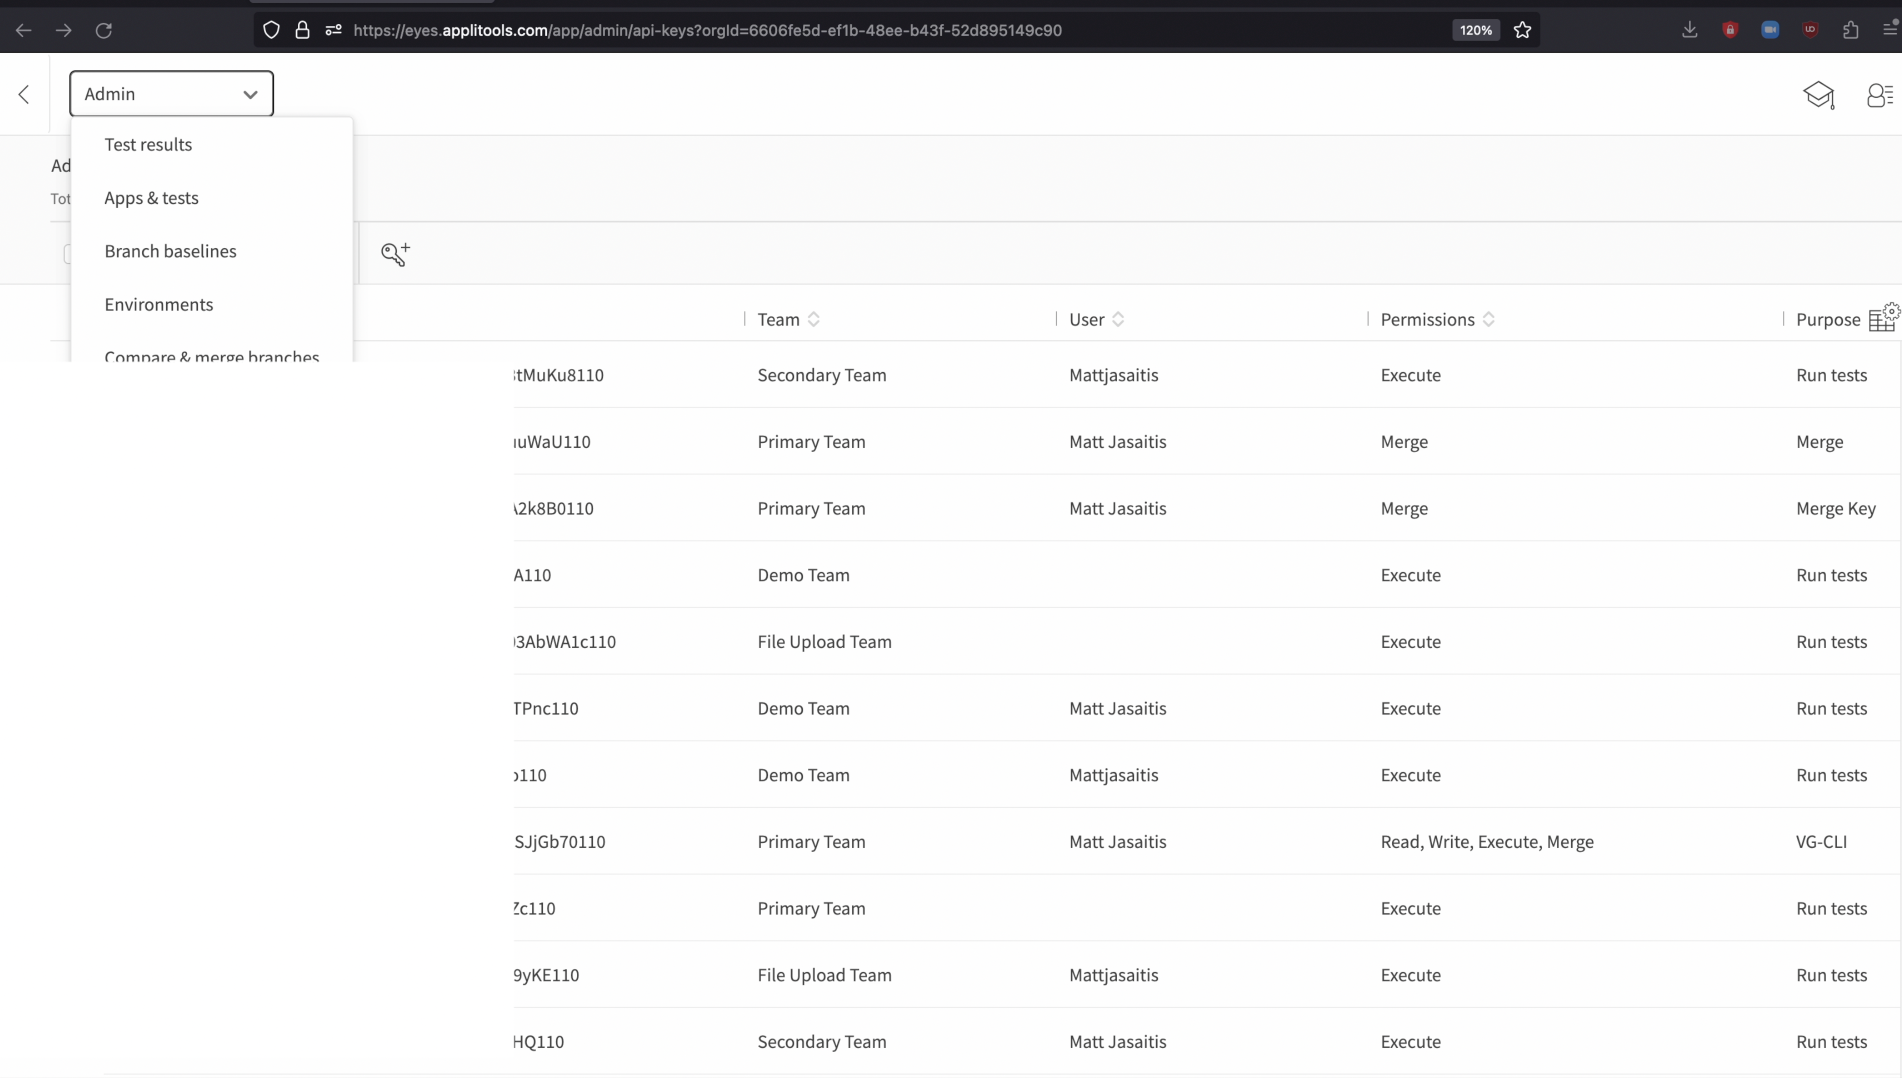
On this screen, we can see in the 2nd and 3rd column from the left which team the API key is associated with and which user it is assigned to.

If we decide to create a key manually by clicking on this icon back here, we can optionally select the user to associate this key with from the dropdown shown here.
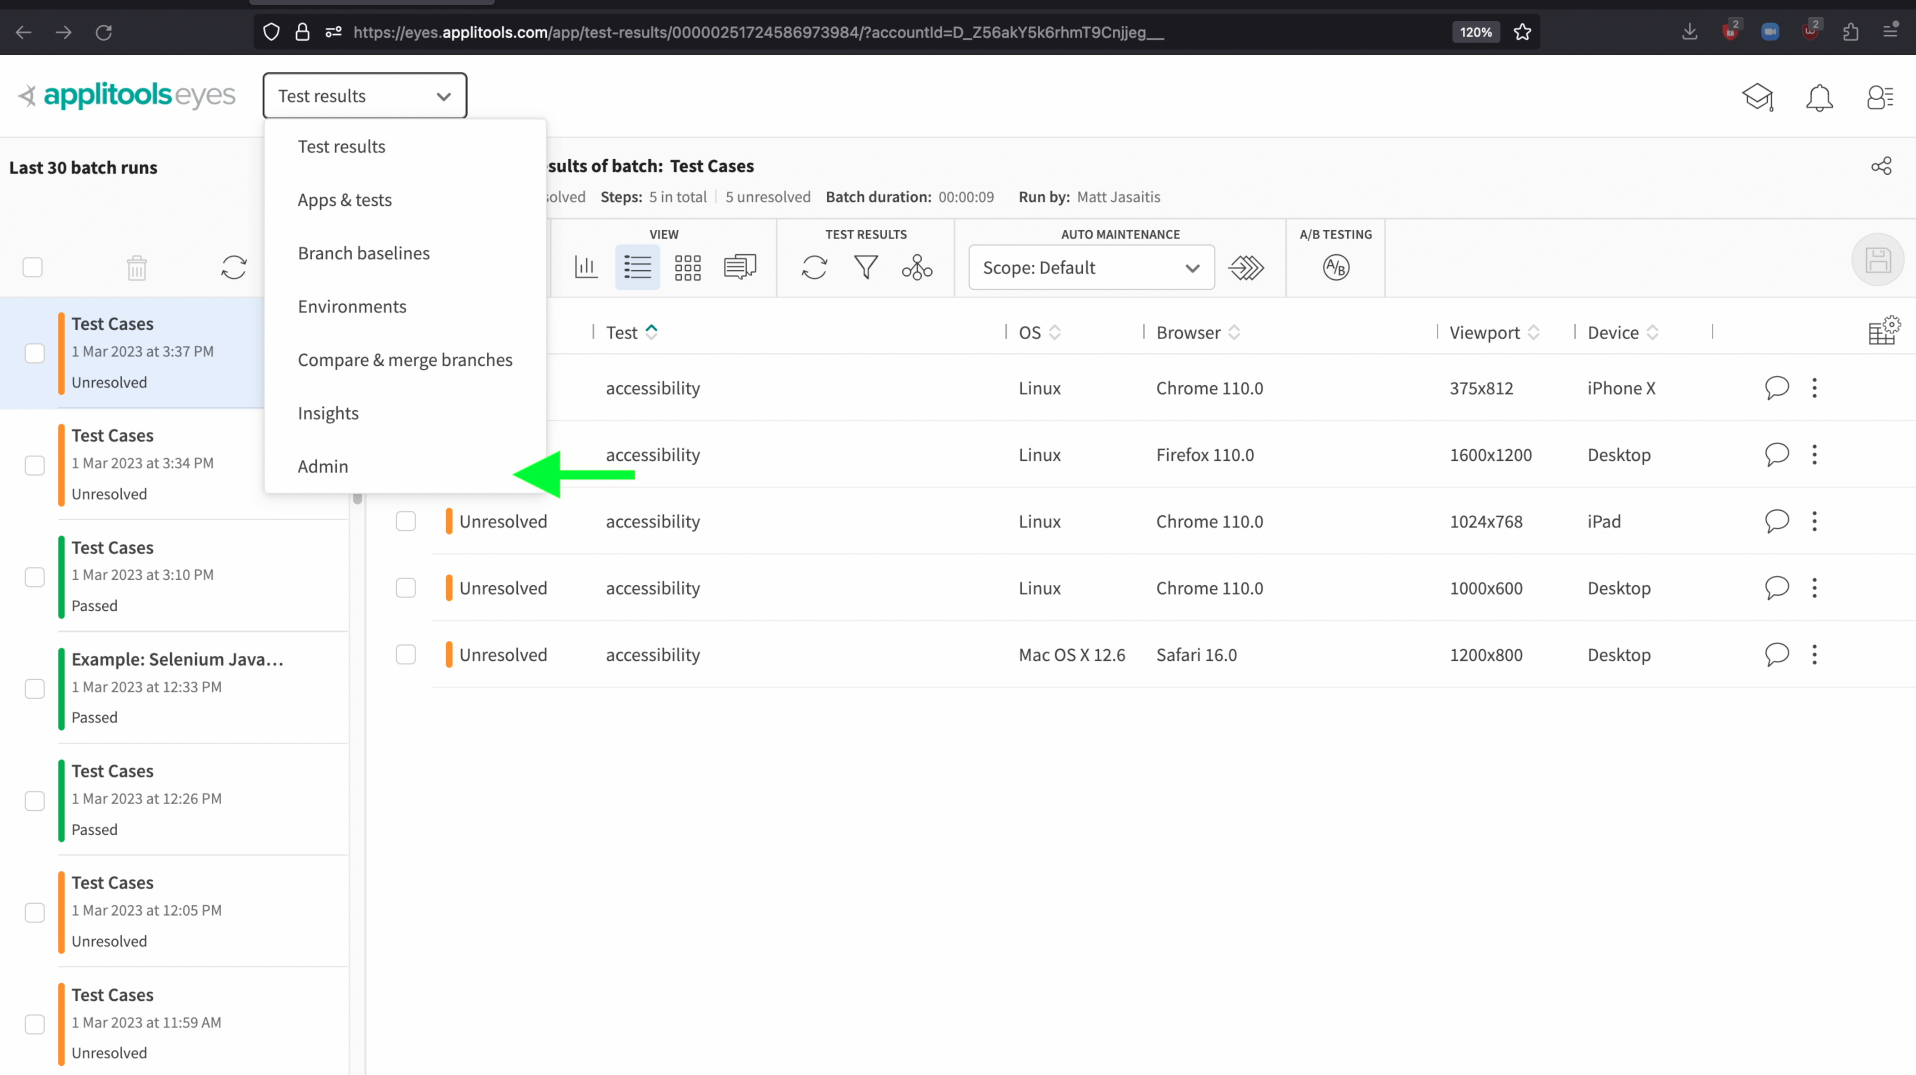
Let's now head back to the Test Results view by clicking on the dropdown at the top once again and selecting Test results.
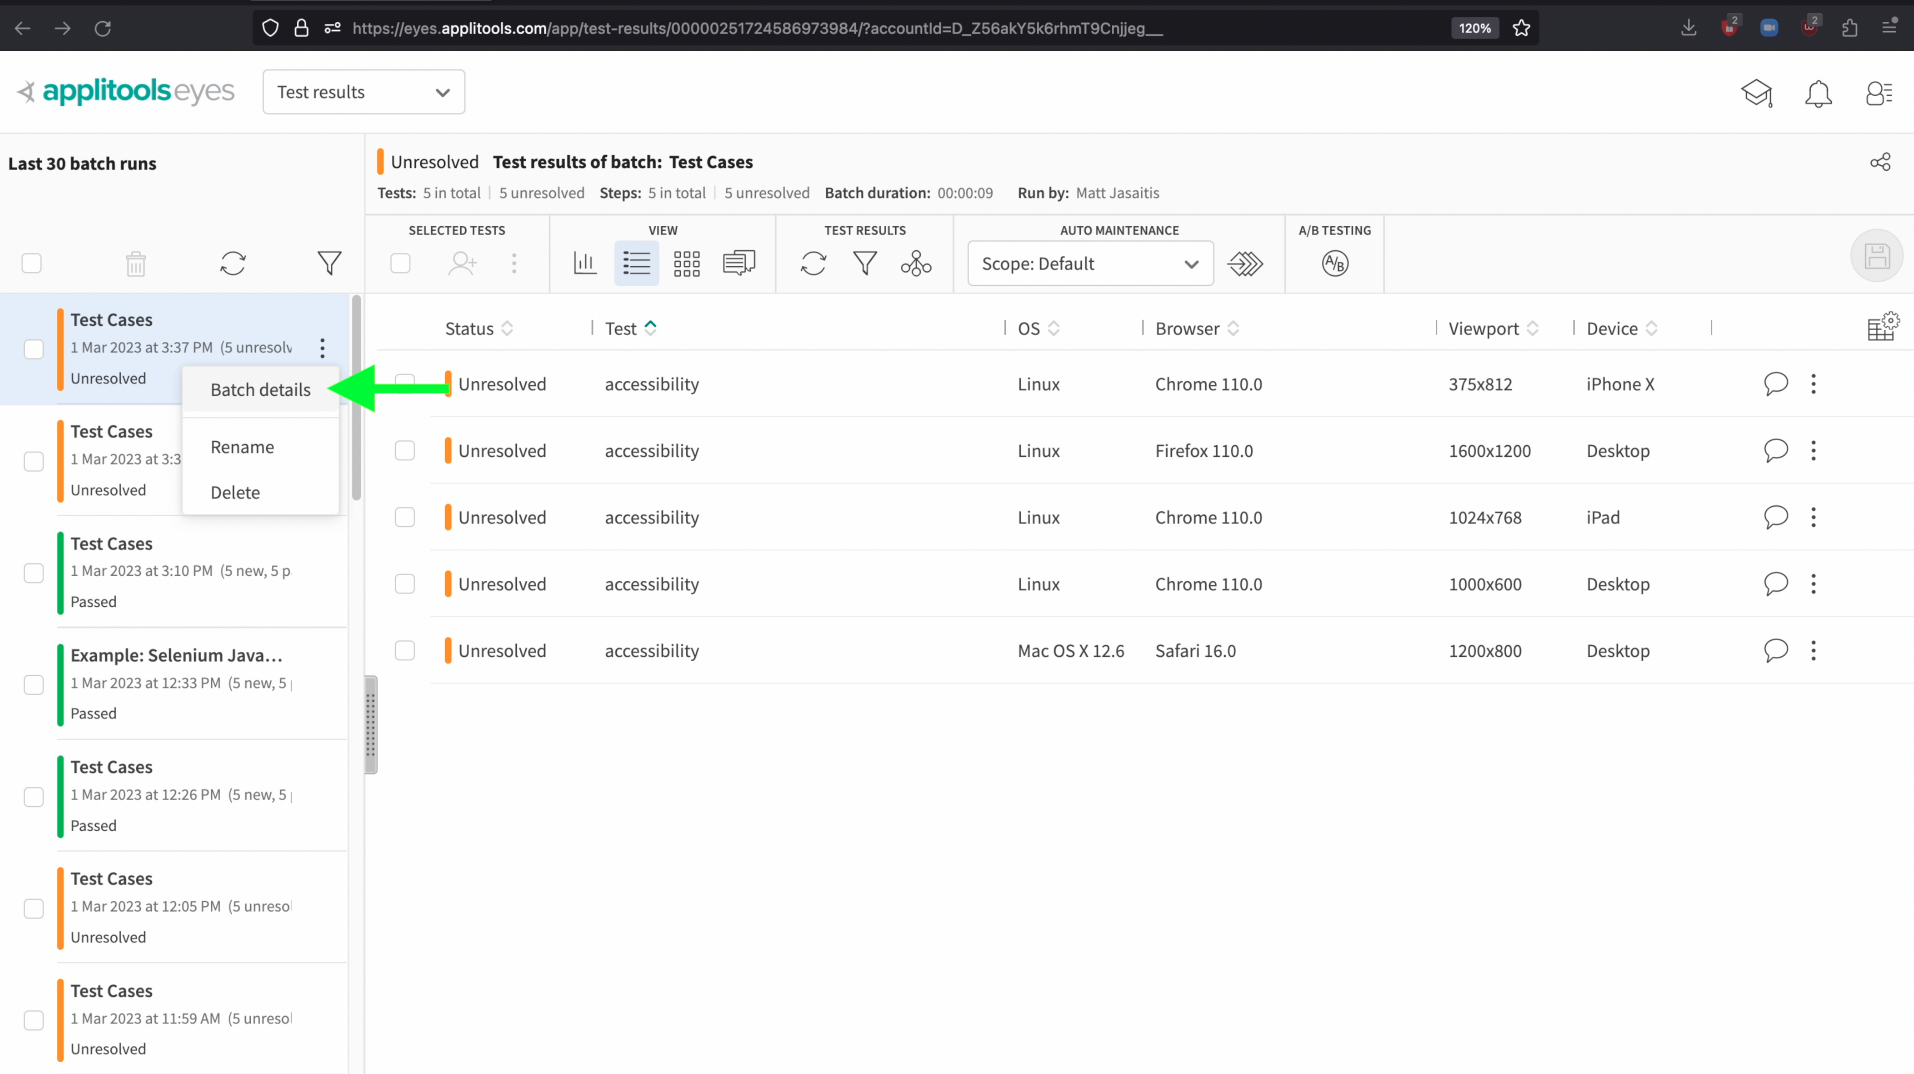
You can see who ran a certain batch by clicking on the 3 dots icon on the right side of a batch entry. Then, click on Batch Details.
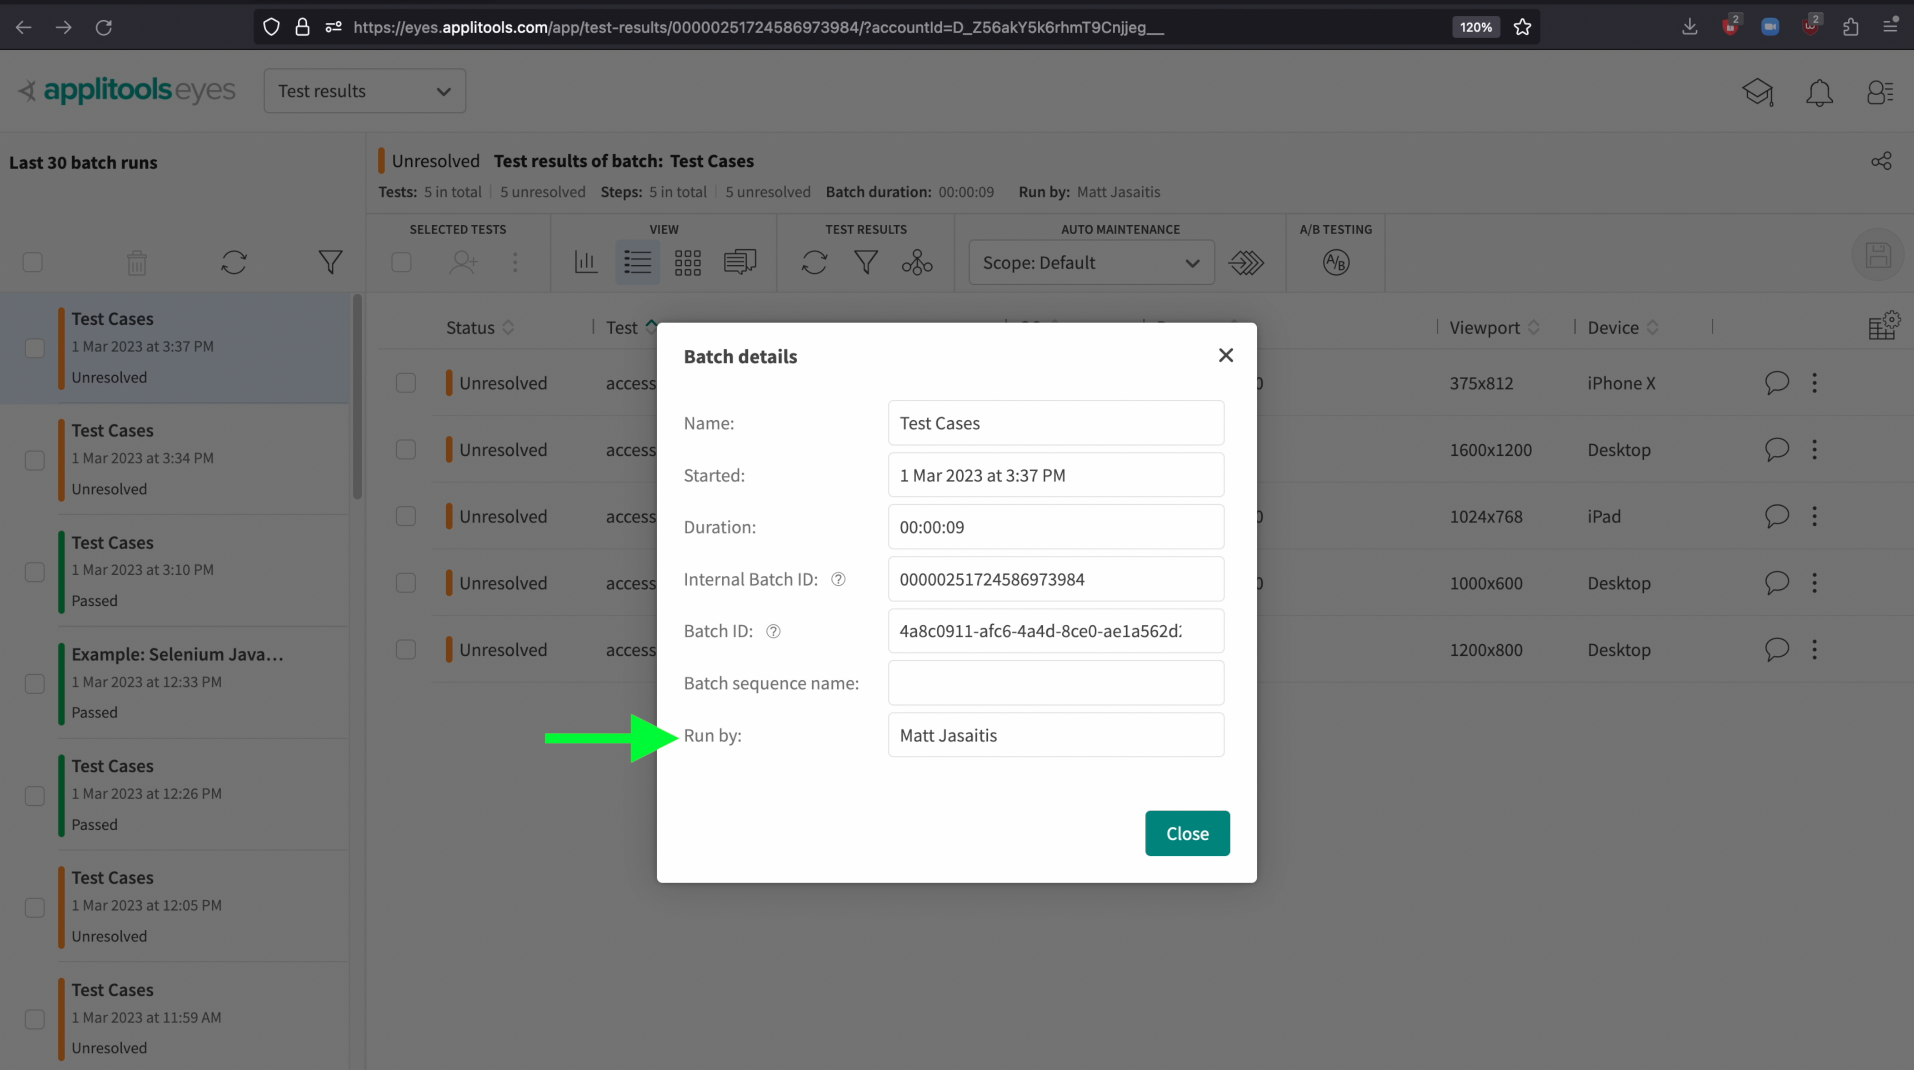
At the bottom of the Batch Details popup, we can see who ran this batch.
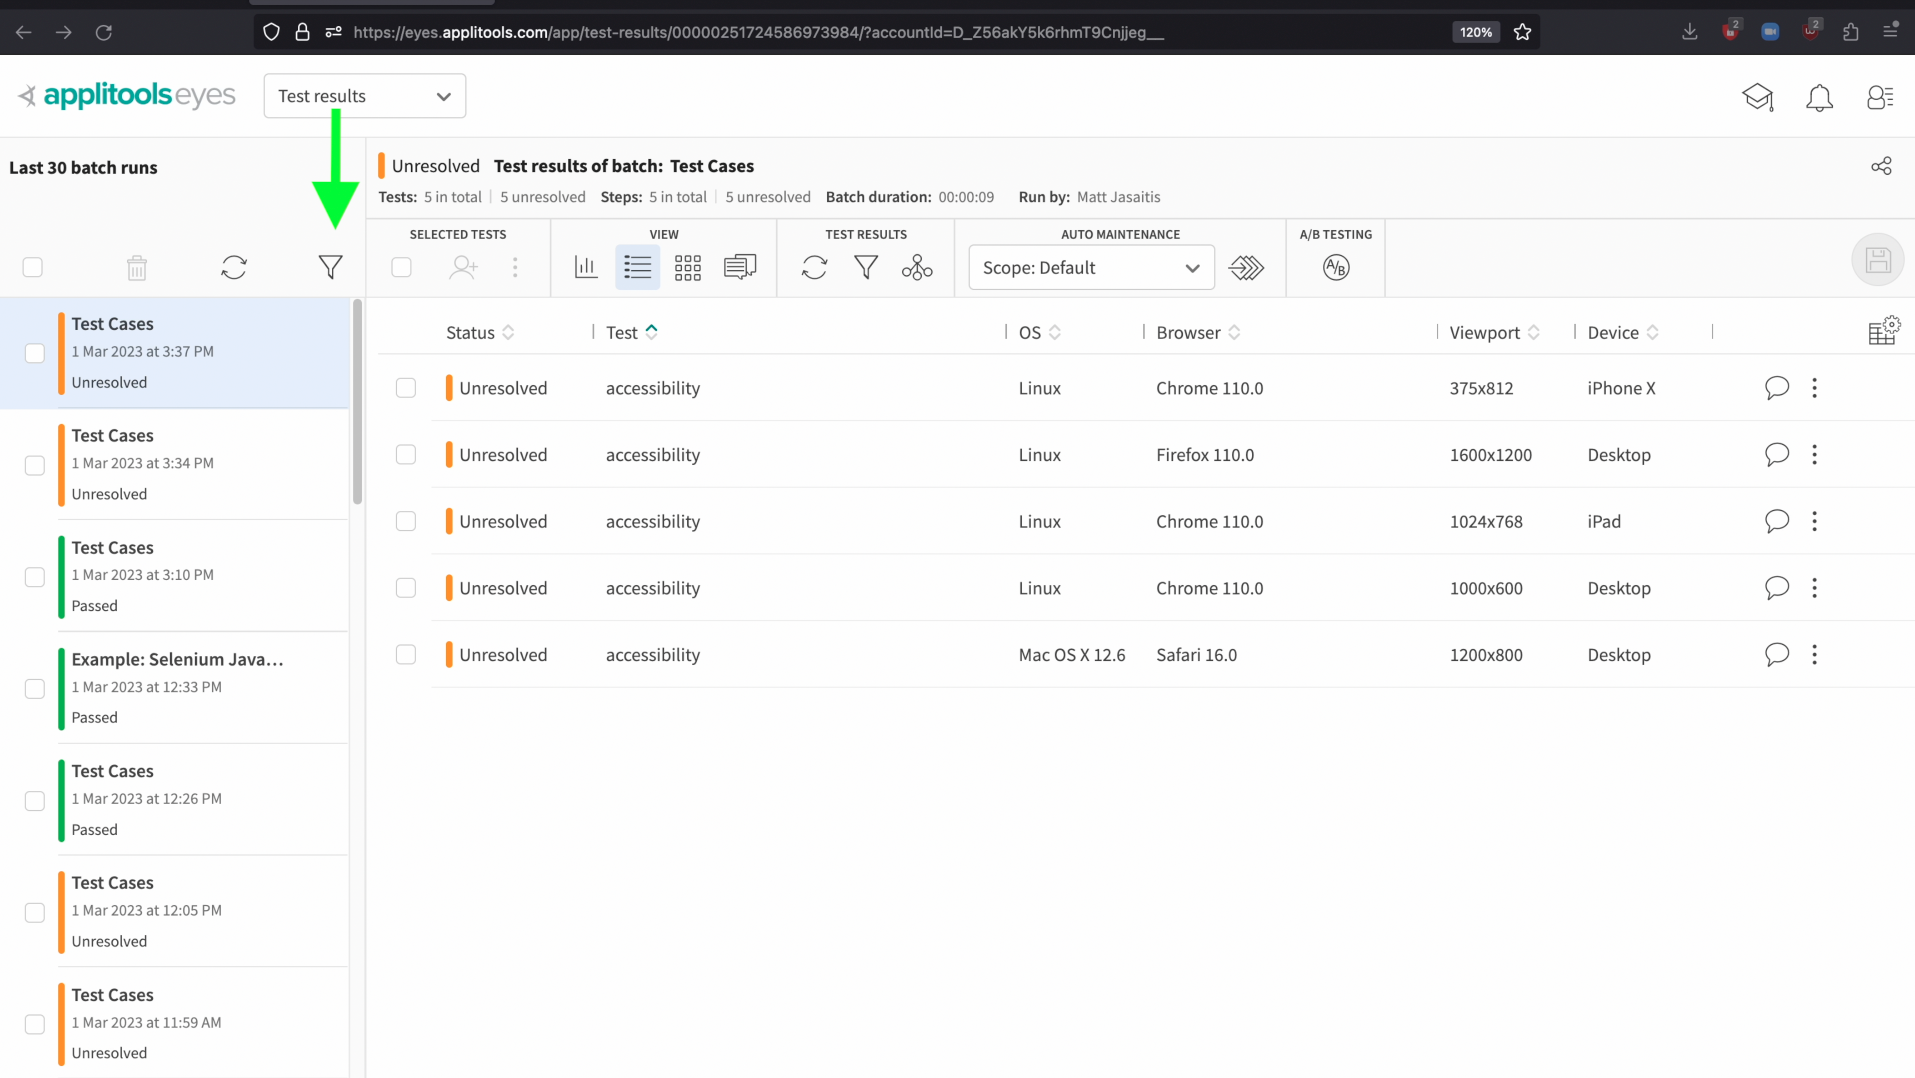
We can also filter our batches based on the user who ran the test. Select the Filter icon above the batch list.

Then, use the Run By filter option to select the users you want to search for. After you've selected your choice, click the apply button.
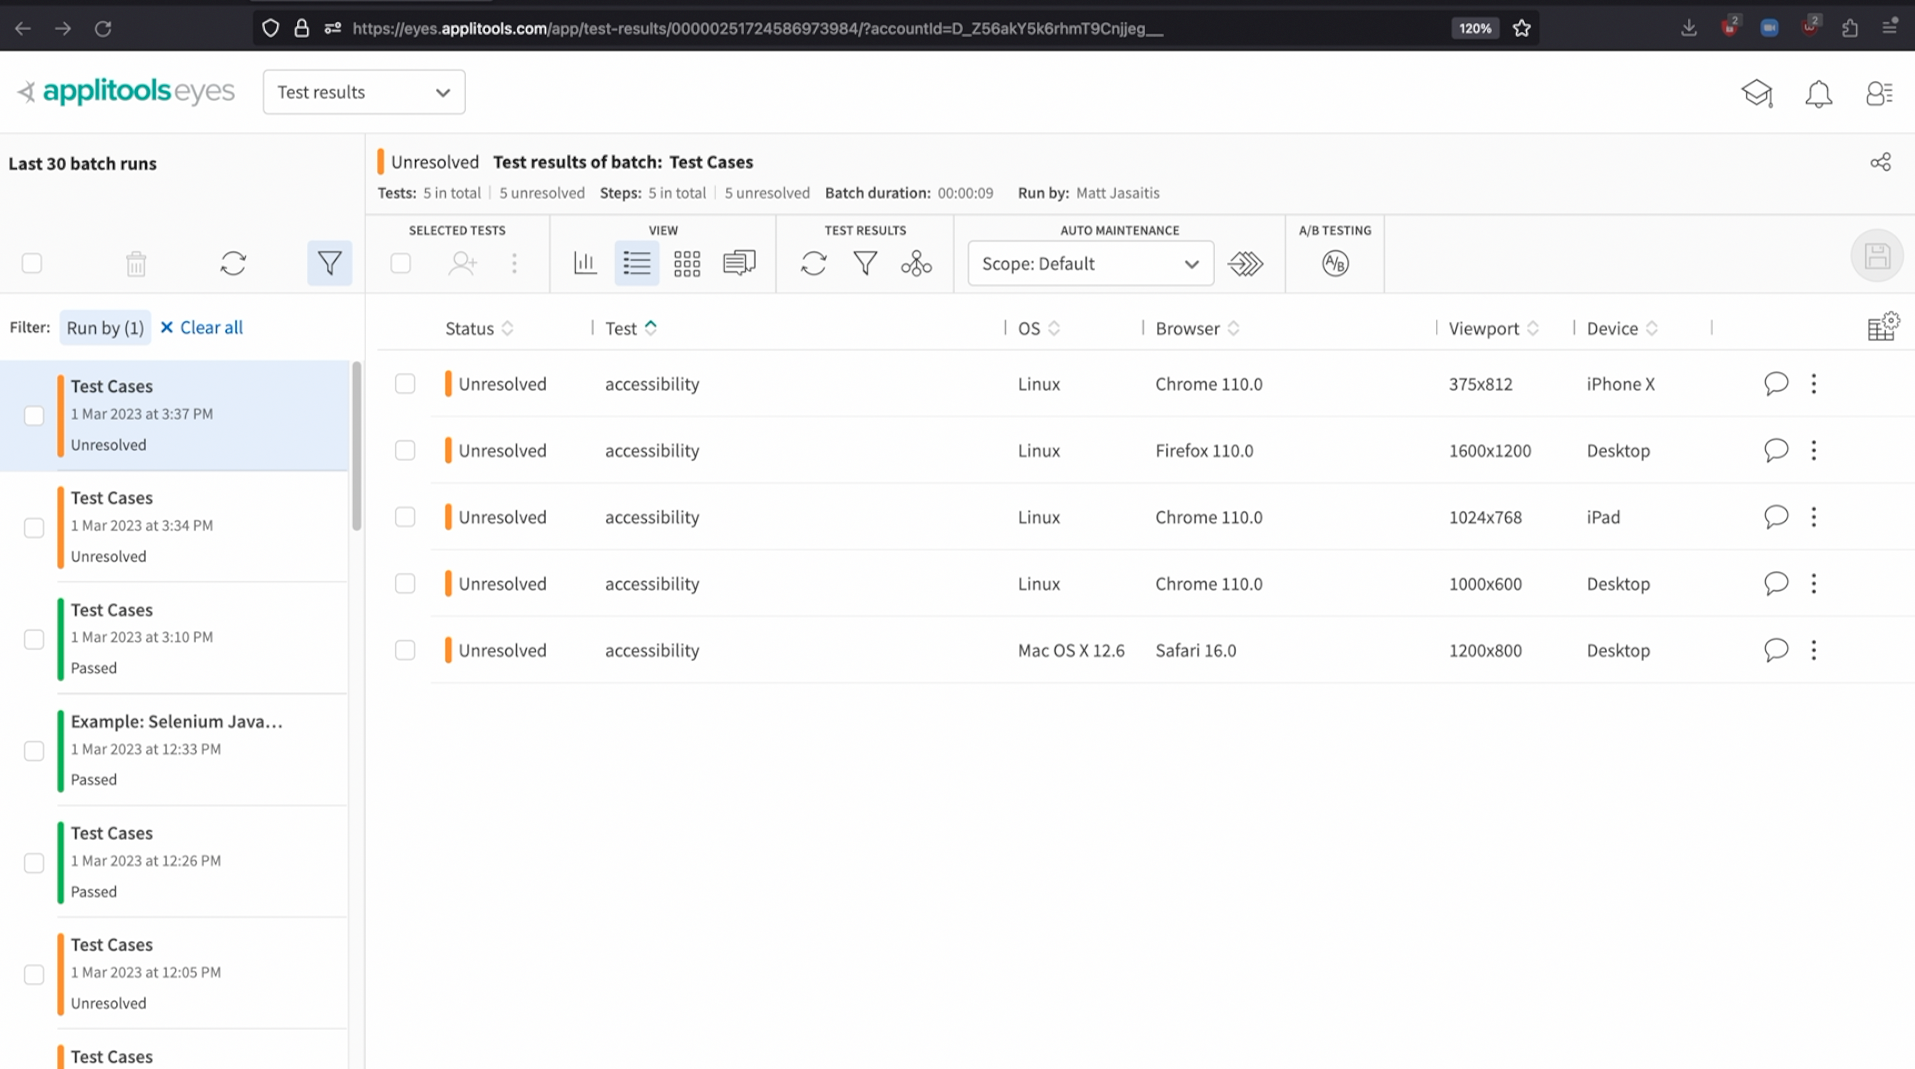
Now, we're only seeing batches that were run by the users that we're interested in. This feature is helpful when multiple users are consistently running tests on a team as it allows you to focus only on your own test runs and filter out others if needed.
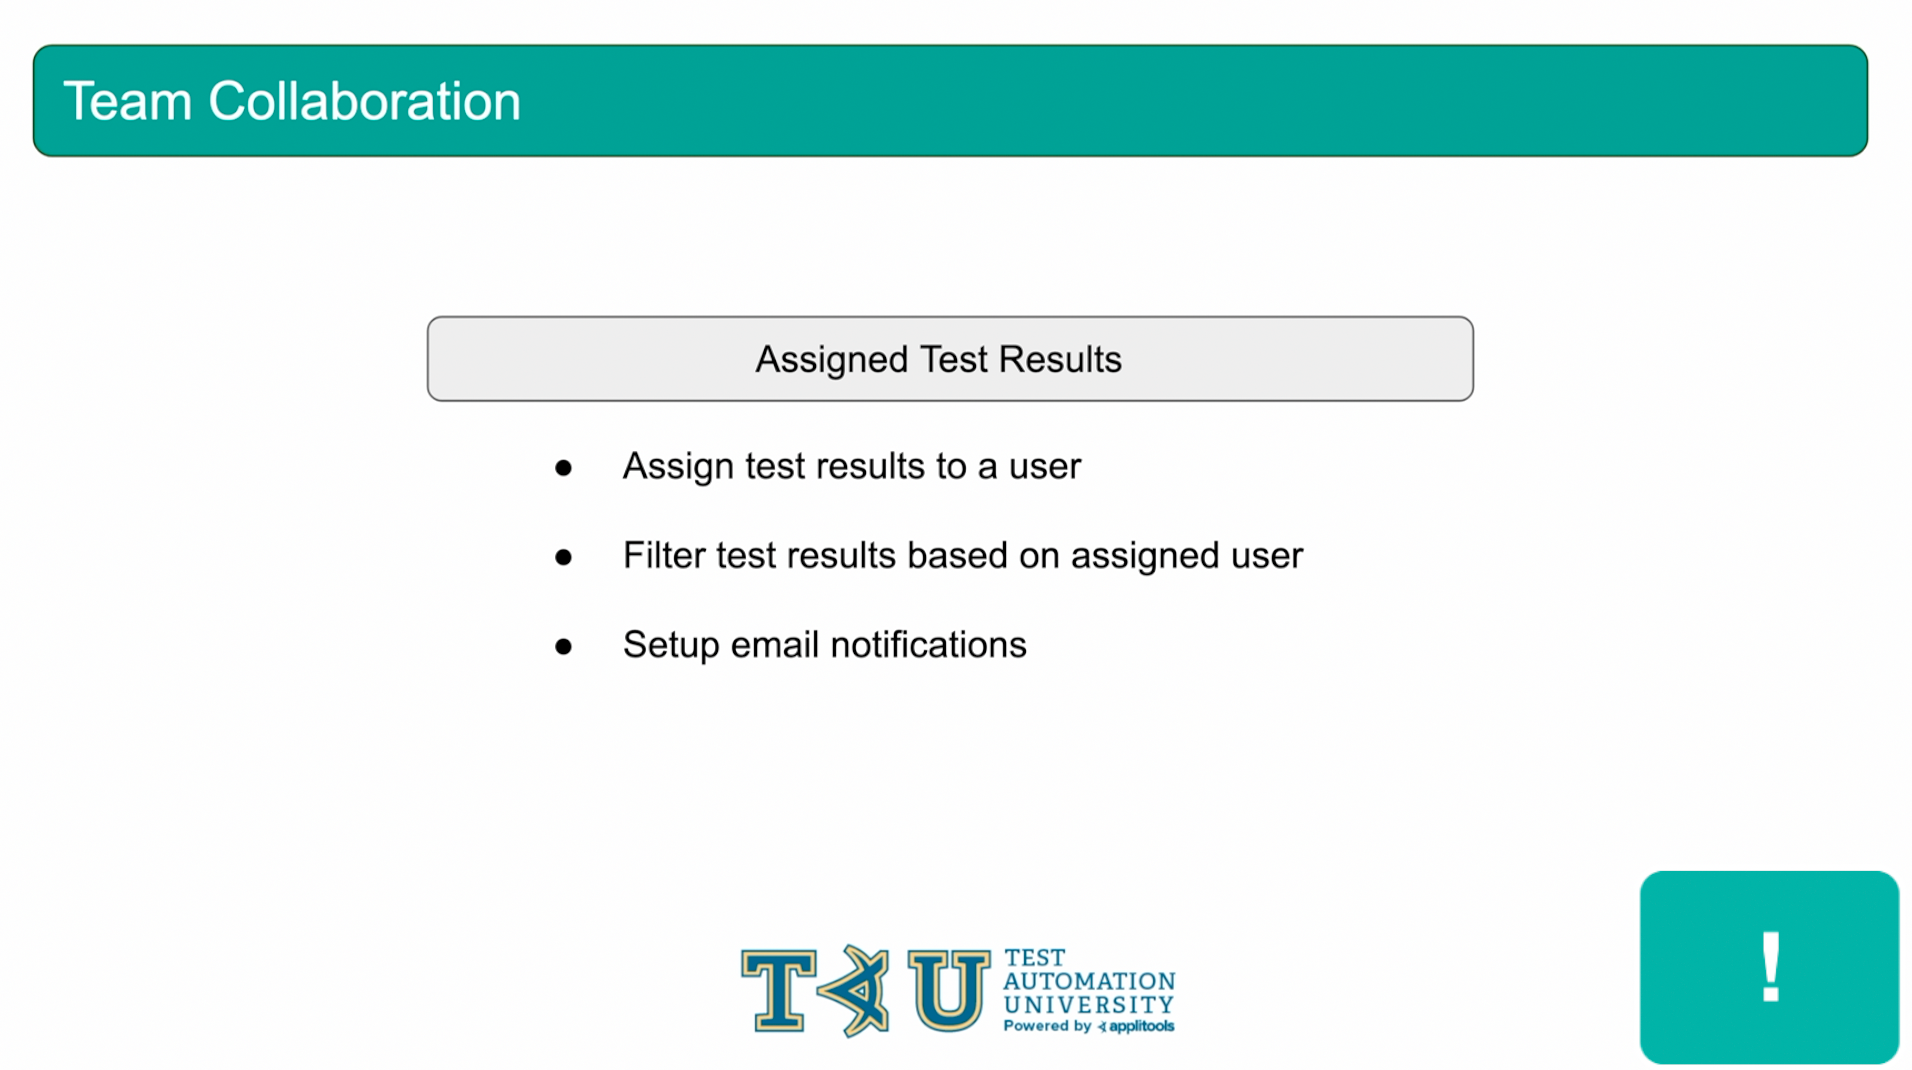
Another powerful collaboration feature is the ability to assign test results to a specific user on the team for their review. Users can then filter test results based on who they're assigned to and admins can also configure notifications to be sent via email when a test is assigned to a given user.
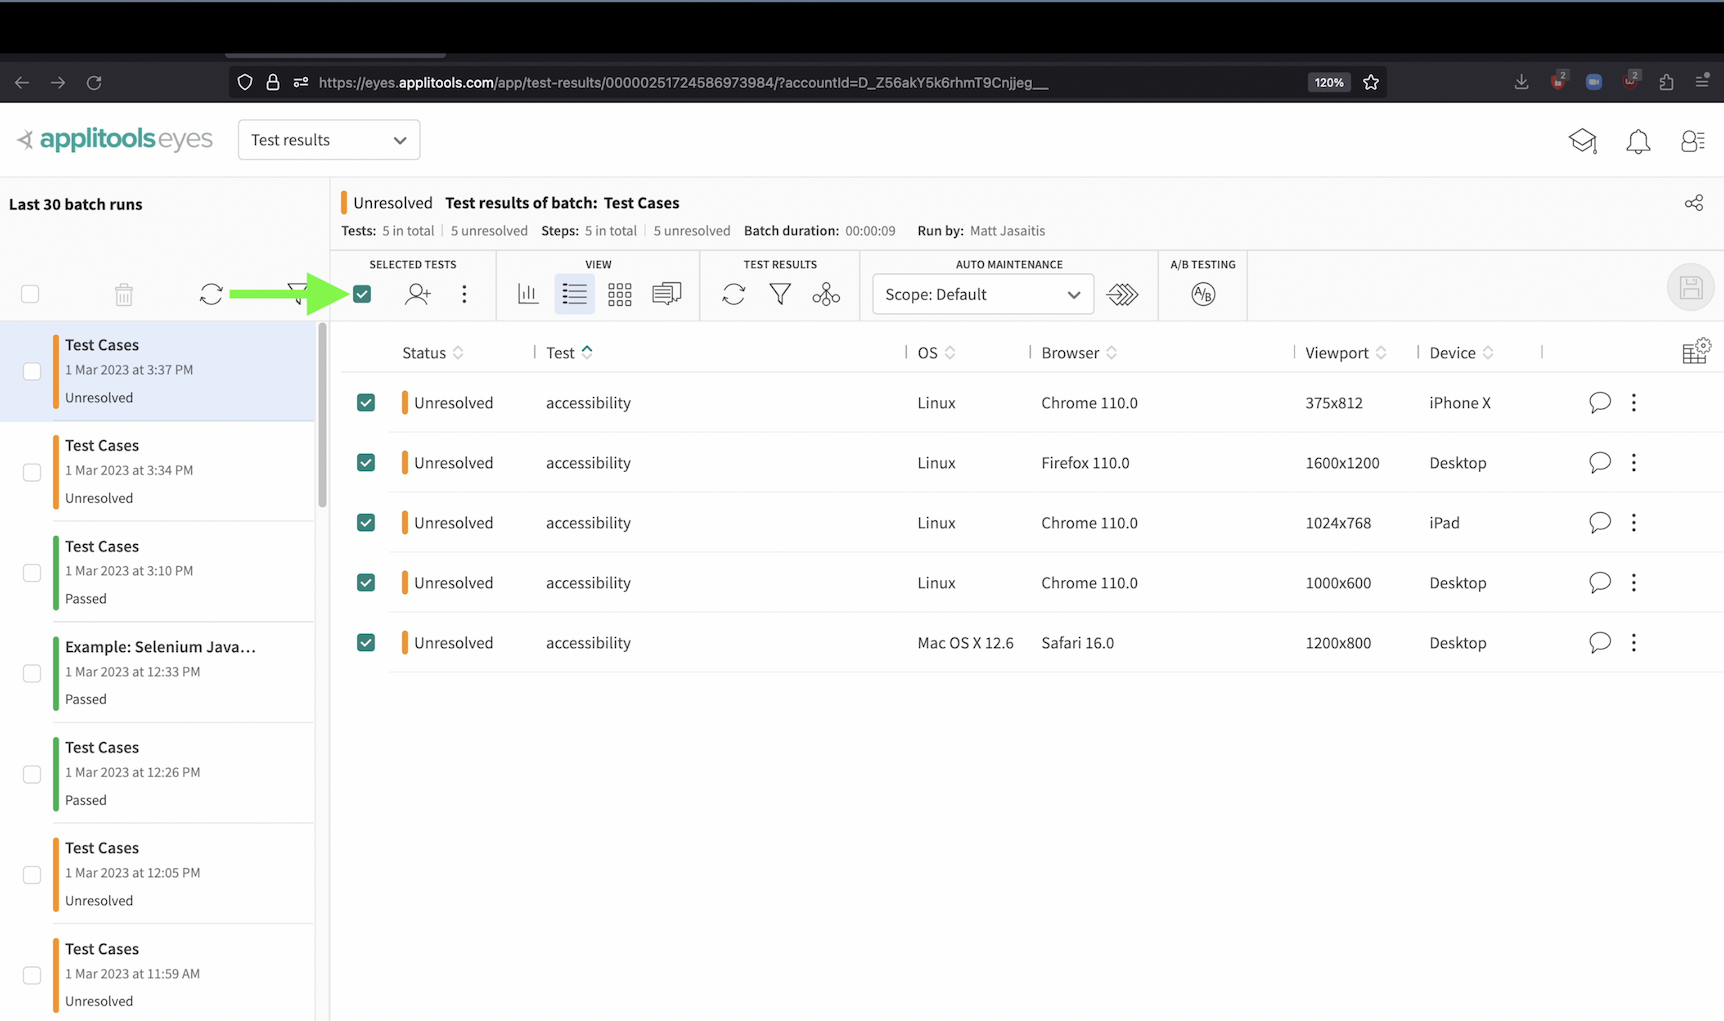
To assign a test result to a user, first select all of the tests you'd like to assign by using the checkboxes on the left. If you'd like to assign them all, you can use this checkbox at the top.
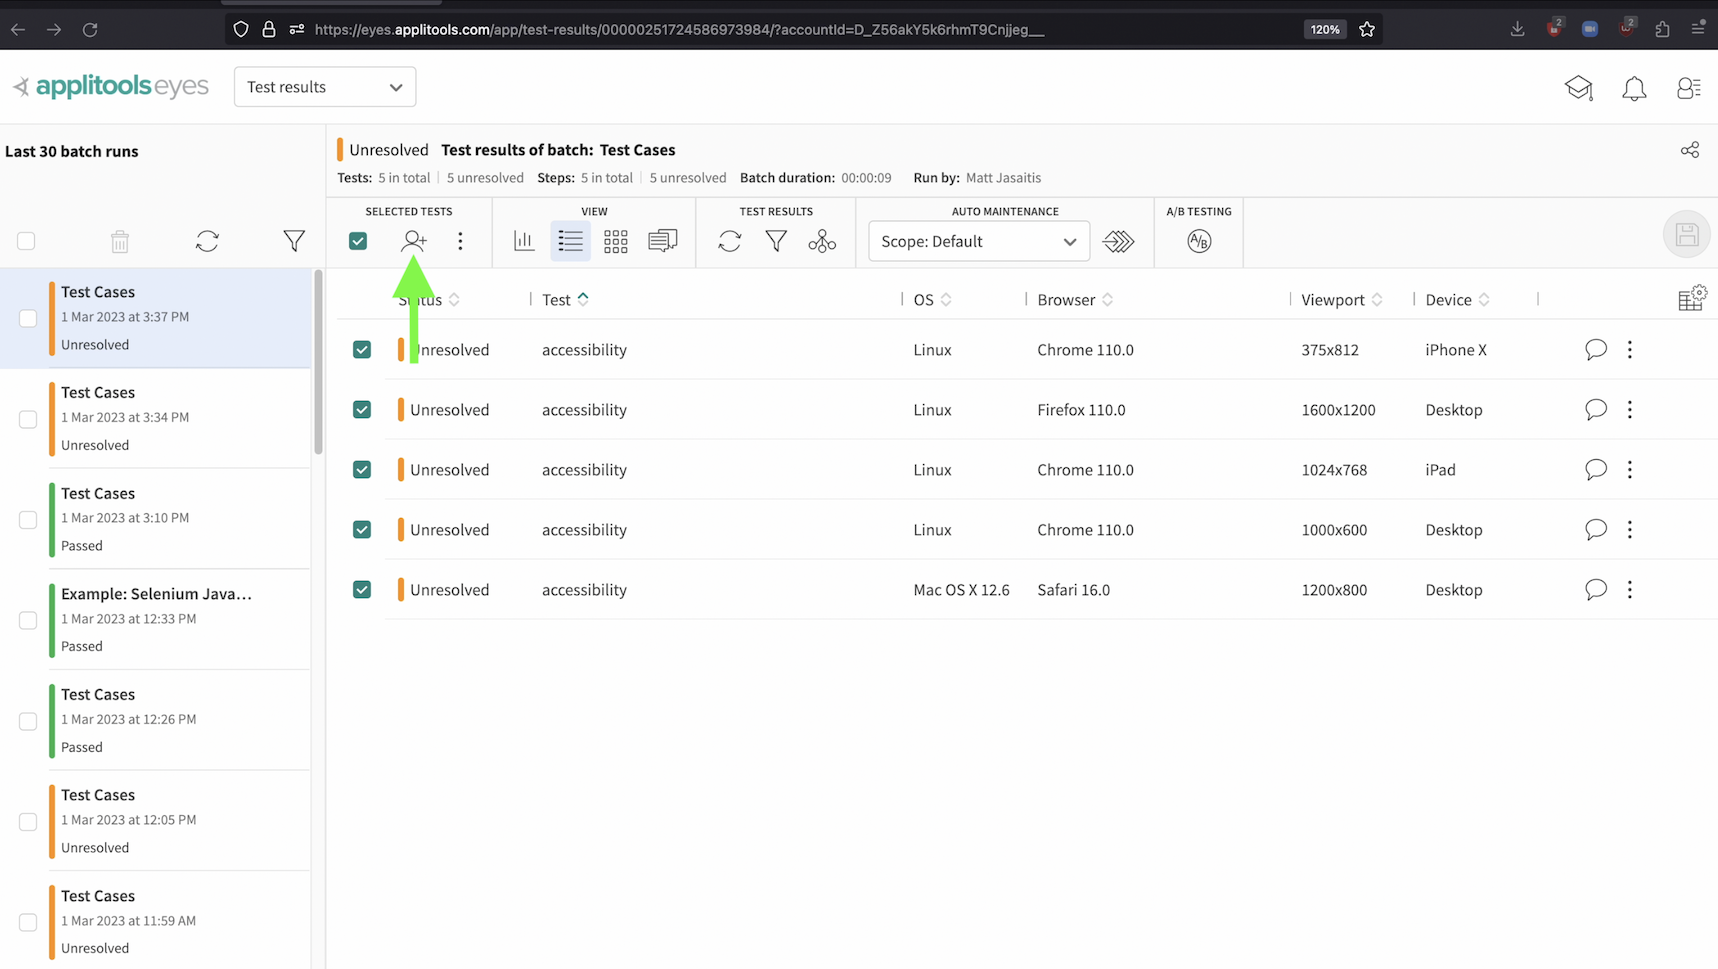
After selecting the results, click on this icon.
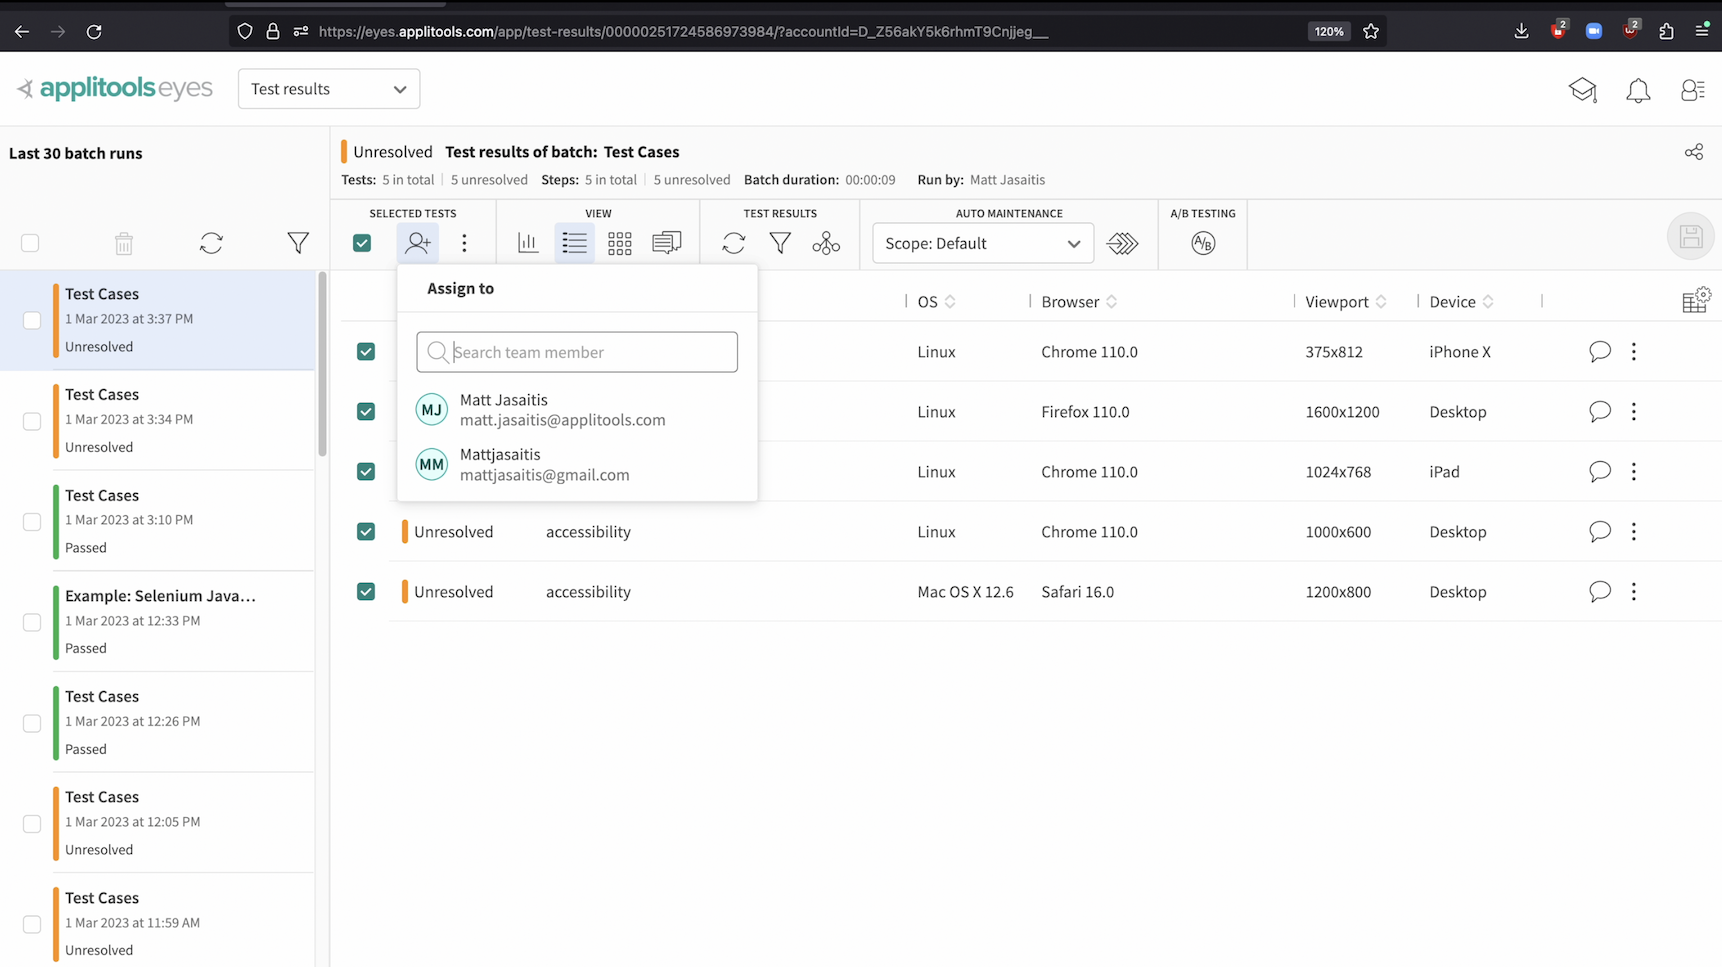
In the dialog that pops up, select the desired user.
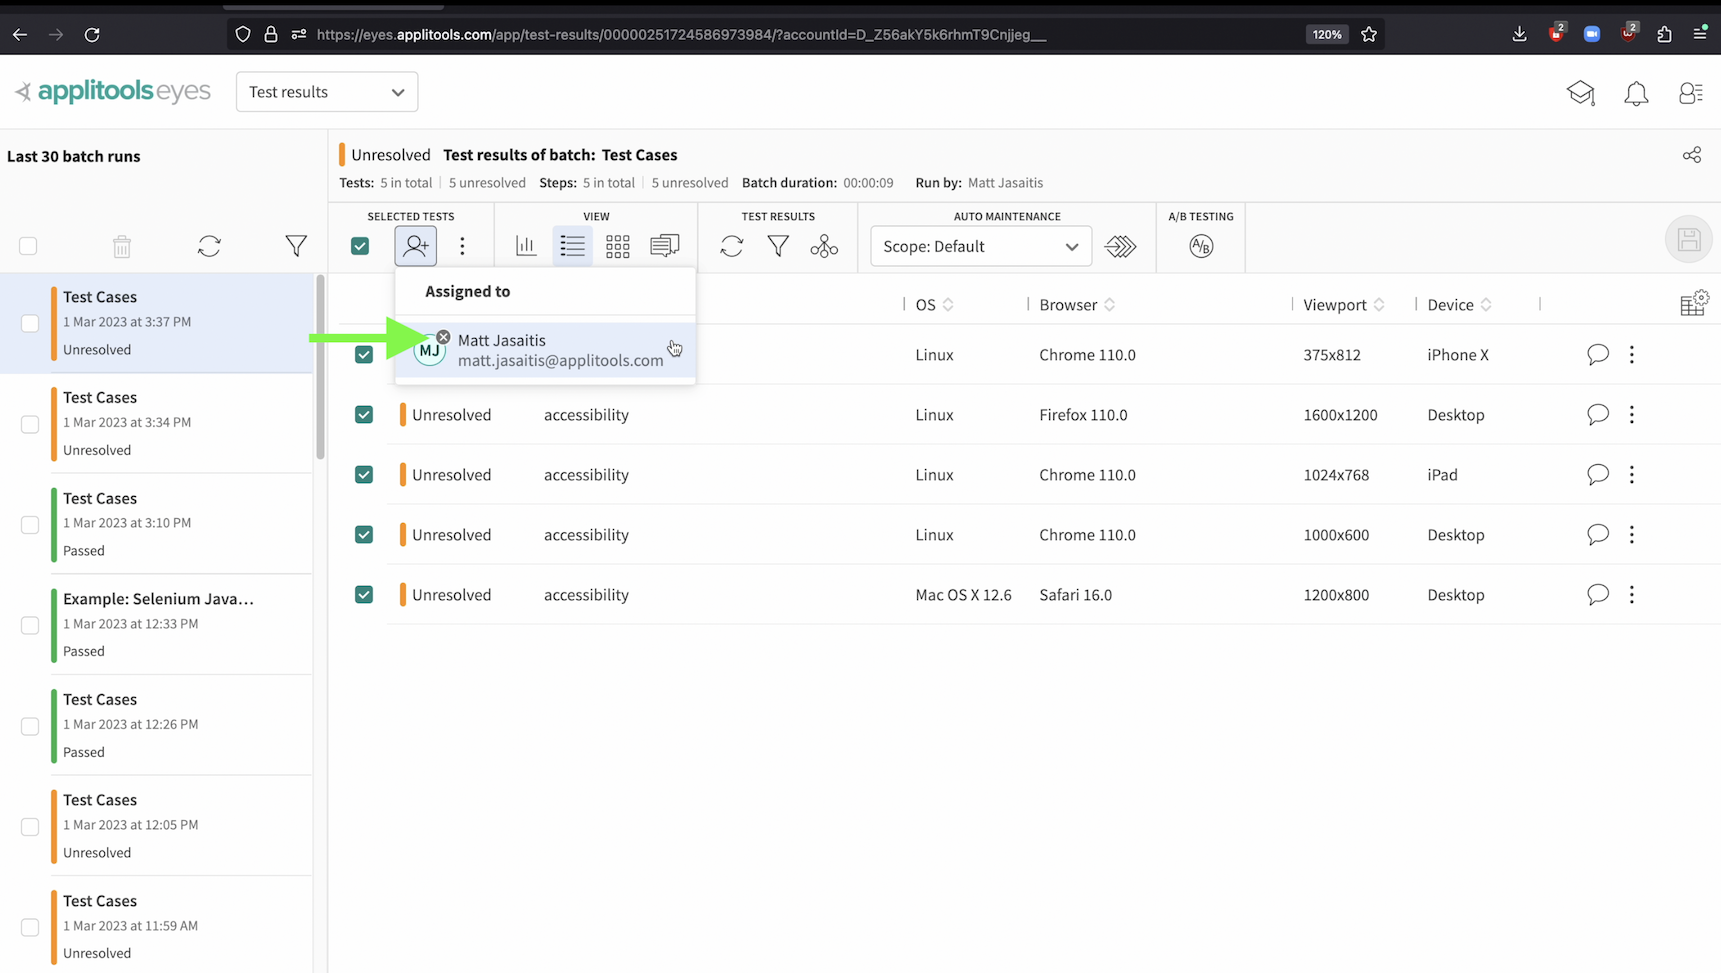
Now, these test results are assigned to the user you selected. If you'd like to change this, click on the same icon again and then press the small x button shown here. Then, you can select a different user if needed.

To filter by assigned status, click on the filter option at the top.
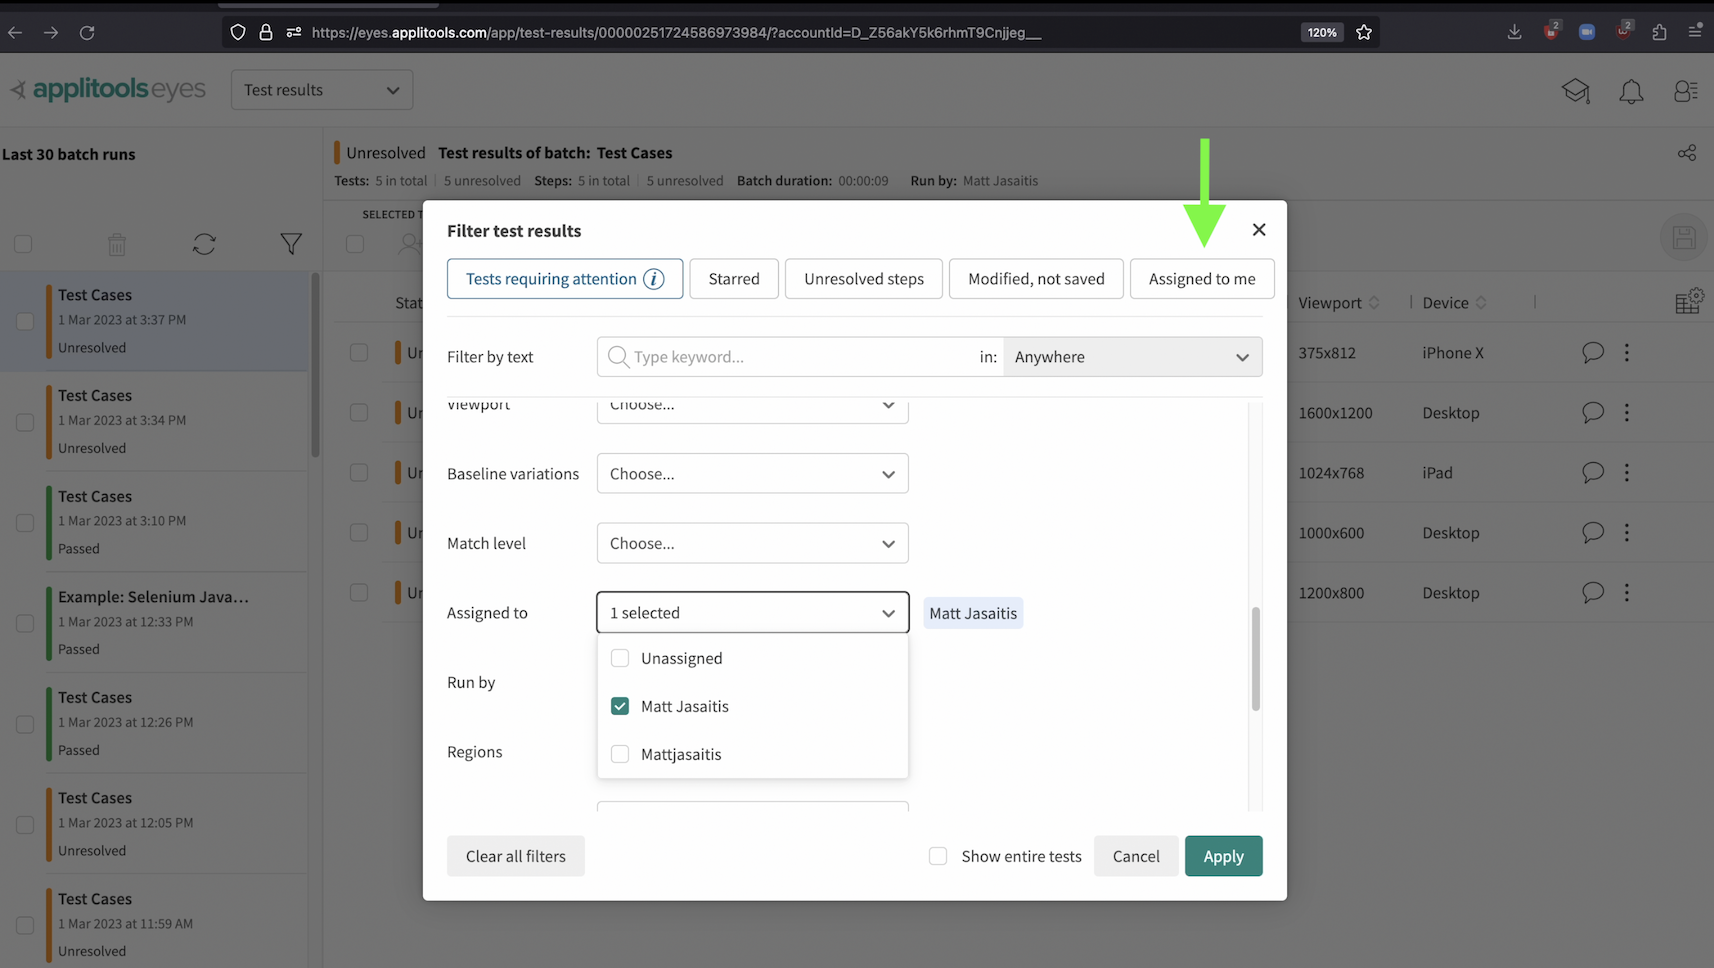
In the filter window, if you're interested in tests assigned to yourself, click on this button shown here. Otherwise, scroll down to where it says "Assigned To" and select a user from that list.
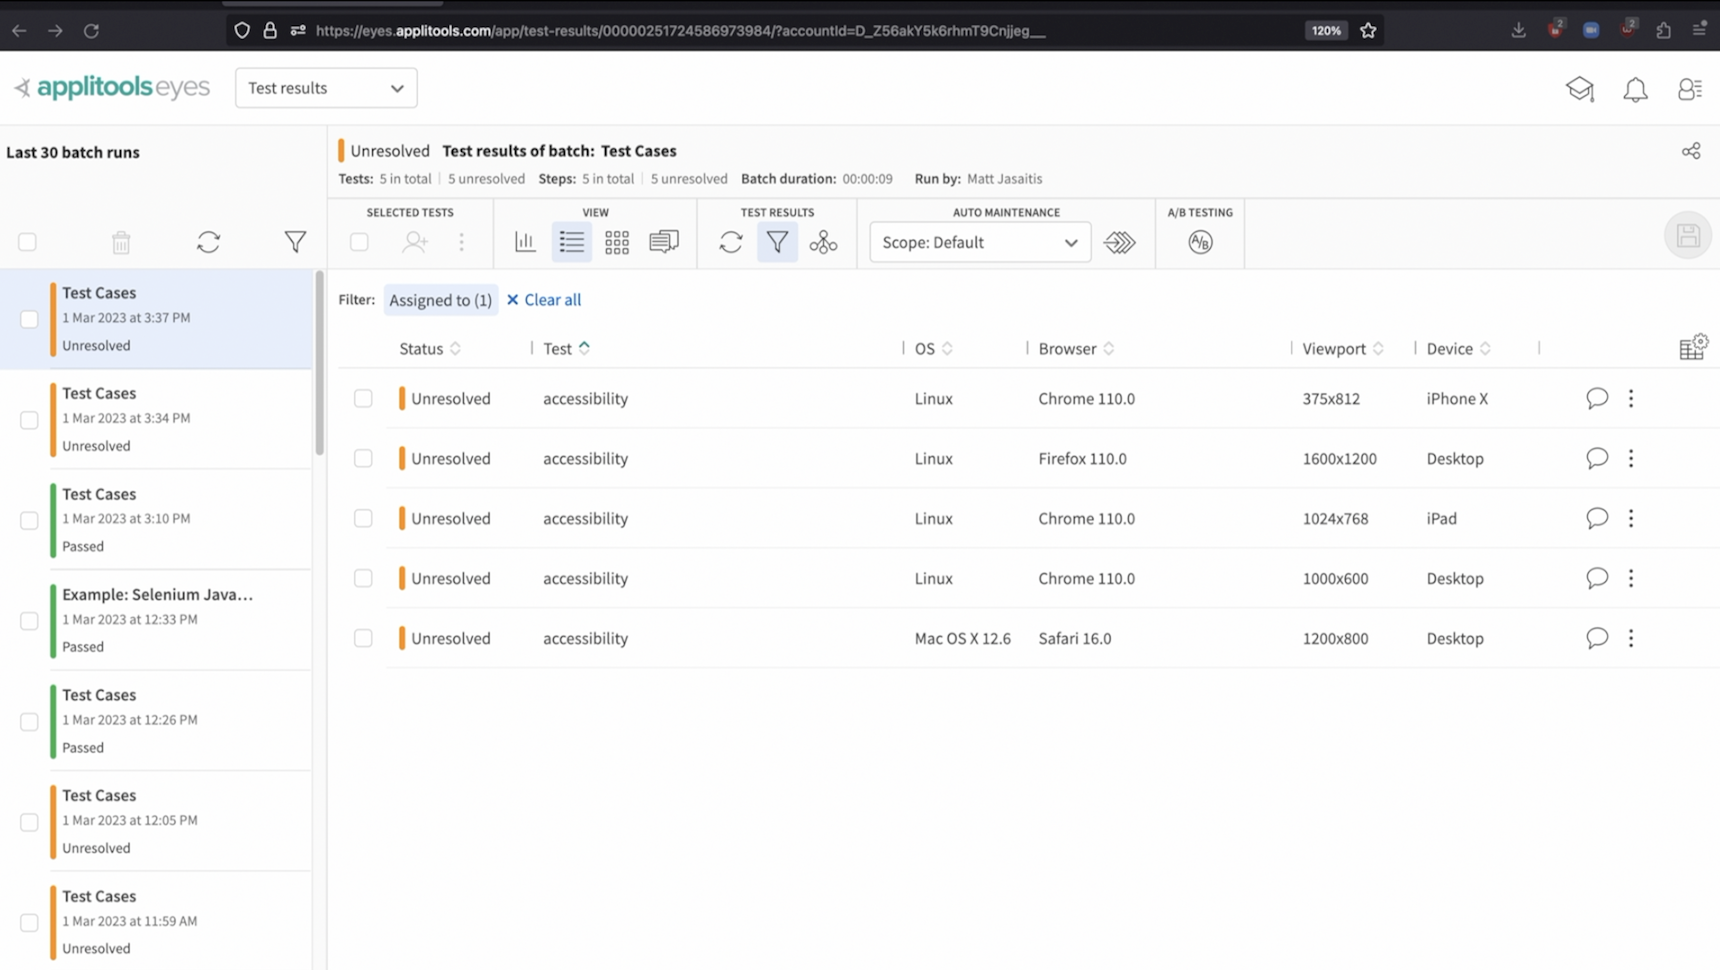
After applying those filters, we only see tests that were assigned to the user that we selected. This feature helps us quickly identify any tests that are assigned to us. I can then proceed with analyzing my Unresolved tests and approving or rejecting the differences.
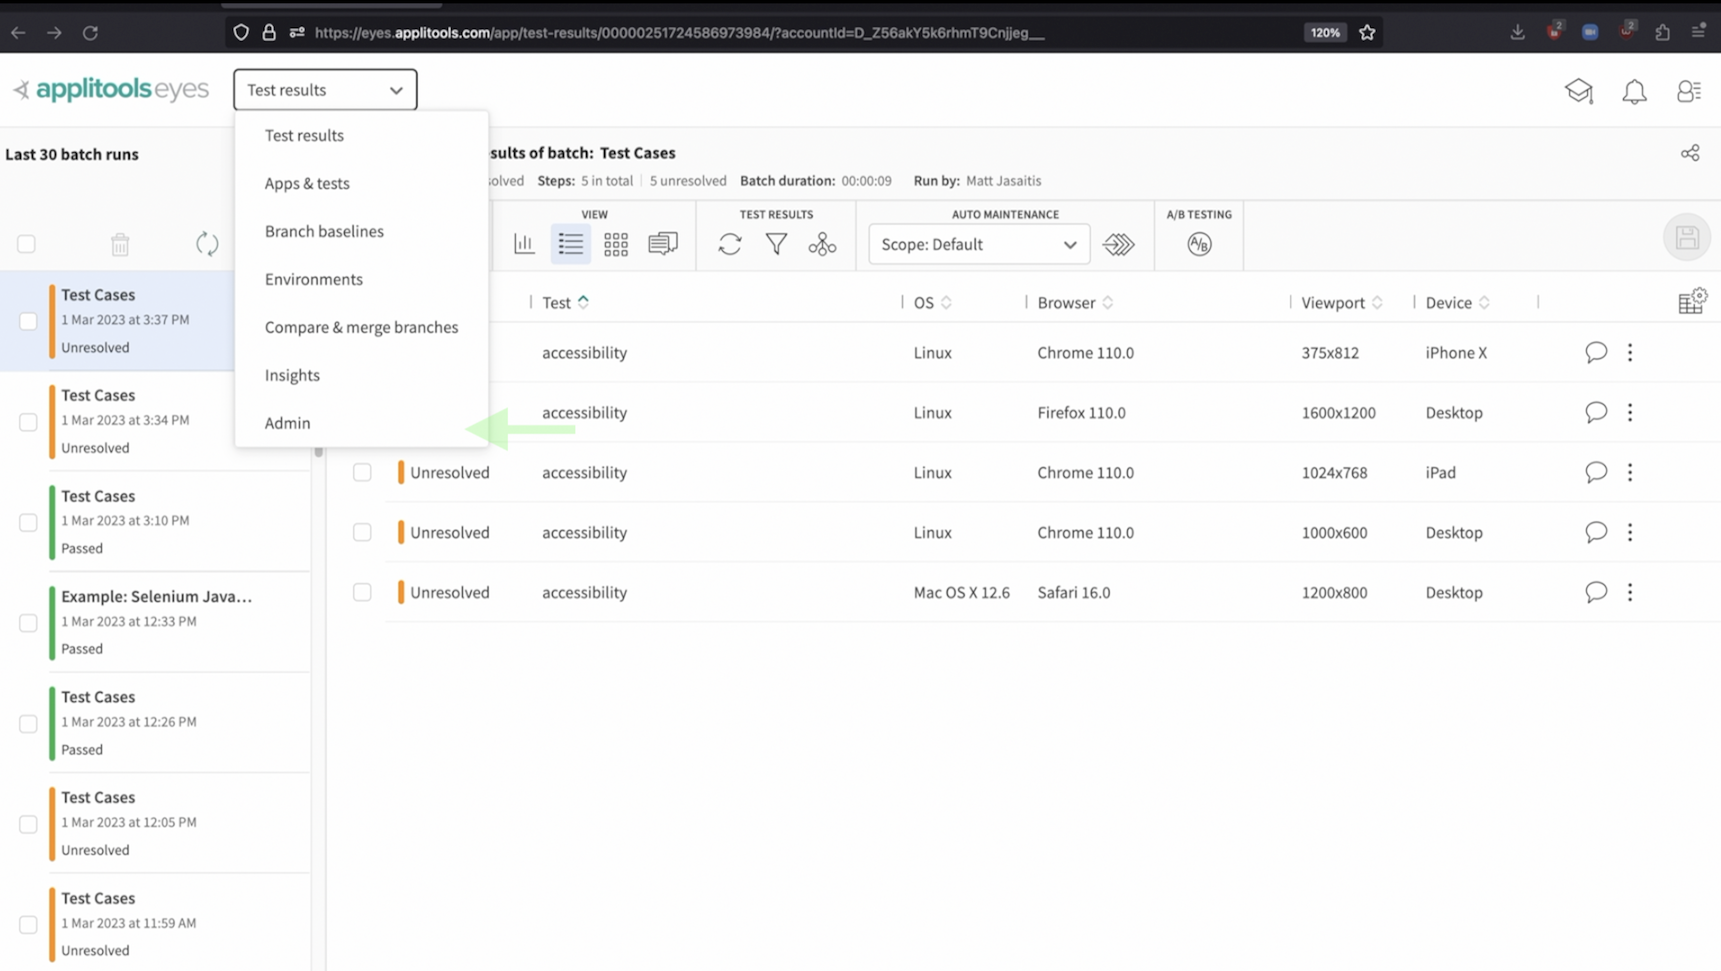
If you're a team admin or org admin, you can also configure notifications to be sent to users when they're assigned a test result to review. Let's head back to the admin panel by selecting Admin from the dropdown at the top.
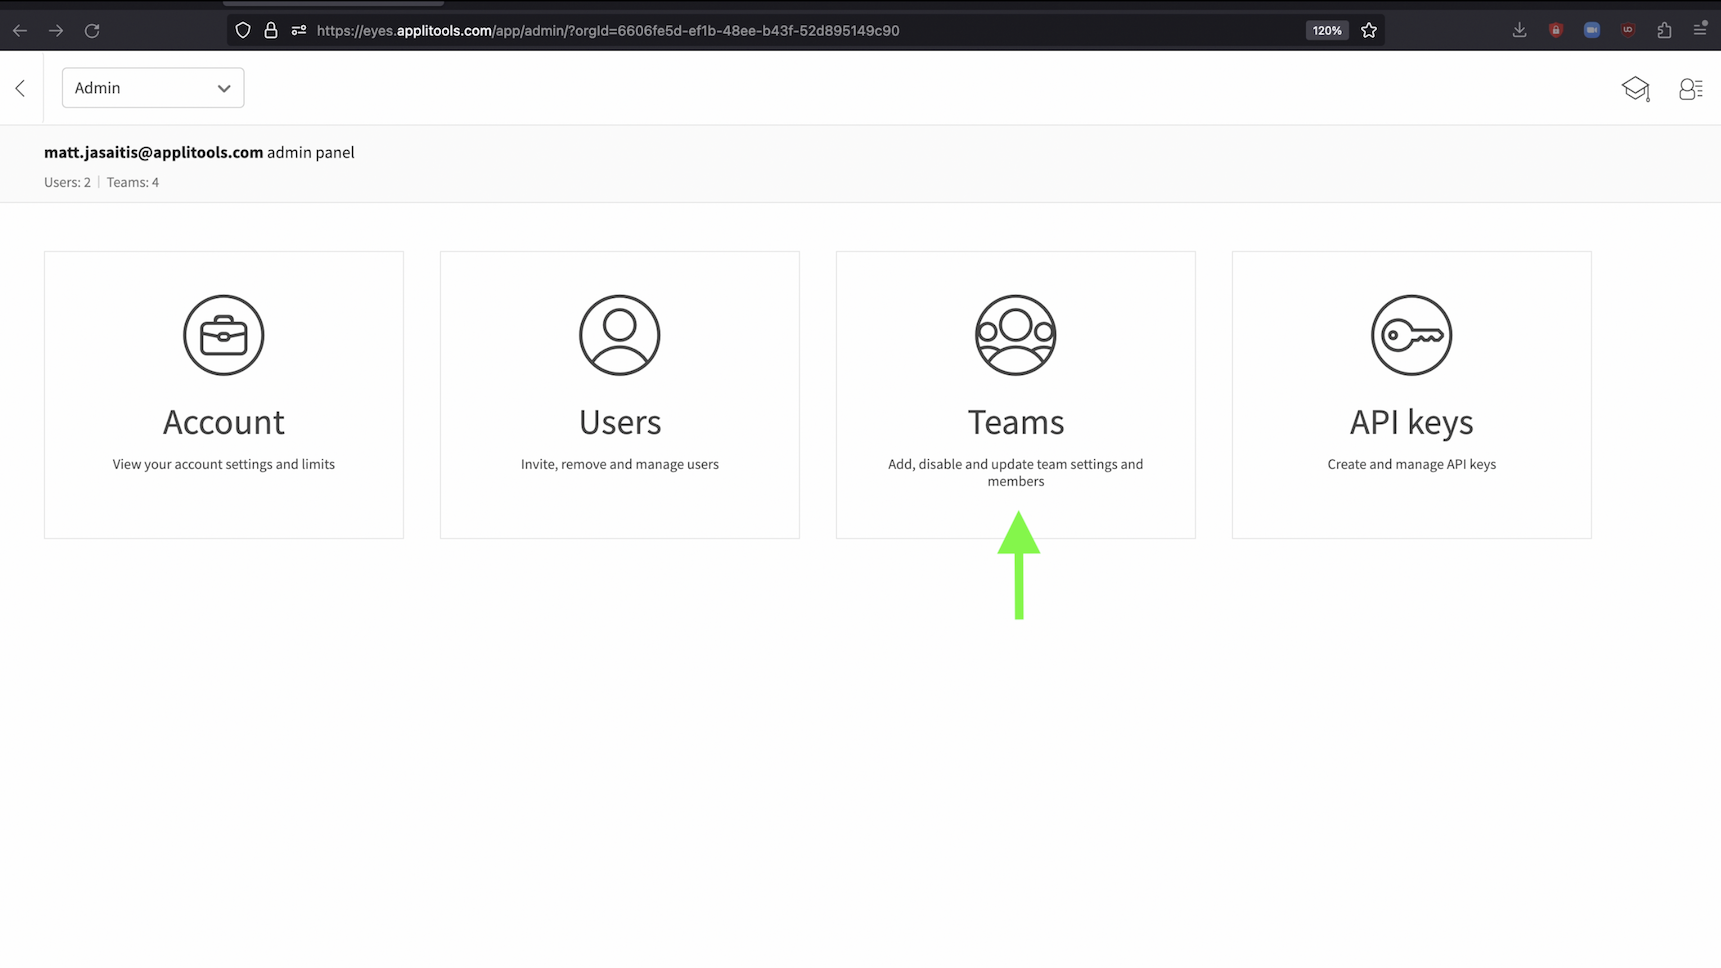
Then select Teams

Select the team you want to configure notifications for.
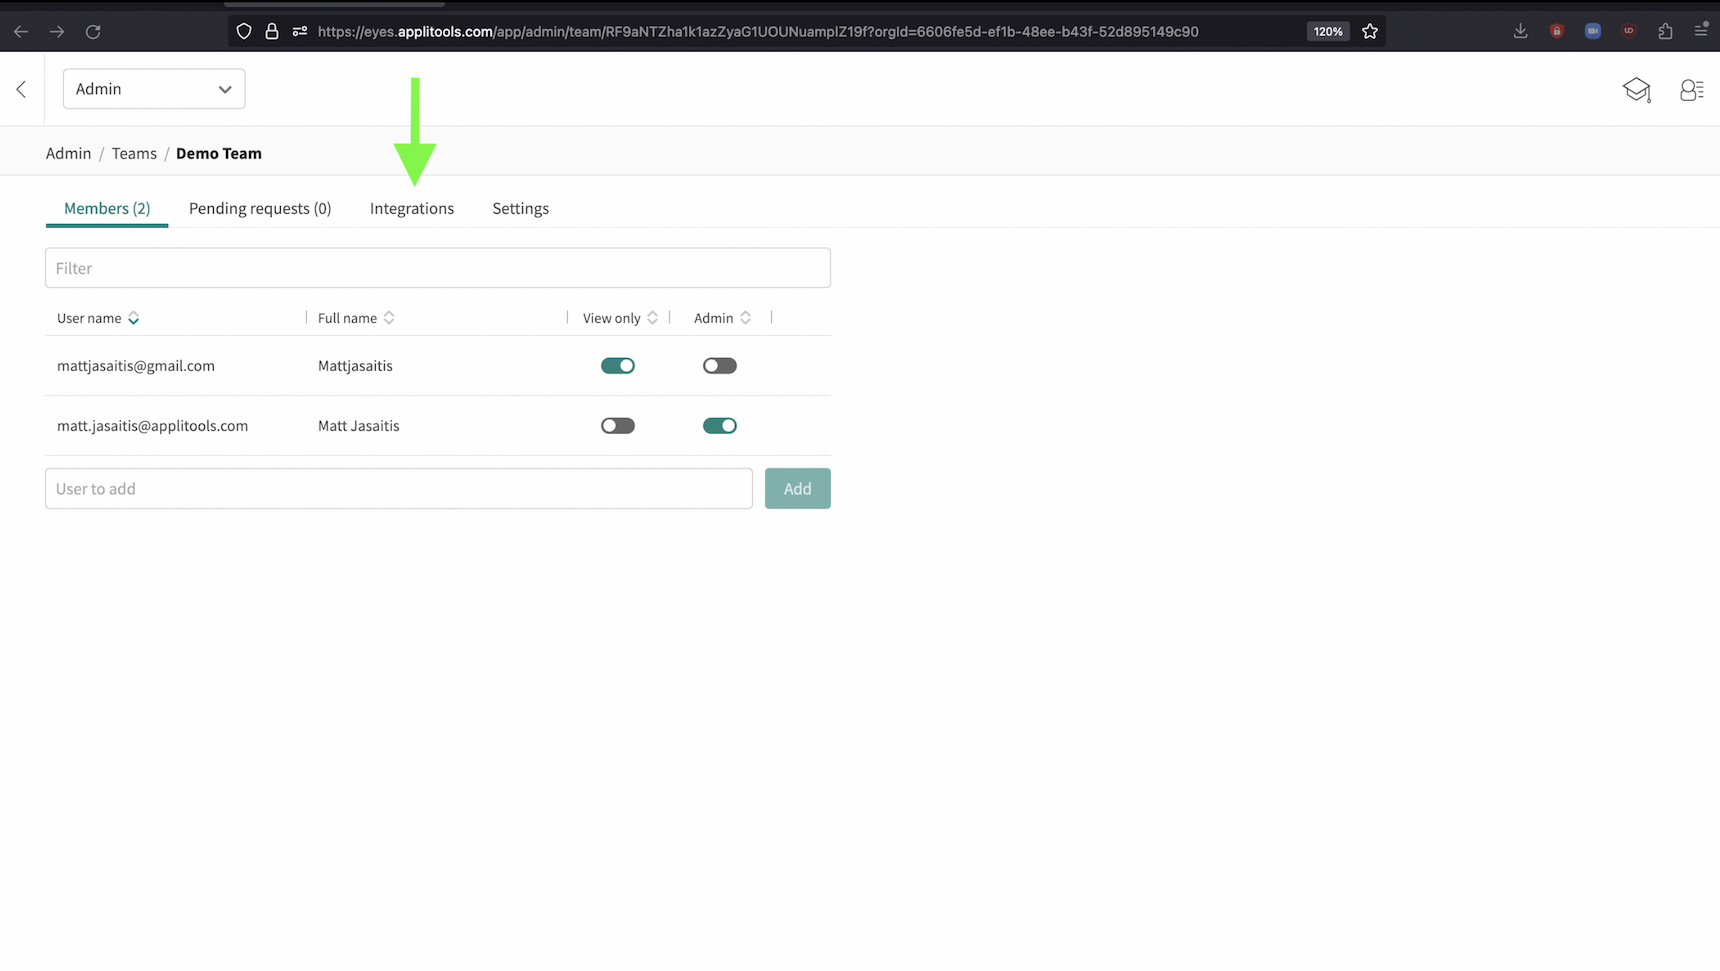
Then select the integrations tab.

Once here, click on the email integration to expand it. At the bottom of the expanded email view, there's a section for Notifications for test assignment. To enable these, click the toggle in the top right. Then, feel free to select all of the cases where you want to send notifications. It's important to note that only users who are assigned to the test in question will receive the email notifications.
You can choose to only send notifications upon assignment or also include notifications when a test result is updated. In my case, I've selected all of the options but feel free to select what works best for you.

Now, when a test is assigned to a user, they'll receive an email that looks like this.
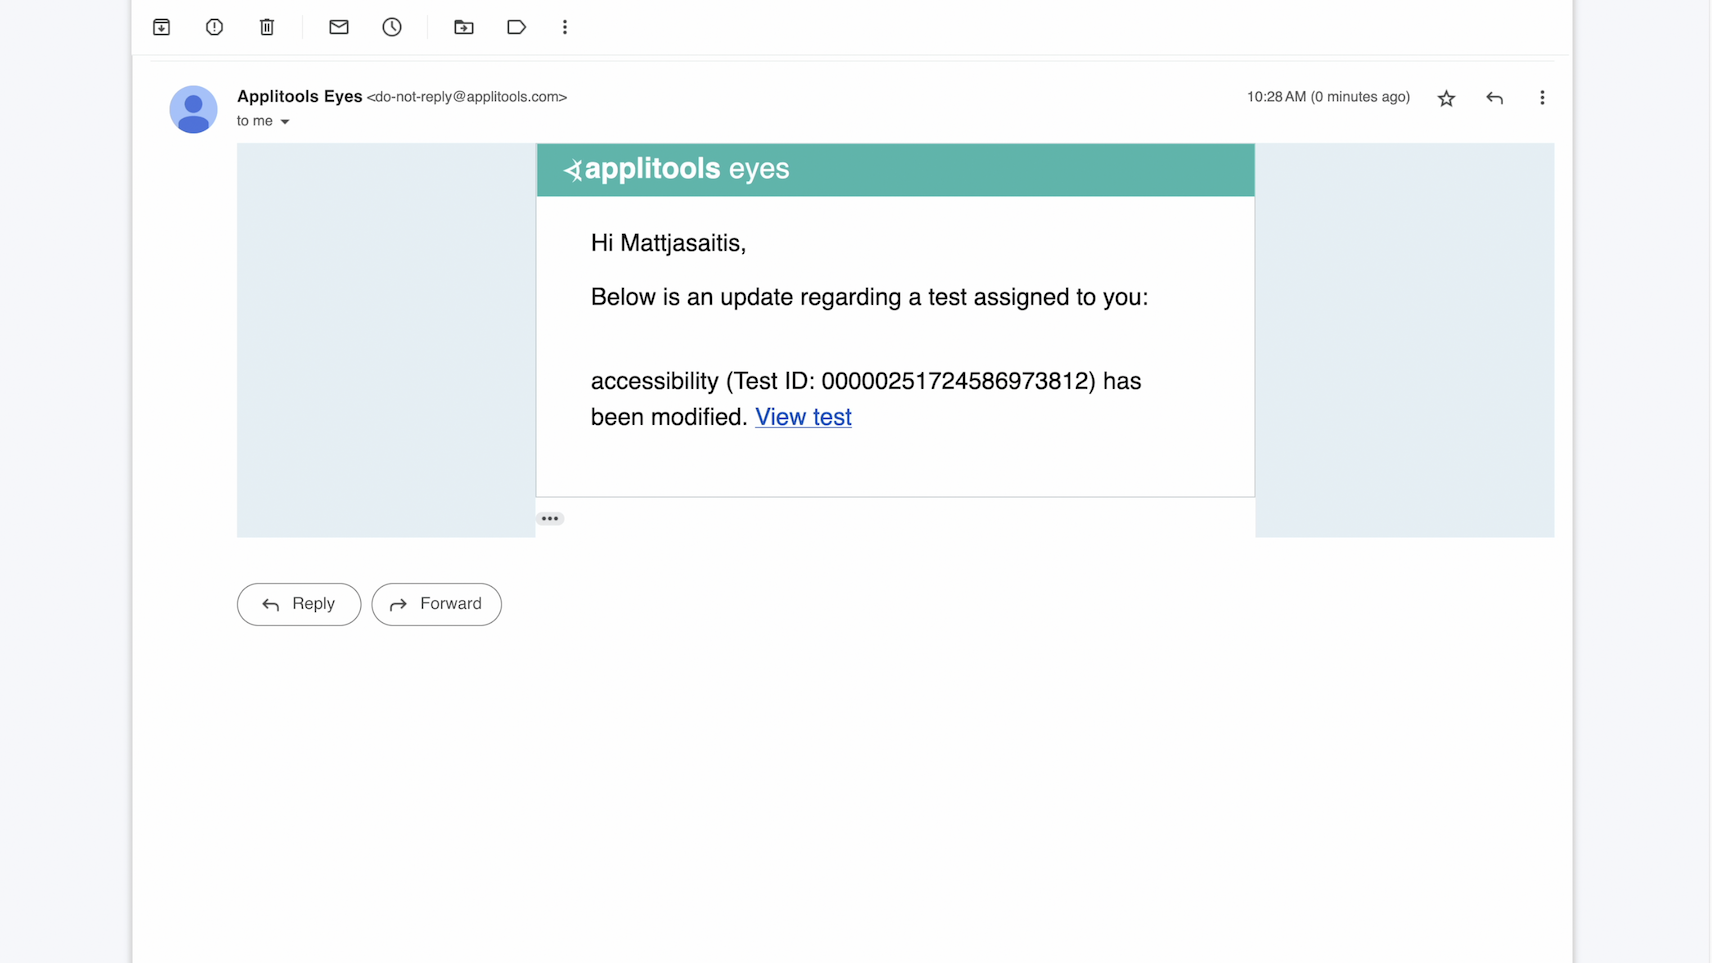
If you also configured notifications to be sent when a test result is updated, the assigned user will see an email that looks like this.
At any time, you can come back to the integrations panel and modify the notification settings as needed.
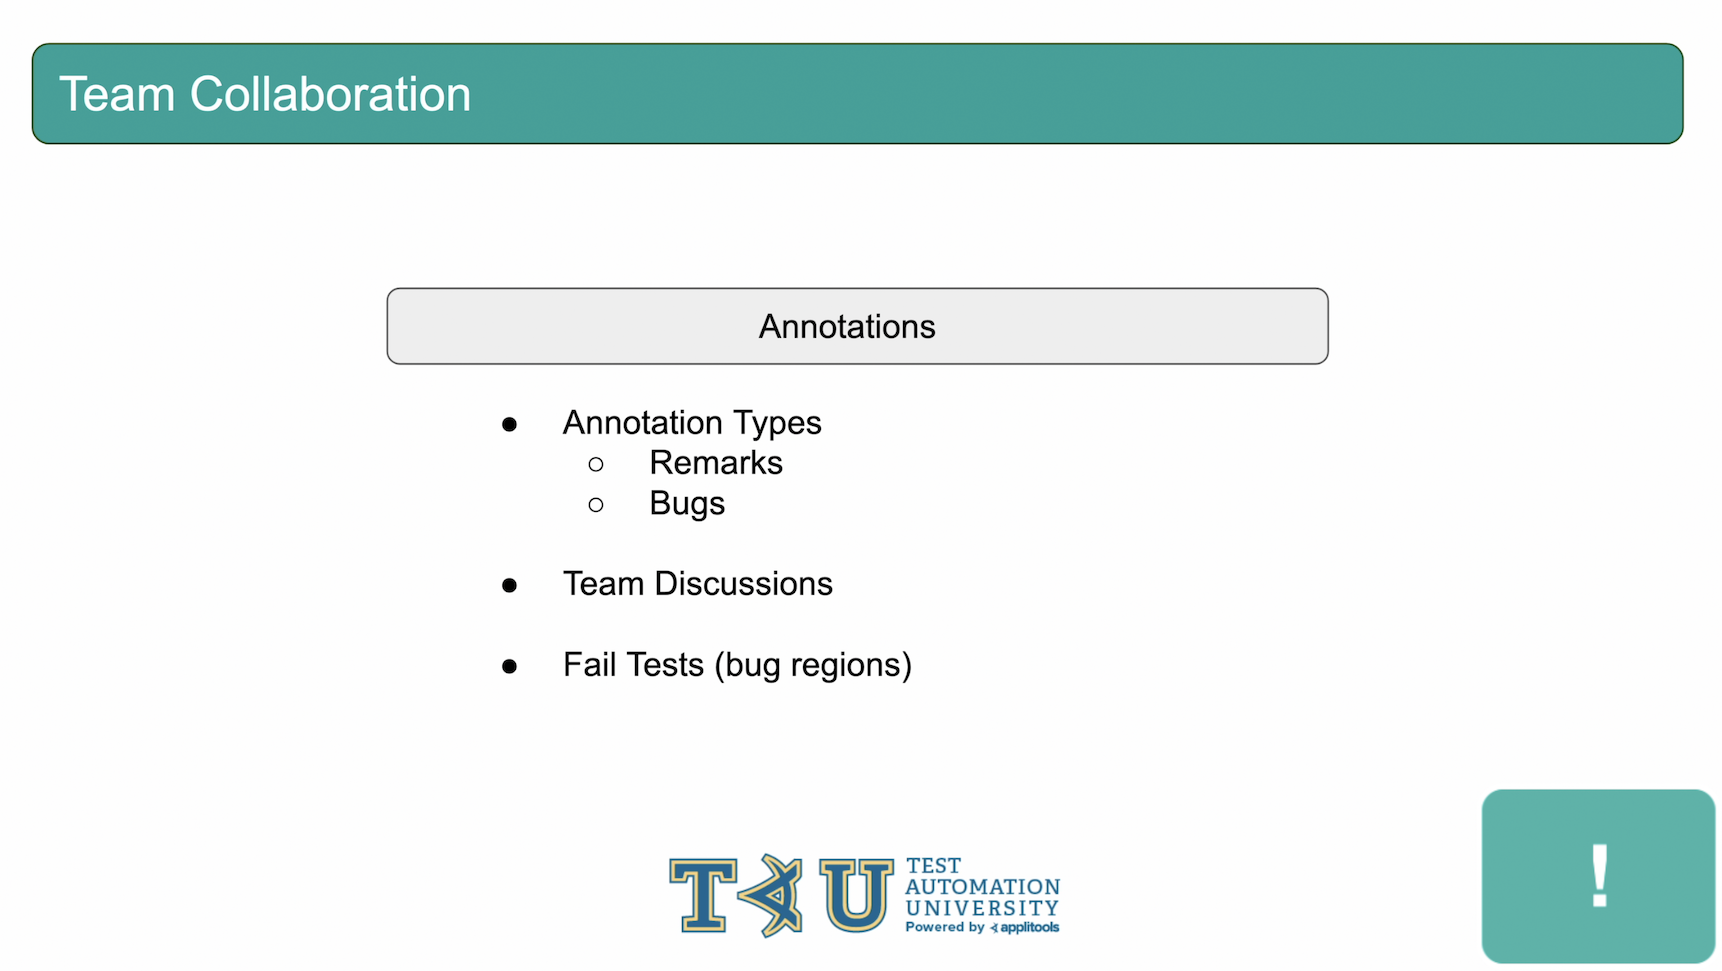
So far, we've seen how you can use regions for Match Levels as well as regions for accessibility. However, there are a couple other types of regions that we haven't covered yet that are not a part of the visual comparison and are instead used for team collaboration. Firstly, there are remark regions. Remarks can be added to a test result and allow users to comment on certain aspects of a result. Secondly, there are bug regions. Bug regions are similar to Remarks but are a bit more powerful and we'll show you why later on in this section. Both remark and bug regions will persist from test run to test run until deleted just like the other types of regions that we've seen.
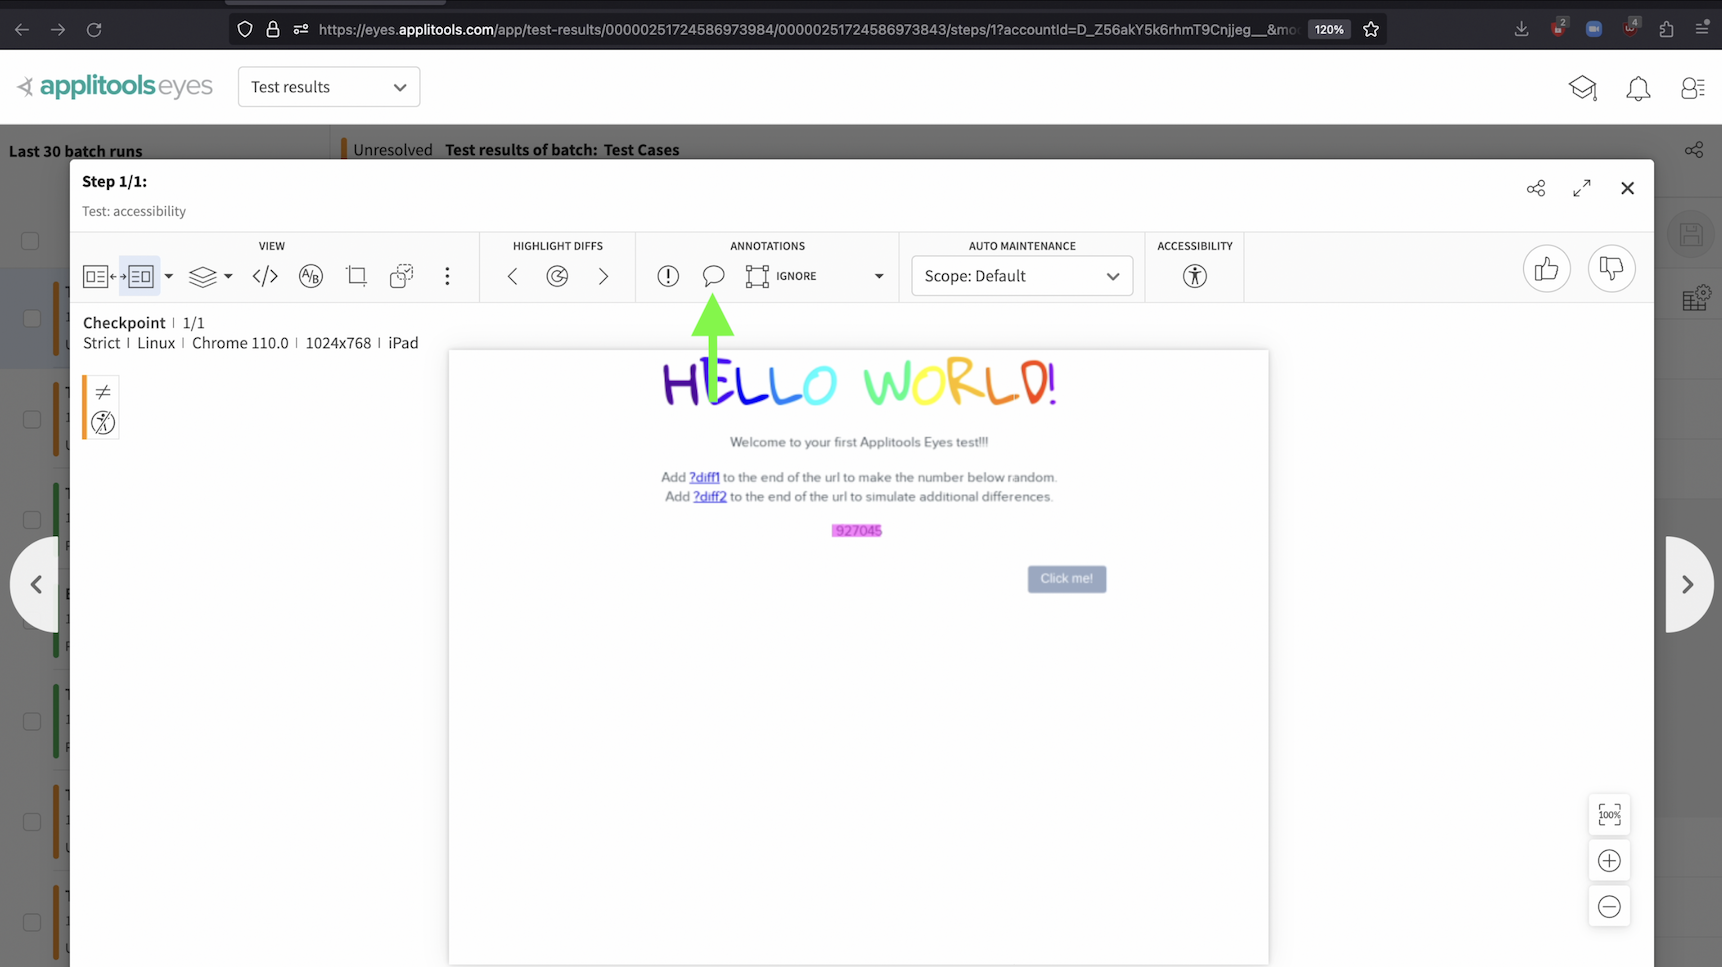
To add a remark, navigate to the step view for the test result you'd like to comment on. Then, select this icon from the toolbar and draw a region around the section of the test result you're interested in.

After drawing the region, you'll be prompted to add a title to the remark. Once done, click the create button at the bottom.
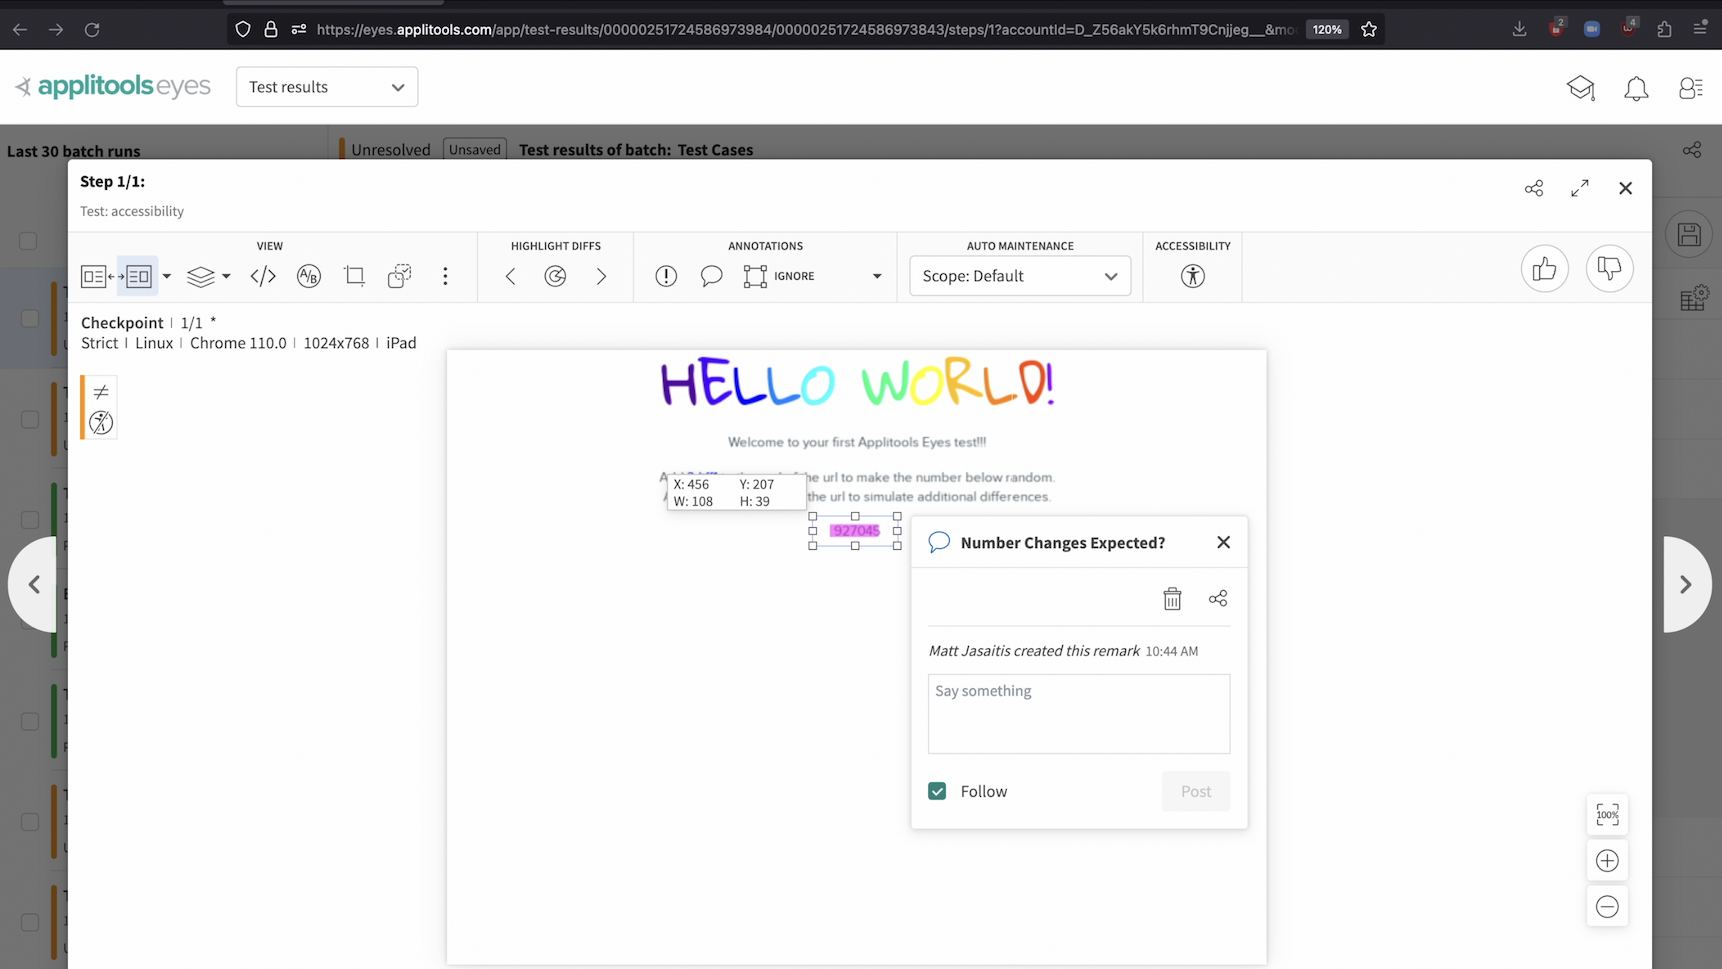
Now that the remark is created, we have a few options. We can delete the remark using this icon, copy a link to share this remark with someone from our team using this icon or follow up on this remark using the text box to continue the conversation.
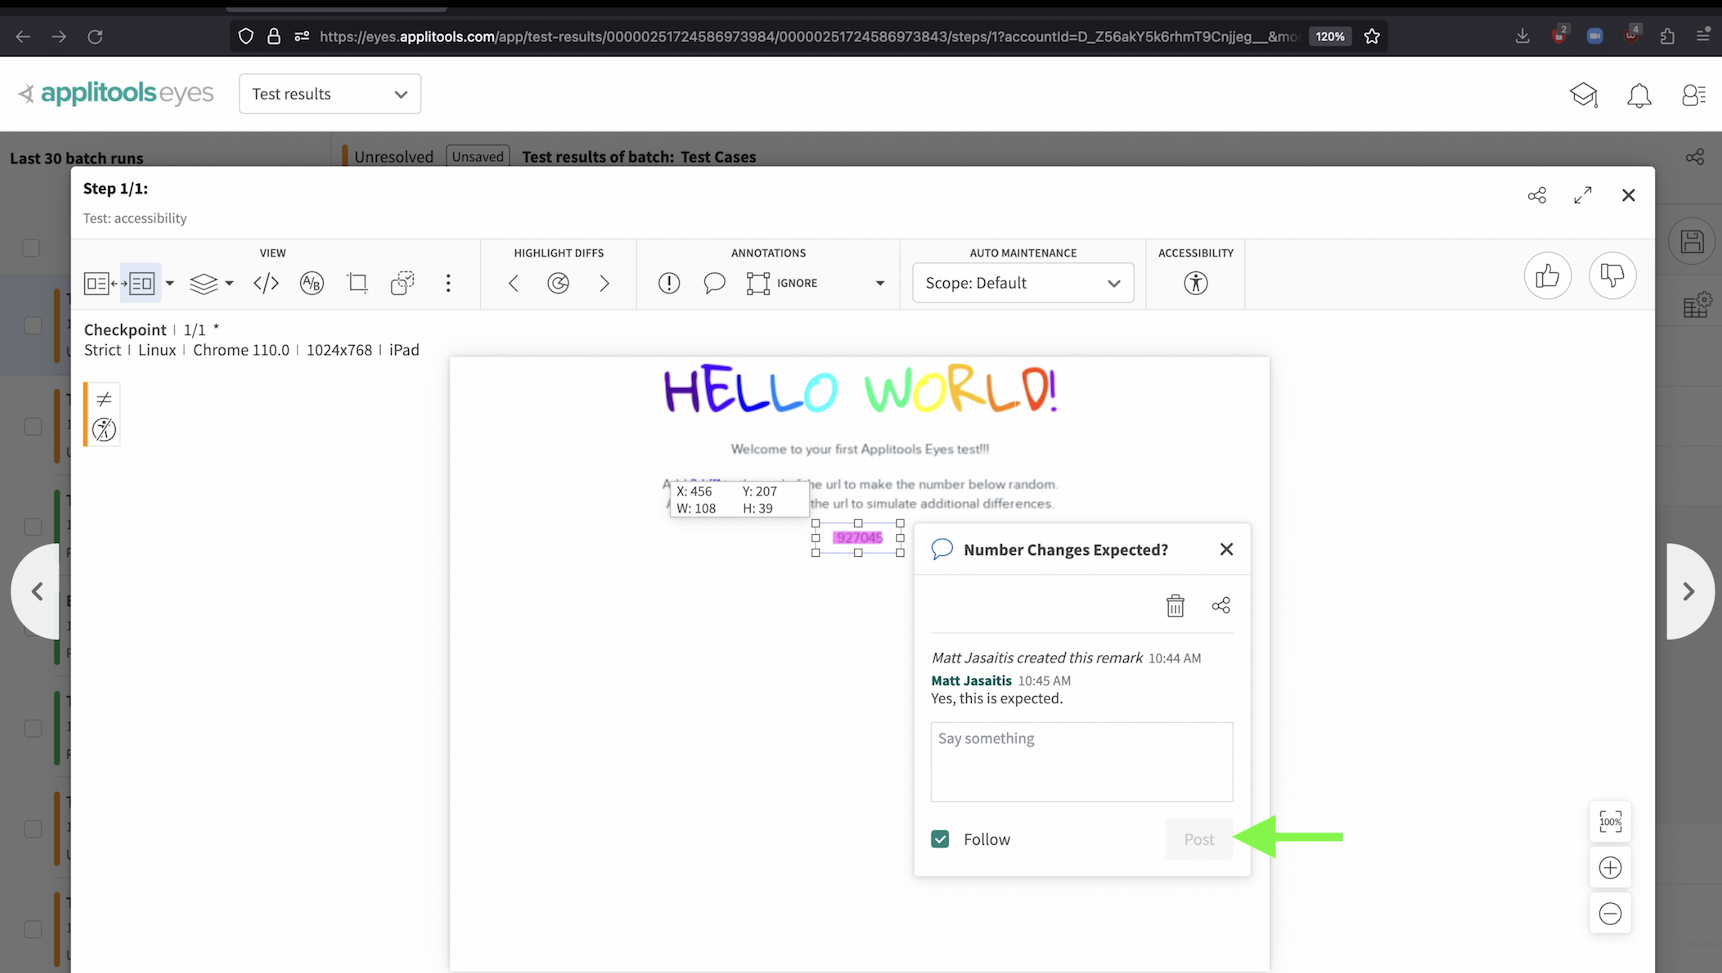
If you type a message into the text box and then click post, the message will be added to the conversation. All users who are following this remark will then be notified about the update via email. You can choose to follow or unfollow the activity on this remark by toggling the follow checkbox at the bottom.
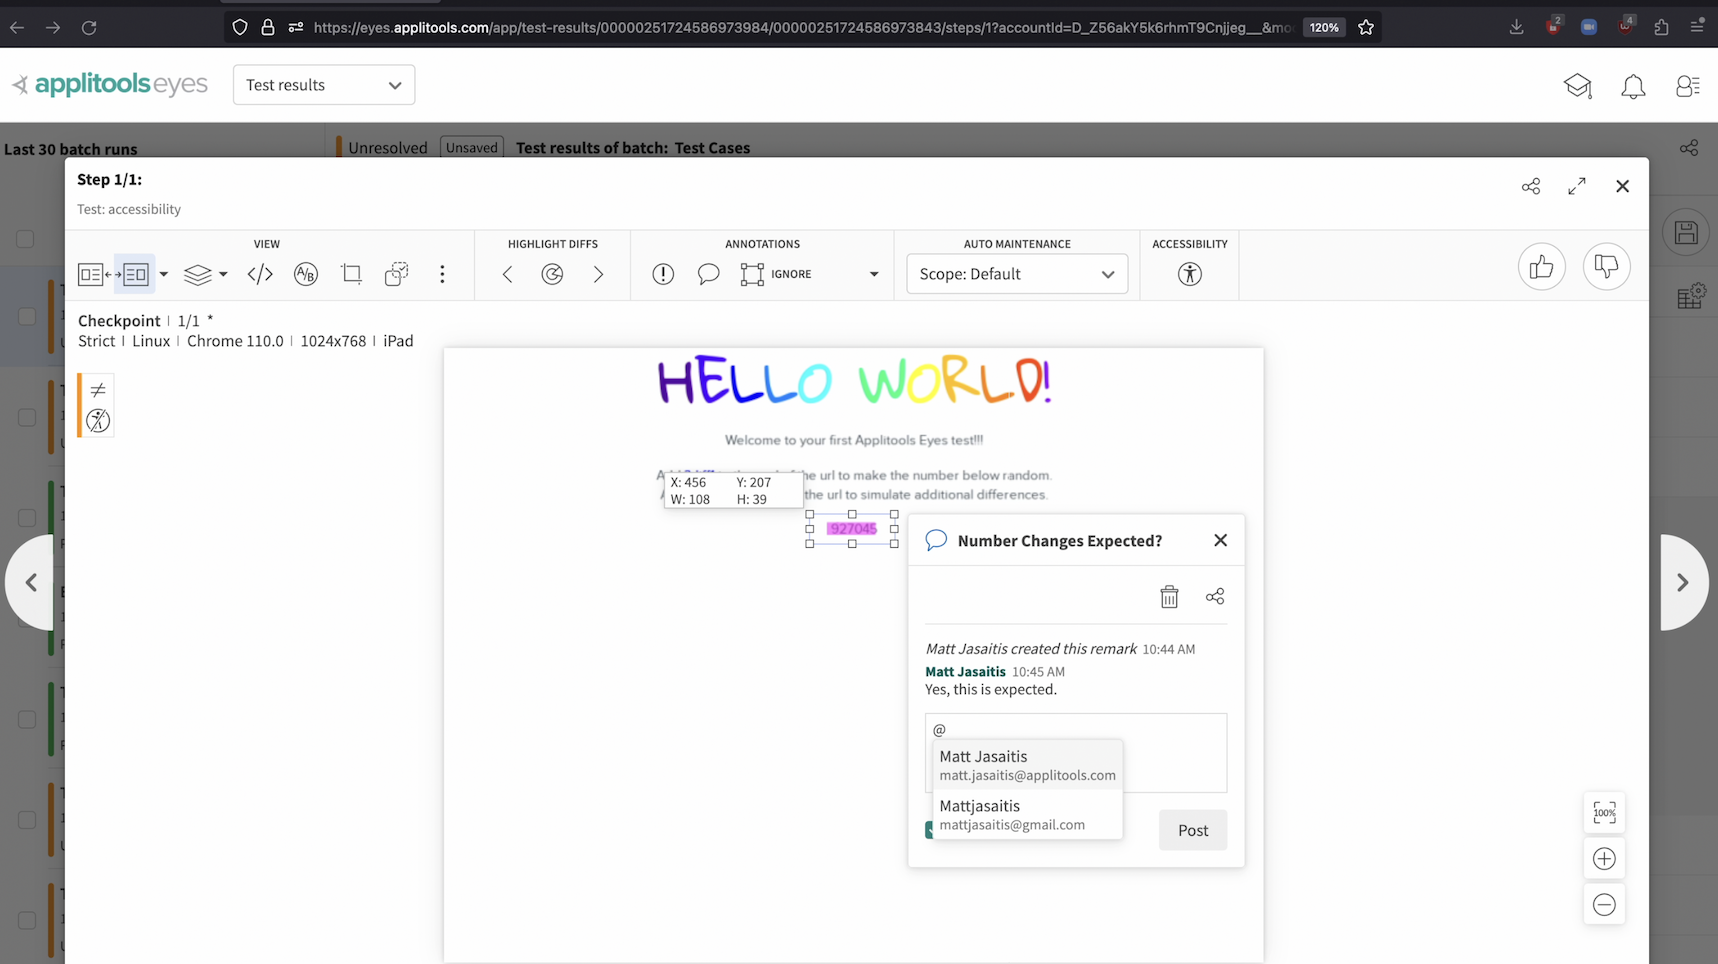
You can also get someone's attention by tagging them. Typing an "@" sign and then selecting a user from the dialog that is shown will tag that user in your message. When you tag someone, they'll receive an email notification with a link to this remark so they can review your message.

A bug region works the same as a remark with a few more features included. You create a bug region using the same process as a remark except using this icon to the left of the remark icon.
After creating and naming your bug region you'll see that you have similar options like deleting, sharing, writing a comment and toggling your follow settings. All of the same notifications as remark regions will be sent to users following this bug region. With bug regions, we also have 2 new options: Fail tests and Snooze Failures.
The Fail tests option will automatically mark this test as Failed going forward until this bug region is removed or you uncheck this box. The use case for this scenario is if we have an expected change in addition to a visual bug within our test result. Let's head over to our code and set up an example to show how this works.

I've made the following changes to our test code: I've removed the accessibility checks to simplify the test, I've changed the URL back to the base hello world page and have changed the test name to bugRegion so we get a fresh baseline. Let's go ahead and run this test.
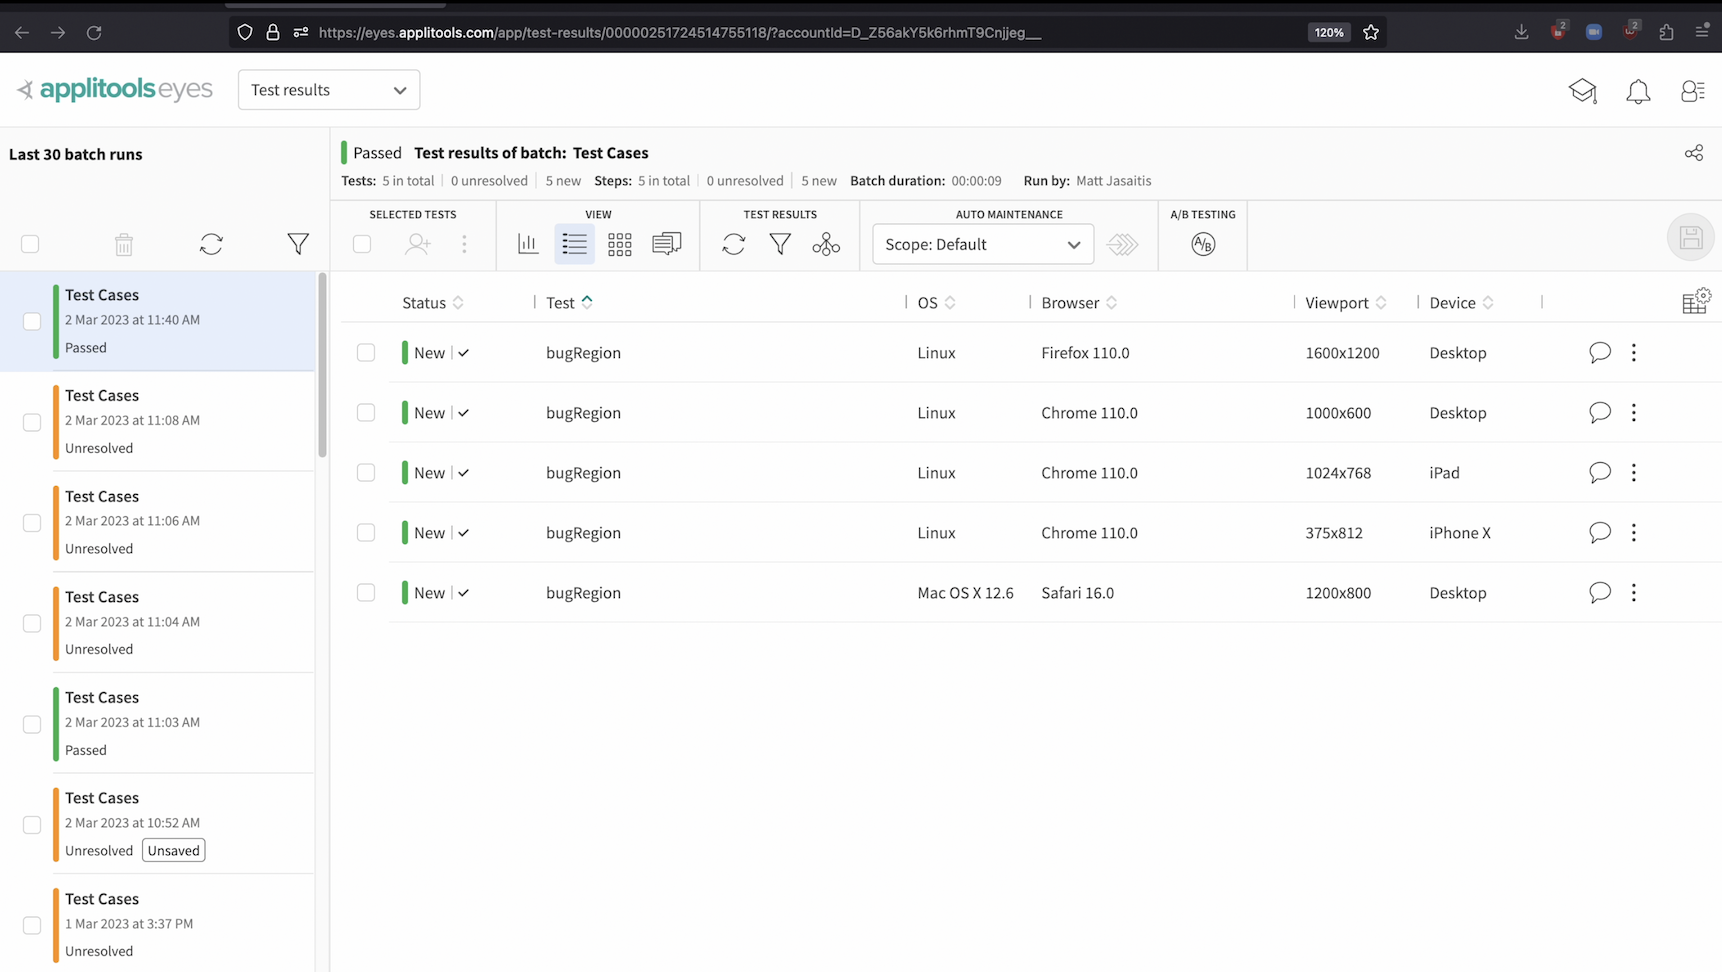
As we can see, we now have a fresh baseline to work with. Let's head back to the code.
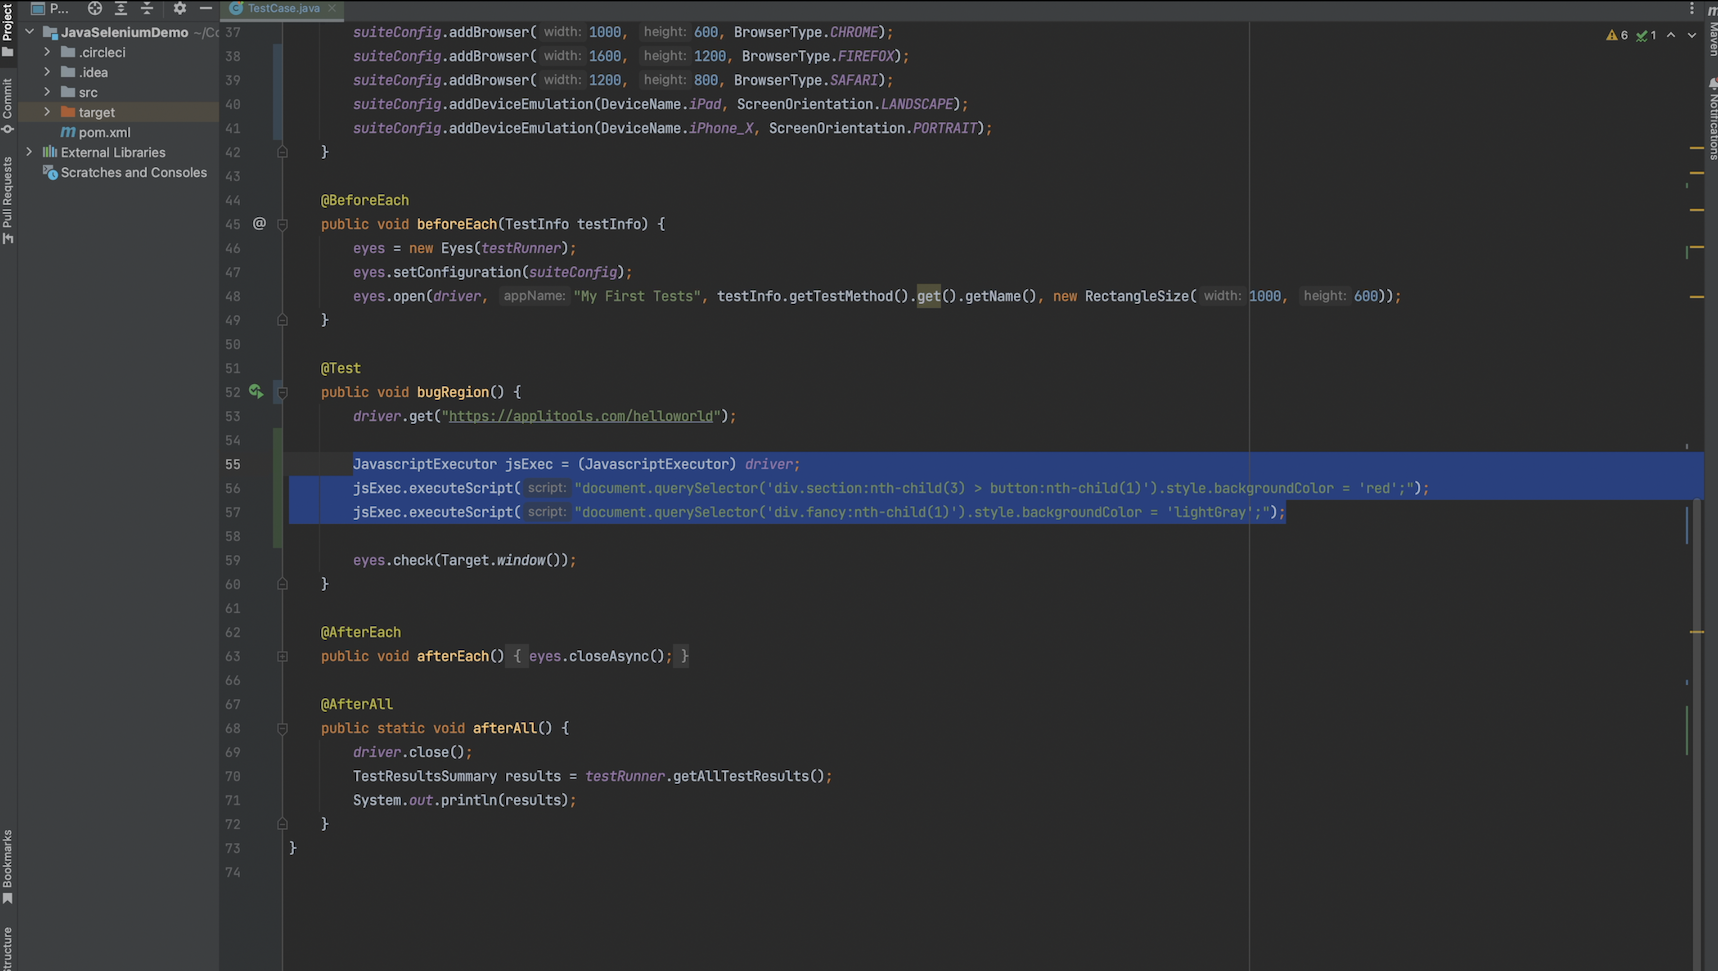
JavascriptExecutor jsExec = (JavascriptExecutor) driver; \
jsExec.executeScript("document.querySelector('div.section:nth-child(3) > button:nth-child(1)').style.backgroundColor = 'red';");

jsExec.executeScript("document.querySelector('div.fancy:nth-child(1)').style.backgroundColor = 'lightGray';");
To simulate some differences, I've added these JavaScript injections which will change the button background color to red and the header background color to light gray. Let's now rerun our test.

Looking at our test result, we have the header and button flagged as visual differences as expected. In this case, let's assume the header with a gray background color is an expected change but the button changing to red is an unexpected change. If the header was the only change, then we would just accept this image as the new baseline and save it. However, we don't necessarily want to accept the button changing colors since this is an unexpected change. The Fail tests option in a bug region gives us the flexibility to accept the new checkpoint image as the baseline image, so that our expected change is applied to our baseline, while also allowing us to keep track of the unexpected change and fail our tests going forward.
I've gone ahead and added a bug region around the button since this is an unexpected change and a visual bug. I've added a title to the region and have selected the Fail Tests option. We can now thumbs up and save this checkpoint image as the new baseline.
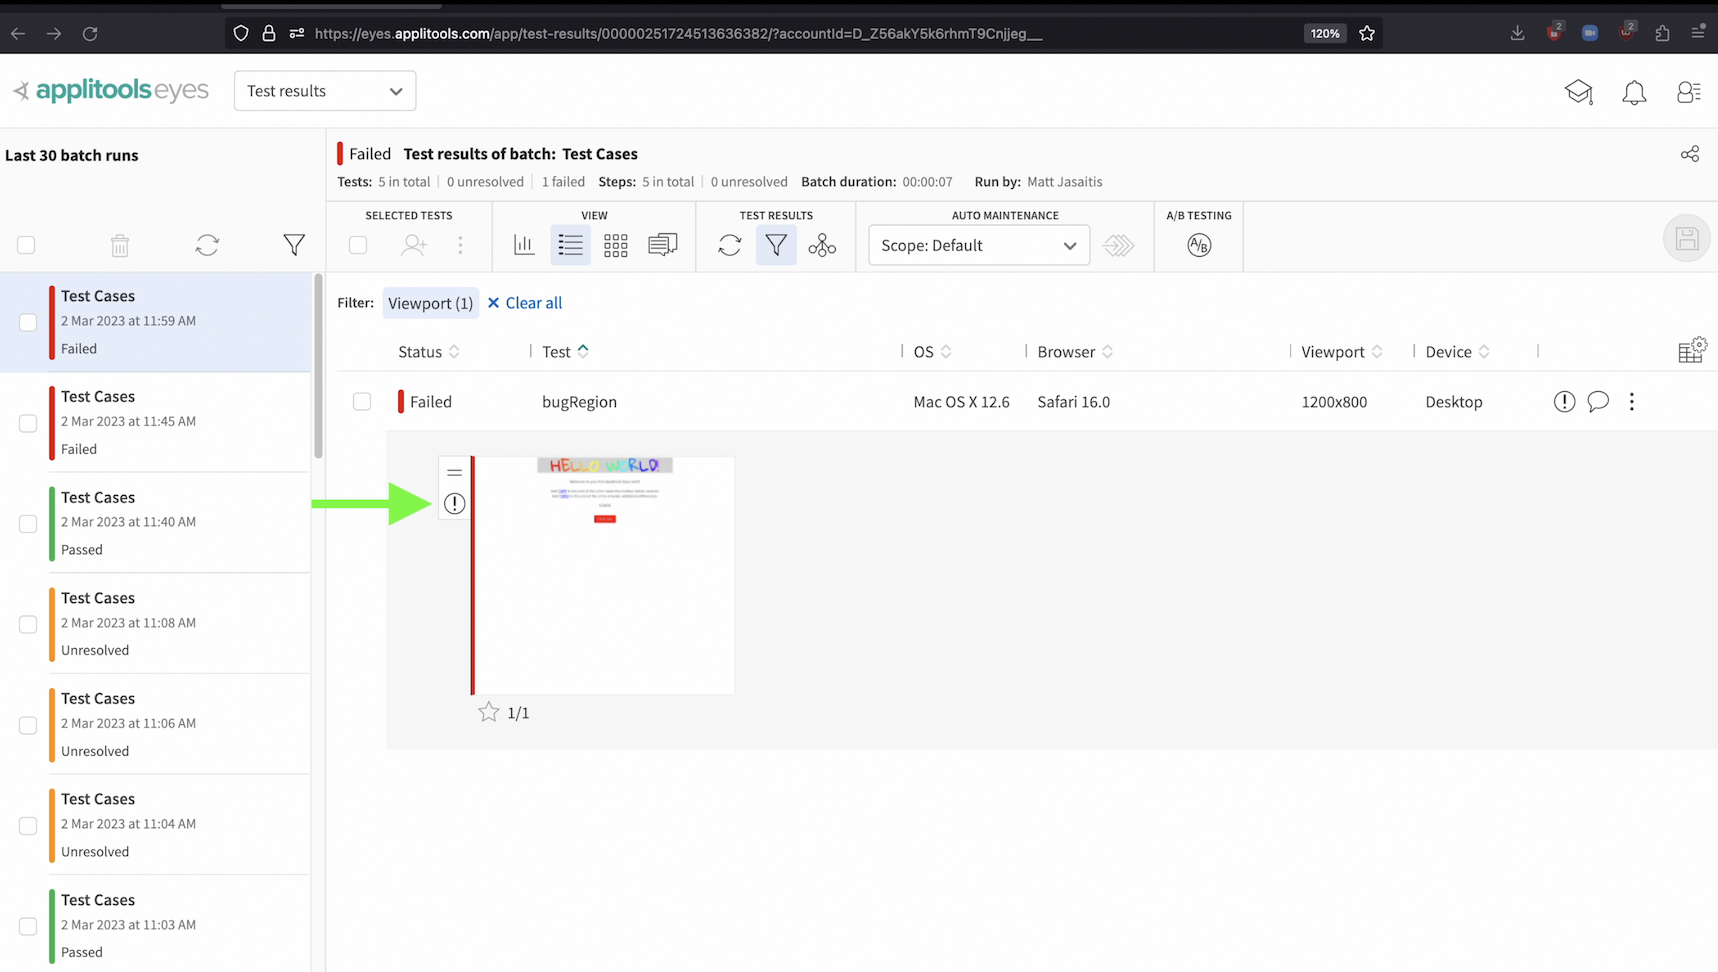
In future test runs, if no other visual difference is found, like in this case, the test will be automatically marked as failed due to our bug region. We'll also see an icon to the left of our thumbnail indicating that this test result has a bug region.
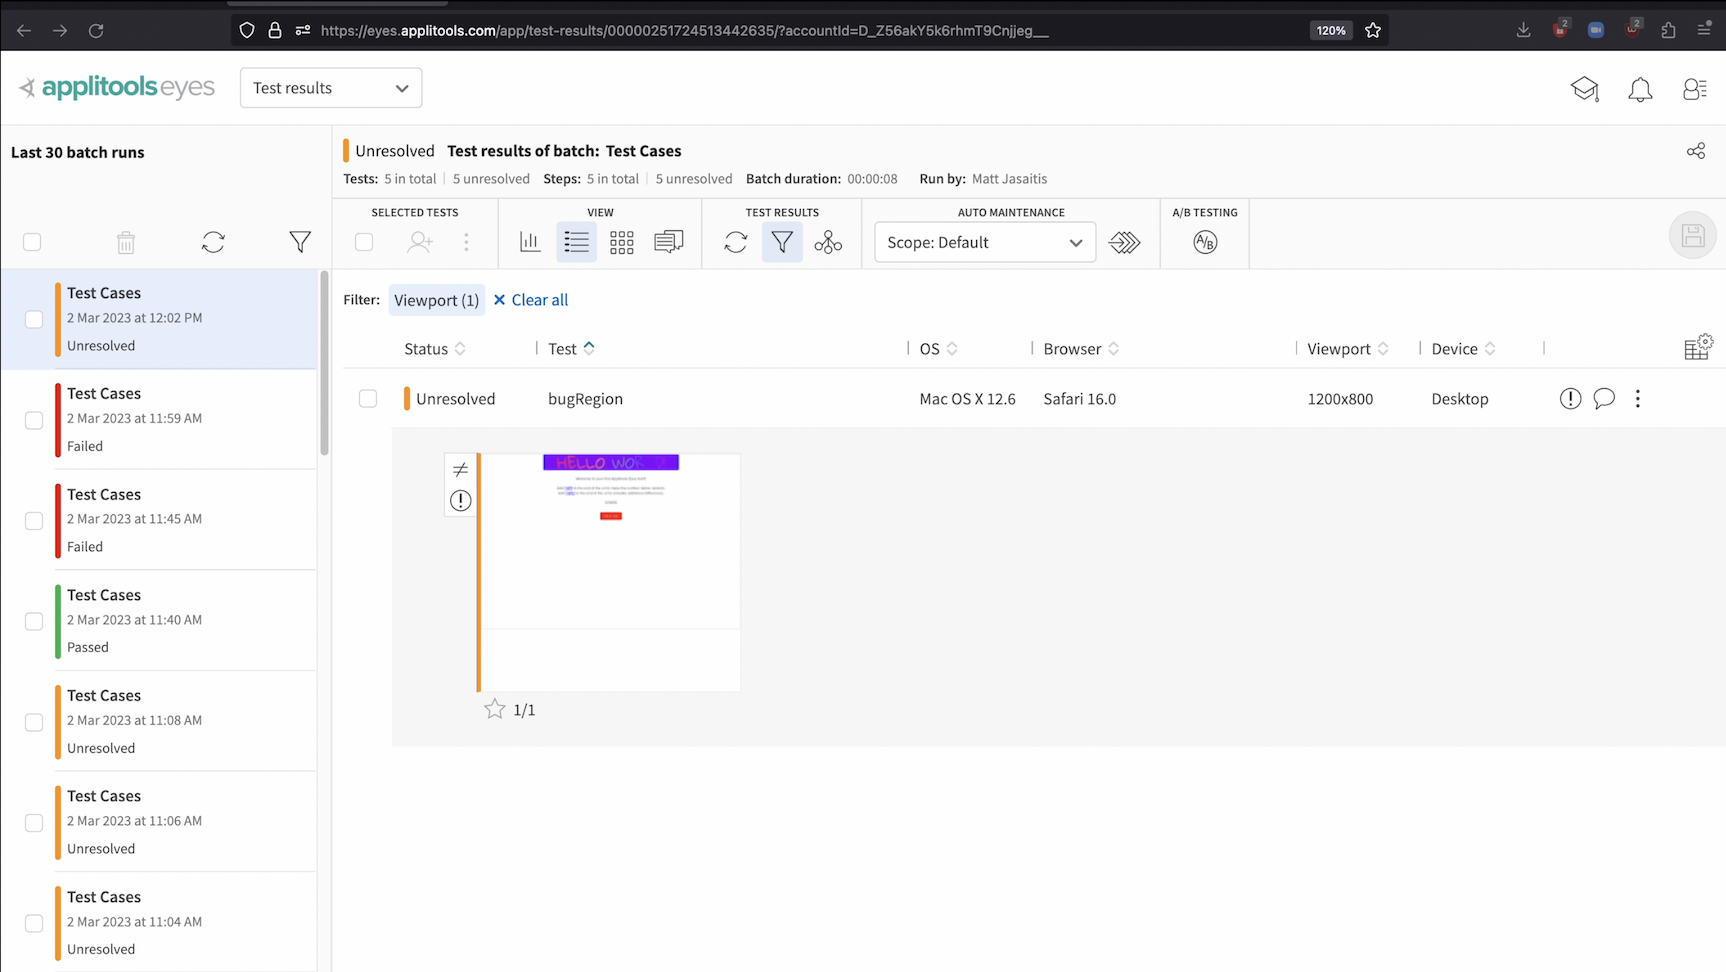
However, if there are any other visual differences found in the test result, it will still be marked as Unresolved to ensure you don't miss other visual bugs. You can then handle these differences like you would for any other test result.
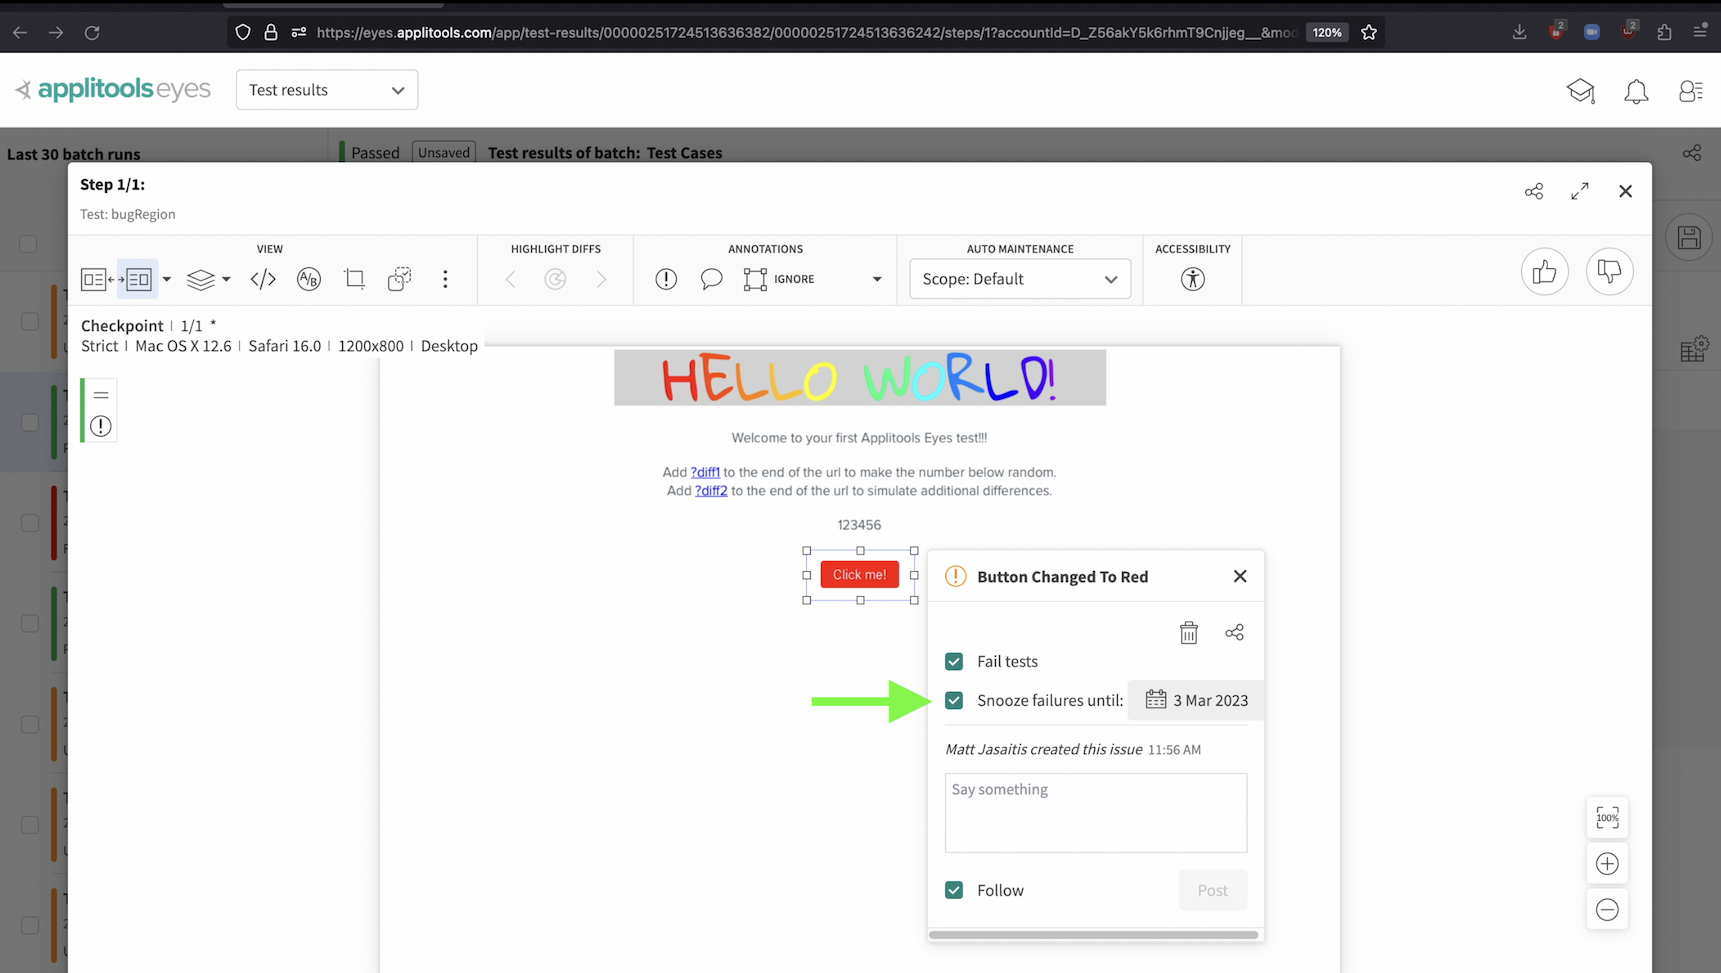
Let's say you have a known issue and have wrapped a bug region around it like we just did but you want to prevent your test suite from failing over and over again due to this known issue. This is what the snooze failures option is for. Checking the snooze failures box and then selecting a date in the future will prevent your test from automatically failing until the specified date. Your tests can still be marked as Unresolved if visual differences are found but the known issue wrapped in the bug region will not fail your tests anymore. With this option set, let's re-run our test once again.

As we can see, our bug region is still present but with the snooze failures option set, our test passed. The snooze feature will prevent this known issue from failing our tests over and over again while still allowing us to keep track of it.
A couple final notes on remark and bug regions. If you click on this icon here, you'll be taken to a view that shows all the test results in this batch that have a bug or remark region.

In the filter window, you can also filter for test results based on remark and issue regions.

Now that we've seen how to create bug regions, let's now set up the JIRA integration and link these regions to existing JIRA issues or create new JIRA issues altogether right from the Applitools Test Manager.
We also have a similar integration for Rally that is set up in a very similar way. We won't be covering Rally in this section but I've placed documentation on this in the write up down below.

To set up the JIRA integration, we need to head back to the team integrations tab. Click the admin option from the dropdown at the top of the screen.

Then select Teams
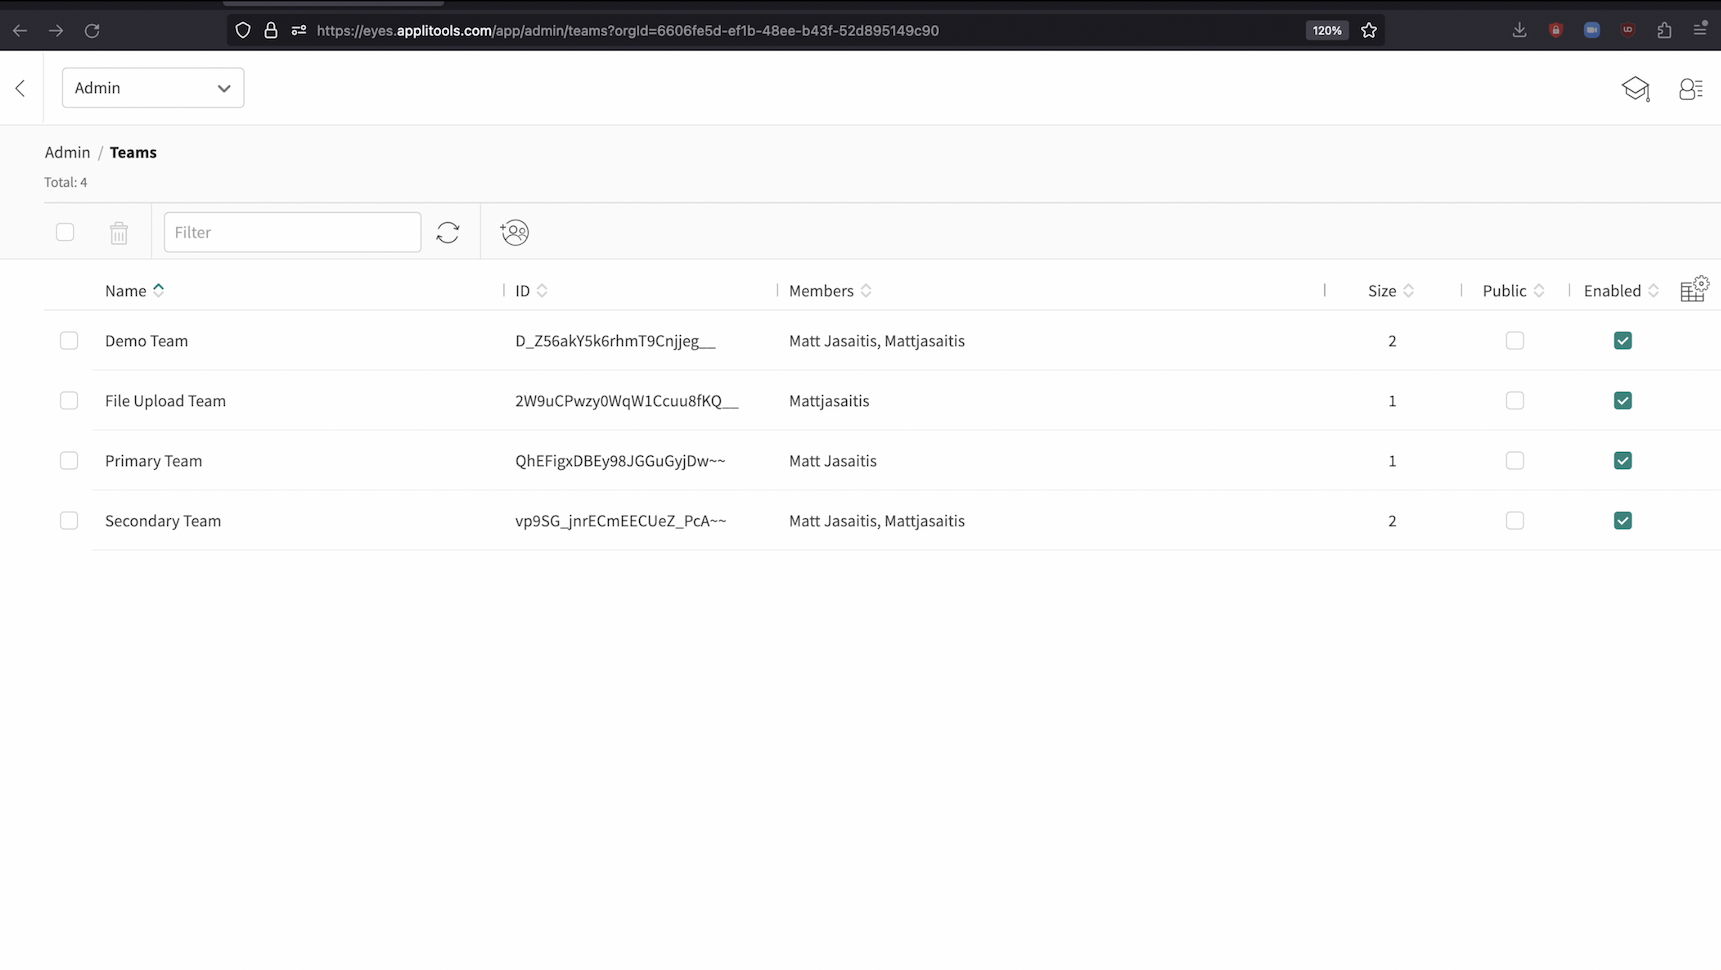
Select the team you want to configure JIRA for

Then select the integrations tab

On the integrations tab, click the JIRA option to expand it. To enable the integration, click the toggle at the top and make sure it's turned on. Then, fill out the required information such as the JIRA server URL, the project id, the issue type and any other settings that you'd like to configure. Only the pid and issueType are required for the integration to work but I've also added a user id for the reporter field. If you're having trouble finding any of these values for your JIRA project I've placed some helpful documentation on this in the writeup down below.
Once you're all configured, your configuration should look something like this. Let's now head back to the Test results tab by selecting Test Results from the dropdown at the top.
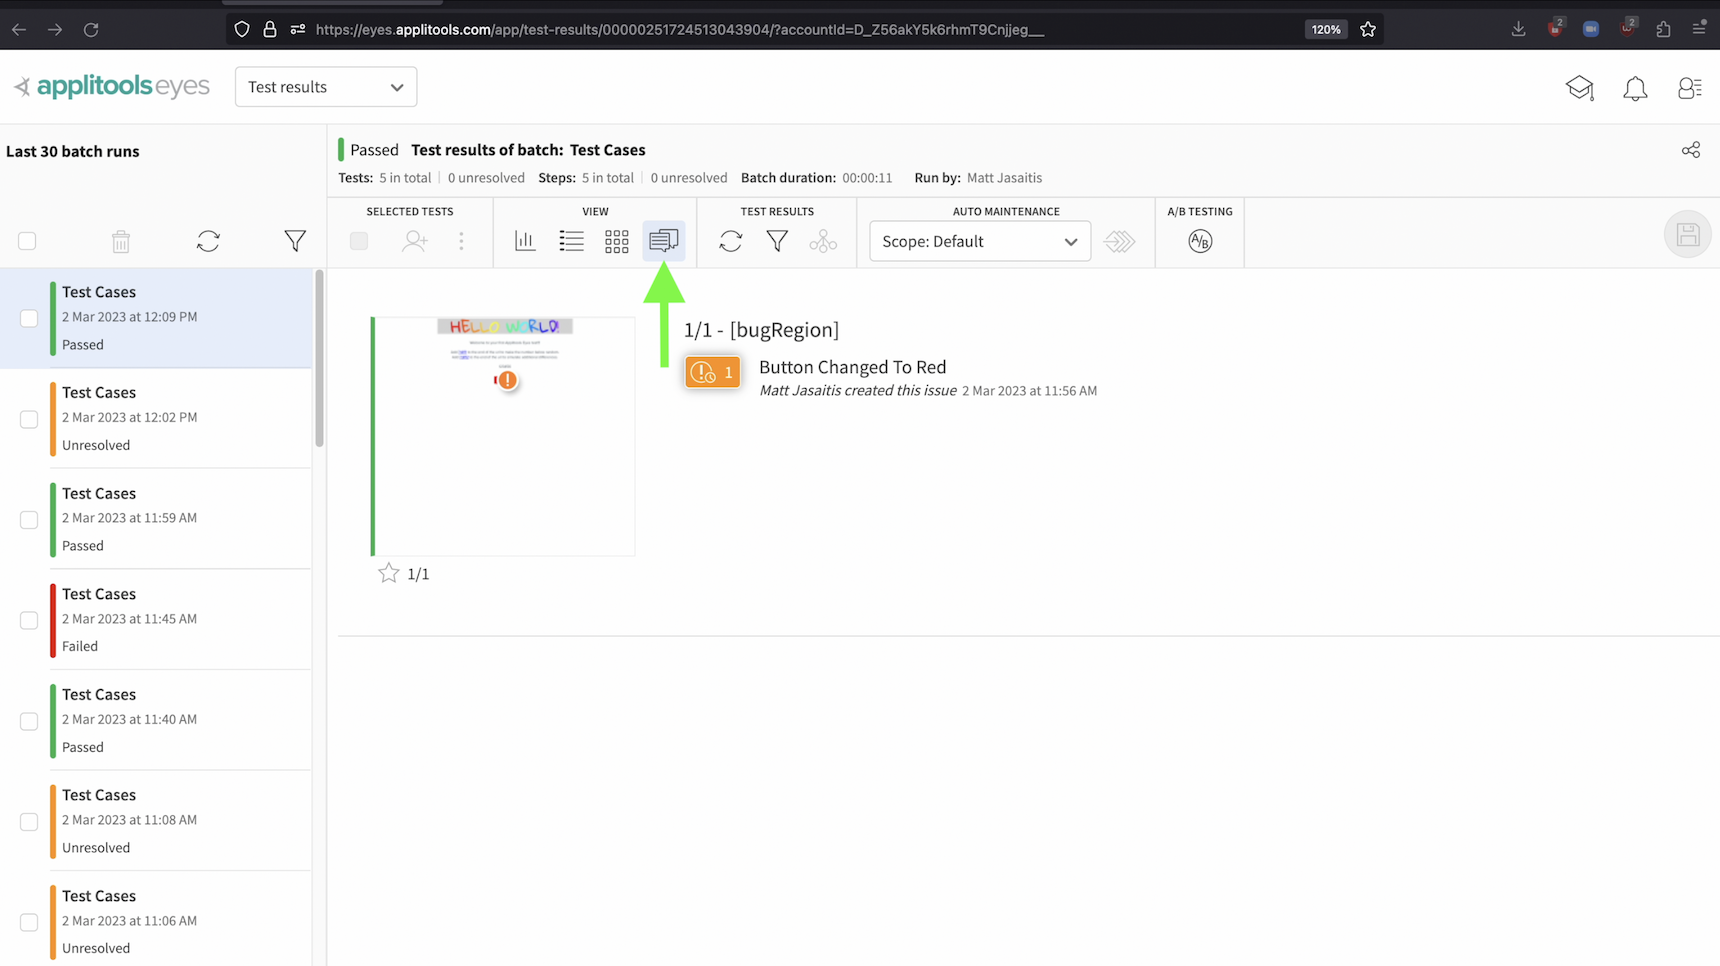
If we head back to the test result where we added the bug region and open it up. We now have an option to create a new JIRA issue from this bug region. Clicking this button will automatically open up our JIRA dashboard and create a new issue.
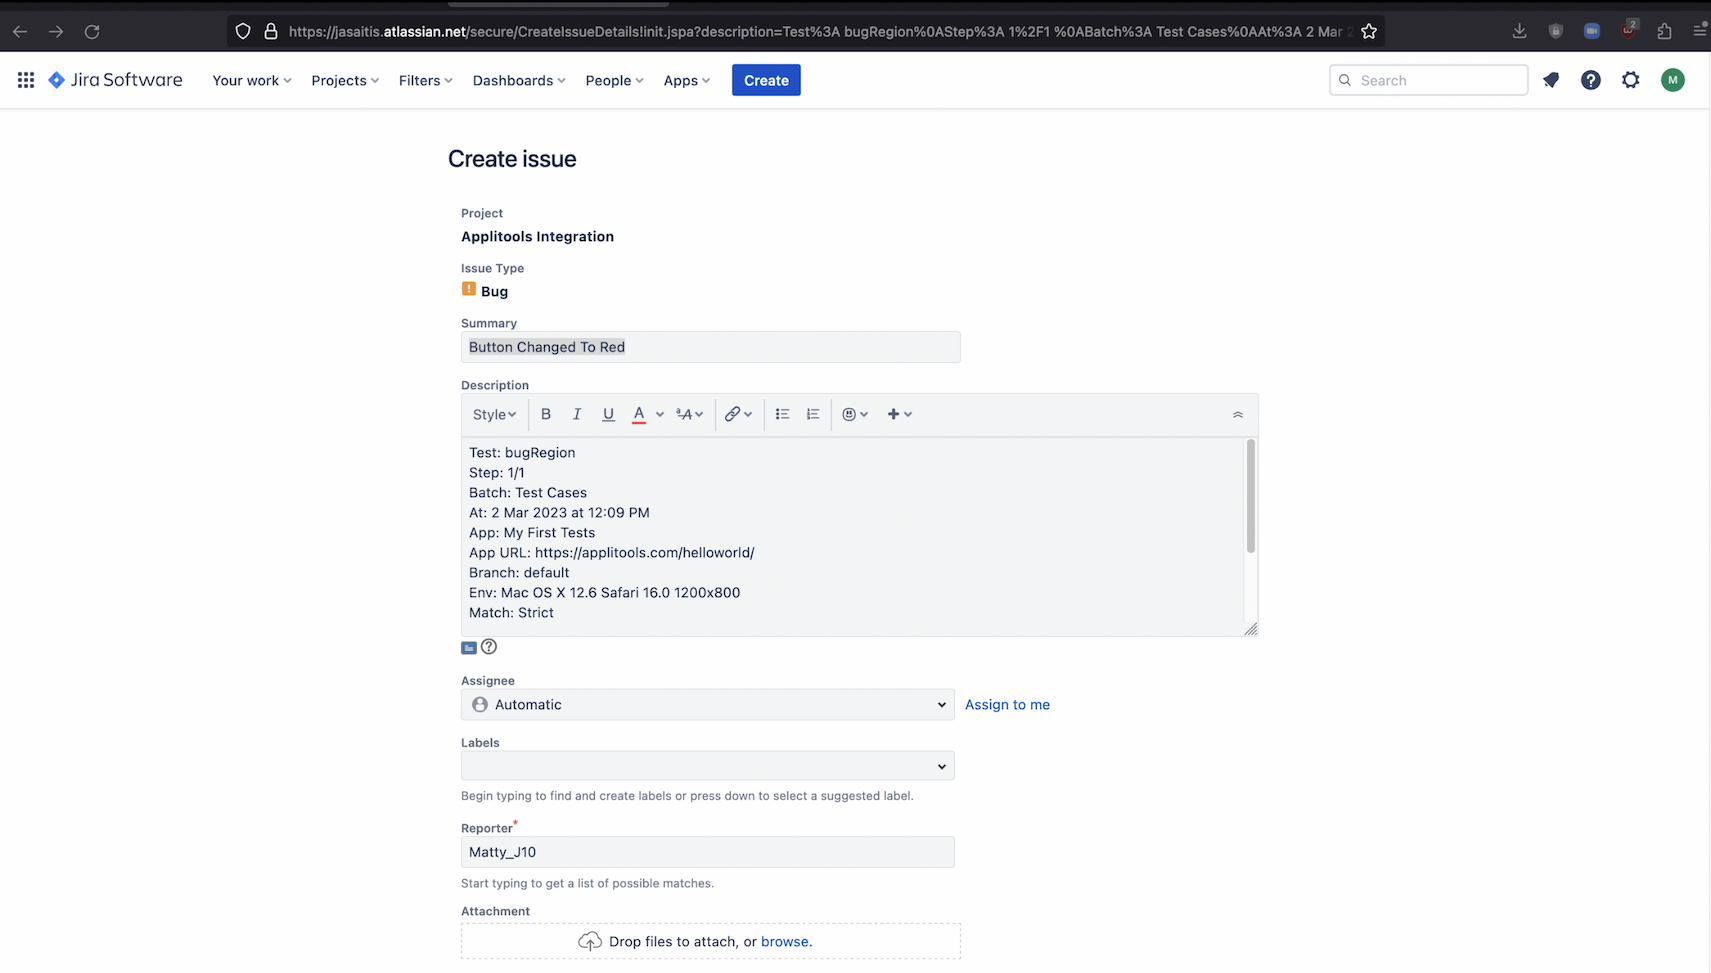
It should look something like this. After adding in any other details that you'd like, save the JIRA issue.
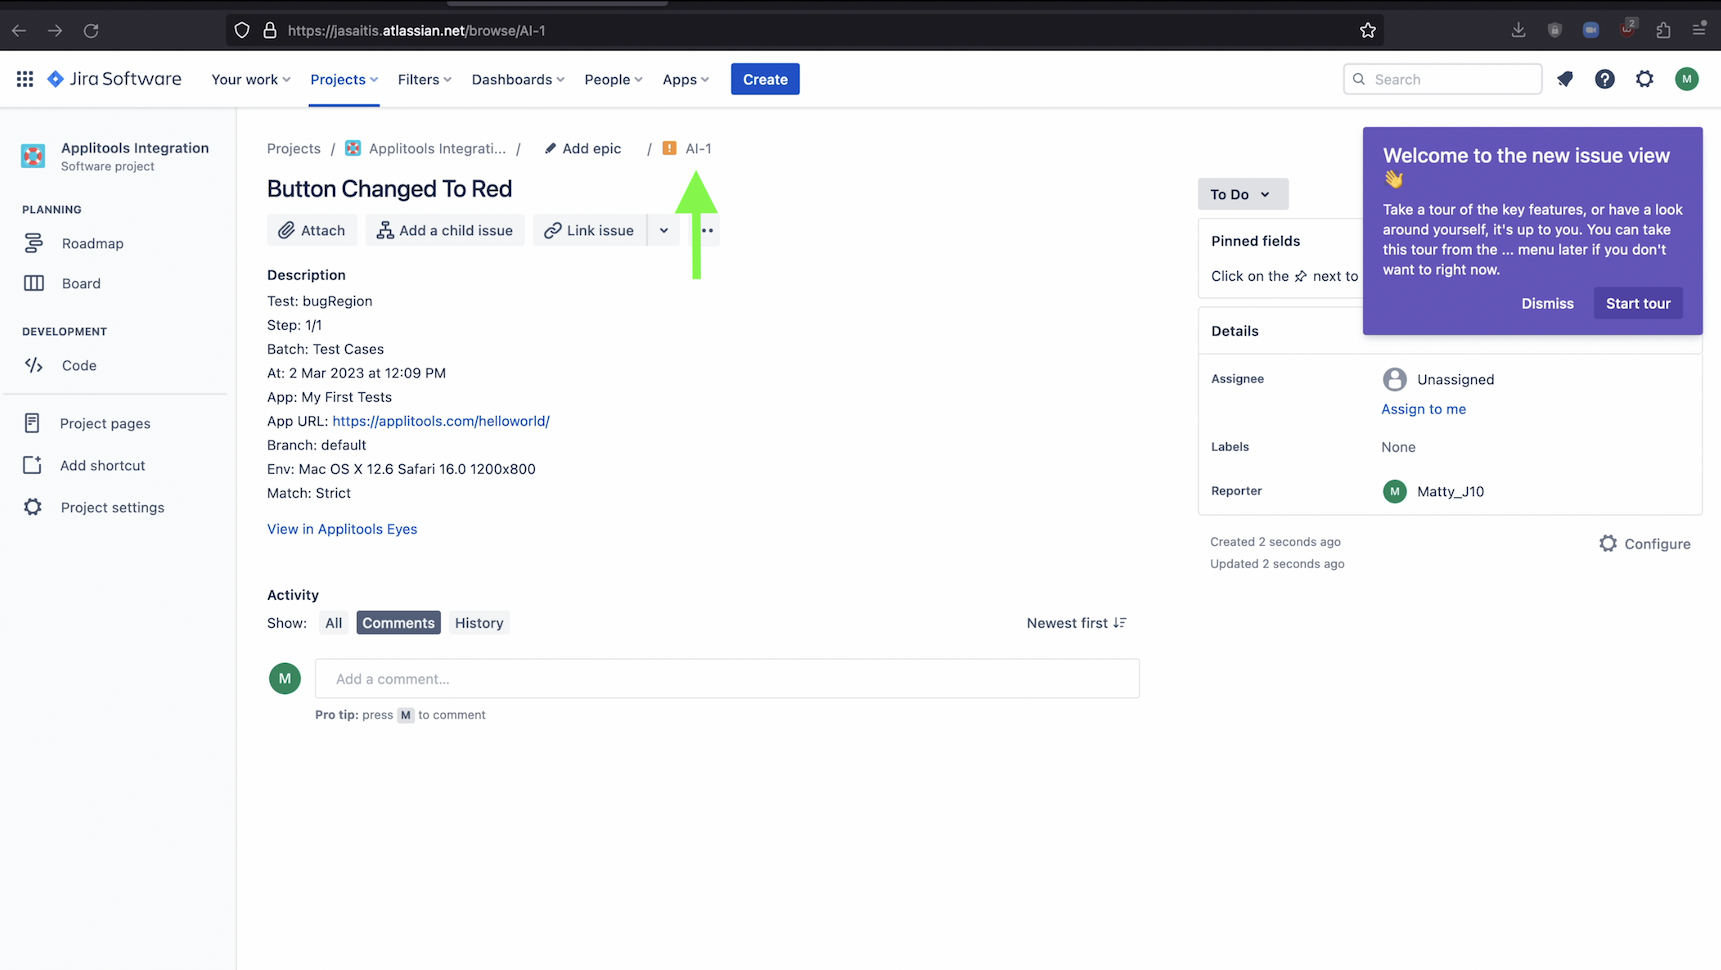
After saving, grab the issue id from here.

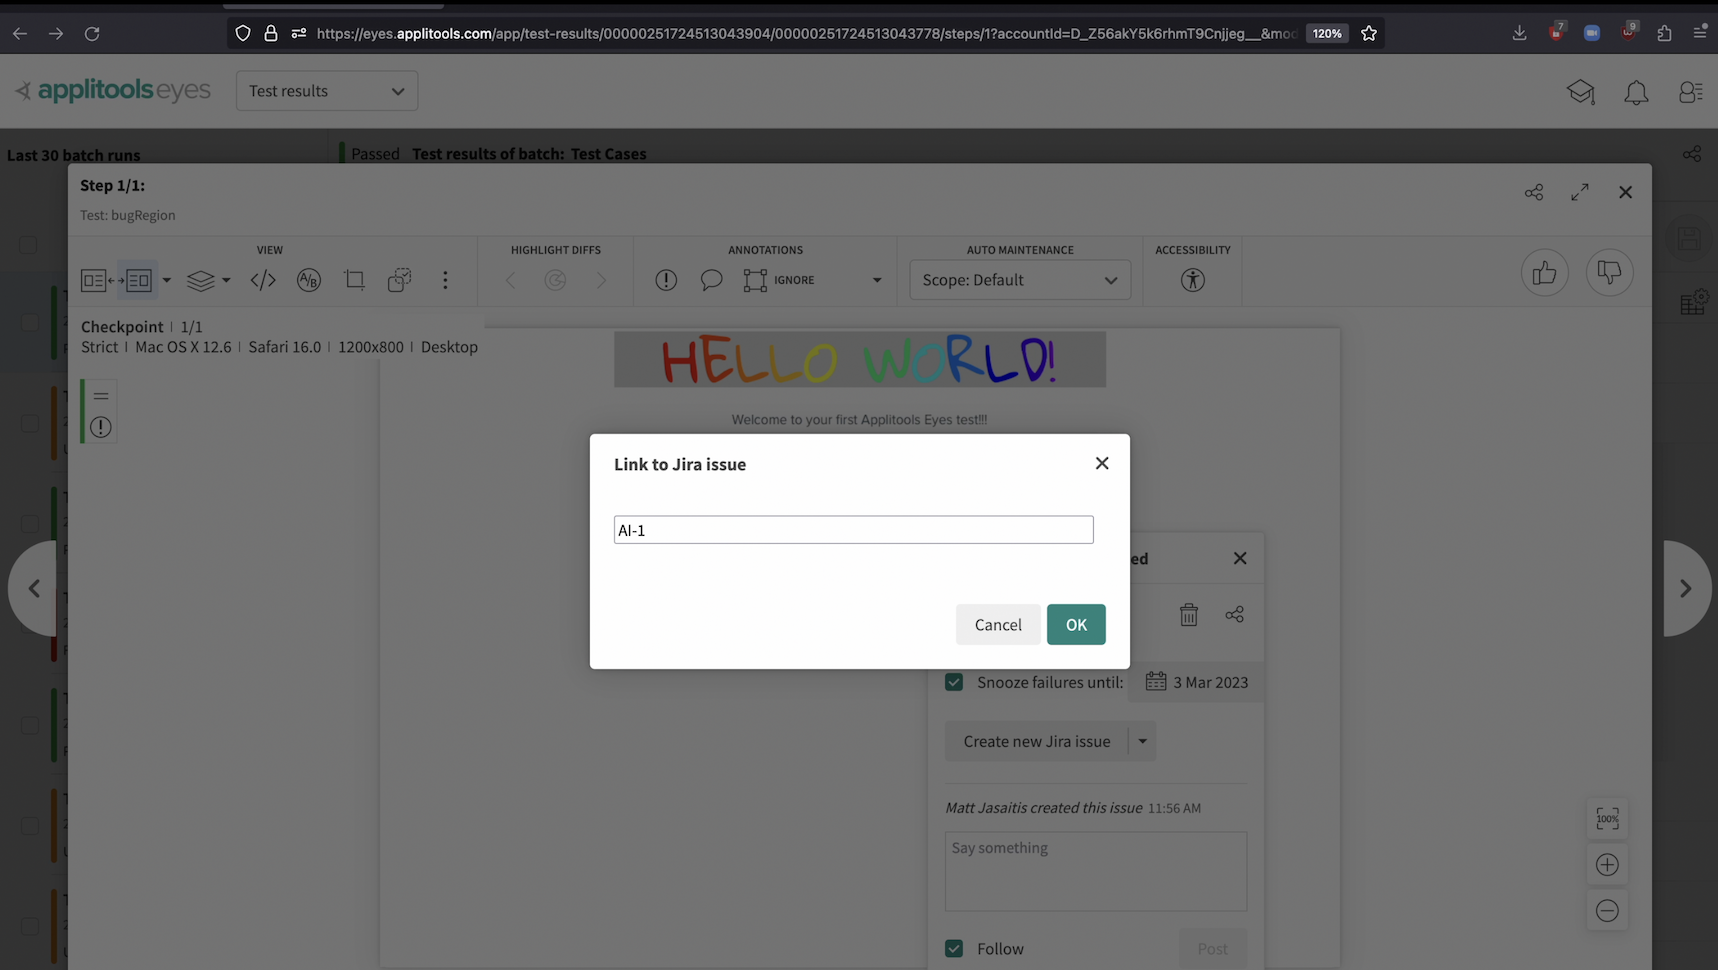
Then, back on the Applitools Test Manager, place the id of the issue in this dialog and press ok to link them together.
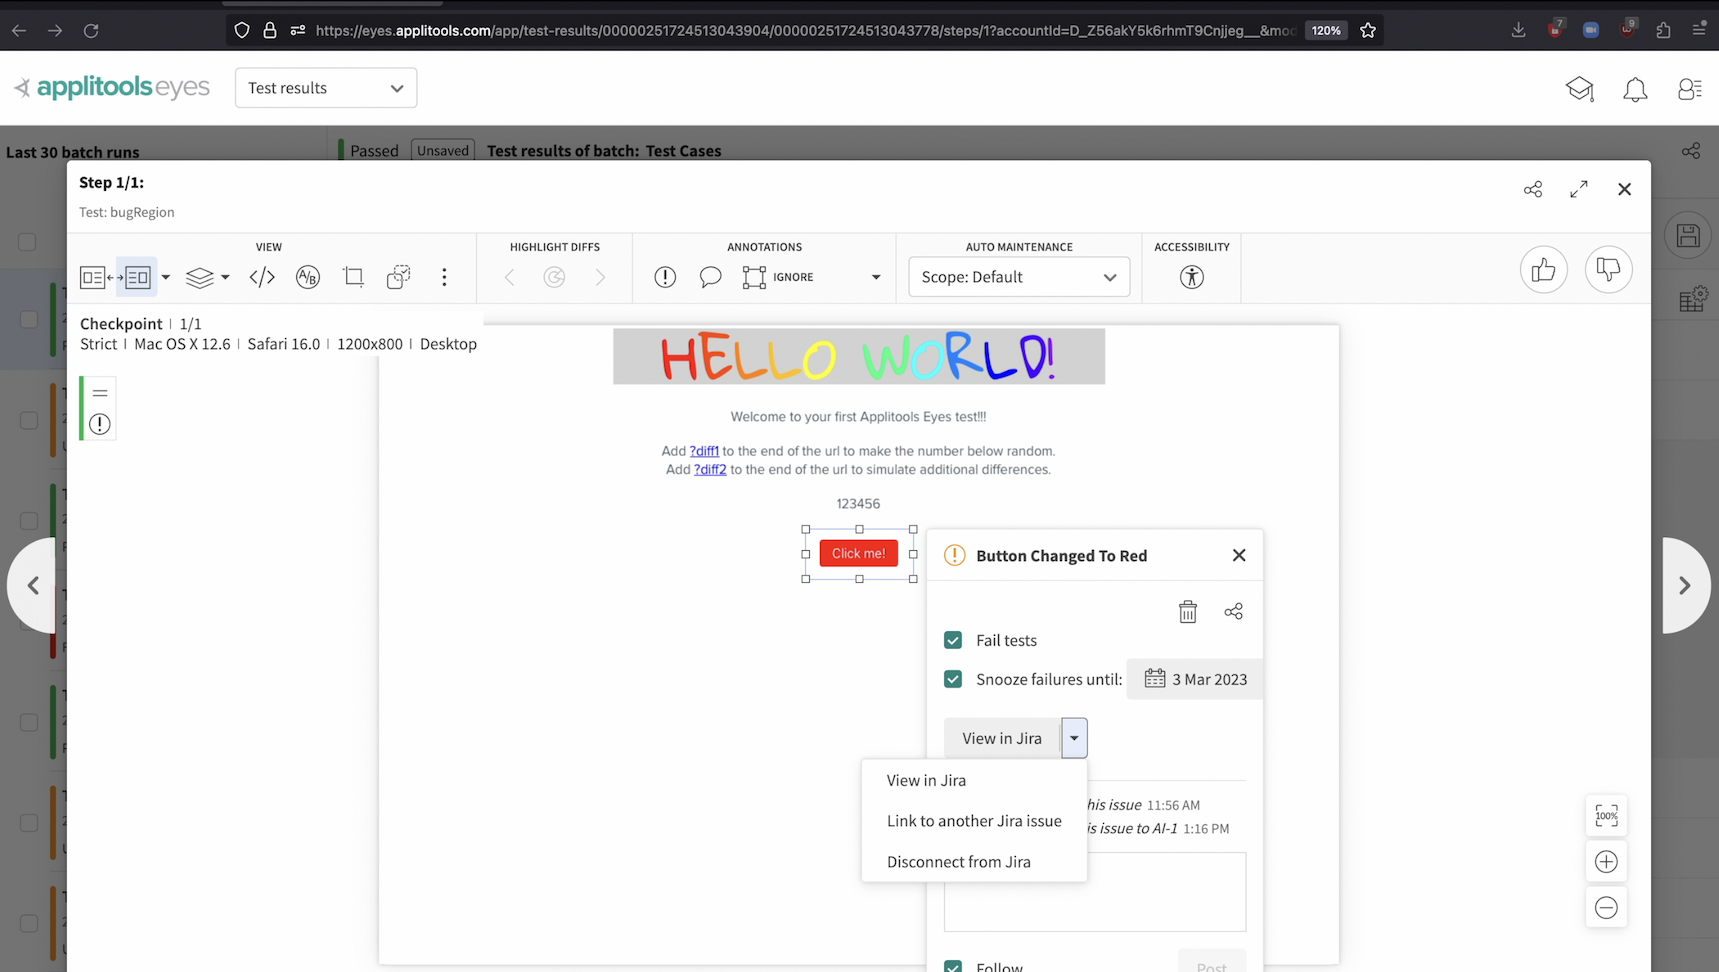
You can also link a bug region to an existing JIRA issue by clicking the dropdown arrow and selecting that option.
In the dialog that pops up, place the existing JIRA ID and then press ok.

After linking a JIRA issue, we can disconnect it using this option, link to another issue using this option or view the issue over in JIRA using this option.
The JIRA integration allows us to link bug regions to JIRA to provide even more context around the issue and helps our team stay in sync. As mentioned earlier, you can find documentation about our Rally integration in the write-up down below.

In this chapter, we ran through many of the collaboration tools offered by the Applitools Test Manager. This includes assigned API keys to see who ran a batch, Assigning tests to users to manage who should review the test results, adding remark and bug regions to highlight parts of the test results and then linking bug regions to JIRA issues. Taking advantage of these tools helps teams large and small work effectively with Applitools.
