

Transcripted Summary

In this chapter, we're going to look at two powerful tools available to you that provide deeper insights for your test results. The first tool is Root Cause Analysis or RCA for short. This tool will show you what changed between the DOM in the baseline image vs. the DOM in the checkpoint image.
The 2nd tool is known as Auto Maintenance. This tool will assist you when performing bulk actions on test results and save you valuable time. In this chapter we're going to go through each of these tools and discuss how to use them effectively.

When you run a test with an Applitools SDK, the HTML and CSS of the page you're testing are automatically uploaded to the Eyes server. RCA will then take the HTML and CSS of the checkpoint image and compare it to the HTML and CSS of the baseline image. Then, when reviewing your test results, you can access the RCA feature, select a difference in your test result and then understand what changed in the DOM that caused that difference to be thrown.
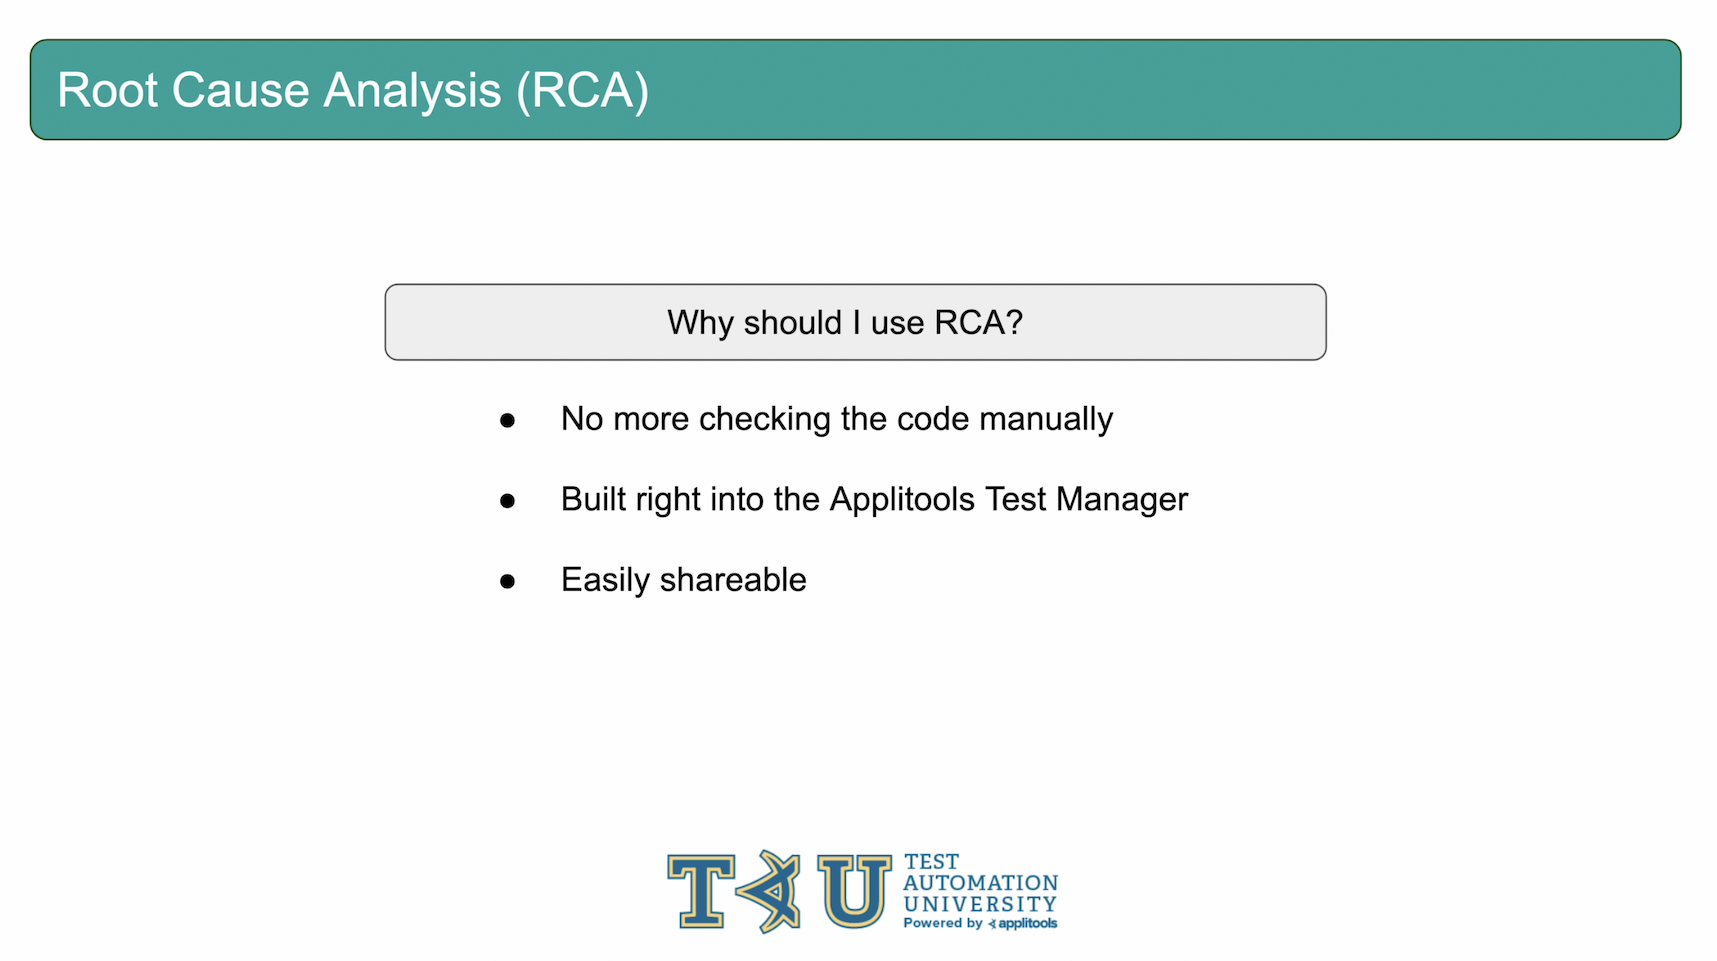
Normally, when you find a difference in your test result, you'll need to inform the developer responsible for that page and then they'd need to go through the code and figure out what caused that change. RCA can automatically compare the DOMs for you and indicate the differences between them and it's built right into the Applitools Test Manager. This will save you time and effort when it comes to isolating the root cause of an issue. Also, RCA results can be shared with the click of a button.

RCA will highlight differences for the following types of information: tag changes, for example if a <span> element was changed to a <p> element. Differences in Attributes, for example if an elements class selector changes. Differences in the bounding box, meaning the x and y coordinate or the width and height of the given element. CSS property changes for instance if the color changed from red to blue and lastly, Text Changes. Let's head over to our Applitools Test Manager and see what RCA has flagged for some of our previous test results.

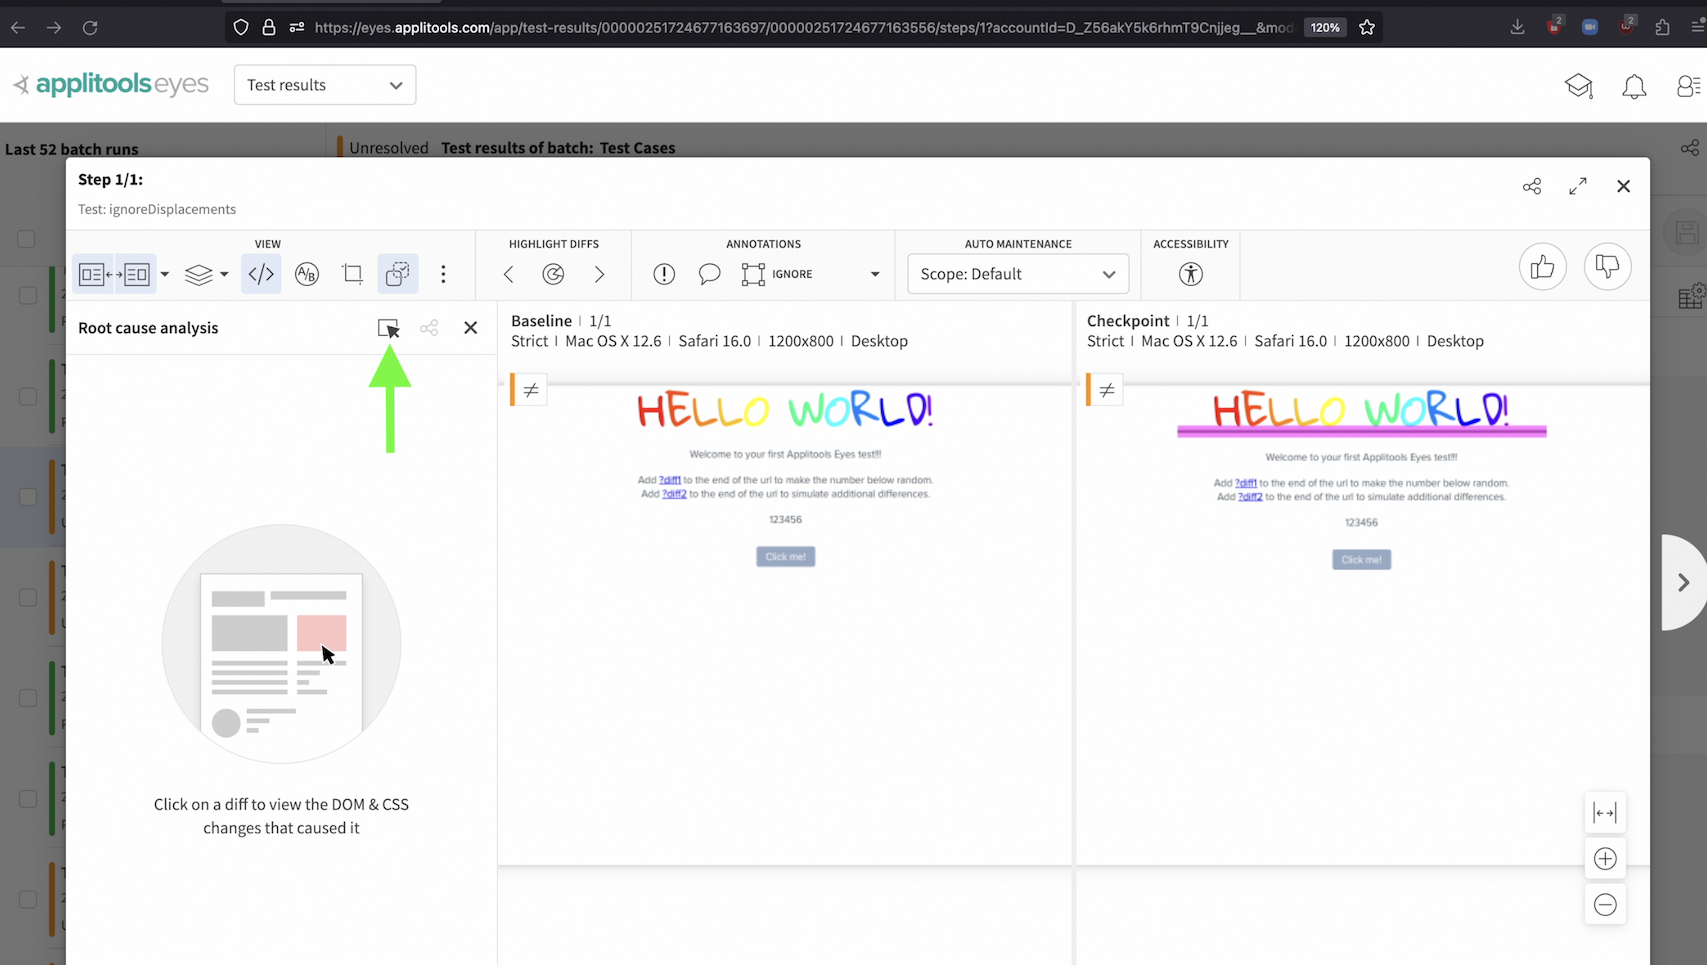
Let's take a look at this example here that we ran earlier where a border was added to the bottom of our title. To access RCA, click on this button in the toolbar.
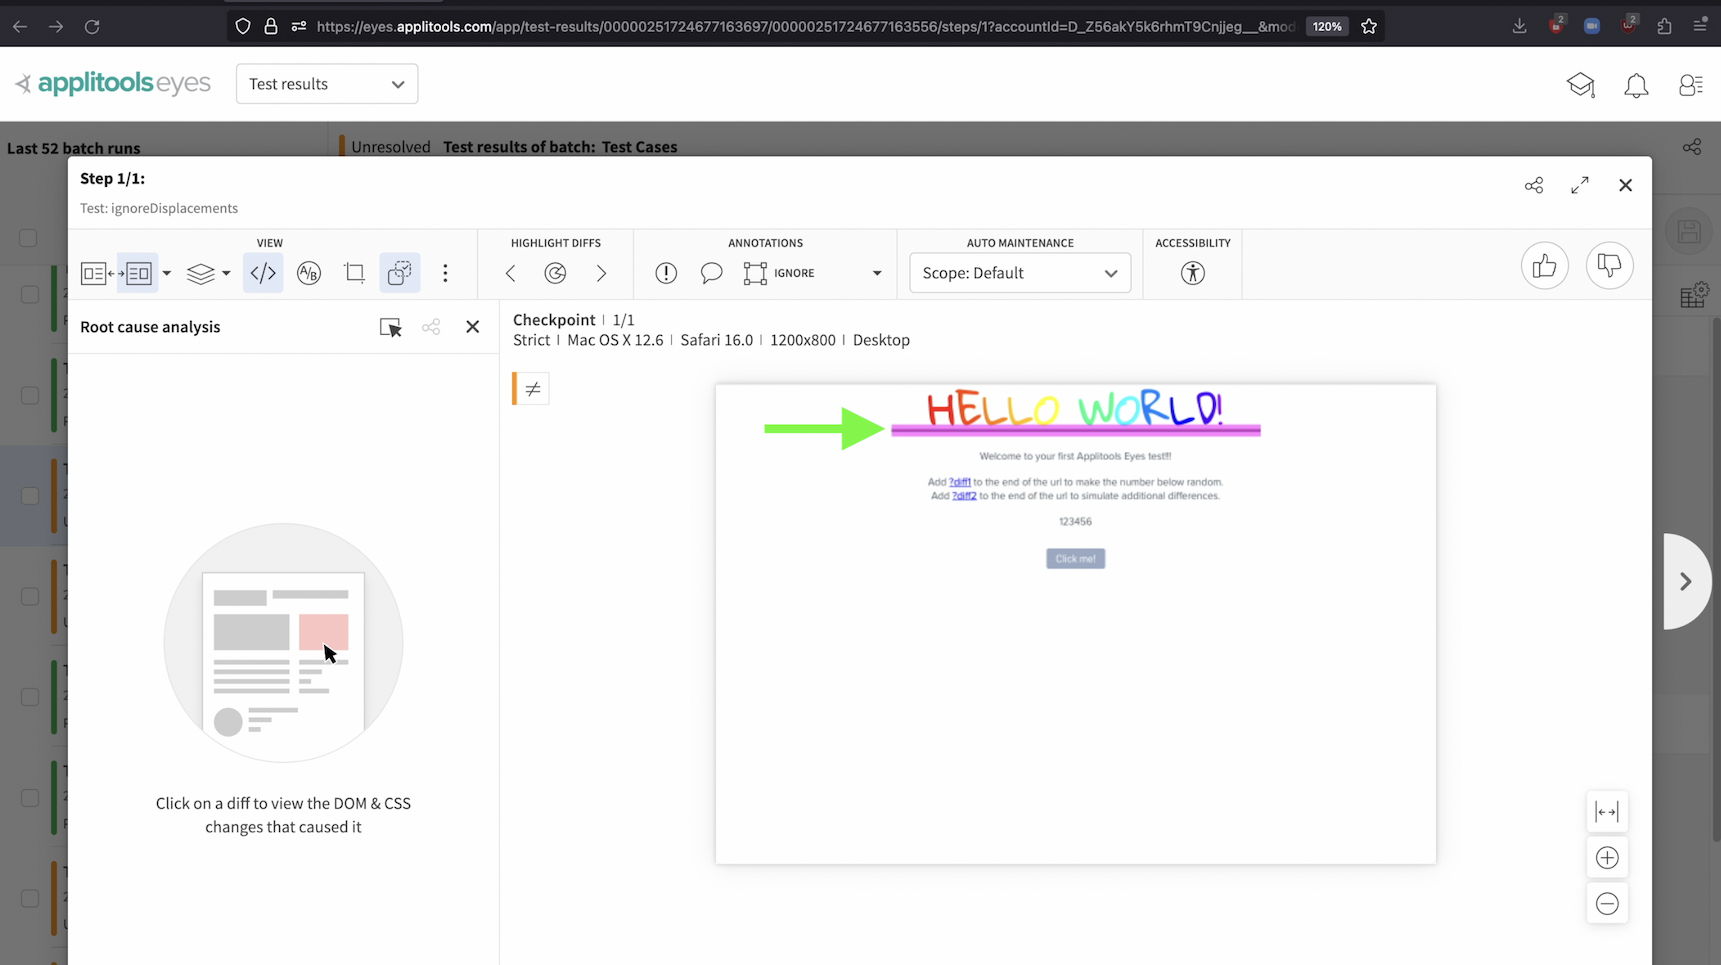
Then, click on a difference that's highlighted in pink within the screenshot.
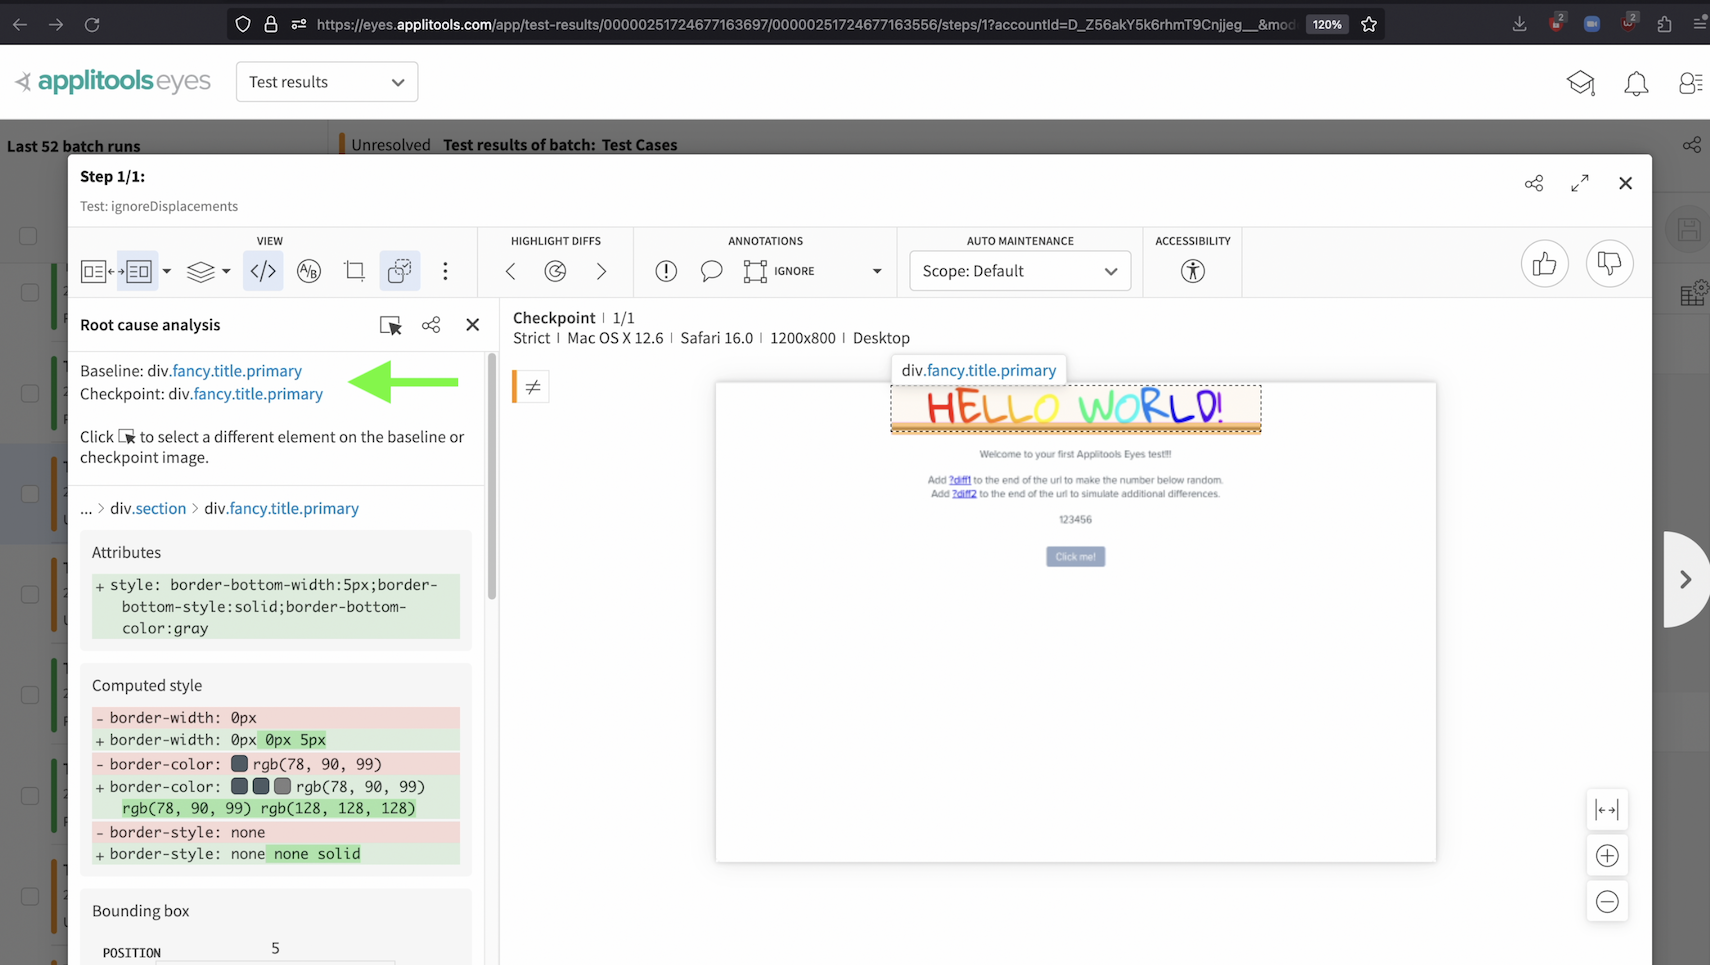
After selecting the difference that we want to analyze, in the left panel we now see the RCA analysis. At the top, we can see which elements we're analyzing in the baseline and checkpoint. In this case, they're the same selectors and we're presented with the changes for this element and its ancestor elements.
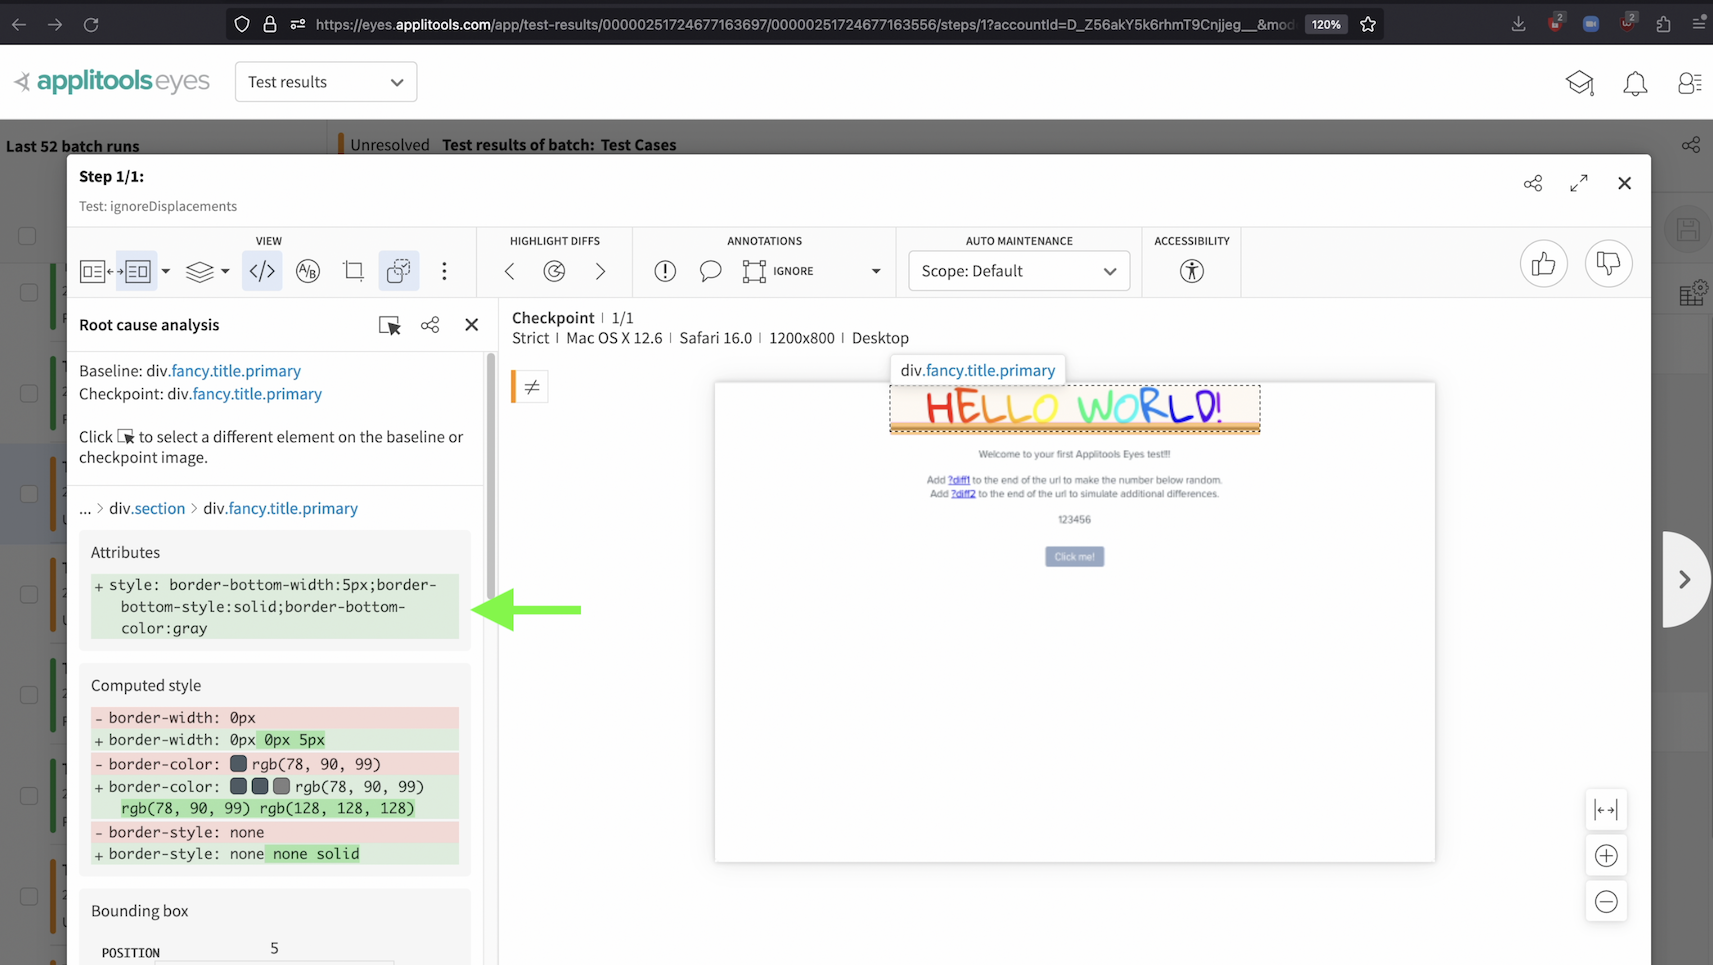
RCA indicates that a style attribute was added to our element causing the border to show up.
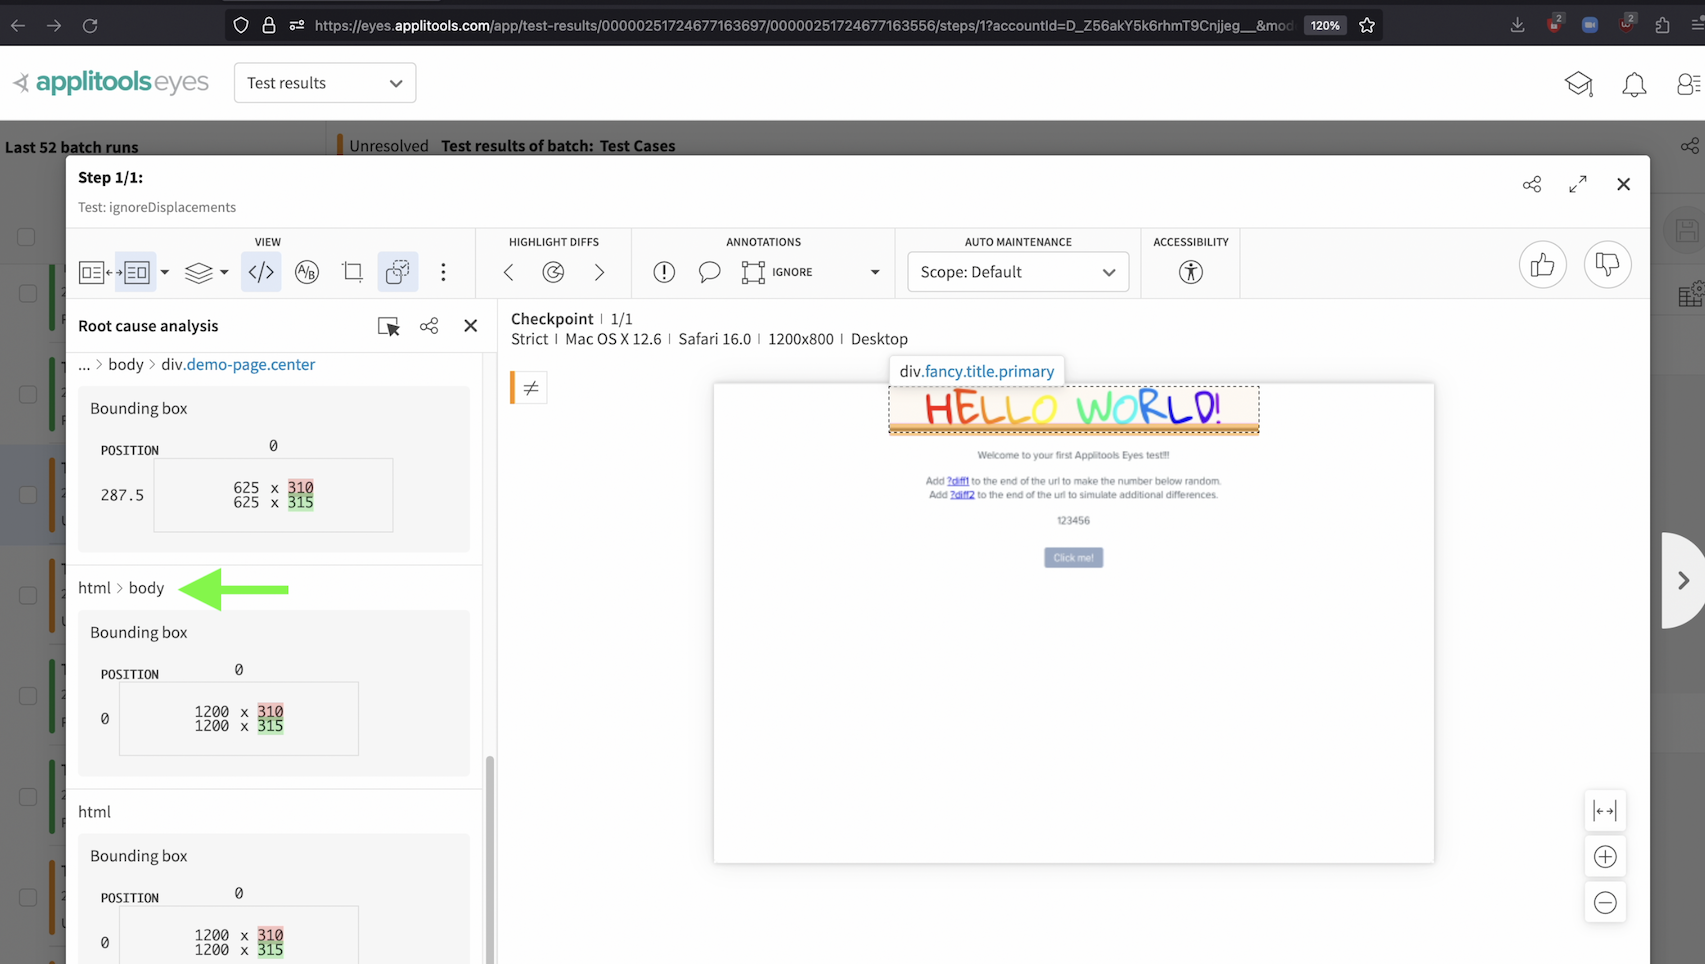
If we scroll down, we can also see how this change affected the parent elements of our div such as the body and html elements. We can see that the height of these elements have been increased as well.

We can also select this button here and then use our mouse to hover over the elements on our screenshot as if we were using the browser devtools. Clicking on an element in the baseline followed by an element in the checkpoint will show the RCA between the two elements that we selected even if they're not flagged as a difference.
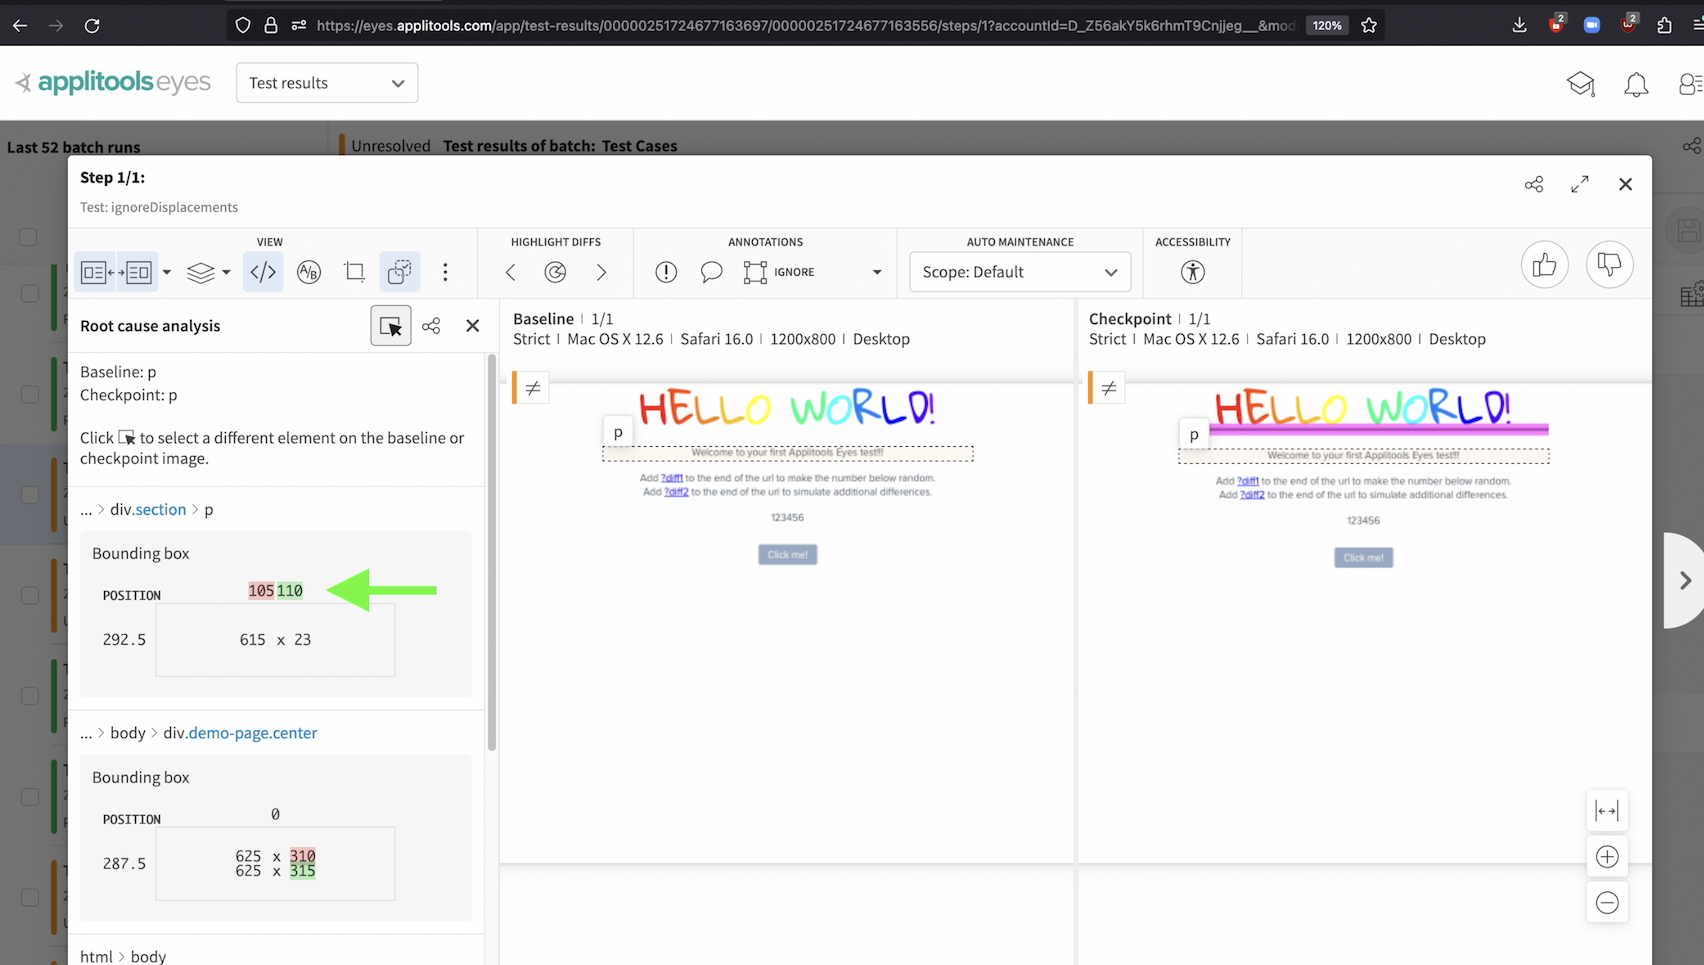
In this case, we had ignoreDisplacements on so no difference was flagged for this paragraph element. However, RCA will still show us that the position of this paragraph has changed and by how much.
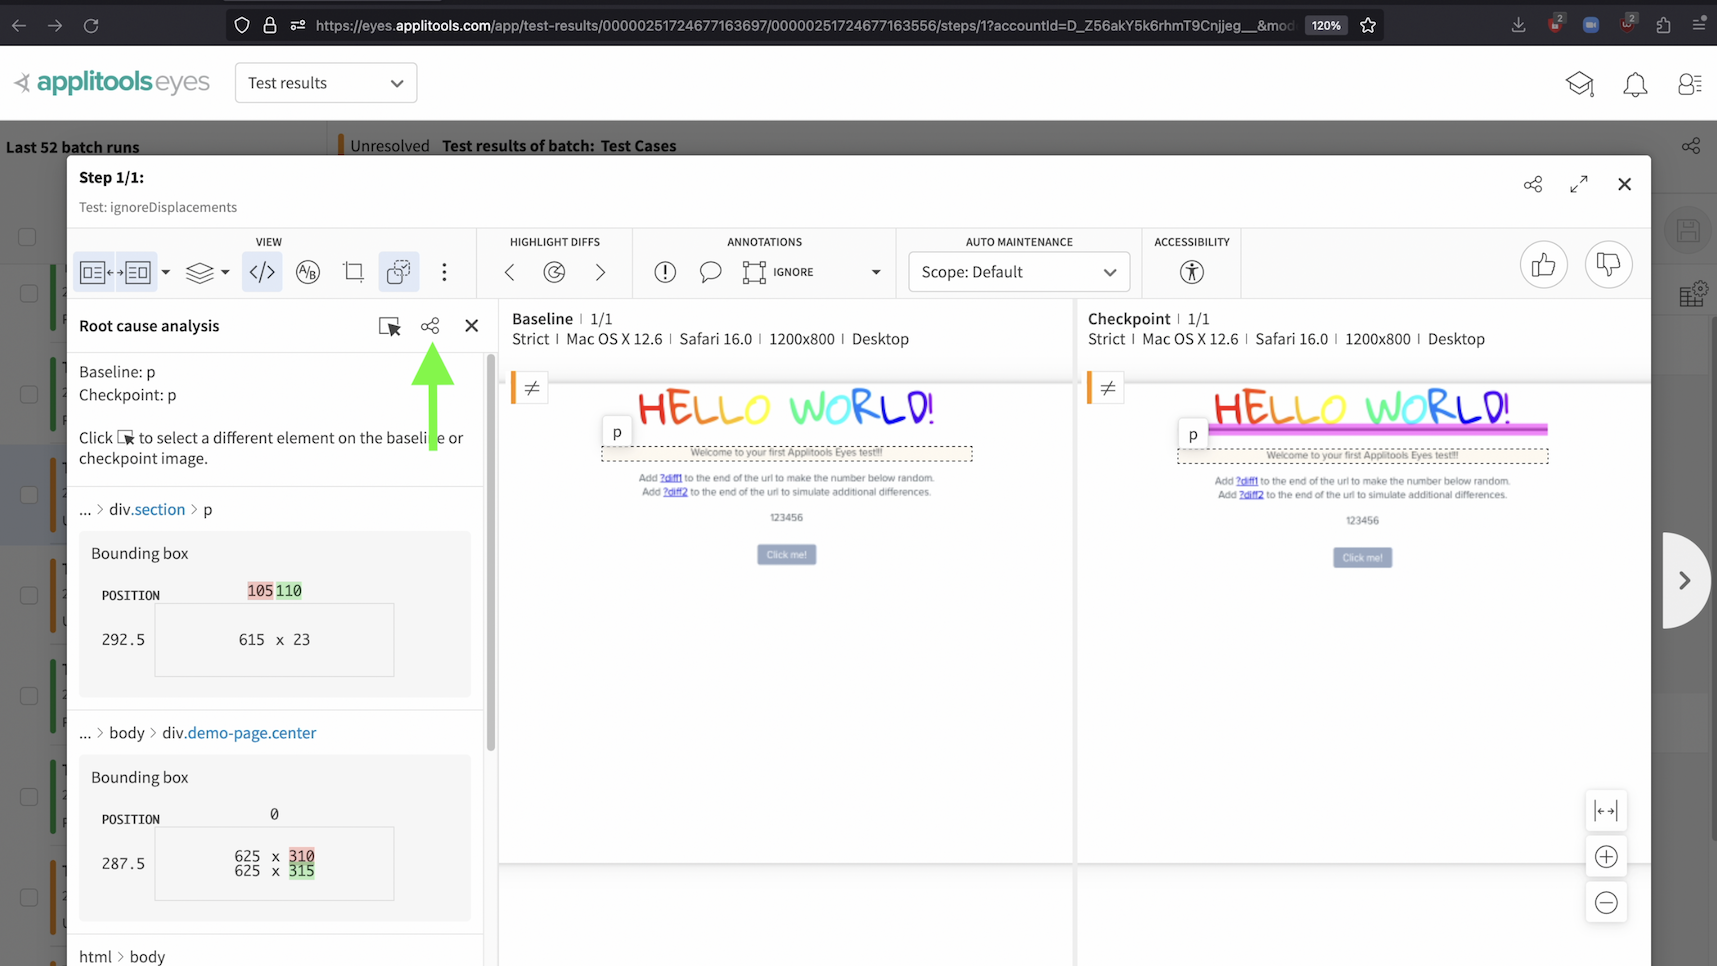
If we wanted to share this RCA with someone on our team, we can select this icon here which will copy a direct link of this exact view to our clipboard.
Let's now shift gears and look at a powerful feature known as auto maintenance. Auto maintenance is a productivity enhancing tool offered by the Applitools Test Manager that allows you to batch repetitive actions together rather than performing them individually.
Oftentimes you may need to apply a region or approve a difference that is repeated for all of the test results in your batch. Rather than having to go through all of the tests and apply the same region or approve the same difference, you can use Auto Maintenance to automatically perform these actions on all of the tests where relevant.
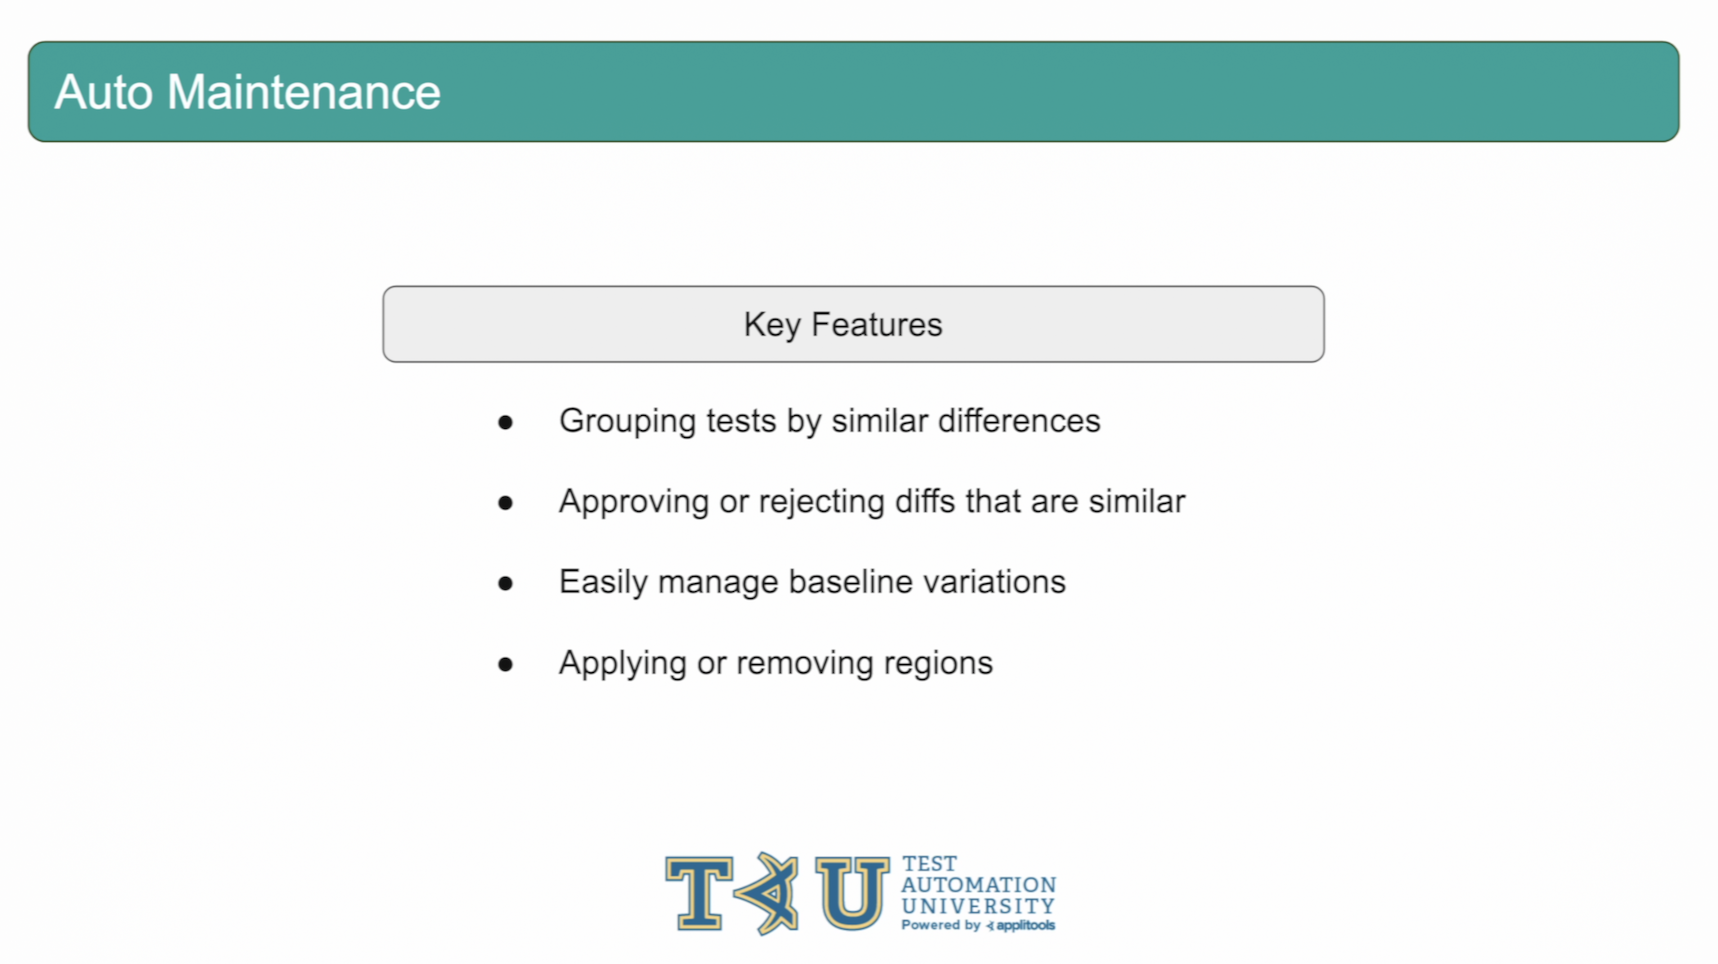
Auto maintenance covers 4 main use cases: grouping tests together with similar differences, bulk approving or rejecting test results that are similar, easy management of baseline variations, as we saw back in chapter 2, and applying or removing regions from your baselines.
In this section, we're going to go through these use cases and show you how the auto maintenance algorithm provided by Applitools can help streamline the test review process.
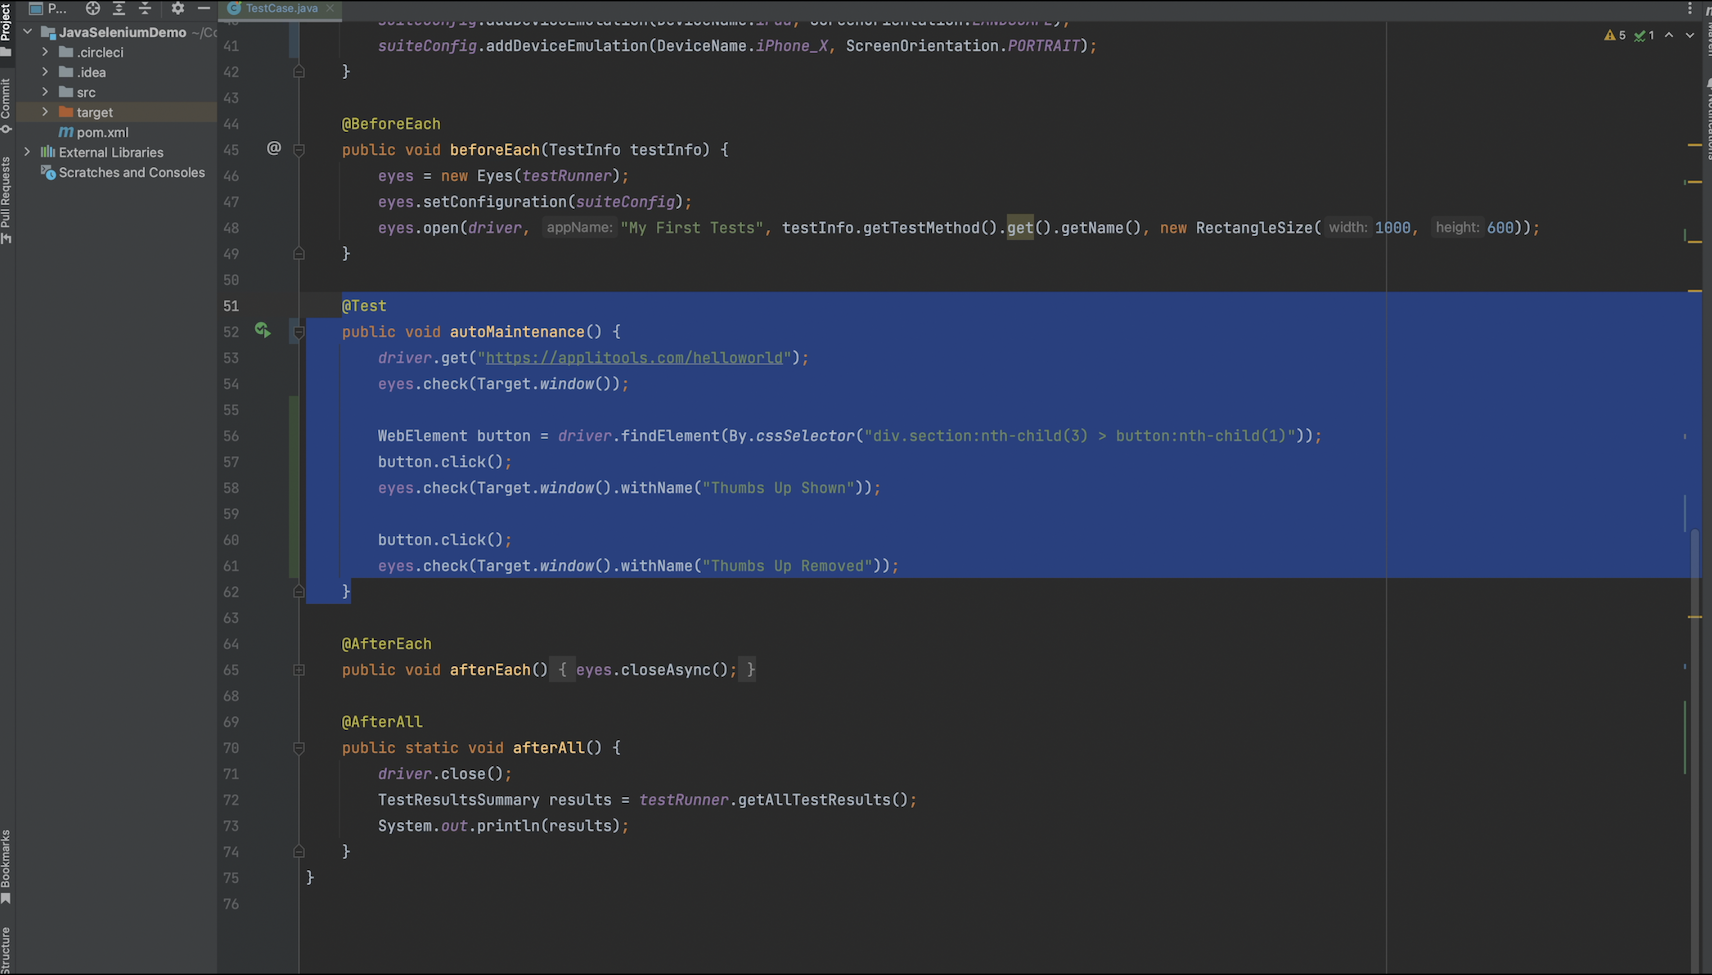
For our example in this section, I've made the following code changes. I first select the button element on the page, click it and take a 2nd screenshot. Then, I click the button again and take a 3rd screenshot. These steps will functionally validate that a thumbs up photo shows up after the first click and that it's removed on the 2nd click.
Lastly, I changed the name of our test once again to autoMaintenance. Let's go ahead and run this test to set up our baseline.
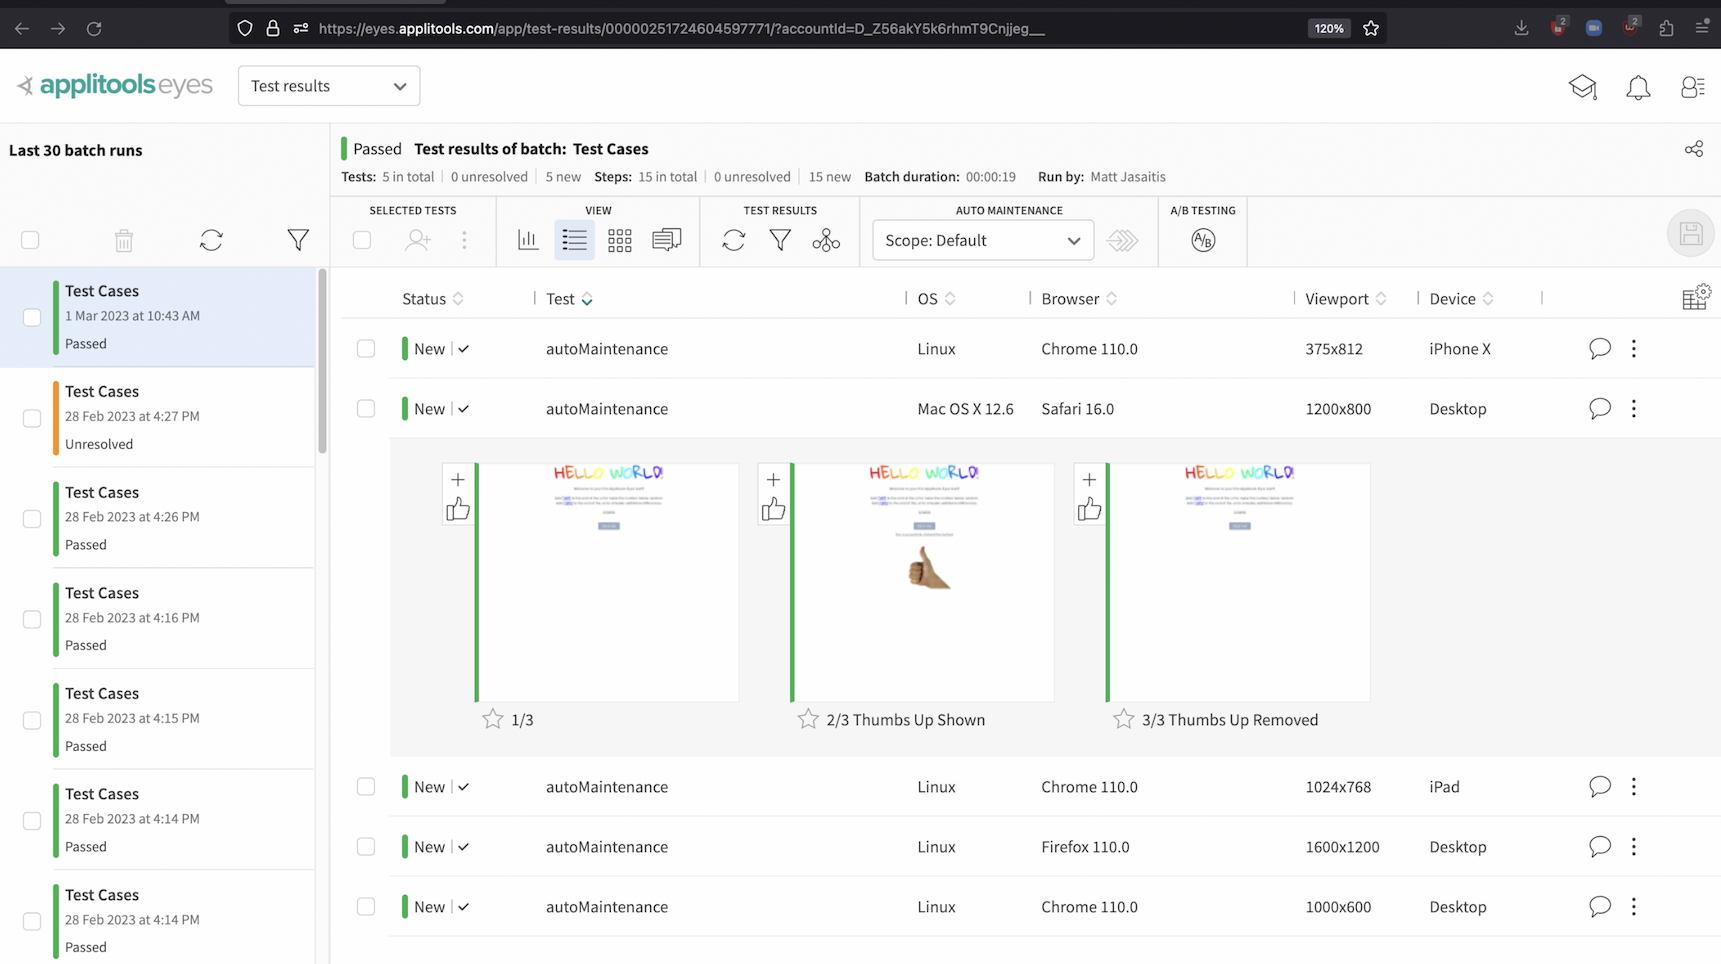
After running our test, we now have 3 screenshots in our test run for each browser environment that we're rendering on. Let's now head back to our code and make a slight change.

To simulate a difference, I've added these lines here that inject JavaScript into our page and change the backgroundColor of the title to a light gray. Let's now rerun our test and head back to the Applitools test manager.
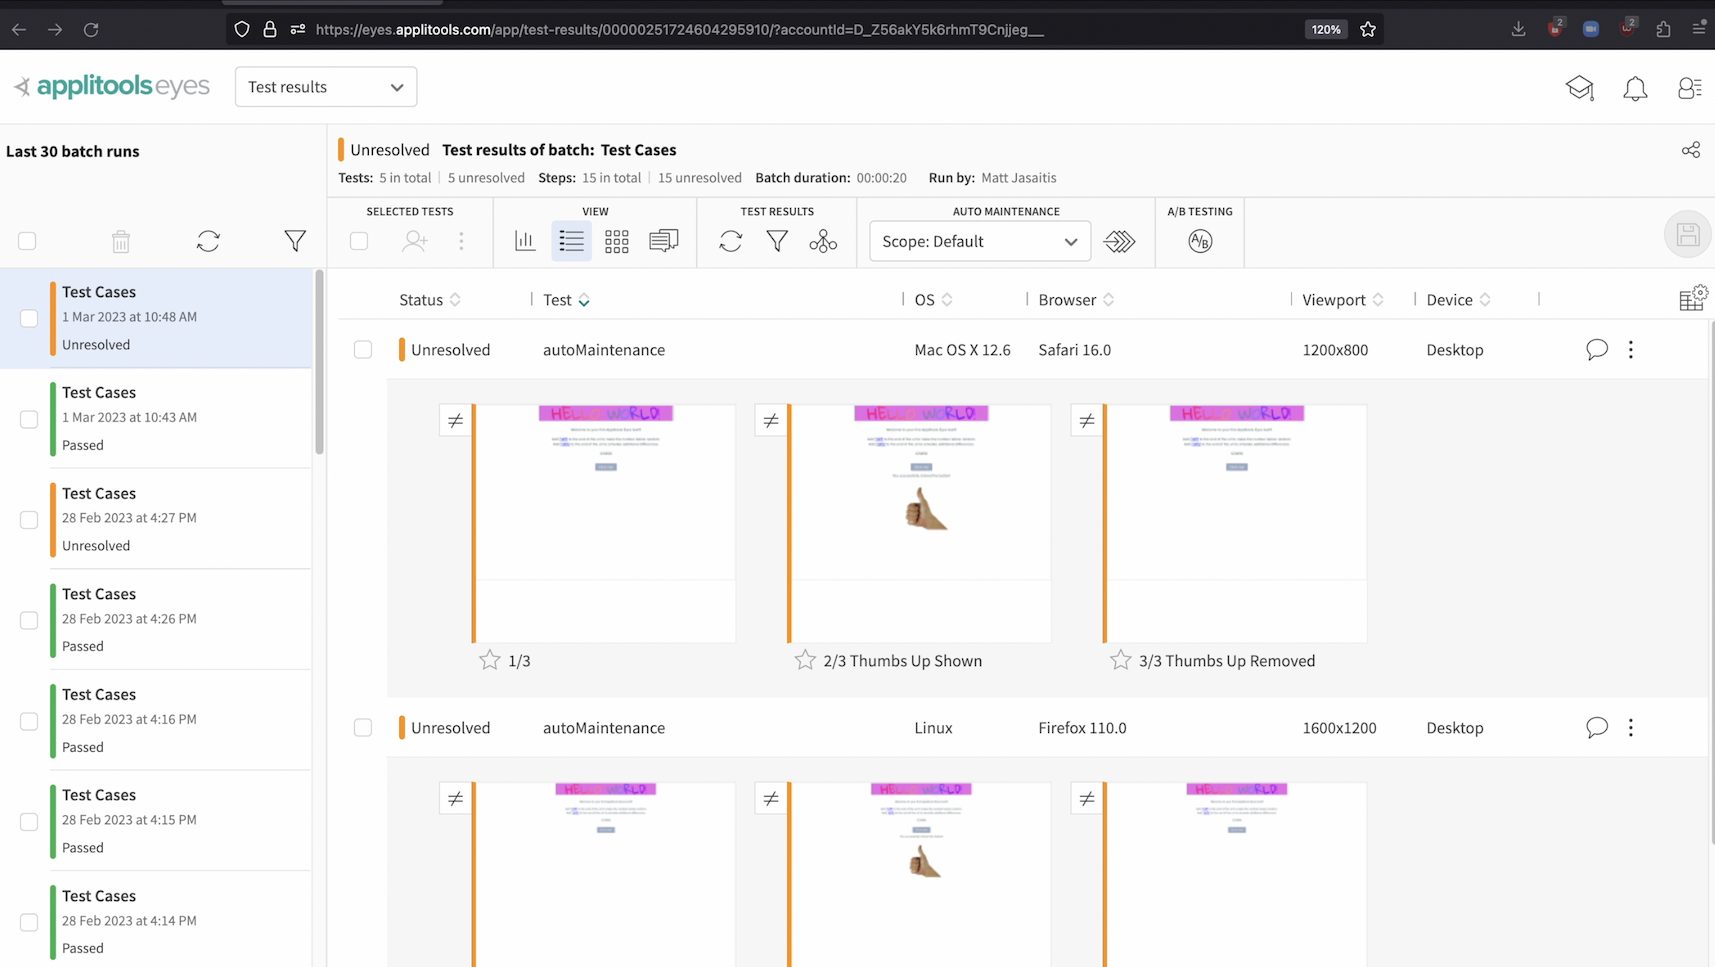
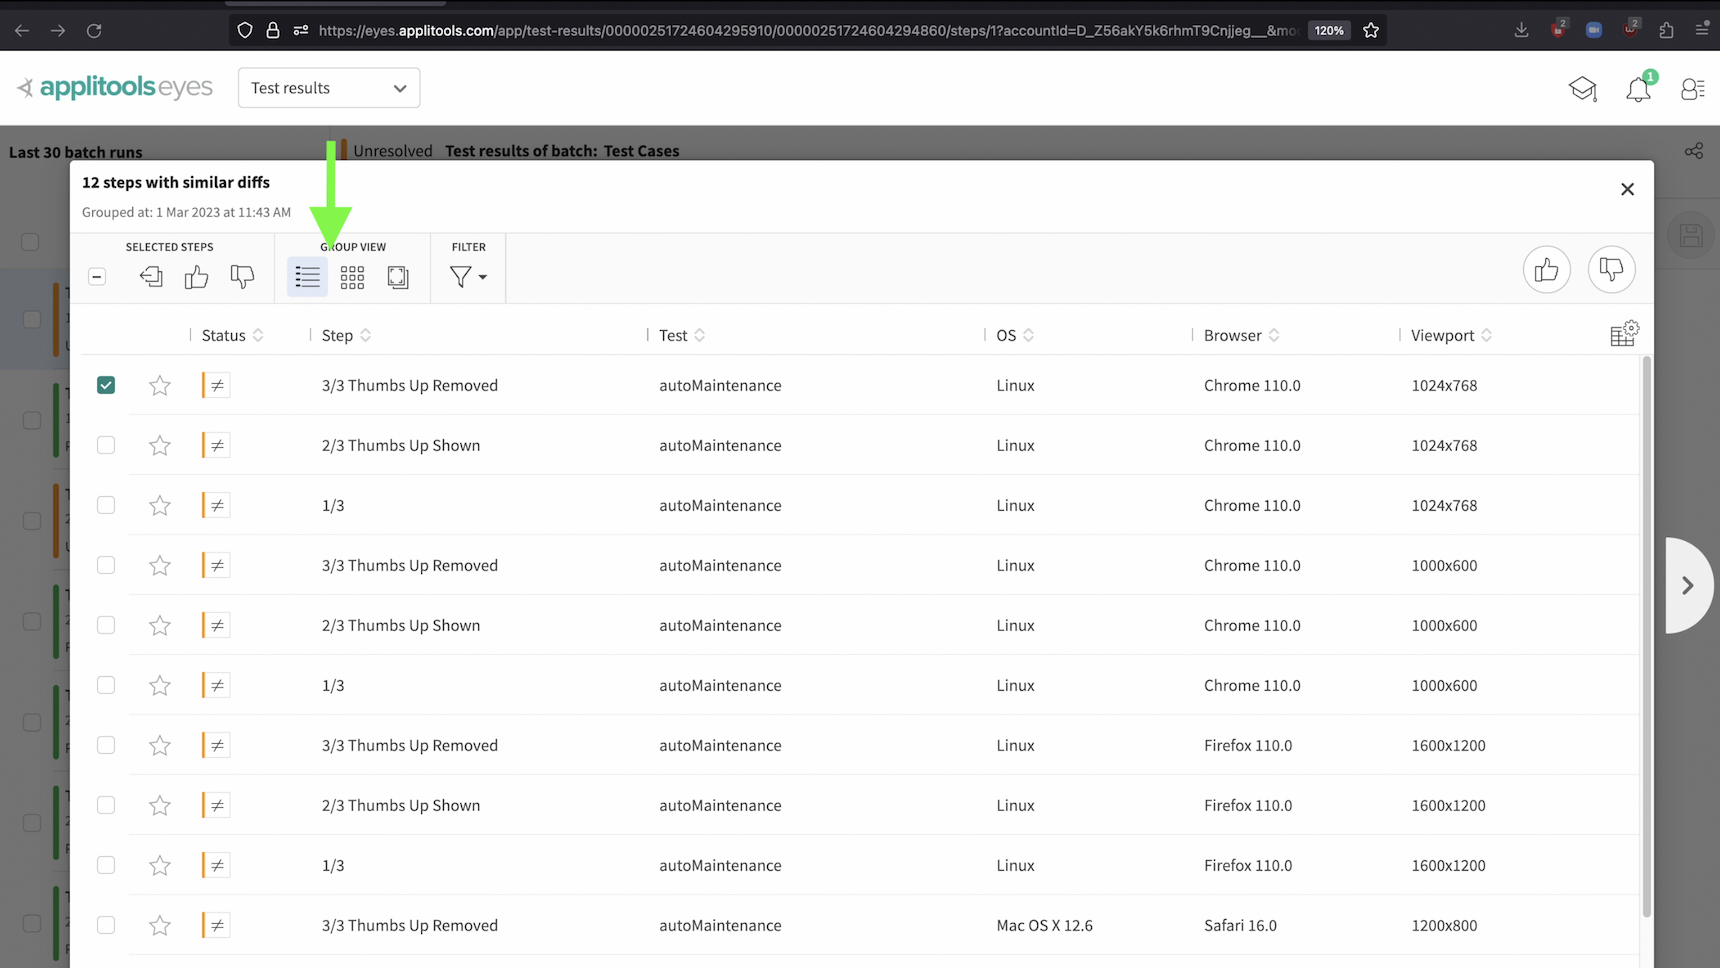
Looking at our test results, we can see that all of our screenshots are now marked as unresolved. Normally, we'd have to manually go into each one, confirm the difference and then either approve or reject it. With auto maintenance, we can save a lot of time by grouping our test results by similar differences.
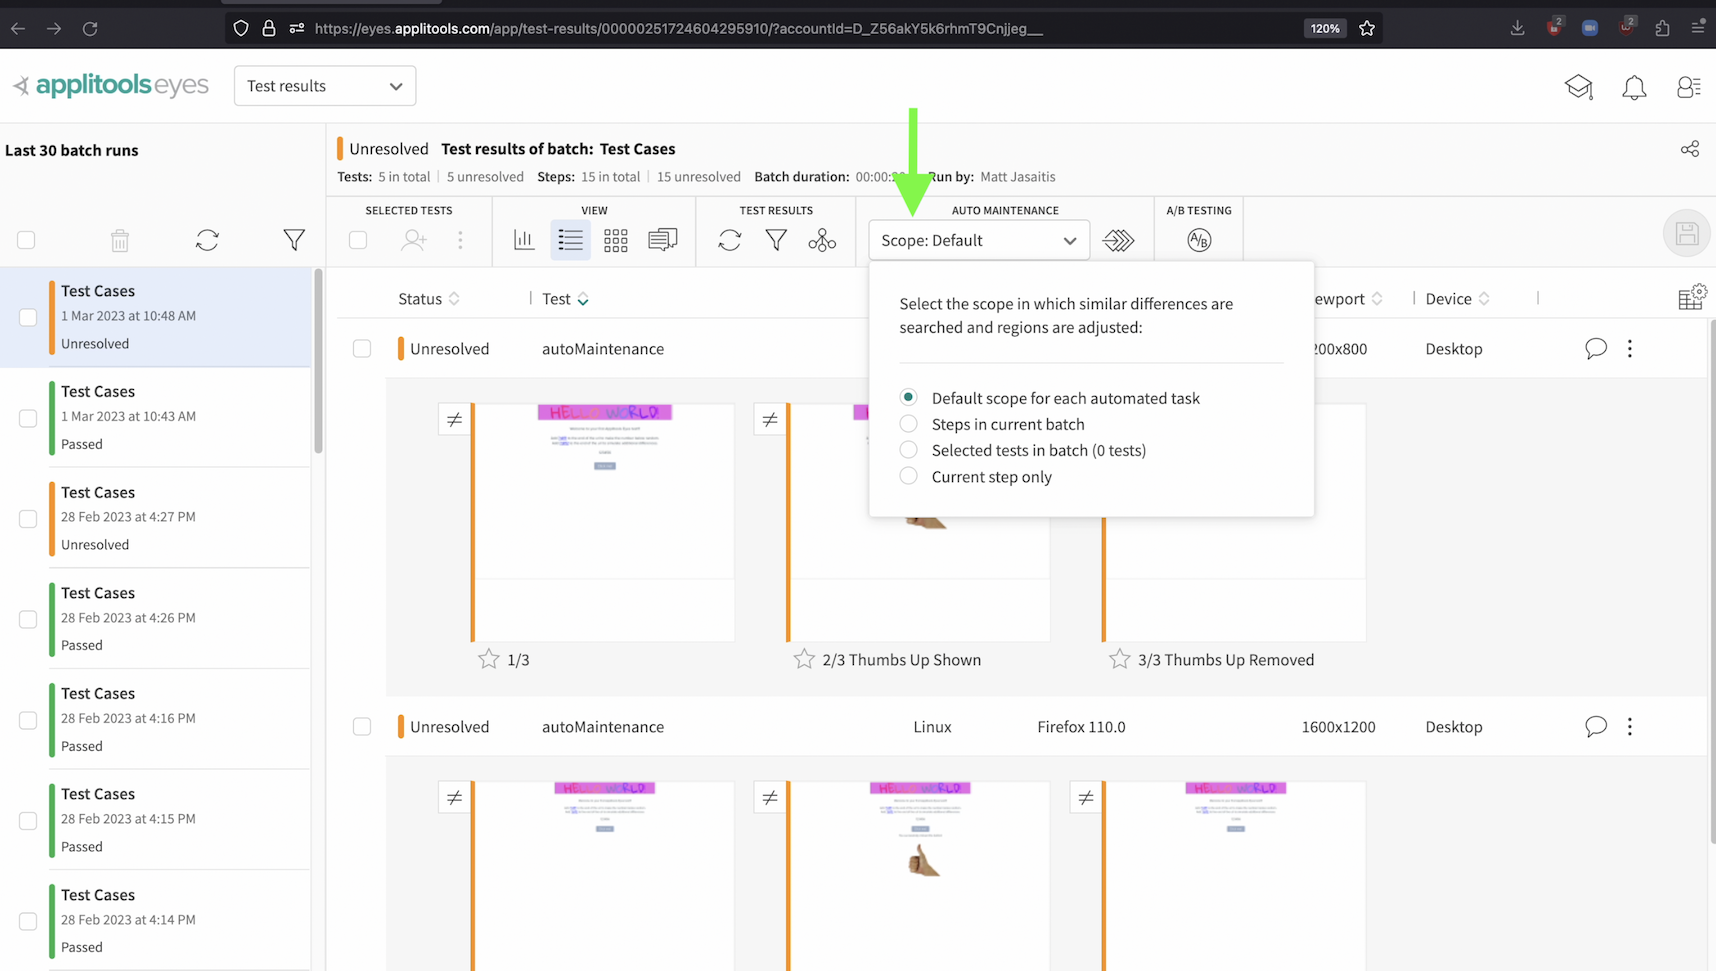
The first step is to select the scope that you want to use for auto maintenance, in this case I've selected the default which is usually recommended.
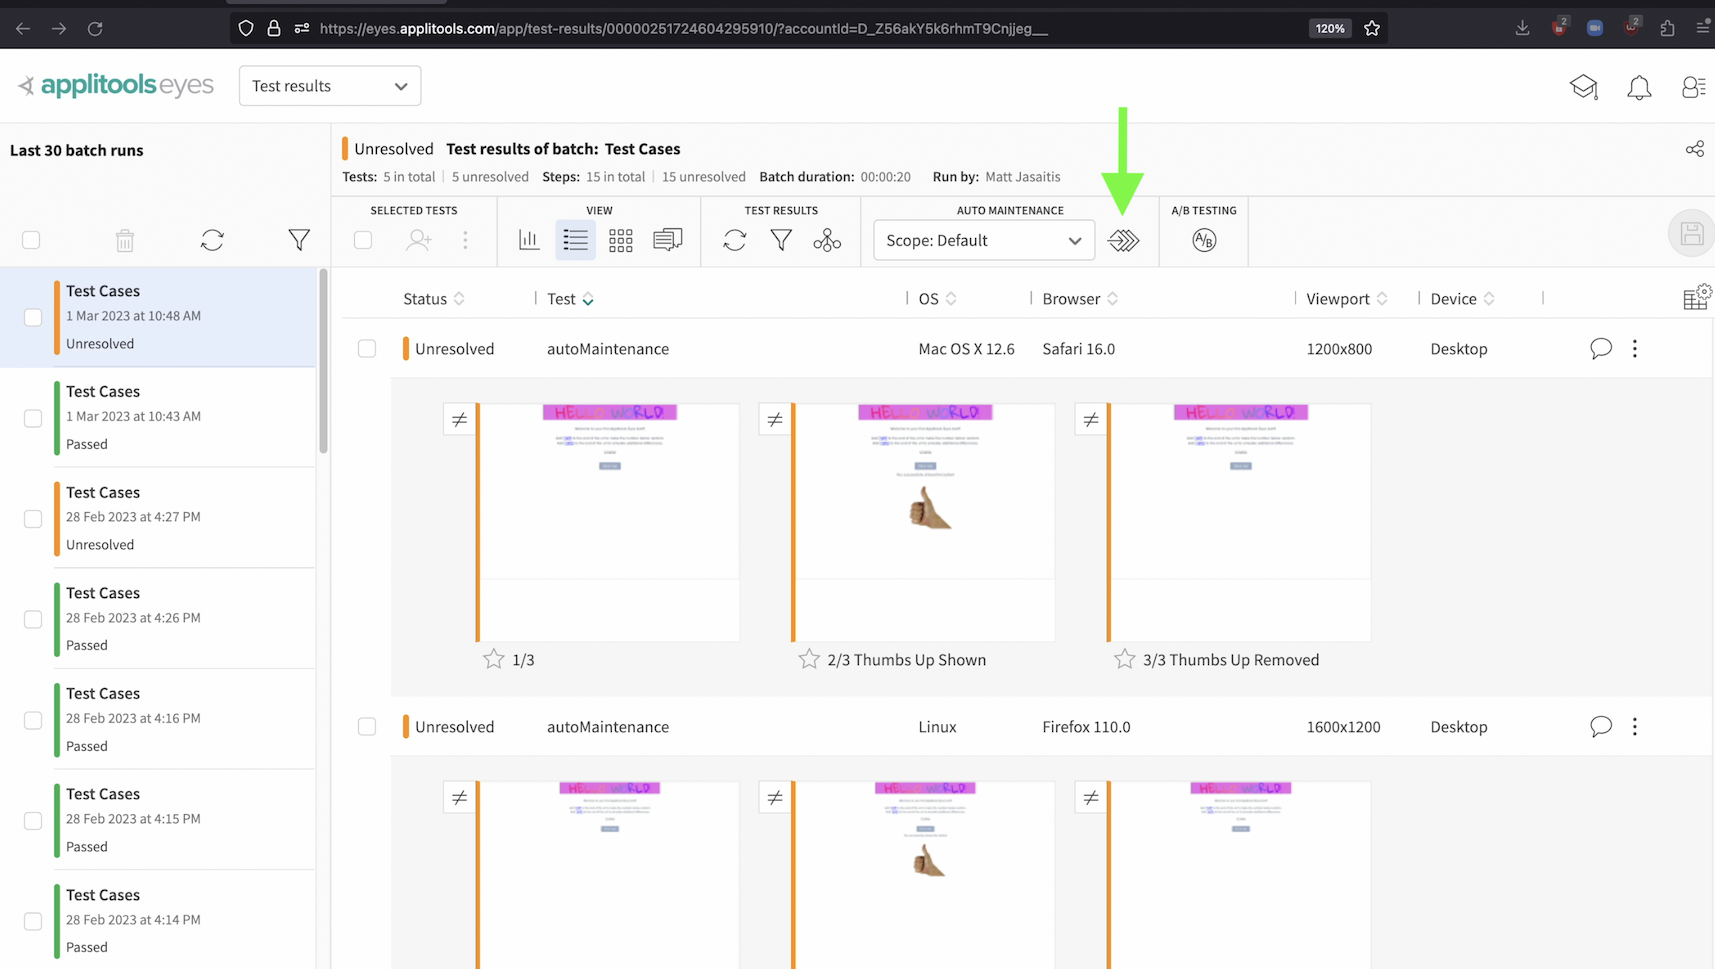
Next, click on this button here which will group the screenshots by similar differences.
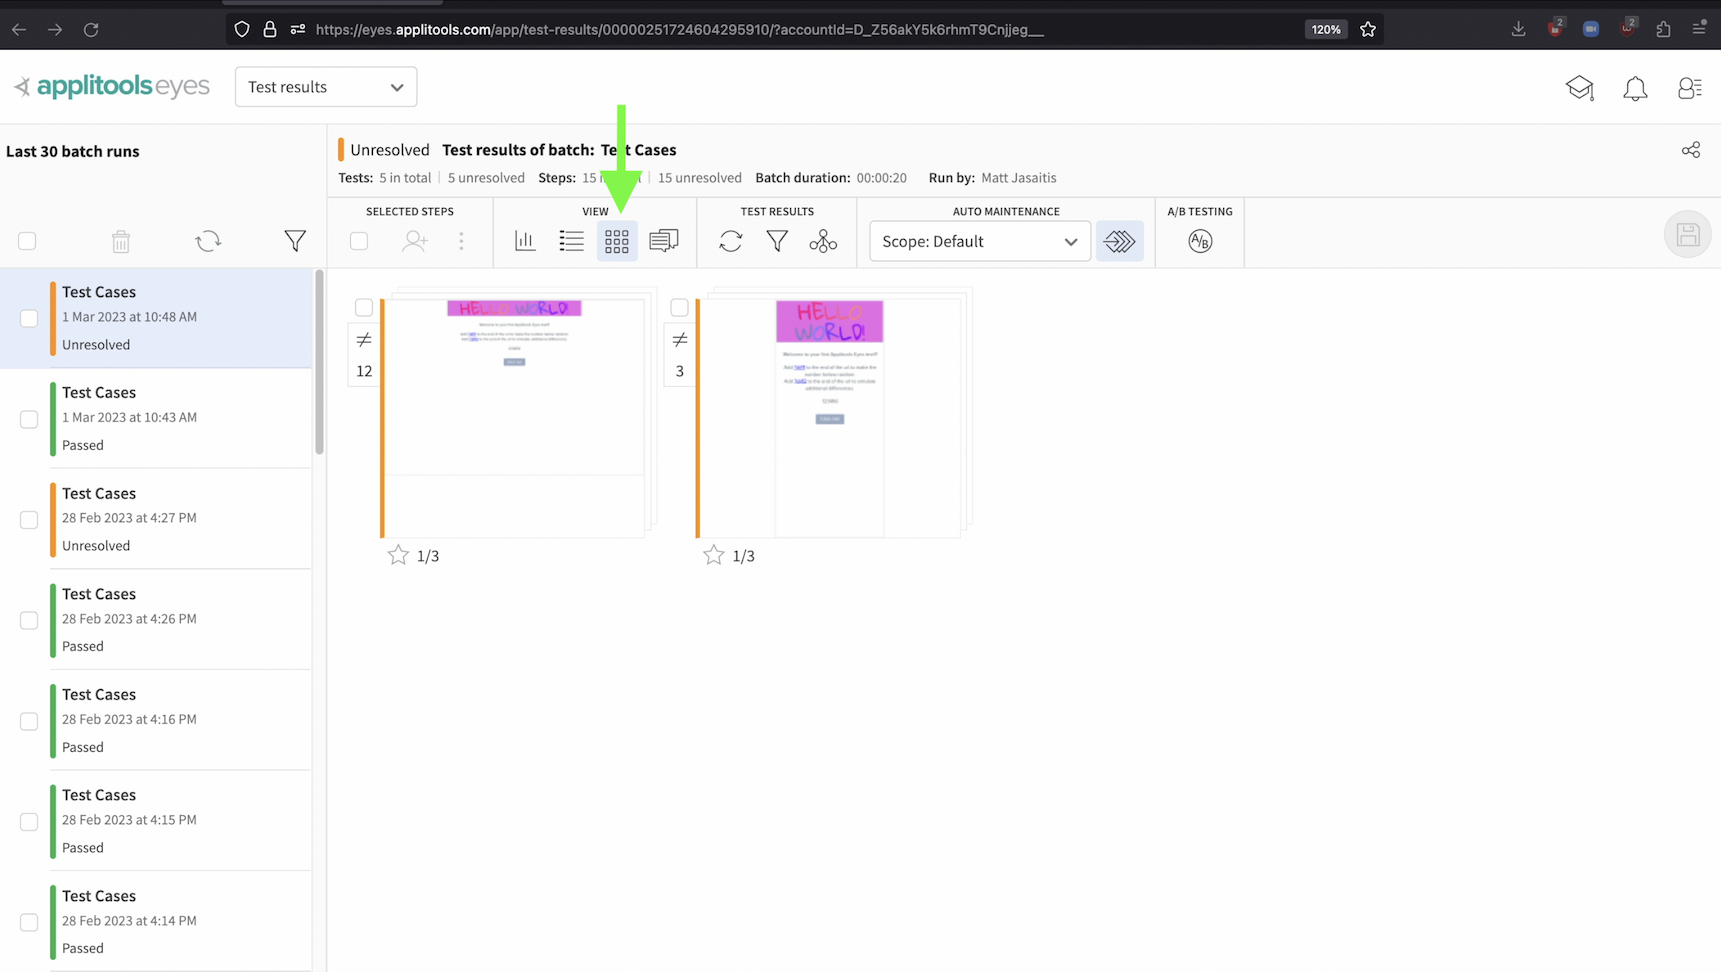
After running the auto maintenance algorithm, our test results have been grouped into 2 groups based on their differences. I've chosen the grid view using this icon here to clearly show our groups. The first group covers the desktop environments and we can see that the Hello World is all on one line. and the 2nd group covers the mobile environments where the Hello World is on 2 lines. Now, all we need to do is review 2 differences instead of 15.
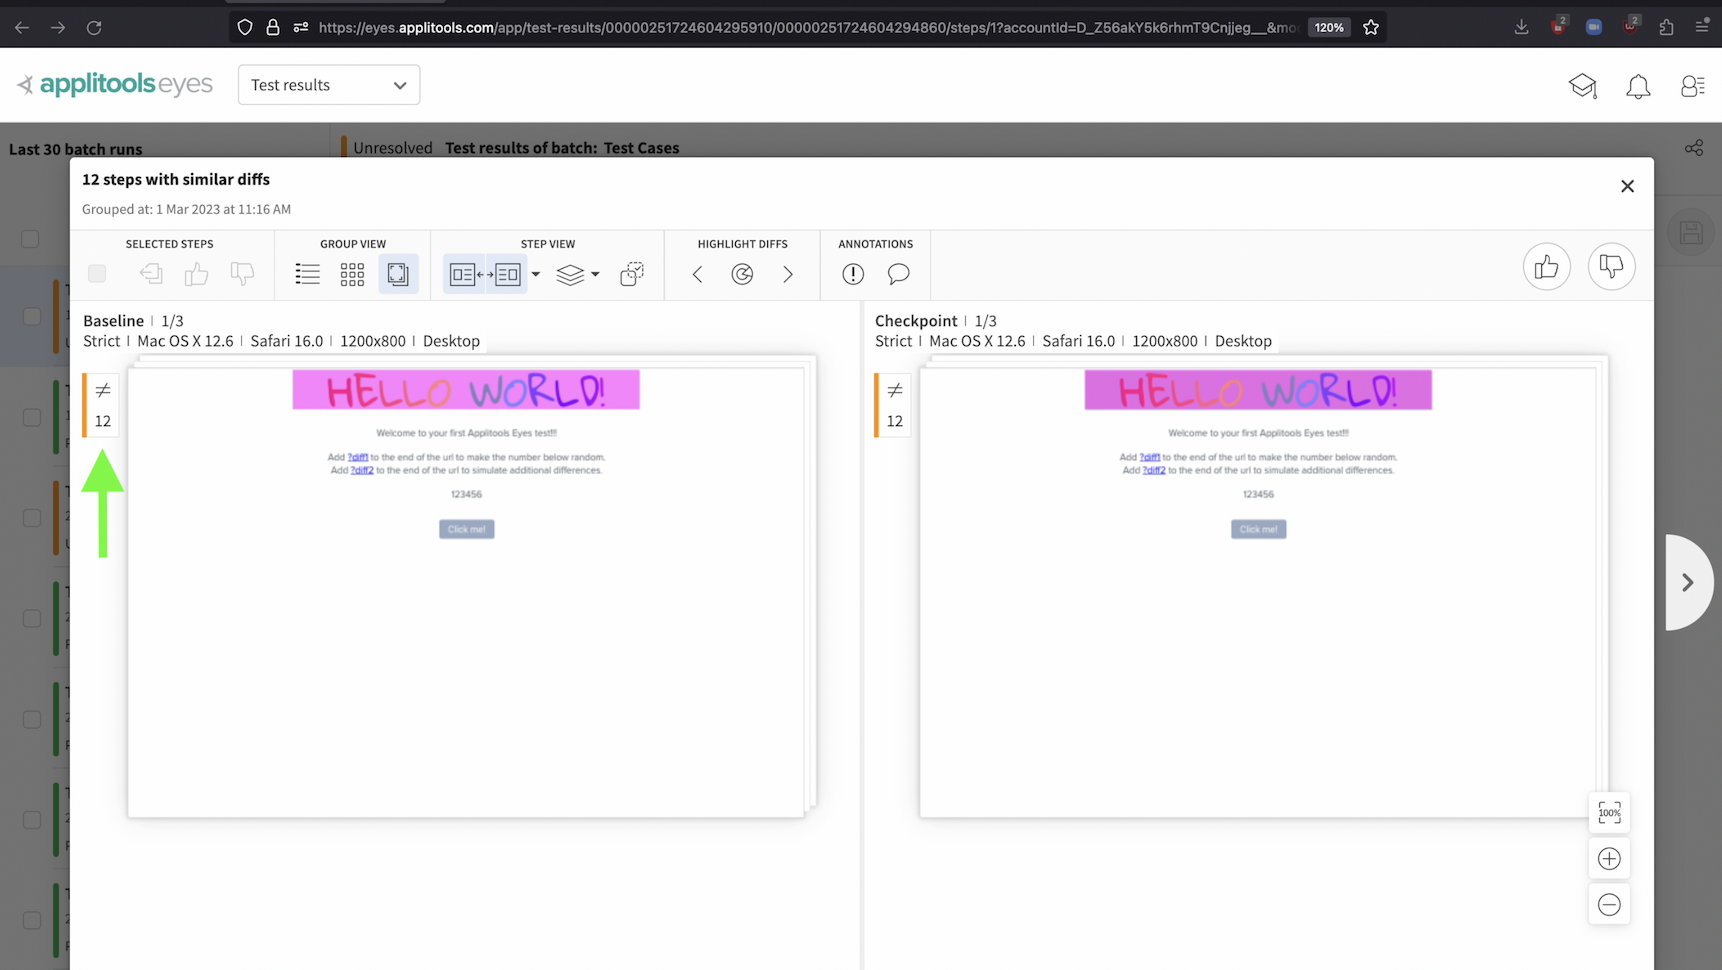
Selecting a group brings us to this familiar screen where we can see the comparison between the baseline and the checkpoint images. Notice on the left, we now have a number indicating how many tests are in this group. We can perform similar actions like toggling between this and the baseline image, removing the differences and more.
We can also look at individual steps by selecting the list view or the grid view using one of these icons here.

We can then choose to exclude a step from our group using this button.
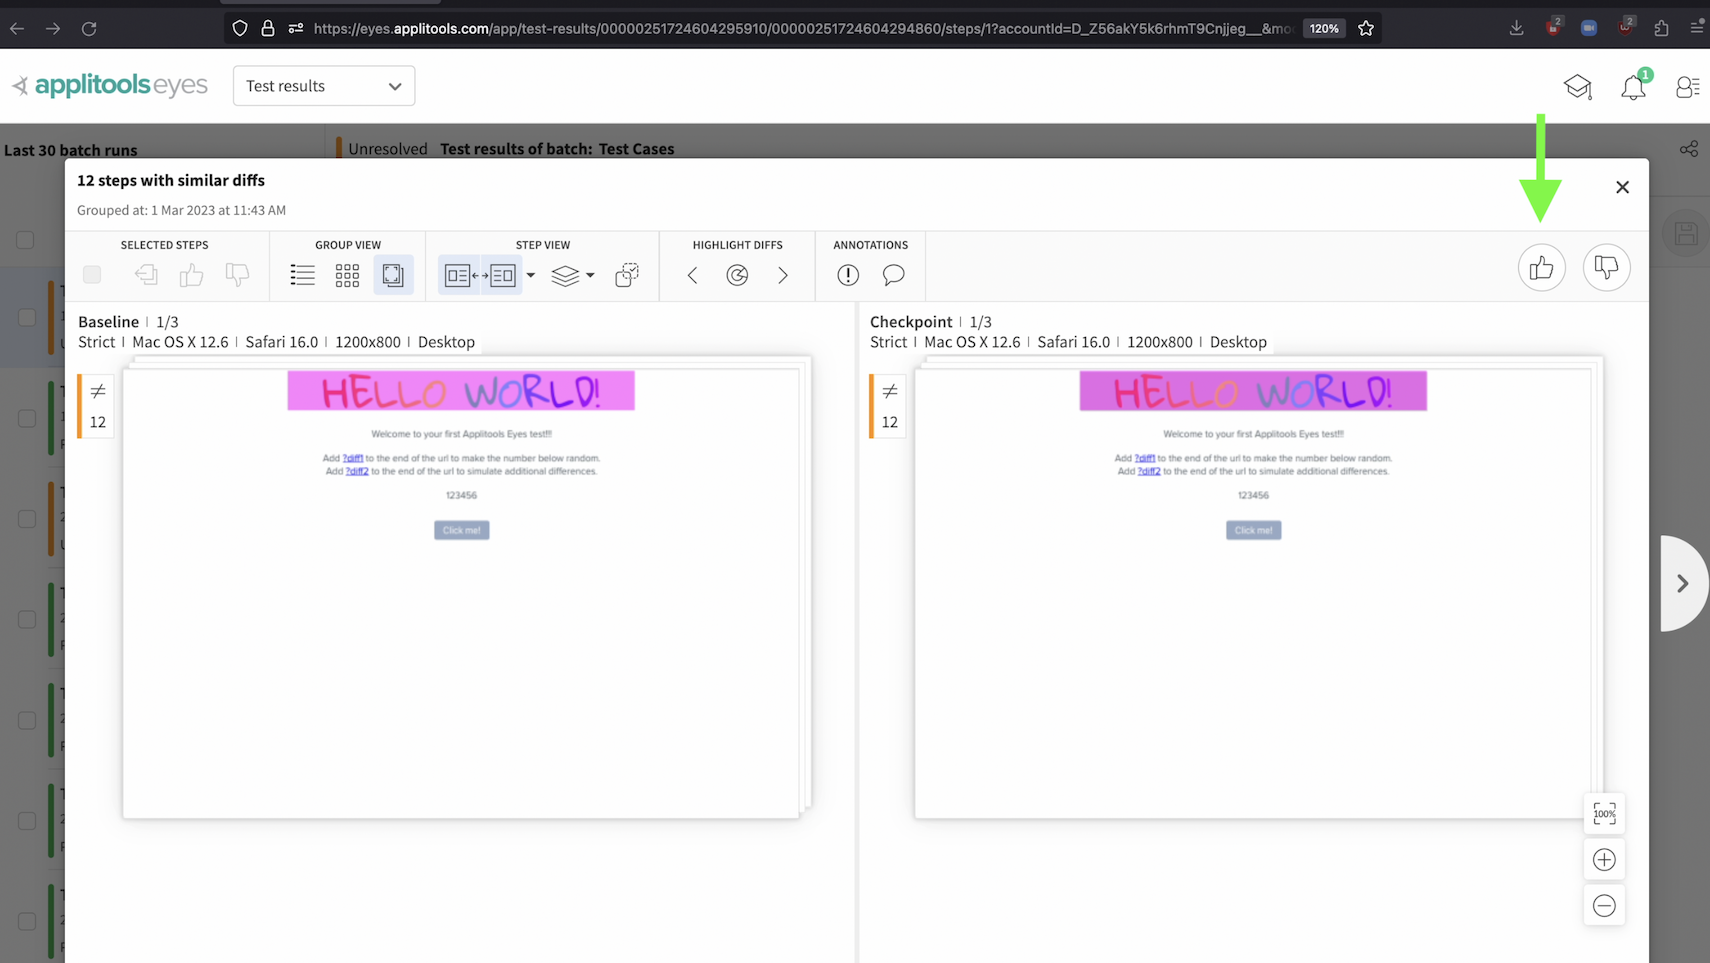
When we're done reviewing, we can press the thumbs up button in the top right as if we were reviewing a single test.
After clicking the thumbs up button, we'll be taken to our next group, the mobile viewports, where we can perform the same review steps.

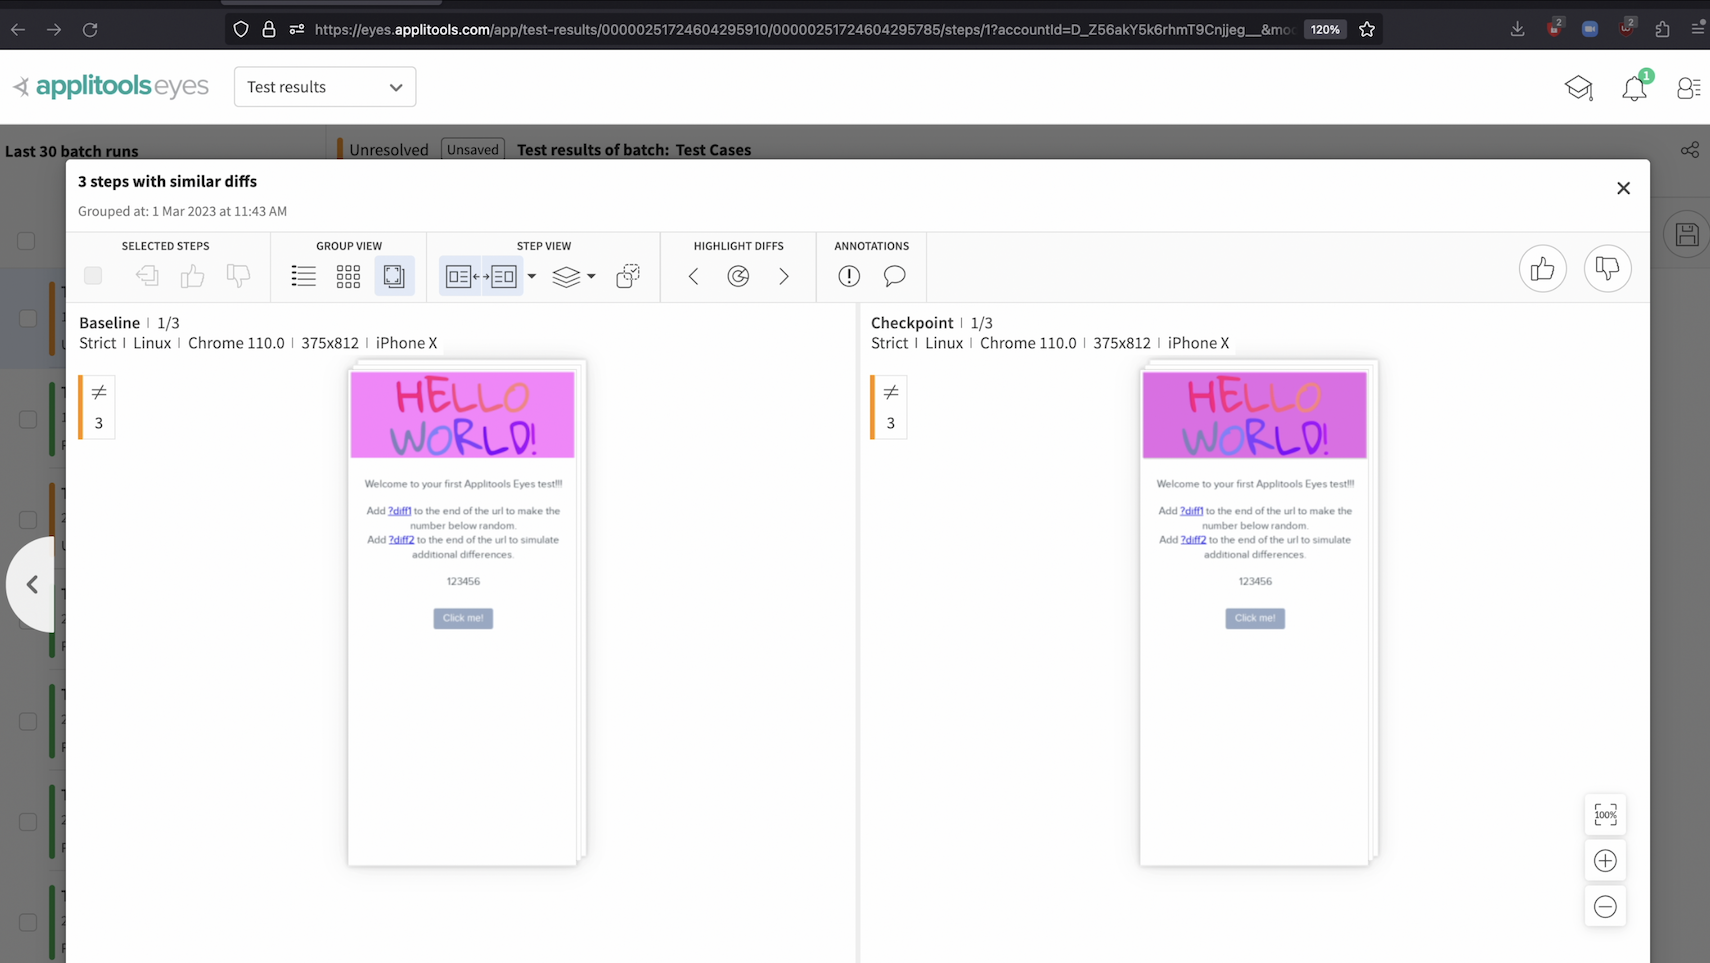
After clicking thumbs up again, we left that window and then we can click the save button in the top right to persist our changes. We now see that all 15 of our test results have been successfully reviewed and approved yet we only had to look at 2 screenshots. Imagine how much time you could save at scale when you have 100s of screenshots to review where the only difference was the navbar changing colors. Without auto maintenance, it would take you hours to go through all of those results individually and you might even miss some important bug that was flagged by the Applitools Visual AI due to rushing through it.

One key thing to note about the auto maintenance algorithm is that it will only group results if the differences are exactly the same. For example, in this case, I ran another example where each of the 3 screenshots has a green, red or blue button. The first group are desktop screenshots that have the green button. The 2nd are desktop screenshots that have the red button and the third are desktop screenshots that have the blue button. Followed by the mobile groups with the same pattern. This shows that you can trust the auto maintenance algorithm to accurately group test results that are the same and separate test results that are different. You can confidently perform bulk actions without needing to worry about something being missed.

Let's say that instead of approving these results, we'd rather add a region to the area that is throwing a difference. In this case, we would want to use an ignoreColors region because the header background changed colors and maybe we assume that this can happen from time to time. Without auto maintenance, we'd need to add this region manually to all of the steps which would not only be time consuming but we'd also end up with regions that are different sizes and in slightly different locations. Instead of doing that, let's select one test result and add our region there.
To add an ignore colors region, click on this arrow button here.
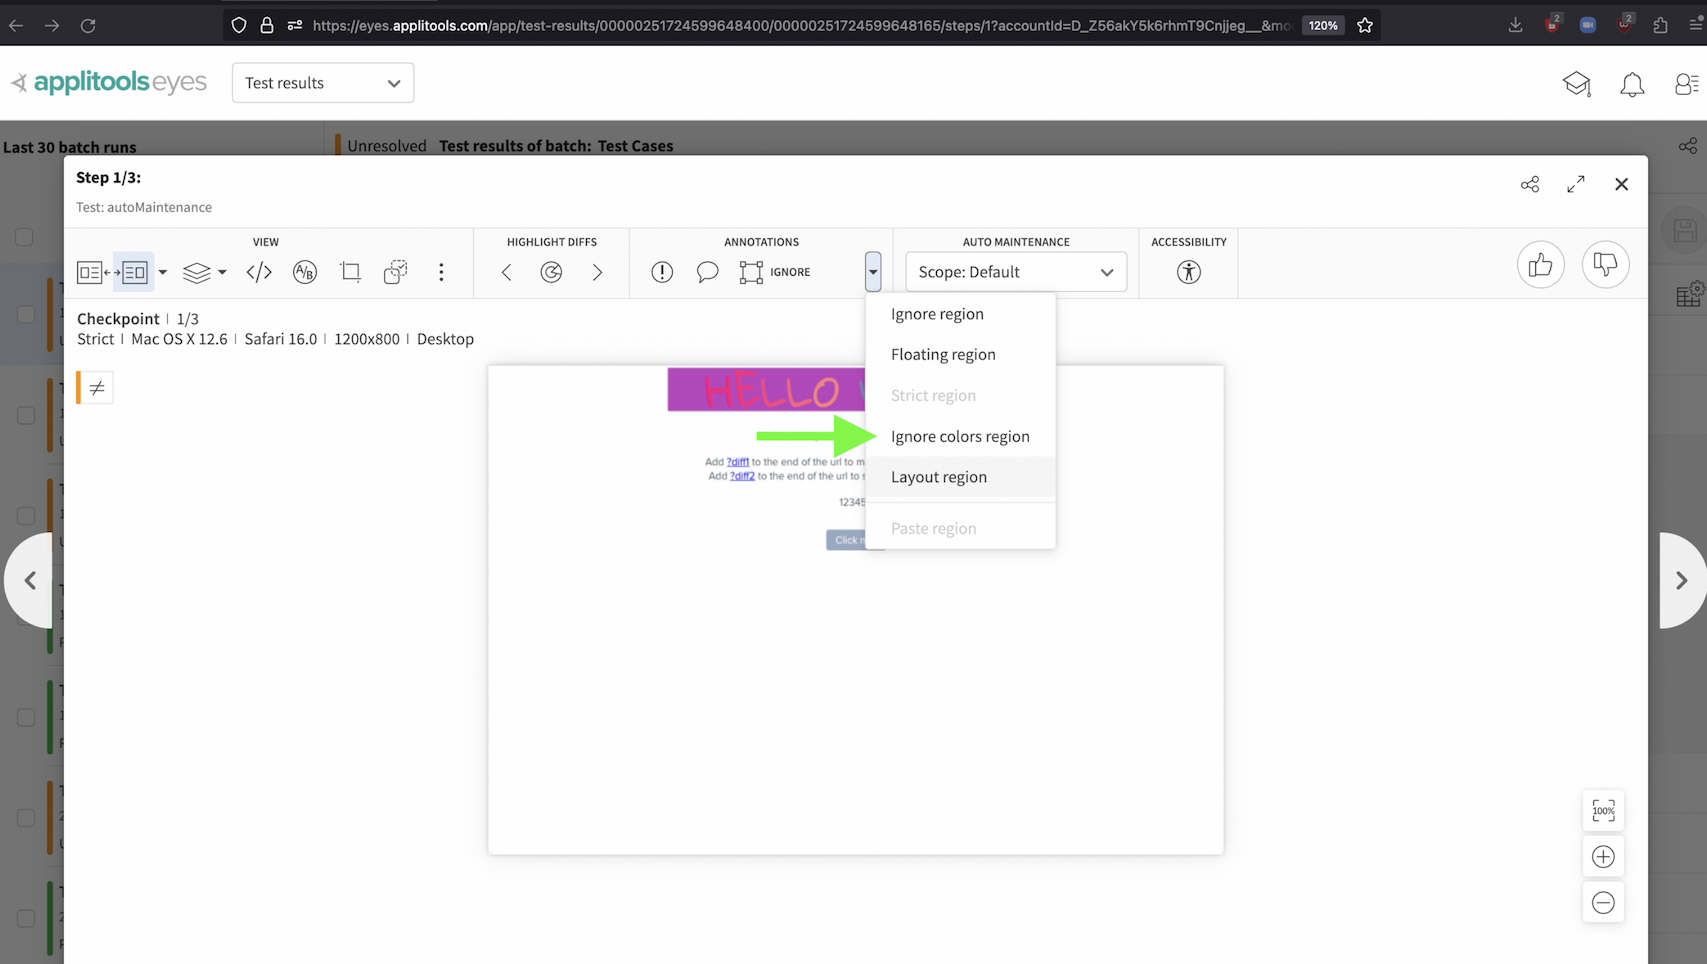
Then, select ignore colors region from the dropdown.
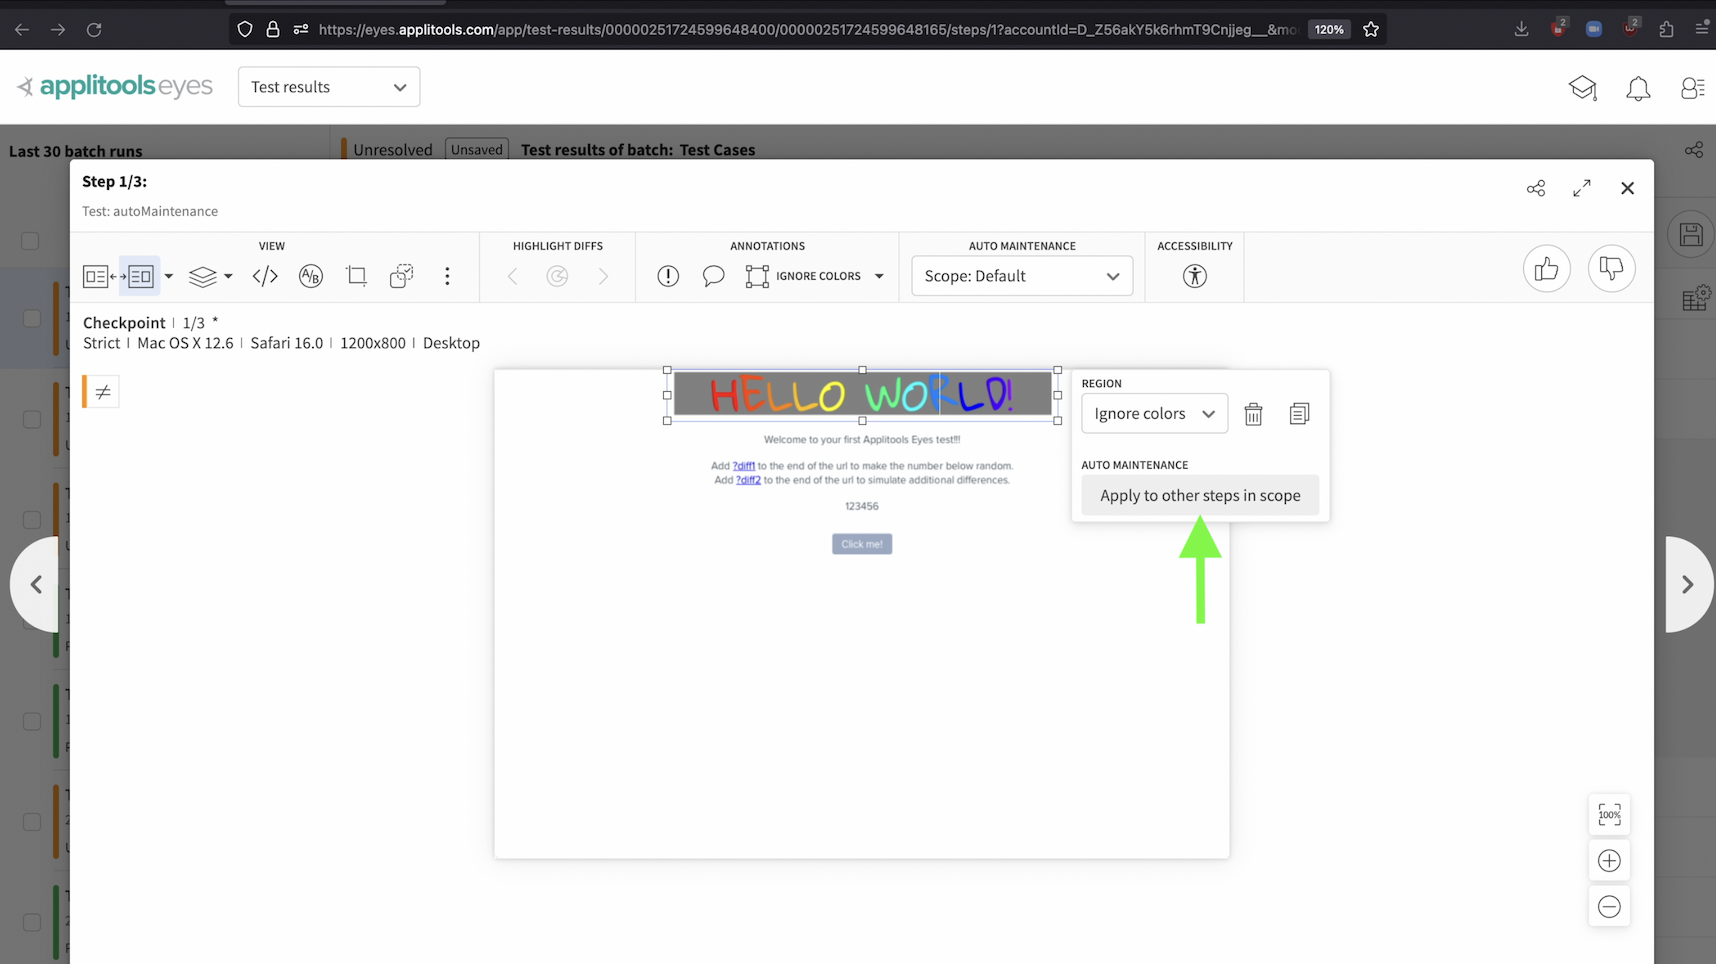
Finally, use your mouse to drag a square around the desired region.
After adding our region, we can click this button here that says "Apply to other steps in scope". Auto maintenance will then kick in and apply this region automatically to the rest of our tests that have the same difference.

After clicking that button, if we look at any of our other desktop test results, we'll see that the region has been automatically applied by auto maintenance. All that's left is to perform the same action on one of our mobile environments and we'll be good to go. Instead of having to create 15 different regions, auto maintenance allowed us to create 2 regions that were automatically added to similar test results.

To review, the auto maintenance algorithm provided by Applitools will analyze the differences in your test results and will allow you to take bulk actions where possible, saving you a ton of time. Imagine if we had 100+ screenshots that we wanted to apply a region to or that had similar differences to review, It would take us hours to get through them all and it would be very repetitive. With auto maintenance, it is possible to cut this time down to a few seconds.
