

Transcripted Summary
Accessibility testing is an important aspect of your test suite that ensures your web pages are accessible to all visitors. There are existing tools out there that provide accessibility checks by analyzing the DOM of the page but these are severely limited and can also result in unnecessary failures.
Applitools offers a built in Accessibility Testing tool called the Contrast Advisor that integrates directly into your existing Applitools automation tests. In this chapter, we're going to provide a high level overview of how the Applitools Contrast Advisor works, show you how to integrate it into your tests and then review the results on the Applitools Test Manager.

As mentioned, the Applitools Contrast Advisor is integrated directly into Applitools SDKs as well as the Applitools Test Manager. It uses a Visual AI algorithm that analyzes your screenshots and automatically identifies interesting elements to check and determines if it's a text element or graphical element. It then measures the contrast ratio for this element against the background and reports a contrast score. Based on the selected standard that you're testing against, this check will pass or fail. Then, all of these checks can then be easily reviewed within the Applitools Test Manager alongside your other automation test results.

The following standards and levels are available to you for testing:
- WCAG 2.0
- WCAG 2.1
- Levels: AA, AAA
The Applitools Contrast Advisor has many advantages over traditional DOM Analyzer tools. Firstly, only elements that are visible are checked. This helps prevent failures from elements that users won't see on the screen.
Also, the Contrast Advisor Algorithm is smart enough to detect text within image elements. This is something that is not possible in traditional DOM Analyzers as they're only able to check the image element as a whole and not the individual components of the image themselves.
Lastly, the Contrast Advisor works for native mobile applications as well which don't have a DOM to analyze.

I've made some changes to our test in order to run an Accessibility check. Firstly, I've added this line to our configuration object. I am calling the setAccessibilityValidation function and passing a new AccessibilitySettings object to it. Within this Accessibility Settings Object I set our Accessibility level to AAA and the Standard to WCAG 2.1. Feel free to change the level and standard on your end if you'd like.

Alternatively, you can set the Accessibility settings within the eyes.check() function as shown here. Setting the accessibility settings here gives you more control over which tests perform an accessibility check and which don't. Either method is fine and it depends on your desired use case.
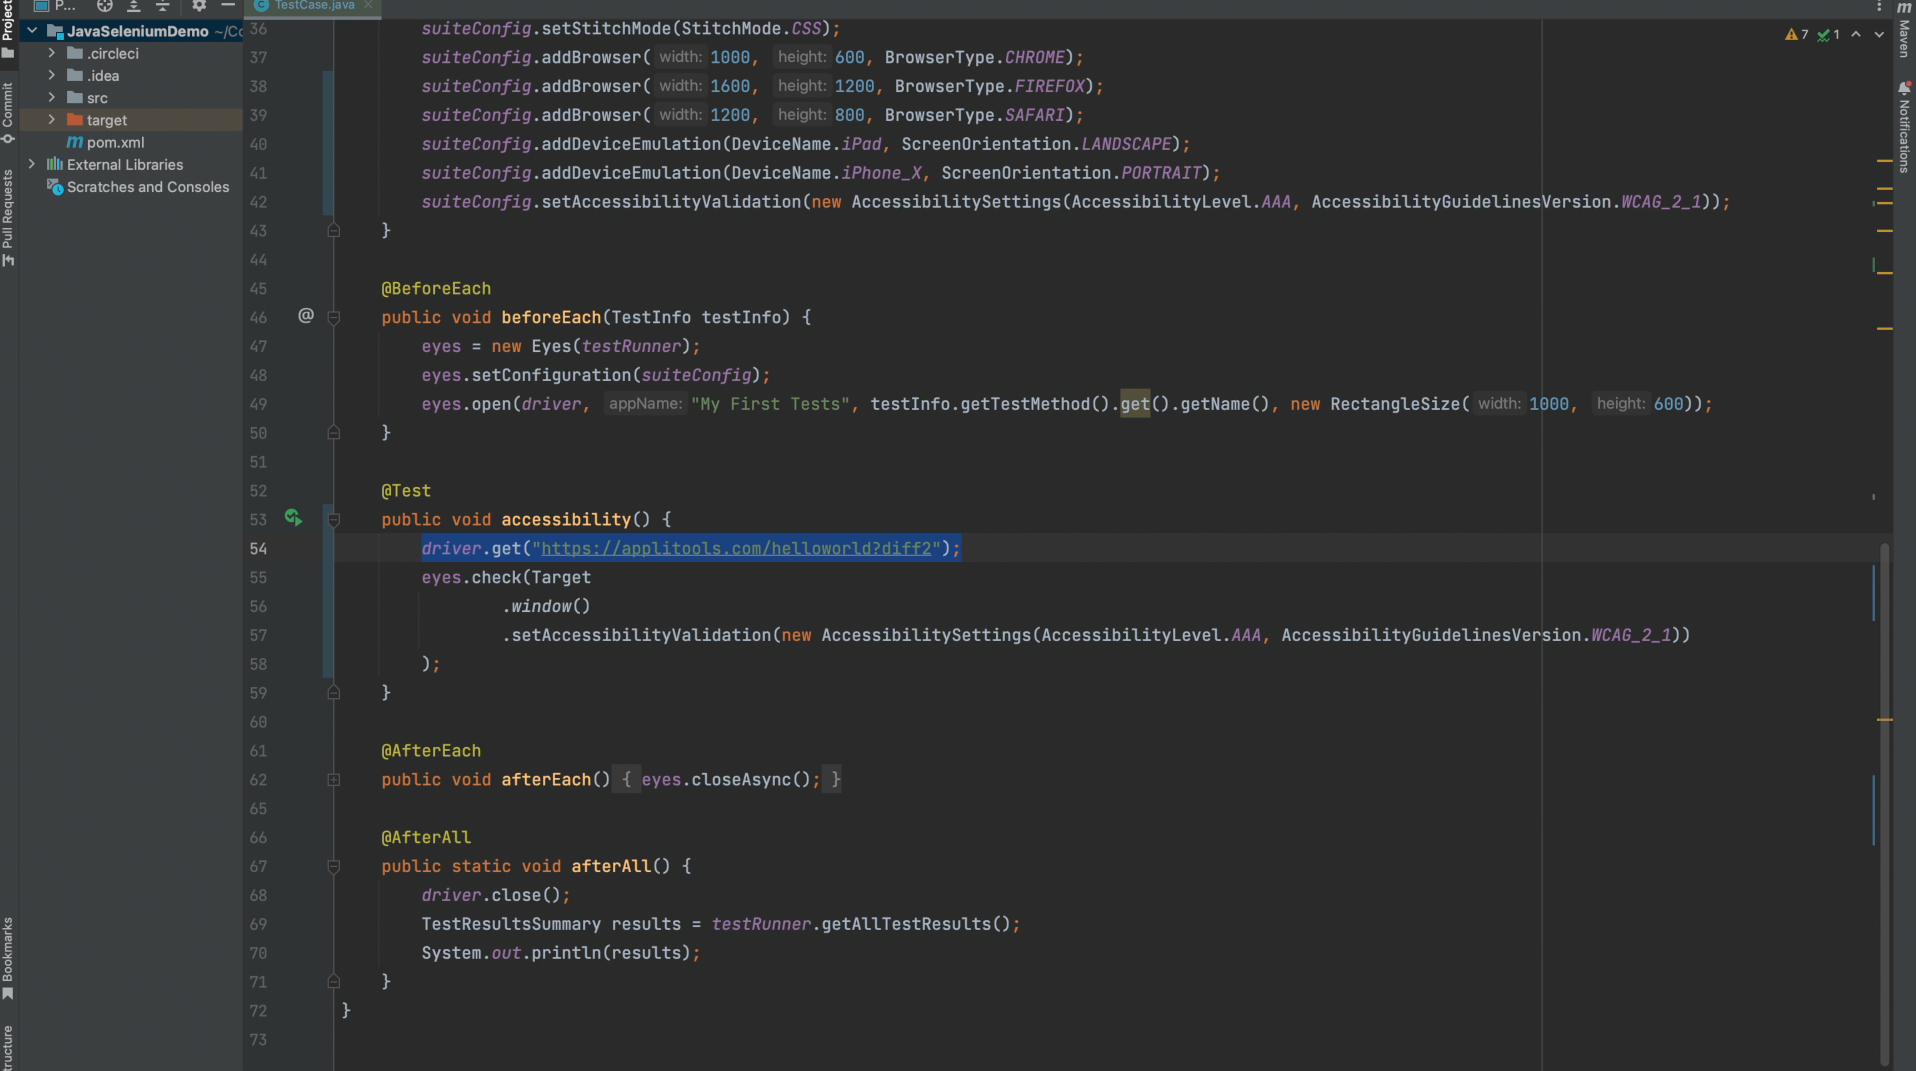
I've also changed the URL that we're testing to the diff2 version of the hello world page.

Finally, I once again changed the test name so that we get a fresh baseline. Let's now run this test and review the results.
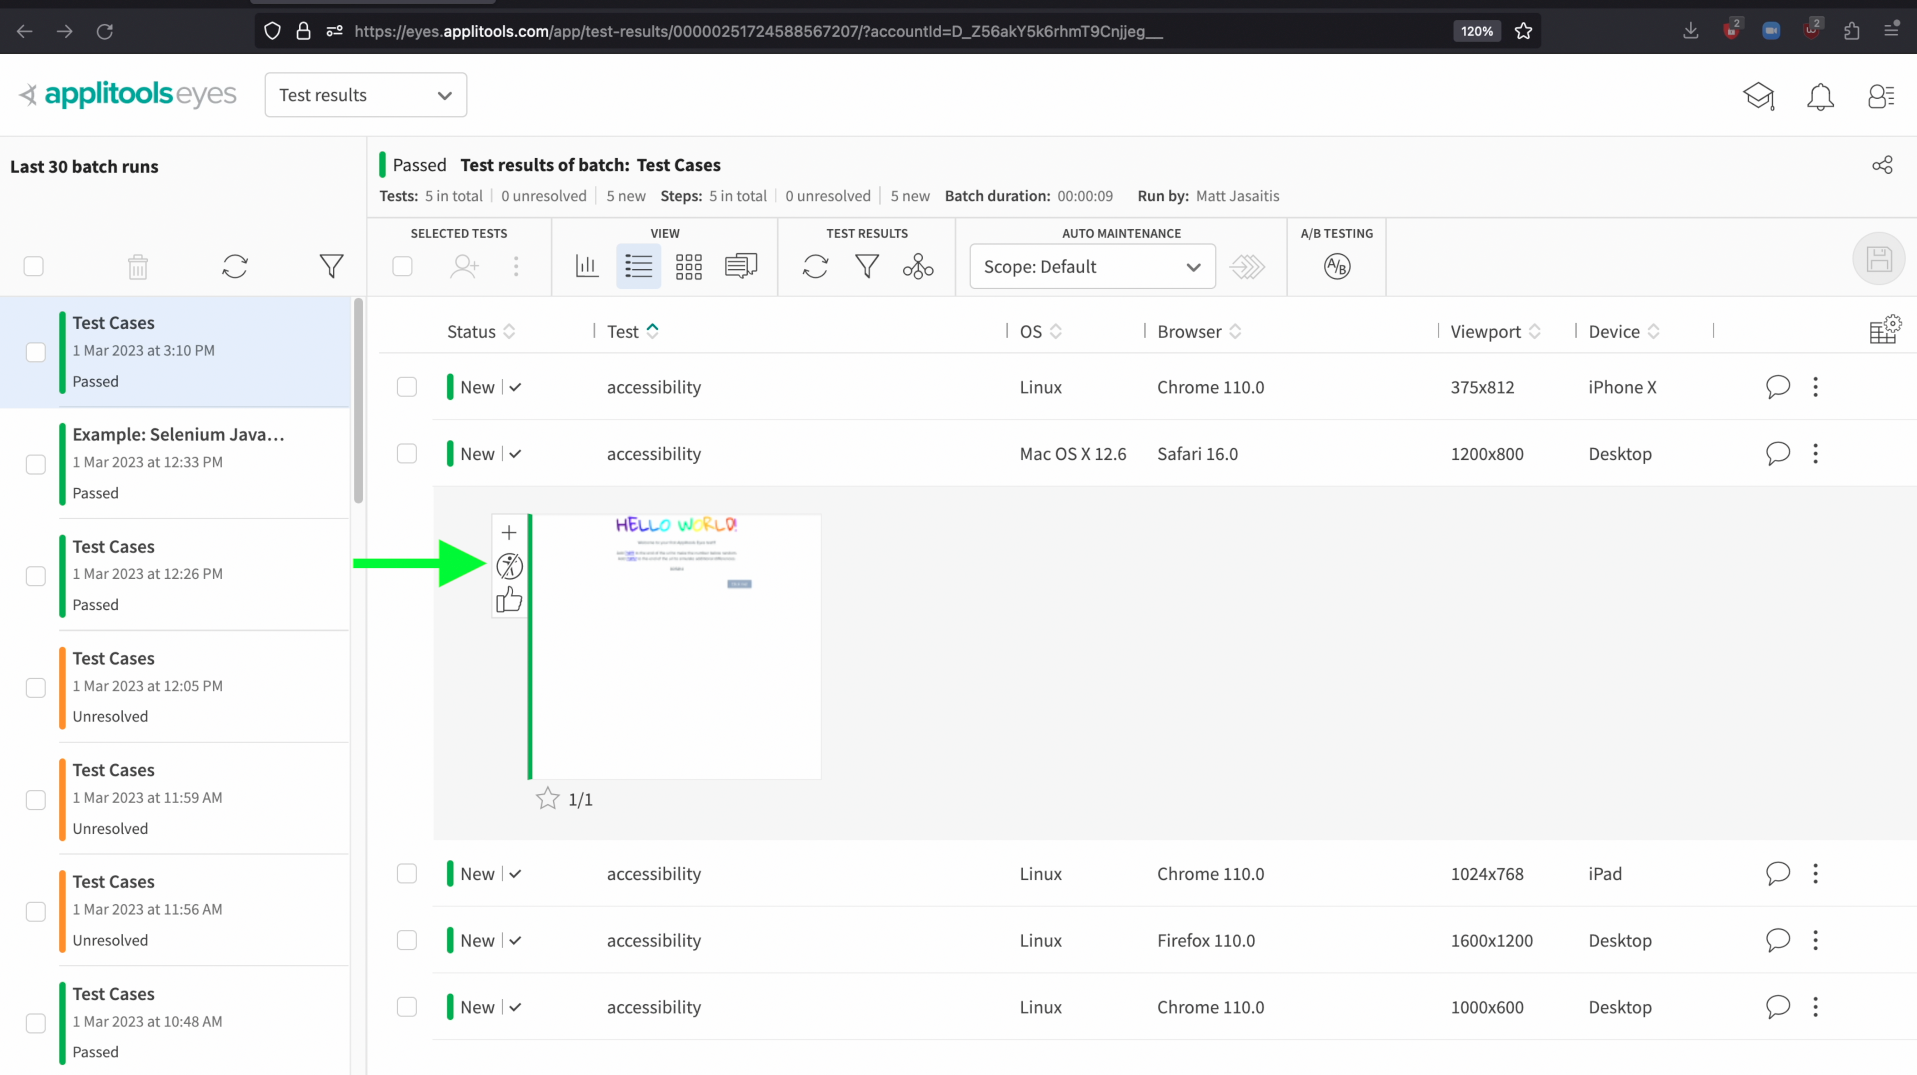
On the Applitools Test Manager, we now see that our screenshot thumbnails have an accessibility icon next to them. This icon will indicate the status of the accessibility check configured in our code. In this case, we notice that it indicates the Accessibility checks did not pass. Let's click on one of our tests and take a closer look.
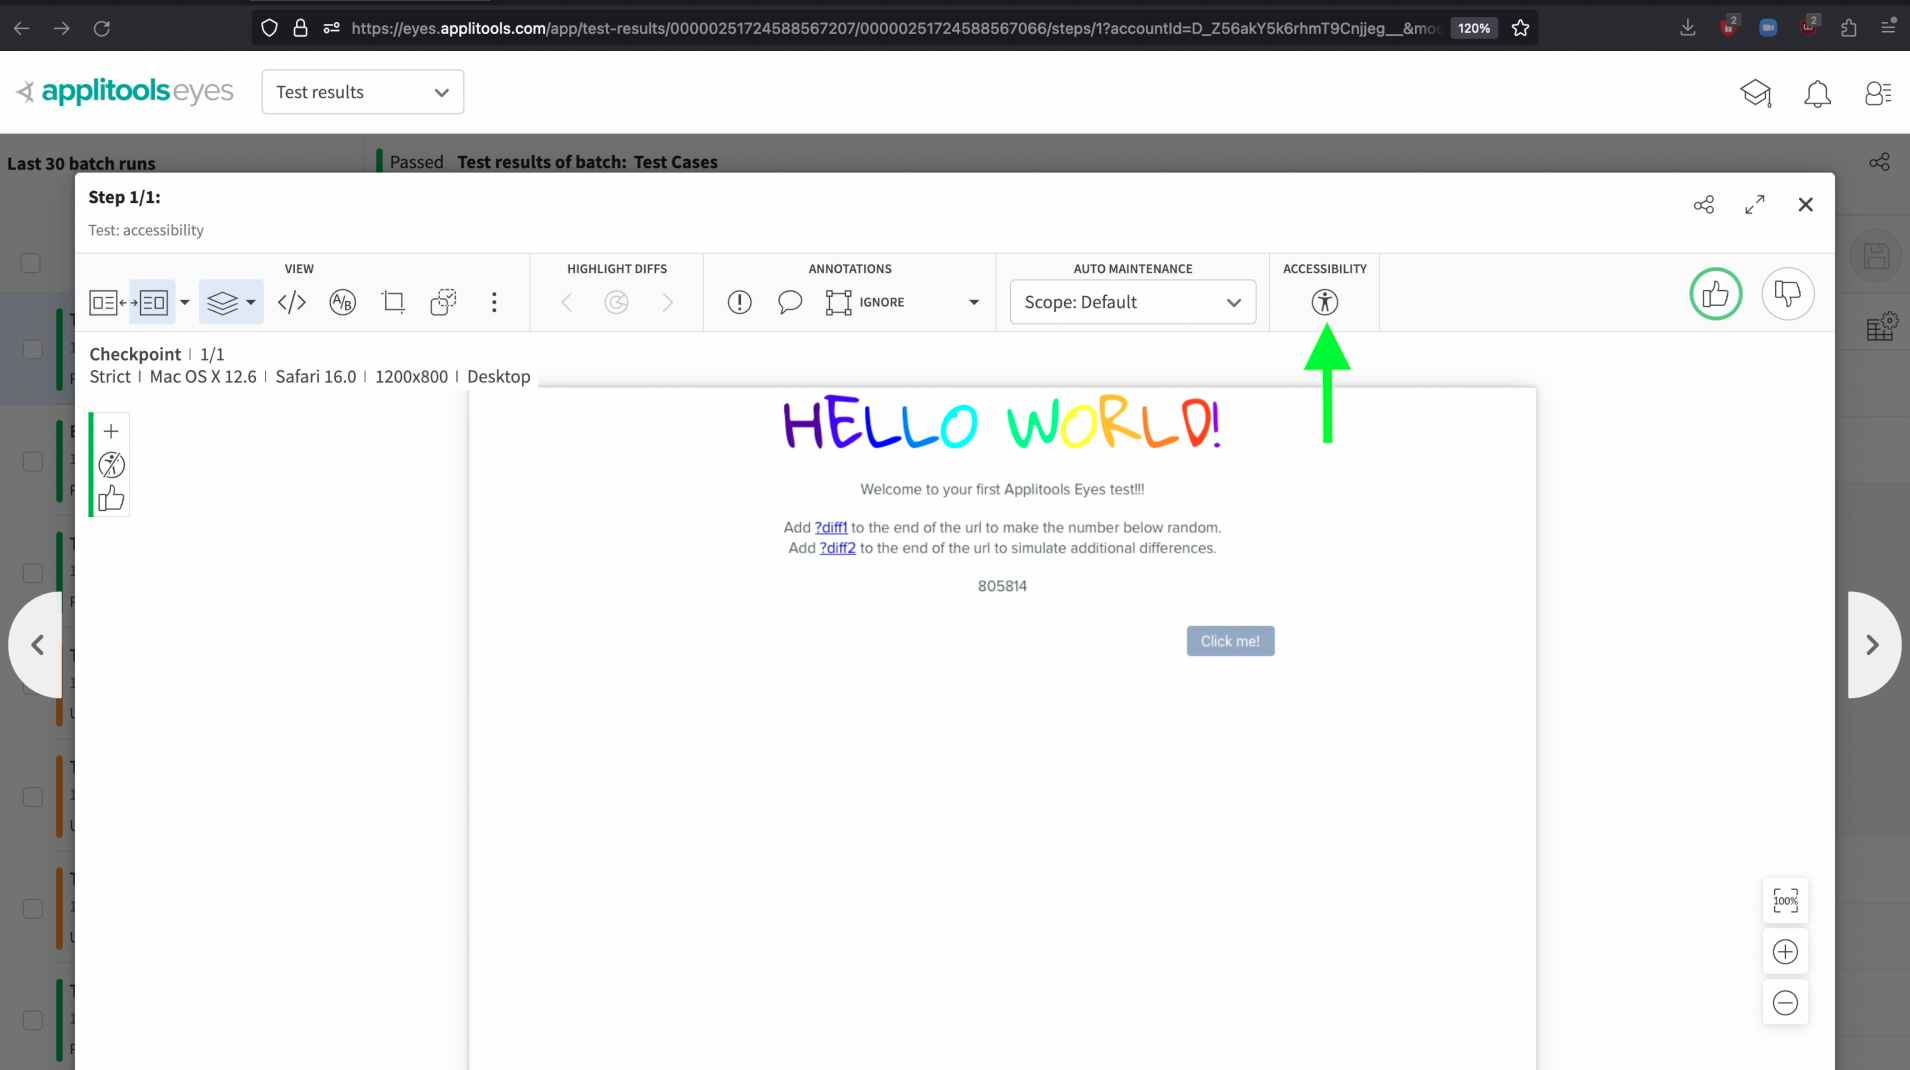
To view the Accessibility check results, click on this icon here.
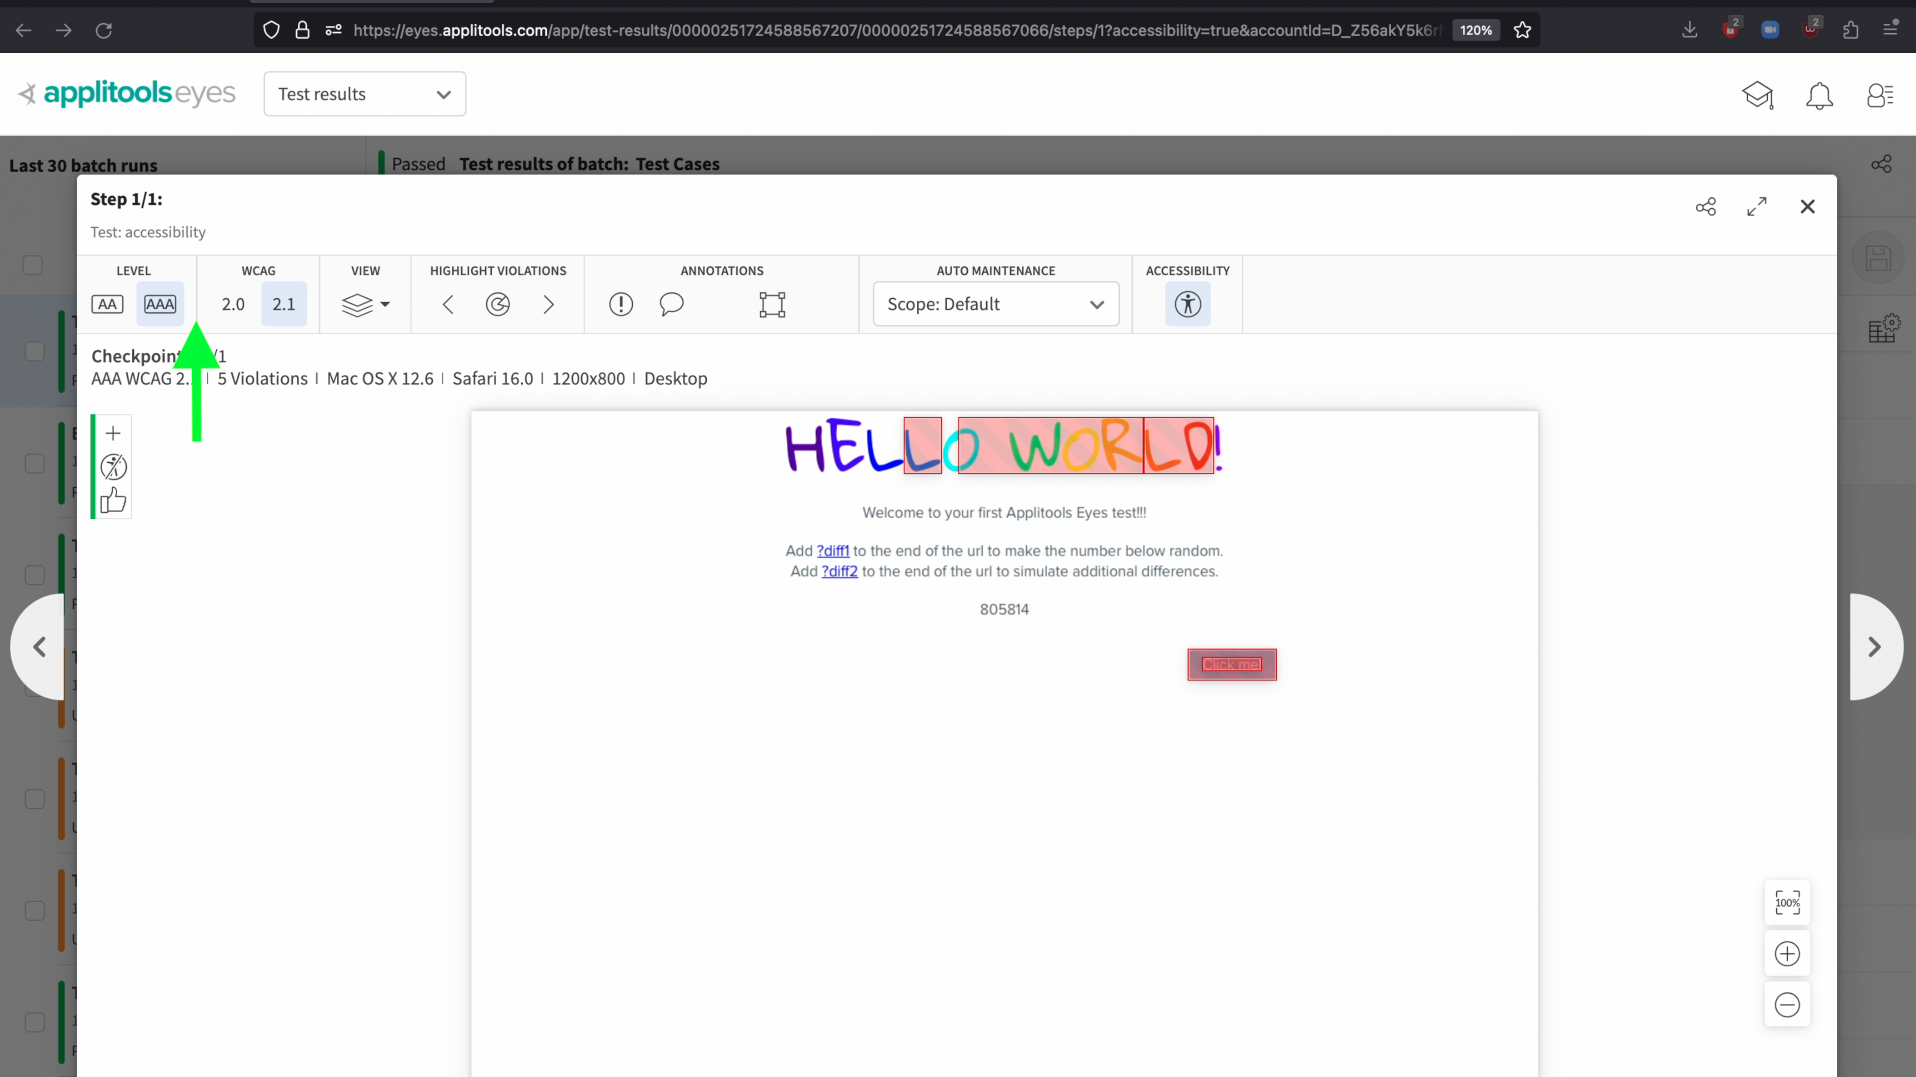
On this screen we can see the level and standard that we've chosen in the top left. We're also able to select a different level or standard if we'd like. On the screenshot itself, The elements that are highlighted in red are where our accessibility checks did not pass. We can see how the lighter colors of the header did not pass the contrast checks whereas the darker colors in the header did pass.

If we hover over an element on the page, we can see more details about the accessibility check. The popup will indicate what type of element this was classified as, what the contrast score was calculated as and what the expected score was based on the level and standard selected.

In addition to the automatic detection and analysis of the elements by the Applitools Contrast Advisor, we're also able to add our own custom Accessibility regions. To add an accessibility region, click on this icon here.

Then, using your mouse, drag a square around the region you want to focus on. In my example, I added a region around this section.
Now, we see there's a dropdown option with a number of options. This is where we can tell the Applitools Contrast Advisor how exactly we want to analyze this region. We can classify it as text or as a graphical object. We could also choose to ignore this section altogether and prevent accessibility checks from running here.
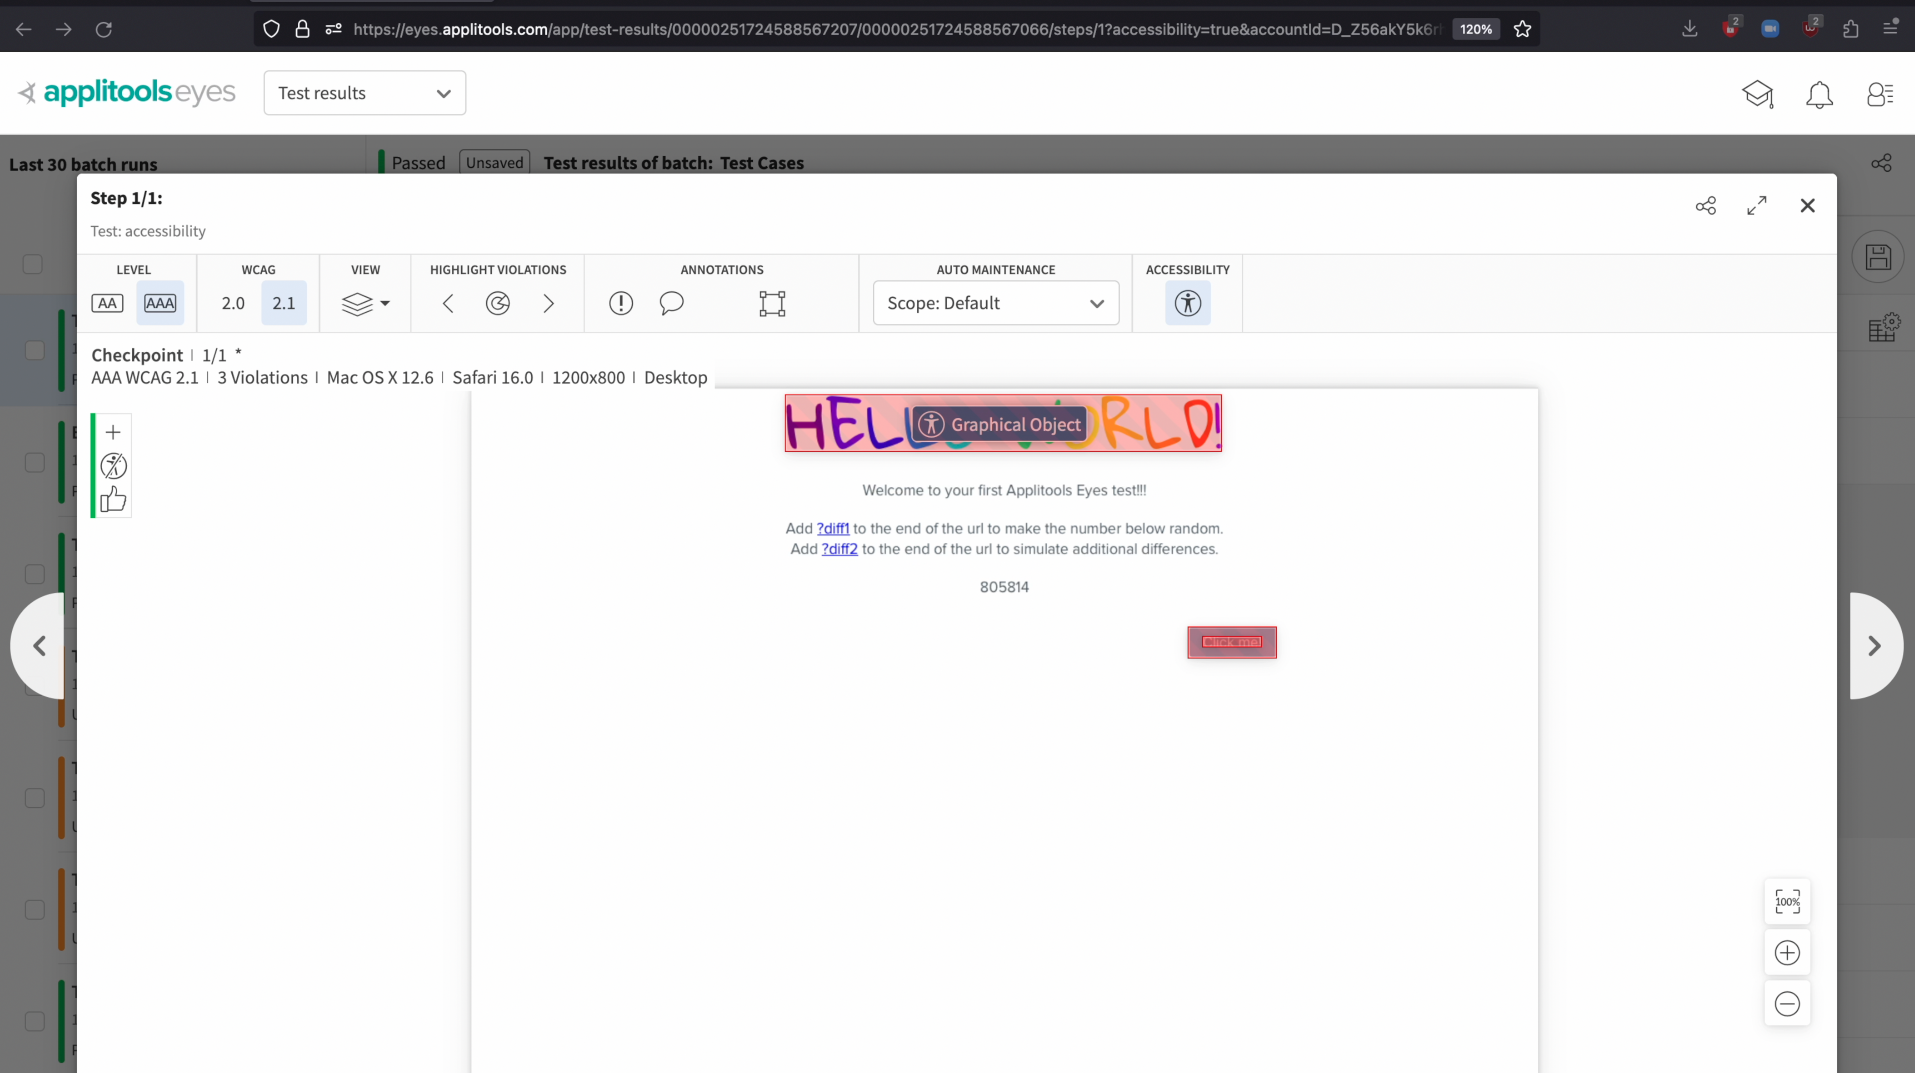
In this case, I wanted to classify the Hello World header as one large graphical element instead of text elements. I selected the Graphical Object option from the dropdown and once done, the contrast score was recalculated.

As a side note, just like other types of regions, accessibility regions can use Auto Maintenance to be automatically applied to other tests in this batch like we saw in chapter 3. Feel free to take advantage of this on your end.

We can also add accessibility regions from the Applitools SDK. I've added this line to my eyes.check() function which calls the .accessibility function. This function takes in a By Selector representing the webElement we want to wrap our region around as well as the type of region that should be applied. In this case, it's a GraphicalObject but feel free to select a different option from the Enum if you'd like. Let's run this test and review the results.

As we can see, we're now automatically wrapping this header in an accessibility region and evaluating it as a graphical Object.

In addition to viewing the accessibility status and results, we can also filter our test runs based on the results of the accessibility checks. To do this, first select the filter icon.

Then, scroll down to where it says Accessibility. Here, we can find test results that passed, failed or were not checked. Let's see if any of our tests passed accessibility by selecting it from the dropdown options. Then, click the Apply button.

As we can see, none of our tests in this batch passed the Accessibility checks so no results show up. In practice, this feature allows us to quickly find test results based on their accessibility status.

In this chapter, we learned about how Applitools offers a built in solution for checking the Accessibility level of your web pages using the Contrast Advisor. We saw how to set this up in our code as well as how to review the Accessibility results on the dashboard. We then took it a step further and added some custom accessibility regions to our test run.
