

Transcripted Summary
In this chapter, we're going to be actually writing some application code.

We've written our unit tests. We've written our acceptance tests. Now we're at the bottom of the cycle, so we can start writing the code to make our tests pass.
Once we've done that, we can run our unit tests, which are running in the background.
We can run our acceptance tests, which are running in the background, and we can watch them go green, which is really exciting.
# Feature — Add Item to “To Do” List
The feature that we're going to add; we've got the input, right? So, we're going to add that to the value so that when someone adds an item to the list, the text will be added to the “To Do” list.
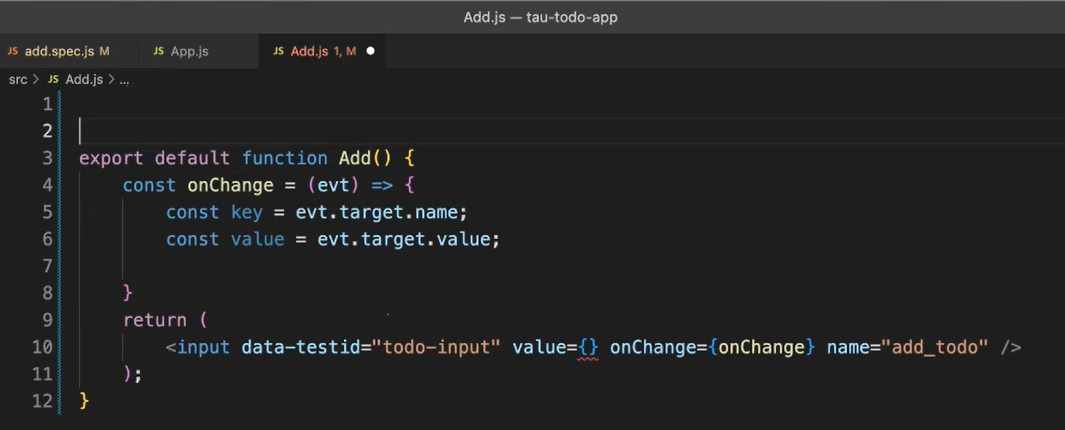
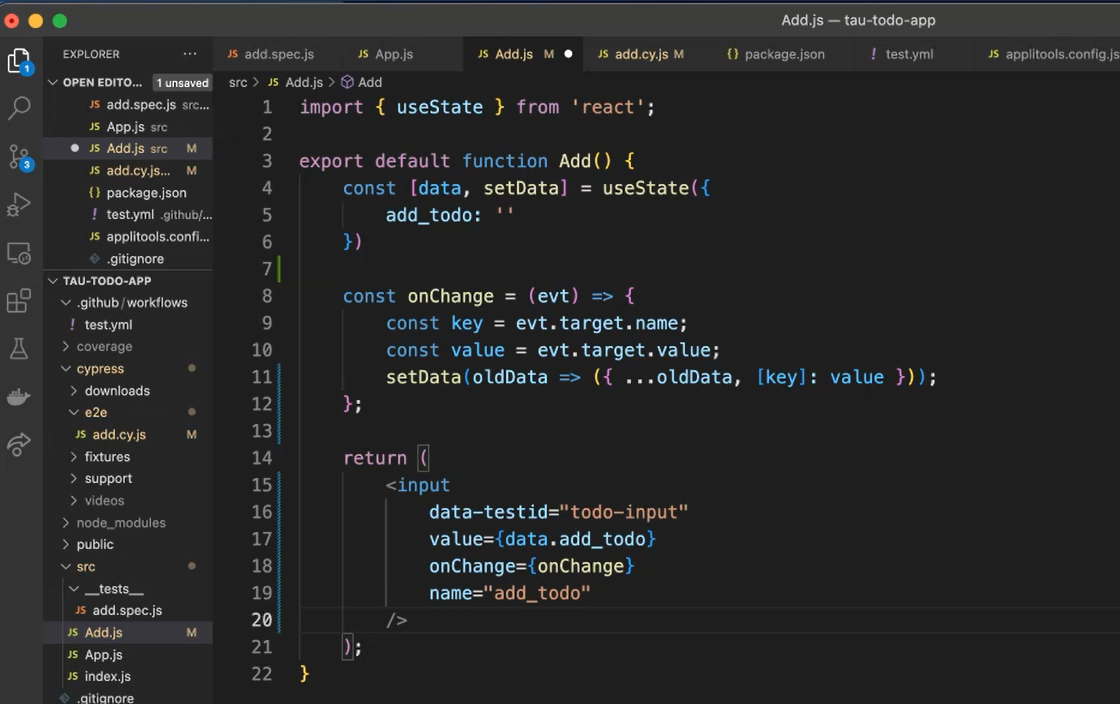
Let's go back to our blank Add component.
The first thing we want to do is we want to return, which we are going to use input with a value.
First, we want to do is add our data-testid, as this is used in all of our tests.
Then we're going to add a value which will take the data from our input, which we will add in a minute.
We need to make sure that we check for any changes for someone entering in the input, and we need to have a name to sync everything together. This will be "add_todo".
The onChange takes a function.

So, we need to add an onChange function.
This takes an event (evt). The evt returns us a key, which is the evt.target.name.
Then returns us a value, which is evt.target.value.
And we're going to then set that to the state of the component.
So, we need to add an import here to import { useState } from 'react';
We need to add in our state elements, which are going to be data and you have a setData state.
And the useState is going to have key, which is the “add_todo” which maps with our name, and it is going to be a String.
So, we've got that there. Now we need to set our data (setData).

We're going to take all of the data that already exists within the input already (oldData).
We're going to append the new data to it by adding in the key and the value. Make sure you wrap this as well.
So, we've now set our data.
import { useState } from 'react';

export default function Add() {
    const [data, setData] = useState({
        add_todo: ''
    })
    const onChange = (evt) => {
        const key = evt.target.name;
        const value = evt.target.value;
        setData(oldData => ({ ...oldData, [key]: value }))
    }
    return (
        <input data-testid="todo-input" value={data.add_todo} onChange={onChange} name="add_todo" />
    );
}
We can now use the state that we have already set and have our new to do item added to the input.
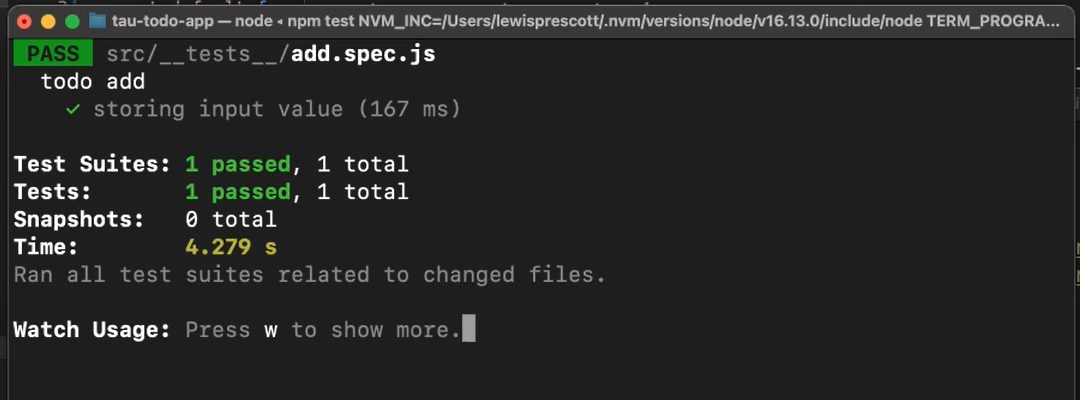
Now when we run our test, then the Jest section passes.
If we have a look at our Cypress test, as it's an end-to-end test, the page is still blank here.
It still can't find anything.
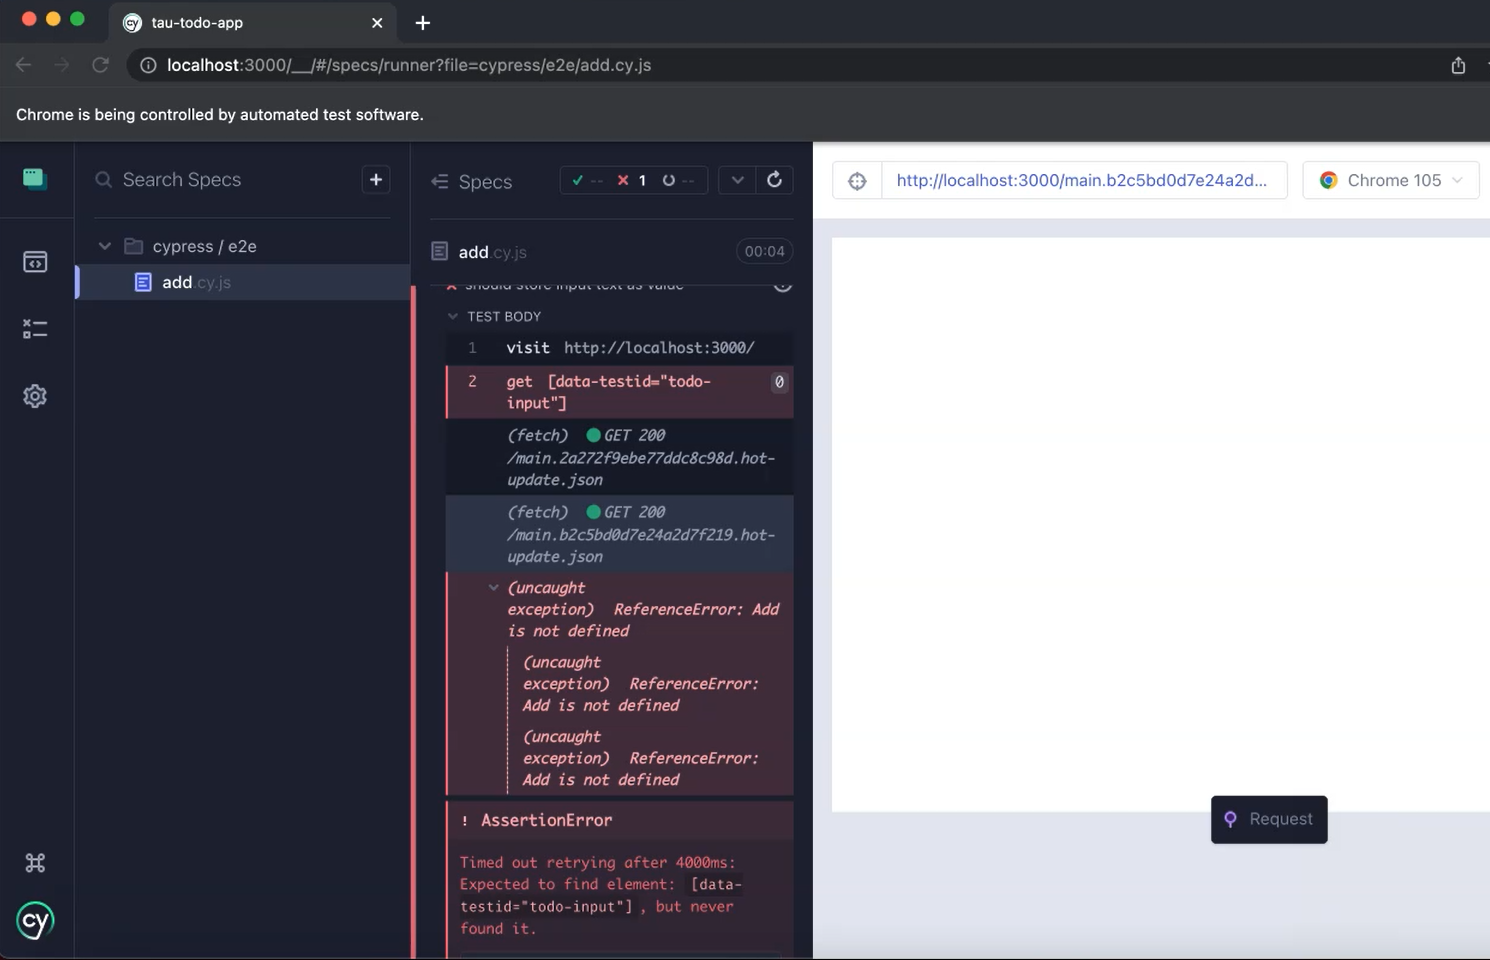
We can’t run because we need to add the Add component to the App itself that's rendered.

We need to import the Add component from the “Add” file and add it to our App.
import { useState } from 'react';

import Add from './Add';

function App() {
  const [items, setItems] = useState([]);

  const handleAdd = (newItem) => {
    setItems(oldItems => oldItems.concat([newItem]));
  };

  return (
    <>
    <Add />
    </>
  );
}

export default App;
Now, when we relaunch, we can see if the Cypress test passes as the input field is there.
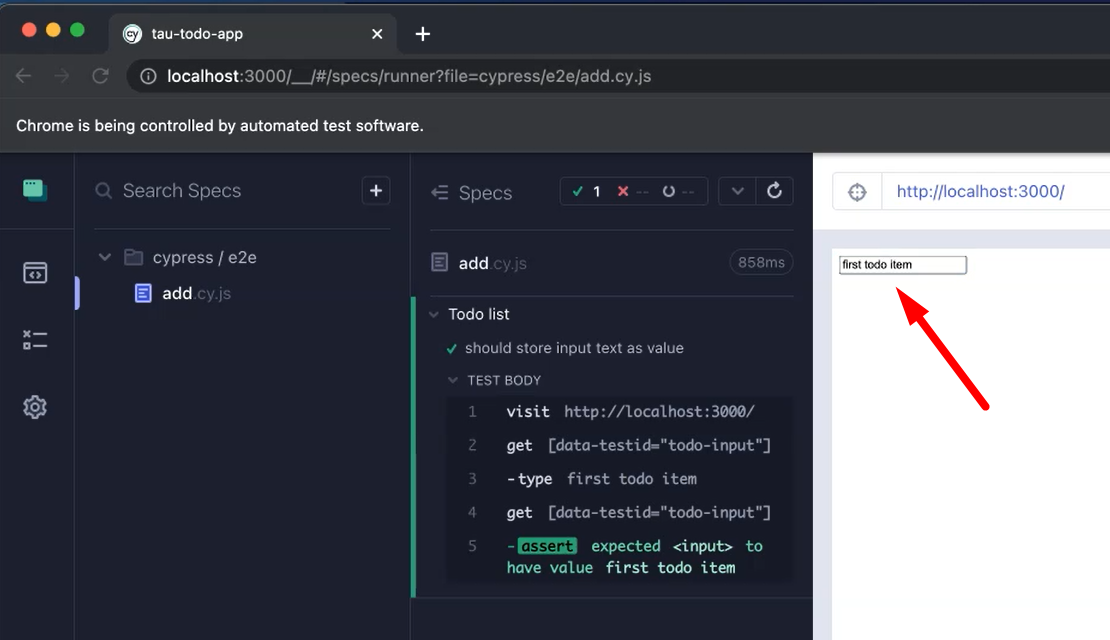
So now we've got both of our tests to pass.
We don't need to write any more tests for this, as we've already included the tests that we need to assert that the Add component works as expected.
We've got the Jest test and the Cypress test now all running and passing. Right?
So, we're at the point where we can start doing some refactoring.
We've got this function onChange which we can put in one line within the input.
We don't need to have it as an external function as it's just been used as part of this onChange method. We can put it within the input tag itself.
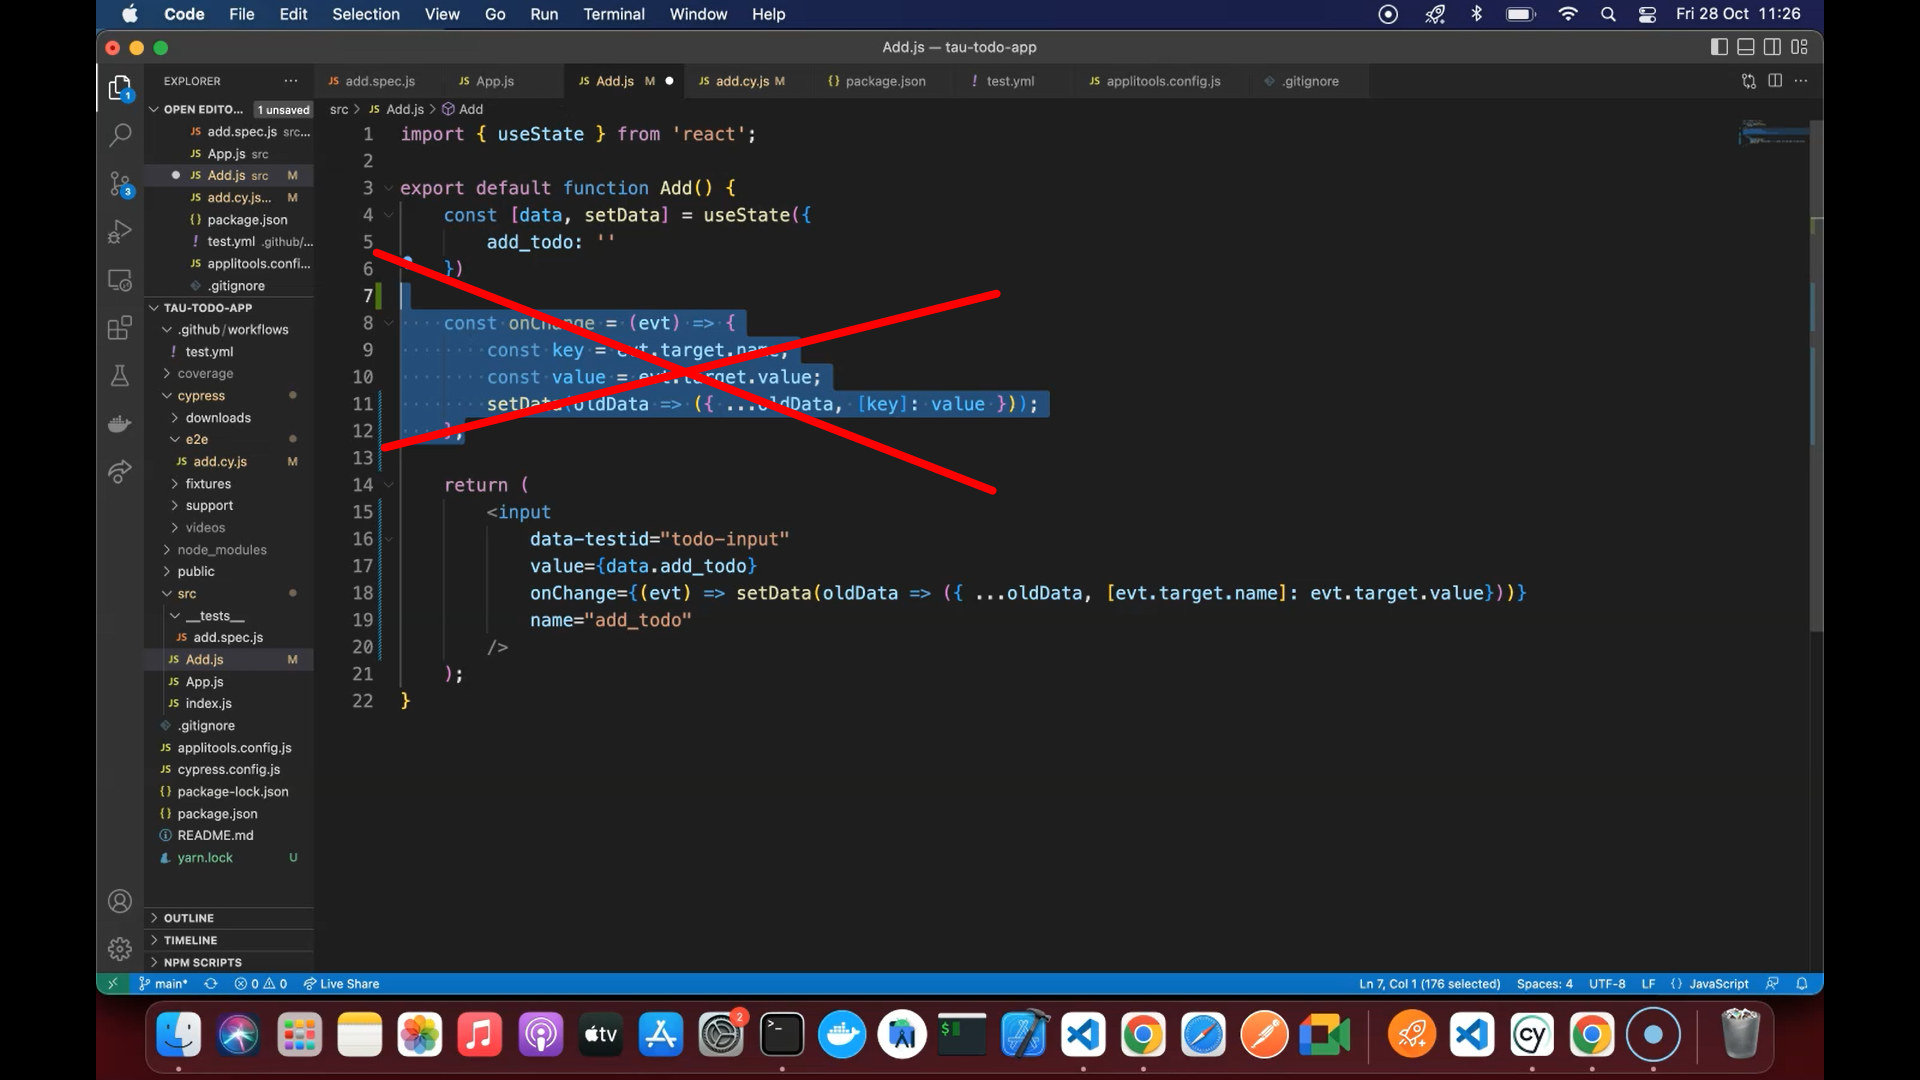
So, we're going to do that. We want to check that our tests are all passing so we know when we make any changes during the refactoring cycle without impacting our tests.
To start with, I'm going to start reformatting the input field because once we put it on one line, it's going to be quite a long line, so it'll be easier if we format it in this way.
What we're going to do is we're going to have an anonymous function within the onChange curly brackets itself. We're going to call the setData function from within, and everything else is going to stay the same.
We're still appending it to the oldData and passing in the key and the value.
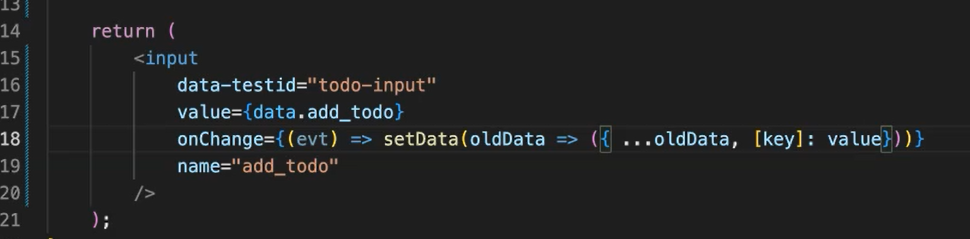
But we haven't set variables within our one line.
So, we are going to change this to call the event directly instead of assigning them to variables as we're just using them once within this method, so we don't really need to do that.
And onChange is now redundant, so we can delete that.
Now, if we check our tests, they're still passing.
We can also check Cypress and just rerun to make sure this is all passing.
We've refactored our code after the tests are green. So, we're confident that if we make any changes to the code our tests still pass.
I know I haven't gone into much detail about how I implemented this component for input, but I recommend you check out some of the React tutorials for “To Do” apps and have a look at how they've done it.
Hopefully, this gives you an idea of how you would implement the acceptance test-driven development and you can go away and you can look at adding more components.
Resources
- Git Repo: Lesson Code - Add.js
- Git Repo: Lesson Code - App.js
- Github Chapter 5 Starting Point
- Github Chapter 5 Completed Code
- React Hooks
