

Transcripted Summary
In this chapter, we're going to be adding test coverage for our Jest tests and putting those reports into our continuous integration using GitHub Actions.
We’ll be setting up the tests, both Jest and Cypress, to run within a workflow.
And then, we need to look at the secrets within GitHub Actions to add our Applitools API key, so we'll be setting that up as well.
# Continuous Integration — Release Small and Often
The idea of continuous integration within ATDD cycle is that we can add all of our tests within the pull request.
They can run as part of the pull request, and we get to know the test coverage.
We get to know whether our tests pass the acceptance of the criteria alongside the pull request. So, we can release small and often and not worry about having to add additional coverage later on.
# Test Coverage — Ensure Quality with TDD
The test coverage comes out of the box with this approach.
Because you are writing the test first, you're automatically getting the coverage, and you're ensuring the quality of those tests.
Obviously, you'll need to add additional test cases, because test coverage just covers the line coverage and doesn’t cover the flow through the application.
We'll want to look at those edge cases, some data requirements, and other scenarios I've not touched upon.
It doesn't cover everything, so achieving a 100% test coverage is not enough when you have to think about your acceptance criteria.
In order to get our coverage out of our tests, we are going to add a command (to the package.json) which we're going to run within the CI.
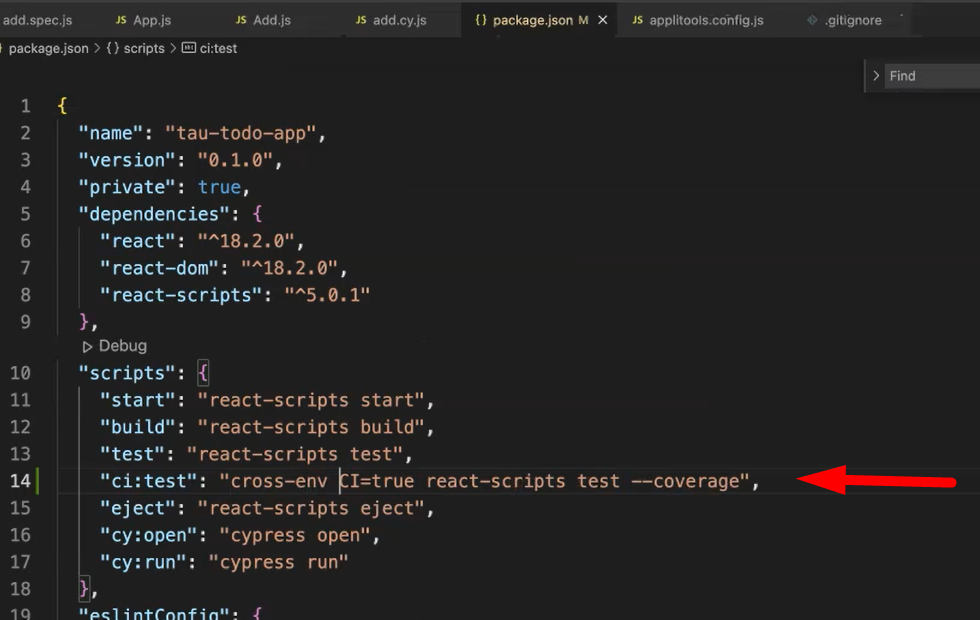
I'm going to call this "ci:test", and then it's going to call the same react-scripts command with the coverage flag.
We're also going to add the CI=true, so that it doesn't watch for changes and it just runs the tests and finishes.
In order to achieve that, and if you want to run this locally, you can install a package in NPM, which is very useful, called cross-env.
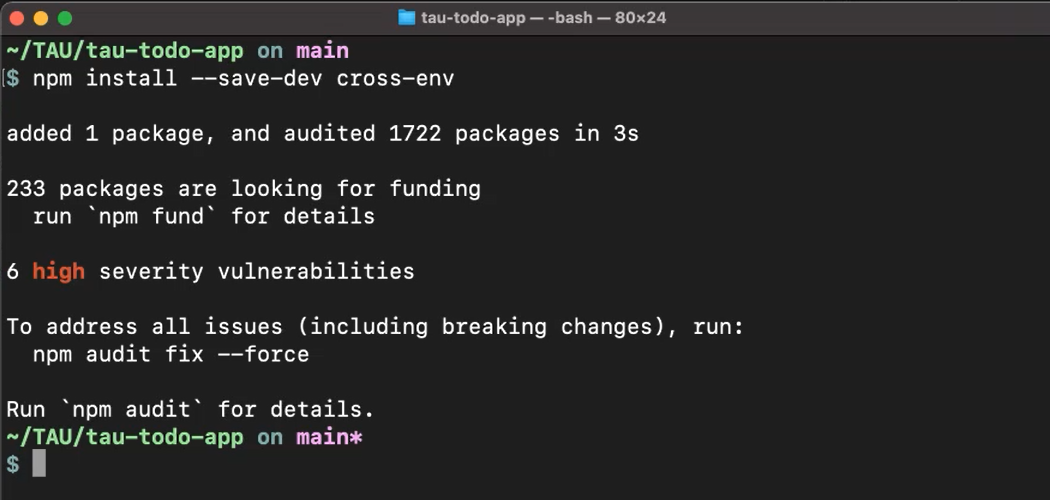
If you install this package — npm install –save-dev cross-env — then obviously, it takes into account your system. You can run it across Mac or Windows, for example. You can share it with the rest of the team.
"ci:test": "cross-env CI=true react-scripts test --coverage",
We've got this CI command, so we can run that on the terminal, and see what it looks like — npm run ci:test.
This will run the tests.
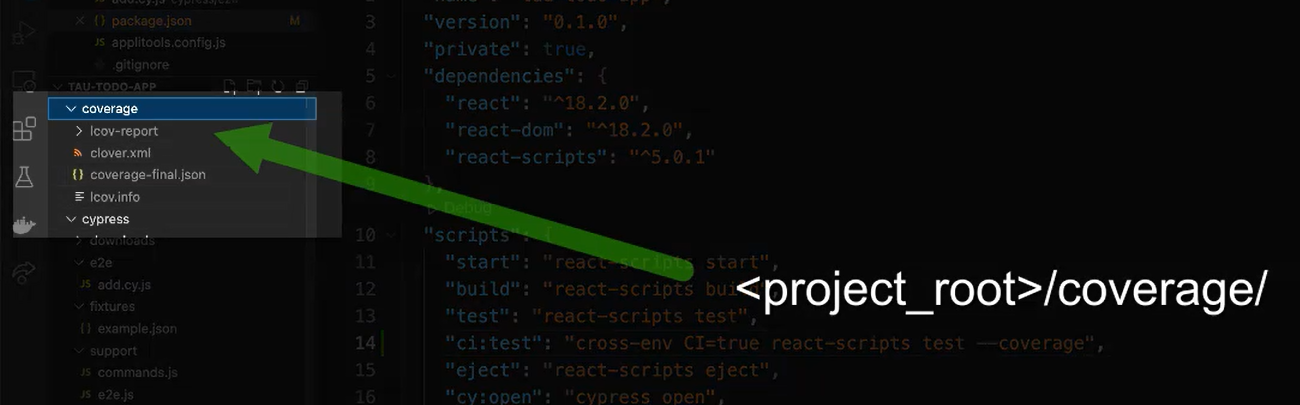
Then it will generate the coverage for the file.
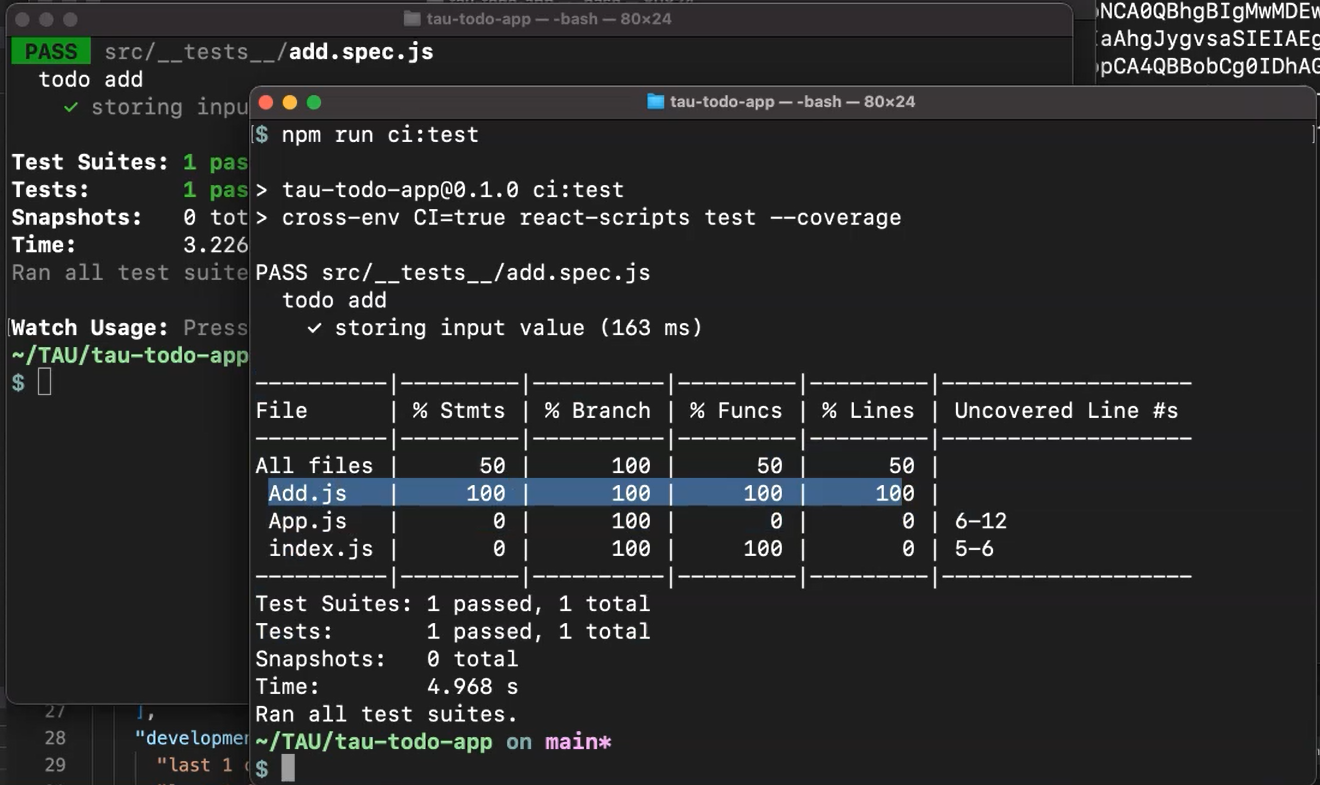
We can see Add, how it has 100% coverage, which looks great.
Also, it creates this coverage folder which we will then use within our CI to publish our results.
Now, we are going to add in our GitHub Actions into our workflow for our repository.
If you haven't set up your own repository yet for the project, go ahead and do that, or you can do that later on when we submit our actions.

When you come to the Actions screen for the first time, you'll see the screen where it offers you some templates that you can use to set up your pipeline.
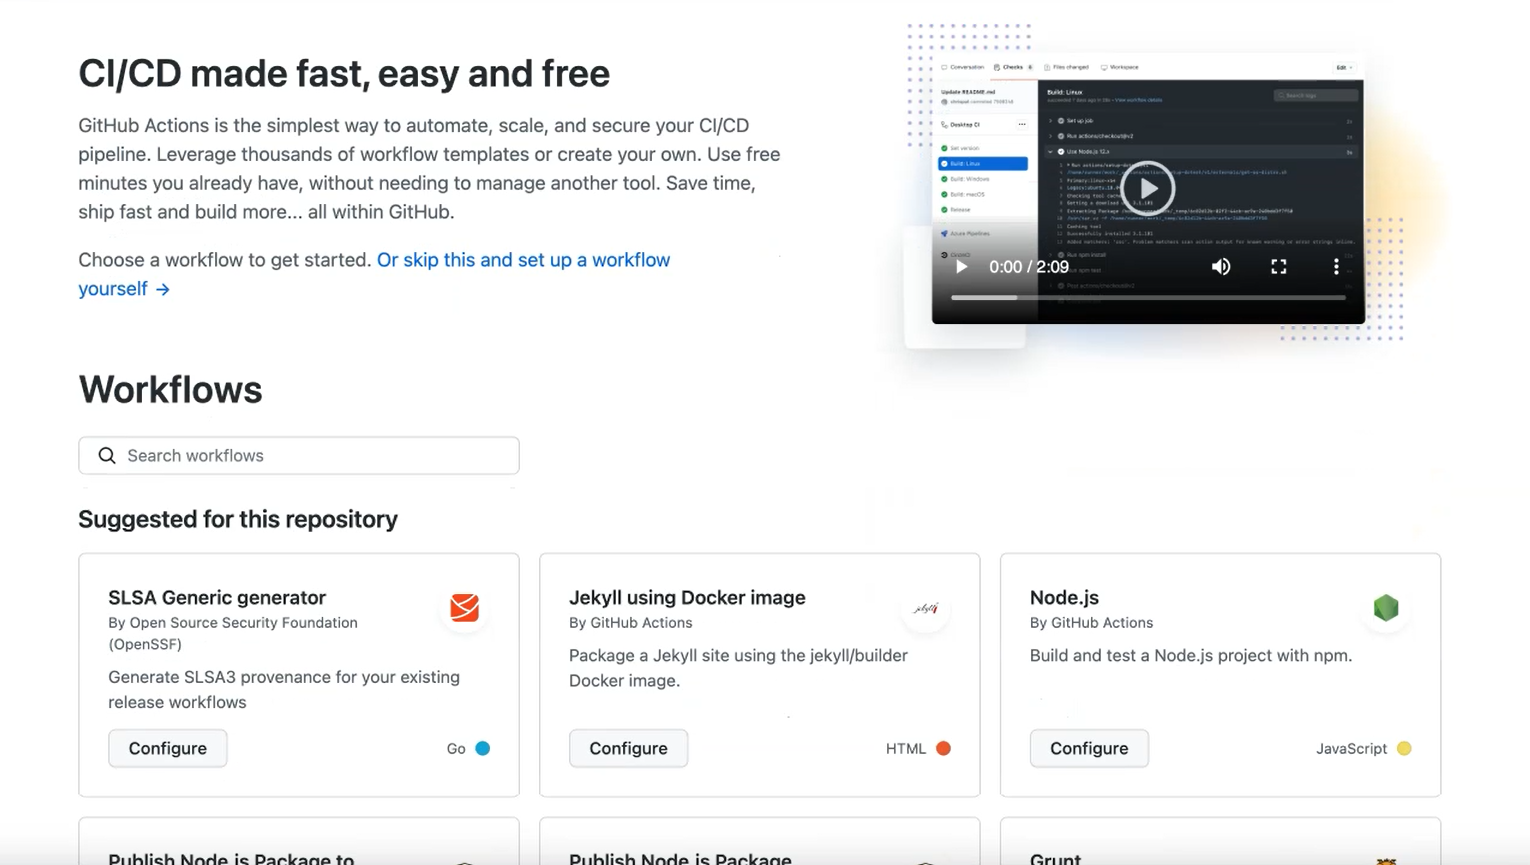
We're going to use the Node.js configuration, so we get some of the steps out of the box.
What we can do is, we can copy this, and then we will create this structure within our repository.
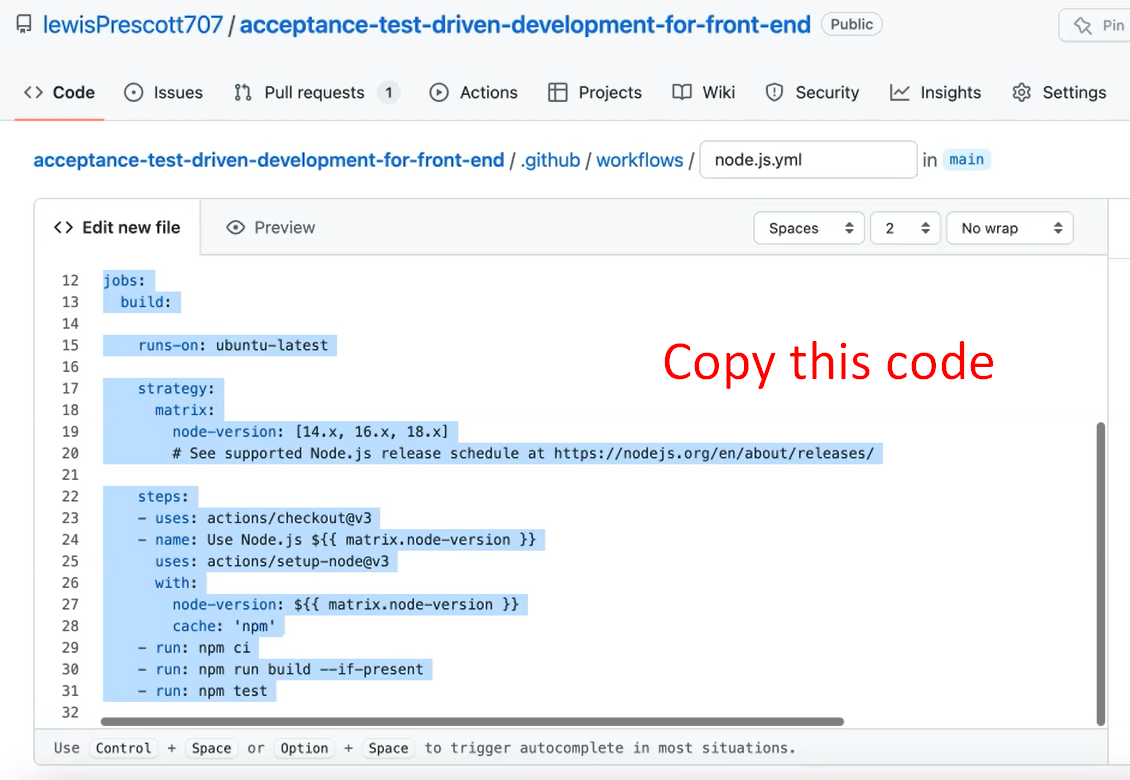
If we create a folder called “.github” and another folder called “workflows”, then create ourselves a “test.yml” within that — “.github/workflows/test.yml”.
Within that and we can copy across the template that we copied from GitHub.
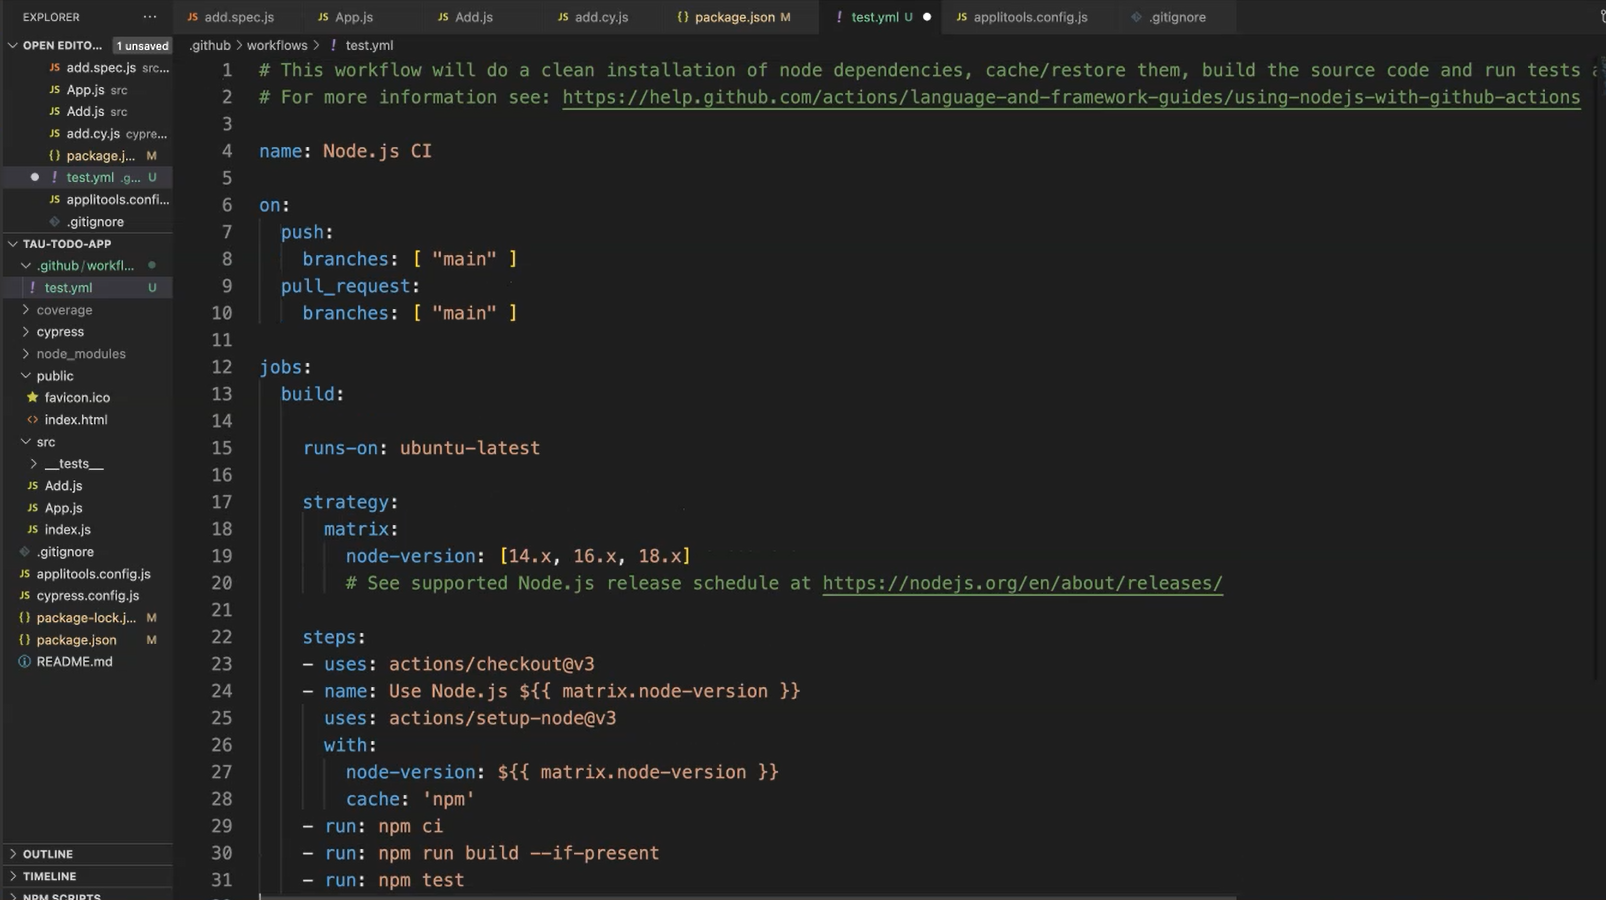
We don't need to run it for multiple node versions, so we can delete those.
We can delete this build step because we are just going to be doing our tests.
There's a few things that we need to add.
We've got our npm test step. We can change this to point to our ci:test, which will generate our coverage.
    - run: npm ci
    - run: npm run ci:test
This npm ci command will do a clean install for us every time, so we don't need to worry about any hanging node modules or anything or misconfigurations there.
Configuration for triggers based on when the pipeline will run or the workflow will run.
on:
  push:
    branches: [ "main" ]
  pull_request:
    branches: [ "main" ]
When we push to the main branch or when we create a pull request against the main branch.
When we update our workflow here, we'll be able to see it running in the pipeline.
We're going to add another step to update and upload our test coverage.
We're going to be using this Code Coverage Report GitHub Action, which can be found in the marketplace.

This allows us to generate a report alongside our pull requests, which will allow us to share our coverage, extract that from the output and put that into our pull request itself.
We can copy this from here and copy that into our “test.yml” file.
uses: romeovs/lcov-reporter-action@v0.2.16
with:
  lcov-file: ./coverage/lcov.info
This is the default location, and when we ran our coverage earlier, it's pointing to this file here — “./coverage/lcov.info”.
So that will exist within the pipeline.
We also need to add in the secret to give it permissions to add it to the pull request.
This is a default token which is available within the secrets. Don't forget to add the uses.
    - uses: romeovs/lcov-reporter-action@v0.2.19
      with:
        lcov-file: ./coverage/lcov.info
        github-token: ${{ secrets.GITHUB_TOKEN }}
We've got our coverage and now we want to run our Cypress tests.
We're going to be using the Cypress GitHub Action.
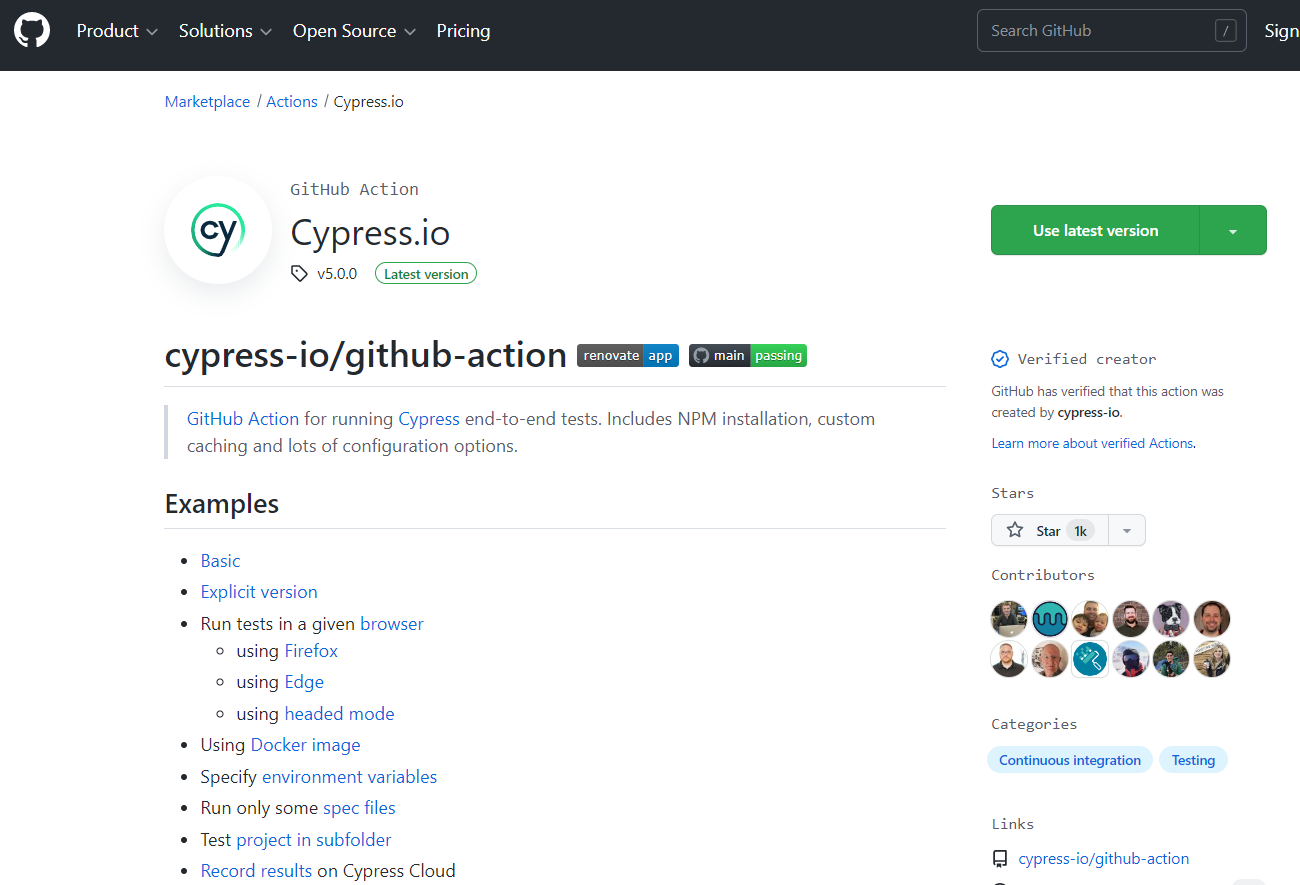
Again, it's available in the GitHub marketplace, so we can just grab what we want from here.
It allows us to run the Cypress command and also allows us to start our server at the same time.
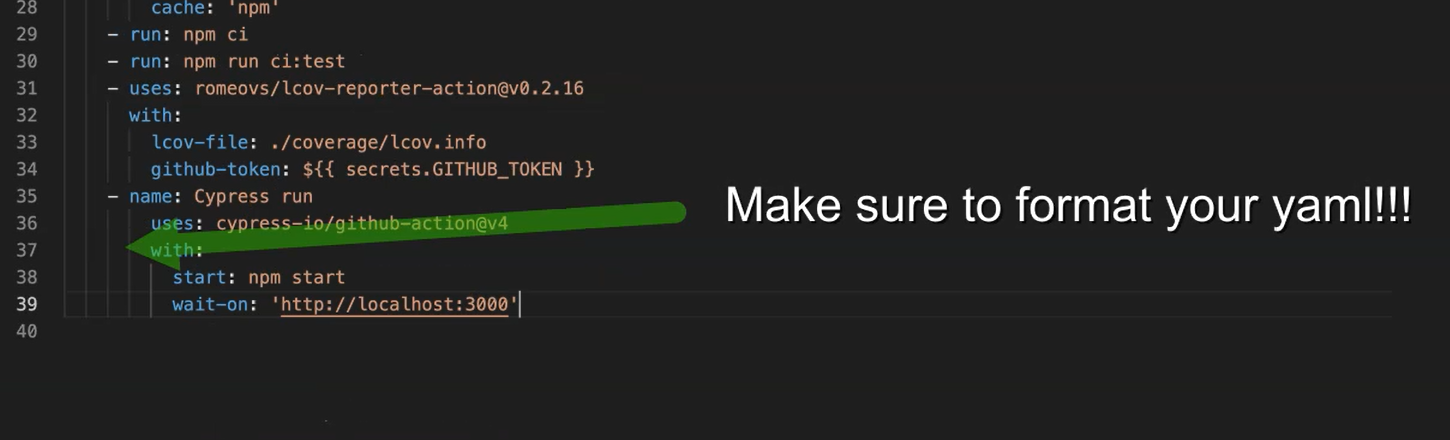
- name: Cypress run
  uses: cypress-io/github-action@v4
      with:
        start: npm start
        wait-on: 'http://localhost:3000'
The npm start matches with our package JSON as well. We've got the npm start command.
It also provides us this wait-on command. This allows us to put in the URL of our app and that starts up on port 3000.
We need to add an environment variable to our Cypress run, which takes the Applitools API key.
      env:
        APPLITOOLS_API_KEY: ${{ secrets.APPLITOOLS_API_KEY }}
We are going to grab that from the secrets within GitHub, the same name.
We add that to our Cypress run, we need to add that into GitHub as well.
If you go to Settings on the GitHub repo, and then you go down to Secrets in the Security section.

For Actions, we're going to set up a new repository secret, it's the “APPLITOOLS_API_KEY”.
I'll grab that from my config, but you shouldn't be committing that to Git.

Now, we've got the repository secret here, then the workflow will have access to that secret when it runs the workflow.
I'm just going to make a small change to our README file, so it picks up the change to trigger a pull request.
Create a new branch, update README, create a pull request.
You check in the Checks, it will start building and running our pull request.
Wait for that to complete. Then we check back to our conversation tab, so someone coming to review this pull request can quickly see the code coverage.
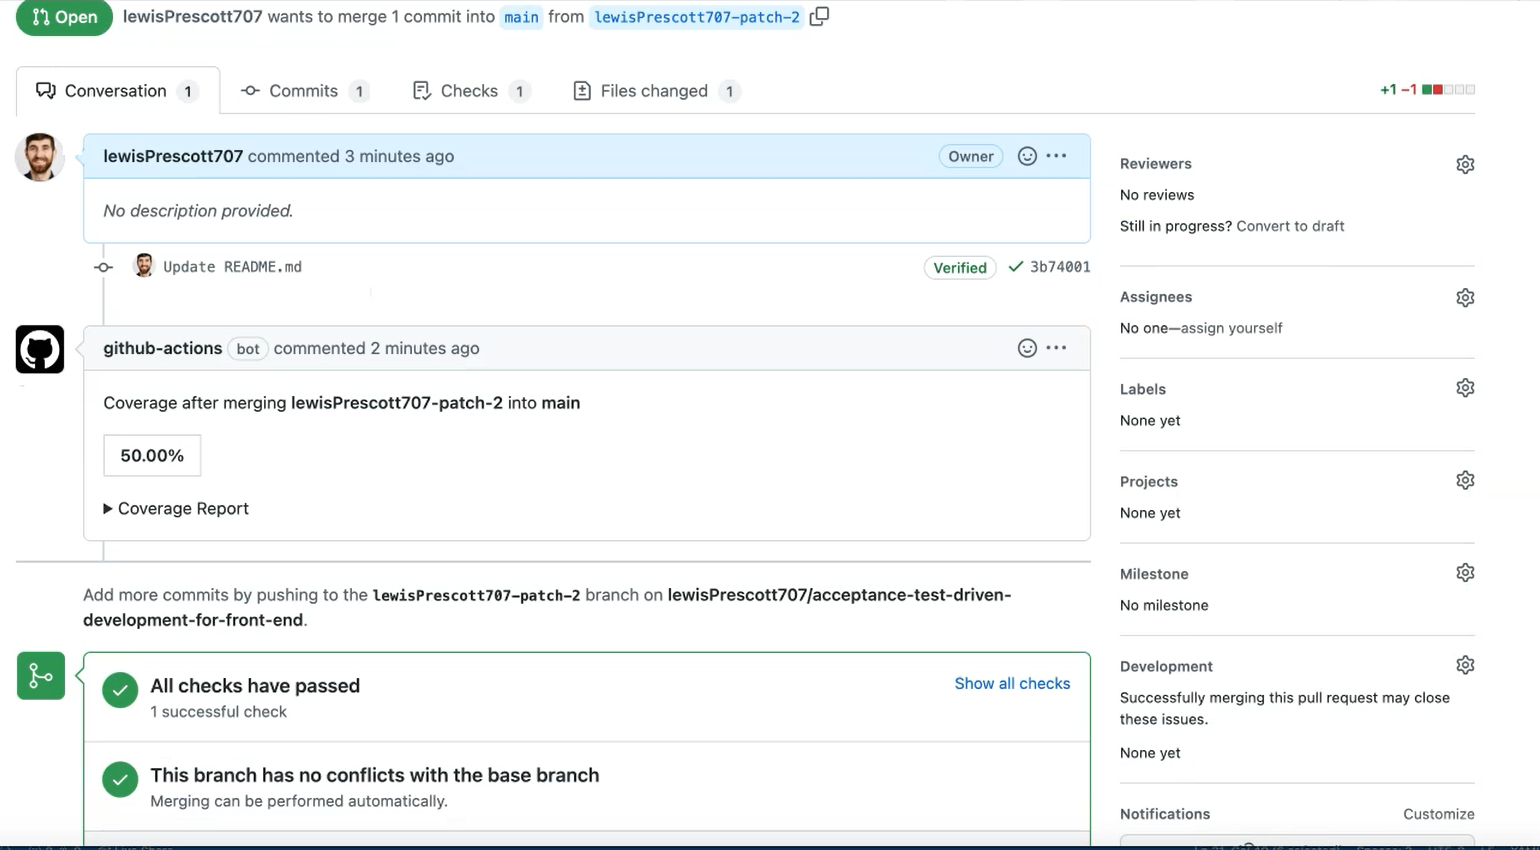
They open up this PR, they can see, "Okay, this file has a hundred percent coverage, and this one doesn't have any coverage."

Hopefully now, that closes the loop of how you would add your acceptance tests, add to your unit tests, and build those into your continuous integration.
You can see how that will be applied for ease of understanding the quality, building in quality from the start, and then deploying your feature, releasing your feature with all of that built in, and all of that confidence to release.
We've come to the end of the course and it's an opportunity for you to take on this optional assignment.
Why not try and add some additional test cases as we identified in using the test coverage?
App.js didn't have full coverage. Why not add some Jest tests to make sure that you cover all of the paths for App.js.
In addition to that, you could look at adding additional features.

We've just added the input field for now, so you could look at adding additional features on top of that.
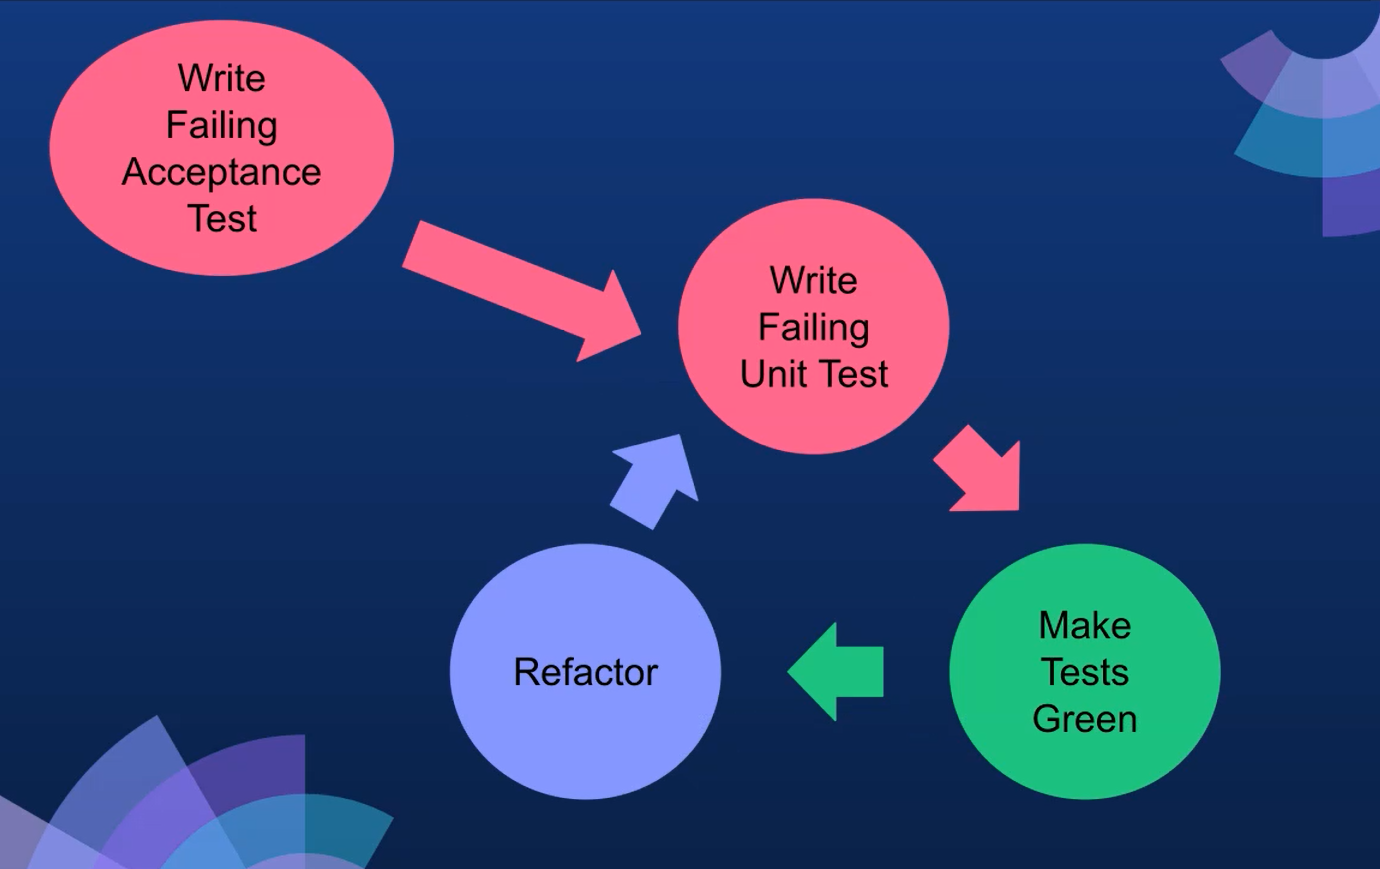
Make sure that you comply with the ATDD cycle.
Write your acceptance test first, then the unit test, your failing tests run, you implement the feature, the tests are green.
Then you can go back and do your refactoring, like we did throughout the course.
Follow the cycle.
Make sure that you keep this in mind.
Some examples of what you could look at implementing.
- Add a button to submit the form,
- List out the todo items that someone enters, and then
- Delete a todo item from the list.
You could look at it implementing some of these features as part of this assignment.
Good luck.
# Optional Independent Exercise
To practice what you’ve learned in this chapter, here is an exercise for you to try on your own.
Using React Testing Library render. Add jest tests for App.js to improve the test coverage.
Using my completed project as guidance todo app code. Go through the ATDD (Acceptance test driven development) cycle again to submit the form and render a list of todo items.
Resources
- Git Repo: Lesson 7 - package.json
- Git Repo: Lesson 7 - .github/workflows/test.yml
- Github Chapter 7 Starting Point
- Github Chapter 7 Completed Code
- Code Coverage Report Github Actions Marketplace
- Cypress Github Actions Marketplace
- Github Actions Secrets
