Welcome to Java Programming. I'm your instructor, Angie Jones.
I'm a certified Java Programmer who has been using the language for more than 18 years. In addition to programming in Java at companies such as IBM and Twitter, I've also worked as an adjunct professor teaching Java at the college level.
In this course, I will go in depth, teaching you the Java programming language.
The material covered here is equivalent to the curriculum of a full semester of Java programming at a university and is designed for complete beginners to programming. While you may be here because you desire to become a test automation engineer, this course will not limit your knowledge to just that area. You will learn Java in general so that you are a true Java programmer and can use this skill for any related programming role, including an automation engineer.
The course is filled with tons of relatable and relevant examples, as well as optional exercises for you to practice what you've learned on your own. While the independent exercises are optional, I strongly encourage you to give them a try, so that you can fully lock in what you're learning.
To take this course, you'll need to have Java Version 10 or later, as well as the IntelliJ Editor.
- If you already have both of these installed, meet me in Chapter 1, where we'll begin.
- If you need to get set up, stay tuned; we'll do that now.
The first thing we're going to do is install Java.
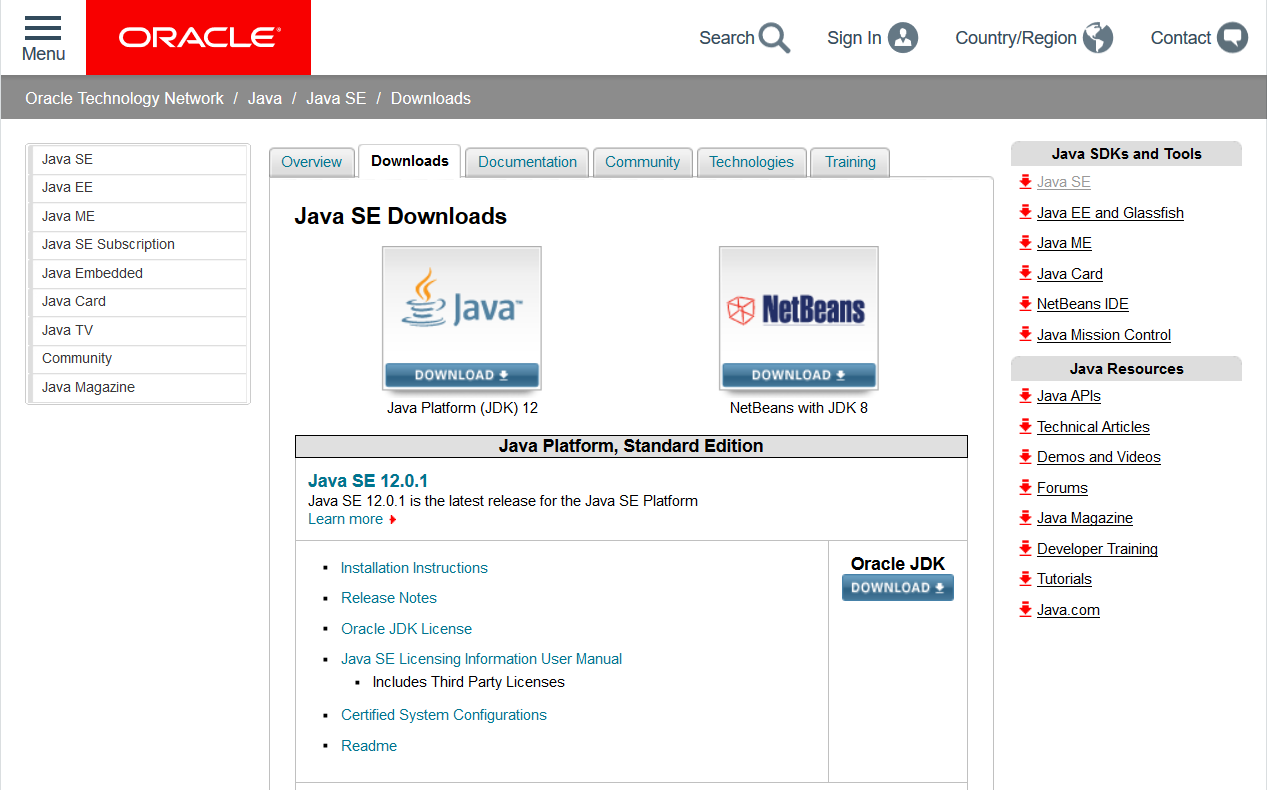
Java is an Oracle product. So we're on the Oracle site, and if I look here, I see that we have a Java 12 version, we have a Java 11 version, and a Java 8 version.
If you already have Java 10 or later installed, you're fine. There's no need to upgrade.

I want to go with Java 11, just because Java 12 is really, really new (at the time of this recording). Just to be on the safe side, I'm going to go with Java 11 here.
There's a lot of new things going on with Oracle's licensing, so I'm not going to install the commercial one, but I'm going to go to the Open JDK, which has the open source version.
Download the one for your operating systems: there's Linux, Mac, and Windows. I'm going to go with the Mac one.
Note about Java Installation
The following instructions in this section are for Mac OS only. For Windows, there’s a video in the Resources section below.
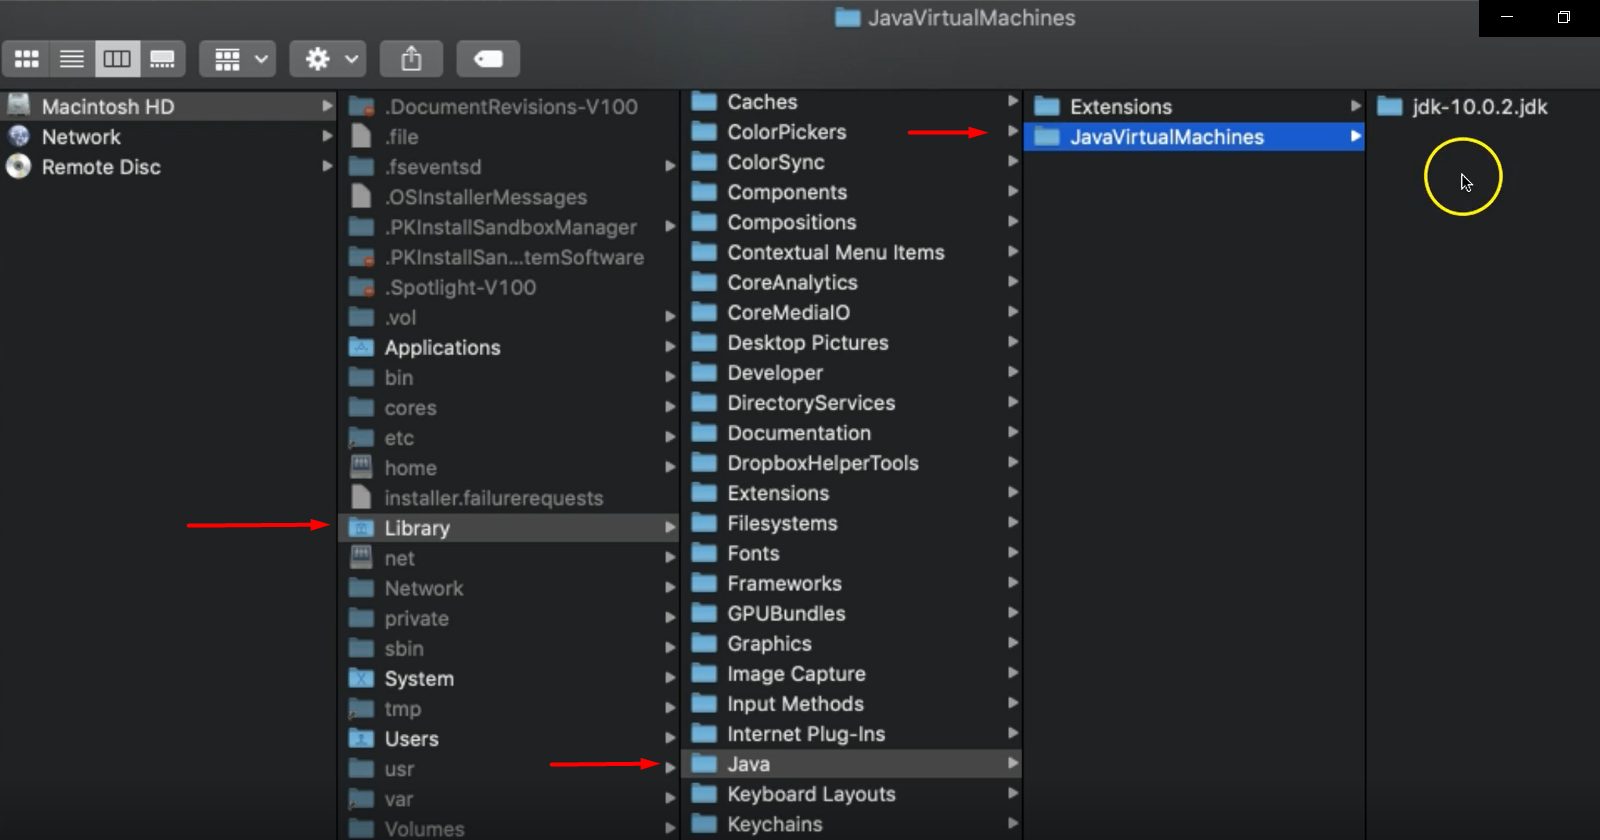
I've unzipped this file and now I have this JDK folder (jdk-11.0.2.jdk). I'm going to take this folder and put it under the Library directory.
So, I'm going to copy this to: Library > Java > JavaVirtualMachines.
If you don't have any of these folders, just go ahead and create them.

Notice I already have JDK 10, now I'm just going to add JDK 11. It should prompt you for your system password. Go ahead and enter it.
Now, if you go your terminal on Mac, (you can open this by going to your Spotlight search and type in “terminal”). That should open a terminal for you.
On the terminal, now we can type java -version. Now, you should see whichever version you downloaded.

I downloaded the Version 11, and that's what I see there.
# The next thing we want to do is to download IntelliJ.
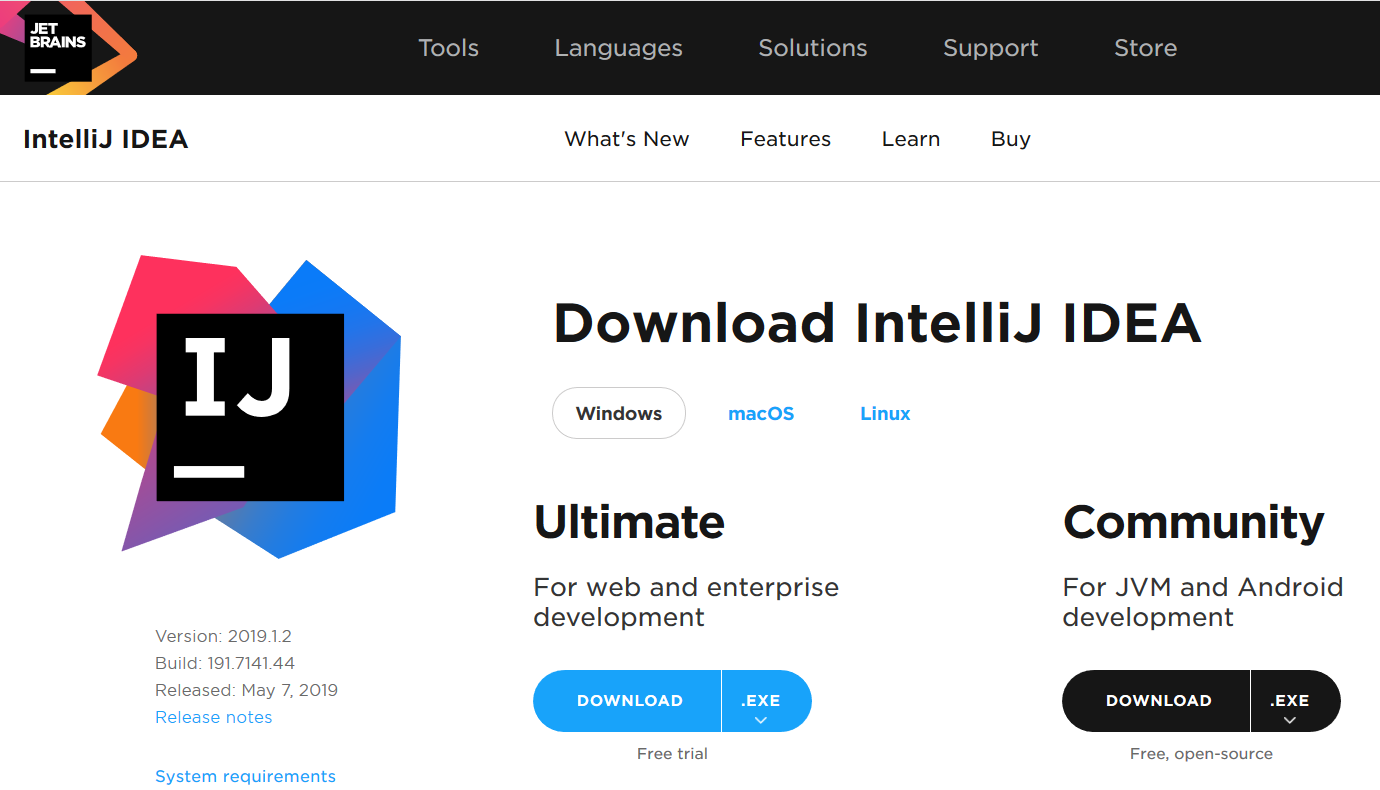
IntelliJ is the editor we're going to use to write our Java code in (I provided the link to this in the resources section).

You want to select your operating system. You can select Windows, or Mac, or Linux. I'm on Mac.
Then you want to get the Community version, which is the free open source one. Click Download.
Note about IntelliJ Installation
The following instructions are for Mac OS only. For Windows, there’s a video in the Resources section below.
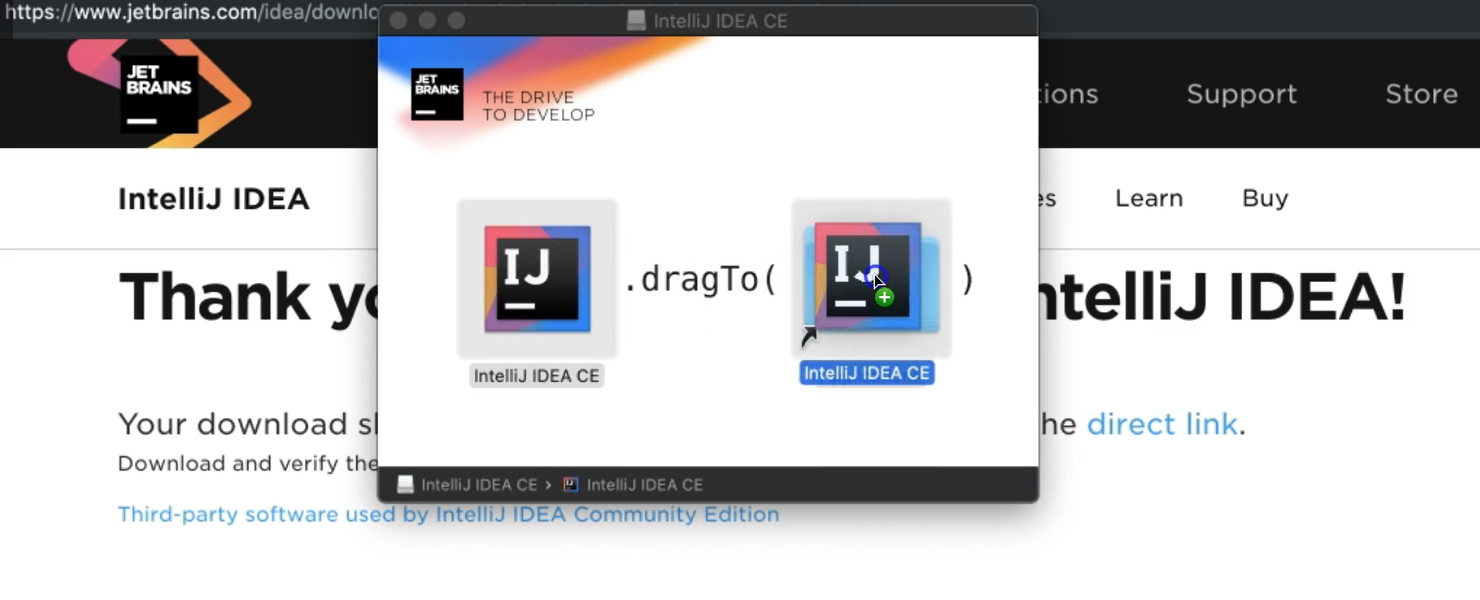
Okay, I double-clicked on the download. I'm going to drag this over to the applications folder.

Now, let's open it. You may get a prompt asking you, "Are you sure you want to do this?" Click open to confirm.
This is opening and now we have IntelliJ installed.
