

Transcripted Summary
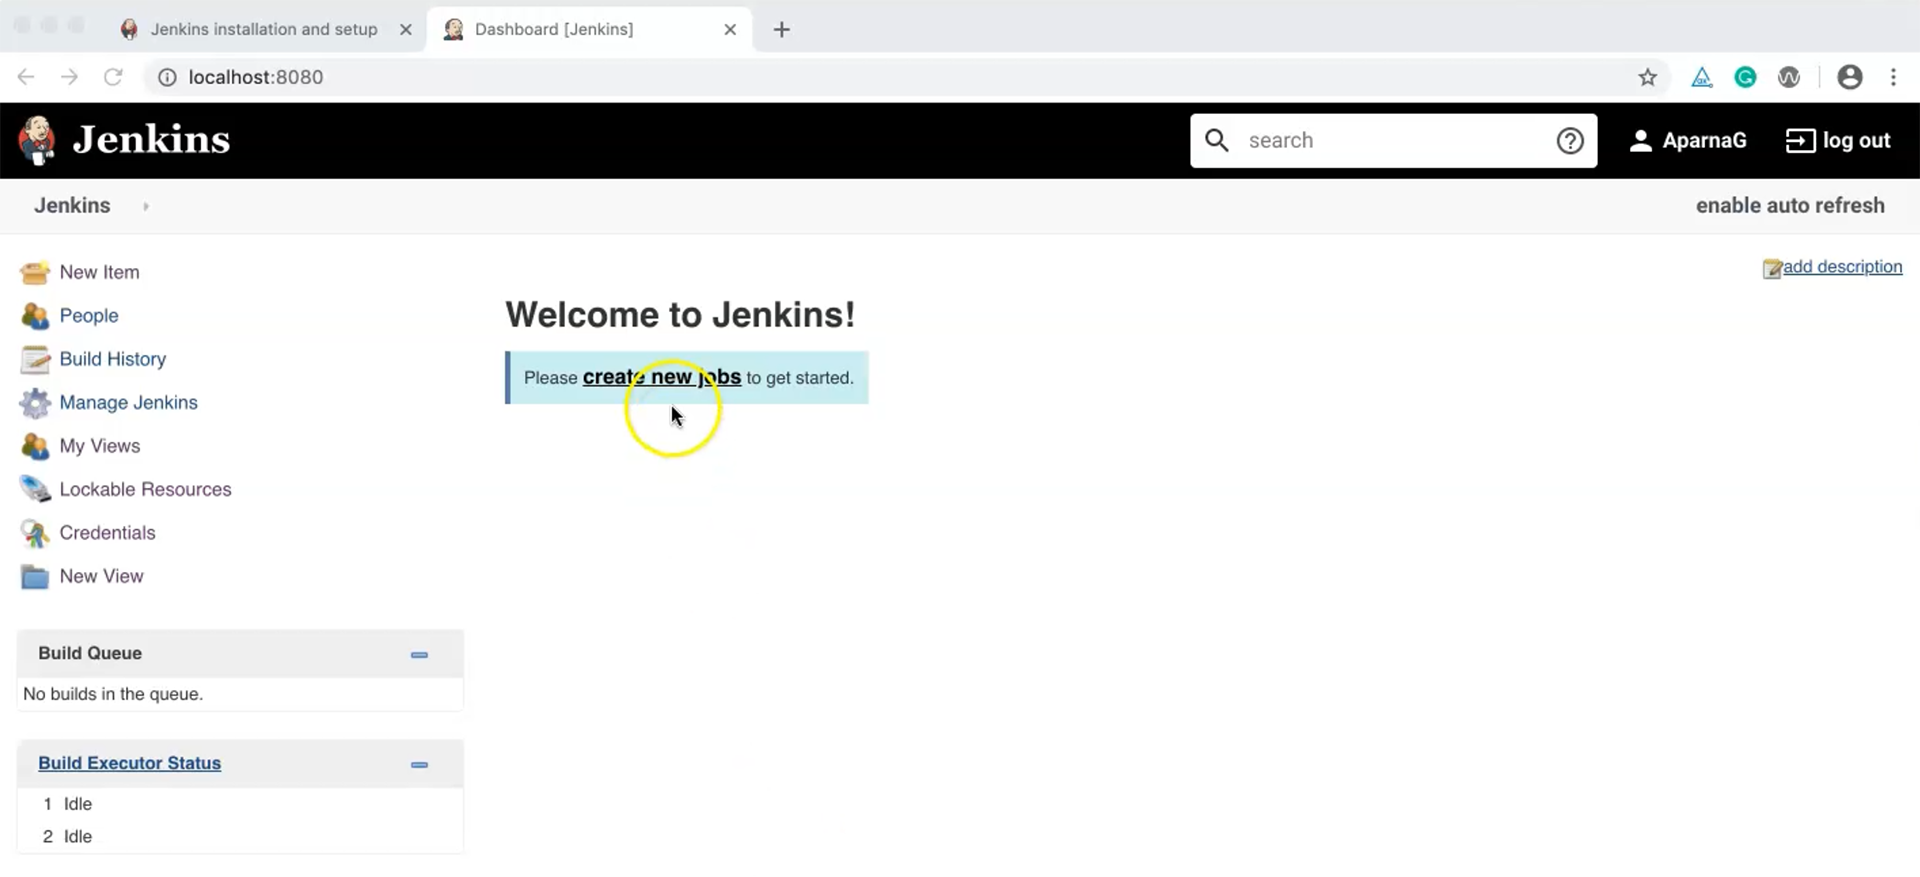
Now, we can start creating our first job. Click on "create new jobs":
On the next page, enter an item name which is simply our job name. Let's create "MyFirstJob".
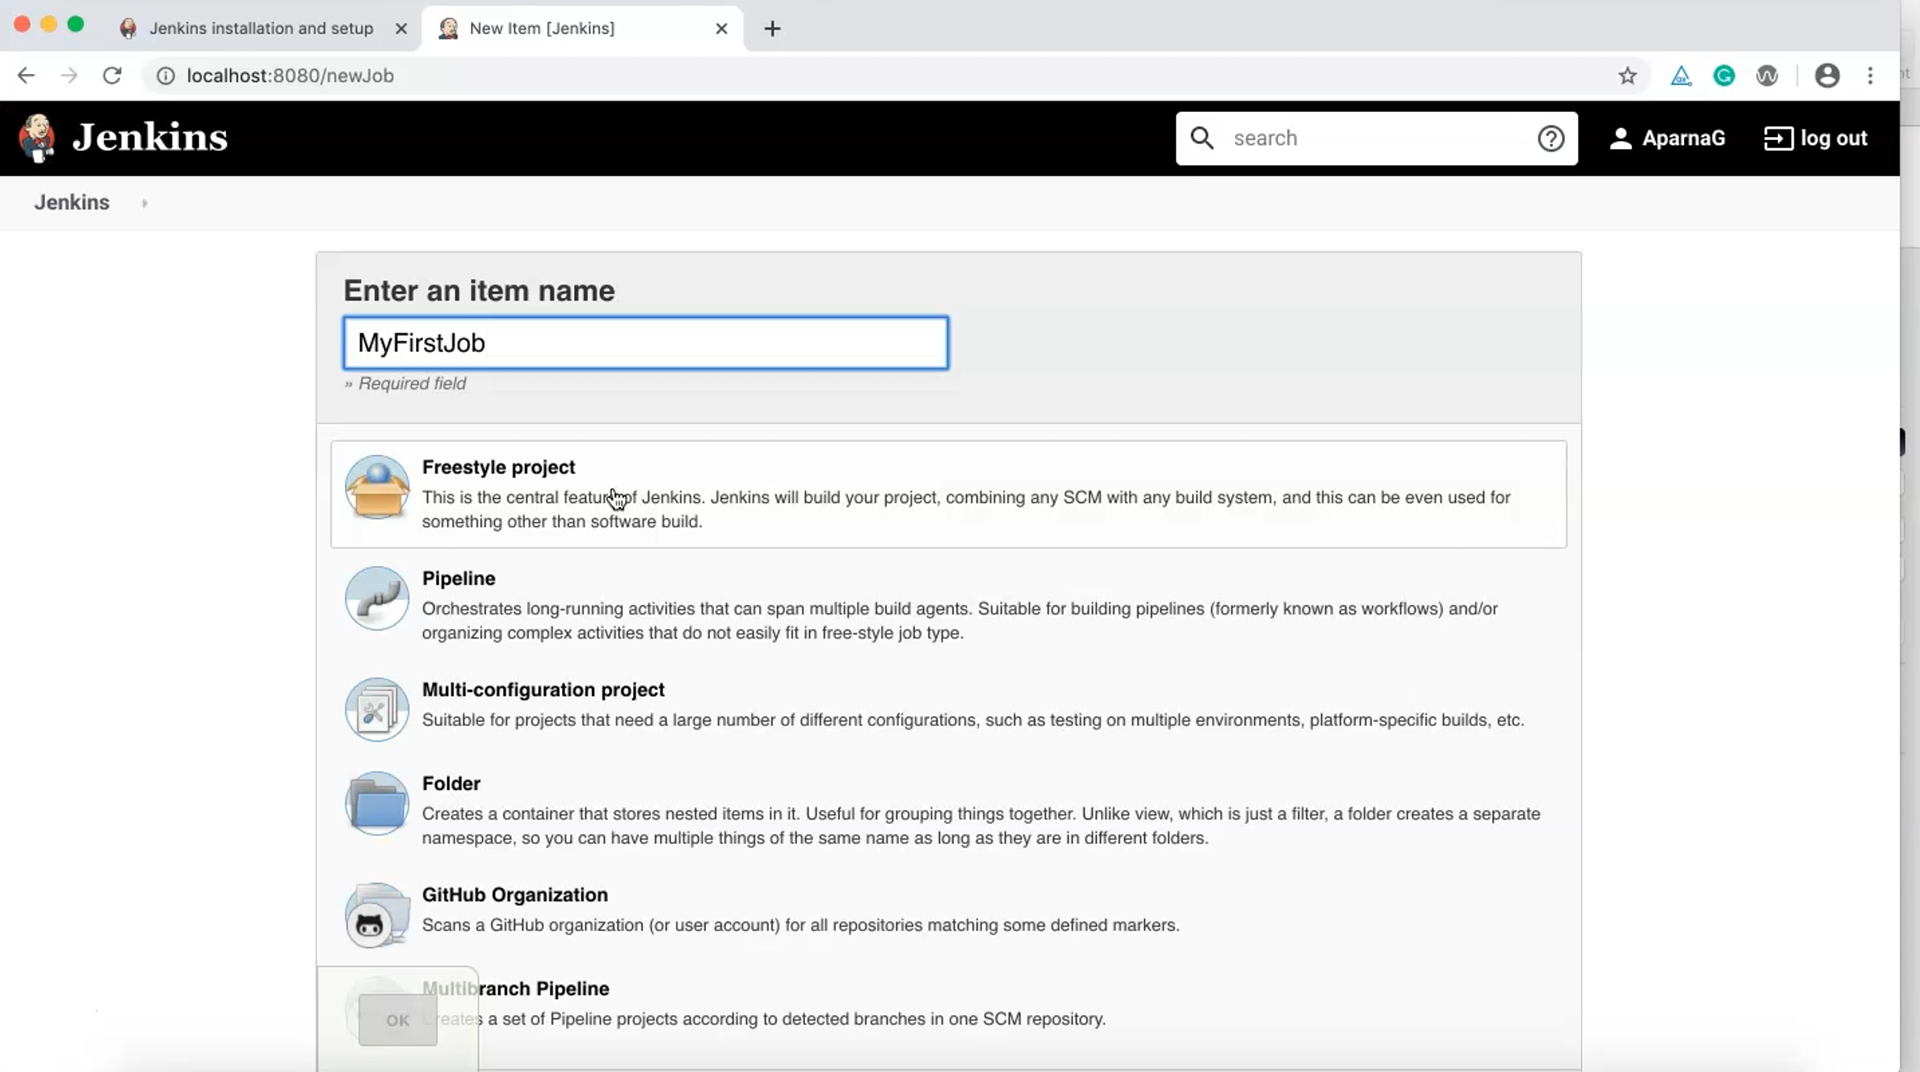
Now we can choose the job type from the options below. Options like "Freestyle project" are commonly used.
"Pipeline" type is useful in large projects for setting up a pipeline process. If multiple configurations are present in a project," Multi-configuration Project" can be used. Based on our project needs we can select the appropriate project type.
We are going to choose "Freestyle project" for now. Select "Freestyle project" and click "OK".
Now comes the configuration part. We need to configure various sections including "General", "Source Code Management", "Build Triggers", "Build Environment", "Build", and "Post-Build Actions".
# General
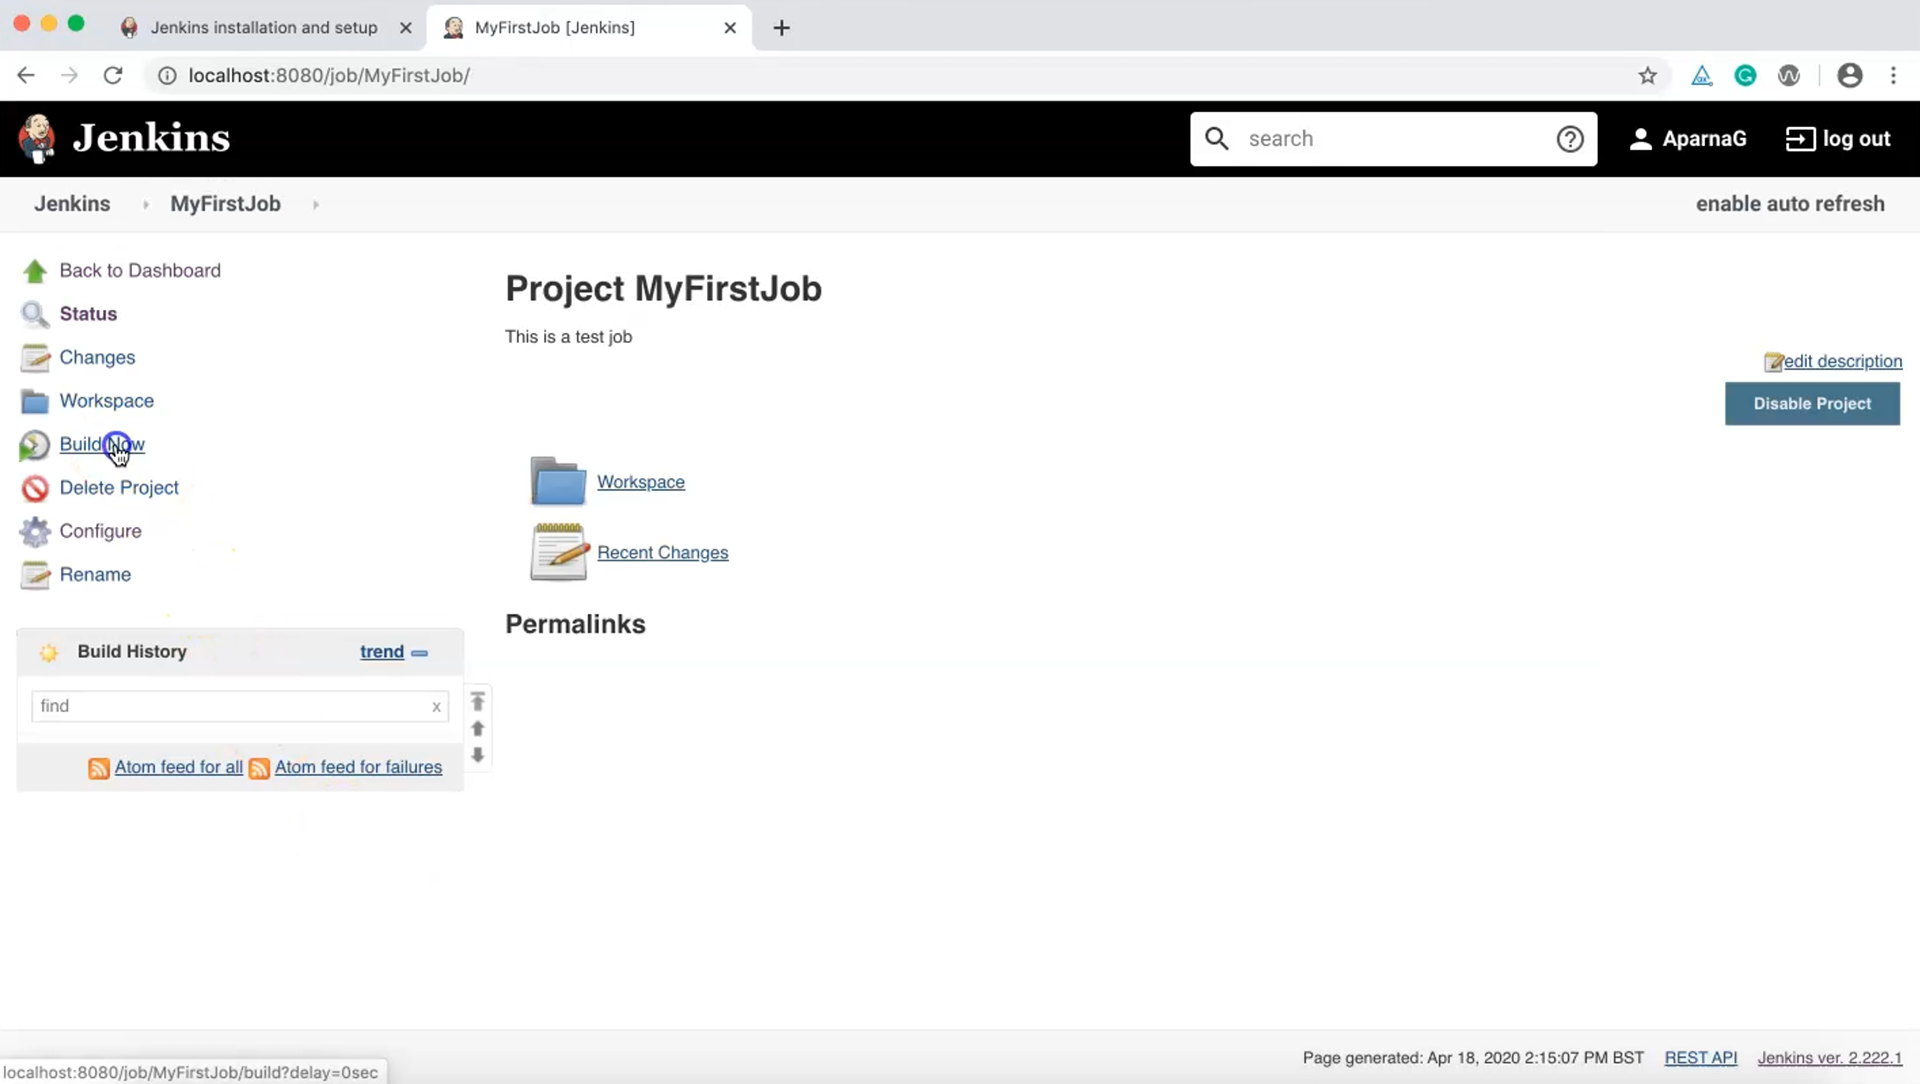
Clicking on the "General" tab we see a text field where we can provide a description of the job.
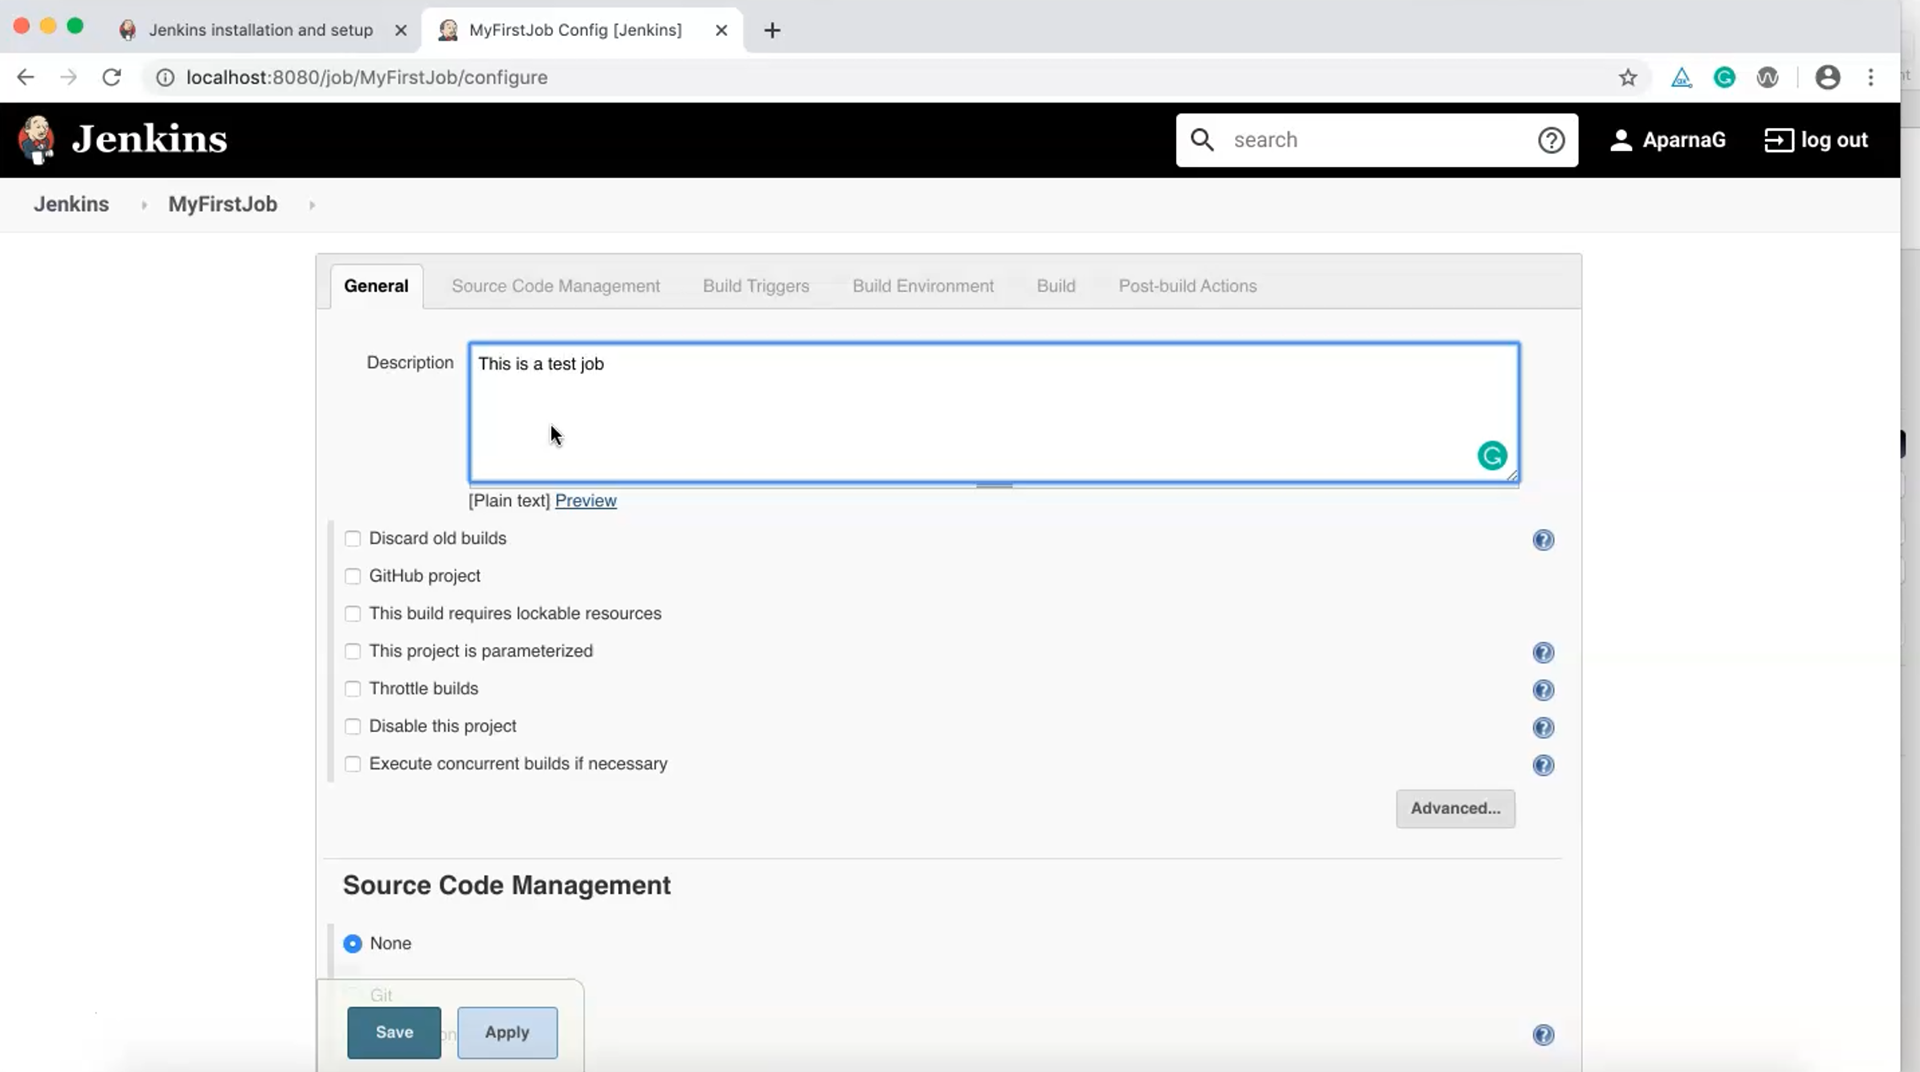
We can type something like "This is a test job." Then we have a few configurations options which can be selected based on our needs. Some of these include:
"Discard old builds" - Select this if you wish to set a limit on the number of builds to keep, up to a certain number of days or up to a specific build.
"This project is parameterized" - Select this if you wish to pass certain parameters to the project or job.
"Throttle builds" - Select this if you wish to execute jobs in periodic intervals.
"Disable this project" - Select this to disable a project so that none of the jobs in the project will be executed.
Options such as these can be configured according to our build requirements. Different builds will have different configurations.
# Source Code Management
Based on the SCM tools used this tab must be configured accordingly. For now, I will choose "None". We will cover check-outs using Git in subsequent chapters.
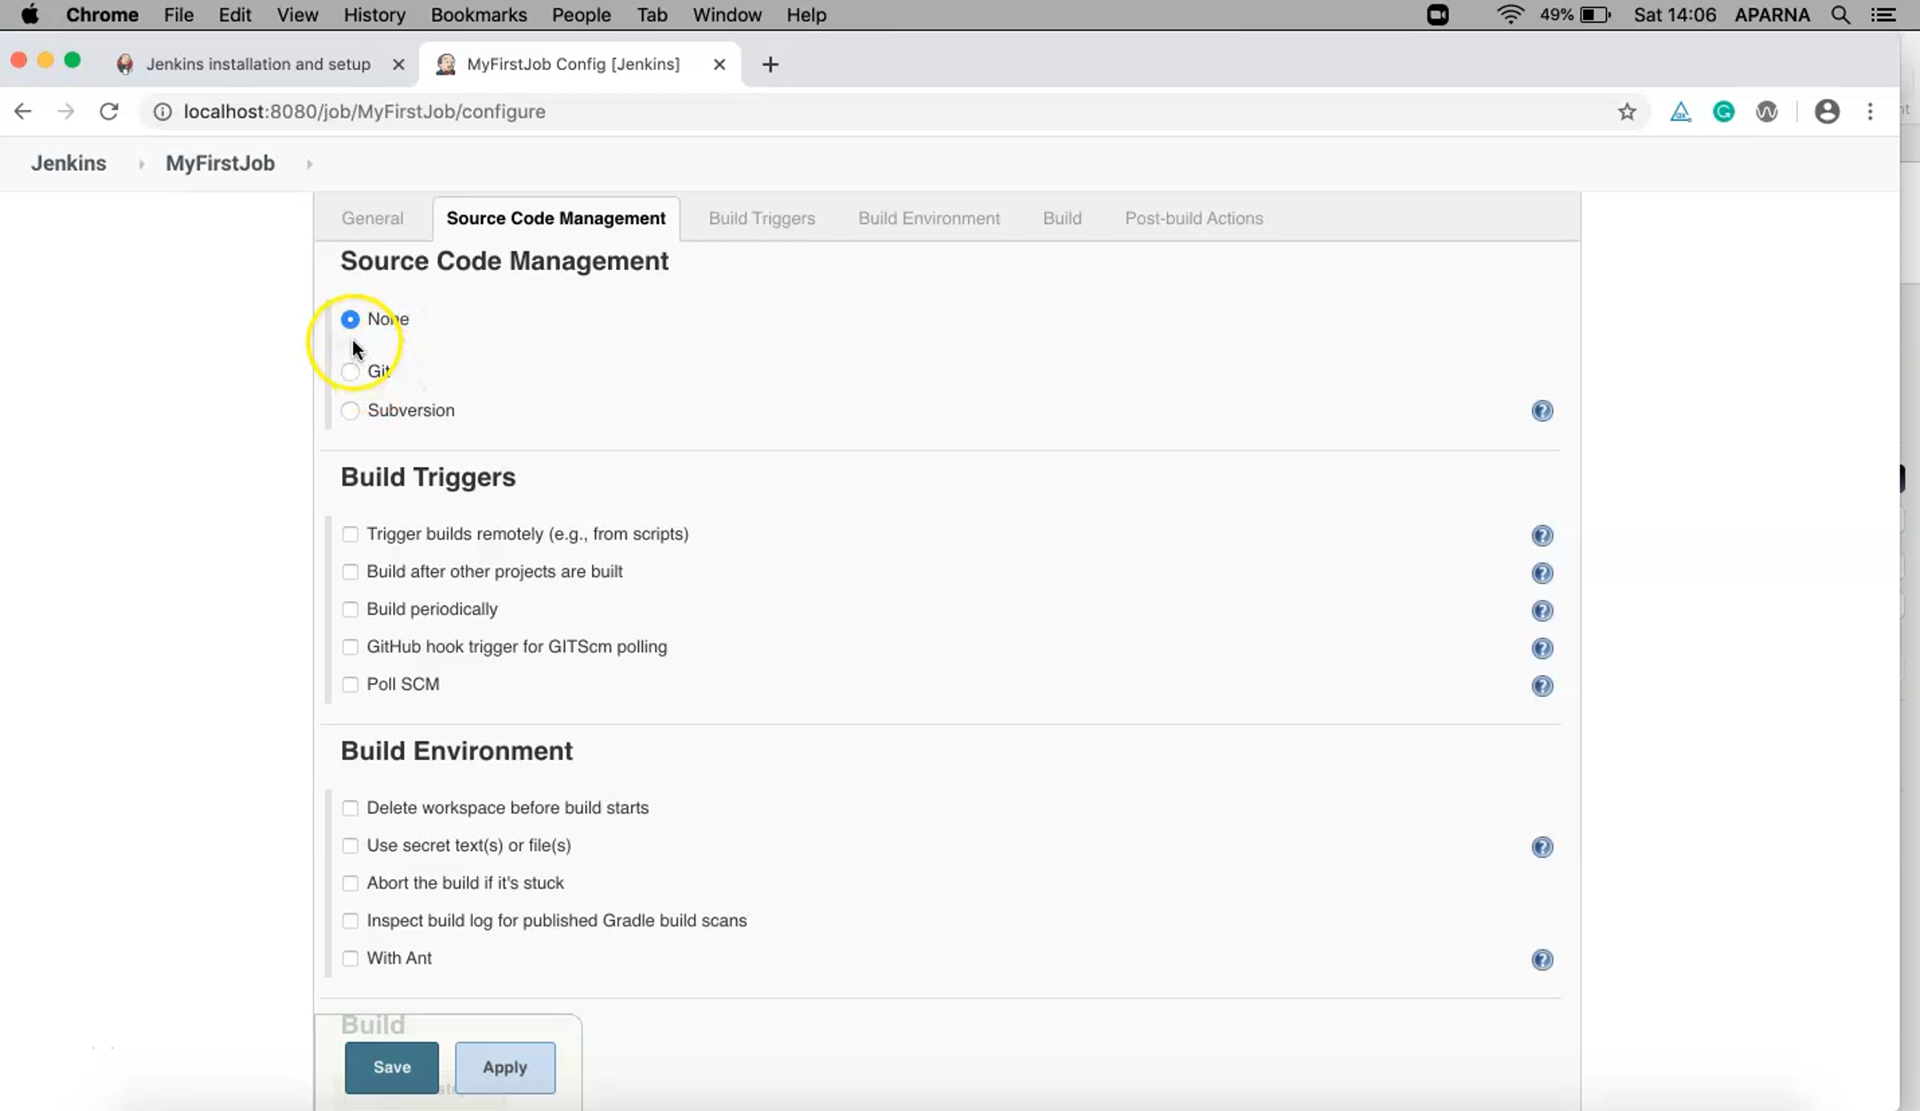
# Build Triggers
In this section you will find options to trigger builds in different ways, such as remotely using a script, after other projects are built, or on a periodic basis.
Builds can also be triggered by GitHub changes or SCM polling tools working on specific time intervals. This behavior can be configured based on your specific requirements.
# Build Environment
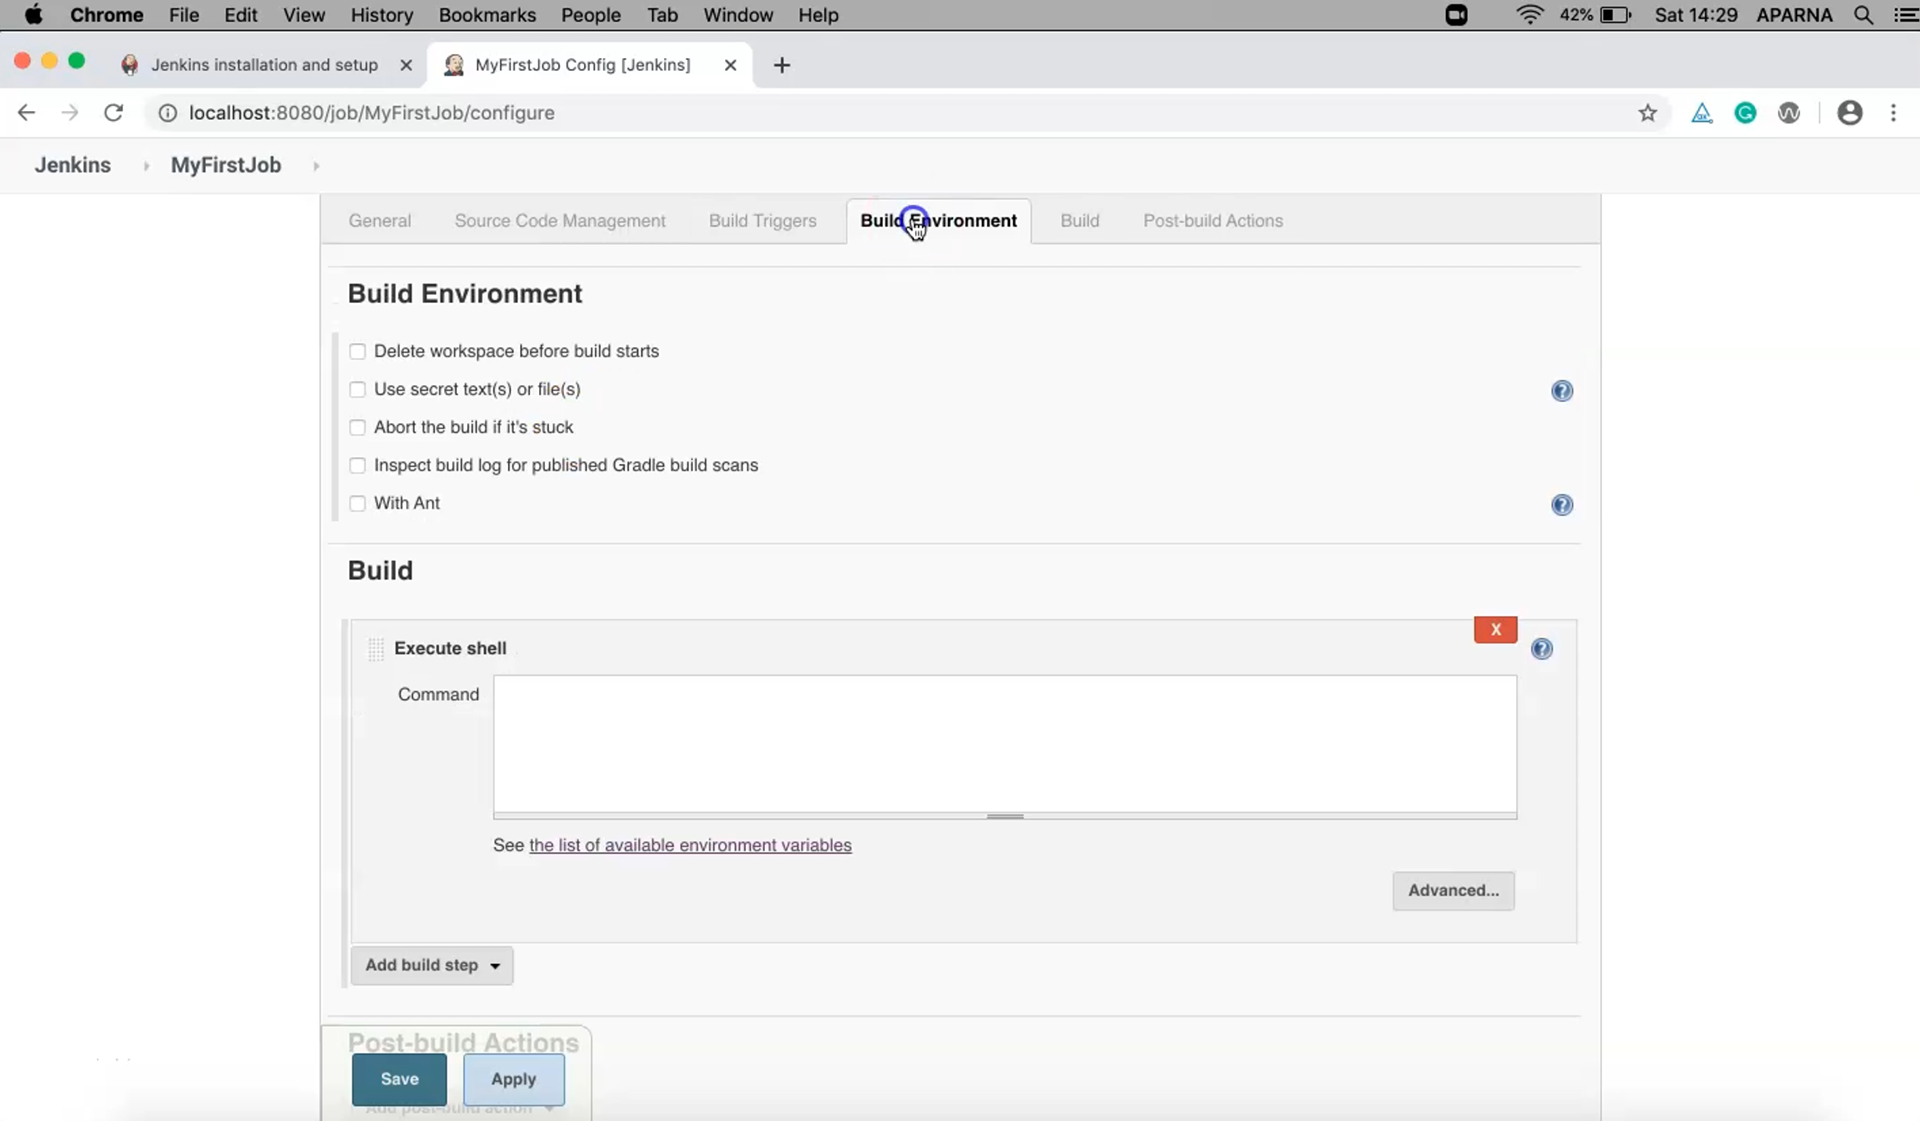
The Build Environment page includes the following configuration options:
"Delete workspace before build starts" - Select this if you wish to delete the workspace before a new build starts.
"Use secret text(s) or file(s)" - Select this to pass any secret text, i.e. additional bindings like certificates or SSH keys.
"Abort the build if it's stuck" - If a build has been running for three hours and you know it shouldn't take more than an hour, you should go and abort the build.
"Inspect build log…" - Select this if you want to inspect a Gradle build log.
"With Ant" - Select this to build the environment using Ant.
More options are configurable with additional plugins.
# Build
This is the build execution component. There are many options here as well.

We can use Windows batch commands, shell scripts, Ant, Gradle, Maven command sub- scripts, and more. Many additional options are available depending on the plugins we use.
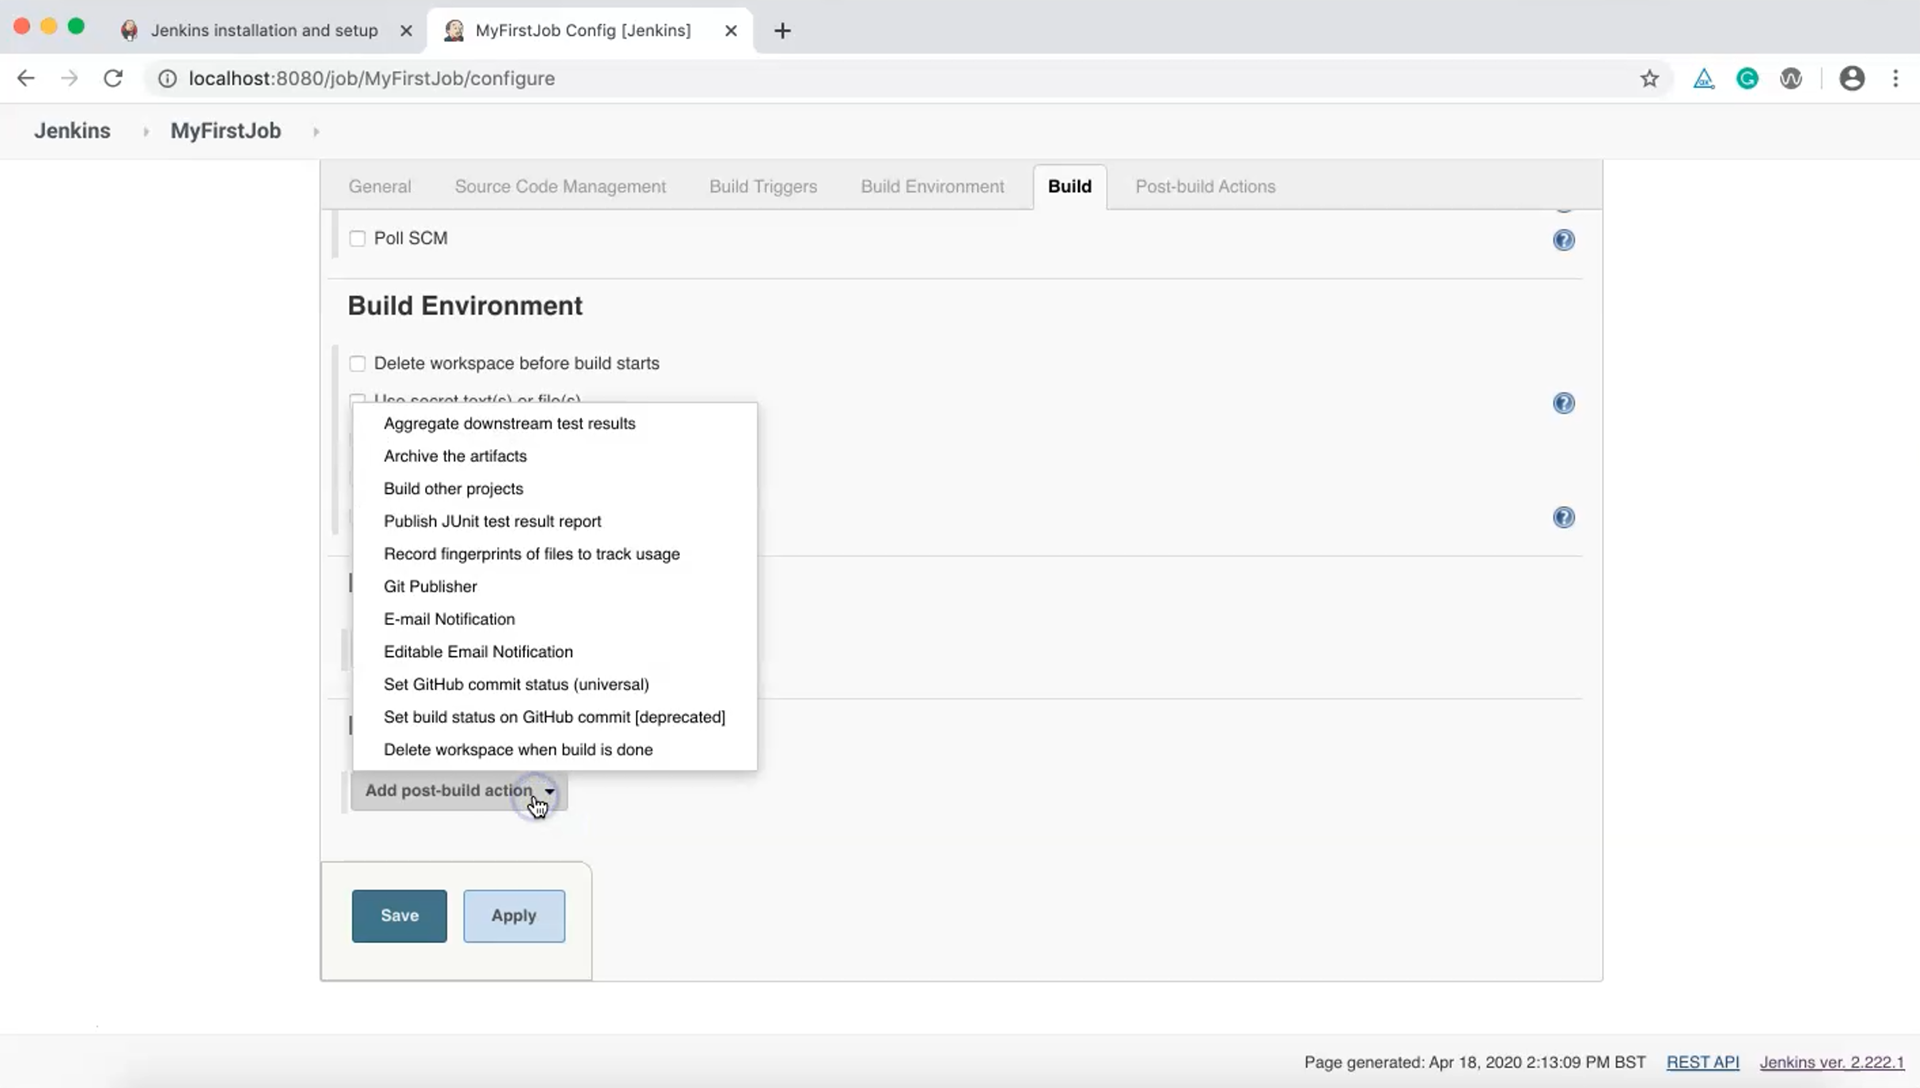
# Post-Build Actions
The final section is Post-Build Actions. Again, these options are customizable with additional plugins. These options can be used for publishing test results, sending emails, triggering a third job, and more.
# First Job
To test our first job, in the Build section we will add a build step.
I'm using a Mac so I'll choose "Execute shell" here. If you are on a Windows machine you will have to choose "Execute Windows batch command".
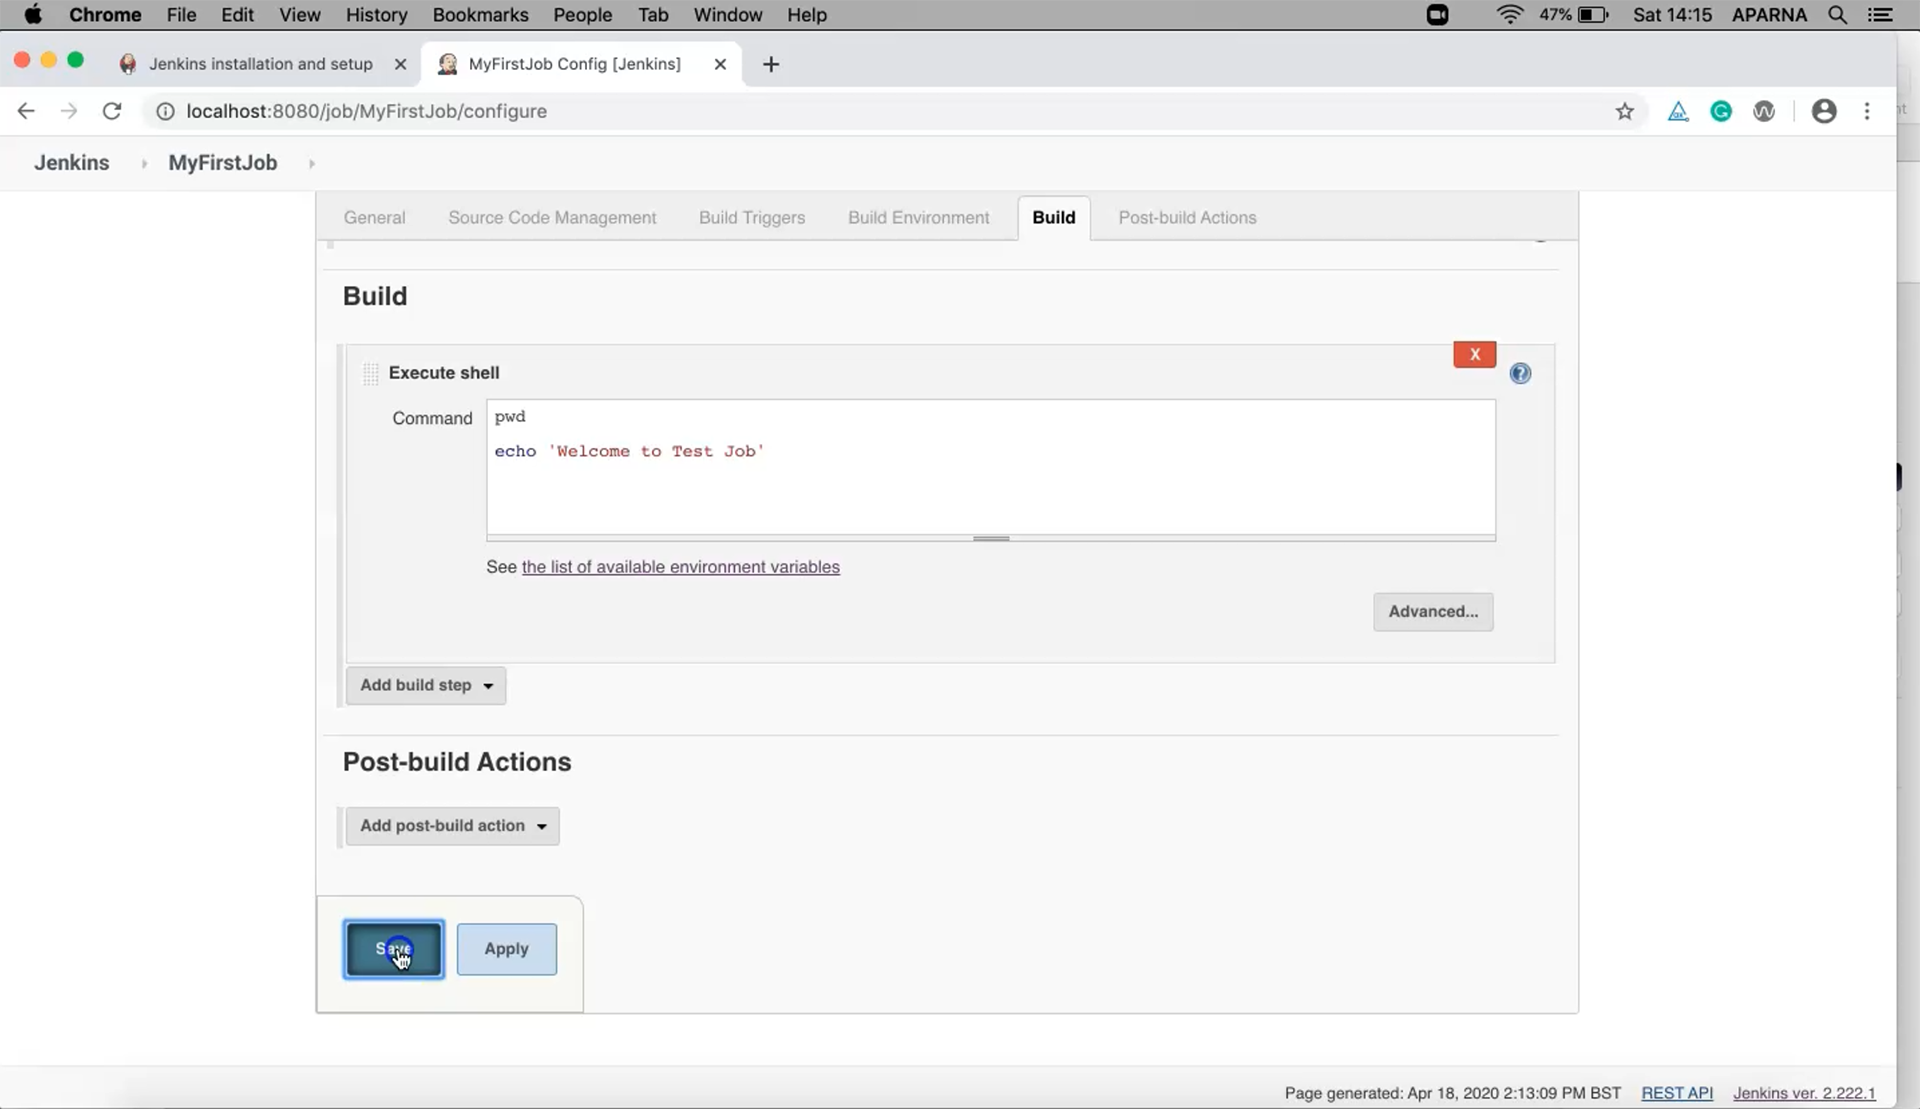
In this example we will add a command to display the current directory path.
pwd
echo 'Welcome to Test Job'
pwd is specific to the Bash shell; the equivalent Windows command ('echo %cd%`) must be used if you are on a Windows machine. We will also display a message, "Welcome to Test Job". Now, click "Apply" and "Save".
Once finished, let us build it by clicking "Build Now".
A blue indicator means that the build result is stable. Let us check the console to verify the build result.
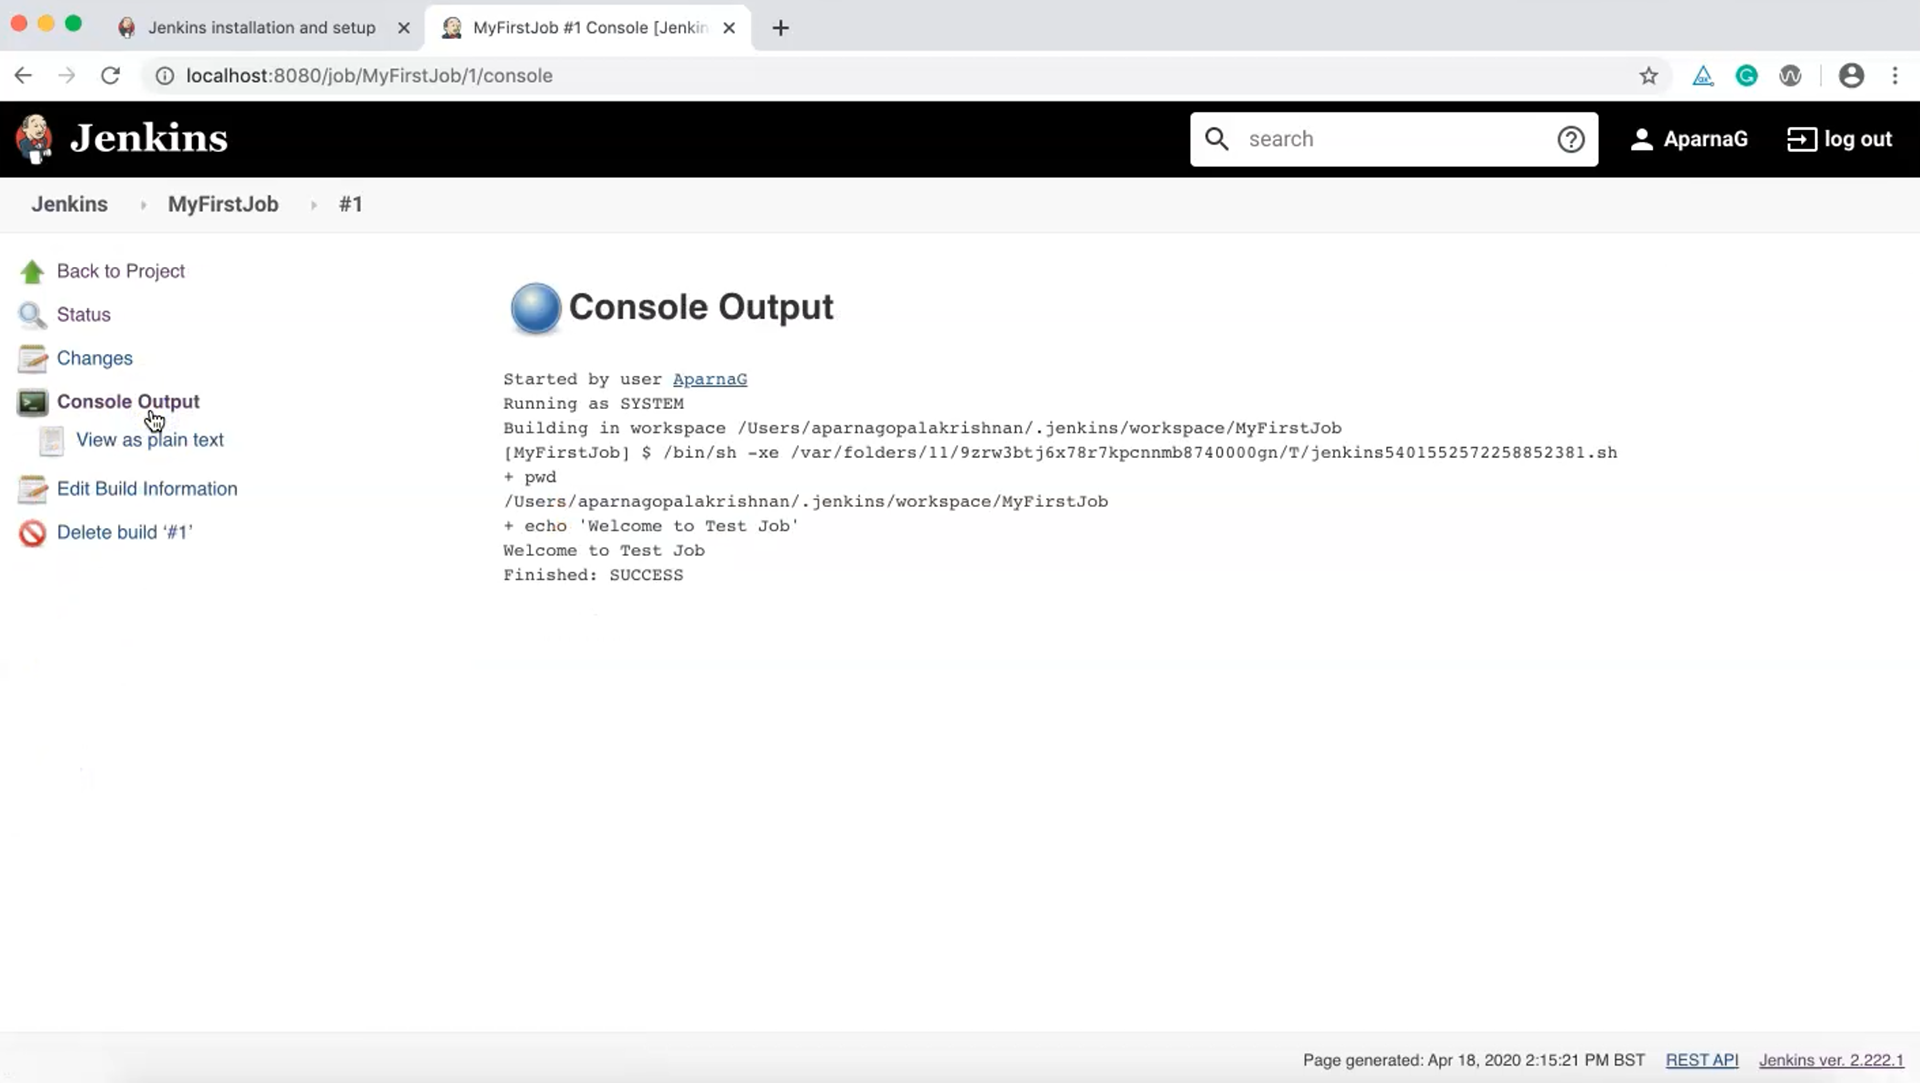
Here we see the full directory path and the message that we wanted to display. So, that's all for our first job. We will explore a more complex, real-time example in the next chapter.
