

Transcripted Summary
So we have seen how to integrate tests in Jenkins, how to execute them in parallel, how to skip tests, how to disable a test, and how to parameterize a job or a build.
Now it is time to explore reports in Jenkins. Of course, reports will be generated when running our test automation but how can we publish these reports in Jenkins?
In this chapter, we will look at reporting.
# Jenkins Reporting Plugins
We can view reports in two ways. As reports are generated in HTML, we can publish them using a plugin called HTML Publisher to which we pass a part of the generated HTML file.
This report can then be viewed from the job and appears in our target folder with the name "index.html".
Since this is a TestNG project, a TestNG reporter plugin is also available that takes a "testng-results.xml" file and converts it to a formatted report for Jenkins.
Similarly, different plugins are available based on the type of project that we use, including HTML Report for Cucumber-based projects and JUnit HTML Report for Java.
So we can choose a plugin based on our project type, requirements, and needs.
# HTML Publisher
Let's add the HTML Publisher plugin to our Jenkins instance.
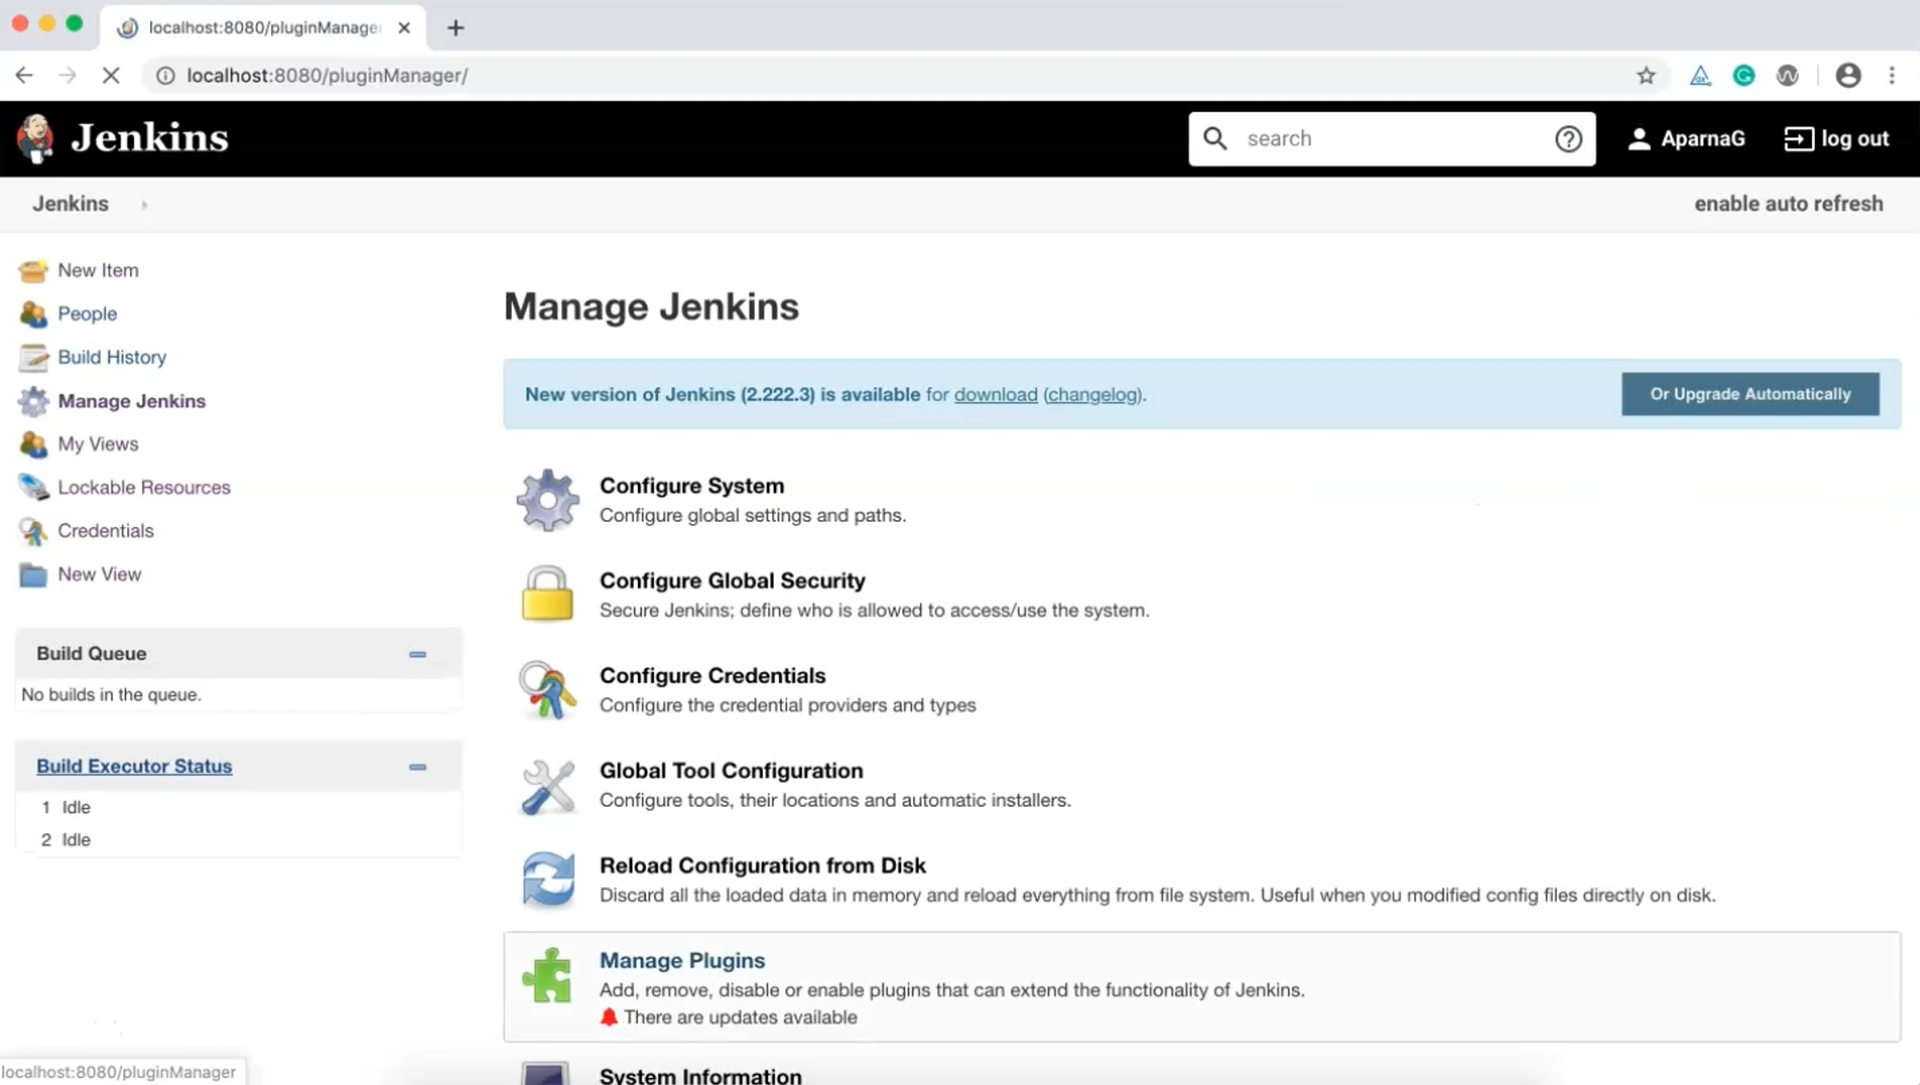
Click on "Manage Jenkins" and click on "Manage Plugins".
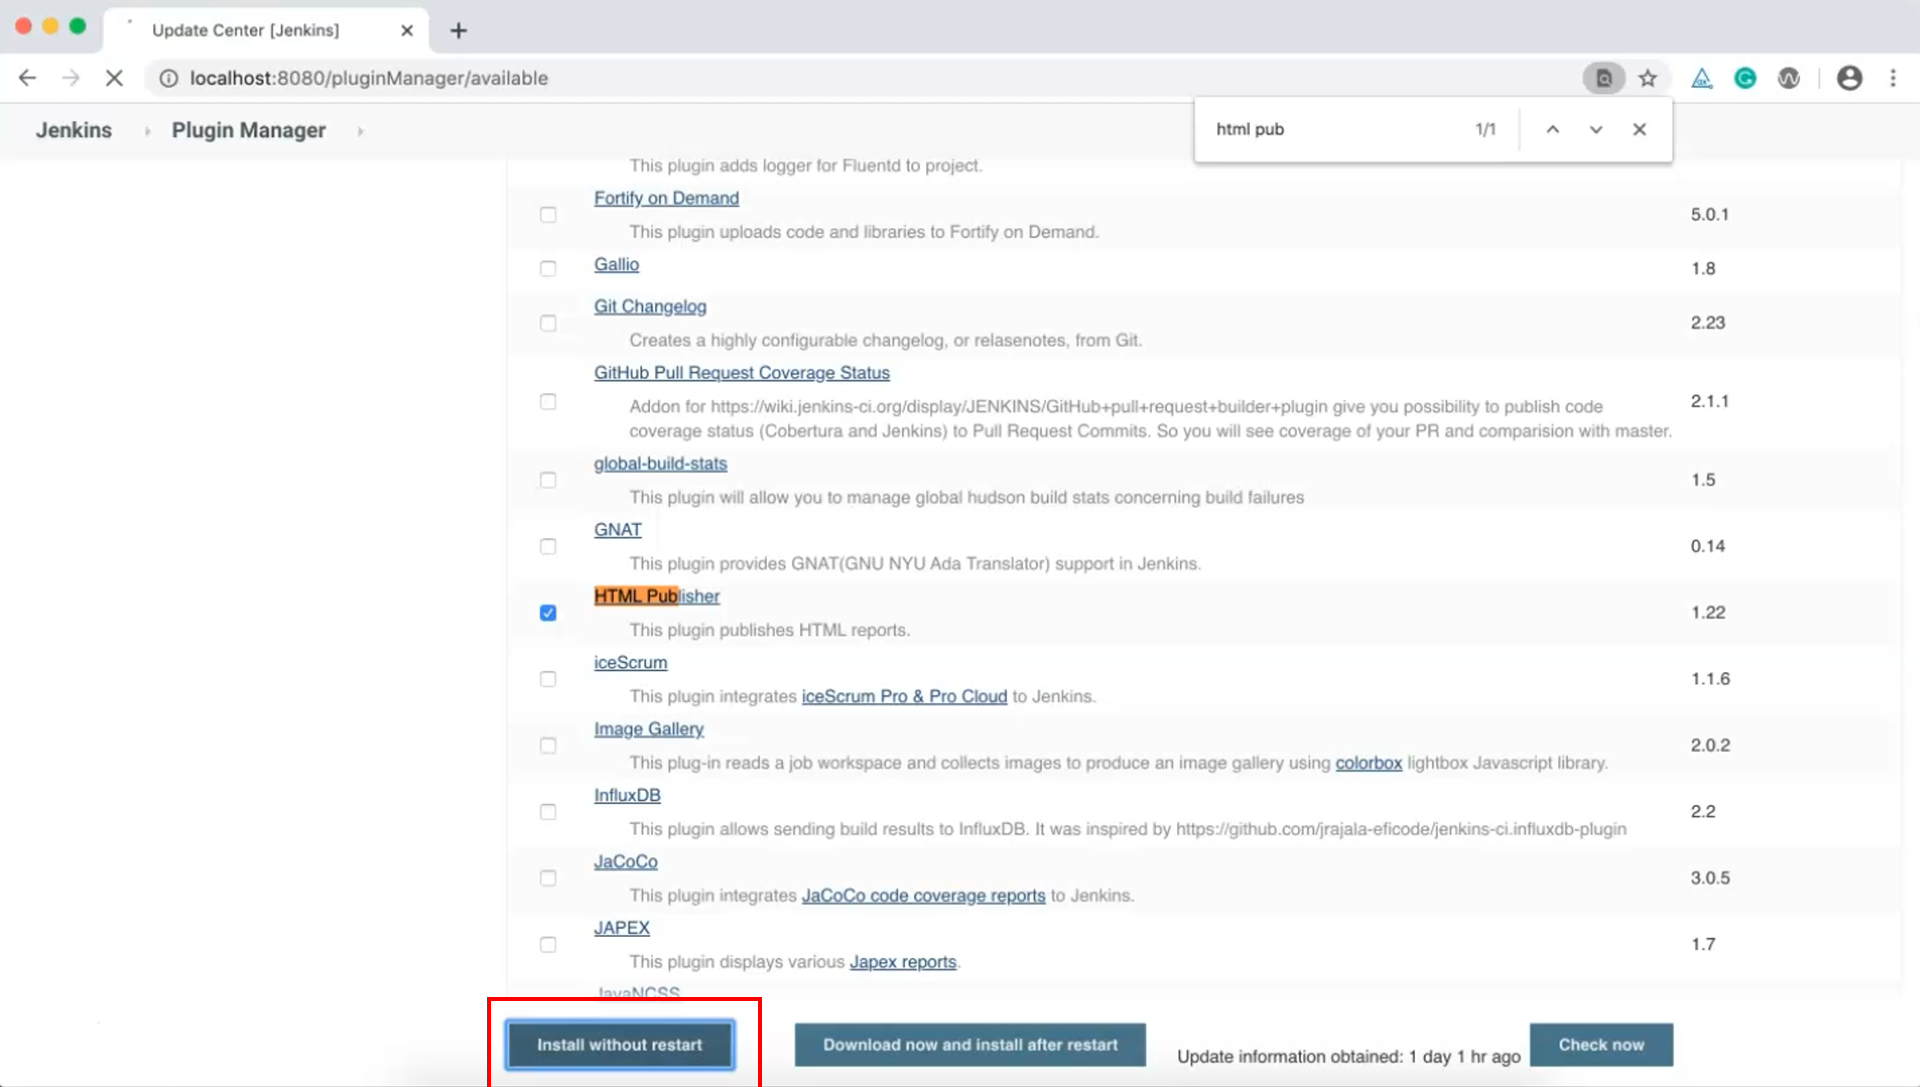
Click on "Available Plugins". Search for "HTML Publisher", select the entry and click on "Install without restart". This will install the plugin without having to restart Jenkins.
Now in the "Configure > Post-Build" section we should see a new HTML Publisher plugin option. Let's check that.
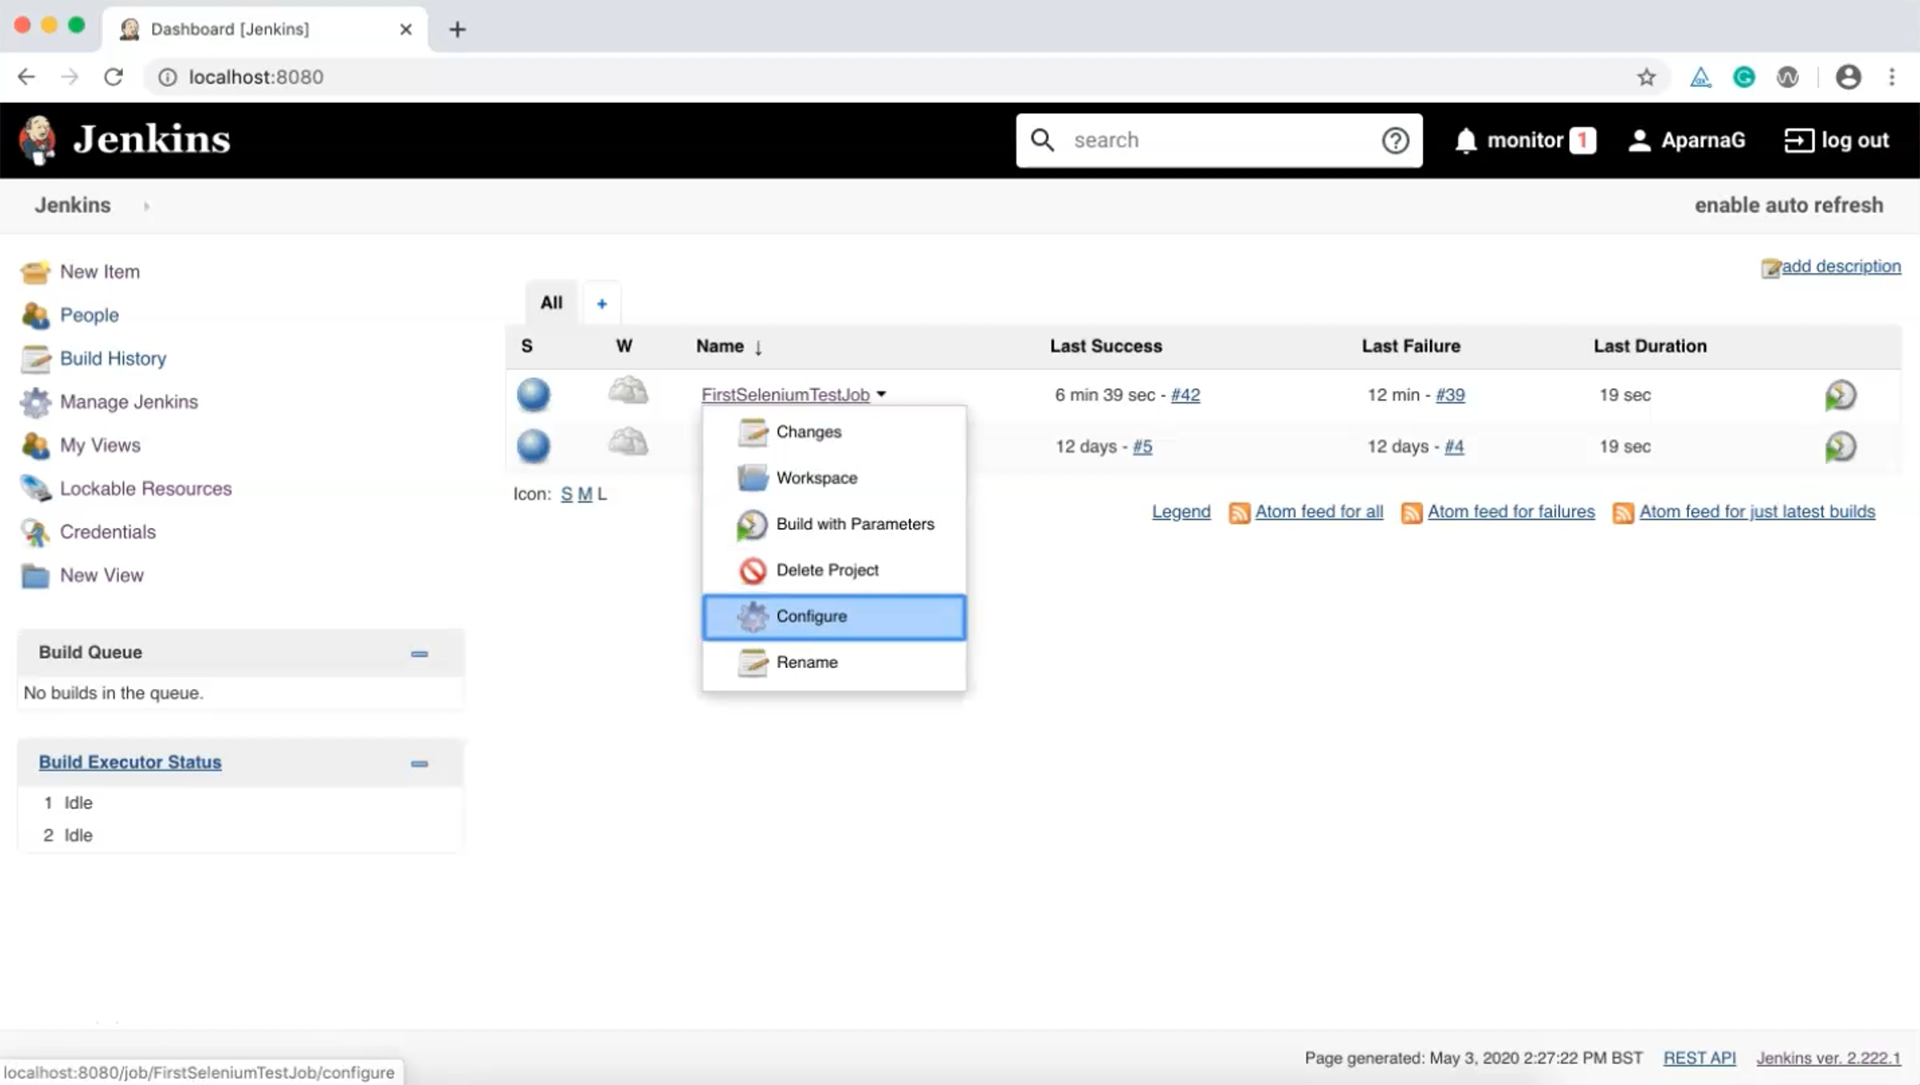
Click on your job, then click on "Configure".
On the "Build" tab scroll down to the "Build" section.
Clicking on "Add post-build action" should display the option "Publish JUnit test result report".
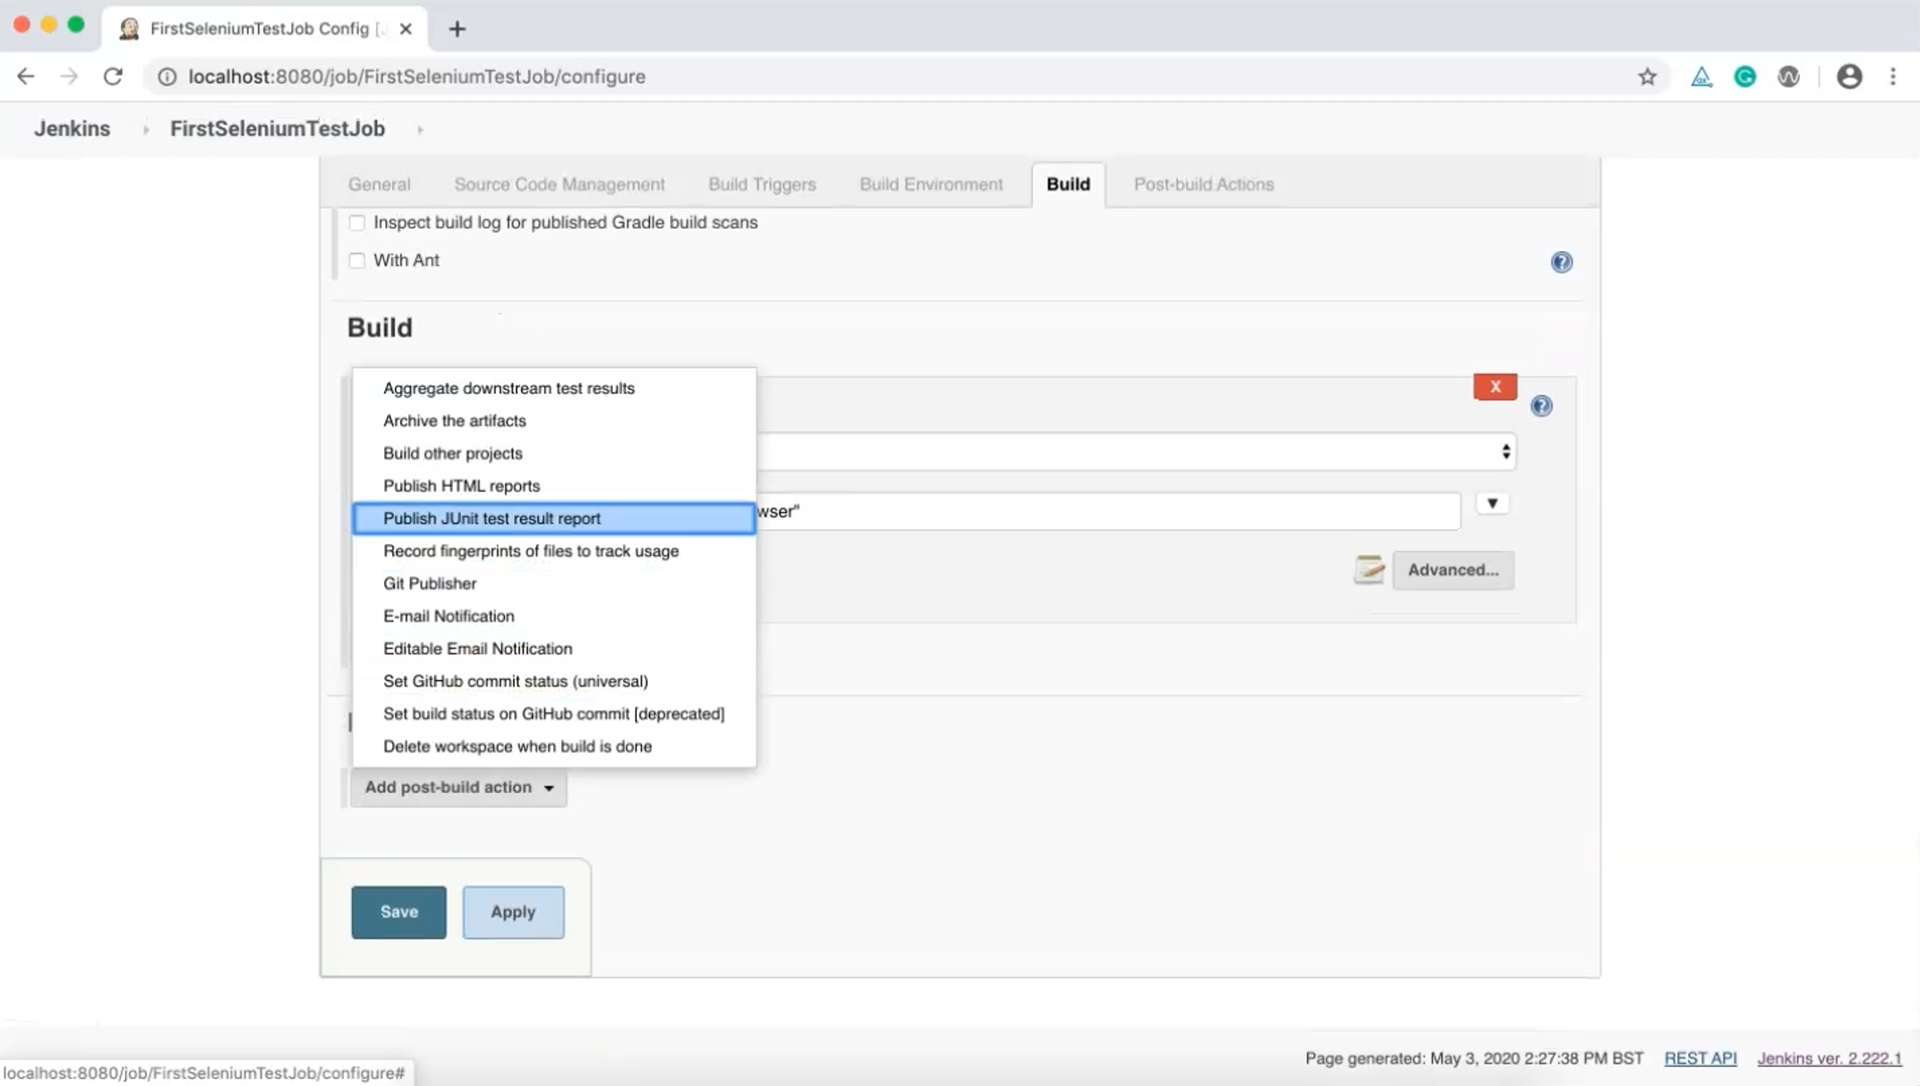
Select that option, then click on "Add".
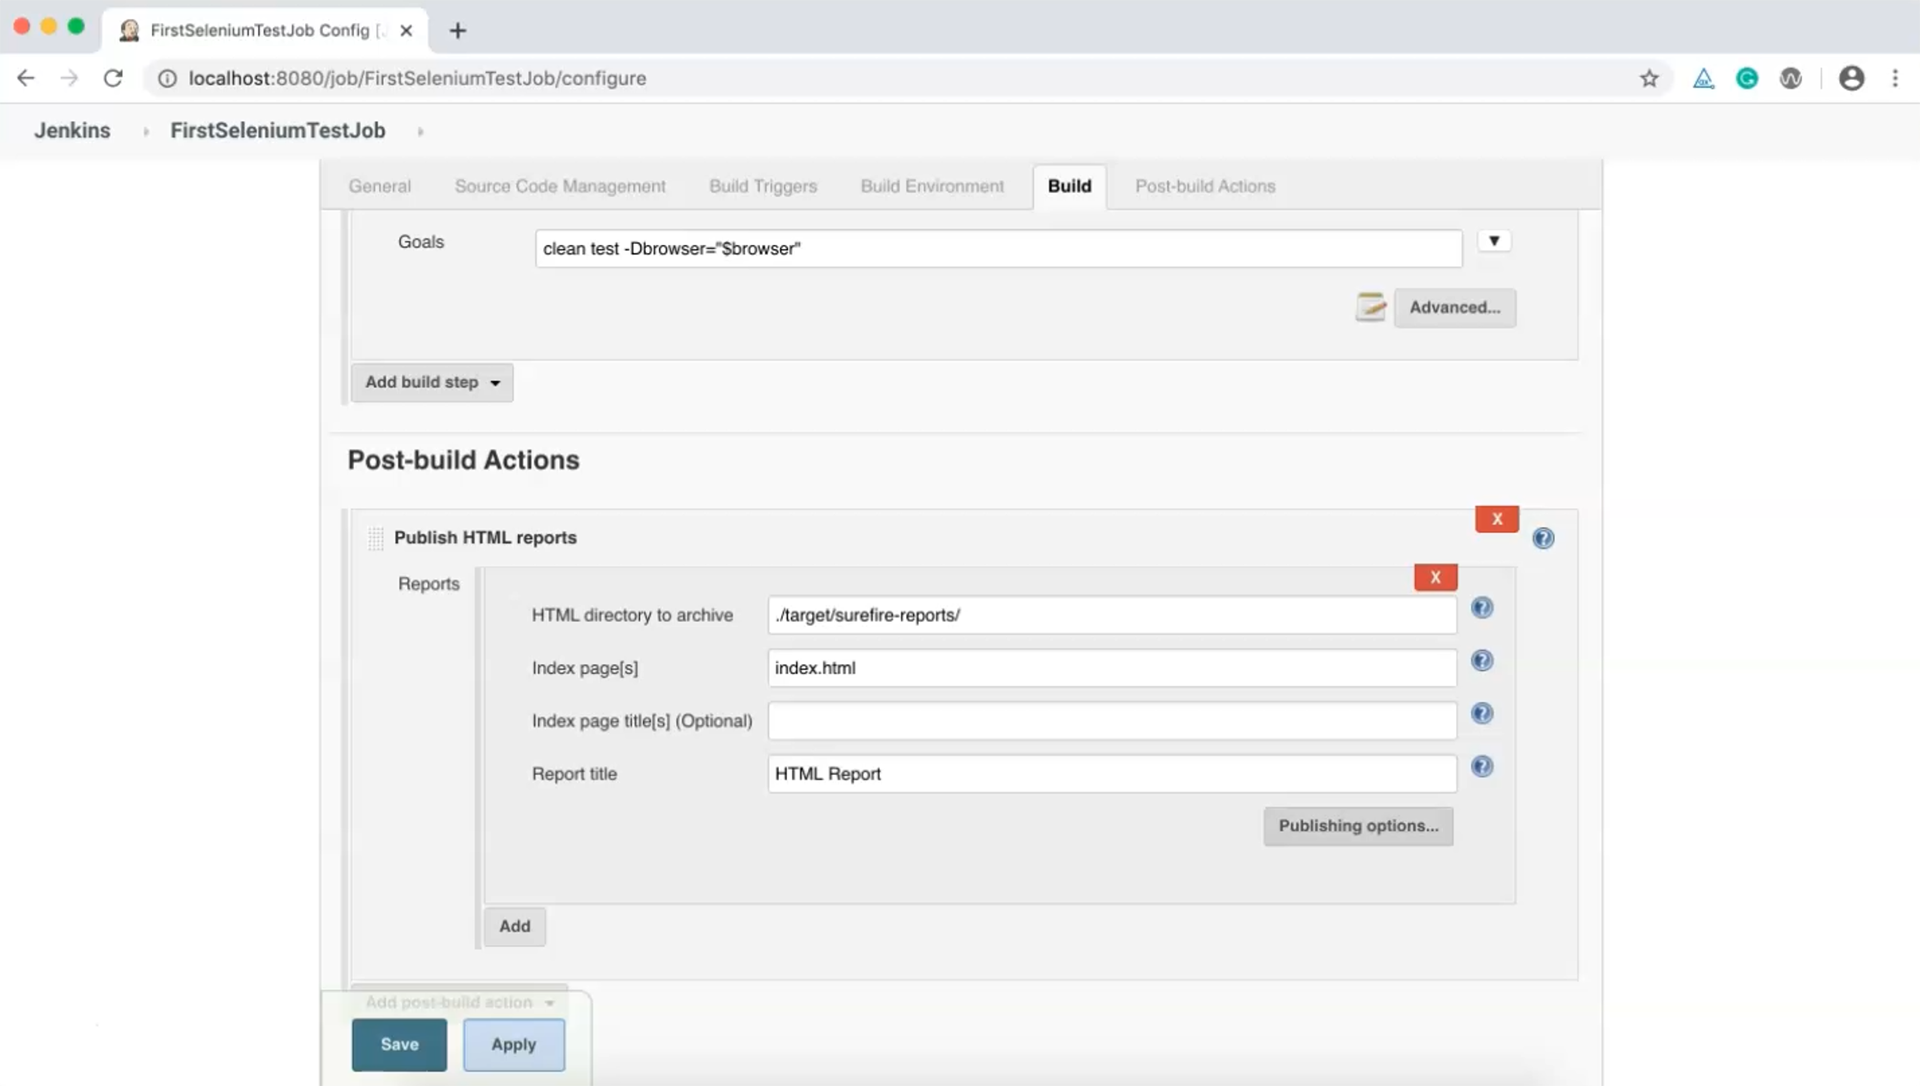
We need to enter an HTML directory path which in our case is ./target/surefile-reports/. Provide the complete path. Now click on "Publishing options" to show additional options.
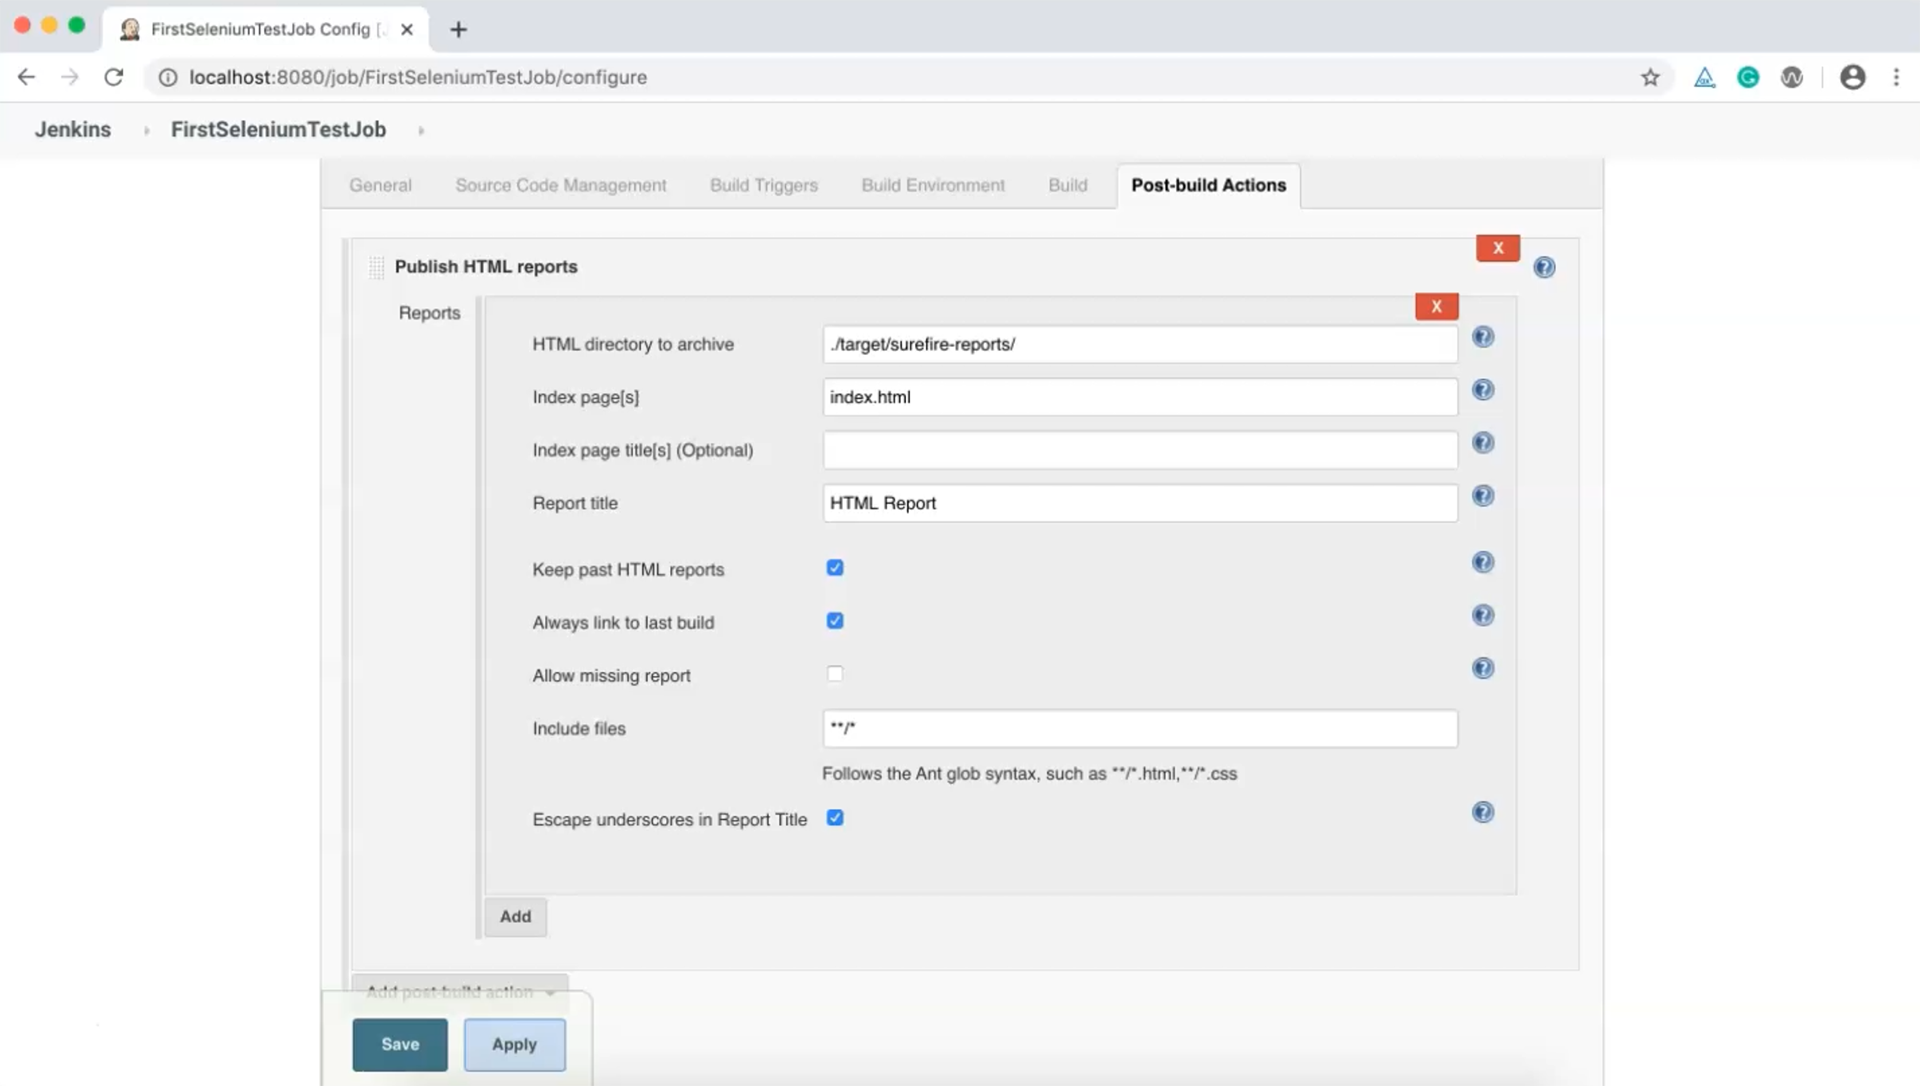
Select the "Keep past HTML reports" and "Always link to last build" options so that we always have a record of our previous build results.
At this point we are done so apply and save these changes. Now when we build this job we should be able to see the reports.
Go ahead and start the build and wait for it to complete.
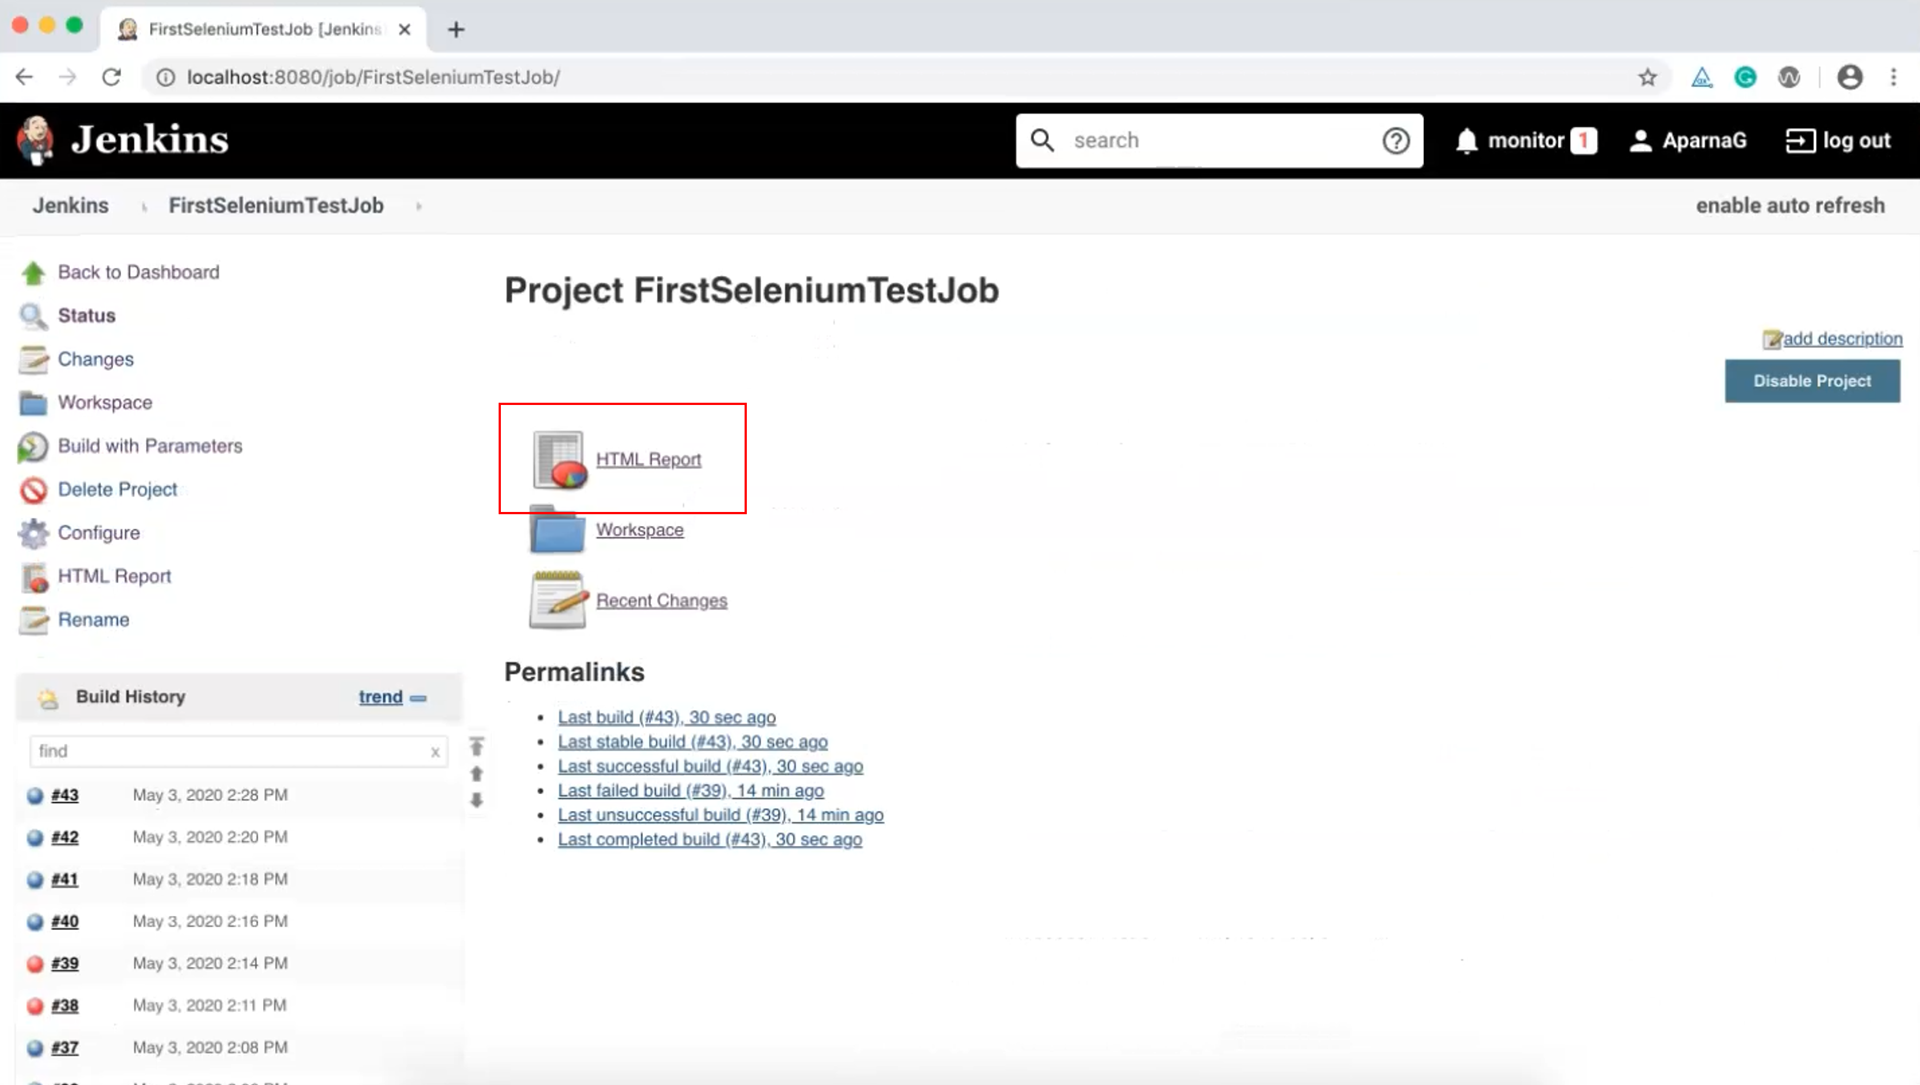
All done. We can see "HTML Report" on the dashboard so let's click on that.
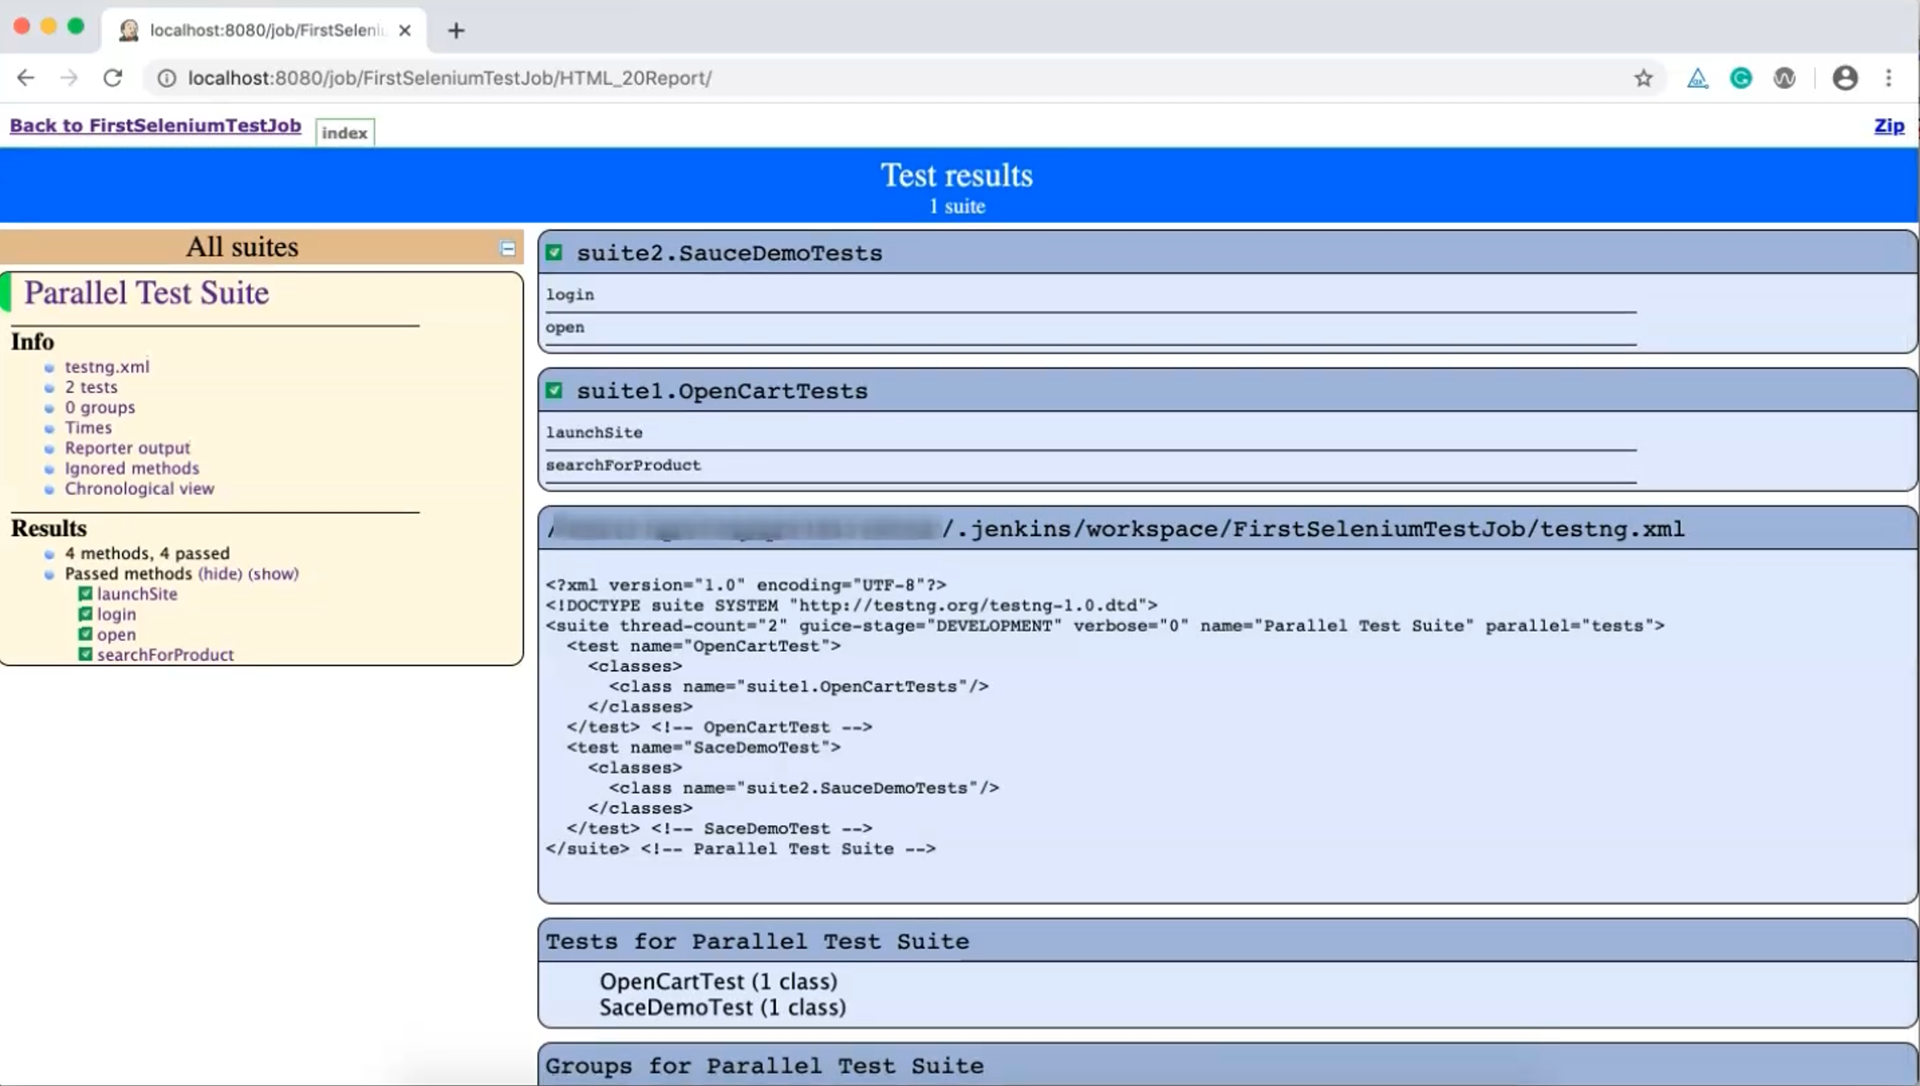
This report contains details such as test name, testng.xml, and so on. Every detail in index.html that was created during test execution is available for viewing here in the Jenkins portal.
# TestNG Results
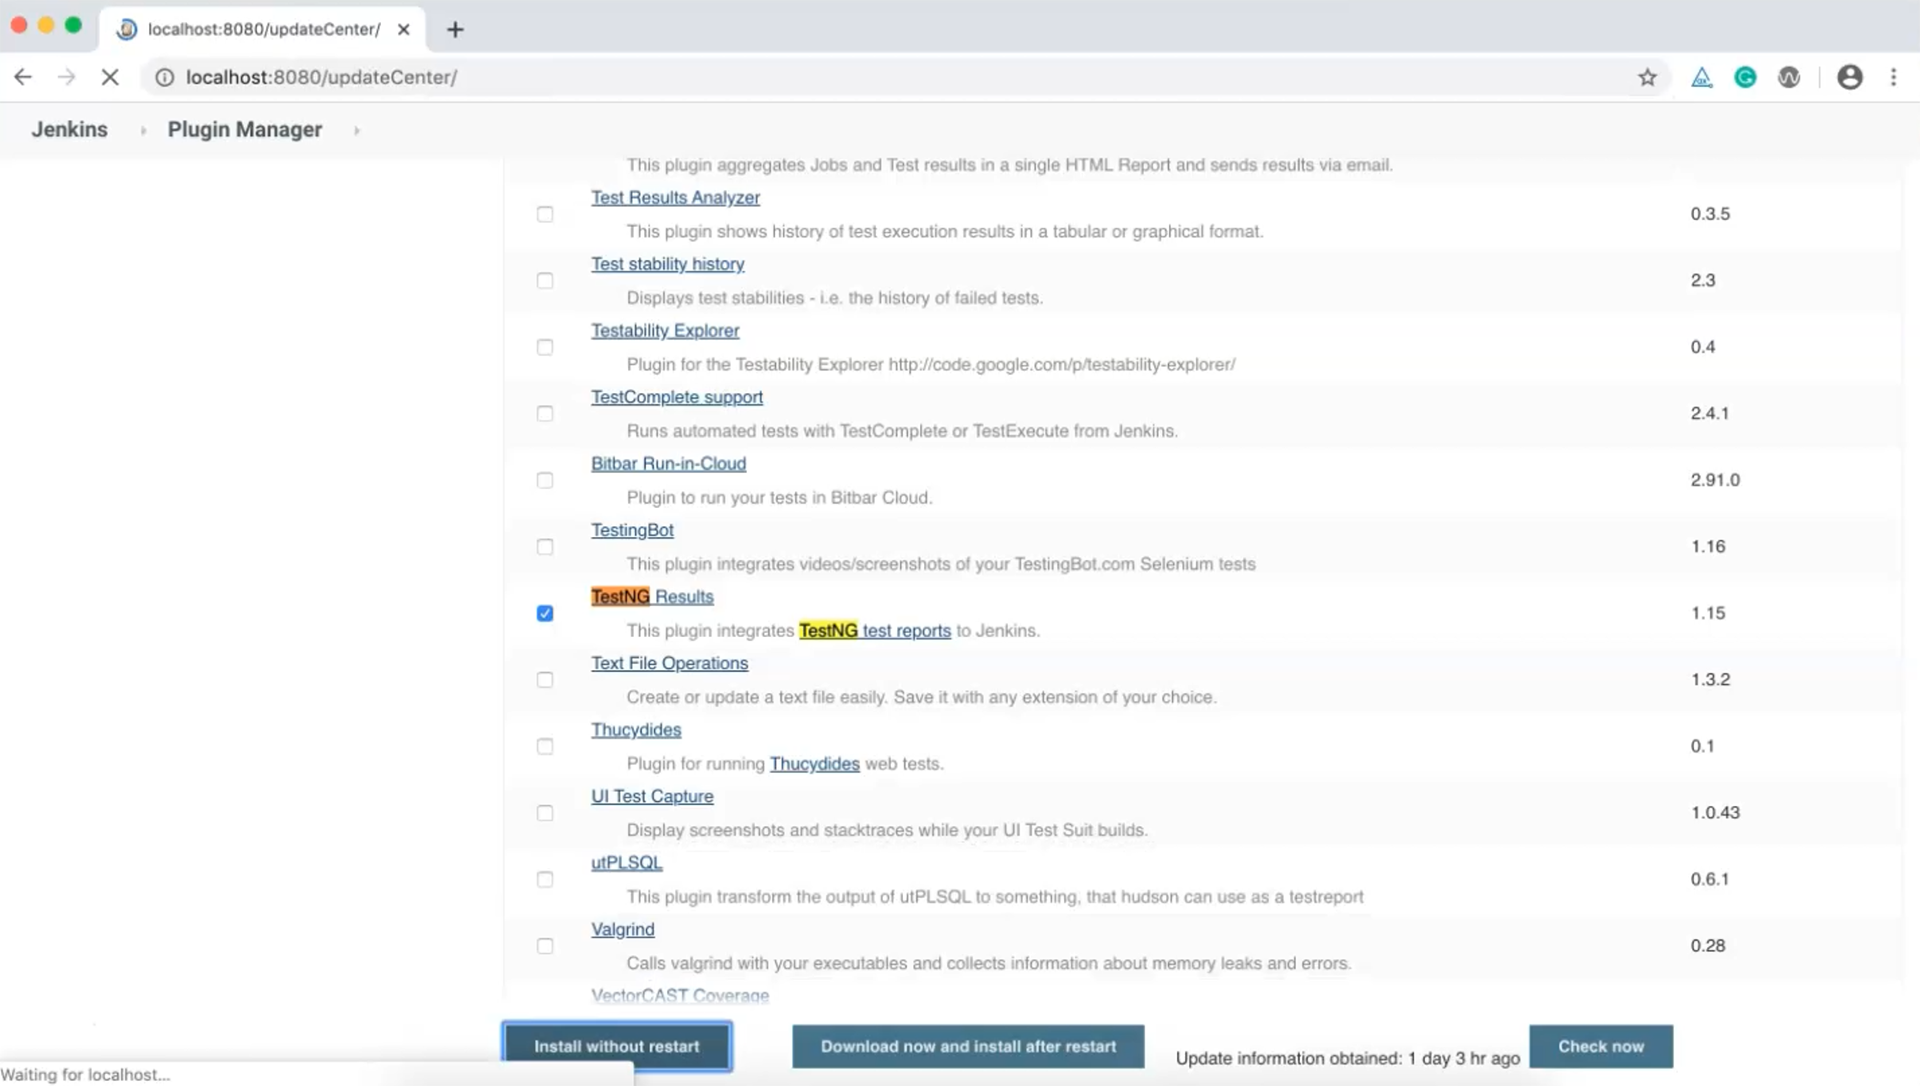
Now let's look at the TestNG Report plugin. Just as we did for HTML Publisher, let's install the plugin "TestNG Results" from the list of available plugins.
Wait until the installation is complete. Now it's done so let's configure that in our job. Click on your job, then click on "Configure".
On the "Post-build Actions" tab, click on "Add post-build action" and find the "Publish TestNG Results" option.
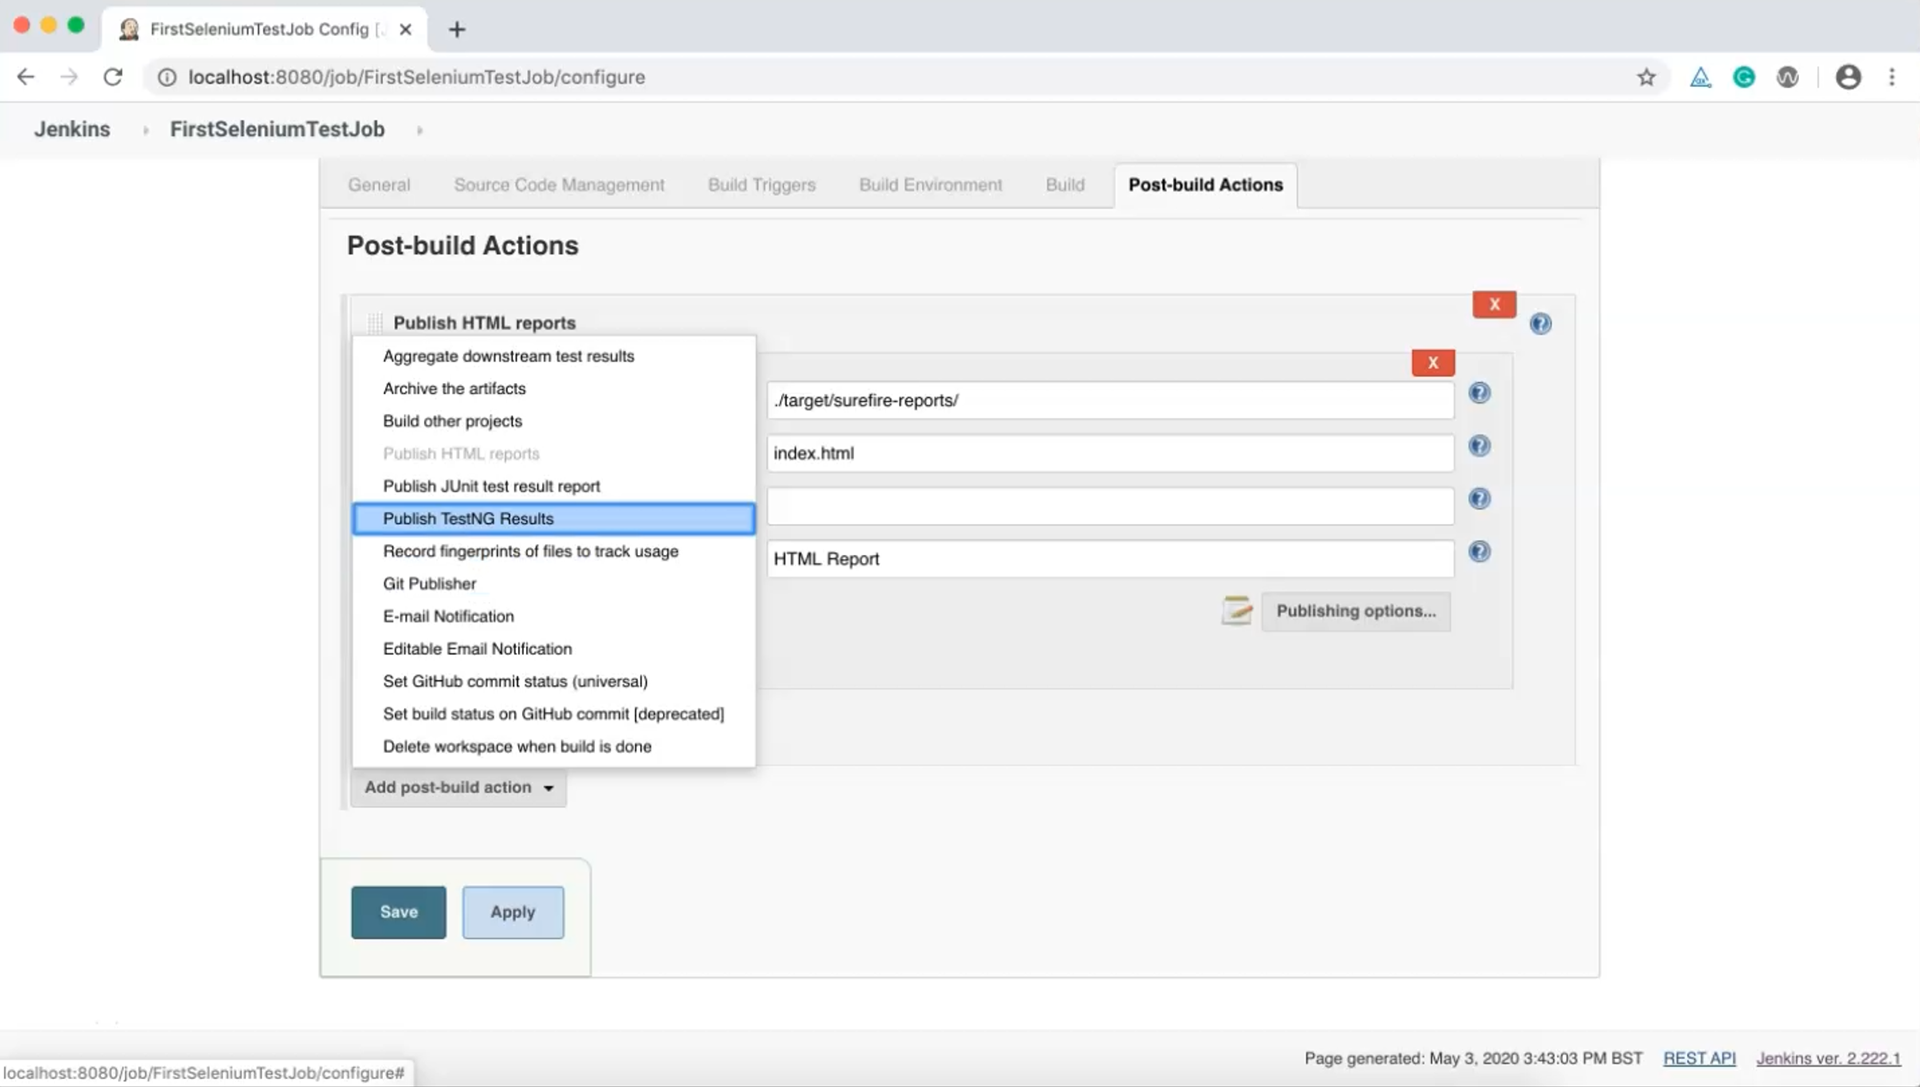
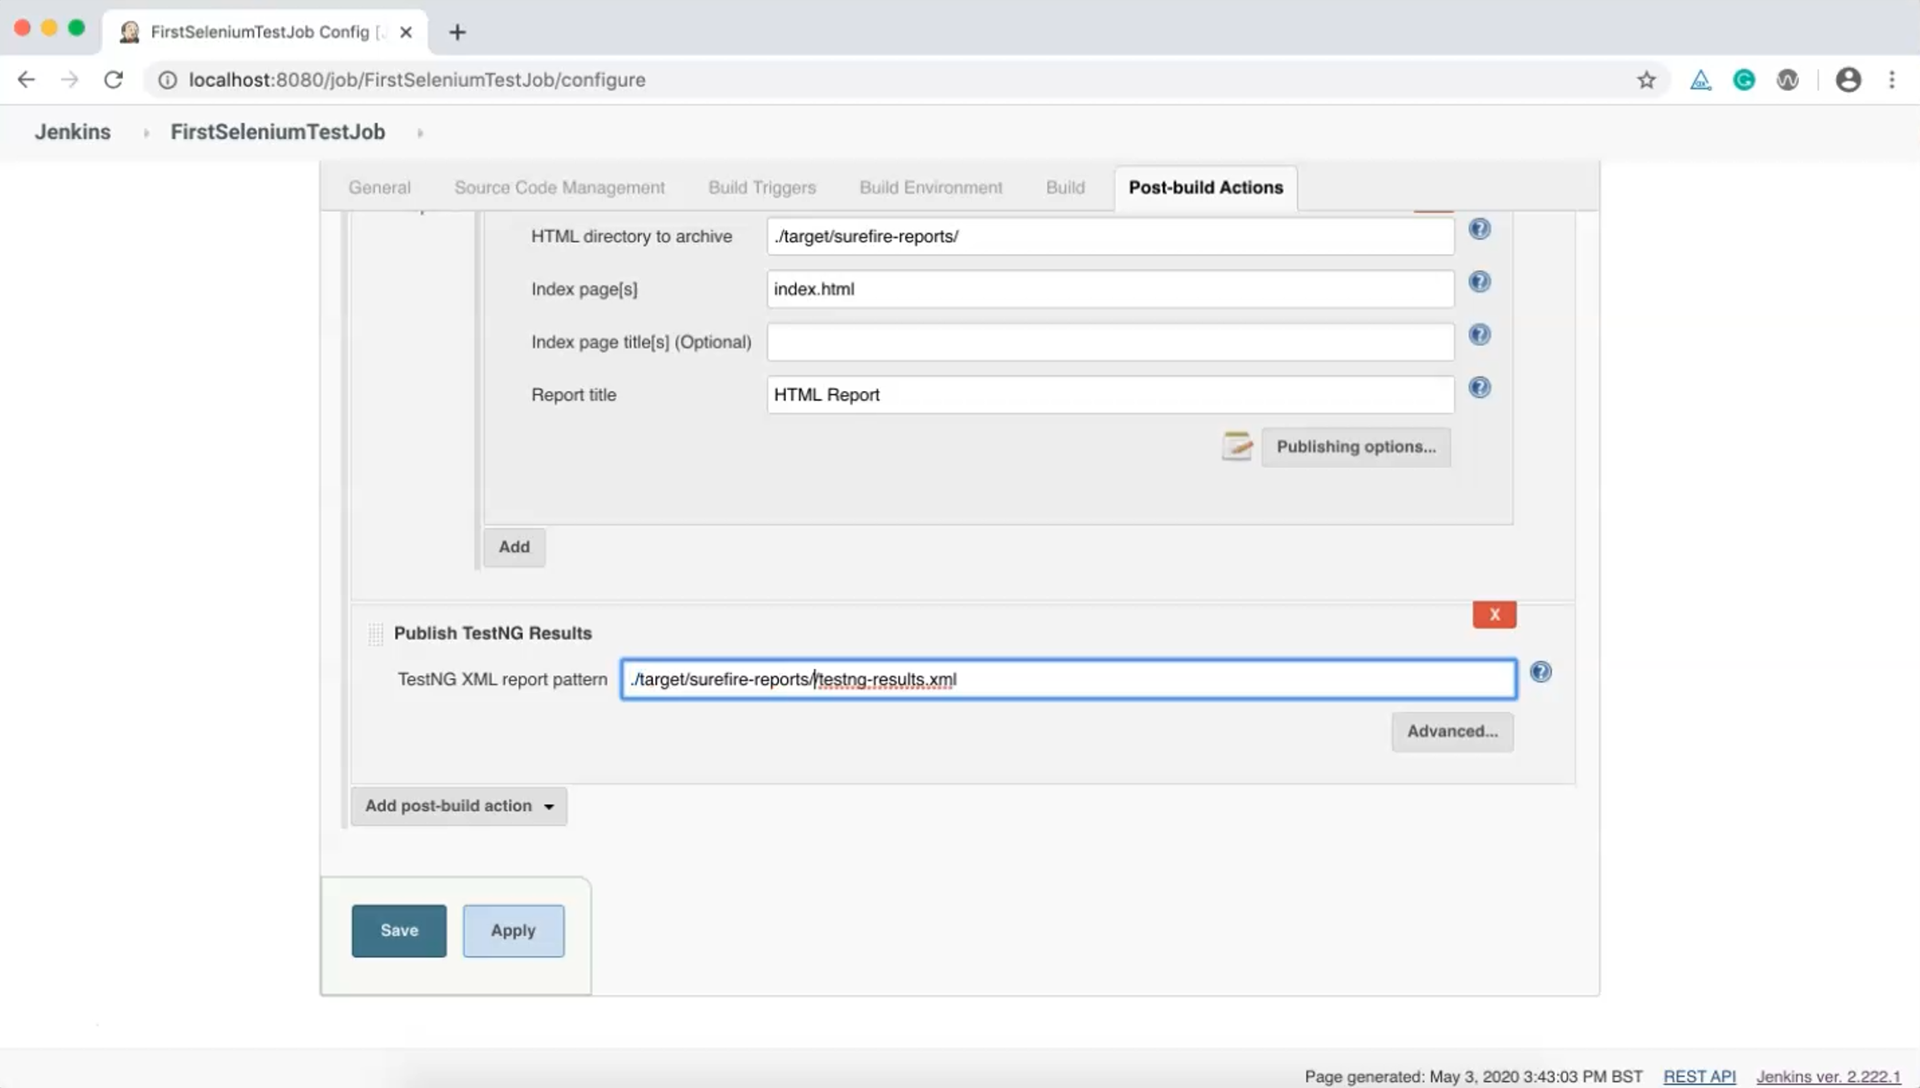
Select that. We need to provide our TestNG XML path here. In our case it will be ./target/surefile-reports/testng-results.xml. Give the full path, then apply and save these changes.
Let's start a new build and we'll see how the reports are being created.
Wait until the build is complete. The build is done and it appears to have completed successfully.
Now let's look at the TestNG report.
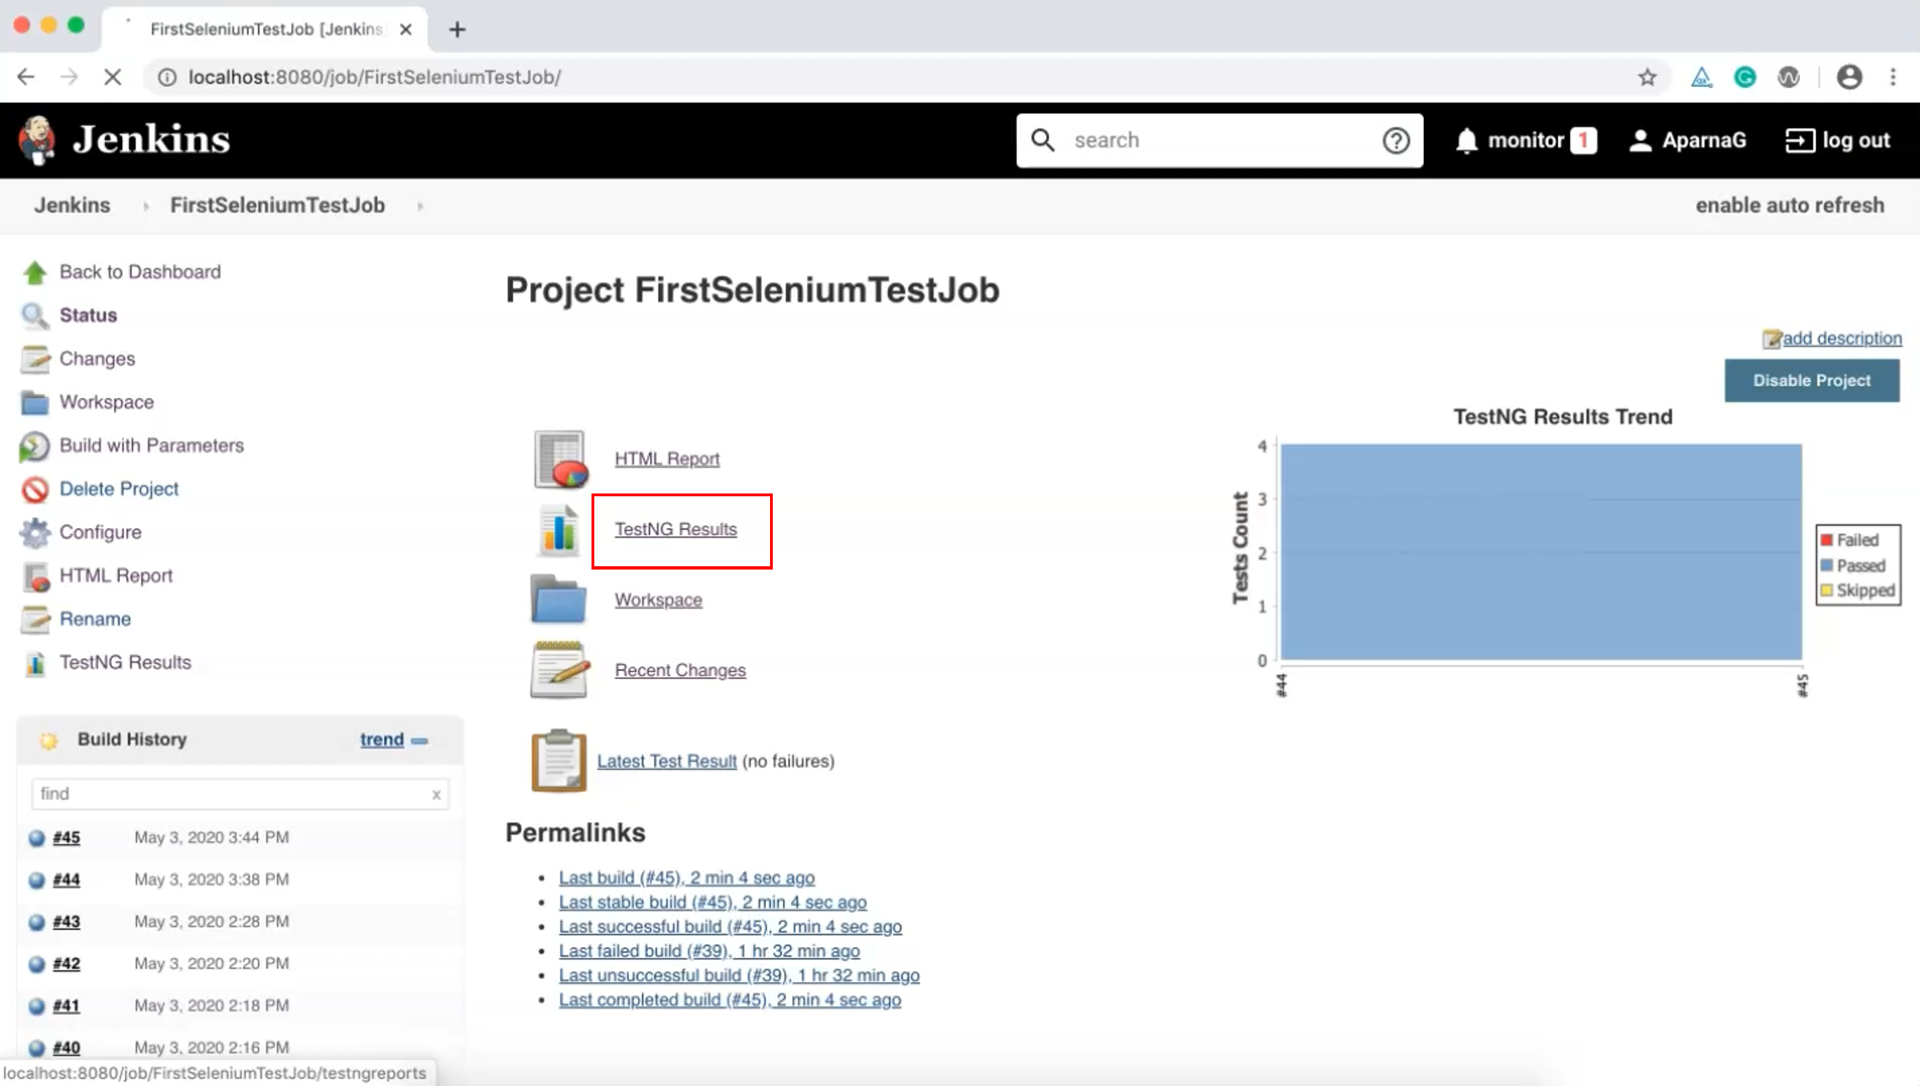
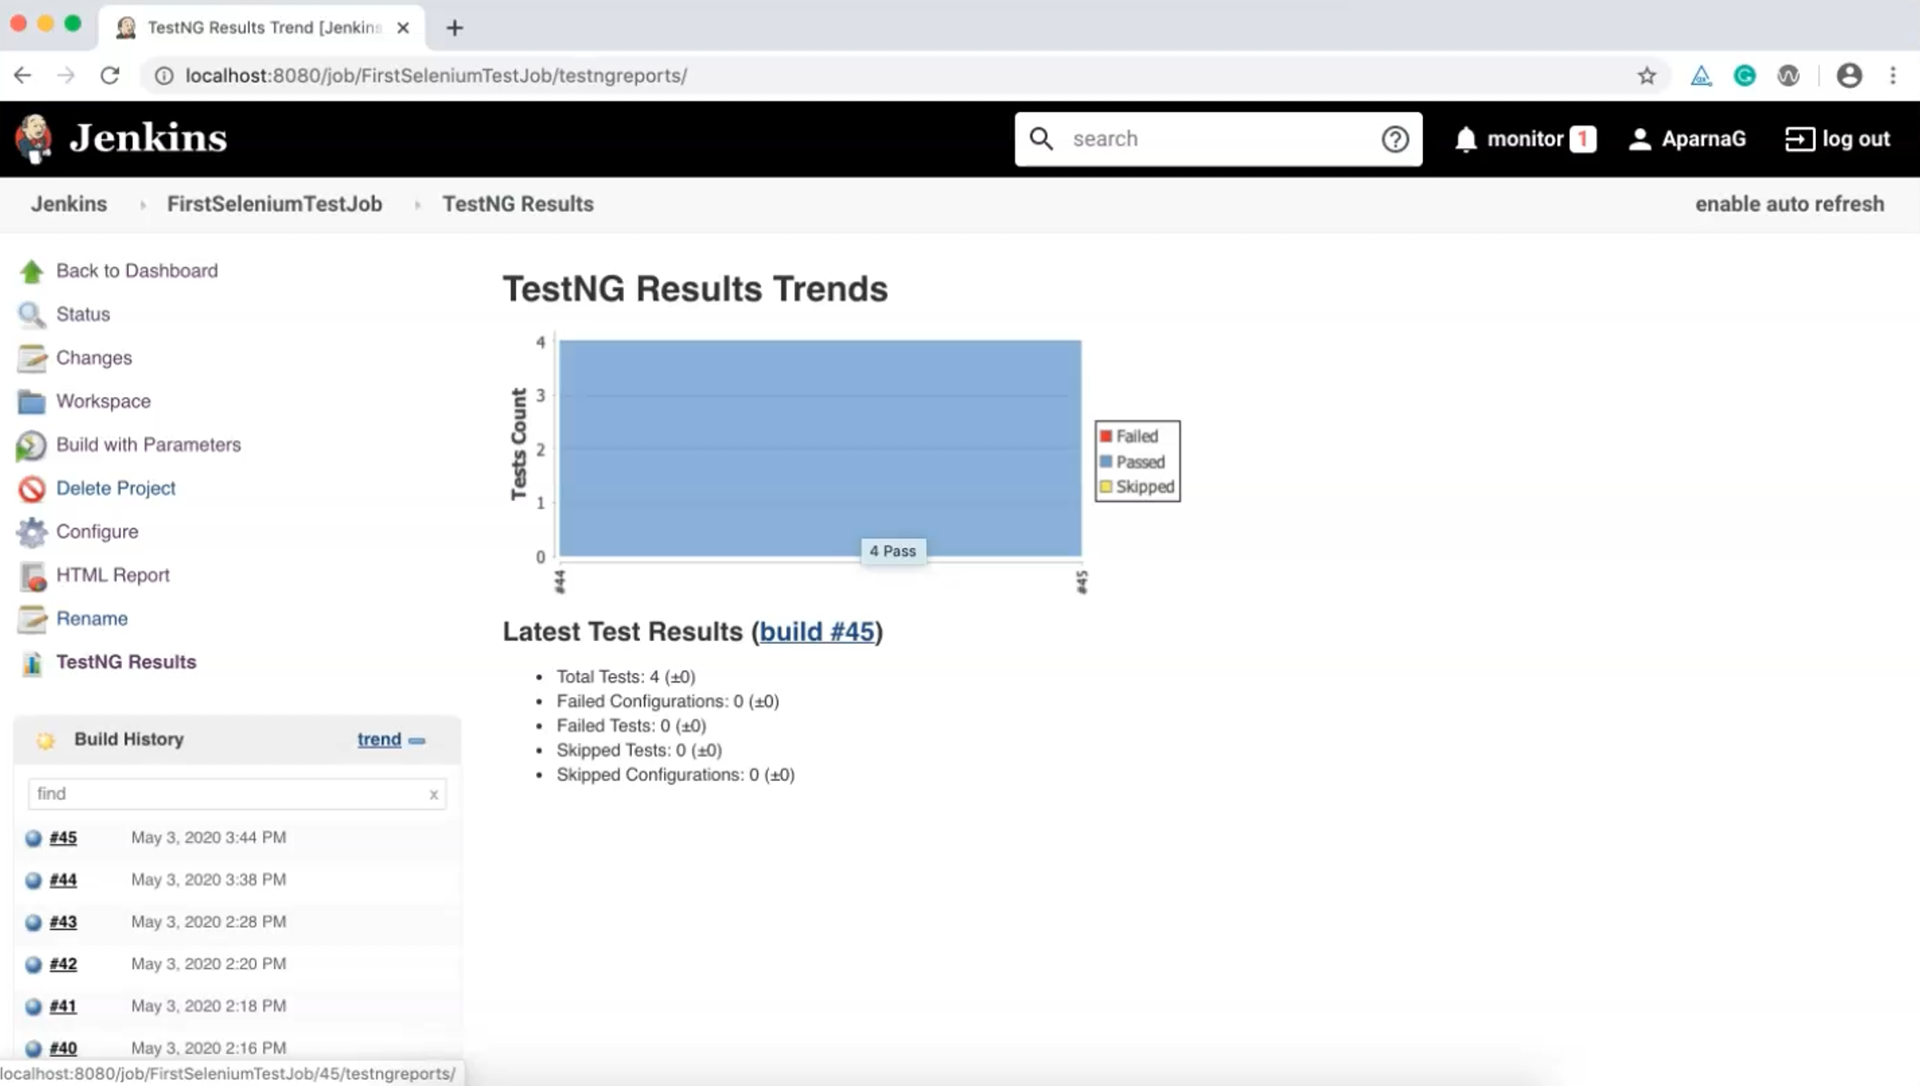
If you click on "TestNG Results" we can see the complete trend graph of the test cases that were executed.
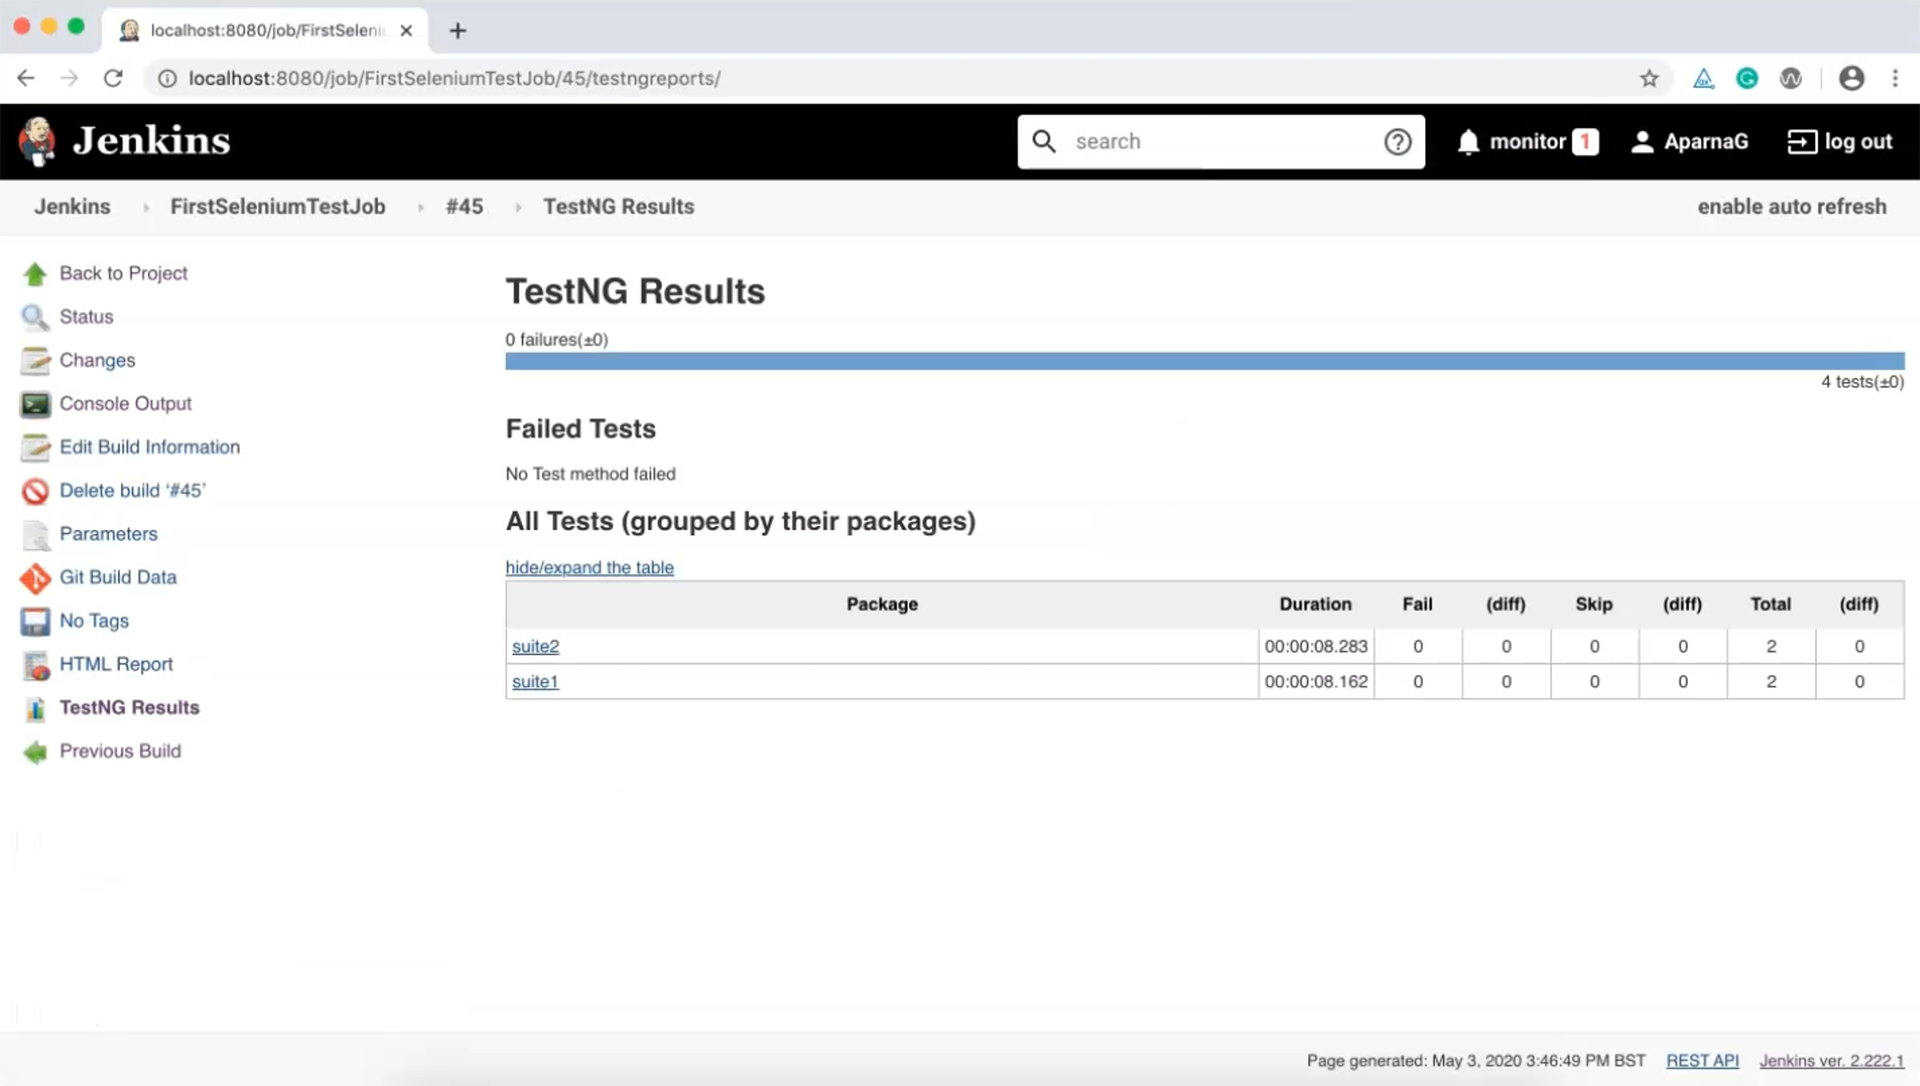
Clicking on a specific build we see the tests and suites that were executed.
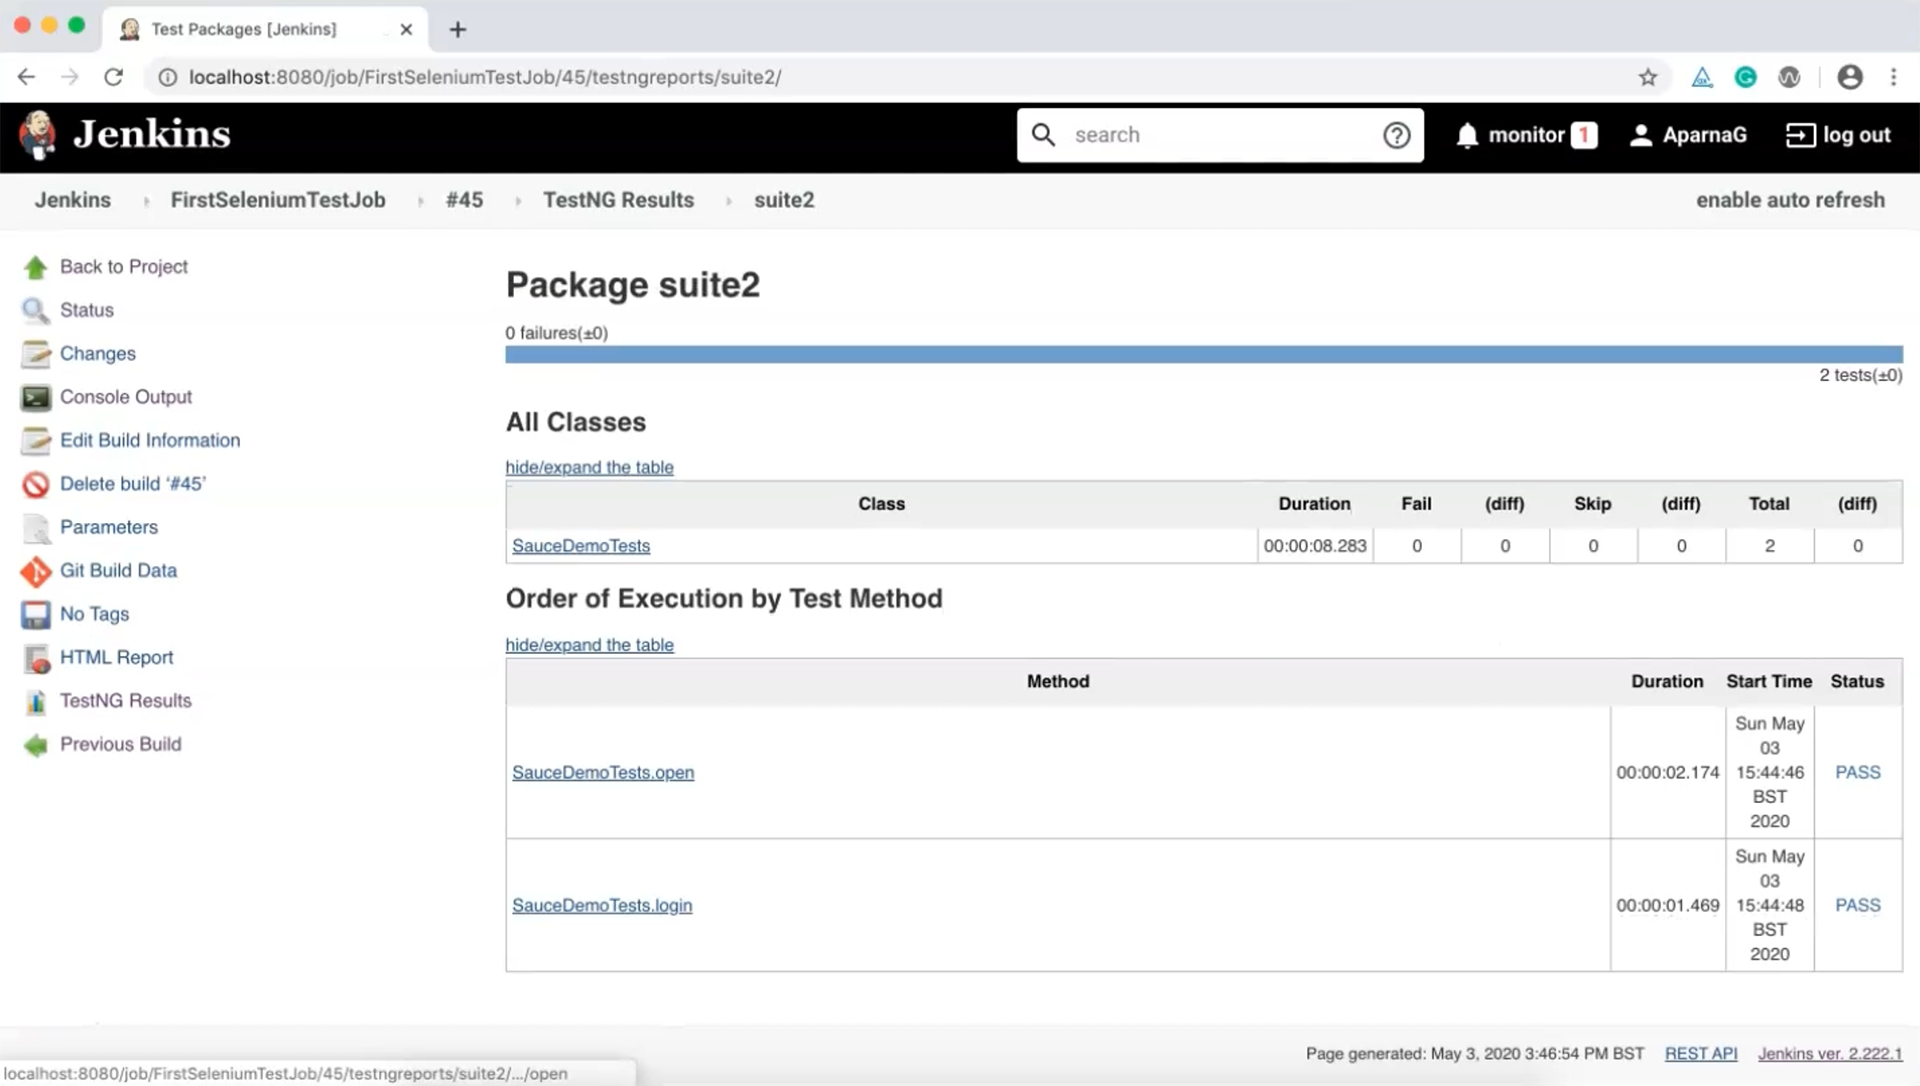
Clicking on a suite will list the individual tests and a complete summary of test function statuses.
So this is how we can make use of the TestNG plugin to see the complete details of tests we are executing.
It also provides a complete trend history of previous executions in addition to the current execution. This helps us track execution time and pass rate metrics for any test we execute.
