

Transcripted Summary
In this chapter, we will look at sending emails from Jenkins.
In most cases it is important to inform teams about build statuses. We can do that by sending emails from Jenkins once a build is completed. Let's see how to do that.
In a real-world scenario corporate email IDs would be used but for demonstration purposes we will use Gmail.
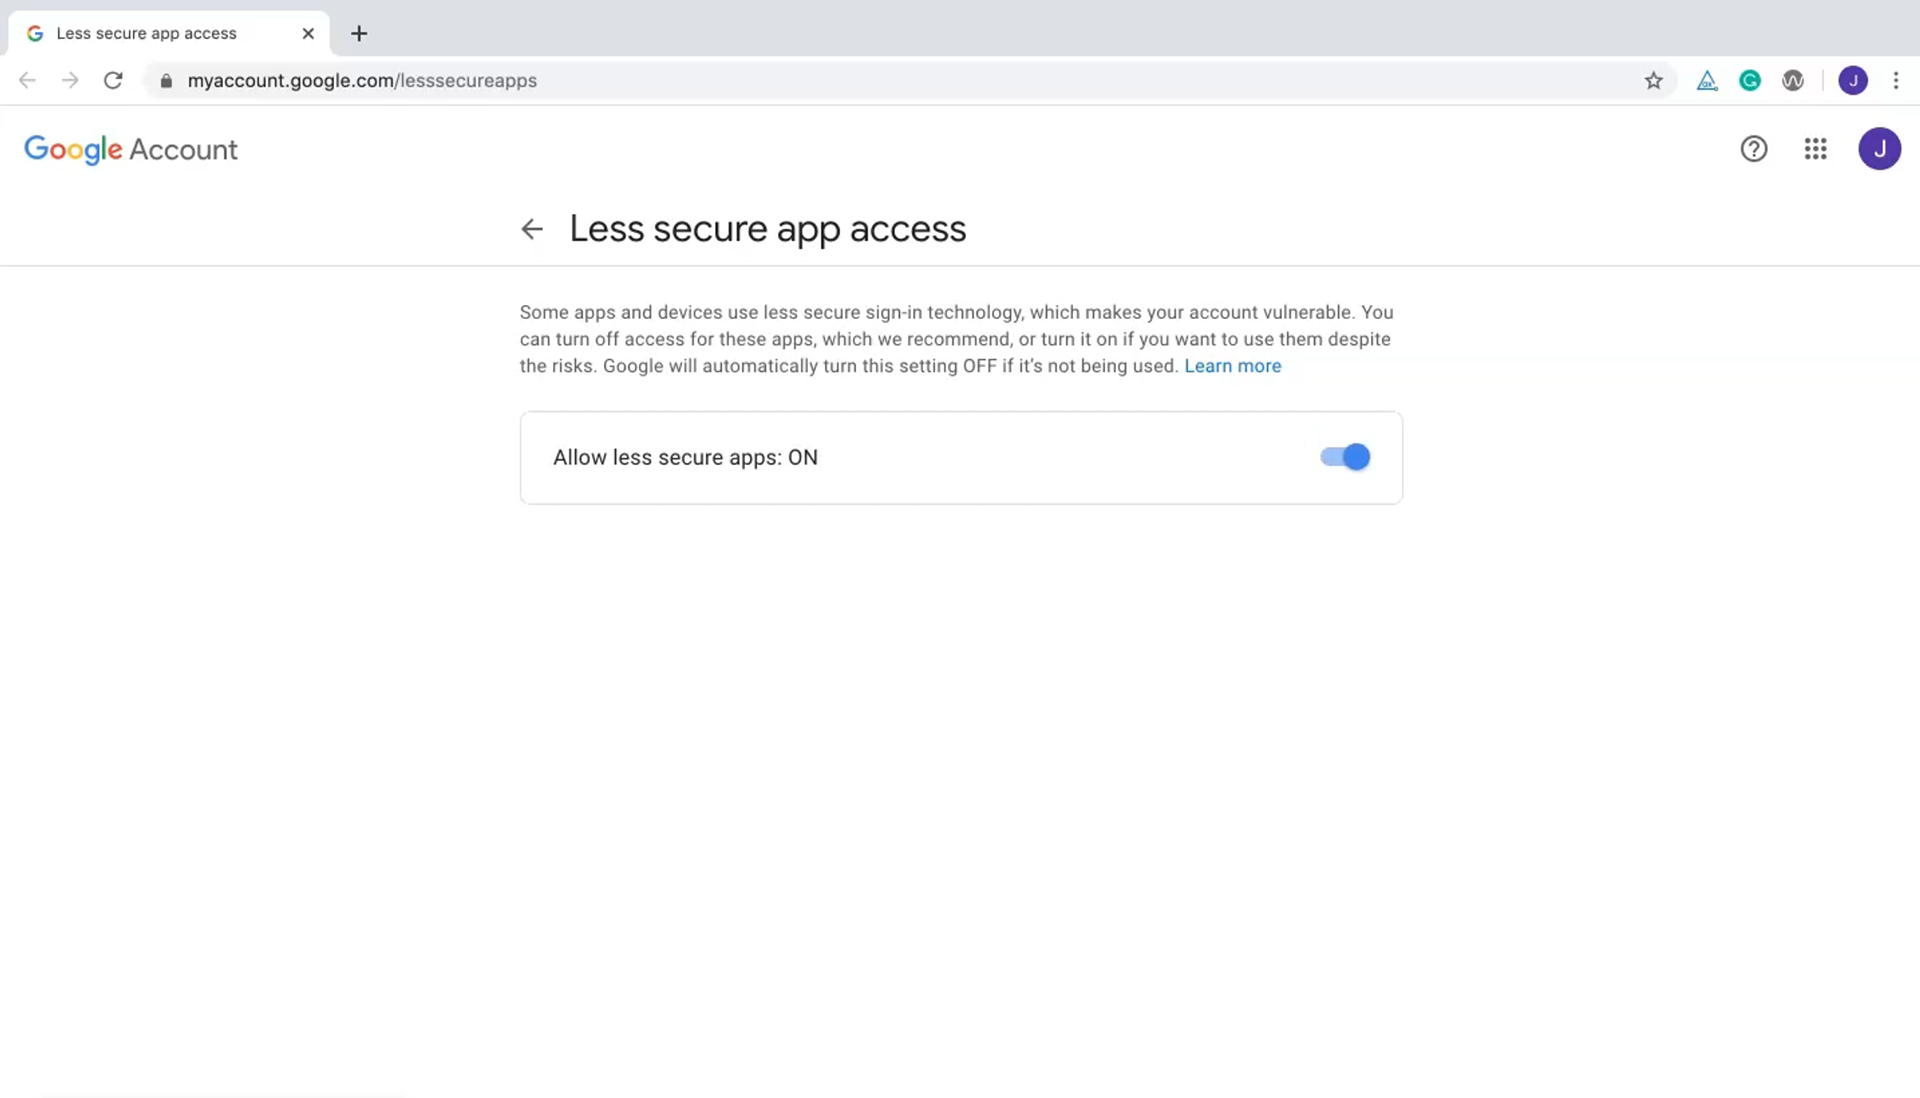
To use Gmail you may need to change some configuration settings to permit less secure apps:
In Jenkins, click on "Manage Jenkins", then click on "Configure System".
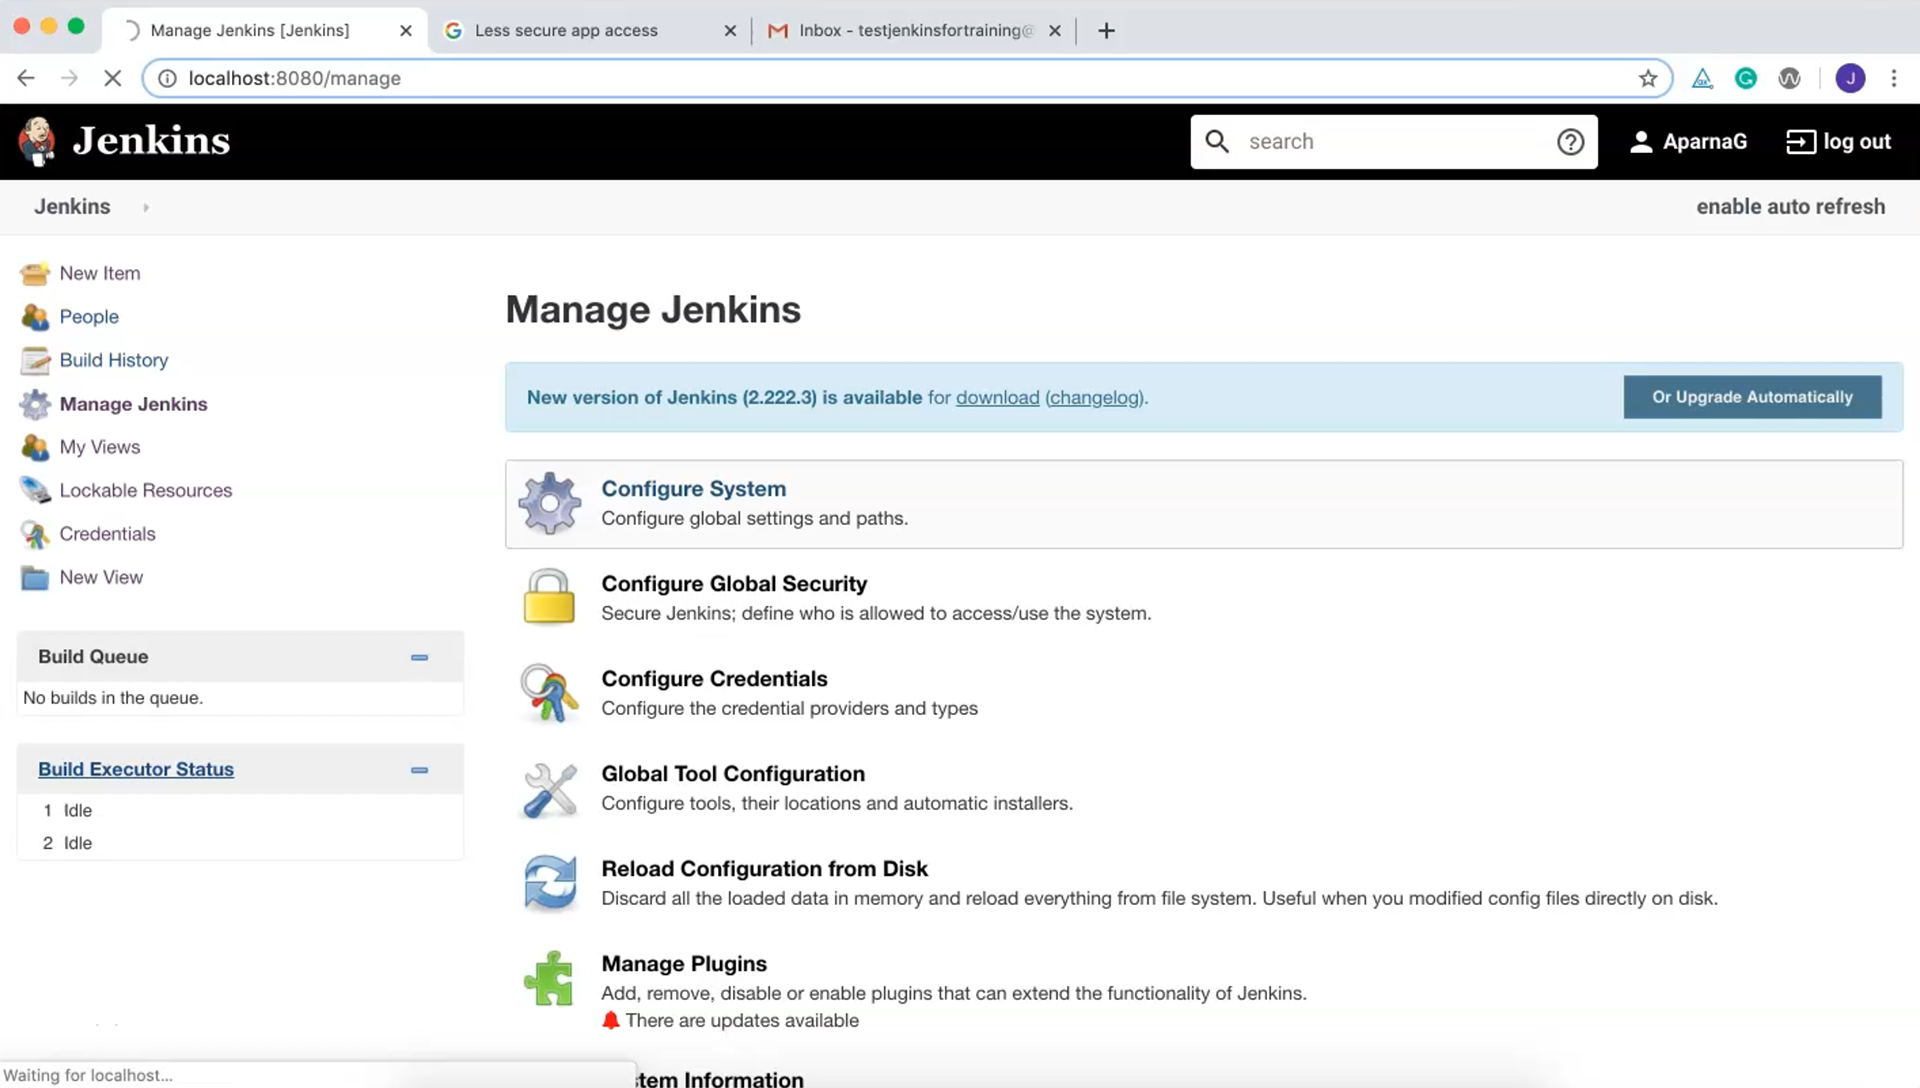
Scroll down the next page until you find the "E-mail Notification" section.
Here, we need to provide details. For Gmail we need to provide the details of the Gmail server but if you're using a corporate ID then those details must be provided.
The SMTP server of Gmail is smtp.gmail.com and the default user e-mail suffix is @gmail.com.
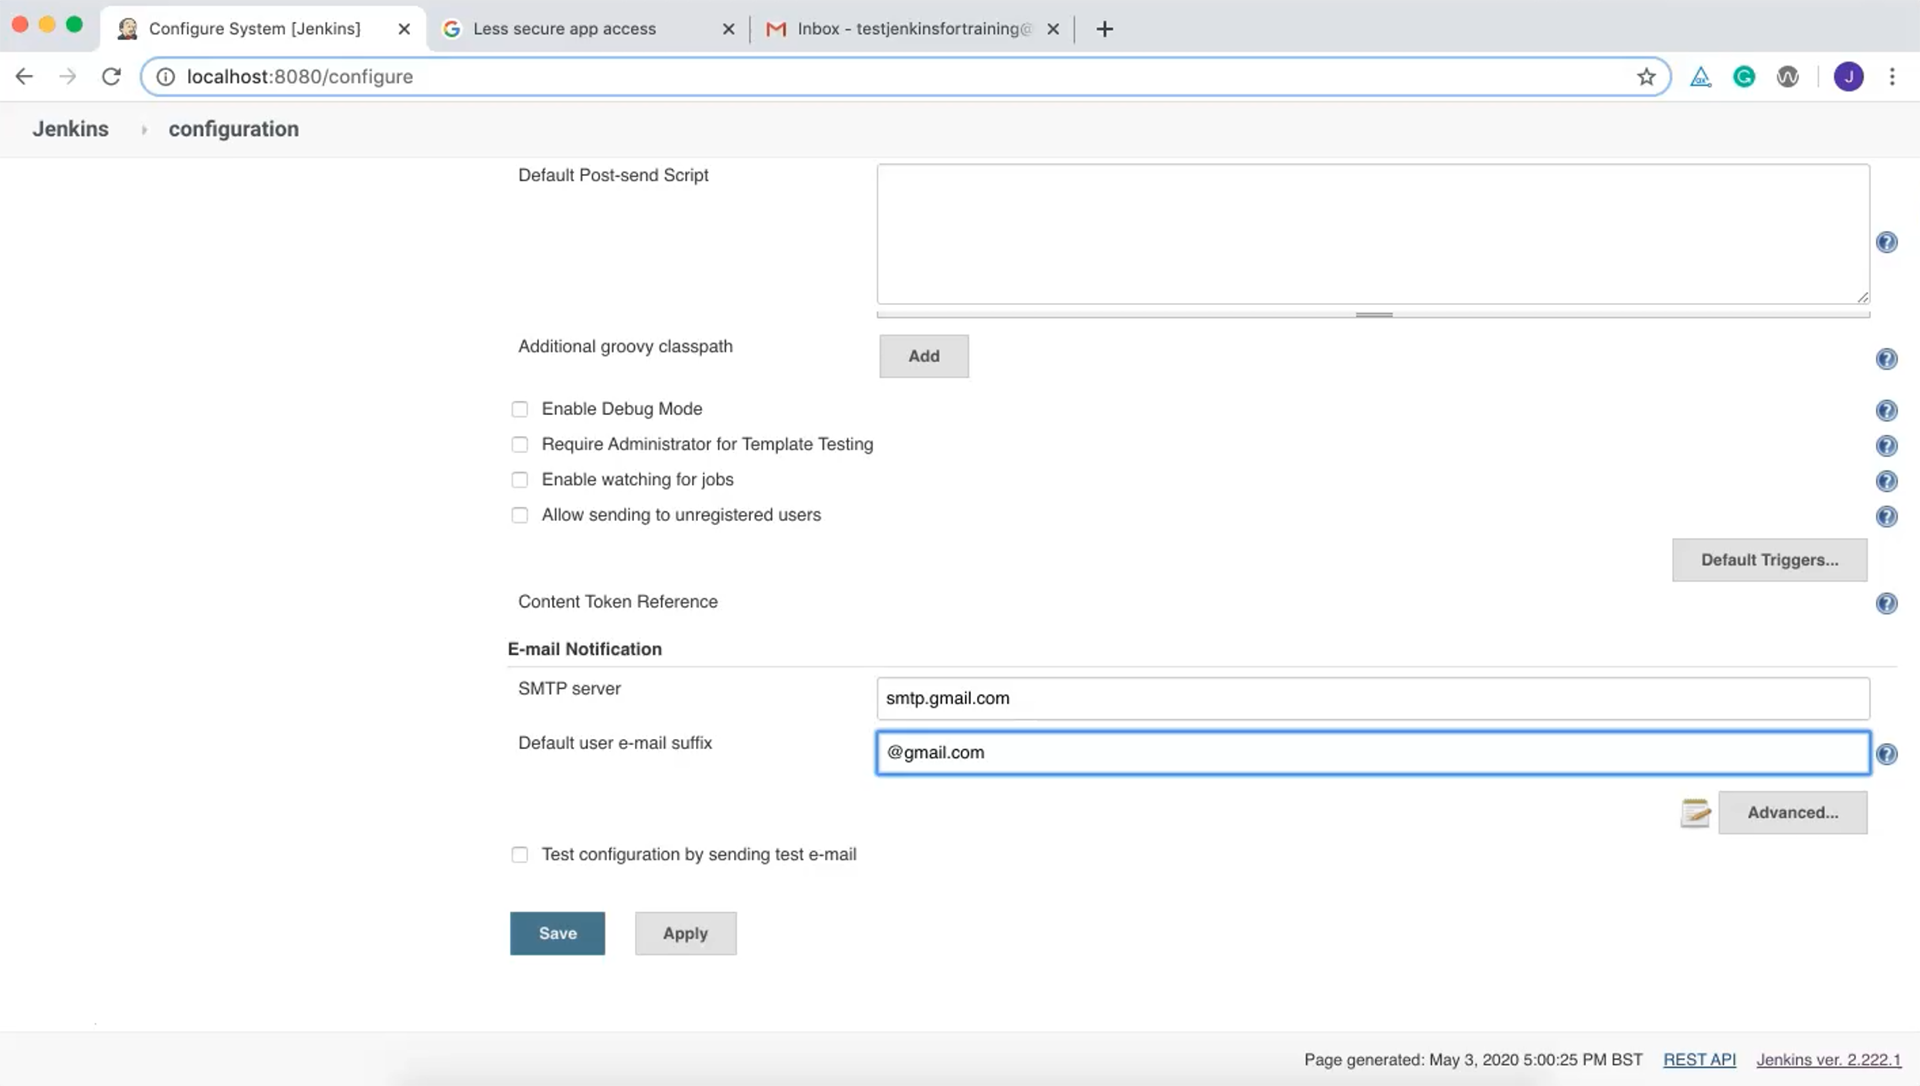
Now click on "Advanced...".
Select "Use SMTP Authentication" and provide a username and password.
We have already created an ID for testing which is testjenkinsfortraining@gmail.com.
Let's copy this ID which we will paste into other fields.
Select "Use SSL" and set the SMTP Port to 465.
Also set the "Reply-To Address" field using our copied ID value.
Finally, check "Test configuration by sending test email" and set "Test email recipient" to our ID value as well.
As mentioned before, I have made changes to secure app access settings for testing purposes.
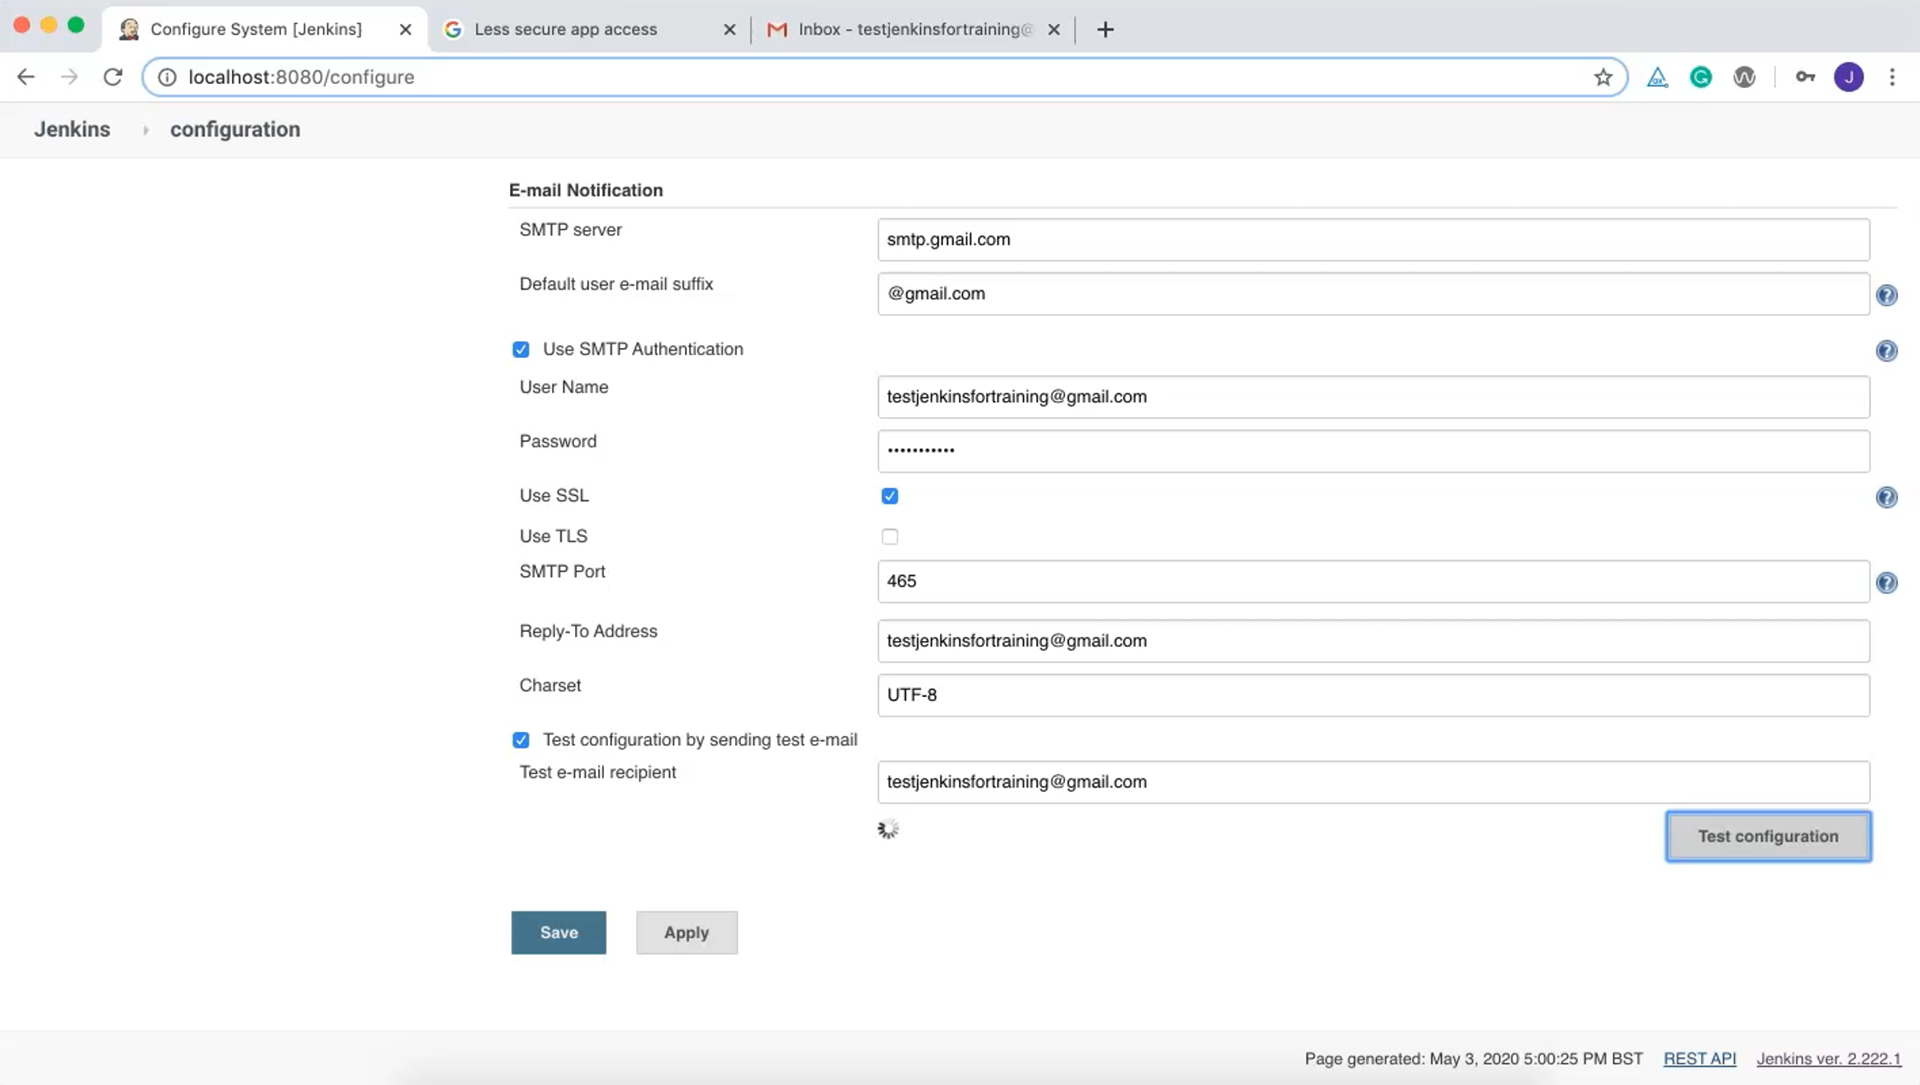
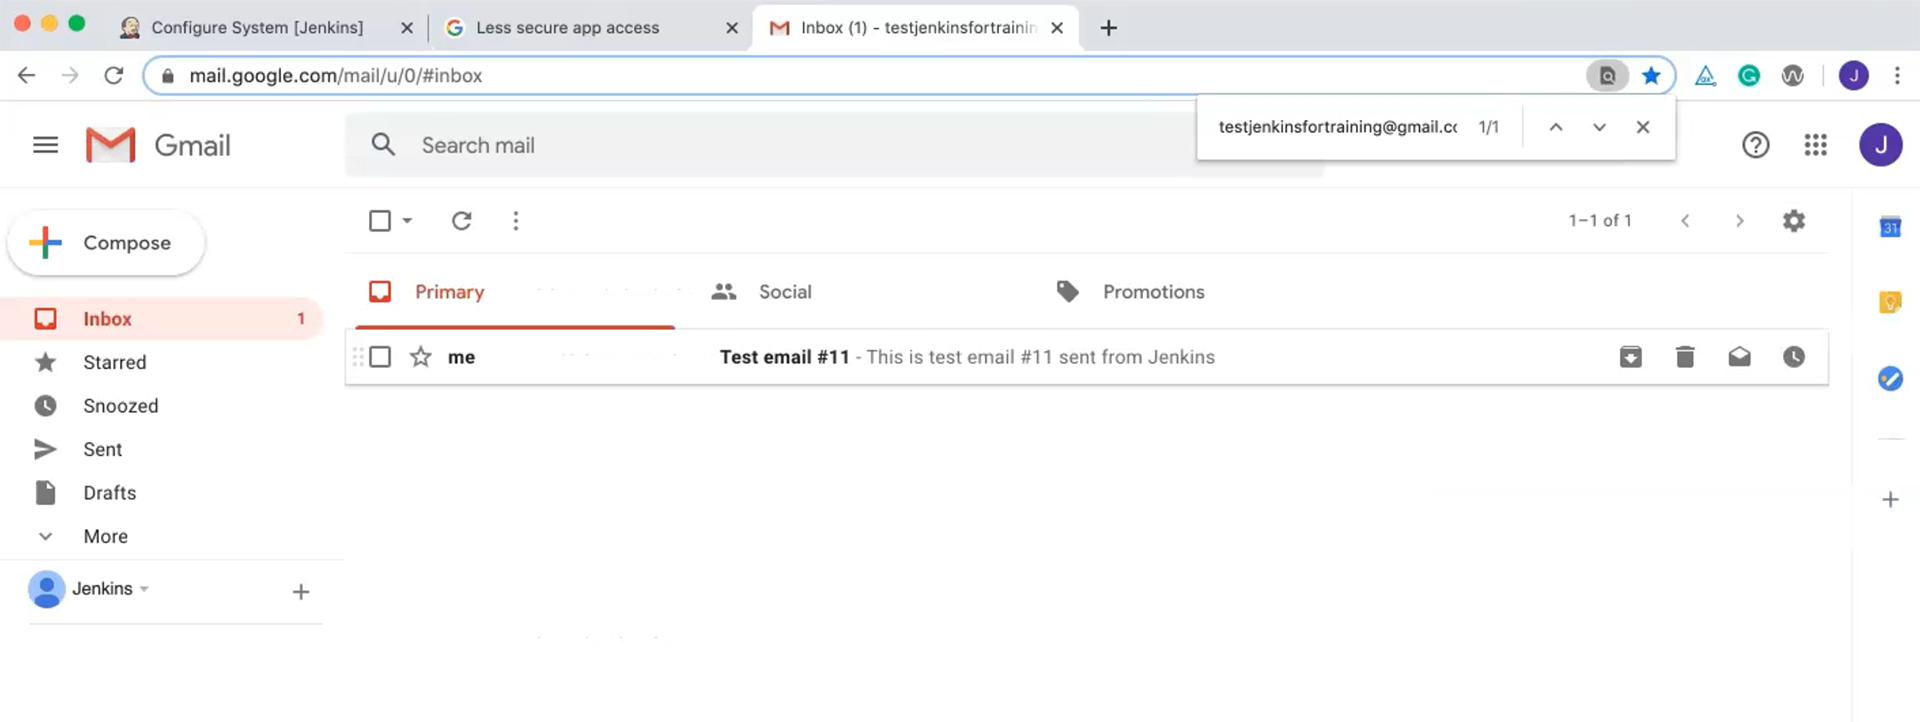
It's done. Now click the "Test configuration" button. I successfully received an email so the configuration is correct.
Before creating a job we need to make one more configuration change.
Scroll up to the "Jenkins Location" section and provide a valid value for the "System Admin e-mail address" field.
Paste the same ID value, testjenkinsfortraining@gmail.com.
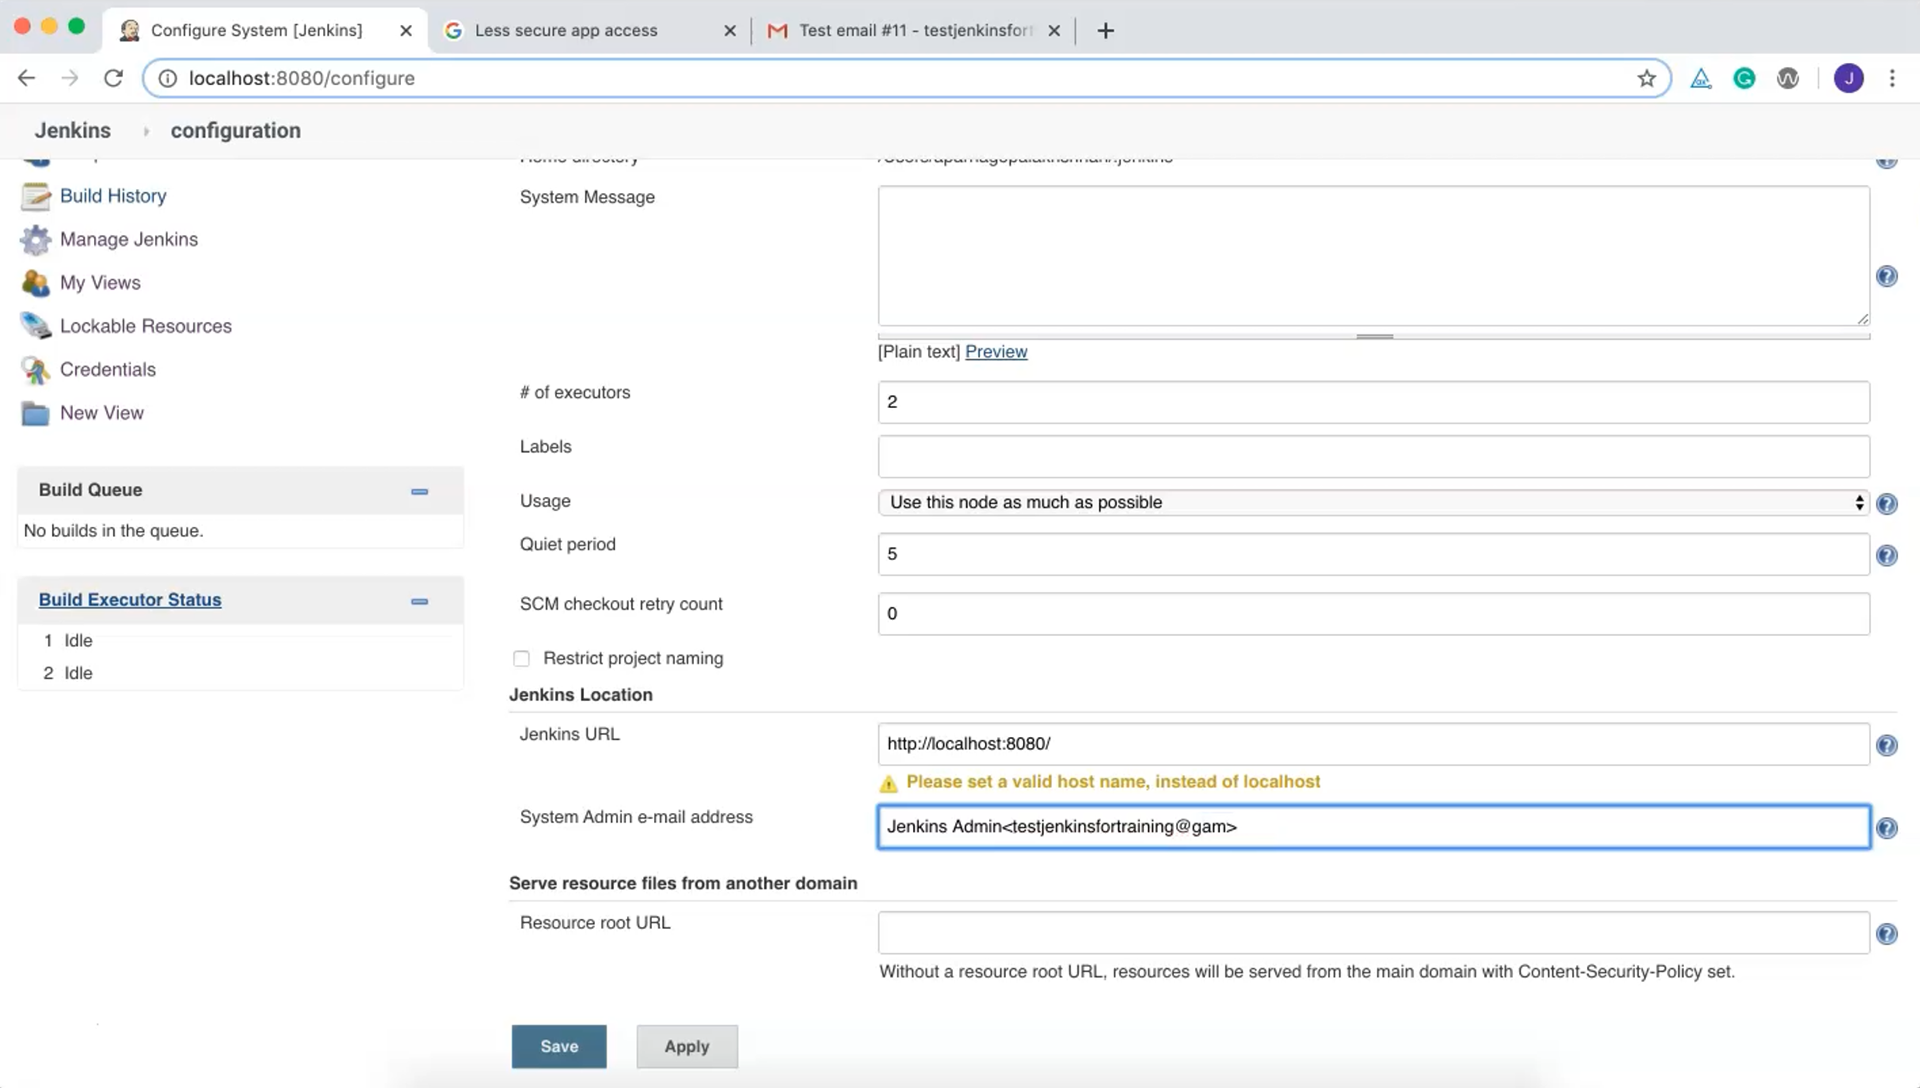
Now apply and save these changes.
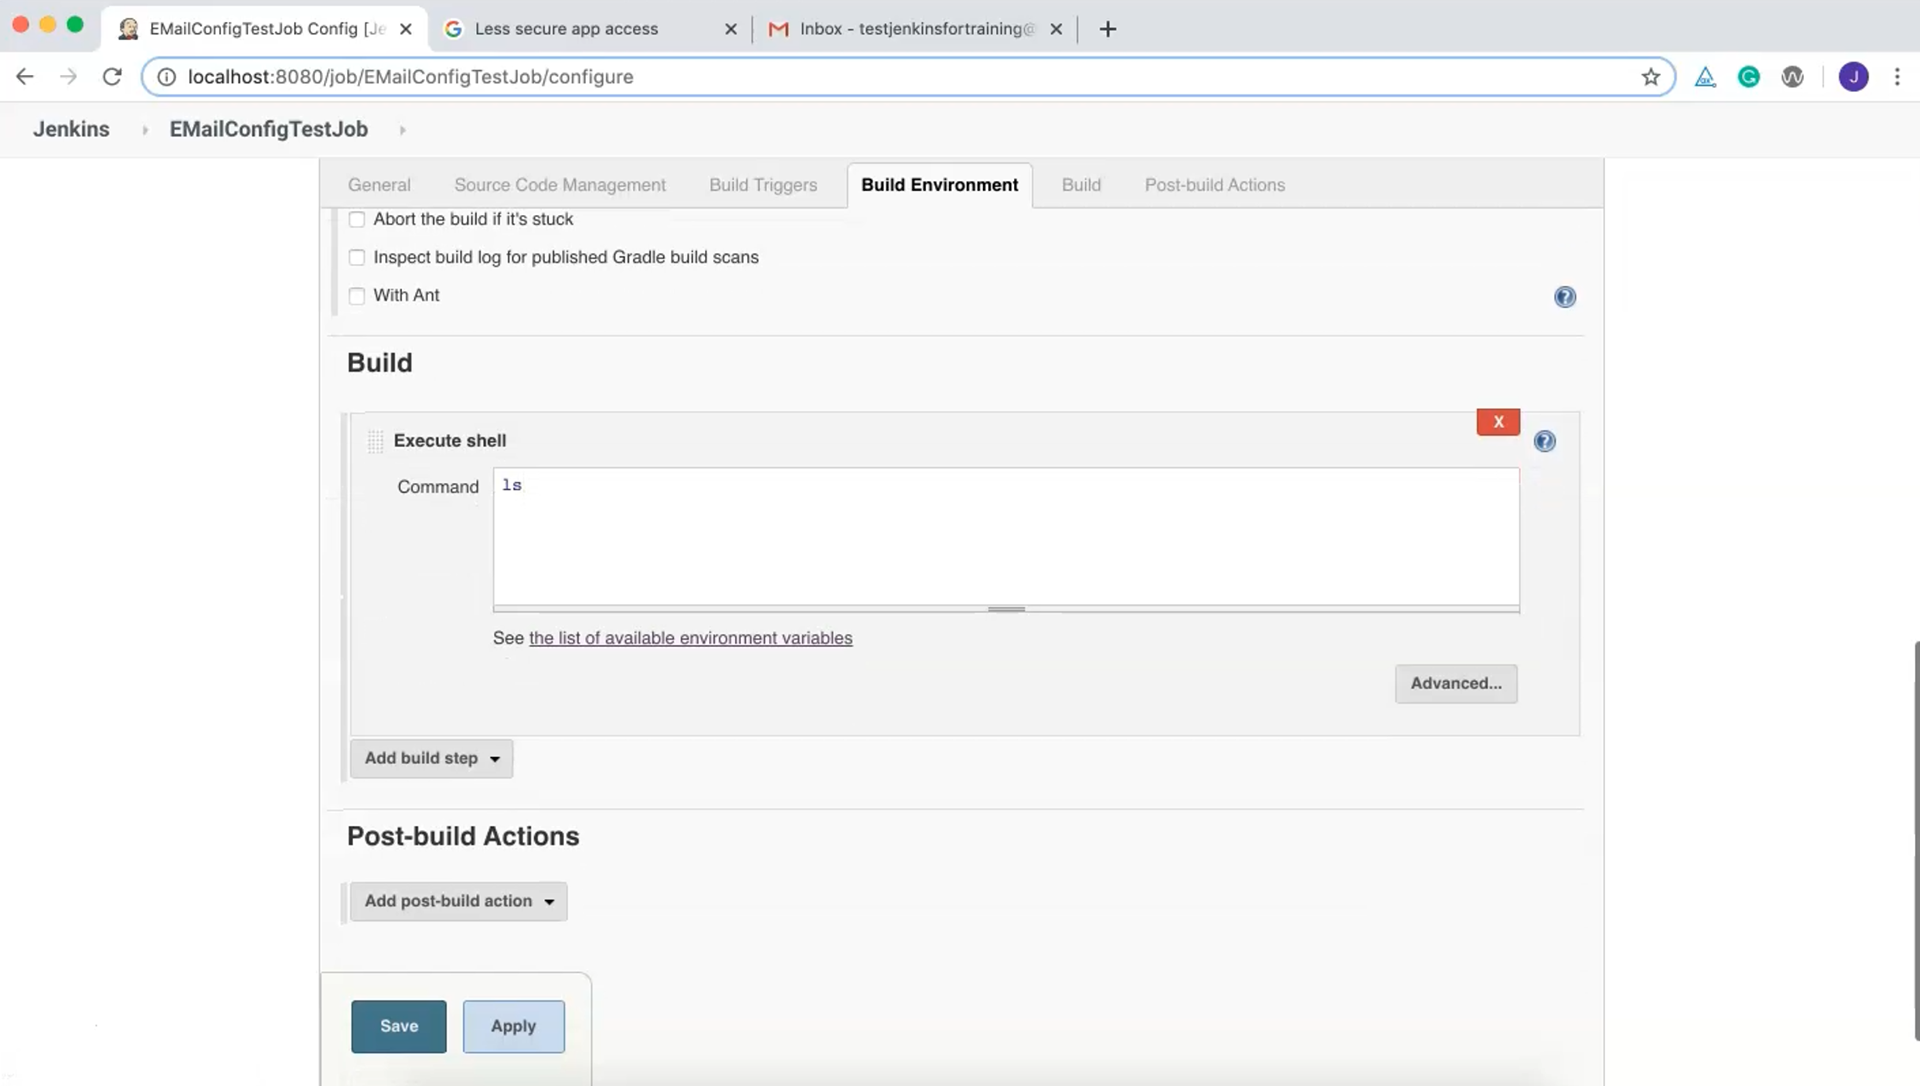
Let's create a new job. Call it "EMailConfigTestJob" and select "Freestyle project".
On the "Build Triggers" tab in the "Build" section, click "Add build step" and select "Execute shell".

NOTE
Windows users should choose "Execute Windows batch command".
To list all of the directories within the current directory, let's add the command ls.
NOTE
Windows users should use the Windows equivalent, dir.
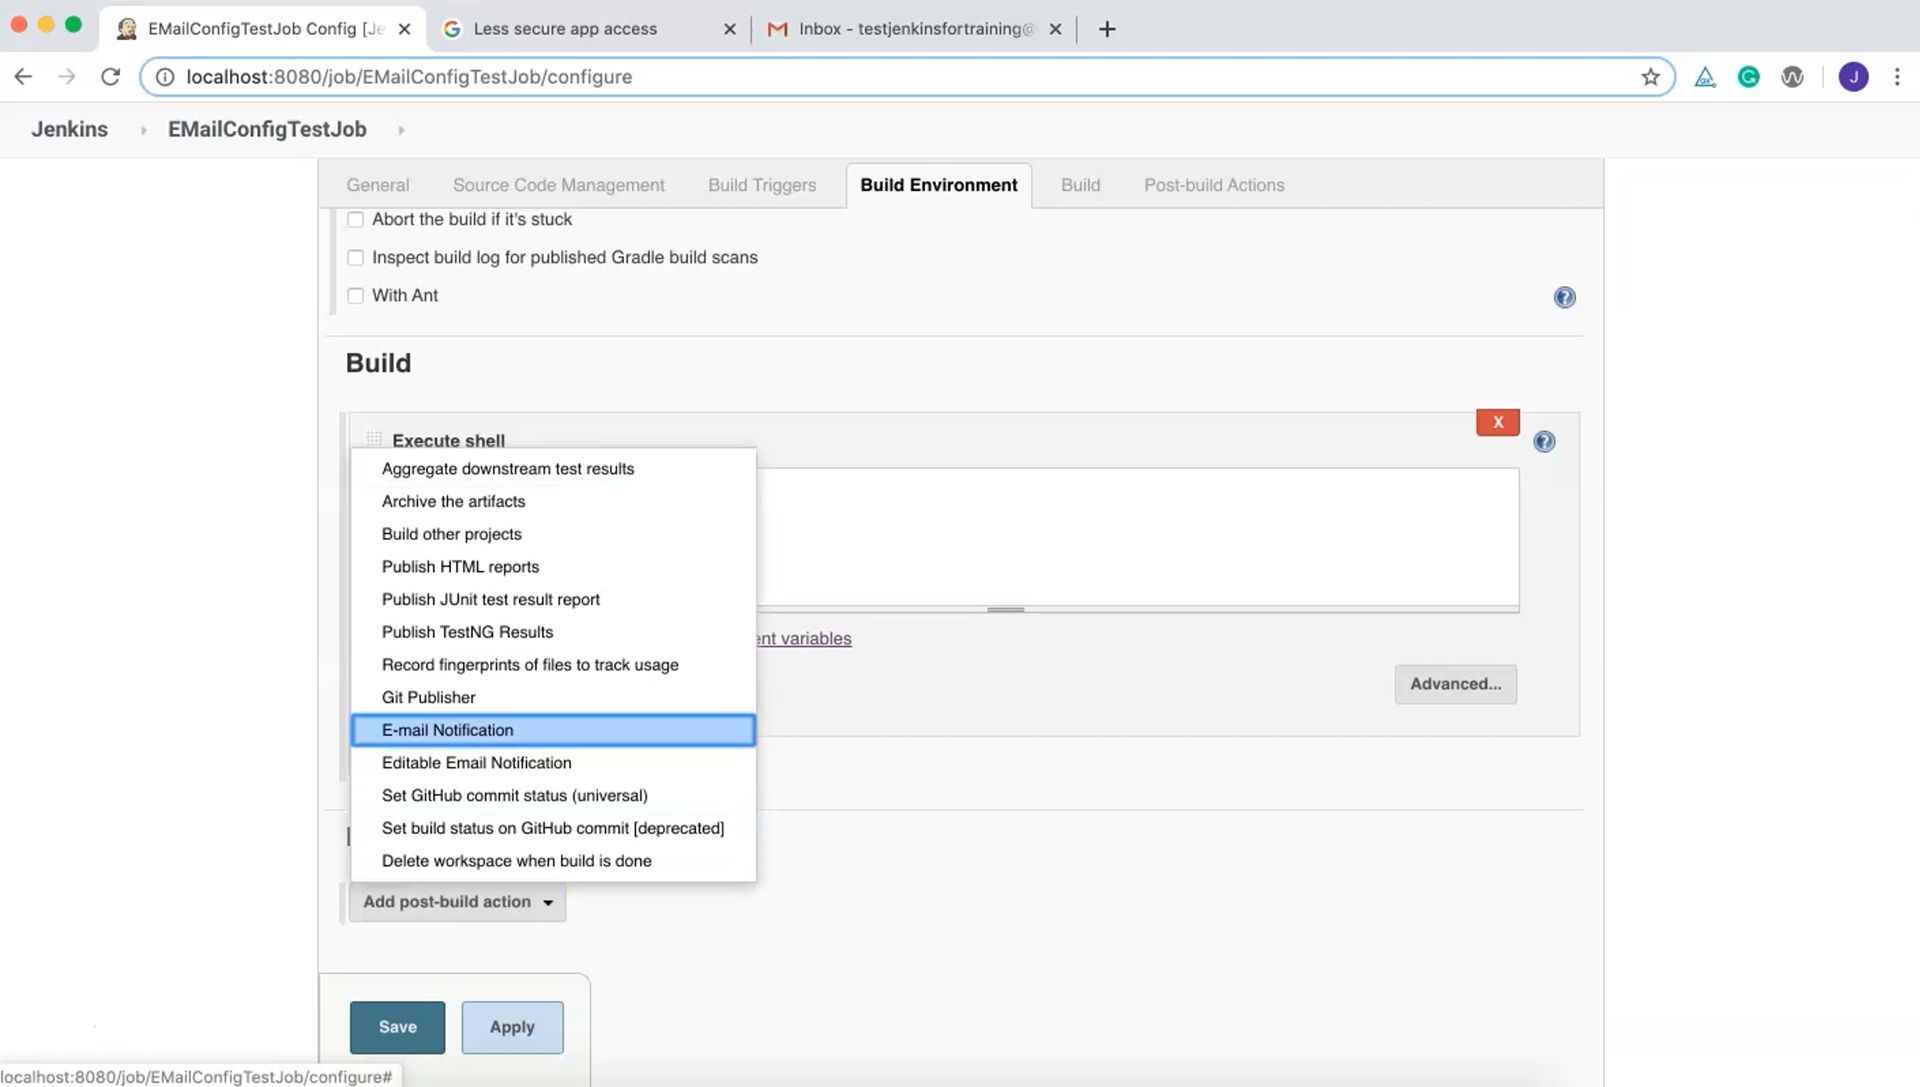
In the "Post-build Actions" section, click on "Add post-build action" and choose the "E-mail Notification" option (not "Editable Email Notification").
In the "Recipients" field, paste the same ID value of testjenkinsfortraining@gmail.com.
Check the "Send e-mail for every unstable build" option which should already be checked by default.
The "Send separate e-mails to individuals who broke the build" option is not required here.
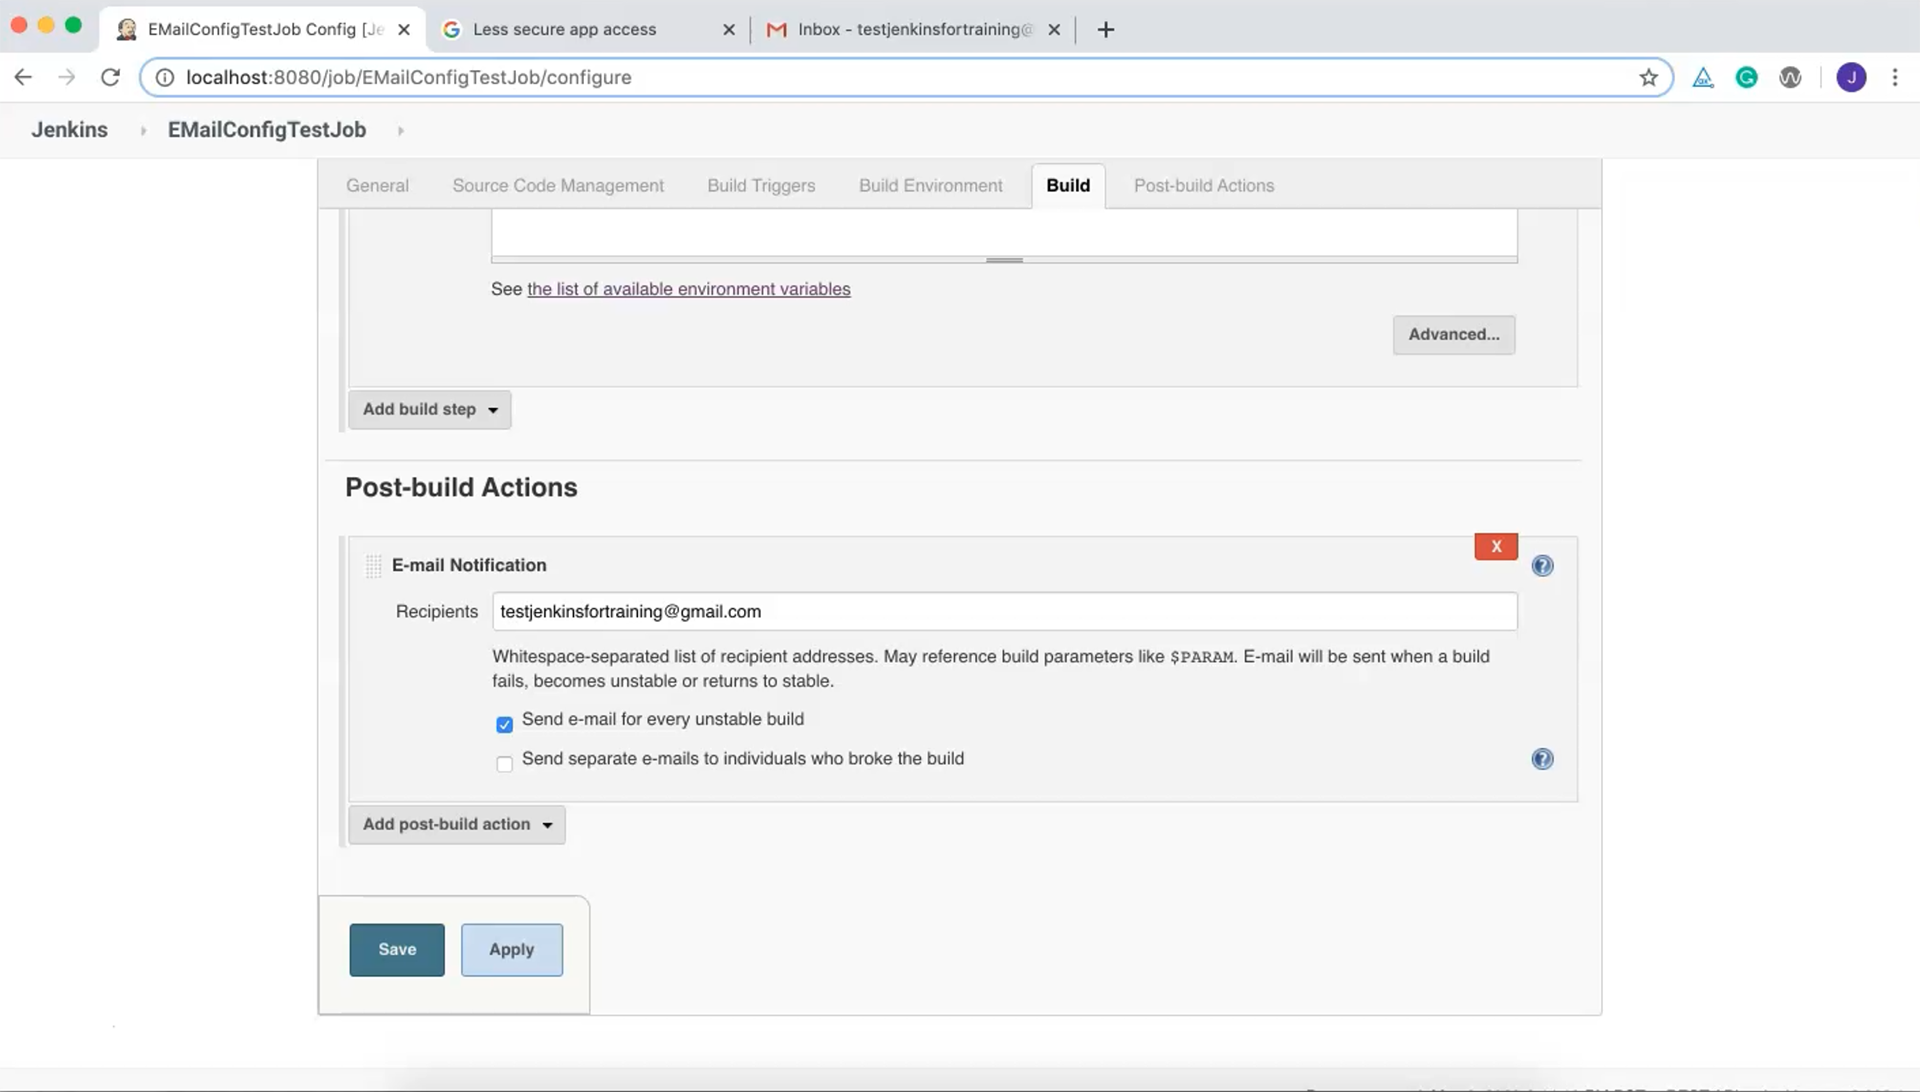
Apply and save these changes. Now let's run the build.
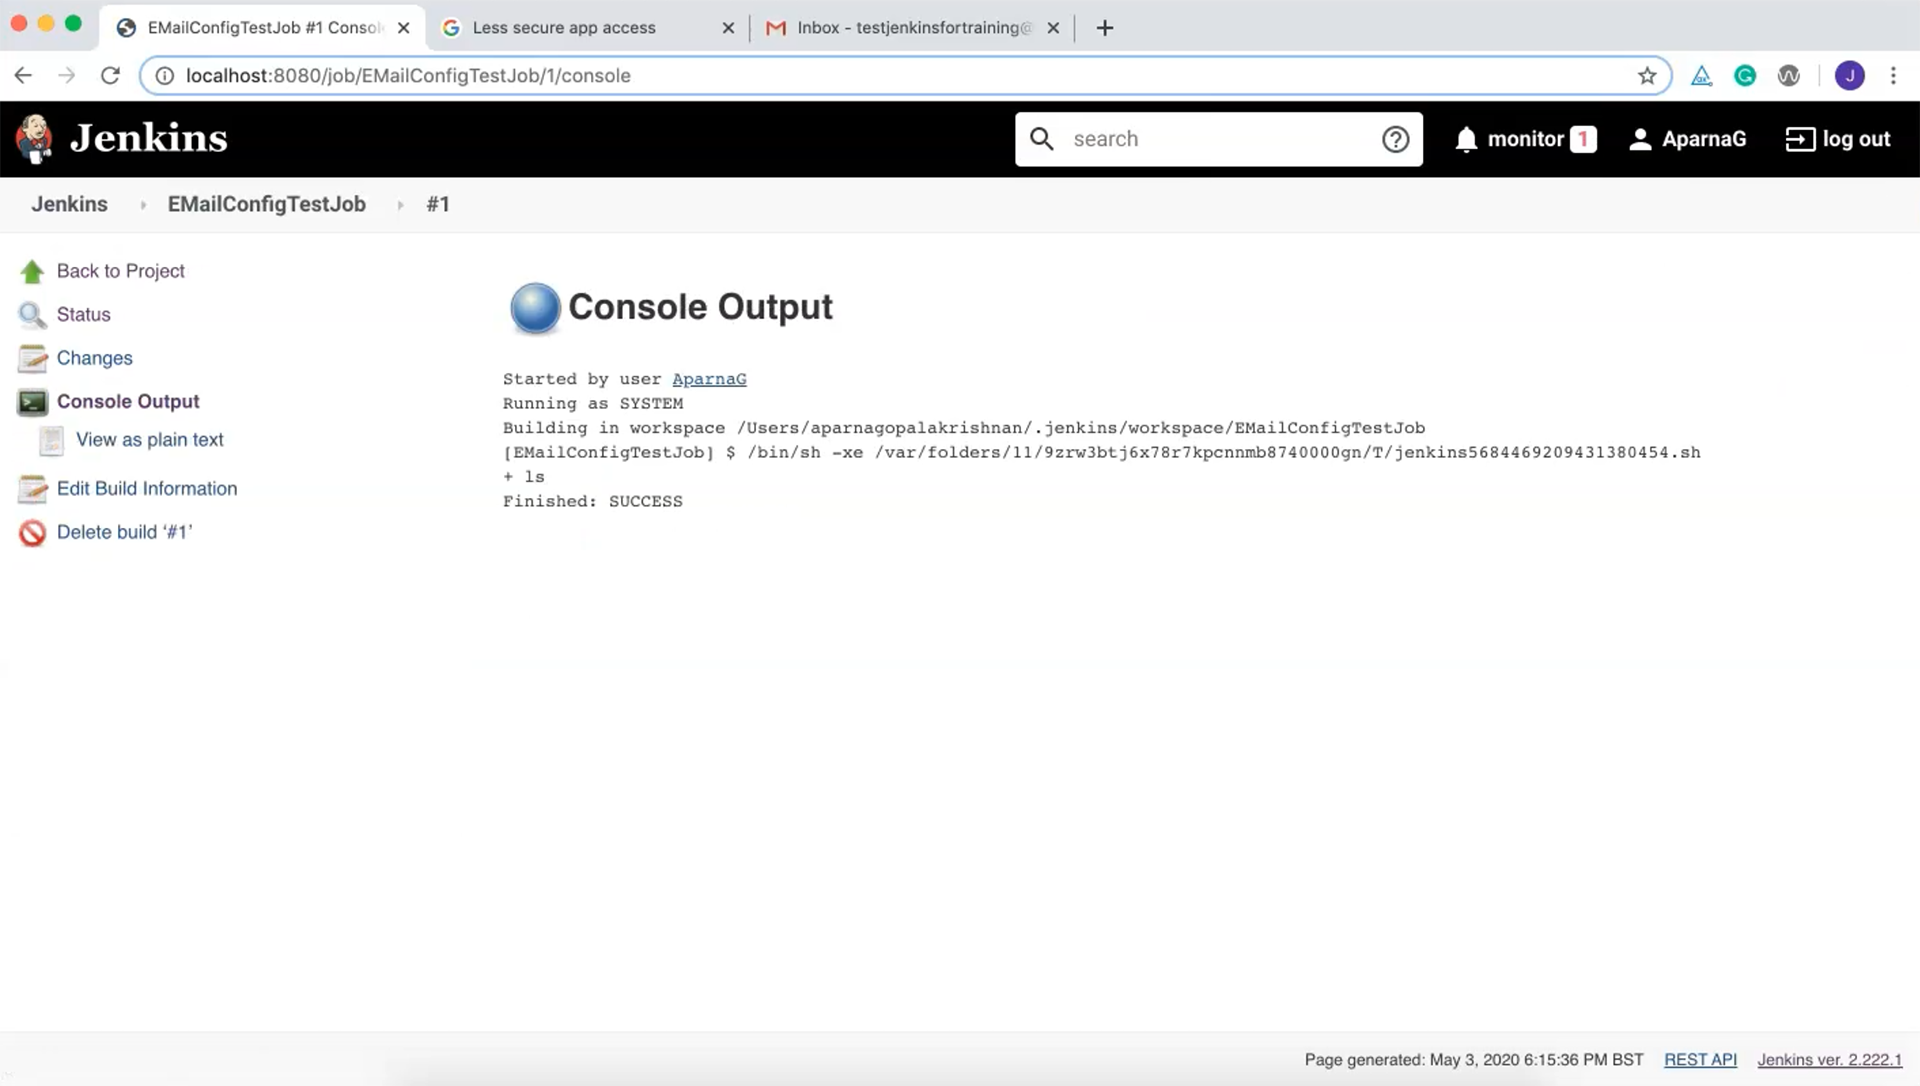
The build has completed but no emails will be sent since the build finished successfully.
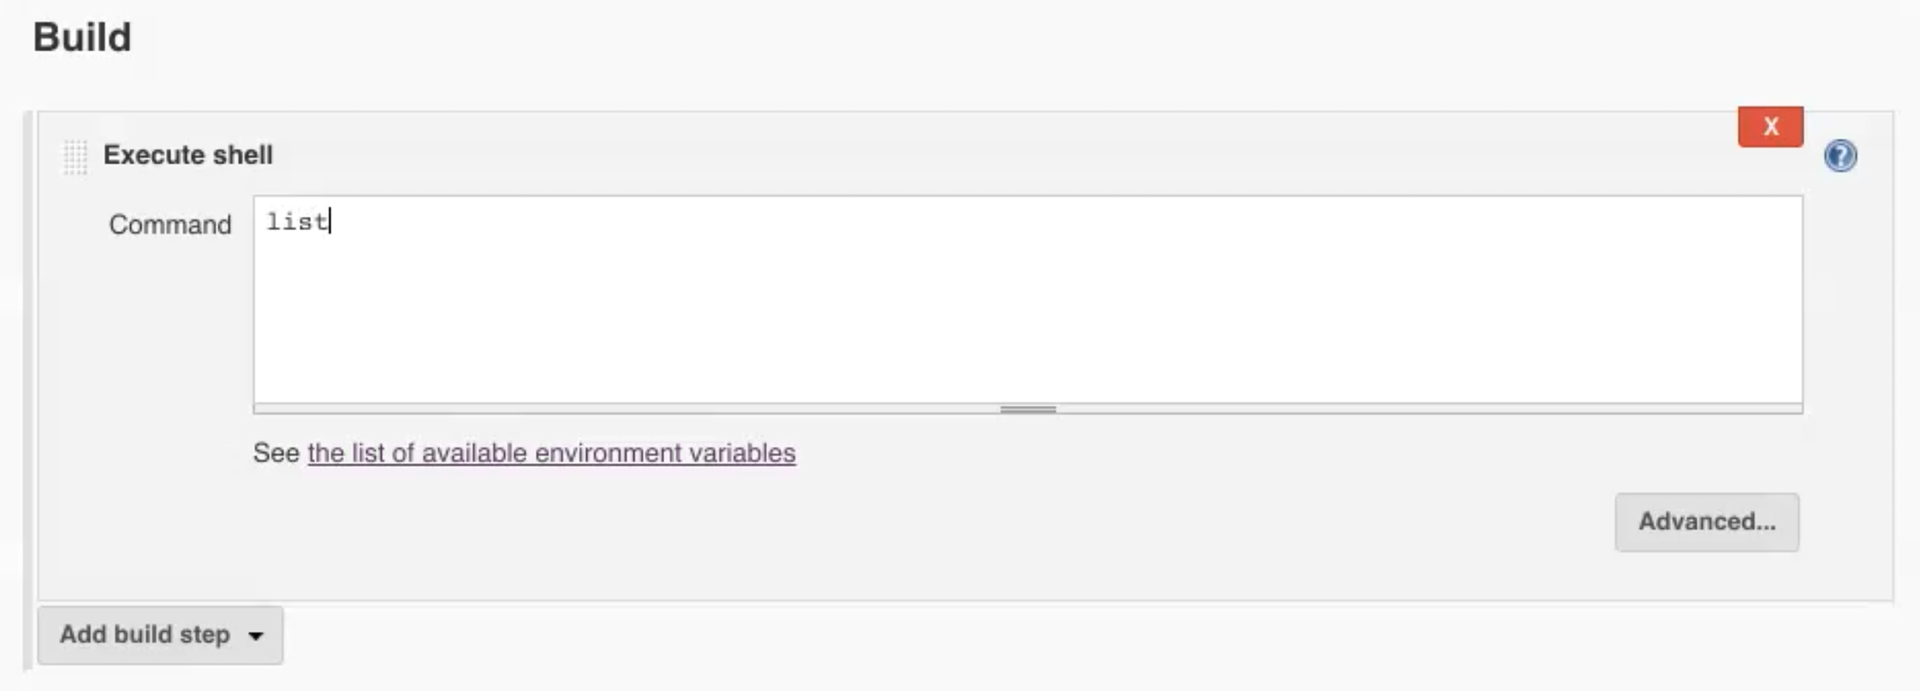
To make this build fail let's try adding an incorrect command.
Back in our build step let's replace ls with the nonexistent command list.
Apply and save these changes and start the build again. This time the build should fail. Let's take a look at the details.
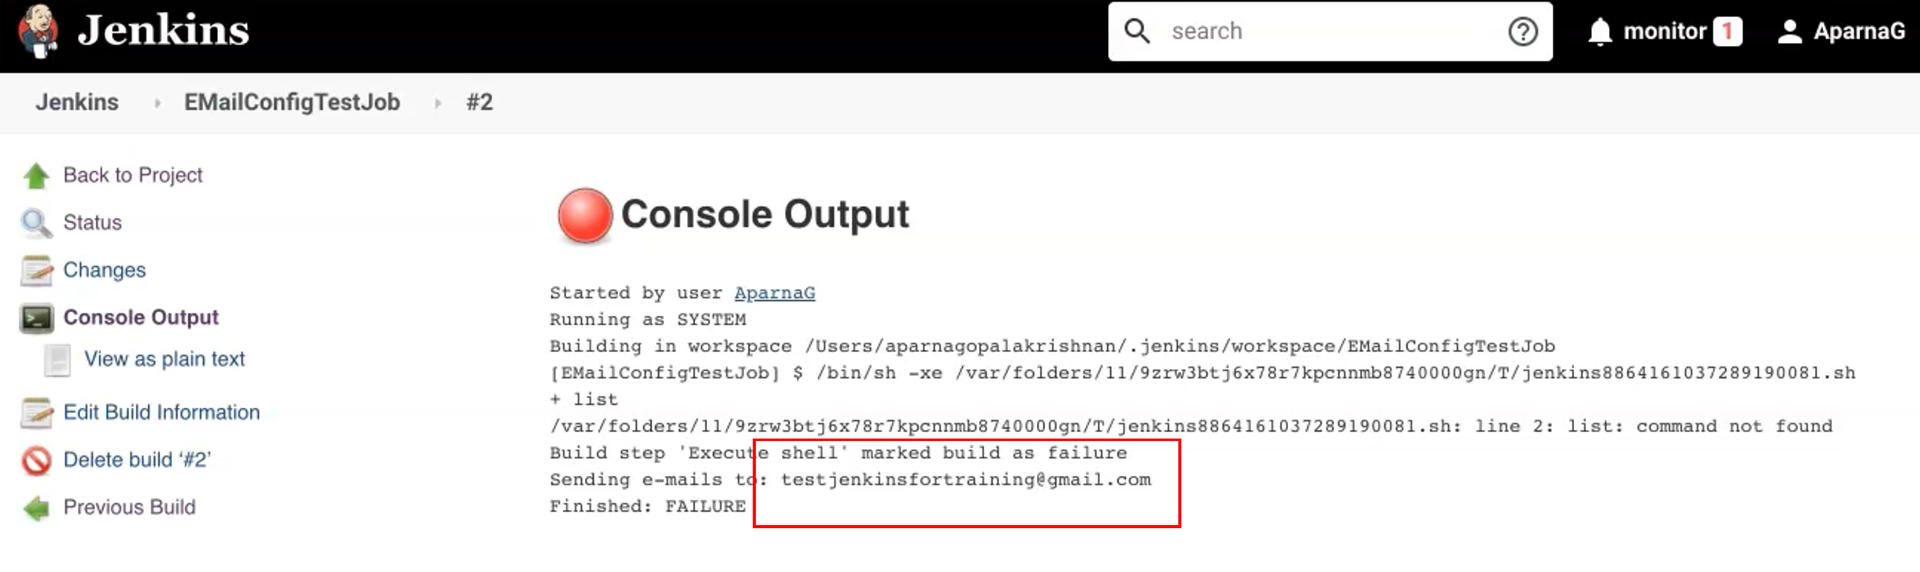
We can see that emails are being sent to "testjenkinsfortraining@gmail.com". Checking this email confirms this.

The email body contains build information, including the build number and a failure reason. This concludes our discussion on sending email notifications from Jenkins which is a very useful feature.
# Summary
With that, we have come to the end of this course.
I really hope that you enjoyed it and were able to expand your knowledge of continuous integration, Jenkins, and integrating Jenkins with test automation projects using build configurations.
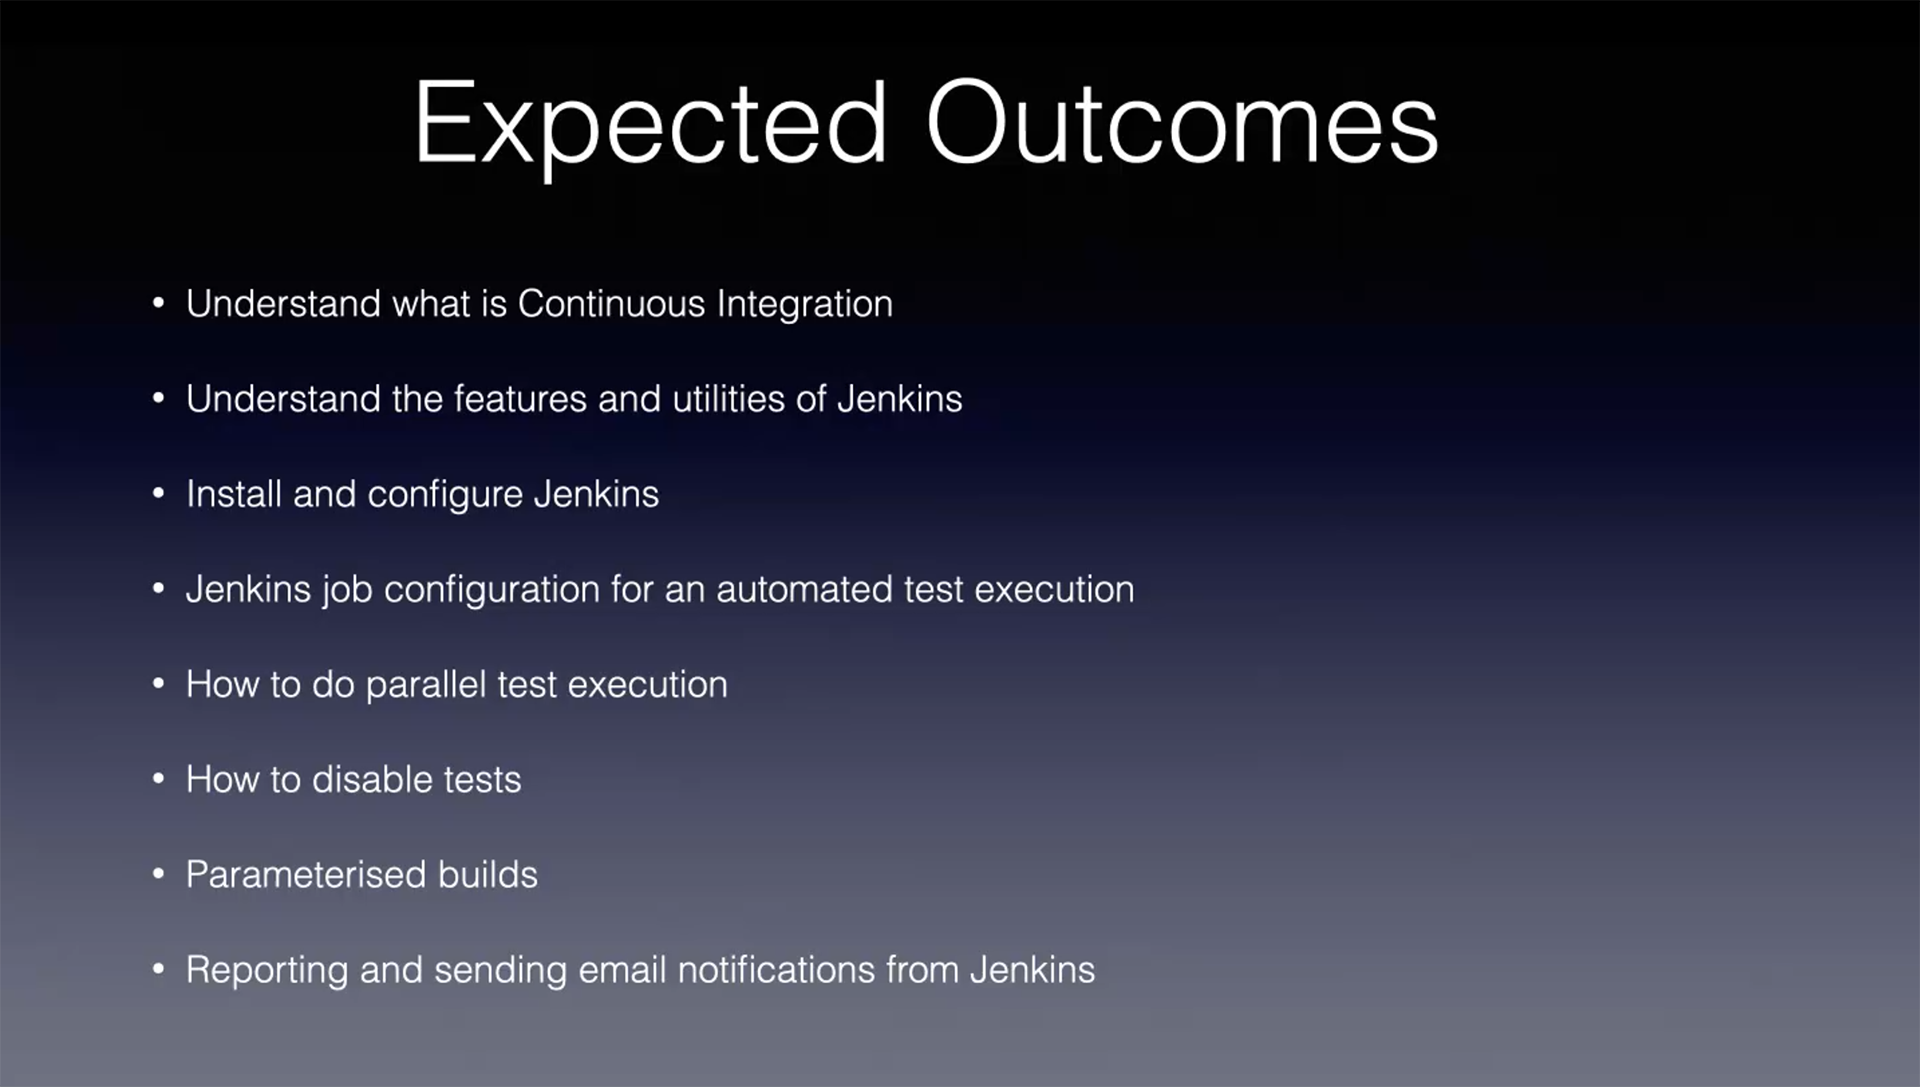
We have discussed parallel testing, disabling tests, parameterizing builds, and finally, reporting and sending email notifications.
If you have any questions regarding this course, please feel free to contact me via Twitter or LinkedIn.
For further reading about Jenkins and its configuration settings please have a look at the official Jenkins website.
Thank you for taking the time to complete this course, I wish you all the very best and happy learning!
