

Transcripted Summary
Now that we have set up our Salesforce Developer account, let's understand the concept of Connected Apps.
Salesforce provides us the capabilities to build on top of the platform with the use of connected apps.
Basically, a connected app is a framework that enables an external application to integrate with Salesforce using APIs and standard protocols.
Some of the use cases of Connected apps are to:
- Provide Authorization
- Access data with API integration
- Integrate services
- Manage access to third-party apps
We will use the Connected app to pull the UI API data from our Salesforce application in the upcoming chapters.
Now that we know what a connected app is, let's try creating one.
For that, please go to the Setup section of your Salesforce instance.
Once you are here on the left hand side, in the quick find search box, type in app manager.
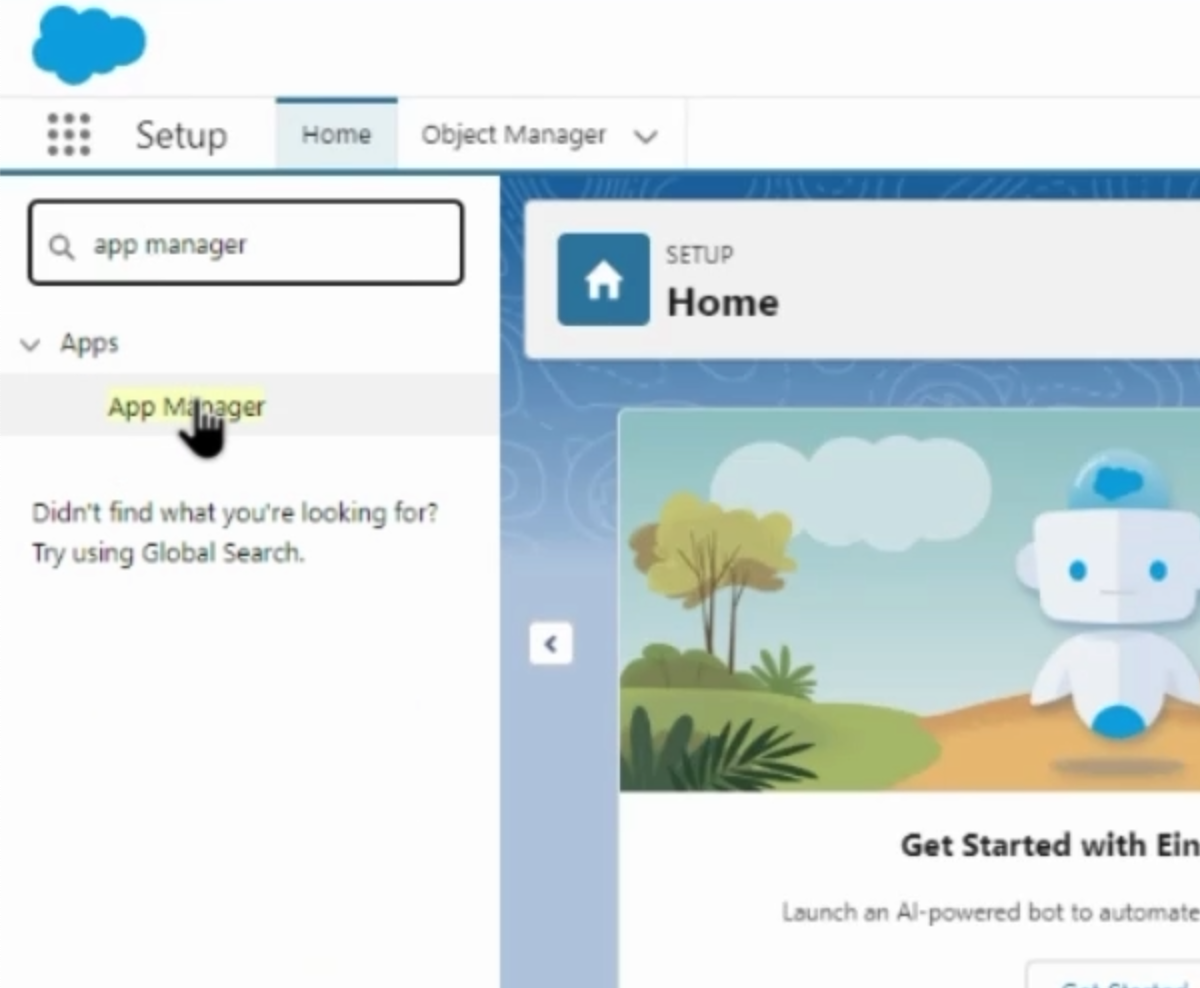
On the search results, click on App Manager and on this UI, on the right hand side, you'll see the New Connected App button.
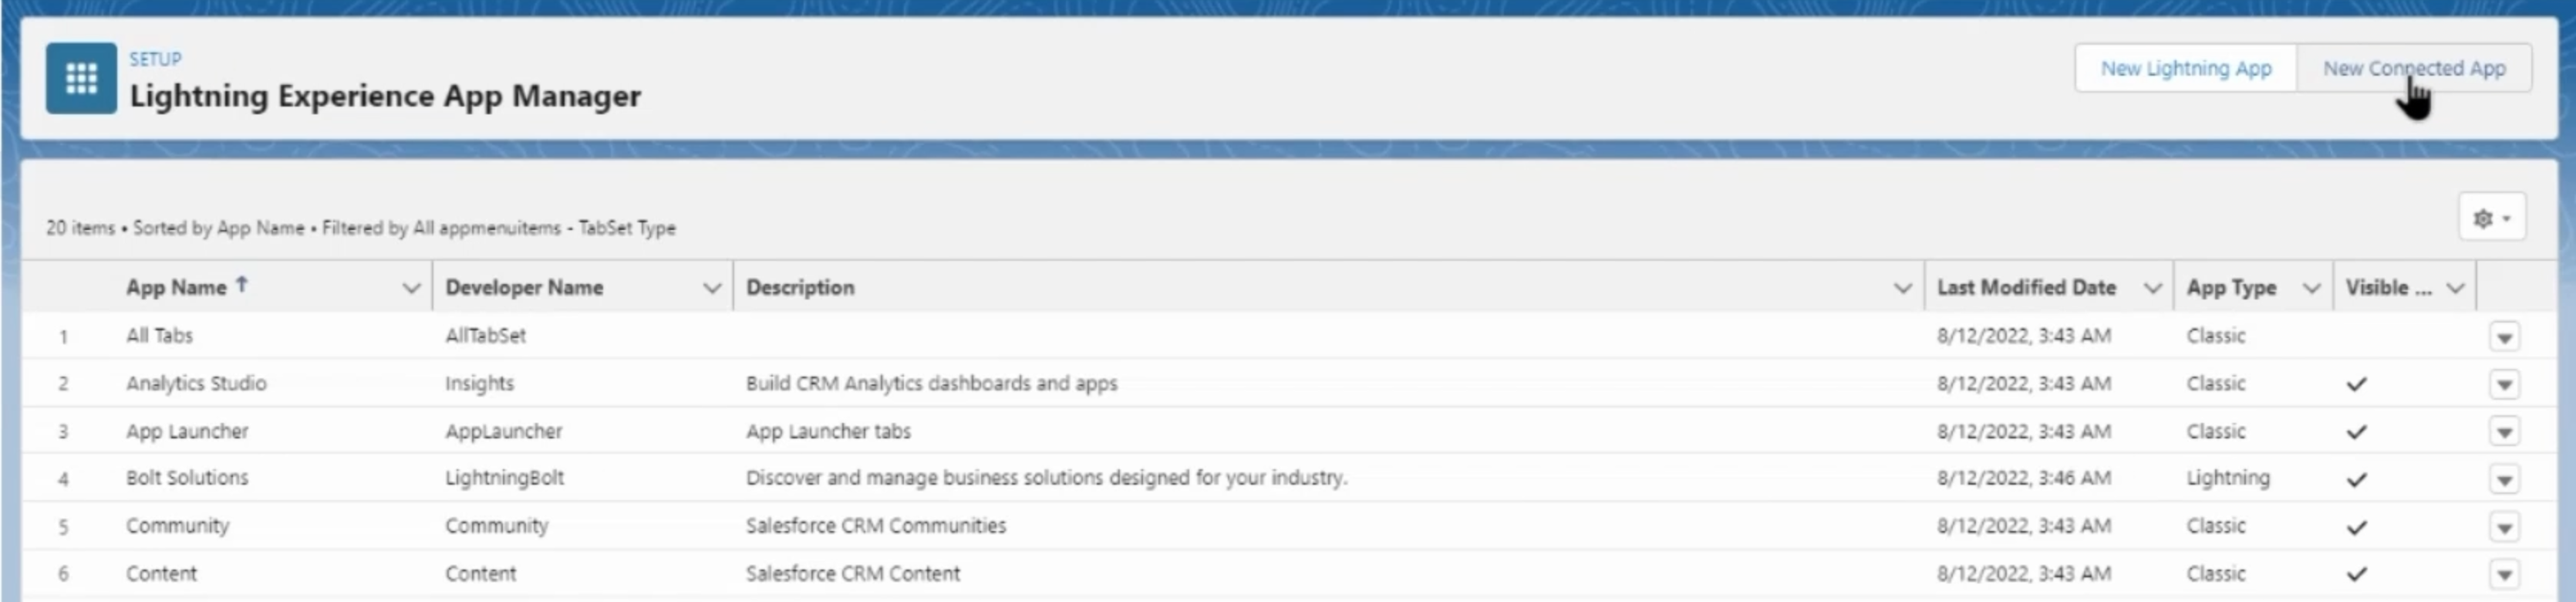
Once you click it, you will be navigated to the page for creating a new connected app.
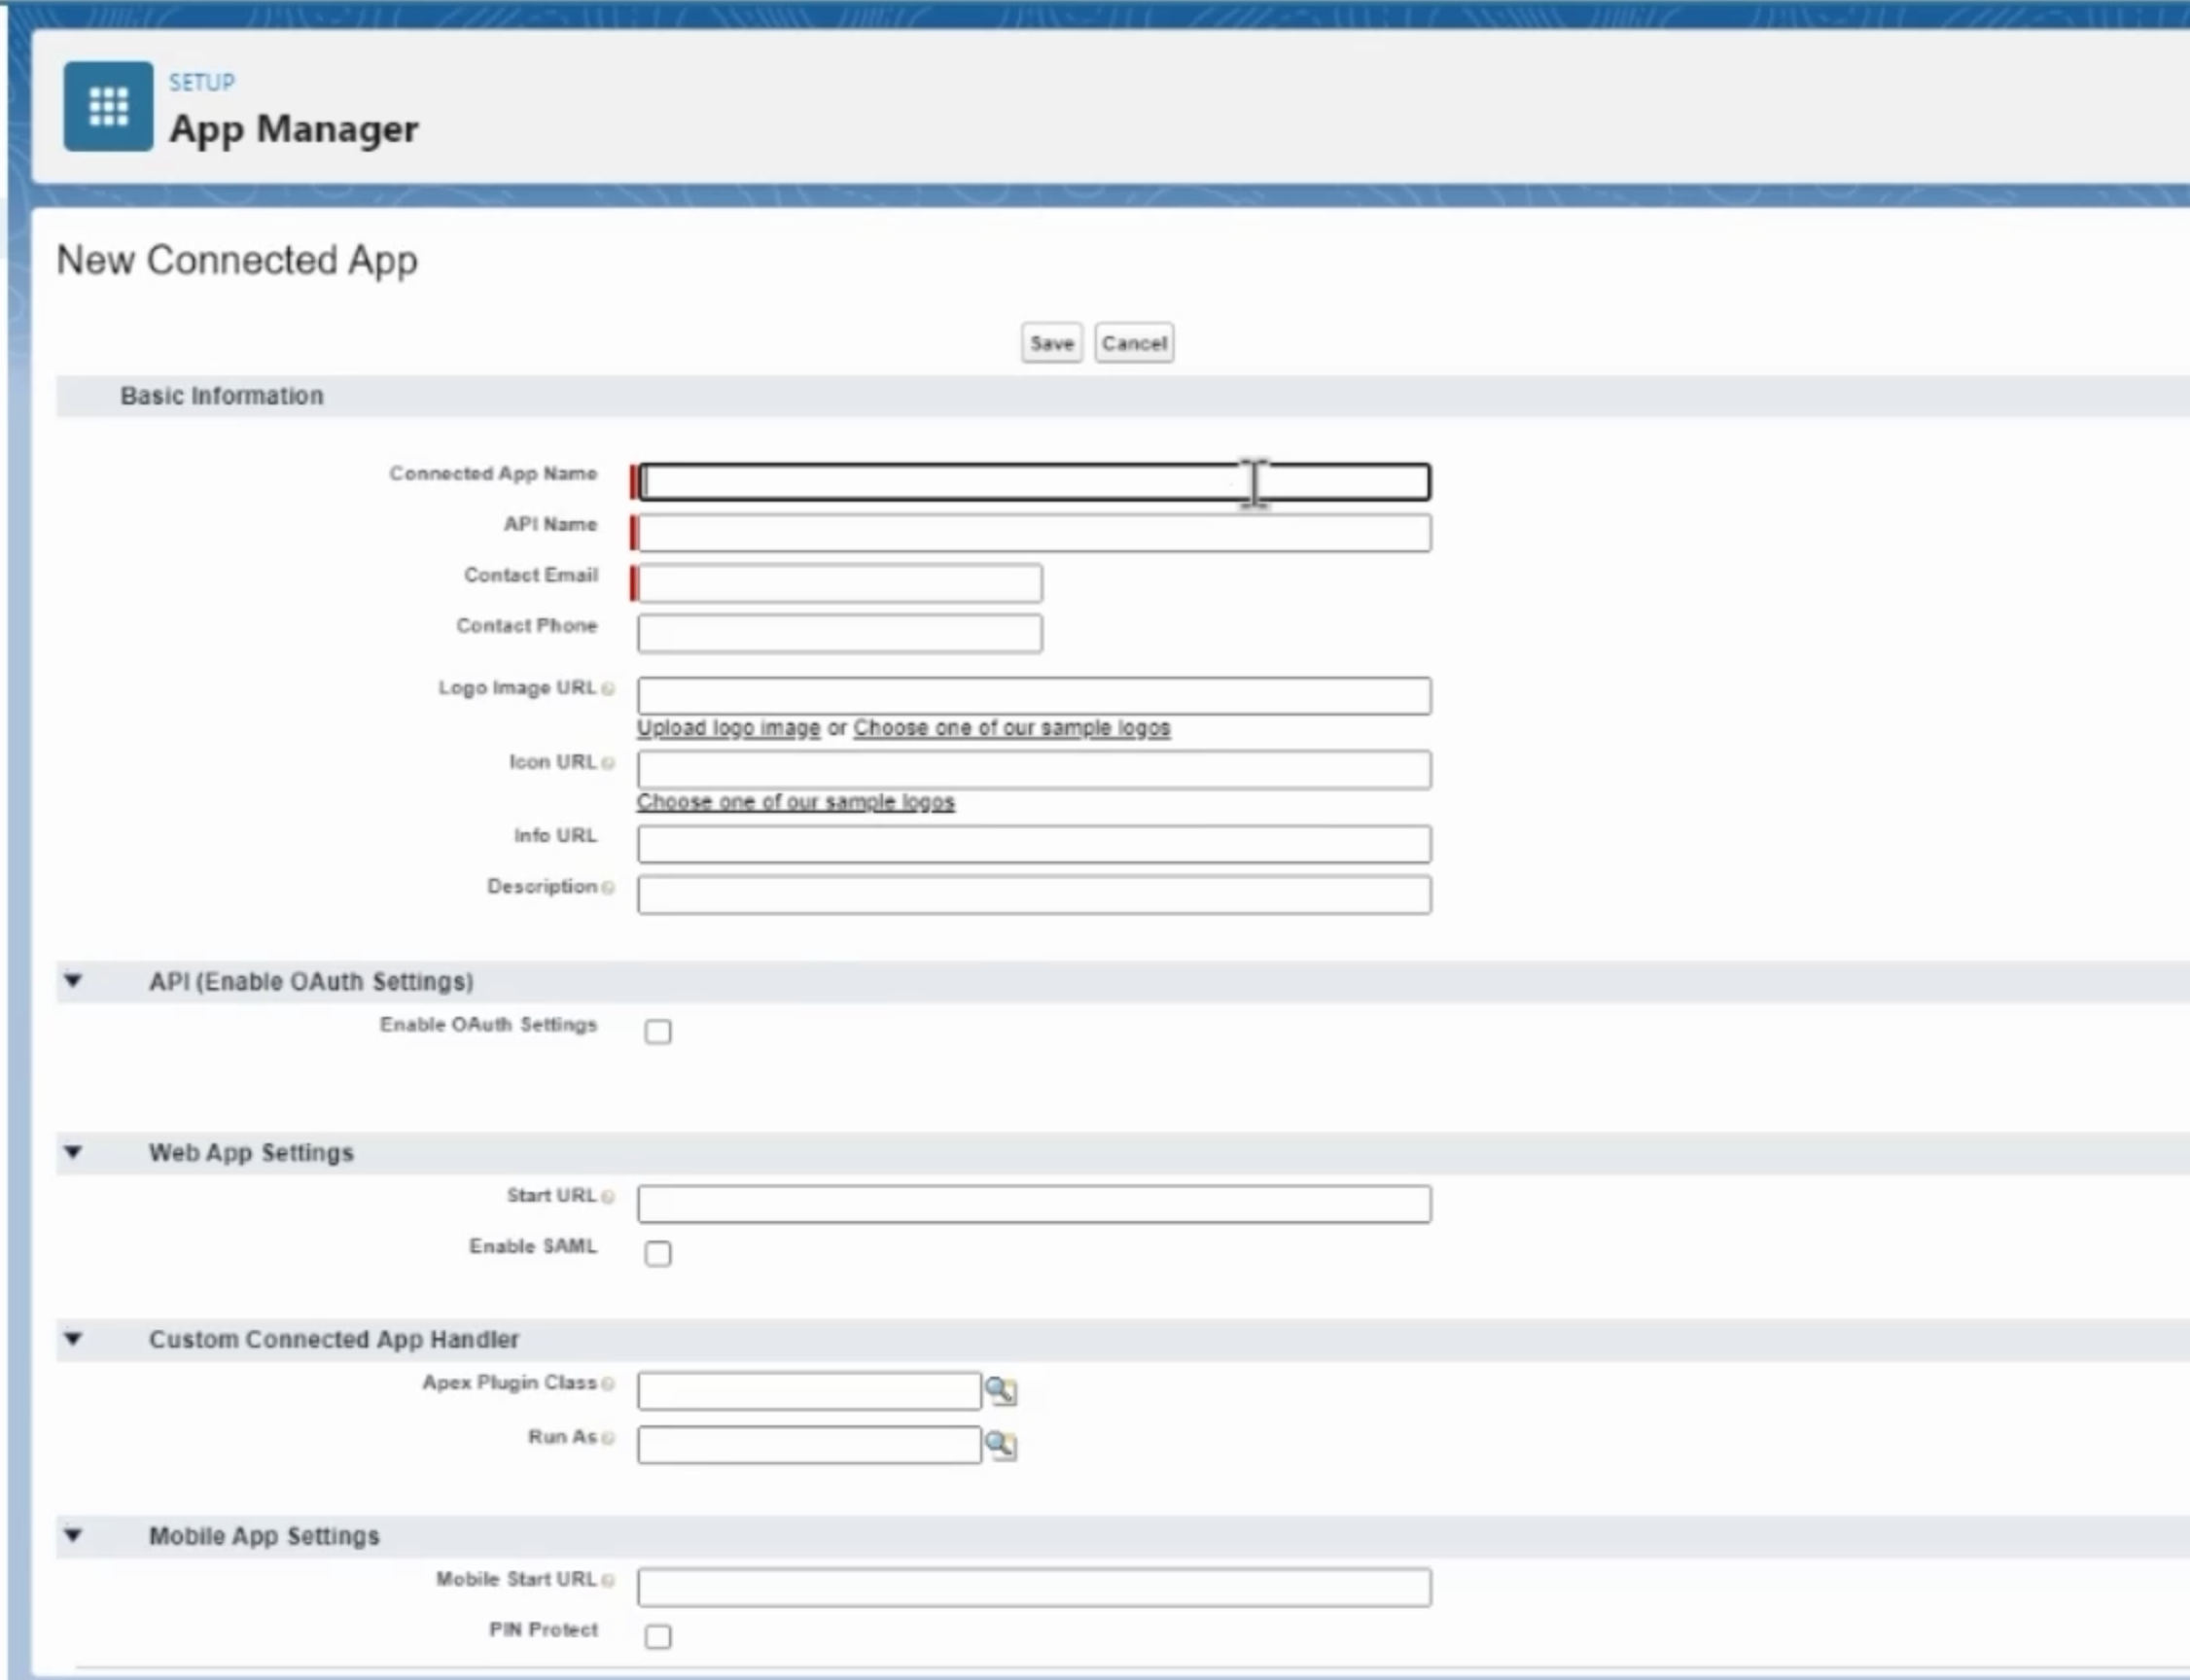
Let's start filling out some details over here.
Your Connected App Name could be a combination of alphanumeric strings to individually identify your connected app - let's say we call it "testzeus".
The API Name could be the same or similar.
Contact Email would be for the connected app as the email which you have used for registering the account. This is not shared with your admin.
I will skip these fields which are non-mandatory, but come do this important section around Enable OAuth Settings.
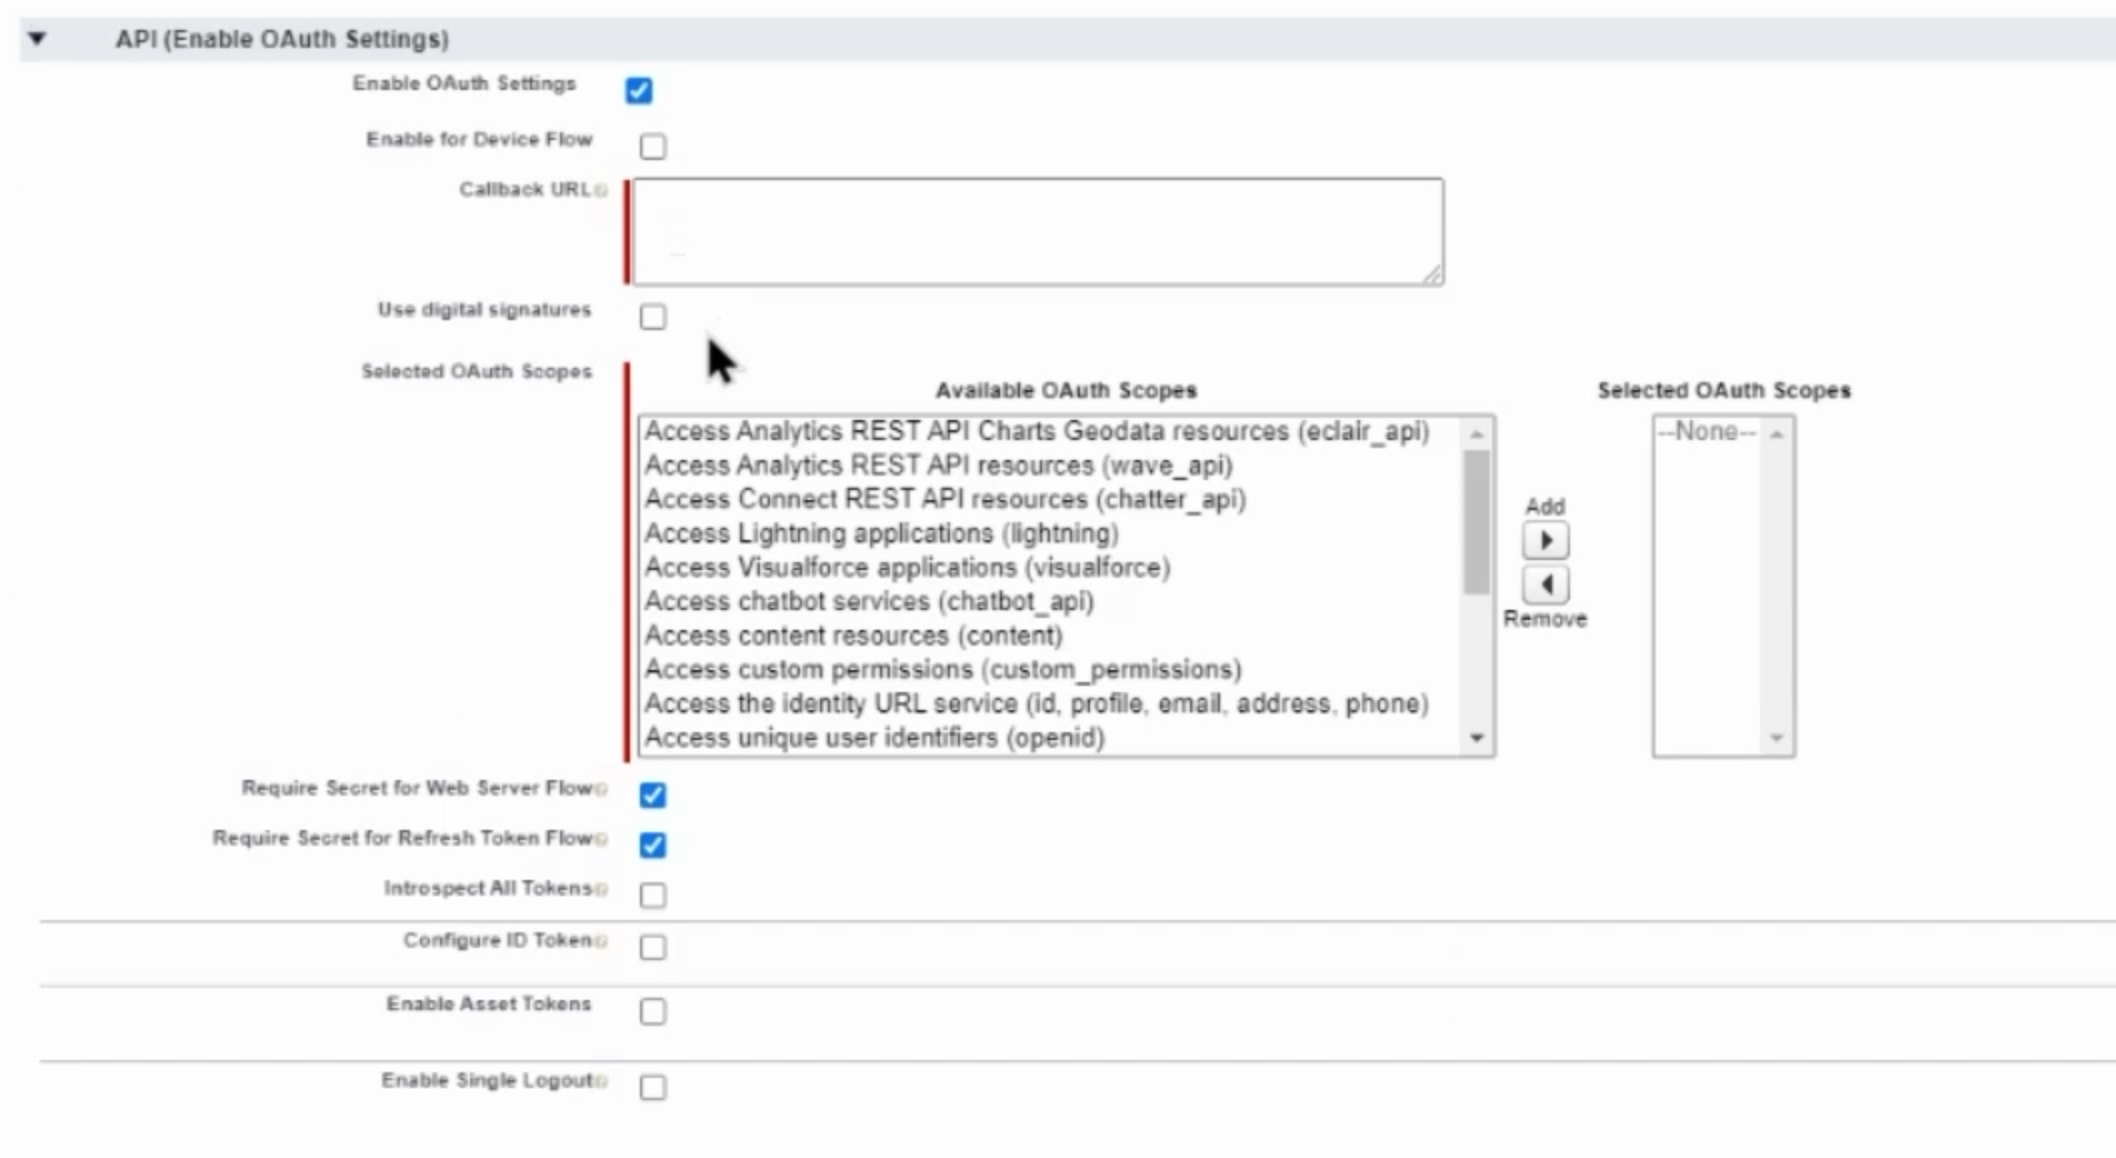
Once we click the checkbox over here, it asks us for a few details.
First and foremost, let's look at the Callback URL.
The callback URL can be the URL from your login page.
You can take it from the browser URL section over here.
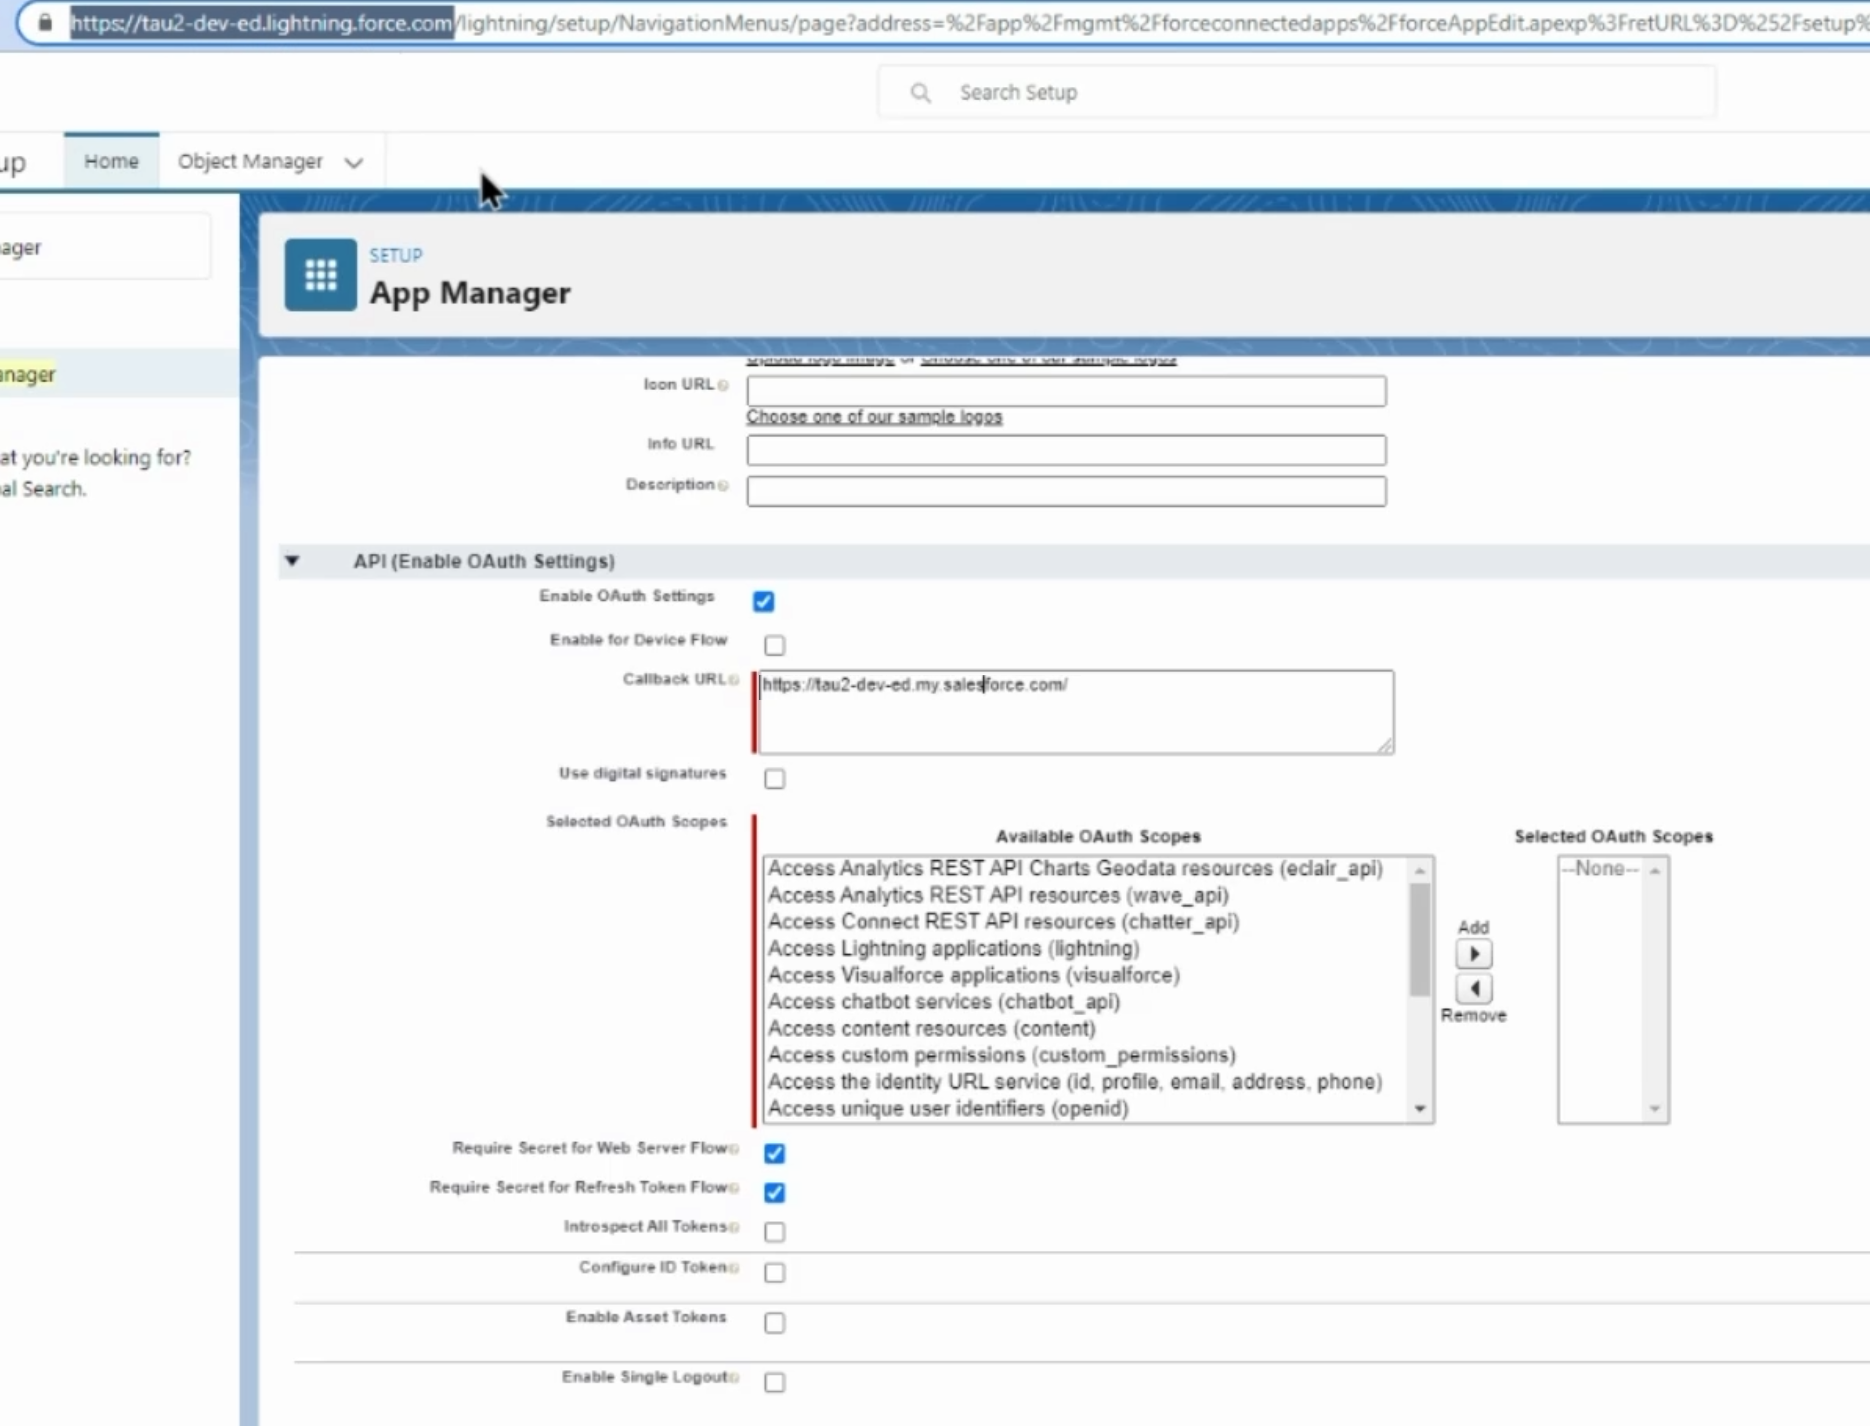
Let's make a few changes to this.
Once we have done this, we need to enable the available OAuth Scopes and just to ensure that we don't hit any problems, we'll select all and add them.
There are some other settings on this page, but we'll not tamper with them too much.
Once we have set up the basic details, please ensure that your Callback URL is the same as your Salesforce login URL, which you would have received in the email when you have signed up for the account.
Once the details are set in, you can click "Save" and that will create a new Connected App on your Salesforce instance.
This can take a while as per the message over here.
Once your Connected App is created, go to the Consumer Key and Secret section.
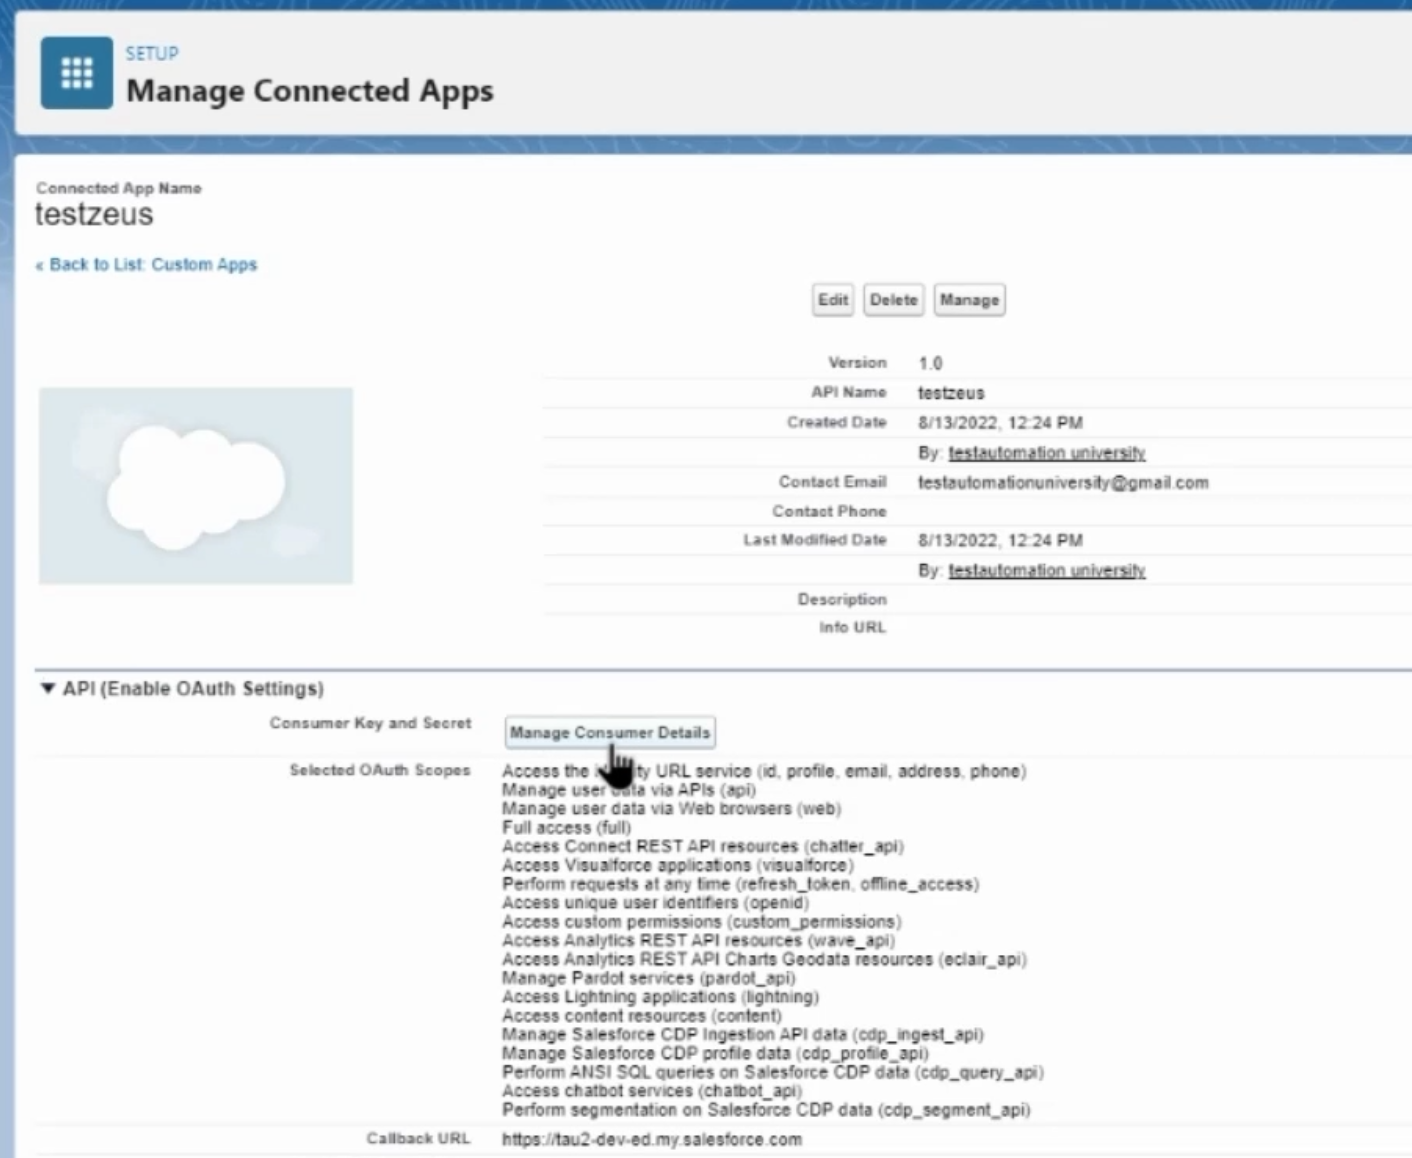
Over here, click on the "Managed Consumer Details" button.
When you do so, sometimes it might take you directly to the Consumer Details page, or it might also send you a verification code and lead you to the Identity and Authorization page, where you can put the code sent to you in email and that will lead you to the Consumer Details page, just like this one.
Over here, make a note of your Consumer Key and your Consumer Secret.
These will be used throughout the course for creating an API connection, pulling in details from your Salesforce instance, and running your test cases.
