

Transcripted Summary
Let's go a little deeper into the rabbit hole and understand why in the previous chapter we didn't have to create the page objects for the account creation form explicitly, and how are those WebElements being created on the fly using auto locators.
Let's begin.
As you can see on the image, we have a big, bold question at the top.
**How is the UI rendered for Salesforce? **
To answer that question, let's look at the image. You can think of this image as a burger.

We have the bottom bun, the top bun, and the stuff in the middle.
Now, any entire application is structured like this burger that we were discussing.
It has a back end, some middleware, and a front end, and Salesforce as a web application is no different.
As we can see in the image over here, we have at the bottom** Core Platform and Shared Services**, which provide the backend services.
In the middle, we have the Application Layer, Lightning Data Service, and a very important component - the User Interface API.
And then, there's a front end - we have the Experience components and the Base components.
Interestingly, what happens is that the core platform and shared services provide the data to the middleware, and our friendly user interface API plays this very crucial role of determining how the UI is constructed for a Salesforce application.
Where do the elements end up? Which row and which column do the first name and last name come from? What are the data types and labels for these web elements?
That is how TestZeus scrapes the UI API and creates the web elements on the fly, which we'll be looking into in just a minute over here.
Now that we have an understanding of the burger of our Salesforce application, let's take a deeper look at the AutoLocator Strategy.
# AutoLocator Strategy
If you recall, we have understood that the UI API presents the elements on the front end, or the screen.
And if you look at the current slide on the left-hand side, we have the record detail page, specifically for the account sObject.

Now, the same is actually translated into a JSON response, which we get back from the UI API on the right-hand side, or the second box.
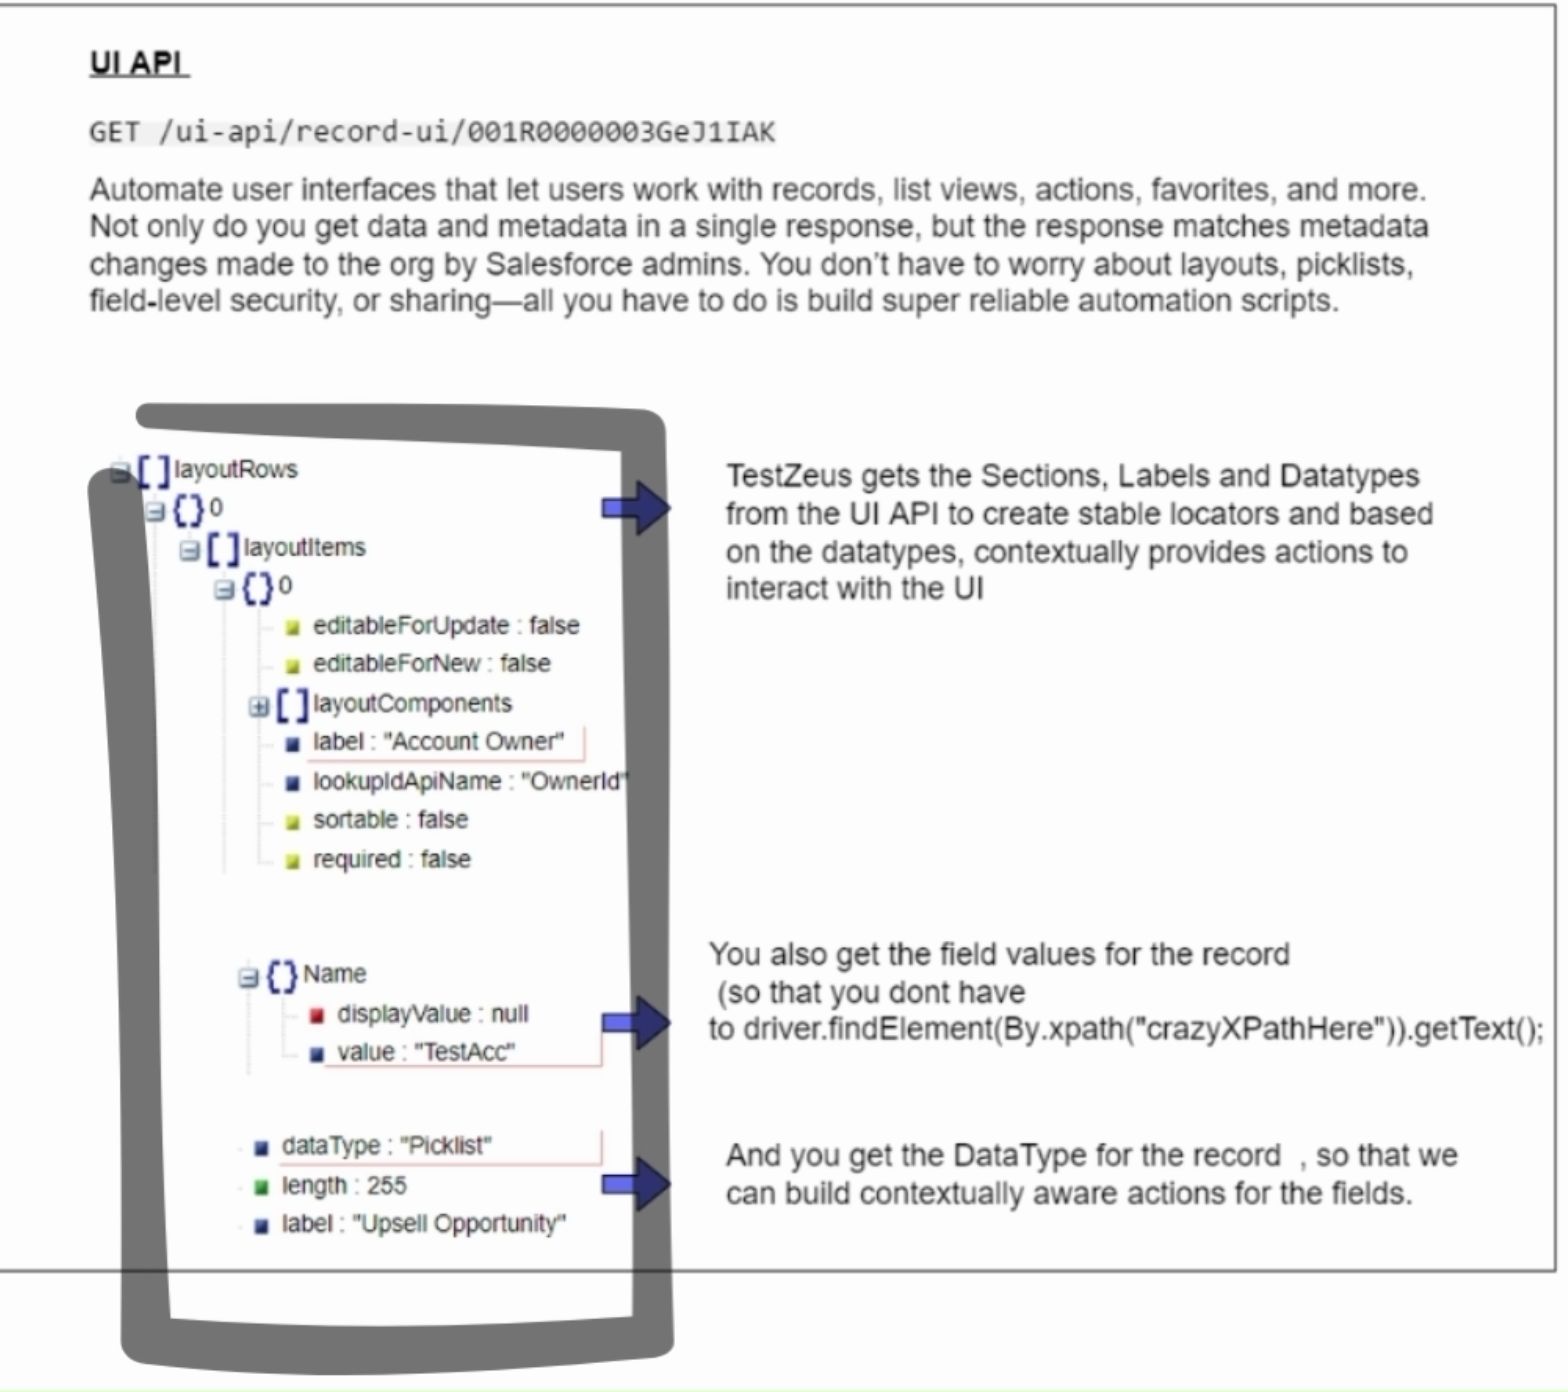
As you can see, when we hit the UI API with the record ID, we get a very detailed and nicely formatted response back in JSON format.
There are three key pieces over here.
First is that we get the layout structure of the web elements on the screen - so we get the sections, labels, and datatypes from the UI API.
As you can see, it specifically says that - let's say - the label "Account Owner" comes in row 0, first column.
Second, we can also get the exact type - as in, whether it is a text field or a pick list or a boolean from the UI API JSON response.
Interestingly, we also get whether the field is mandatory or not - it says required false or true - for the nature of that element.
Using these values, TestZeus creates the WebElement on the fly.
If we know that a certain element is coming up on row 0 column 1, we can create xPaths for it.
And then, if we just scale that up to all the elements on the UI, we can run a for loop.
It's as simple as that - scrape all the elements from the UI API, and construct the WebElements for Selenium to interact with, because we know the location of these web elements on the screen now.
Now, let's look at the code equivalent of the same thing.
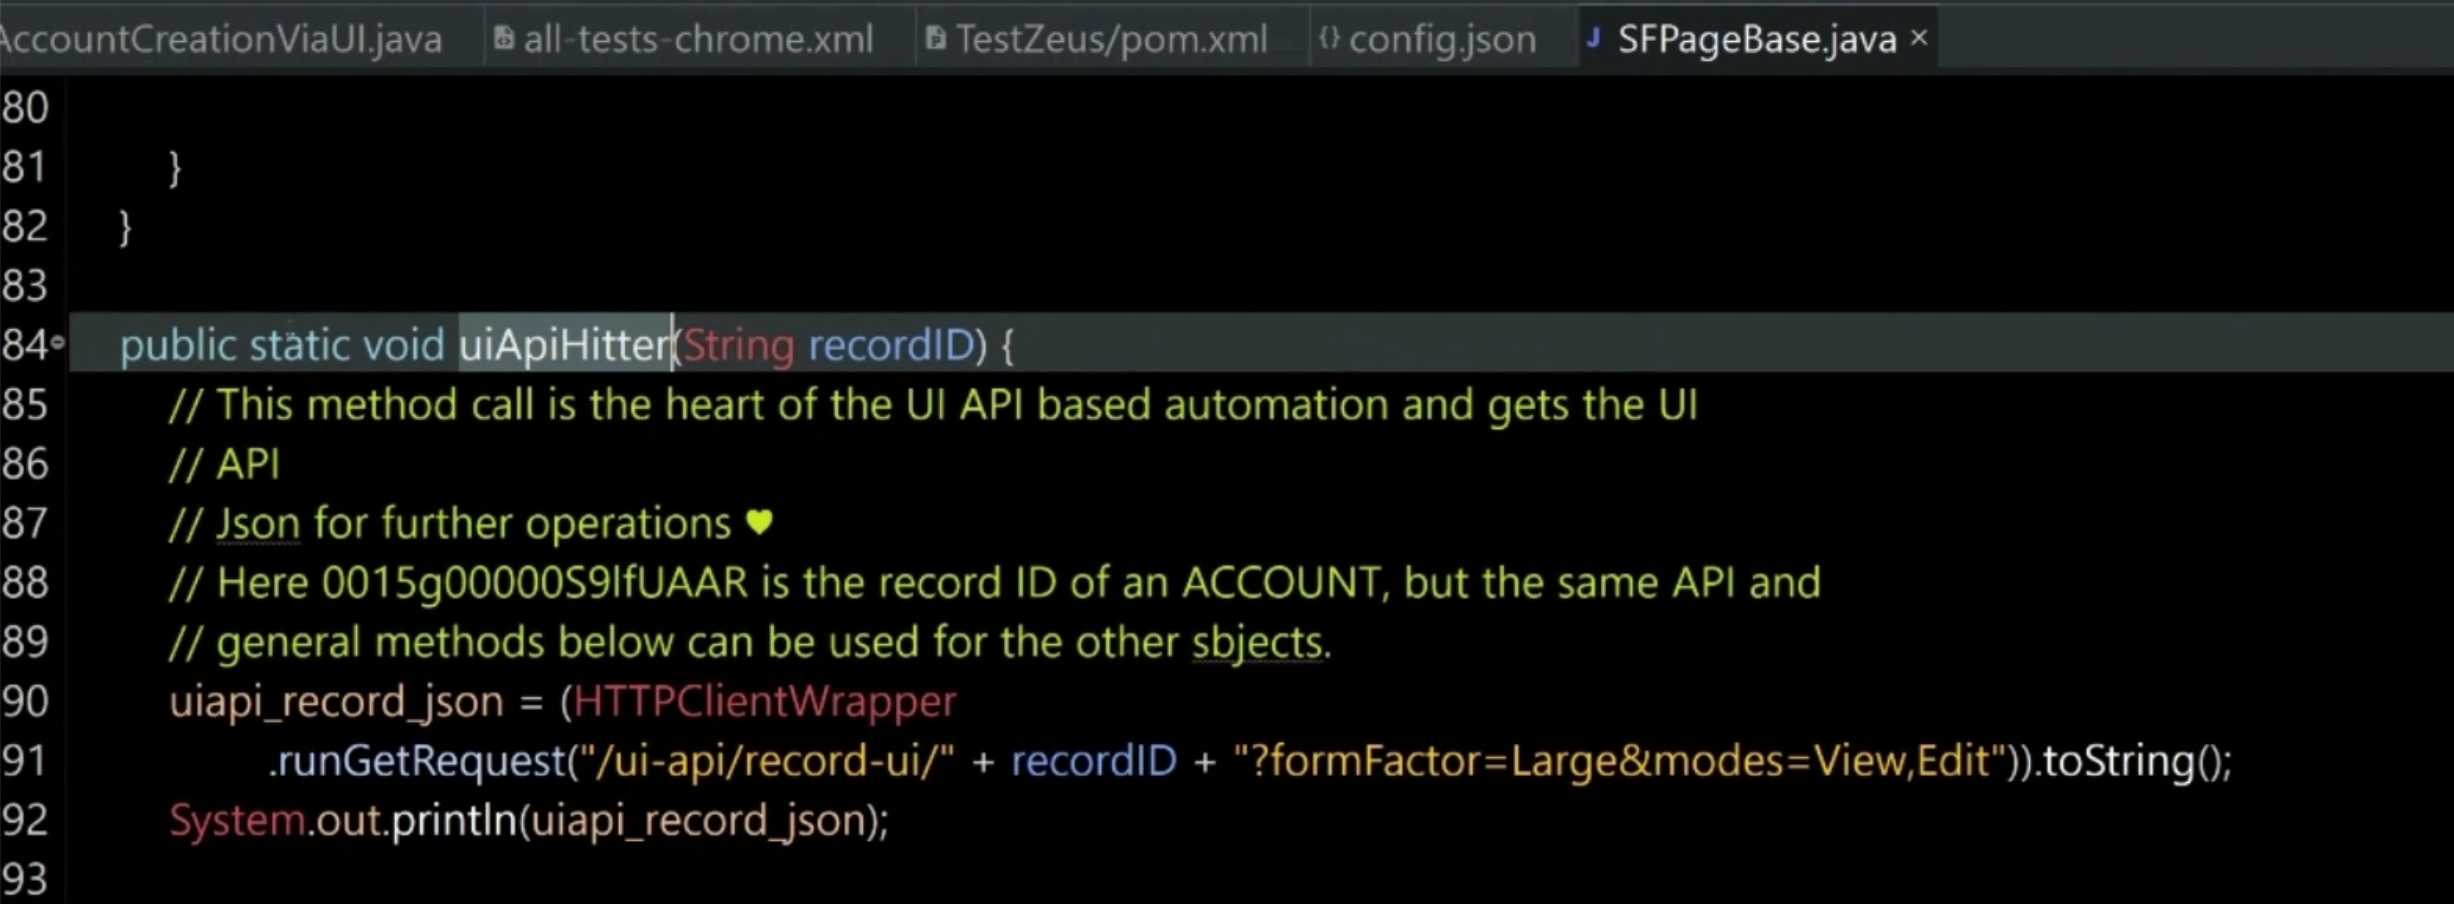
We are back in the code base and in the IDE, we have the SFPageBase Java class open over here for reference.
As we had seen earlier in brief, the uiApiParser takes a recordid to identify all the elements from the UI API.
Now, let's take a deeper look into how it does it.
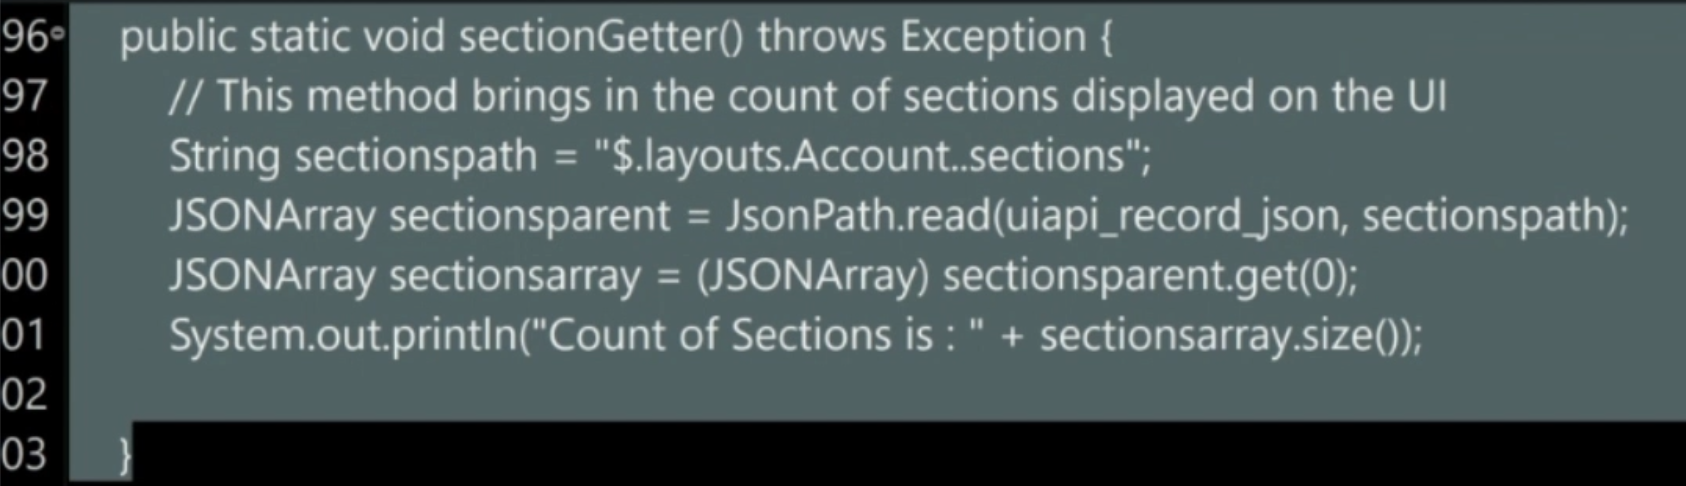
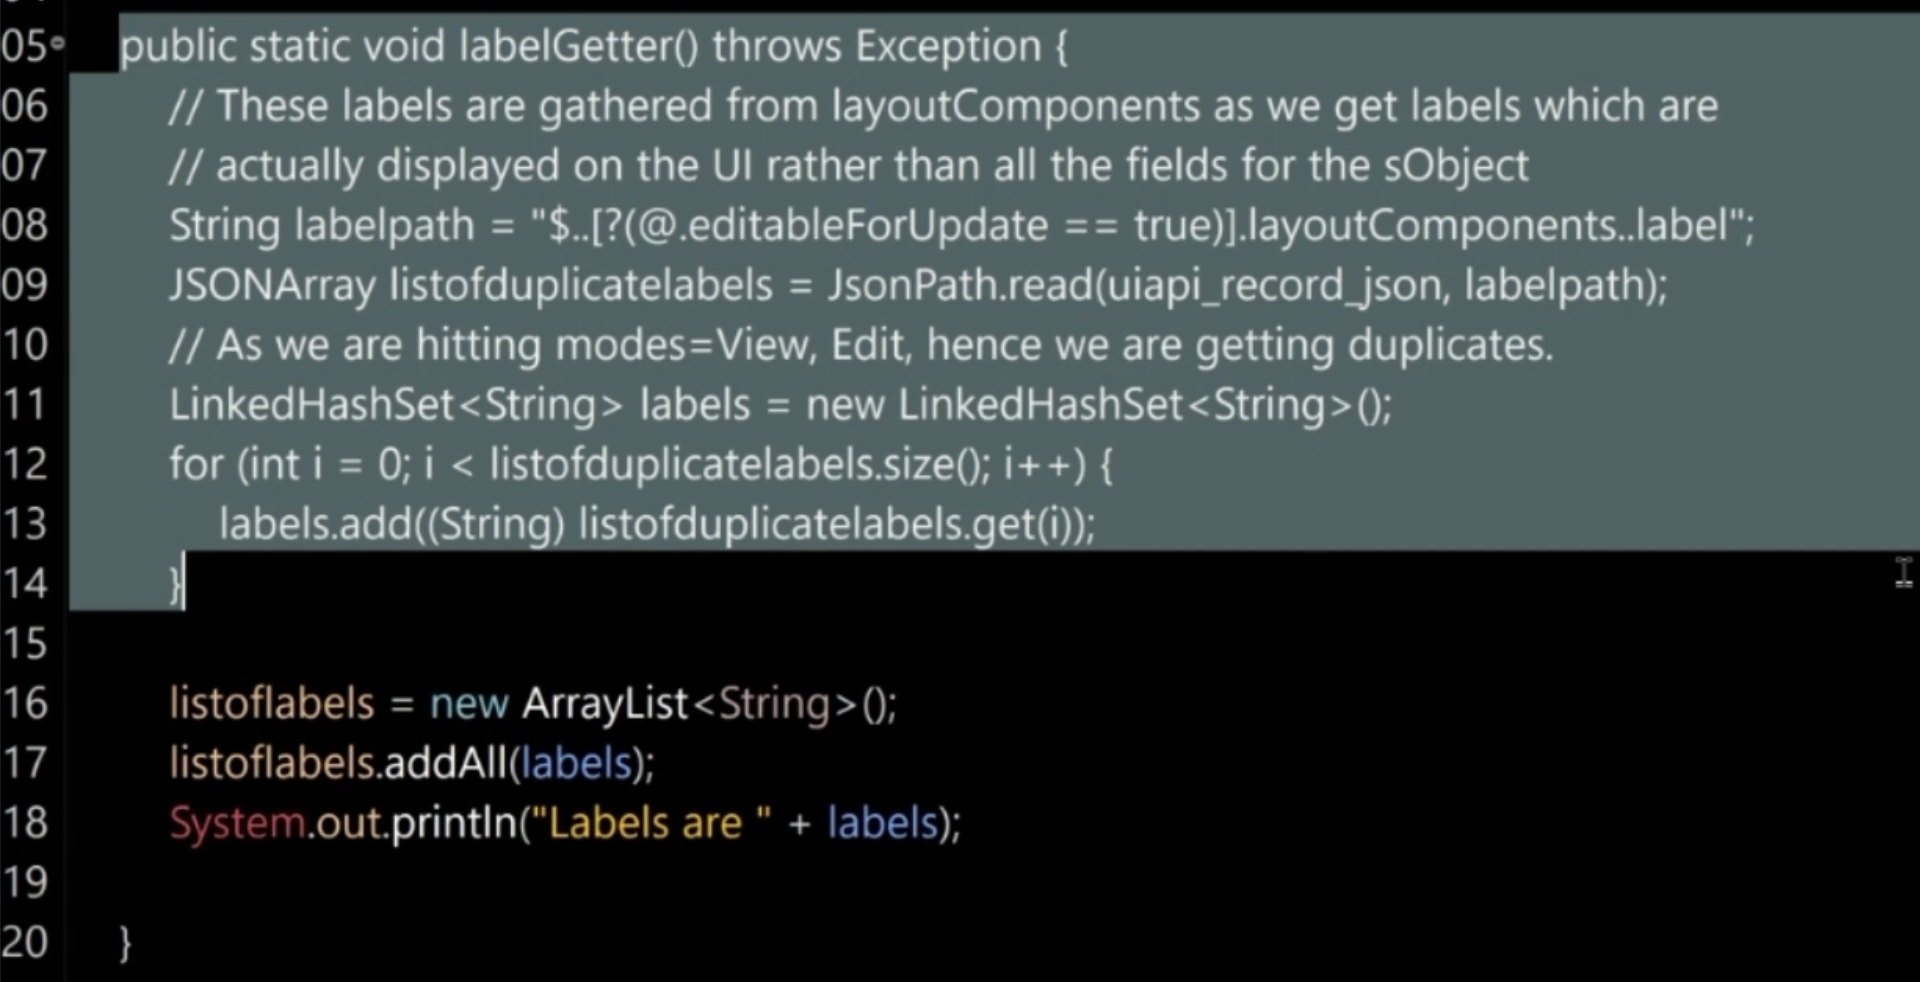
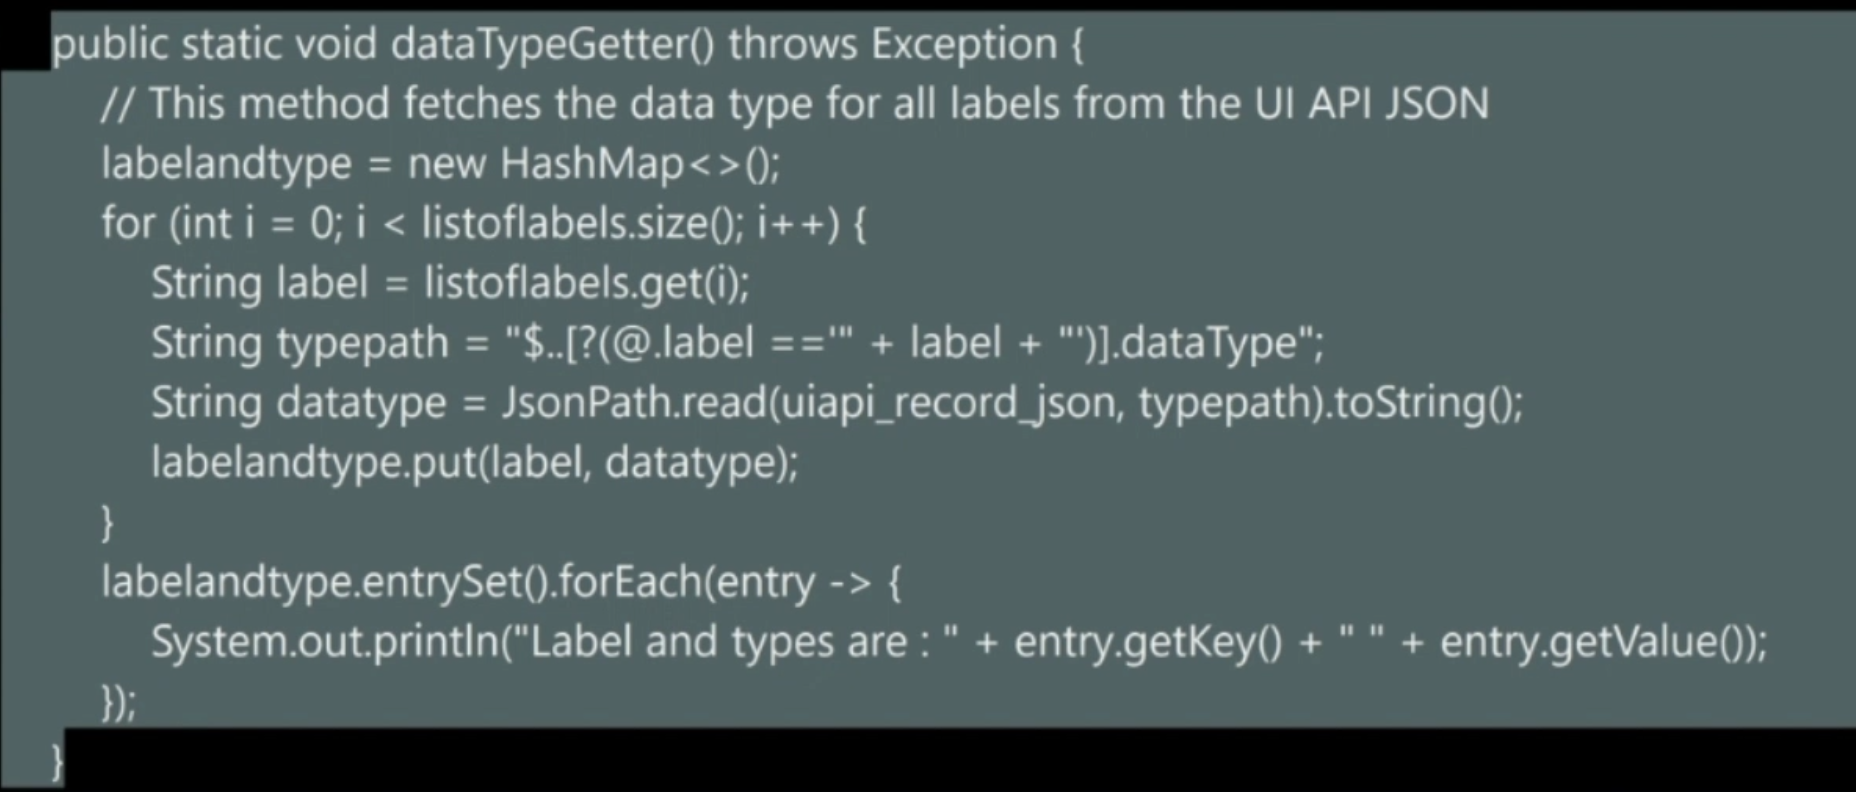
The uiApiParser actually calls up four child methods - first is uiAPIHitter, second is sectionGetter, third is labelGetter, and then, fourth is dataTypeGetter.
As we had seen earlier from the UI API JSON response, we actually get not just the exact location - let's say row 0, column 1 of a certain WebElement - we can get the label and then the data type and its nature - mandatory or not - as well.
We exploit these pieces to construct the WebElement on the fly.
First and foremost, we actually hit the UI API, get the JSON response using the HTTPClientWrapper class over here for that purpose.
Once that is done, we construct the sections for our code by slicing and dicing the response in JSON.
Once we do that, we parse the labels.
Last but not the least, we also get a data type so that we know whether it's a boolean or a picklist or a text field.
Once we have all these values, our TestZeus framework has a method called formValueFiller, as we saw earlier.
Now, in this case, we do a simple switch case, identify what kind of WebElement we have, and then construct that WebElement on the fly for Selenium to interact with.
If we go a little further in the same Java class, we also see that we can verify that the fields with which we are interacting are required or not, and so on, so forth.
We also have methods for appLauncher, so rather than clicking on the nine-dot icon and navigating to a certain object, we can do it using the appLauncher method.
This class SFPageBase is actually the heart of the TestZeus framework and performs these key actions, such as AutoLocators and also performing AutoWaits, as you will see in the upcoming chapters.
