

Transcripted Summary
In the previous chapters, we saw how to create page objects using our TestZeus framework, and we promised that in this chapter we will look at creating the test cases using TestZeus.
Let's get going on that front.
First, just like any good test automation engineer, let's look at the manual flow of the test case so we can understand what we're trying to model or automate, and then we can look at the code.
Here we are on the Salesforce Login screen - this is the same sandbox that we had worked with earlier.
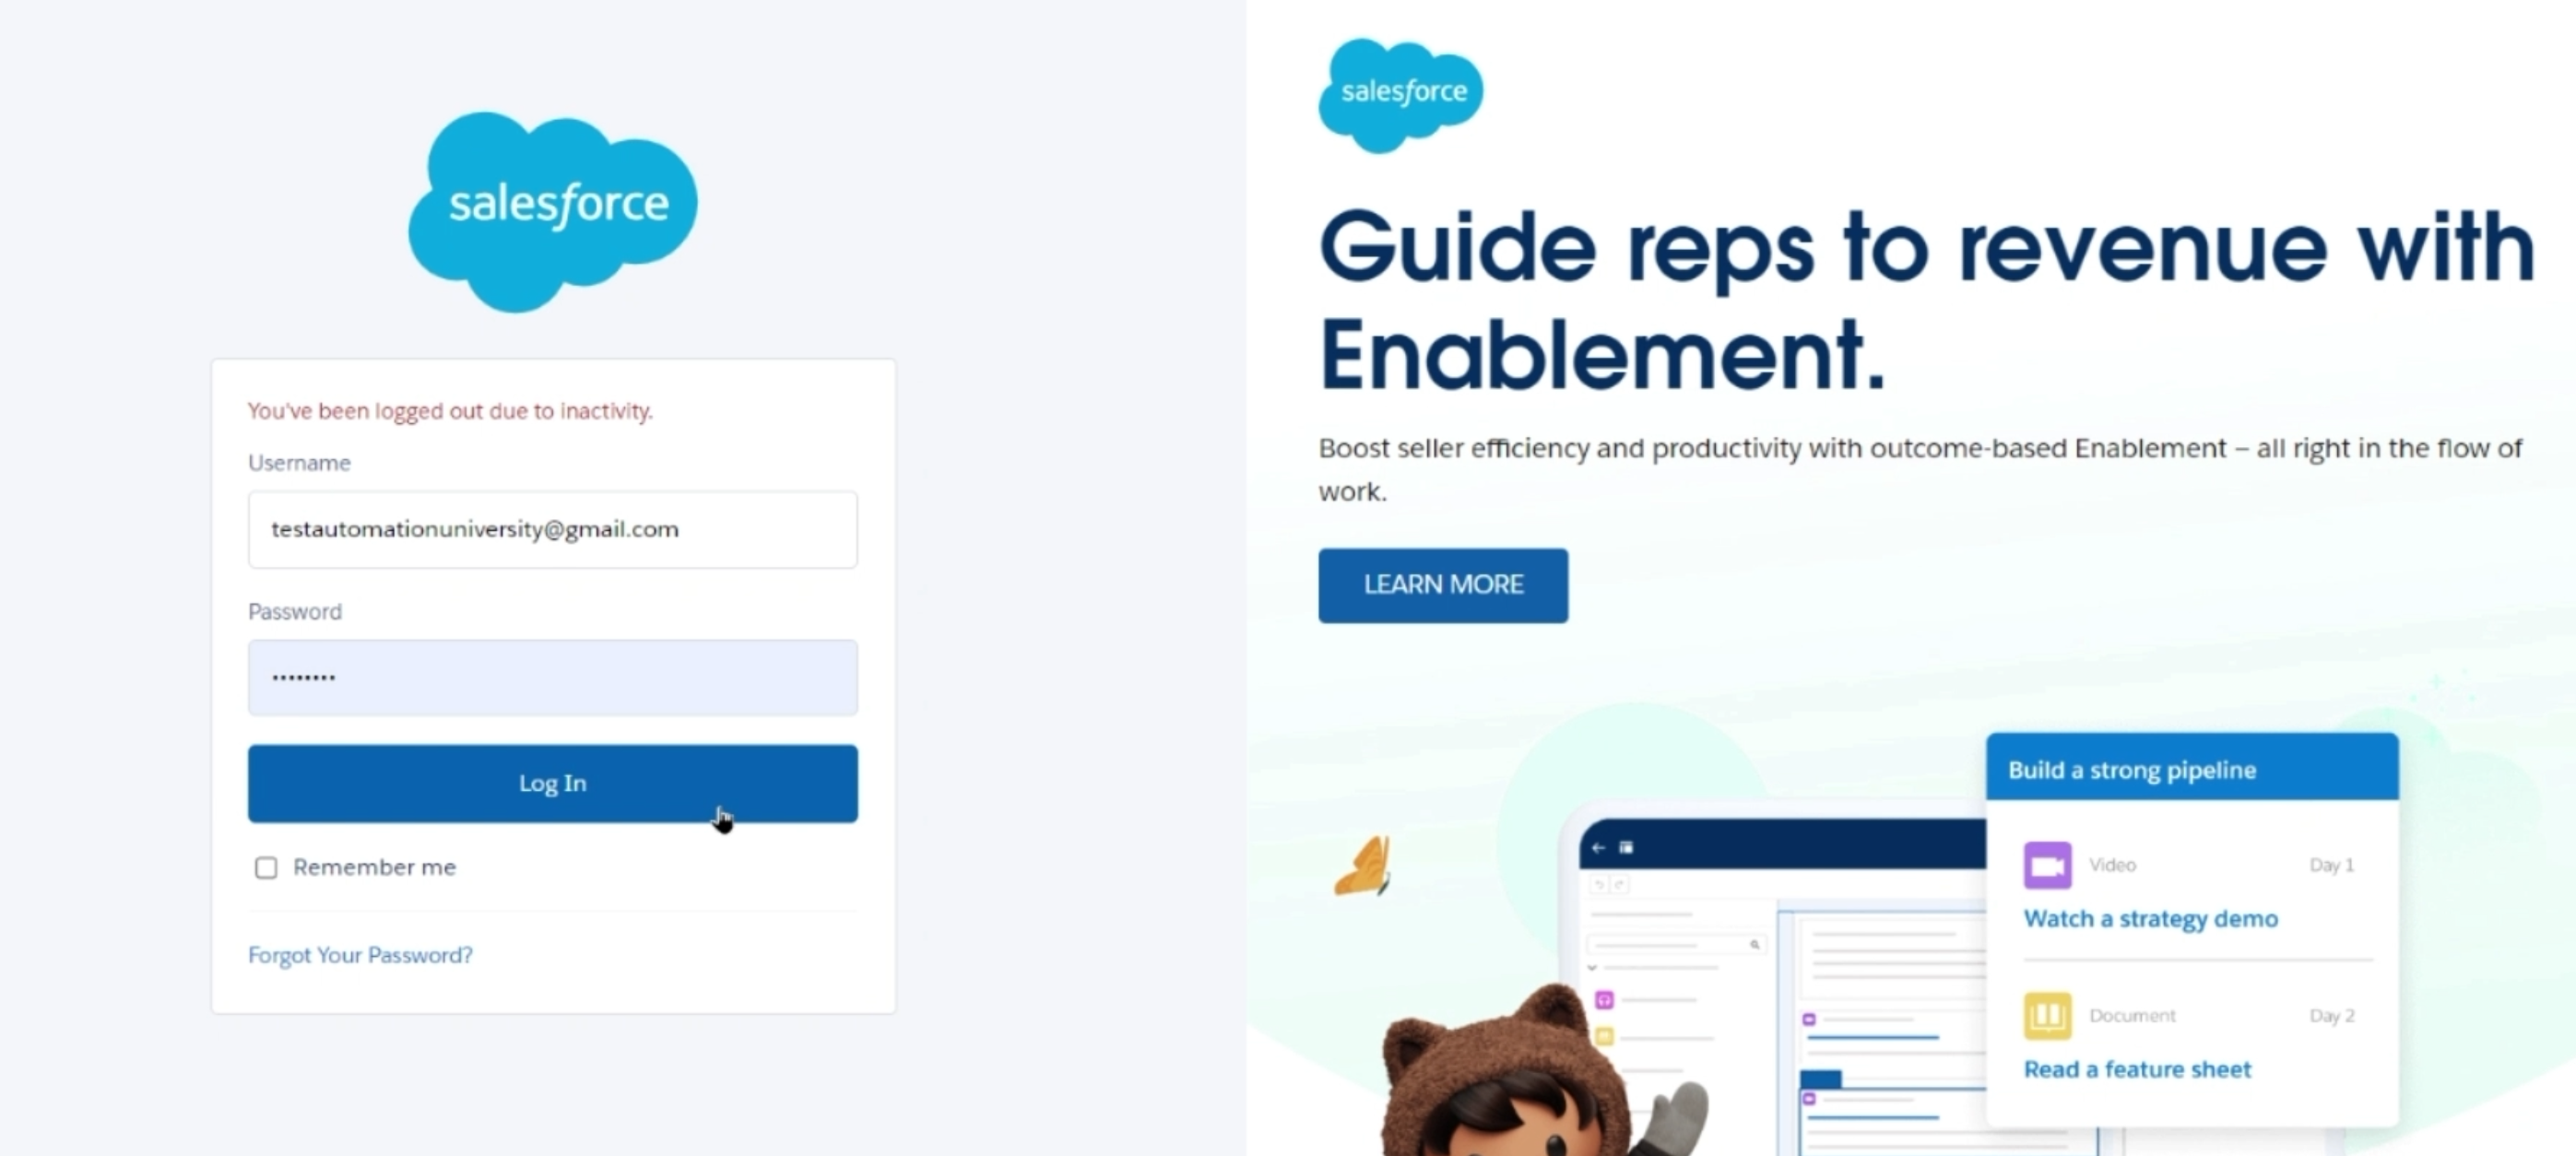
We put in the credentials and we click on "Log In" as a user would do.
Now let's say this user logs in and navigates to the "Accounts" list page over here.
While this can be done in many ways - one of which being clicking on the nine-dot icon on the top left - TestZeus interestingly has APIs which can directly hit sObjects, standard objects in Salesforce terms, and navigate to one of these list pages, whether it's "Accounts", "Contacts" or "Opportunities".
For now, let us stick to "Accounts".
Let's say our user wants to create a new account by going to the list page and clicking on the 'New' button.
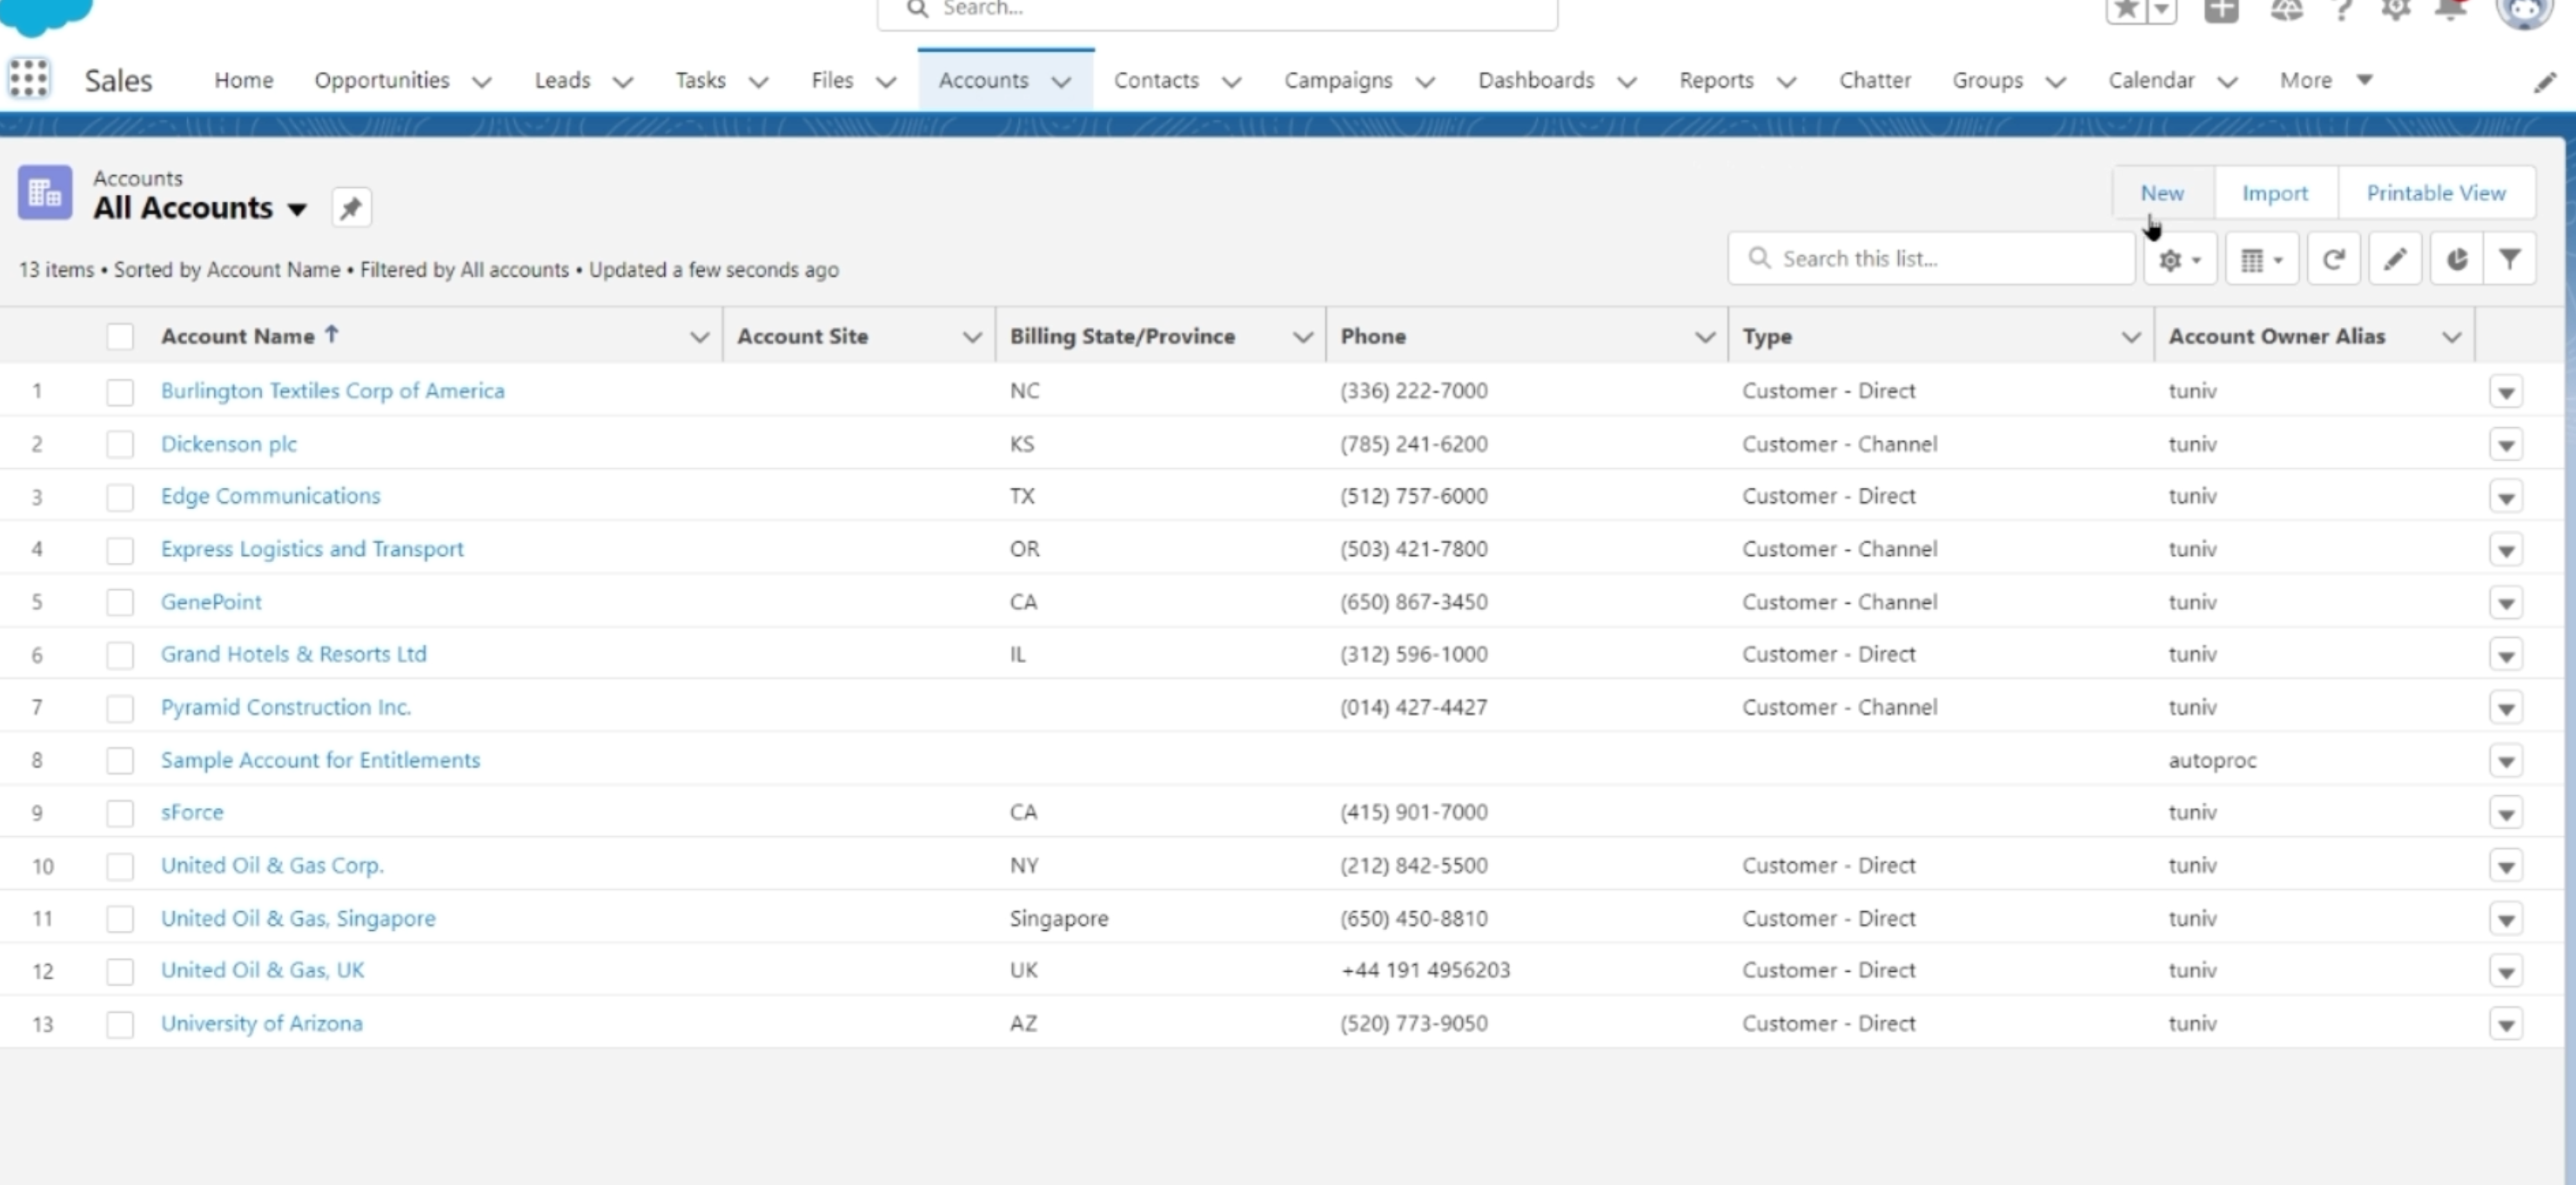
The next step would be to wait for this page to load, and click on the "New" button.
As we saw in the last chapter, this "New" button is also modeled as part of the page object.
Once we click that "New" button, we get this nice form to create a new account.
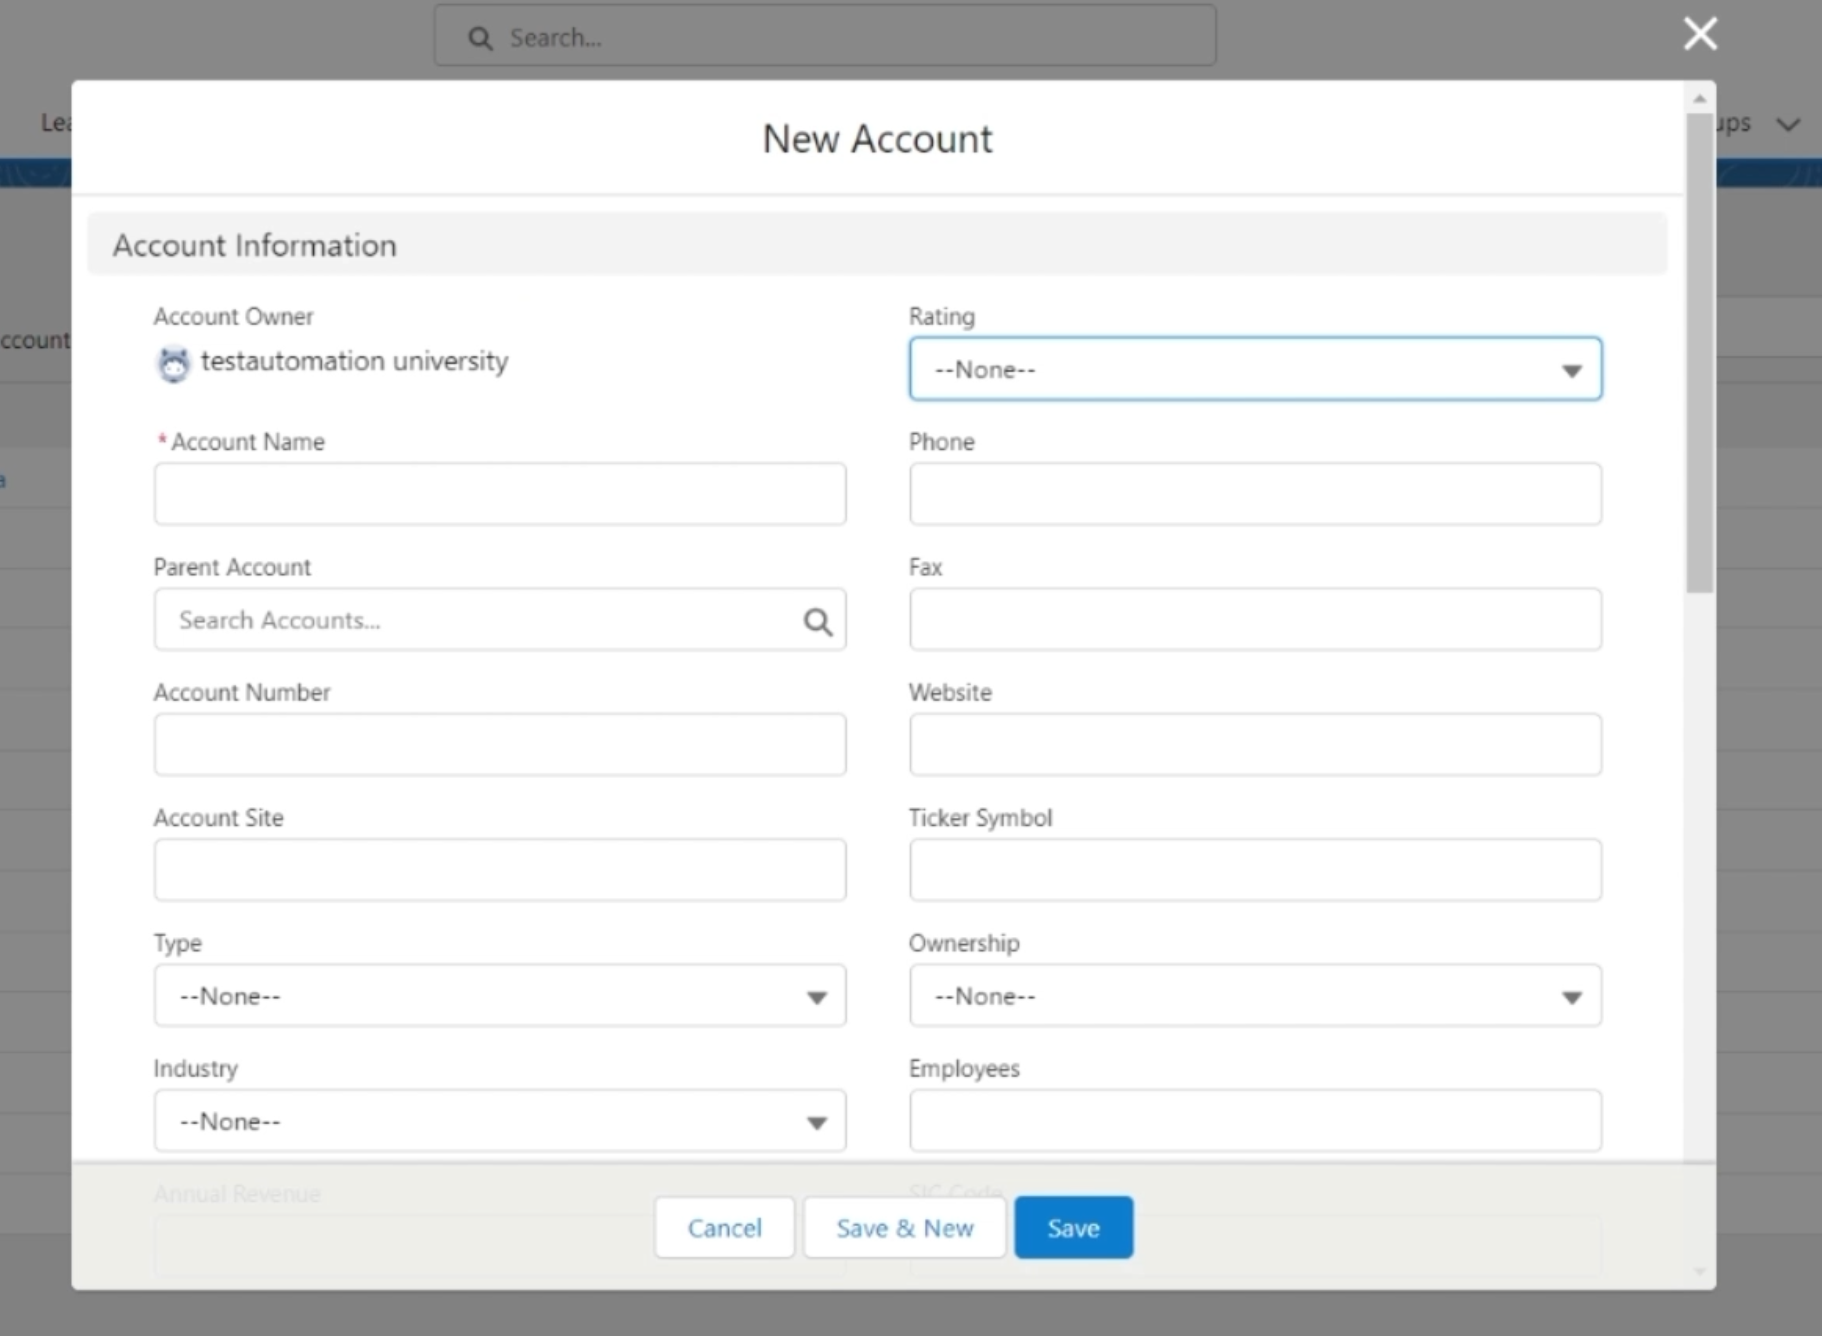
Now, we have some mandatory fields as highlighted by the asterisk or the star sign.
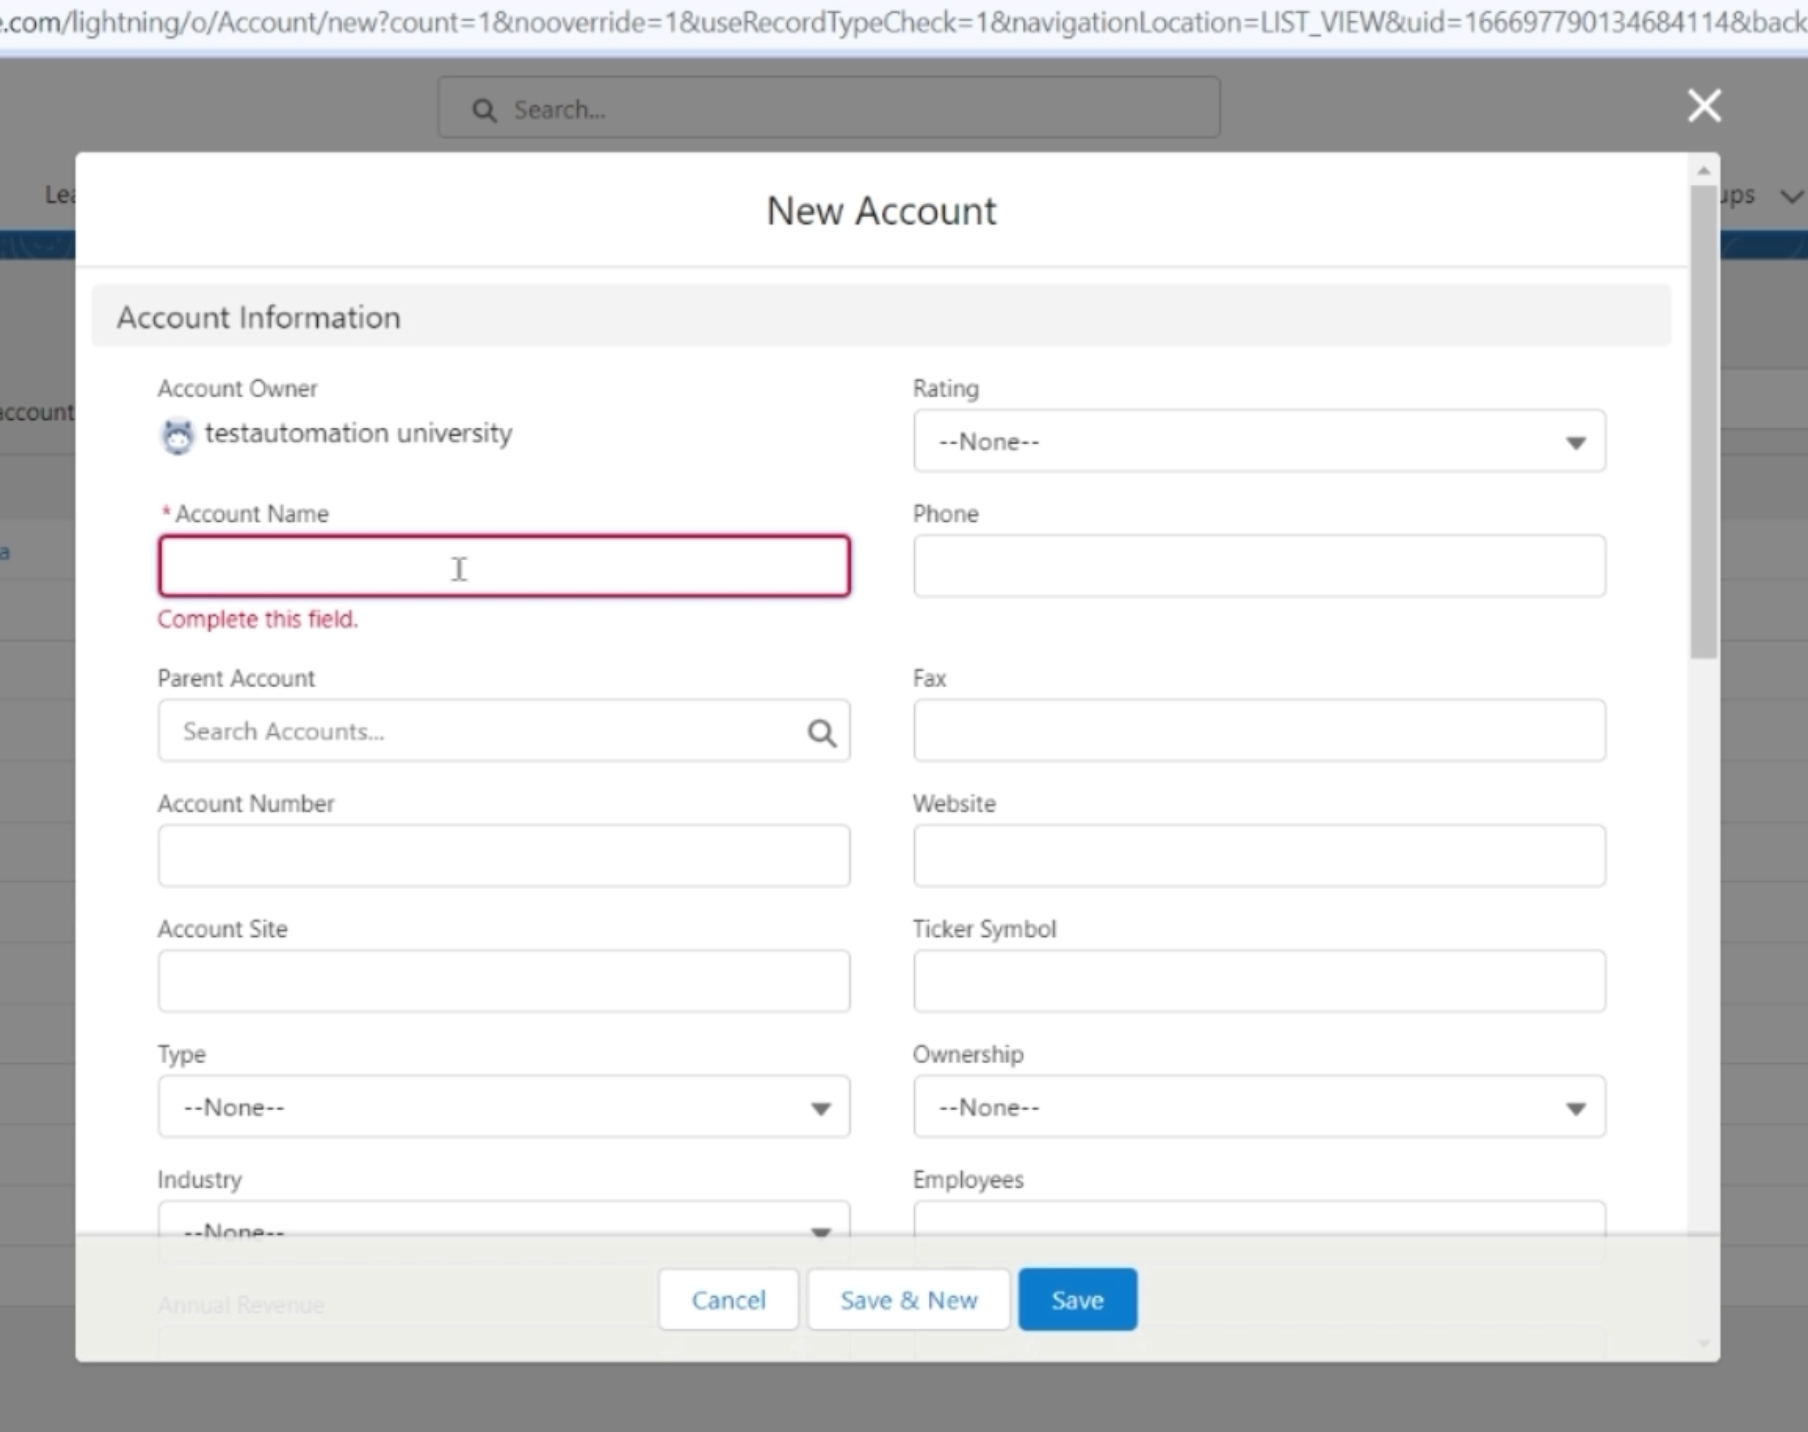
Let's put up some values, and apart from the "Account Name", I believe we don't have any other mandatory values.
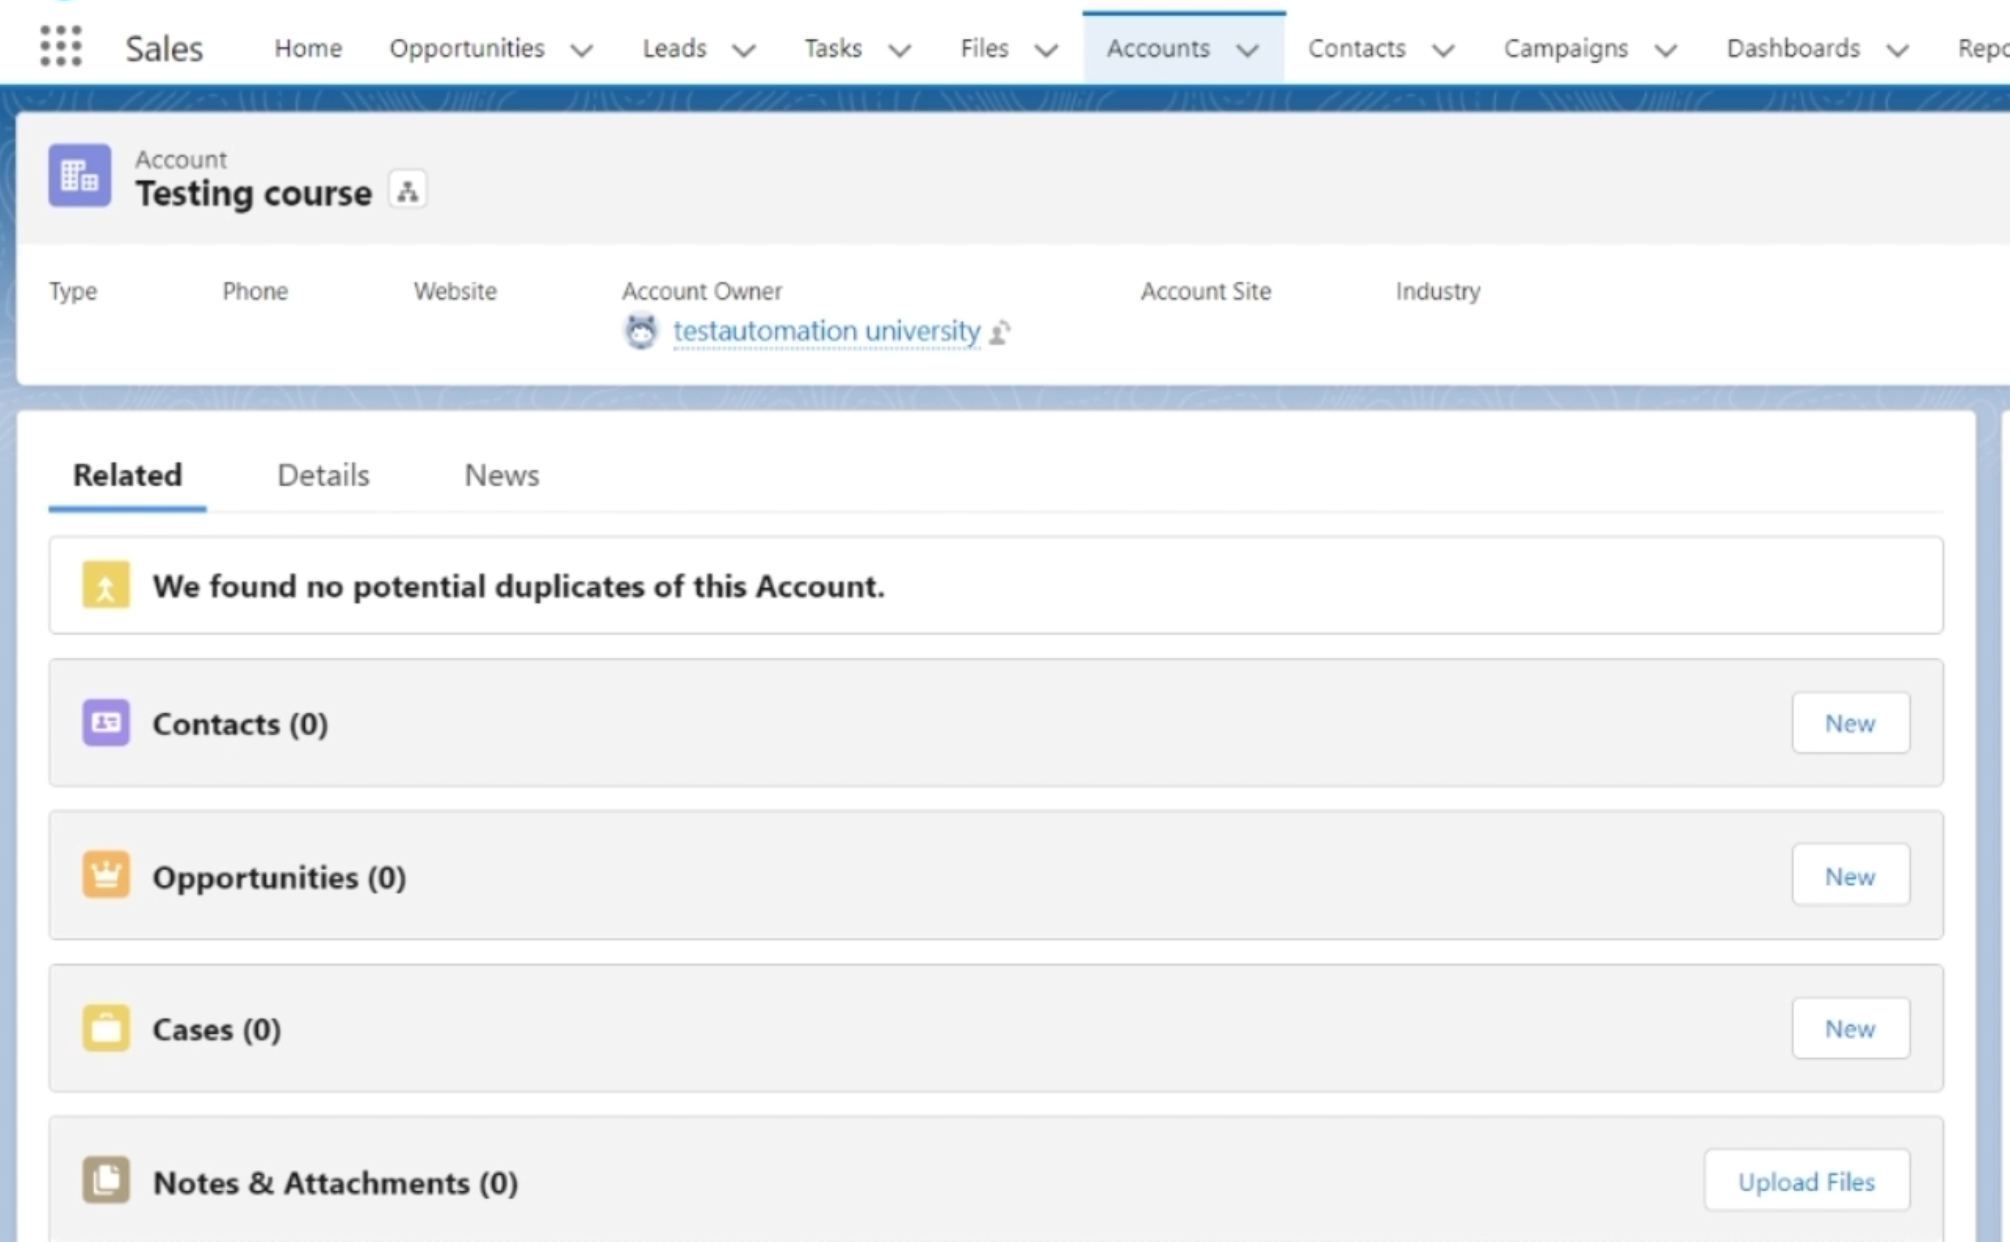
Once you put that value in, we click on "Save", and we see that the Account "Testing course" was created successfully, and we land up on the Account Detail page with sub-tabs like Related, Details, News, so on and so forth.
This is a very simple flow.
Let's see how to model this as code in our test case using the TestZeus framework.
Now that we know what our manual test case looks like, let's try to correlate the same in our code in the TestZeus framework.
When you have cloned a copy of the TestZeus framework, you get the AccountCreationViaUI.java class, as the test class by default under the testscripts package.
I've opened up the same in the IDE - this is Eclipse - and rather than writing it line-by-line, let's go through the major sections of the test case and understand what each one of them does so that you can successfully create your own test cases.
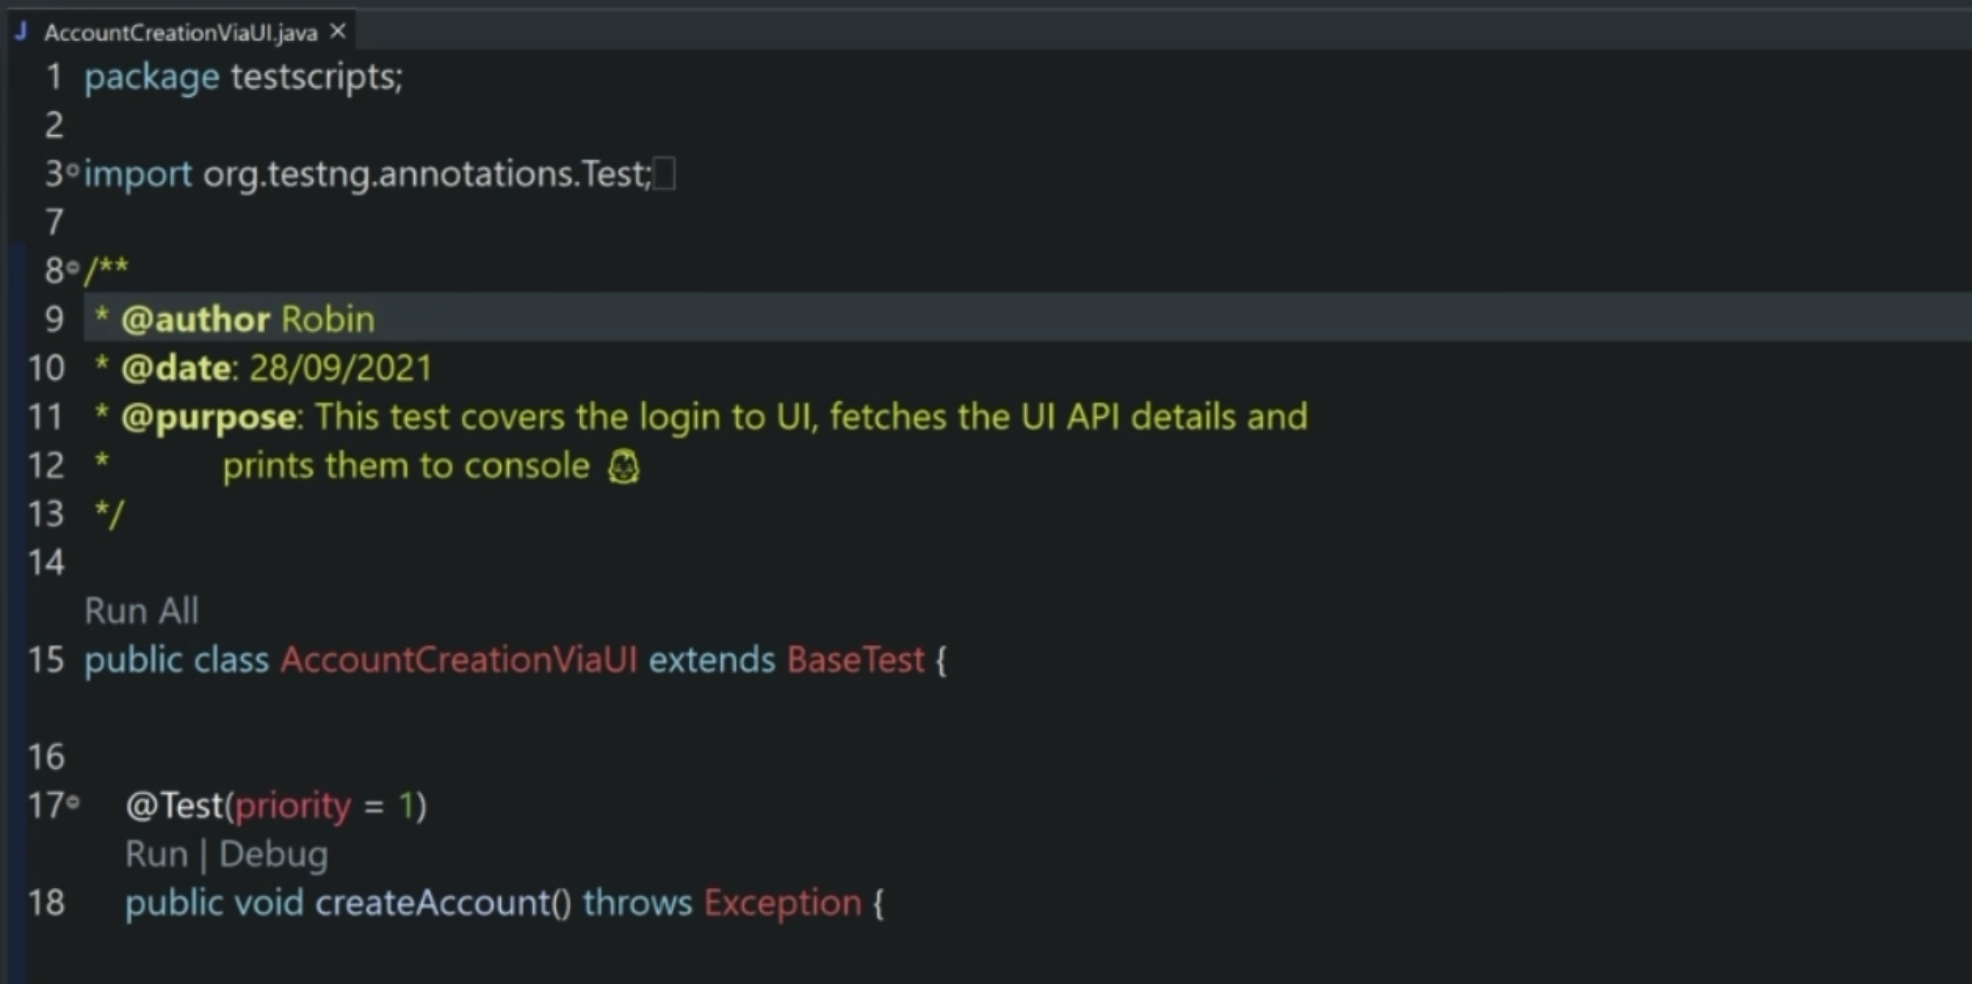
First and foremost, comments and Javadoc are important, so don't forget to add them when you create your own test cases.
Now let's begin.
Basically the test case uses the TestNG framework as the runner, and as you can see on line 15, this test class, and interestingly, all test classes, should extend BaseTest.
Why is that so?
Because BaseTest helps us instantiate the WebDriver, the PageObjects, the TestNG annotations, and other key methods required for test execution, as explained in the chapter around the architecture of the framework.
We are using standard TestNG annotations such as @, @Test, and priority, and then creating the test methods.
We have provided comments so that this can act as reference for creating more test cases.
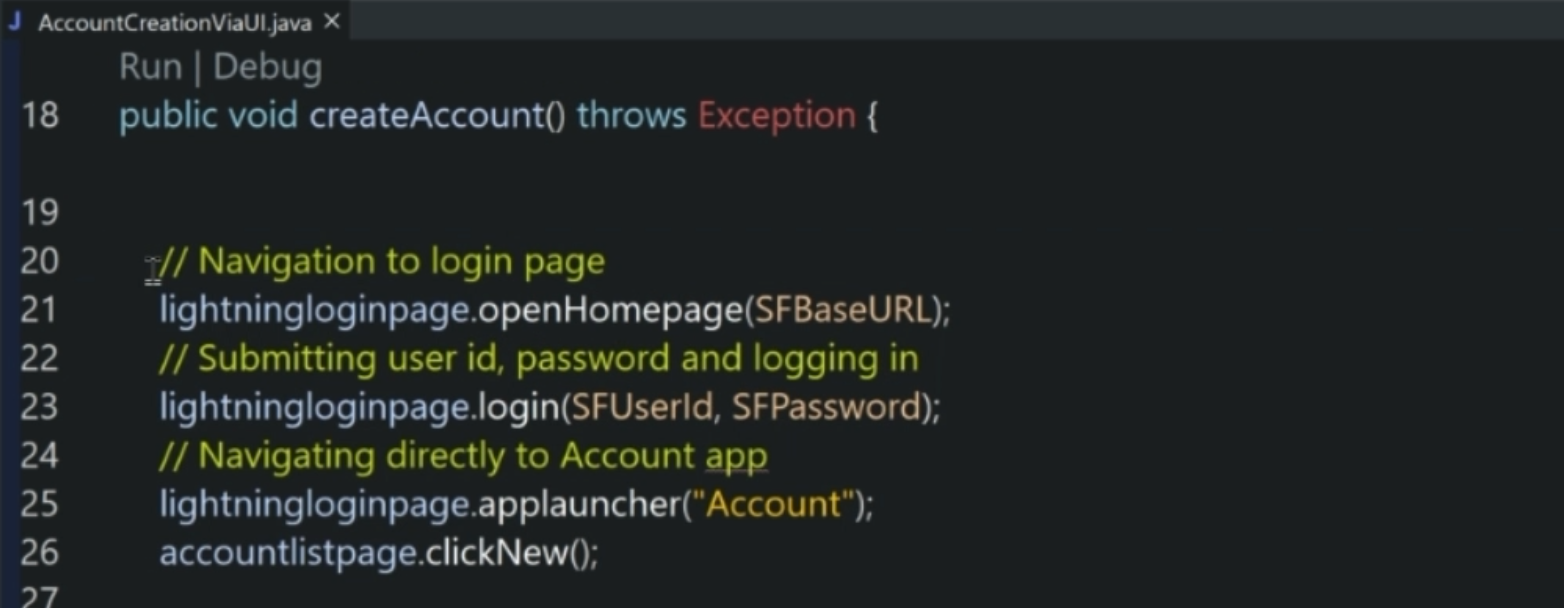
If you look closely at line 21, we are using the lightningloginpage PageObject instance to use the method openHomepage over here.
This part, which I have highlighted, is actually made up of three pieces.
One is the PageObject - it stands by itself, like lightningloginpage.
Second is the openHomepage method, which is coming from the PageBase class on the TestZeus framework.
As we remember, all PageObjects extend SFPageBase and PageBase, so transitively, we can use these methods.
This method, openHomePage requires the variable for the SFBaseURL that we want to open, or the homepage, so to say.
Now let's go a little deeper, one by one into each of these pieces.
So as explained earlier, lightningloginpage and the other PageObjects are being instantiated in BaseTest, but can be found under the pageobjects package in the directory.
openHomePage itself is coming from PageBase.
SFPageBase class extends PageBase, and all page objects extend SFPageBase so that is how it is accessing this method.
SFBaseURL is a value. It is coming from BaseTest, so let's try to take a closer look at that.
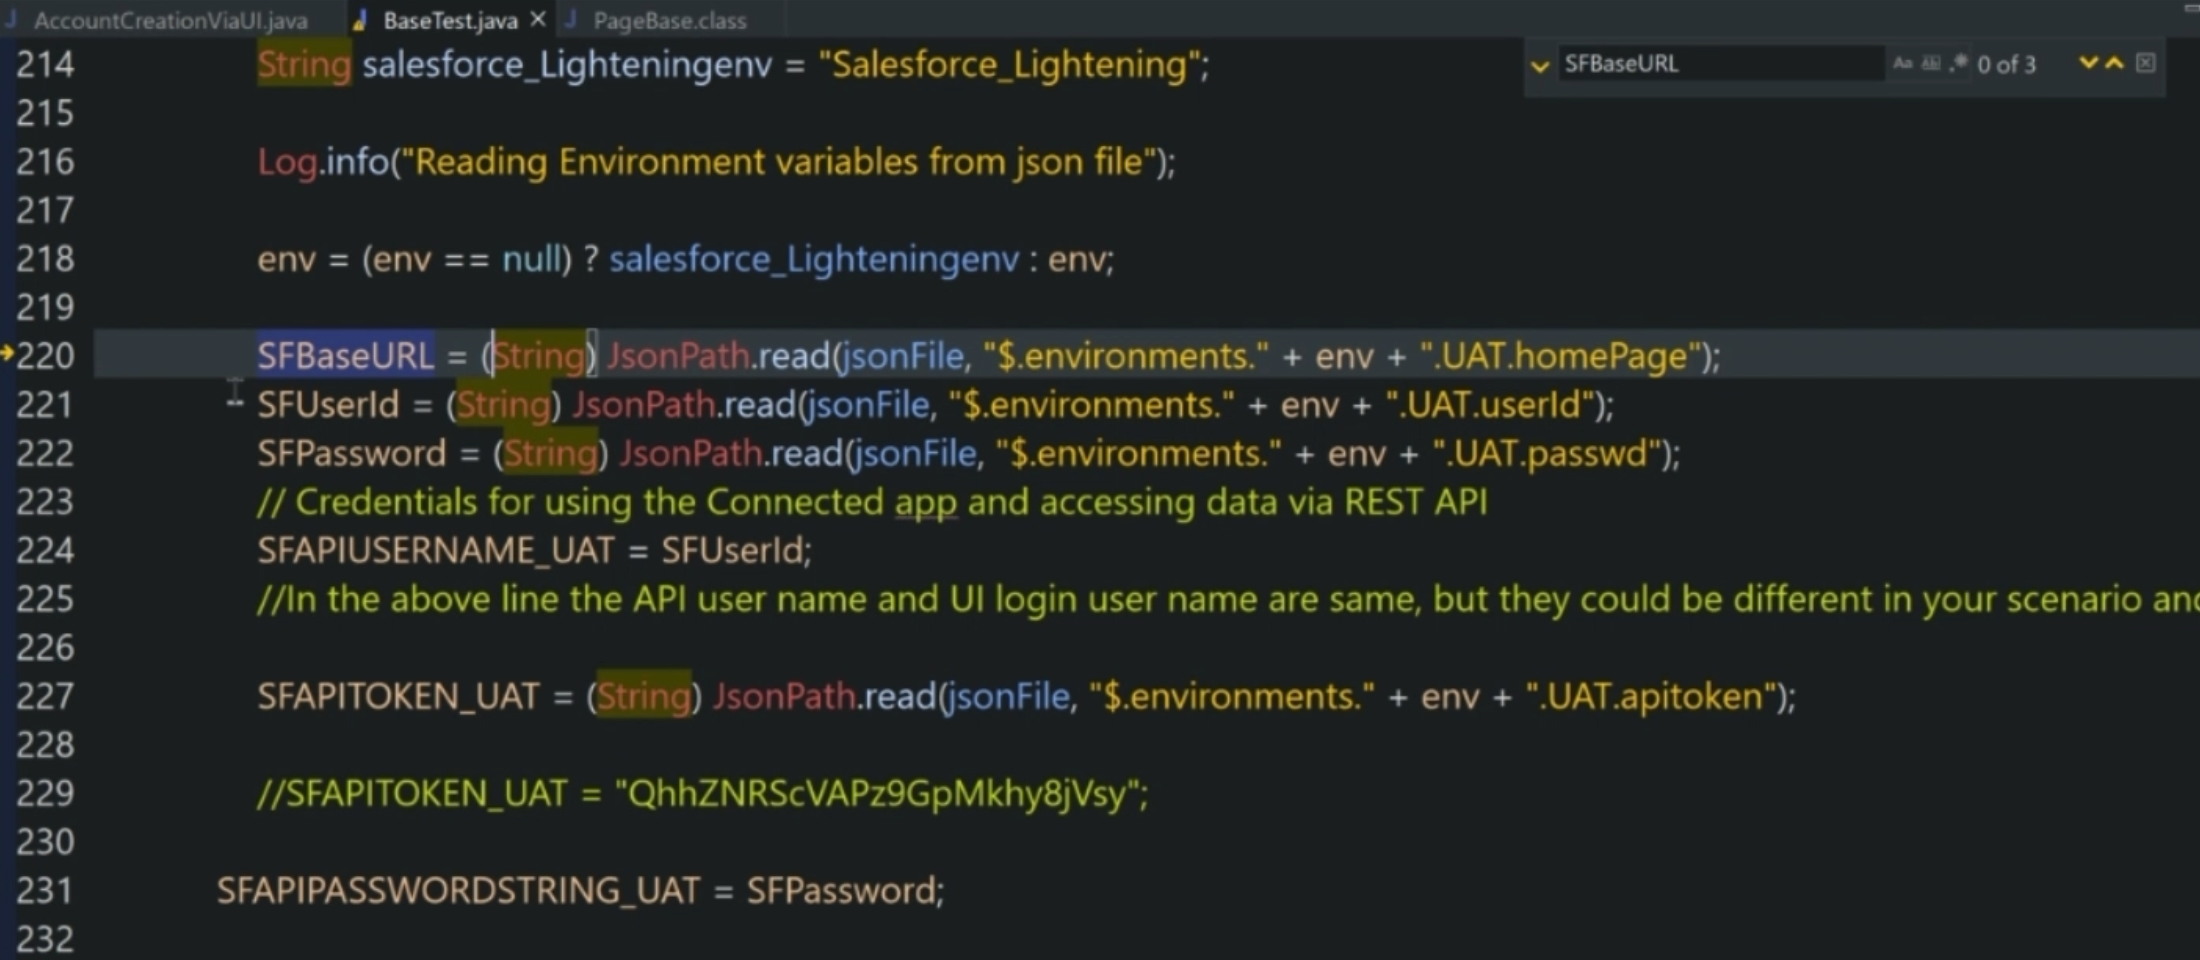
As we can see on line 220, SFBaseURL is actually being read from a jsonFile, just like the userId and credentials, and the other details required for accessing the APIs.
Let's see where this file is located.
These pieces are set up in the config.json file.
As we can see in the config.json file, we have not only the URL, but also the other credentials required for UI and API automation.
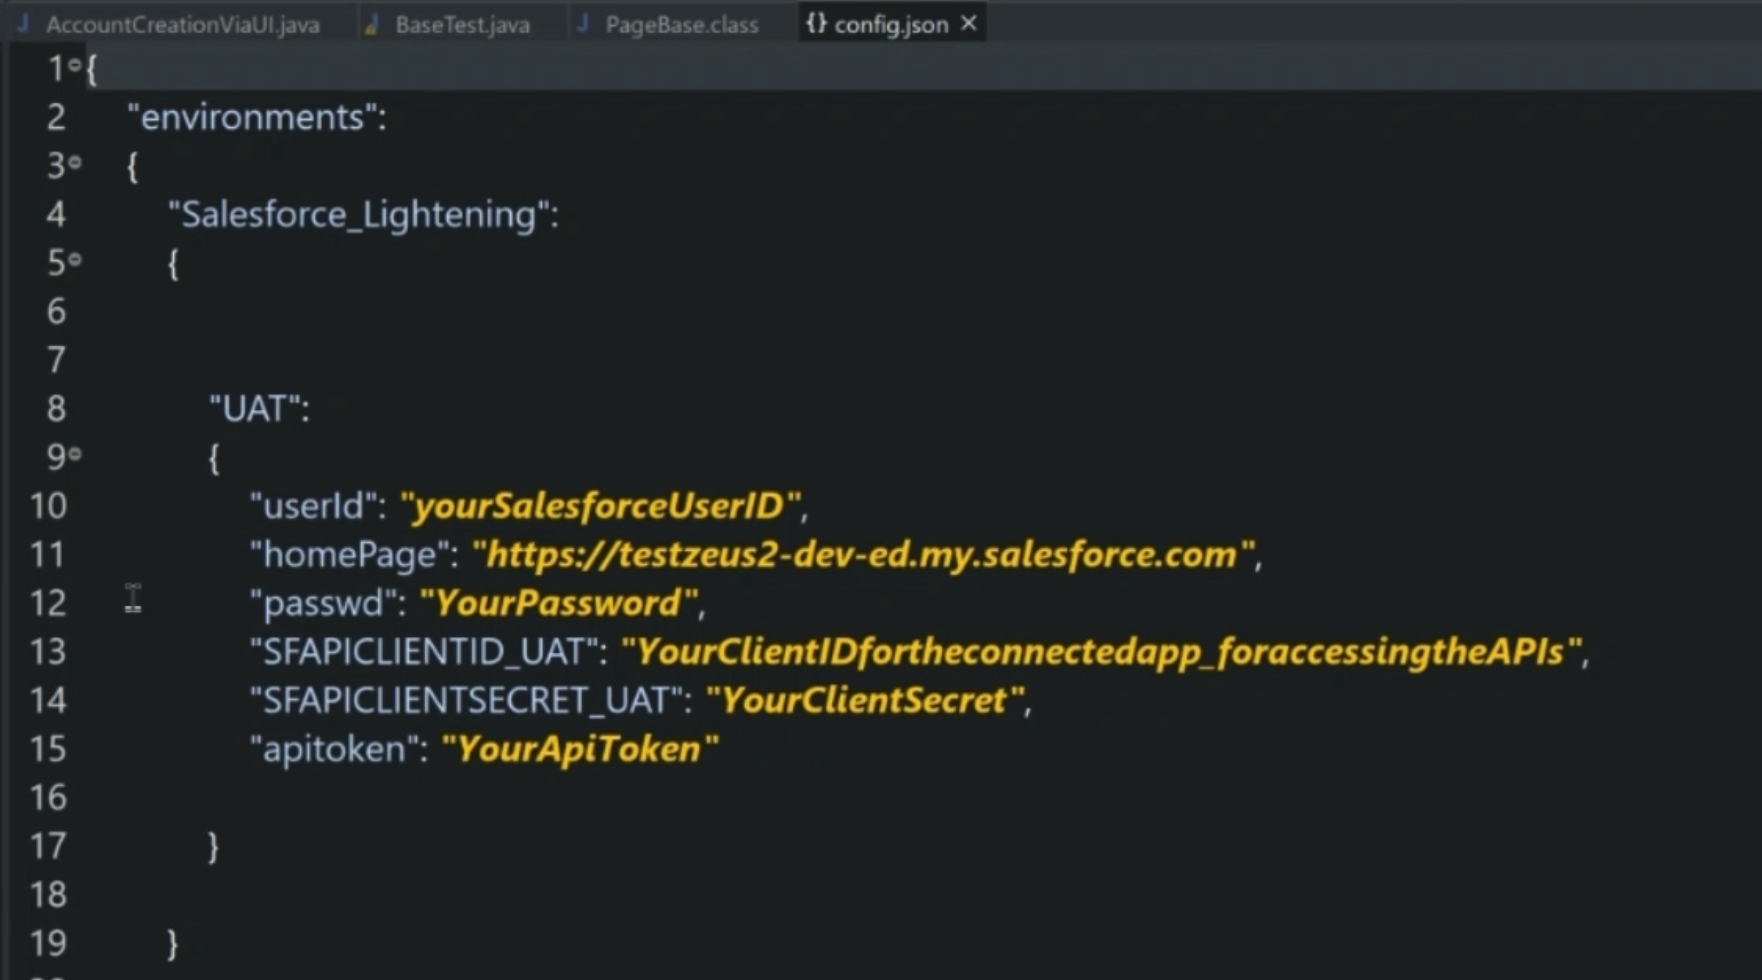
The userId is your Salesforce user id.
The homePage URL is a URL for your Salesforce homepage, or the Login page.
The passwd is the password. \
SFAPICLIENTID_UAT is your client ID for the connected app, as we had set up earlier.
The SFAPICLIENTSECRET_UAT line 14 is the client secret from the connected app, and apitoken token is also coming from there, as we had configured earlier.
Once you key in these values, not only will BaseTest use these to navigate to the correct pages, but also, these credentials are used by HTTPClientWrapper class to hit the API and get details from the UI, API, and other necessary APIs.
That goes back to our test case on line 21 - now that we know what is happening here, let's move on.
Using the credentials, we log into the homepage and then we navigate directly to the account app using the applauncher method.
Once we are there, we click on the "New" button on line 26.
This method clickNew() for clicking on the new button is set up in the PageObject accountlistpage, as you saw earlier.
We provide a sample recordid on line 29.
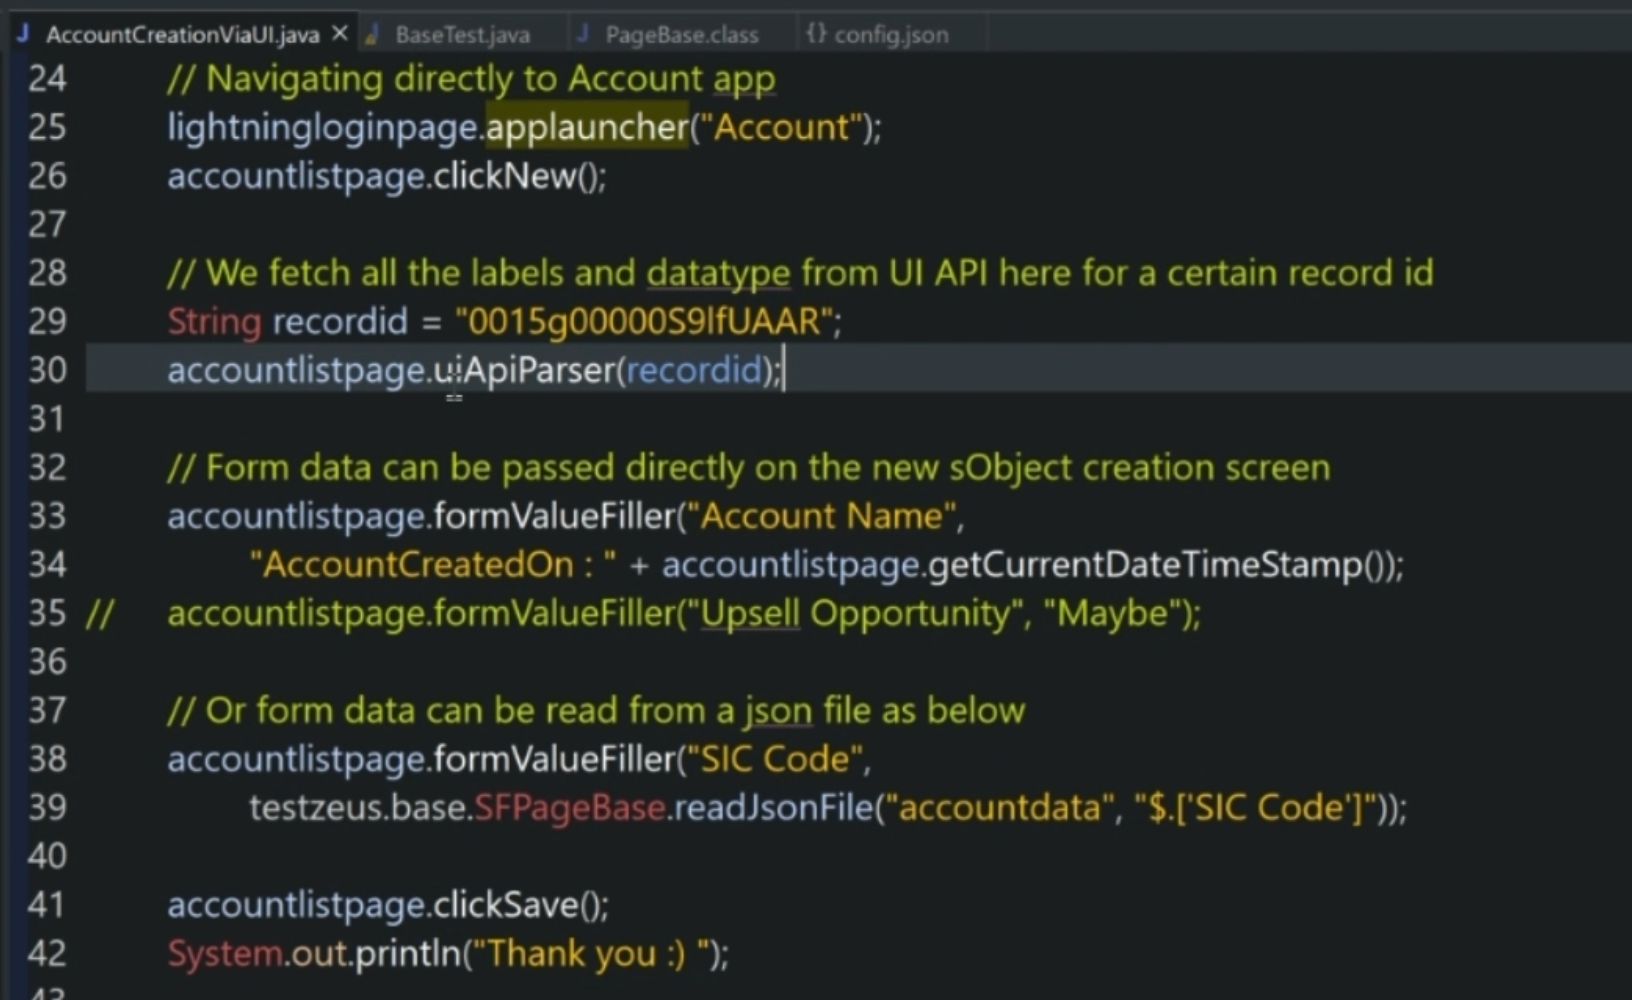
This is for a certain account, so that our method uiApiParser can parse the UI API and understand which fields are there for the account standard object.
Once we have them, we can start filling out those values such as the "Account Name", "SIC Code" and others.
The way to go about it is very simple.
You just have to call the page object accountlistpage and formValueFiller if you're filling in a form.
Now interestingly, the web elements for "Account name" or "SIC Code" are created on the fly from the methods from uiApiParser and formValueFiller, which we'll look into in a minute.
Once we fill in those values, we can hit "Save" as per line 41.
Line 46 is about a simple test for verifying the required fields, again from the SFPageBase class.
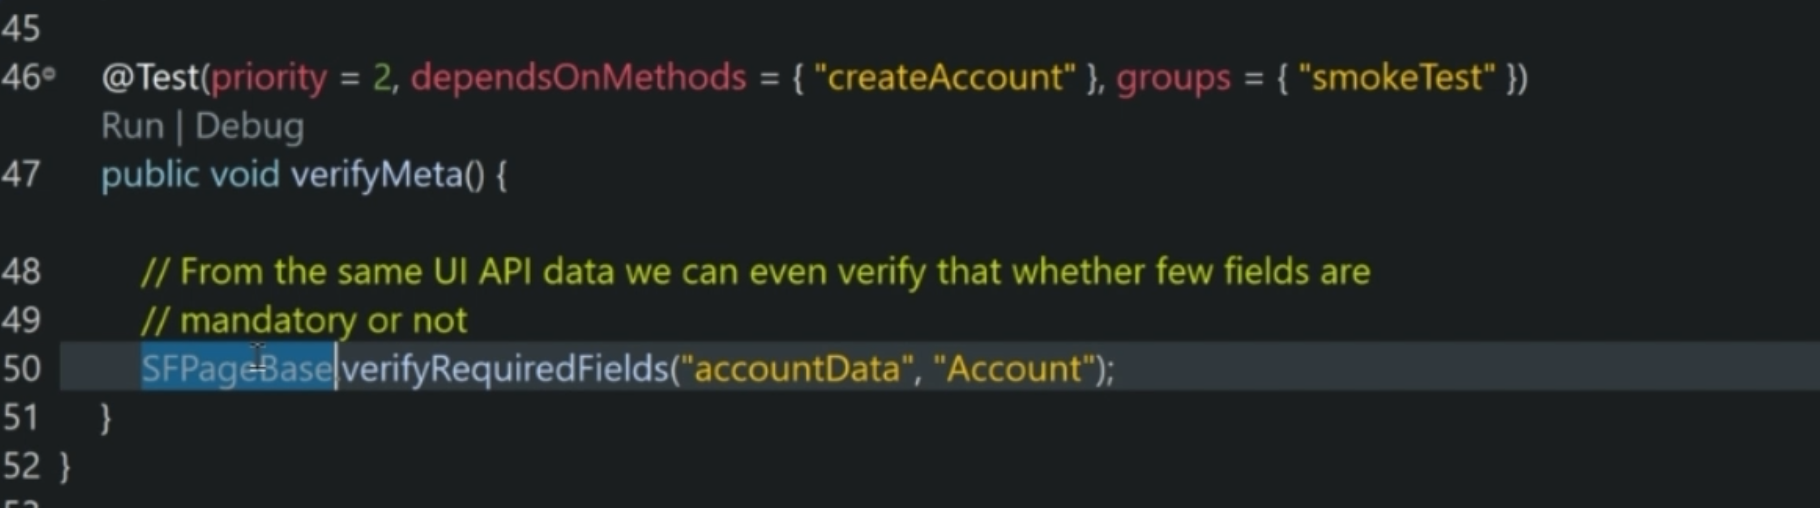
We can see that on the account data - is the account name actually required or not?
Now, let's go a little deeper into the uiApiParser and see what it is doing.
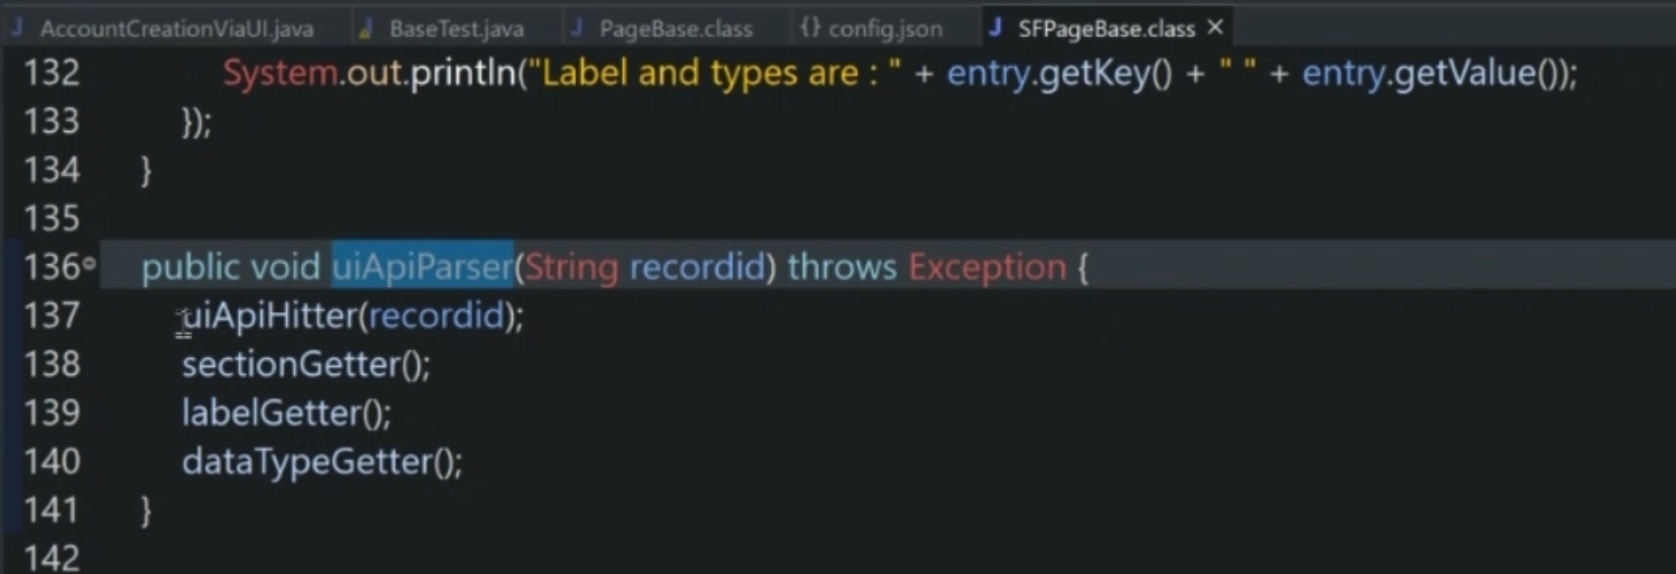
The uiApiParser is part of the SFPageBase class, which is part of the TestZeus framework, and is doing a couple of things.
Not only is it hitting the UI API with the recordid that we have passed, it is getting the sections, and the labels, and the data types, and then using these values, it is constructing the WebElement for the form on the fly.
This is the magic of autolocators.
We will look into this a little bit more deeply in the upcoming chapter, but at a very high level, when we hit the UI API on Salesforce, as per line 137, we get the details like - what are sections on that UI, what are the labels, and what are the data types? Is it a boolean field, is it a text field, or an alphanumeric field? And so on and so forth.
Using them, we can interact with that page, rather than creating all those web elements on the form PageObject, we actually create those web elements on the fly from the JSON value that we get from the UI API, and that is the real magic behind TestZeus.
Once we have created this test case, we can actually run it just like any other TestNG test case.
Right click "Menu" and "Run as TestNG test", or we can run the whole bunch of test cases as part of a TestNG suite or a Maven build, as we will shortly see.
