

Transcripted Summary
Pytest is one of the most popular Python test frameworks. In my opinion, it's also one of the best test frameworks in any language.
Here, I'm showing pytest.org.
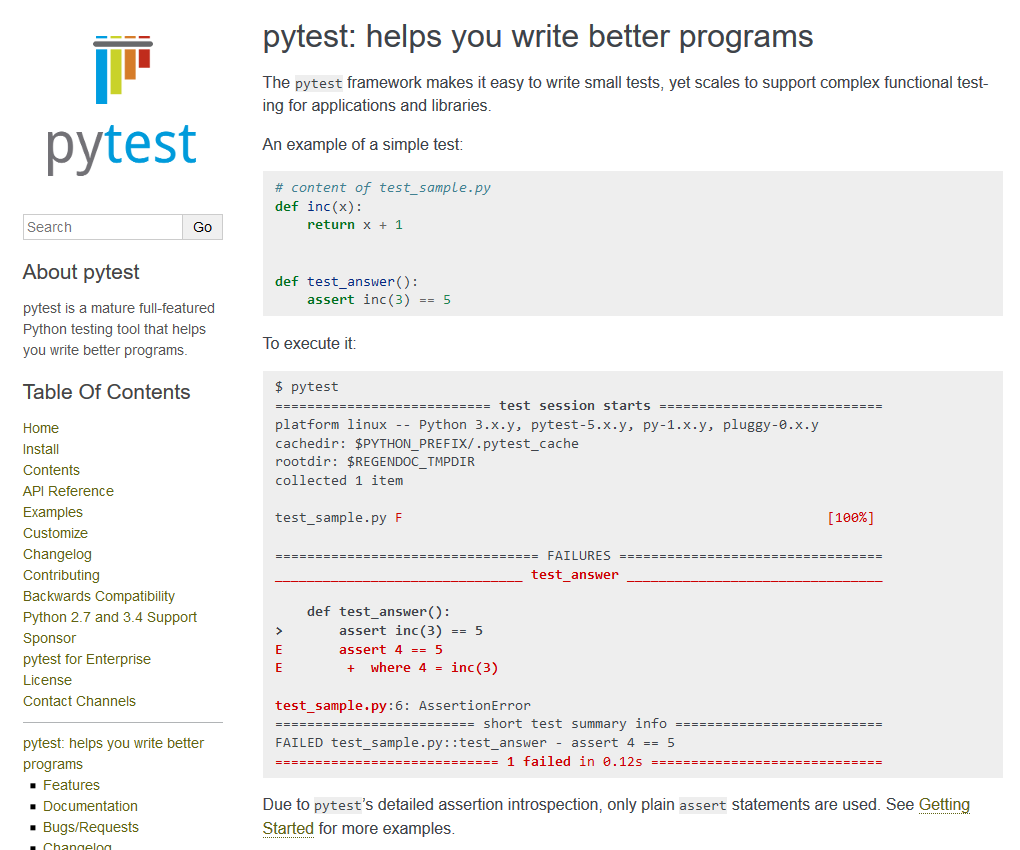
All the docs are freely available online. If you want to learn more about pytest, I recommend coming here.
On the homepage, you can see a very basic example.
Test cases are nothing but simple functions that make assertions. When they're printed out, they'll show exactly where the errors happen.
Now, of course, there's a lot more to the pytest framework than this. I'm not going to go into too much detail about the ins and outs of the framework itself in this course, but I will cover the basic things as we go along for what we need for web UI testing.
I strongly encourage you to go learn more about pytest on your own.
To help you develop your test automation solution as part of this course, I've created a Python test project in GitHub.
It's located under my GitHub account, AndyLPK247, and the repository is named tau-intro-selenium-py.
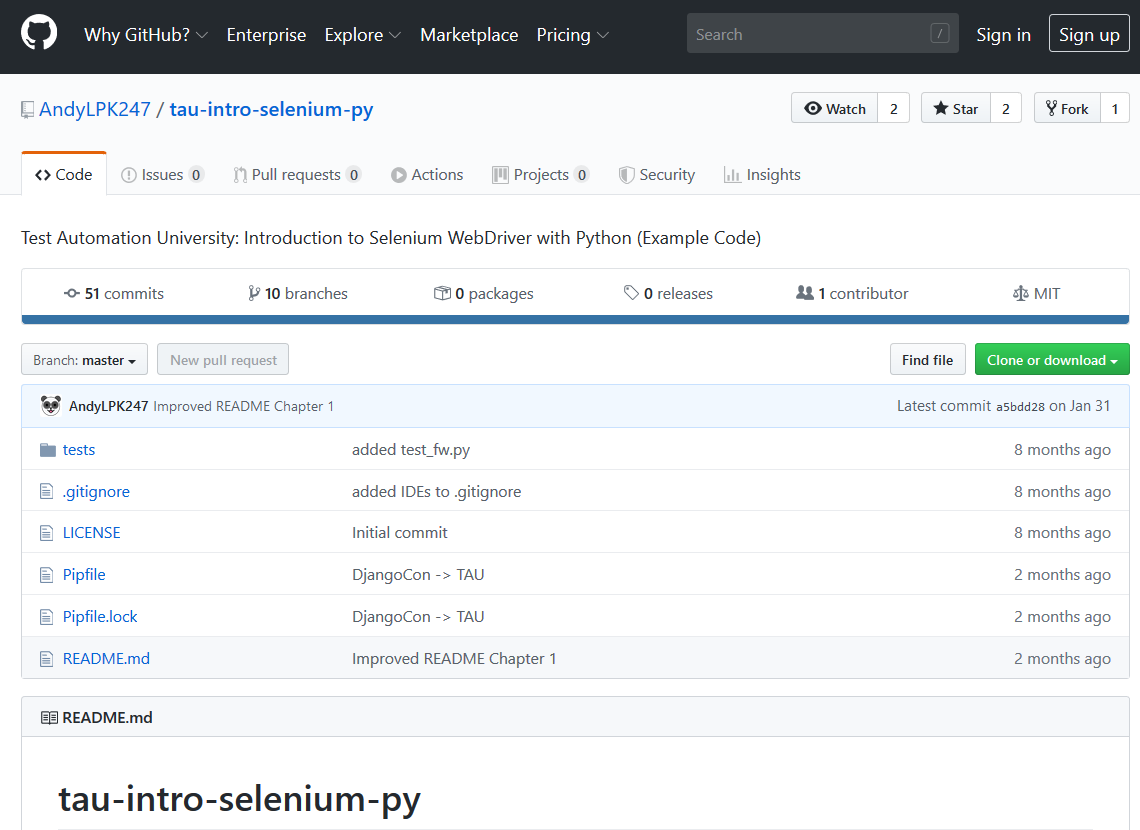
In this repository, we have a full README with instructions on how to set up your projects as well as course instructions for each chapter in this course.
In case you get stuck along the way, I've also created branches with the example code at each chapter as we go.
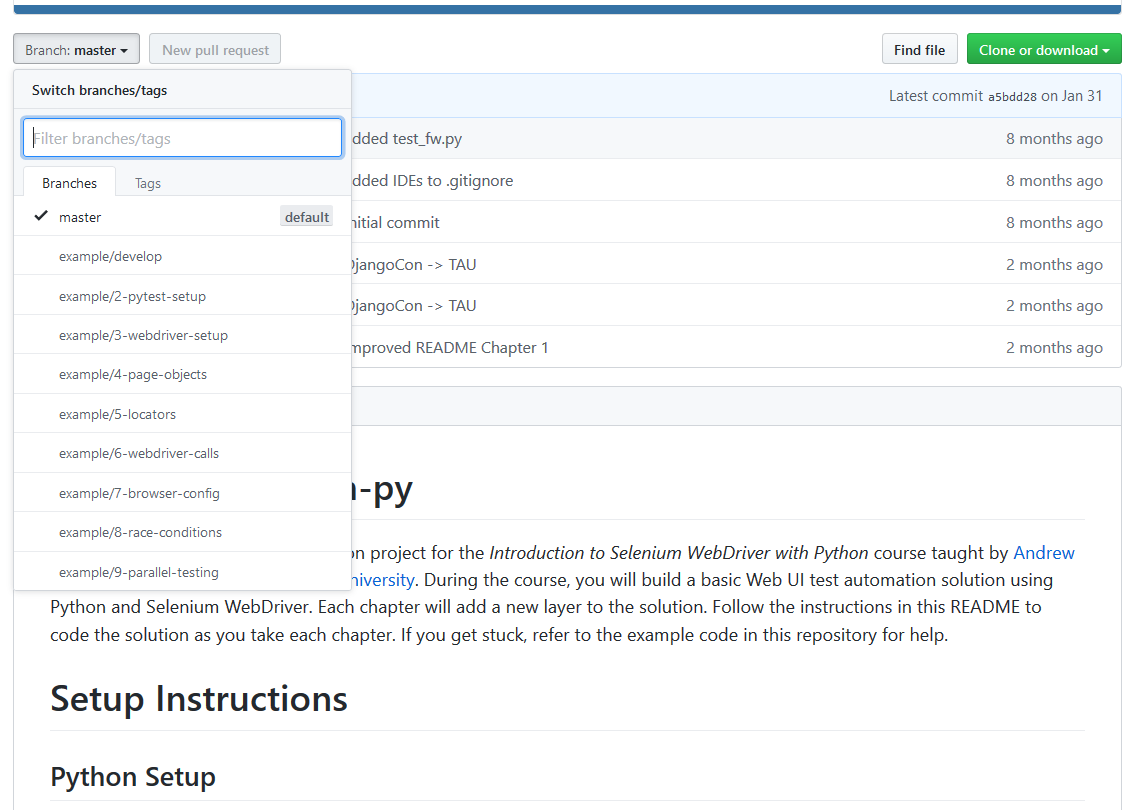
So, if you get stuck or you're not sure if your code is right at any given chapter, compare it to the example branch.
It's time to set up our local project.
As a prerequisite, you will need Python installed. I already have Python 3.8 installed on my machine.
To test version, type --version in the command line.
If you need to get Python, just go download it from python.org.
You'll also need a Python package called pipenv. I already have this one installed too, but if you don't, you can easily install it by running pip install pipenv after you install Python.
Next, I'm going to clone that GitHub repository so I can have the code locally.
In the command line, we type
git clone https://github.com/AndyLPK247/tau-intro-selenium-py
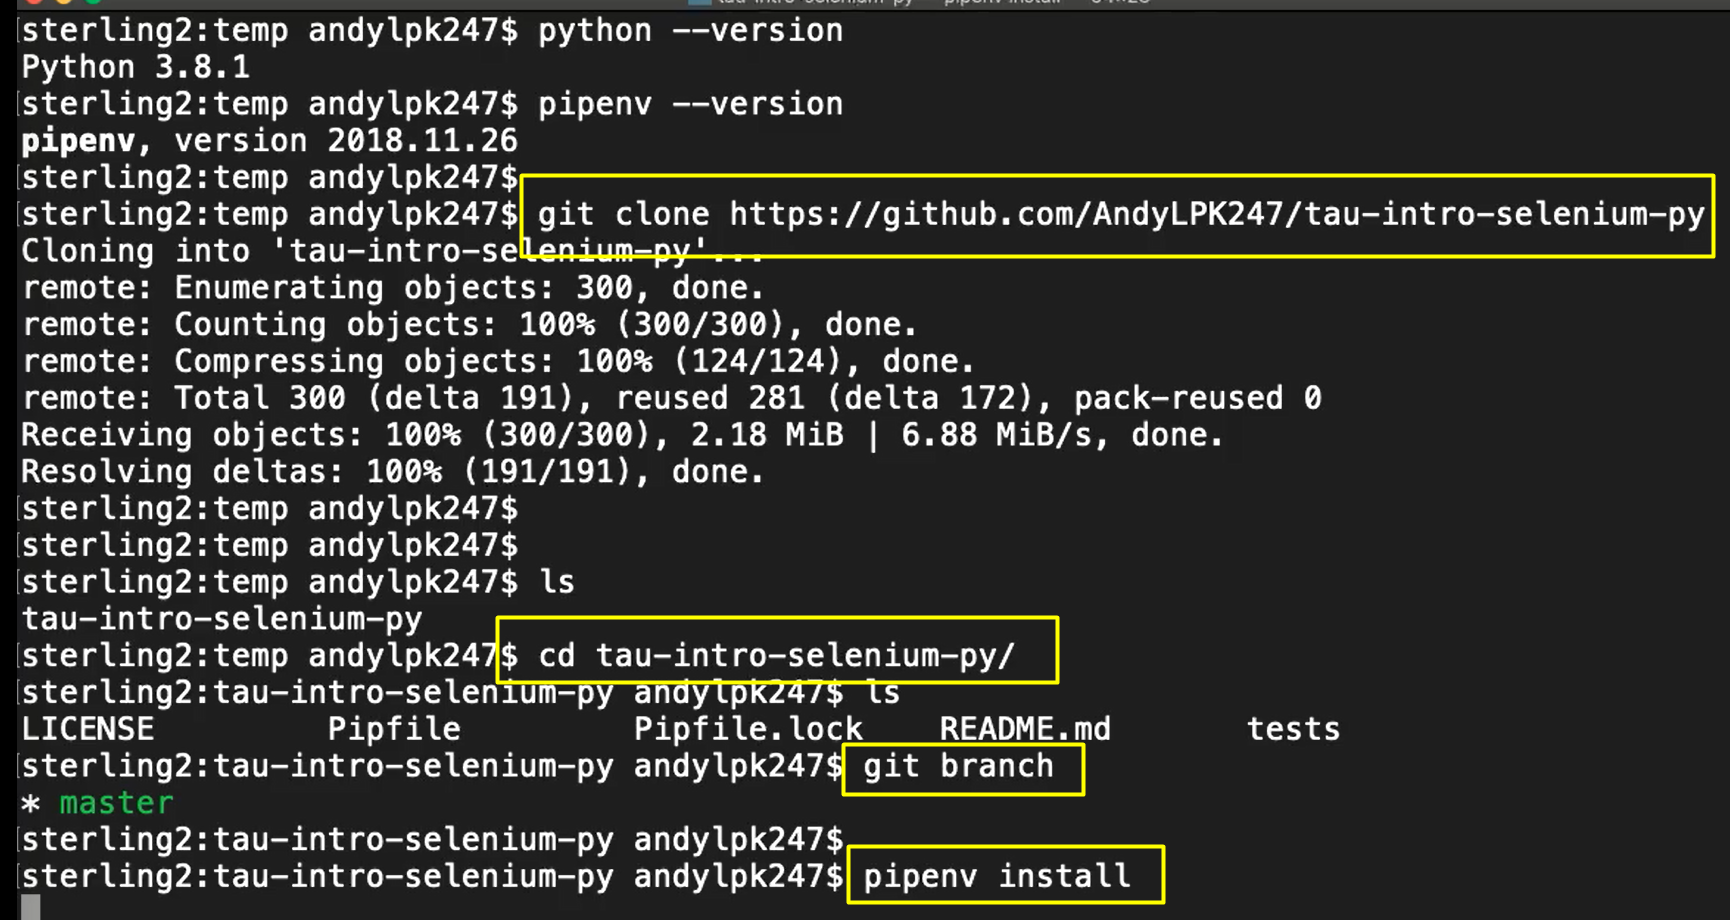
And voila, there it is.
I'll change directory into it and we can see we have all the standard files we expect. I should also be in the master branch by default (using git branch), which is good.
Next, to install our dependencies, I need to run...
pipenv install
This will take about a minute, but what it will do is it will create a virtual environment for us.
In Python, it's always good to create virtual environments for every project you create so that way you can manage your dependencies locally regardless of whatever packages the "global" machine has installed. This is indispensable when you need to work with packages of different versions or perhaps if you need a package that's not currently installed on your machine.
So, here we go.
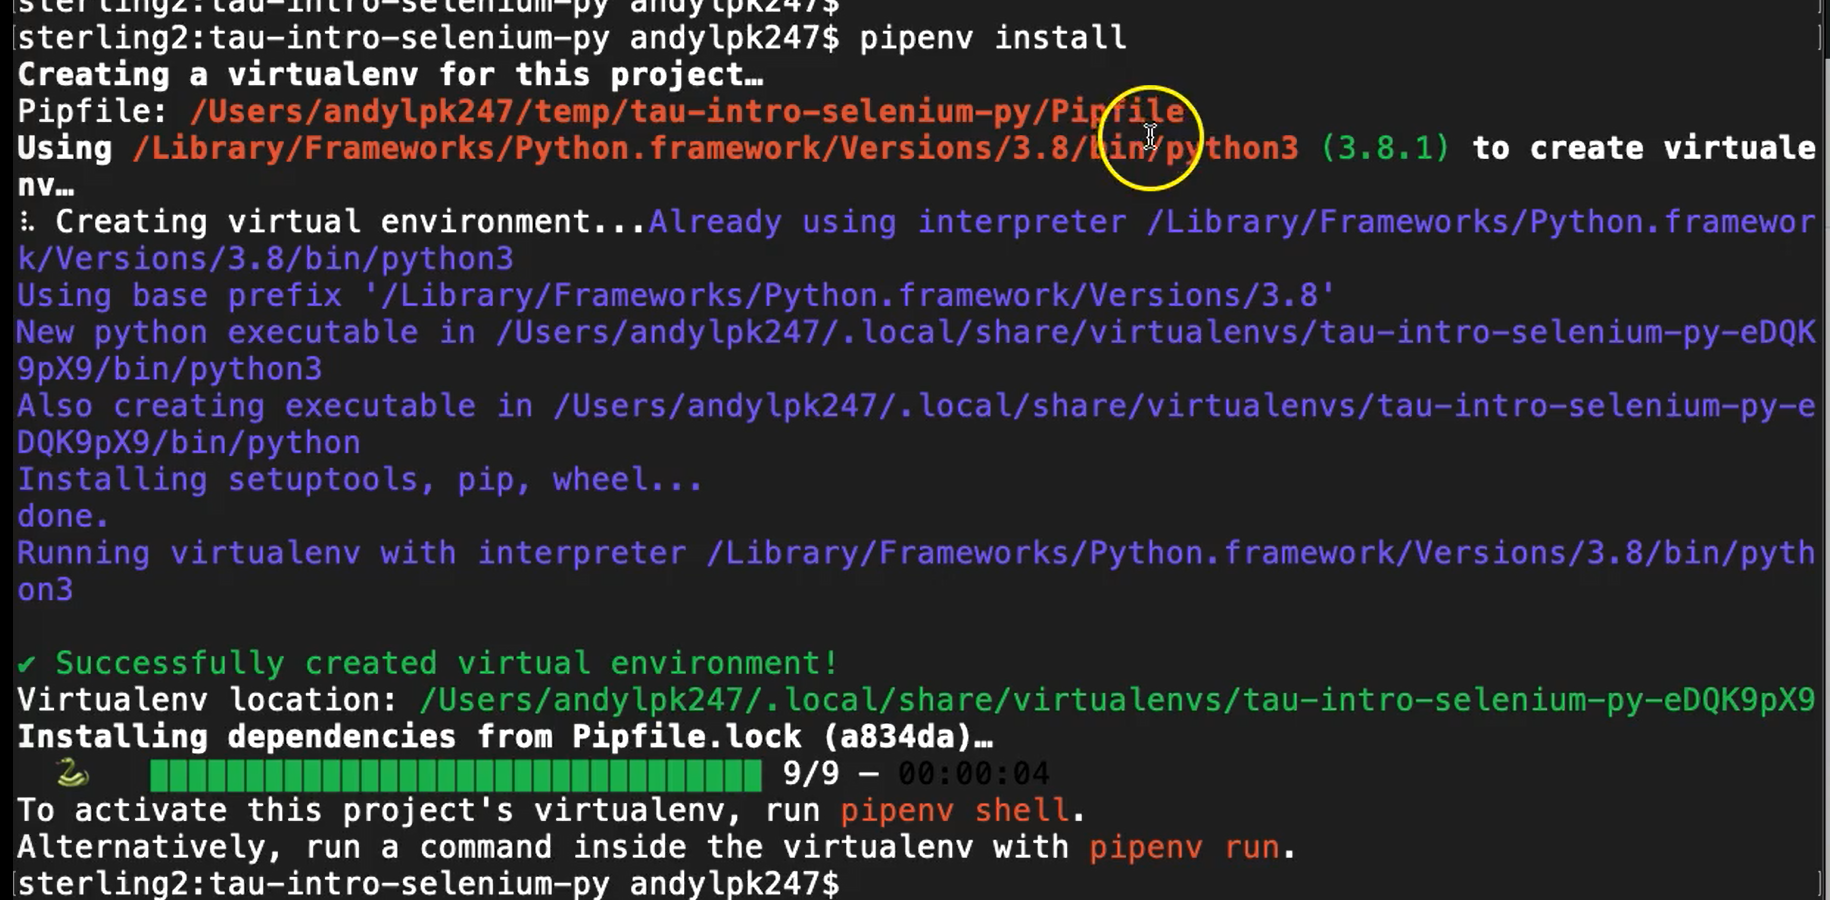
My pipenv has been created for me and it should have installed some of the packages I needed like pytest.
So now if I want to make sure everything is good to go, I'm going to run pytest very quickly. The project has 1 dummy test case inside that should be automatically discovered and run.
So, let's give it a try:
pipenv run python -m pytest
And boom, just like that we were able to find that 1 dummy test case.
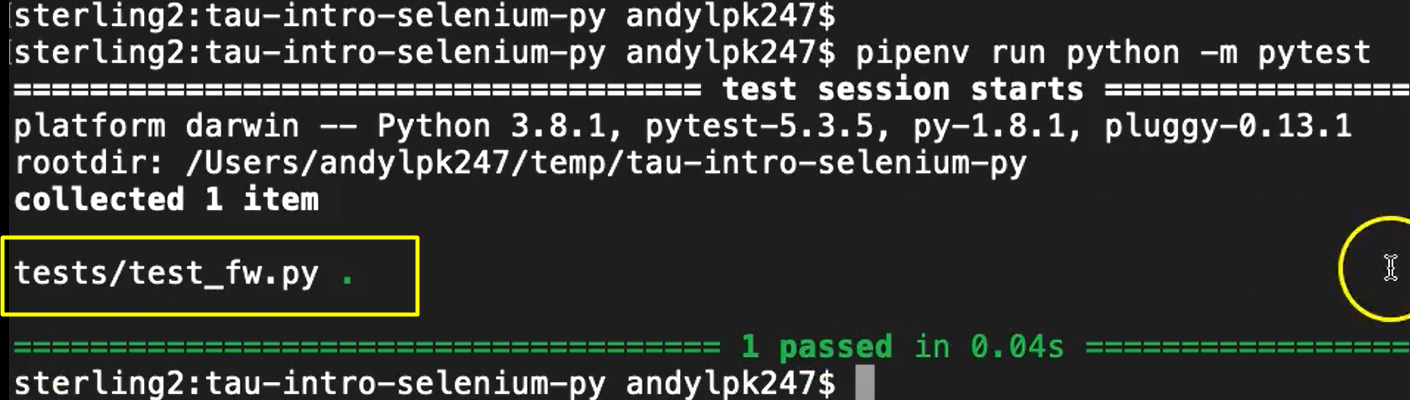
This little green dot here shows that it was successful, in addition to the whole banner saying one test passed. Great. So, now we have our project properly configured.
Now that our project is ready, it's time to add our first test case.
In Python projects, it's conventional to create a “tests” directory underneath the root project directory to contain all test cases.
Under here for pytest, we want to add modules that are named either “test_something.py” or “something_test.py”.
Here I've created one called “test_search.py”.
In this module, we simply add functions for our test cases.
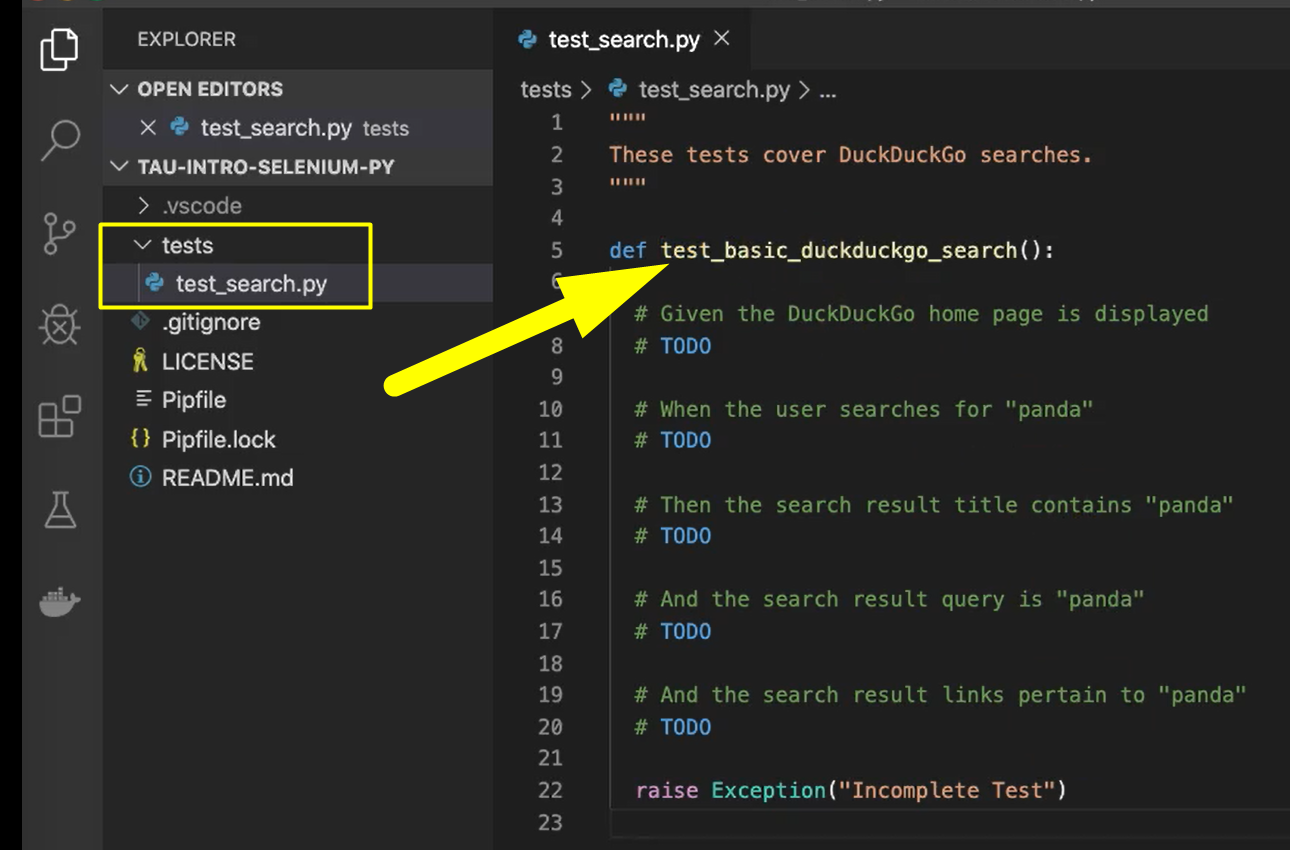
Every test case function must be prefixed with the “test” prefix.
That's how pytest will know that this is a test case. When pytest runs tests, it will scan the entire project directory for any of these test_ modules and then it will look inside of them for any test functions.
Even though we haven't implemented anything for our test yet, I still like to create a test case stub. And inside of my stub I give it the full name I anticipate it to have and I'll put all of my steps in comments.
These Givens, Whens, and Thens should look very familiar. I like to do that because that continues to help me think as I code.
As I implement each step one at a time, I'll remove these “TODO” tags and fill out the Python code that should be there.
And when I'm done, I'll still leave the Givens, Whens, and Thens because they're documenting.
Finally, at the bottom, anytime I have a test case stub, I will raise an "Incomplete Test" exception just to show that this test is not yet ready.
Just to note some housekeeping, I deleted the old test_fw.py file since we won't need it anymore for our project.
Let's run pytest one more time with our new stubbed test case.
# Example Code – Stubbed Test Case
"""
These tests cover DuckDuckGo searches.
"""

def test_basic_duckduckgo_search():

    # Given the DuckDuckGo home page is displayed
    # TODO

    # When the user searches for "panda"
    # TODO

    # Then the search result title contains "panda"
    # TODO

    # And the search result query is "panda"
    # TODO

    # And the search result links pertain to "panda"
    # TODO

    raise Exception("Incomplete Test")
I'll run pipenv run python -m pytest and I should expect to see a failure.
Boom. That's exactly what I see.
So, here we see there was one test case discovered and run, and it failed with a red F.
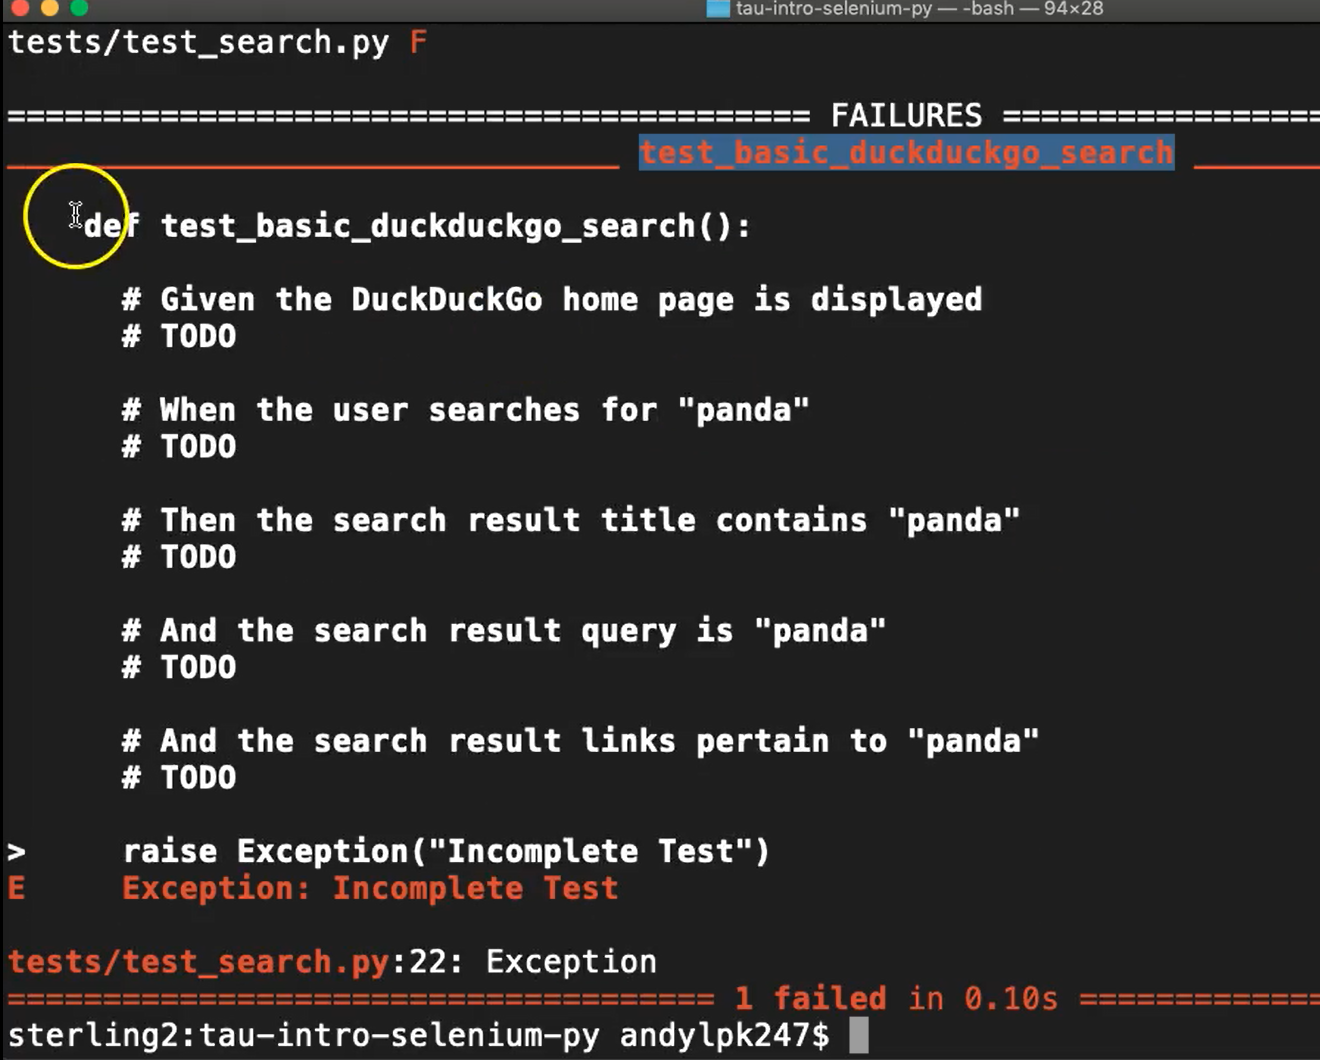
It was the “test_basic_duckduckgo_search” test, which is the one we wrote.
We can see the entirety of its contents printed out here. We see the reason for its failure was this temporary exception.
So, even if the test fails, we know that pytest with its current setup works correctly.
