

Transcripted Summary
The third and final phase of the textbook BDD process is the Automation phase.
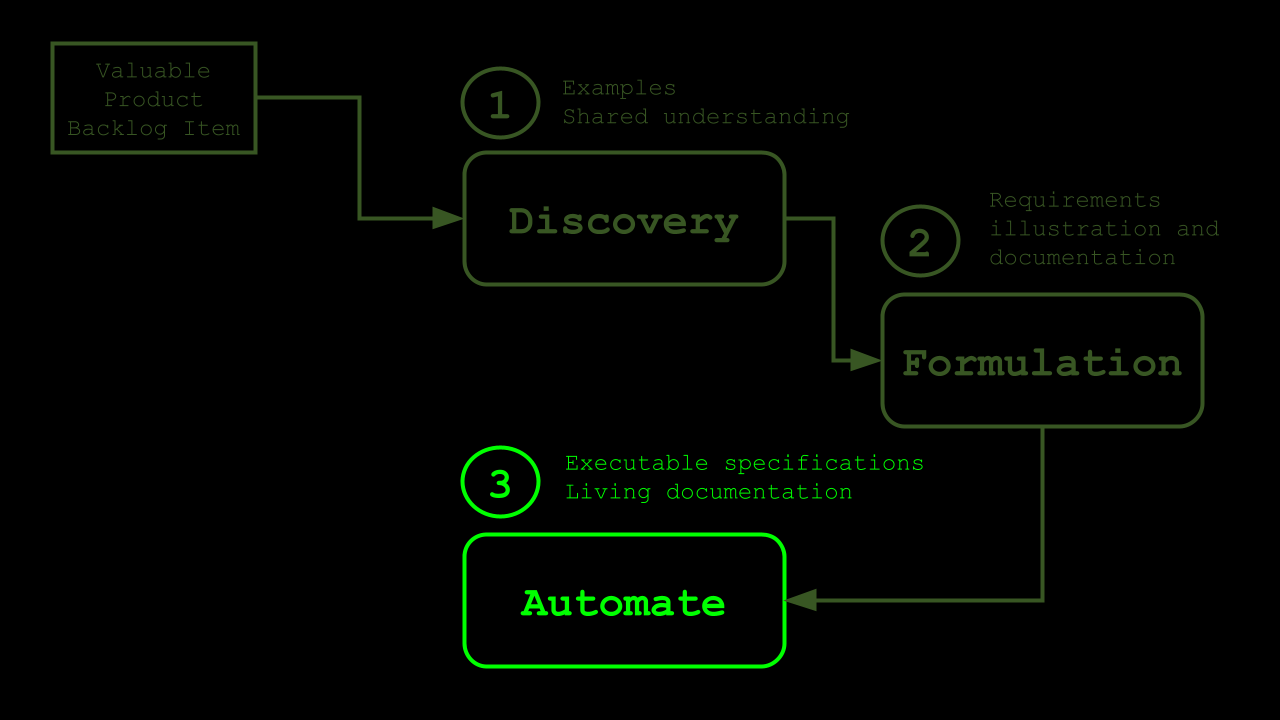
In the Automation phase, we will take the Gherkin specifications that we created in the Formulation phase and convert them into automated acceptance tests for the Feature, or the piece of software, that we are developing.
These automated acceptance tests can then be used to verify that the code that has been written behaves according to the expectations we have discussed and agreed on in the Discovery phase of the BDD process.
So, the Automation phase is where we're tying everything together.
Our automated acceptance tests act as executable specifications, which means that we can execute our Features and Scenarios and see what parts of the behavior described in there are implemented correctly and which parts of the written down and expected behavior aren't matched by the way the software actually behaves.
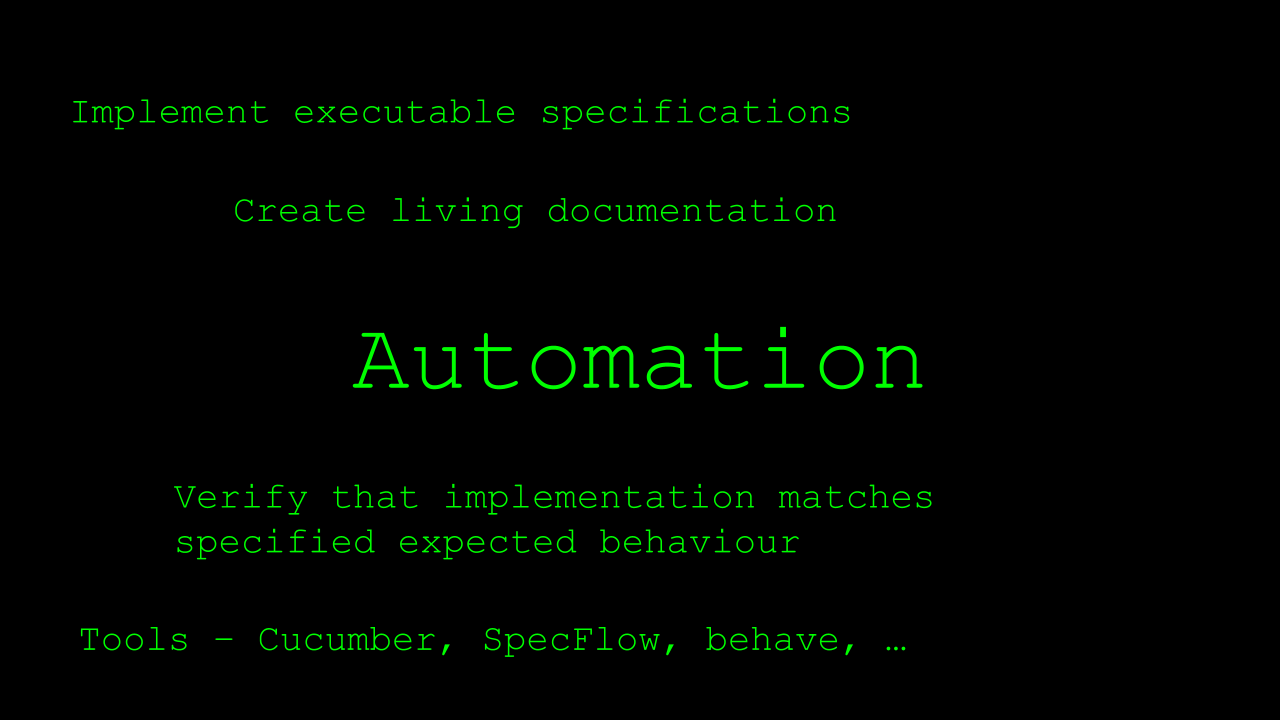
These automated acceptance tests are also often referred to as living documentation.
As you know, our Gherkin specifications document the expected behavior of our product.
Unlike other forms of product documentation, such as Wiki pages, Word or PDF documents, or even physical manuals and design documents, our Gherkin specifications, once implemented as acceptance tests, have a direct, active link to the software that they describe.
This greatly increases the chance that the documentation is accurate and up to date and that it will be updated in case the software behavior has changed or needs to be changed.
So, our automated acceptance tests are a means to verify that the software that has been developed behaves in the way we expect and that we discussed and agreed on before we started implementing it.
There are a number of tools available that can help us turn our specifications into automated acceptance tests.
Some of the most well-known and often used ones are Cucumber, available for a variety of programming languages, SpecFlow for C# and the .NET ecosystem, and Behave for Python.
There are many other tools on the market, though, that can also be used to support the Automation phase of the BDD process.
In the remainder of this course, we are going to take a close look at SpecFlow, the most popular BDD framework for C# and the .NET ecosystem.

SpecFlow is an open-source library that you can use to convert your Gherkin specifications, or Feature files, into executable C# code.
Or, in the words of its creators, SpecFlow can be used to bind business requirements to .NET code.
SpecFlow can also be described as “Cucumber for .NET”, after the popular and well-known Cucumber library that does the same thing — tying Gherkin specifications to executable code.
By the way, those are not my words but a direct quote from the SpecFlow home page.
Speaking of the SpecFlow home page, you can find much more information, documentation, and access to the SpecFlow and BDD community at SpecFlow.org.
More precisely put, SpecFlow is not a single tool, but rather an ecosystem of tools that can be used separately, but that can also be combined to get even more out of your BDD efforts.

Apart from SpecFlow itself, which we'll start looking into soon, this ecosystem contains (at the moment of recording this video)
- SpecFlow+ LivingDoc — an extension to SpecFlow that can be used as a reporting tool, allowing you to publish both your Gherkin specifications as well as the associated results of the automated acceptance tests as a single source of truth, accessible through a web browser
- Online Gherkin editor — facilitating easy collaboration within teams when writing Gherkin from anywhere in a web-based environment
- SpecMap — a story mapping tool that can be used to visualize discussions on the needs of users and to prioritize and structure the resulting work items.
So, without further ado, let's get started with SpecFlow and creating automated acceptance tests from the Scenarios we wrote in the previous chapter.
First, let's take a look at what you need to get started using SpecFlow.
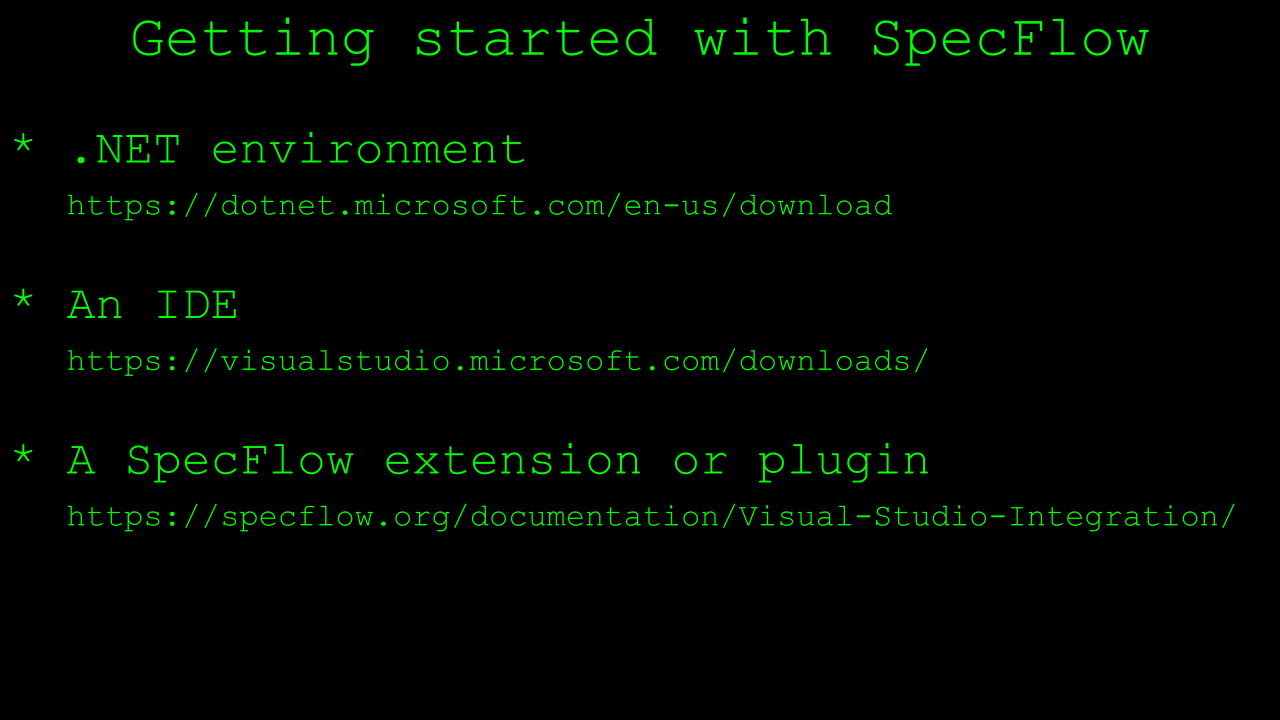
As we'll be writing, compiling, and running C# code, first of all we'll need a recent .NET development and runtime environment.
You can't really go wrong with either the latest stable version, or the one that has been designated as the current Long Term Support version.
Next, you'll need an IDE that helps you write your SpecFlow and C# code efficiently.
There are multiple great options here, like Visual Studio Code, Rider, and of course Visual Studio.
I'm not going to discuss their relative benefits and drawbacks here, just use what you're comfortable with. For this course, I chose to work with Visual Studio mainly because of the next item on this list.
To be able to write, maintain and run your Gherkin Features and Scenarios efficiently, most IDEs will offer plugins or extensions that add, for example, syntax highlighting, autocomplete, and better code refactoring options.
For Visual Studio, working with the official extension developed and maintained by the SpecFlow team is a safe bet.
# Creating Our First SpecFlowProject
Now that we have set up our system, let's create a new project and get started with turning the Gherkin specifications for our “LoanApplication.feature” into automated acceptance tests.

In Visual Studio, the process of creating a new SpecFlow project is very straightforward after we have installed the Visual Studio SpecFlow plugin.
This extension adds a template for a new, empty SpecFlow project that we can use to create a skeleton project quickly.
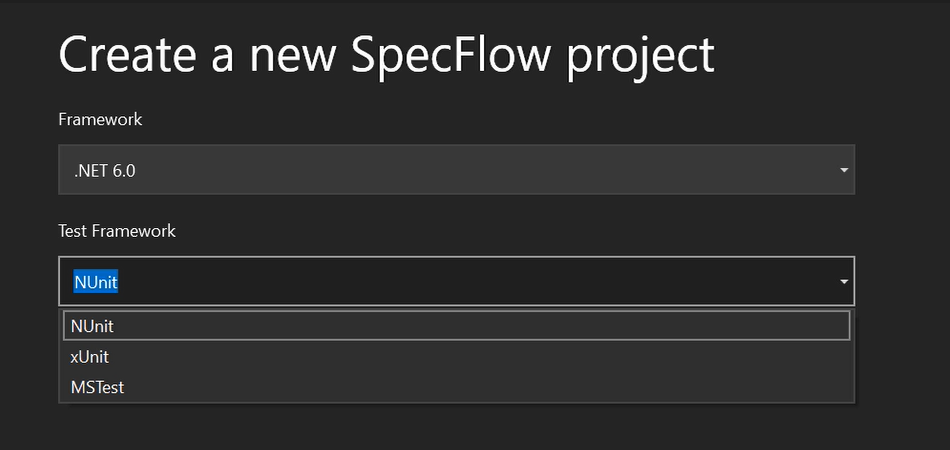
Let's give our project a descriptive name, like “SpecFlowOnlineBank.Specs” and click Create.

Then, choose the .NET framework version you want to use for your project.
I'm selecting .NET 6 here, as that's the long-term stable .NET version at the time of creating this video.
Next, we need to select a test framework to use with our project.
SpecFlow supports the 3 most popular testing frameworks for C#, being NUnit, MSTest and xUnit. This testing framework will serve as the test runner for our Feature files, or in other words, the engine that will execute our automated acceptance tests.
I'm choosing NUnit here, but feel free to use either MSTest or xUnit if you prefer to use any of those.
After we clicked Create one more time, the SpecFlow Visual Studio extension creates a project structure with several folders.
As we won't be needing all of these, let's remove the Drivers folder and the Support folder for now.
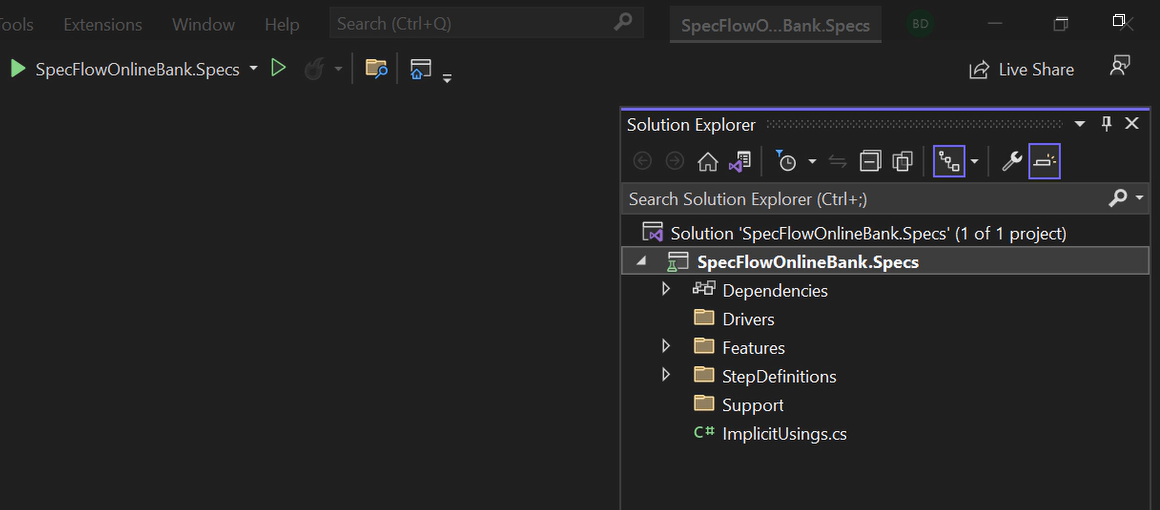
For convenience, an “ImplicitUsings.cs” file is also added so we don't have to import the NUnit and SpecFlow namespaces in our classes every time.
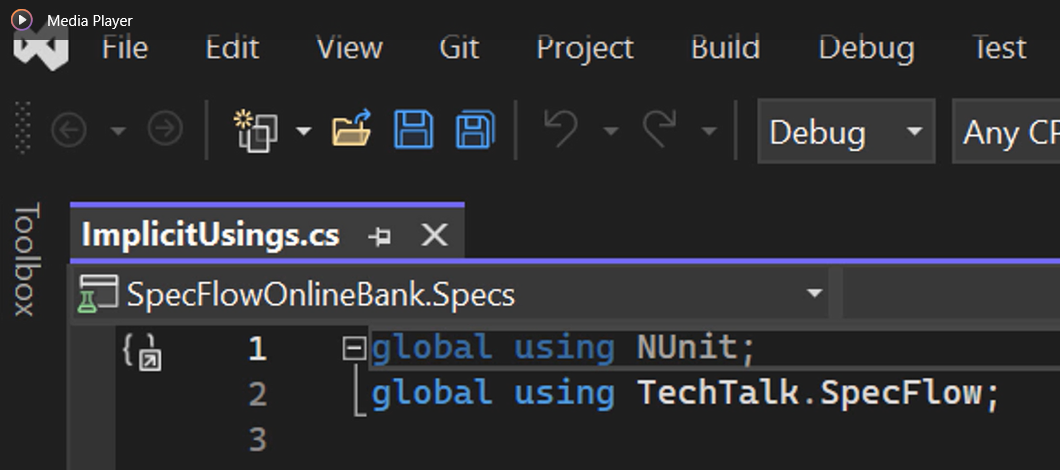
This is a Feature that has been added in .NET 6, so if you're using an older .NET version, you won't see that, and you'll have to add using statements in all the classes that require them yourselves.
As an example, our new project also contains a Calculator Feature file, which we also will not need, so let's remove that, too.
Finally, in the StepDefinitions folder, there's a class that contains the code to be executed when we run the Calculator specifications, so that can be deleted, too.
We now have an empty project that does, however, contain the dependencies and libraries we need to start automating our loan application Scenarios.

As the SpecFlow project template contains references to specific versions of these dependencies, you might want to update these to their latest versions, or to any other specific version that you want or need to use.
In this example, I've updated every dependency to its latest version available at the time of recording this video.
In the next chapter, we are going to take the specifications that we created in the Formulation stage and turn them into executable code using the skeleton project we have available.
The current state of this project is available on GitHub, in the “chapter4” branch of the repository you see linked in the video right now.
Resources
- Git Repo for Course Code
- Git Repo: Chapter 4
- SpecFlow
- SpecFlow+ LivingDoc
- Online Gherkin editor
- SpecMap
- .NET environment
- Visual Studio Code IDE
- SpecFlow’s Visual Studio extension
