

Transcripted Summary
In the previous chapter, we learned how we can work with Table arguments for our steps effectively using the utility methods in SpecFlow.Assist.
Before we start looking at properly implementing our Step Definition methods using some of the most popular C# test automation libraries, there are 2 more features of SpecFlow that deserve closer inspection.
These are hooks and tags.
# Let's start with SpecFlow hooks.
When you're writing automated acceptance tests, there will always be code that needs to be run before and after each test, each test suite, or each test run.
In other words, your tests will often require setup and teardown code.
For example, you might need to spin up a specific service, fill or empty a database, clear logs, and so on.
Including that setup and teardown code in each of your tests will result in a lot of duplicated and messy code.
Additionally, when you're using SpecFlow and Gherkin to document the desired behavior of your system, you often do not want to explicitly mention these setup and teardown steps in your Scenarios, as that would only distract from the actual behavior that is described.
Imagine that, in the case of our “LoanApplication.feature”, we need to make sure that the loan processor service is up and running before every Scenario and that it is properly stored, and log files are backed up afterward.
We probably do not want to pollute the Scenarios we wrote in the previous chapter with additional steps to trigger these actions, not even in a Background.
Starting and stopping the service and taking care of the log files is a technical requirement in order to ensure the smooth execution of our acceptance tests, but it is not behavior that we want to document in our Scenarios.
This is where hooks are useful.
Hooks are essentially event bindings that you can use to make sure that specific code is, for example, run before or after each Scenario or even before or after each step within a Scenario.
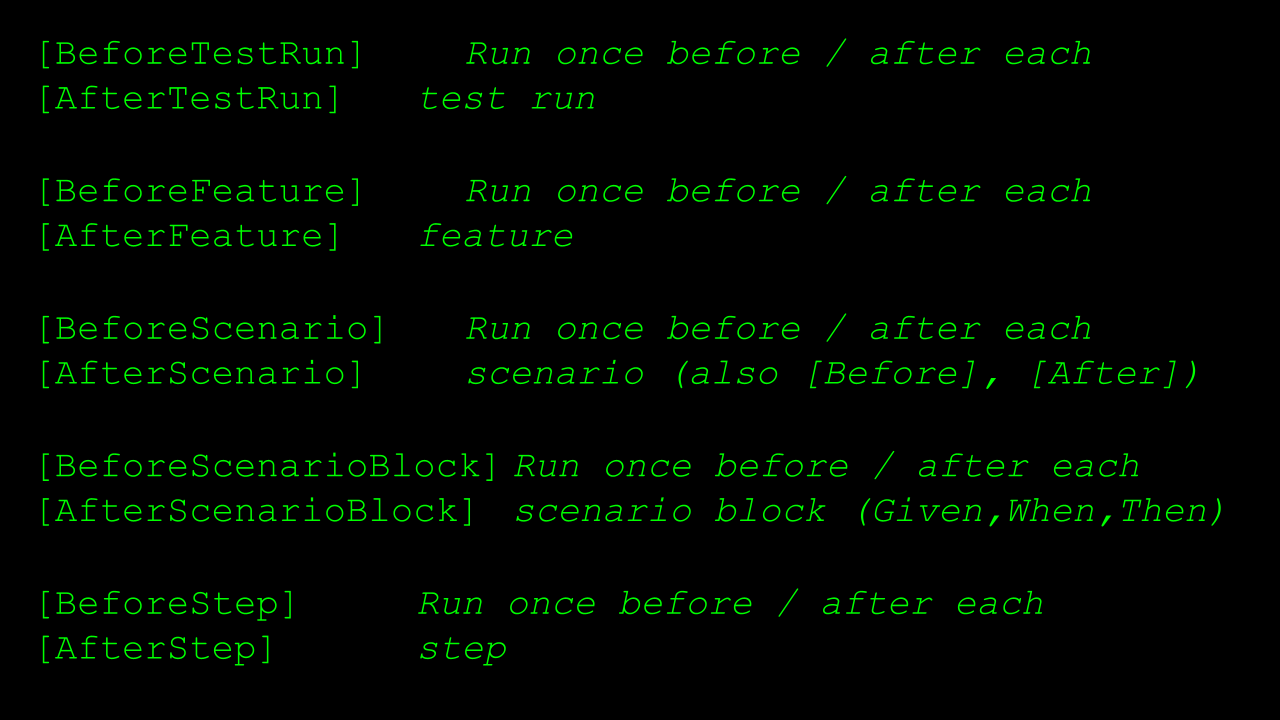
To be precise, SpecFlow offers 5 different levels of hooks:
BeforeTestRunandAfterTestRun— These are used to run code just before or just after the entire test run.BeforeFeatureandAfterFeature— These are used to run code just before or just after every Feature that is executed as part of a test run.BeforeScenarioandAfterScenario— These are used to run code just before or just after each Scenario that is run as part of a test run.BeforeScenarioBlockandAfterScenarioBlock— These are used to run code just before or just after each section of a Scenario, where a section means “all the Given steps in a Scenario,” for example.BeforeStepandAfterStep— These are run just before or just after each individual step in a Scenario.
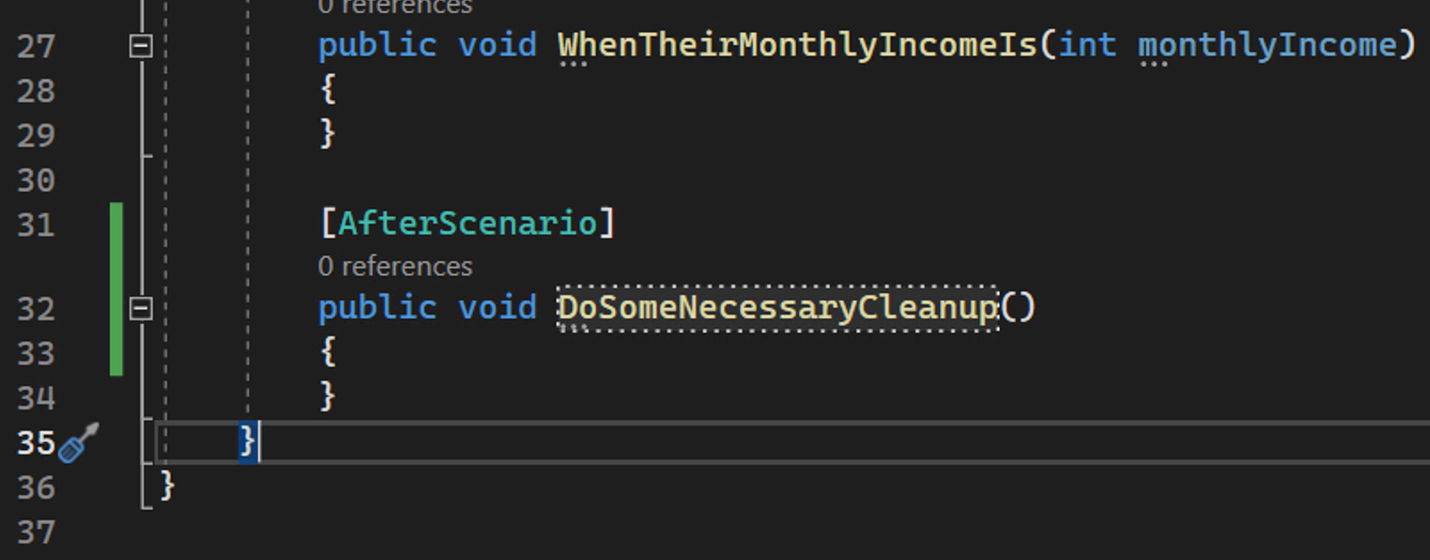
Here's an example of what that will look like in your code.
I've added a method with a BeforeScenario attribute, as well as one with an AfterScenario attribute.
The BeforeScenario method will be invoked by SpecFlow just before the first step in every Scenario that is executed in a specific test run.

And the AfterScenario is run just after the last step in every Scenario in the test run.
For all of the After hooks, it is good to remember that code tagged with these hooks is guaranteed to run, no matter what happens during the execution of the preceding code.
In our example, no matter if the Scenario passes, if it fails because of a failed assertion, or if it fails because of an uncaught exception, the After method will always be executed.
It is, therefore, a great place to do some tidying up before the next Scenario is run.
Of these 5 hooks, BeforeScenario and AfterScenario are used most often in practice, although there are use cases to be found for every type of hook in the list.
A very common use case for BeforeScenario and AfterScenario, for example, is starting and stopping a browser in a user interface-driven acceptance test. We'll see a working example of this in the next chapter.
# The other concept I would like to briefly cover in this video is that of tags.
In SpecFlow, you can decorate your Features and Scenarios with tags to group and filter them.
Tags are optional, and you can add as many tags as you want to entire Features or to specific Scenarios within a Feature file.
As an example, I've added the @loanapplication tag to our Feature file here to indicate that this Feature describes part of the behavior around loan applications for our online banking platform.
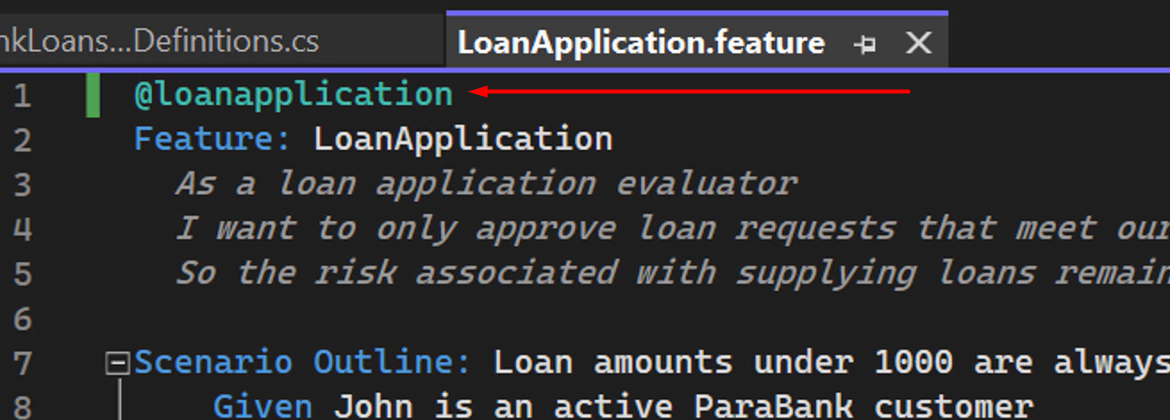
It's good to know that decorating a Feature file with a tag automatically applies that tag to all Scenarios in the Feature file.
When you run acceptance tests described in SpecFlow Feature files and Scenarios, you can tell the test runner to only run those Features and Scenarios decorated with a specific tag, or, alternatively, to exclude Features and Scenarios with a specific tag from your test run.
Some common use cases of tags are:
- Grouping Feature files and Scenarios together so they can be run as a whole
- Marking specific Features and Scenarios as work in progress or to be ignored
Another useful feature of SpecFlow is the fact that you can scope hooks to specific tags.
In other words, you can tell SpecFlow to only execute specific Before and After methods for specific Features and Scenarios.
In this example, I've scoped the methods with the BeforeScenario and AfterScenario attributes to Feature files and Scenarios containing the “loanapplication” tag.
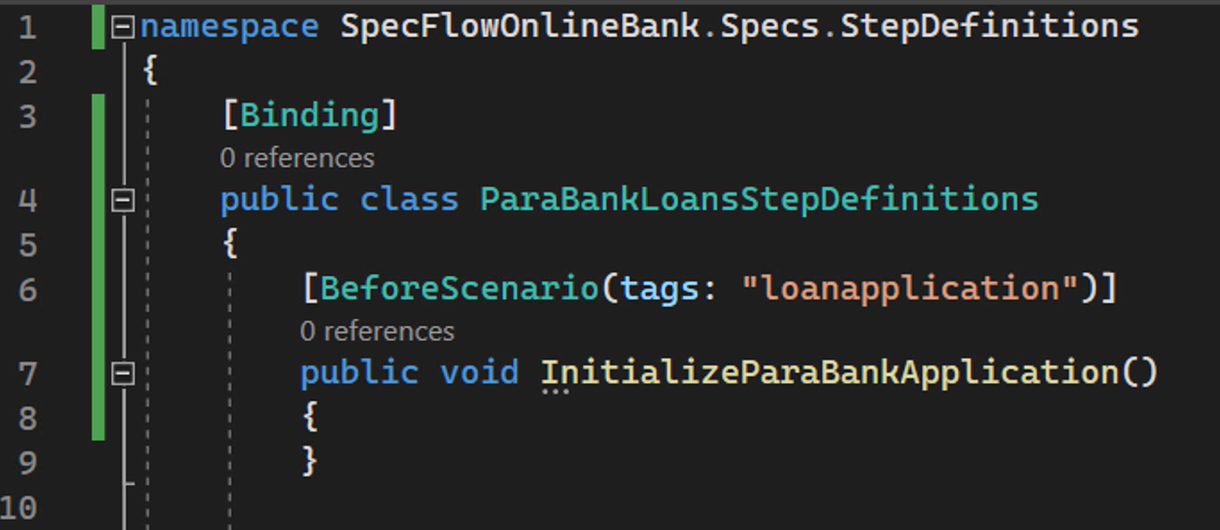
SpecFlow will execute these methods just before and just after every Scenario that either is decorated with the “loanapplication” tag itself, or is contained in a Feature file decorated with that “loanapplication” tag.
Also note that using named arguments as I did here is entirely optional, but in this case, I think it makes the code easier to read.
Besides hooks, you can also scope individual Step Definition methods and even entire Step Definitions classes to specific tags.
For example, if I add the Scope attribute with the Tag argument set to “loanapplication” to our StepDefinitions class, all Step Definitions inside this class will be mapped only to Features and Scenarios with that tag.
If I remove the tag from the Feature, for example.
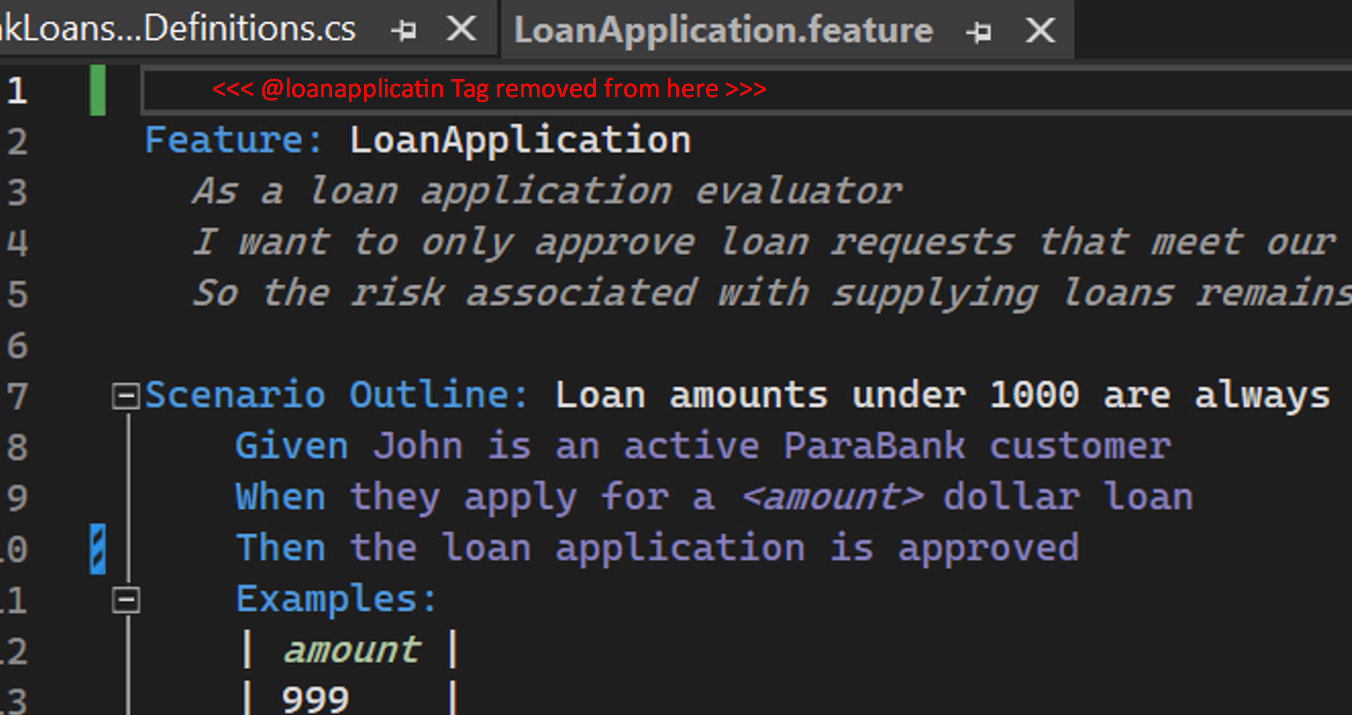
You'll see that SpecFlow can no longer find the corresponding Step Definitions, because the ones we have only apply to Features and Scenarios with the @loanapplication tag.
This enables you to implement the same steps in different ways for different types of tests, for example.
We'll see a working example of this in the next chapter.
In that chapter, we will finally turn our SpecFlow Scenarios and Step Definitions into proper automated acceptance tests on our online banking application by means of implementing the actions described in our Step Definitions using some of the most popular UI and API automation libraries available in the C# ecosystem.
