

Transcripted Summary
In this chapter, we'll be focusing on Automation Architecture with Cucumber.
We'll be going between the slides and the text editor. I'll be explaining some new concepts, and as I do so I'll be implementing them.
Let's get into it.
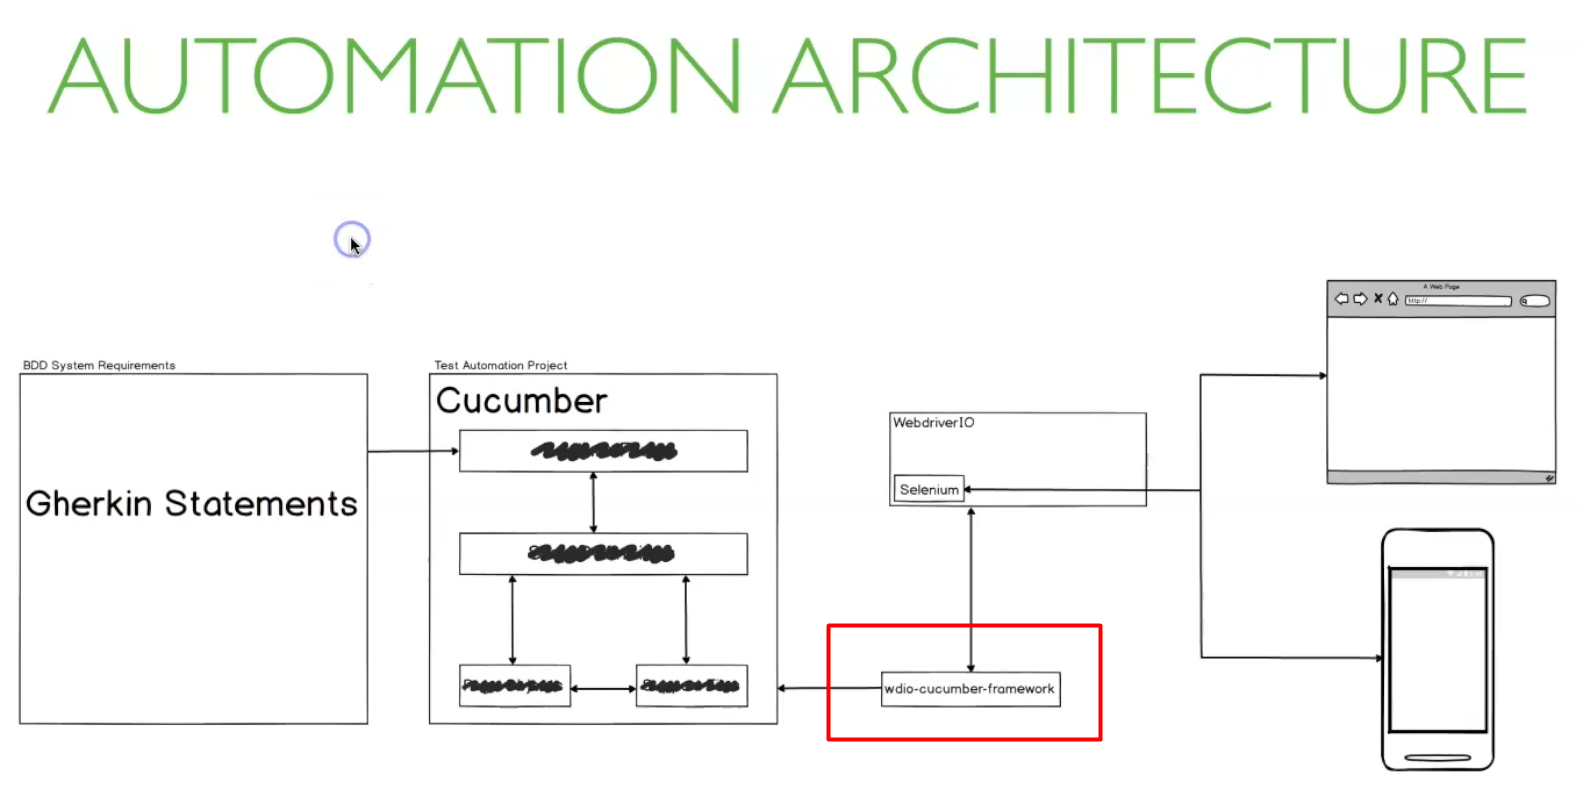
To start, I want to revisit a diagram I had previously shown you, with some additions.
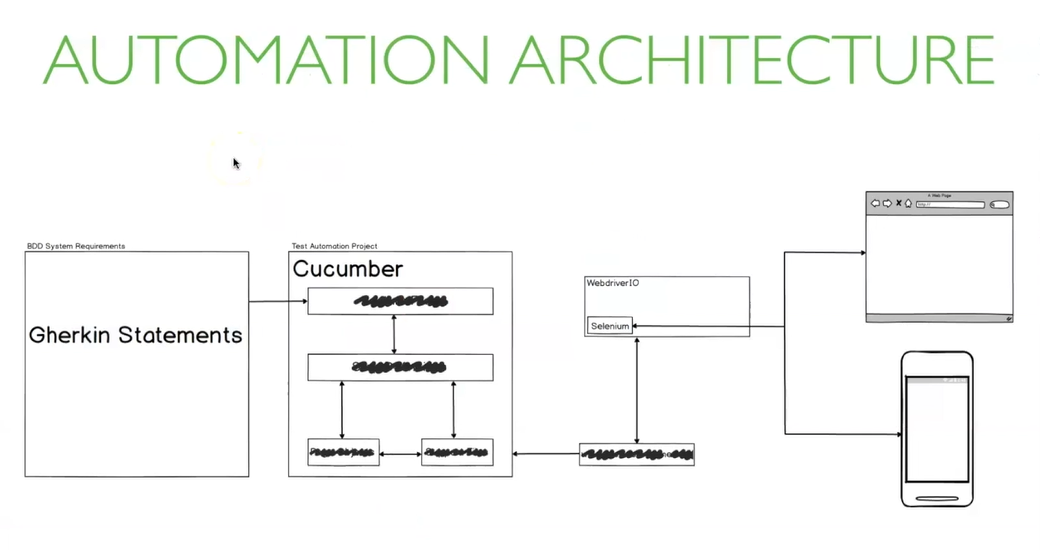
As we go through this chapter, I'll reveal more of the diagram.
But for now, we can clearly see some additional components have been added inside the Cucumber box and also some new components are between Cucumber and our devices.
As I mentioned in the previous chapter, WebDriverIO is a tool that we use to automate the browser, and we'll be leveraging it to create our Cucumber project.
Within WebDriver is Selenium and this is what's actually responsible for carrying out actions on our browser. Selenium relies on Java to work and is installed automatically when you install WebDriverIO.
So that's the first place we'll start.
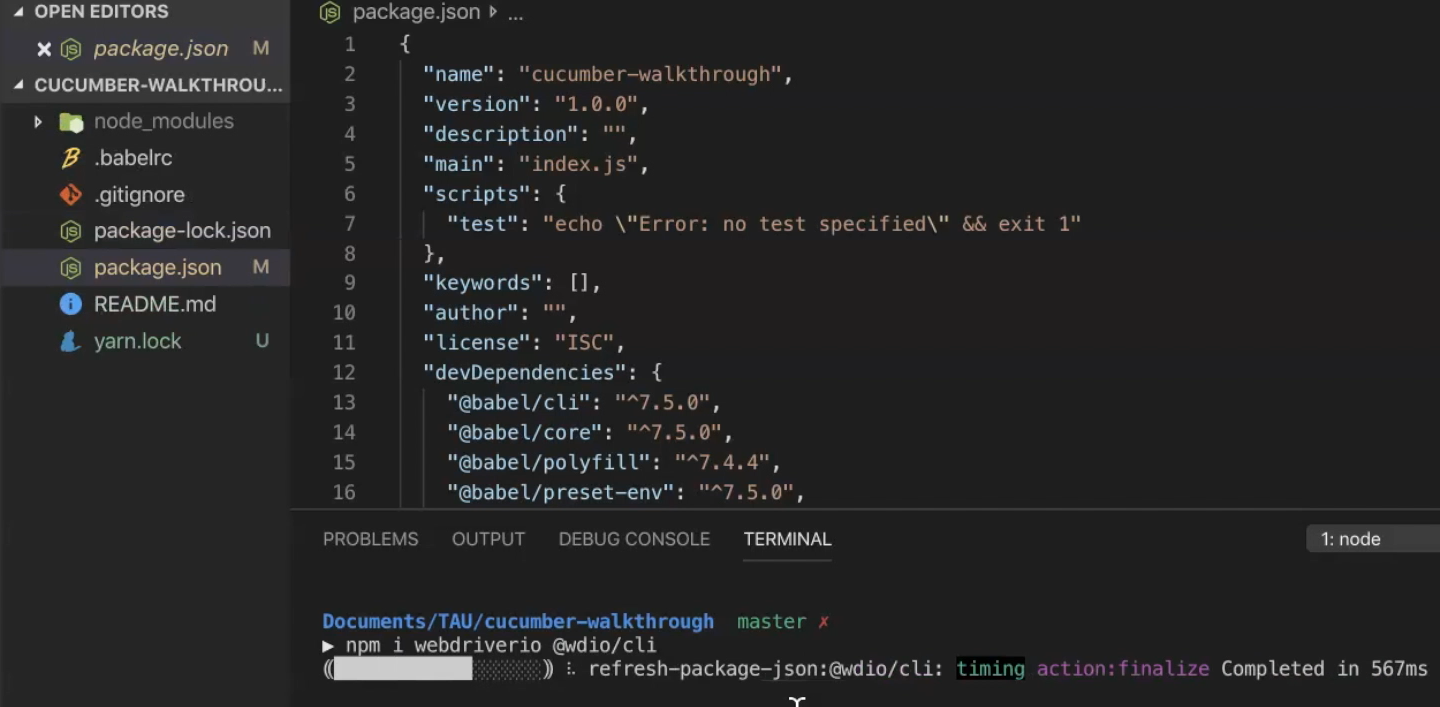
I already have a project folder with some Babel configuration set up, so I'll just navigate to that.
Now, I'll install WebDriverIO in this folder, as well as a WebDriverIO CLI (the test runner)
npm i webdriverio @wdio/cli
WebDriverIO does a great job of helping you set up your automation project, so you can focus on writing tests.
The cli command will ask you a series of questions that you need to answer, so WebDriverIO can bootstrap some files and install necessary dependencies to get you started.
To run the CLI, we have to run a file in the node modules folder — the command is
./node_modules/.bin/wdio config
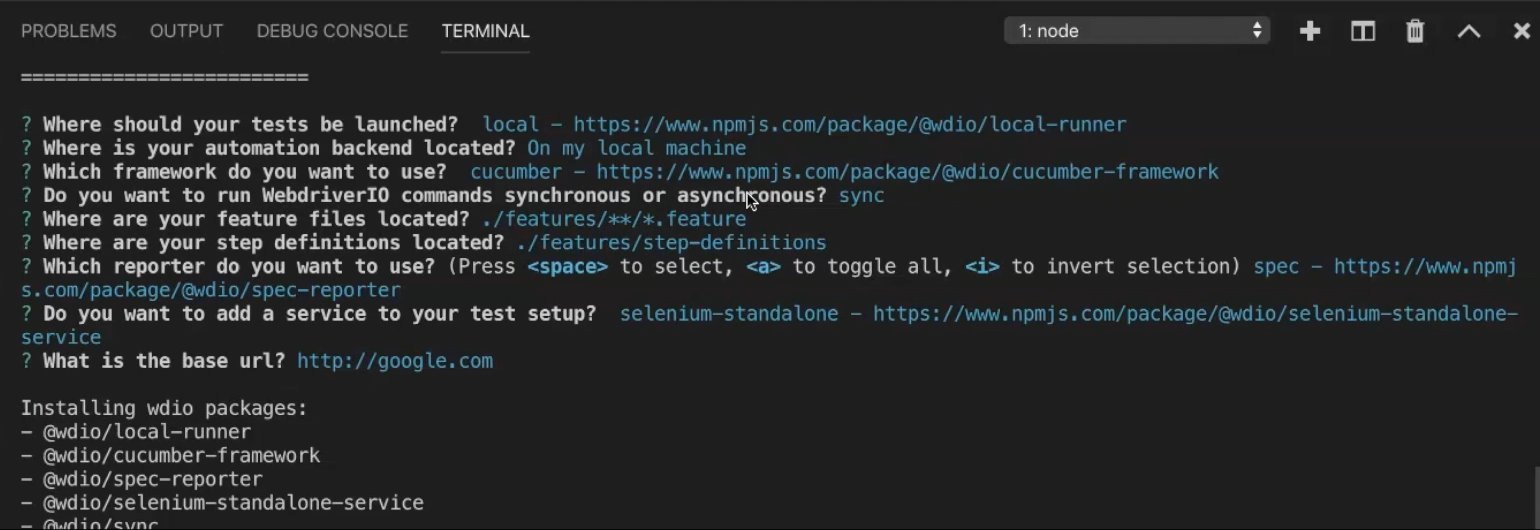
The first couple of questions are just asking where our test will be launched from and where our backend is — we'll pick local for both.
We'll choose cucumber for the framework and sync for how we want to run commands.
We will select the default values for where we want to store our feature files and step definitions. Don't worry. I'll explain these in more detail in a future lesson.
For the type of reporter, we'll use a default spec, so just hit Enter.
For services, I only want the selenium-standalone service, so I'll go down to the chromedriver, deselect it by hitting space, and select selenium-standalone. Selenium-standalone is what WebDriver will connect to access Selenium commands, and selecting this service allows it to be packaged within our project.
For our base url, I'll go with google.com. The base url is the url for the application that you will be testing.
And that's it. WebDriverIO will now install necessary dependencies.
Two results of completing the cli are:
a WebDriverIO configuration file (wdio.conf.js) was created in the root of our project
the package JSON file (package.json) has some new modules.
The main module I want you to focus on is @wdio/cucumber-framework.
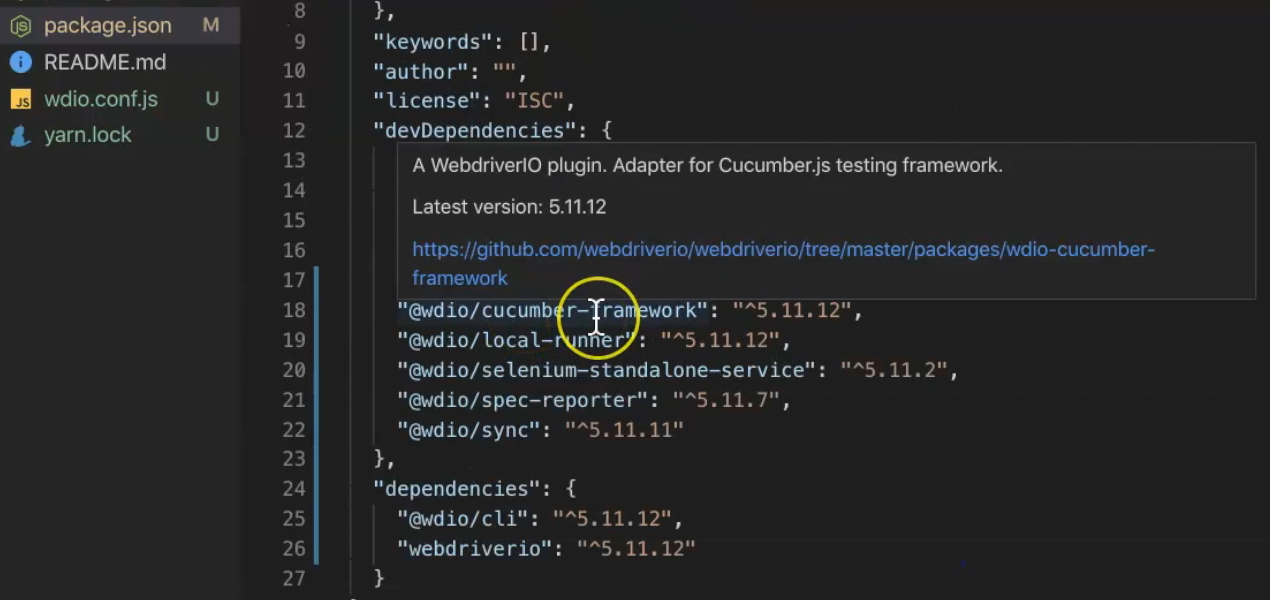
This is what allows WebDriverIO to understand Cucumber.
This library is actually responsible for communicating between Cucumber and WebDriverIO, so WebDriverIO knows how to execute our tests.
If we head to the WebDriverIO configuration file called wdio.conf.js, we can see all the configurations we just selected with some really helpful comments.
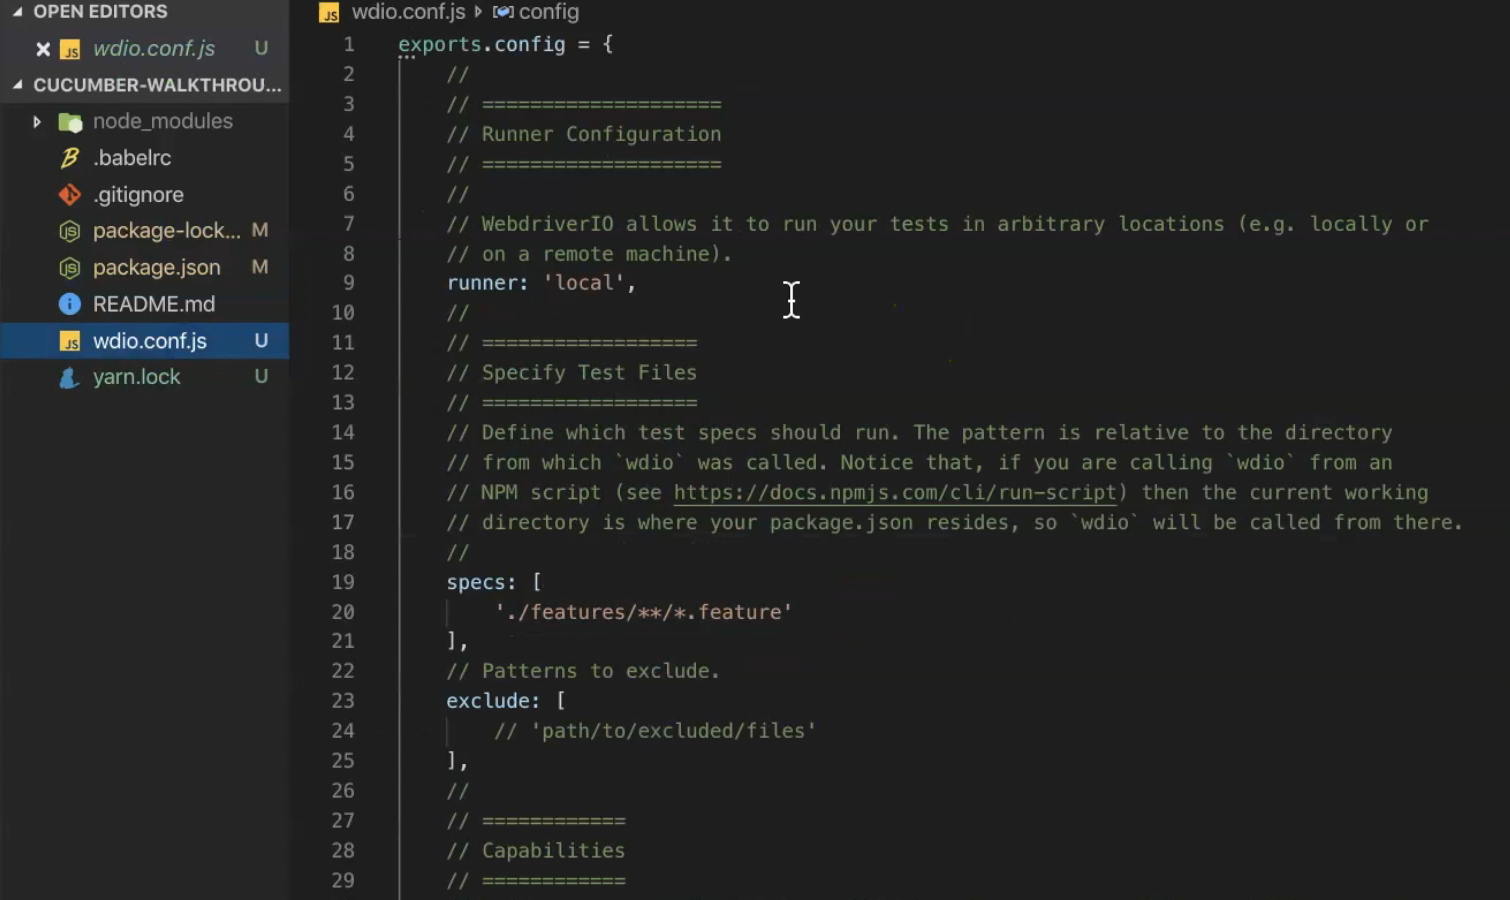
I would advise you to take some time to go through the comments to understand what each property does, and even go through the API docs of WebDriverIO.
Just before we end this section, I'm going to make a few changes to this configuration file.
First off, I'm going to change the browser option here (in the Capabilities section) to Chrome, so my test will run in Chrome —
browserName: "chrome"In the Test Configurations section, I changed the log level to warn, so I only see the warnings or errors in the console —
logLevel: "warn"And finally, in the Hooks section, I'm going to uncomment the
beforeSessionfunction so I can load Babel.

I will add the following code to require Babel.
beforeSession: function(config, capabilities, specs) {
    require("@babel/register");
}
Babel is what will allow us to use some of the more modern features of Node and JavaScript.
All of these Hooks (that you can see in the wdio.conf.js file) can be used to execute commands before or after various events during your test. They come in very handy when you get to managing more complex test automation projects, but I won't be covering these in much detail for this course.
Resources
Quiz
The quiz for this chapter can be found in section 4.5
