

Transcripted Summary
Welcome to the second chapter of XCUITest course.
In this chapter we will get a sample IOS app from Github, and then we will add a UI test target for that app. Then we will record a sample UI test. Then we will write our own UI test.
There'll be a lot of things going on in this chapter, so let's get going.
Pre-req
Before we get into the course, you need to make sure that you have a MAC with Mojave and Xcode 10 or onward version of Xcode.
You can get Xcode by going to the App Store and search for Xcode and then you will get Xcode Developer Tool and you can just download it. Downloading Xcode will take a lot of time. It is about 5Gig software, so you have to wait for Xcode to download.
We have a sample project which is an IOS App, so which is available on Github. The links for this Github repository is in the resources section at the end of the chapter. You can clone or download this repository in your computer.
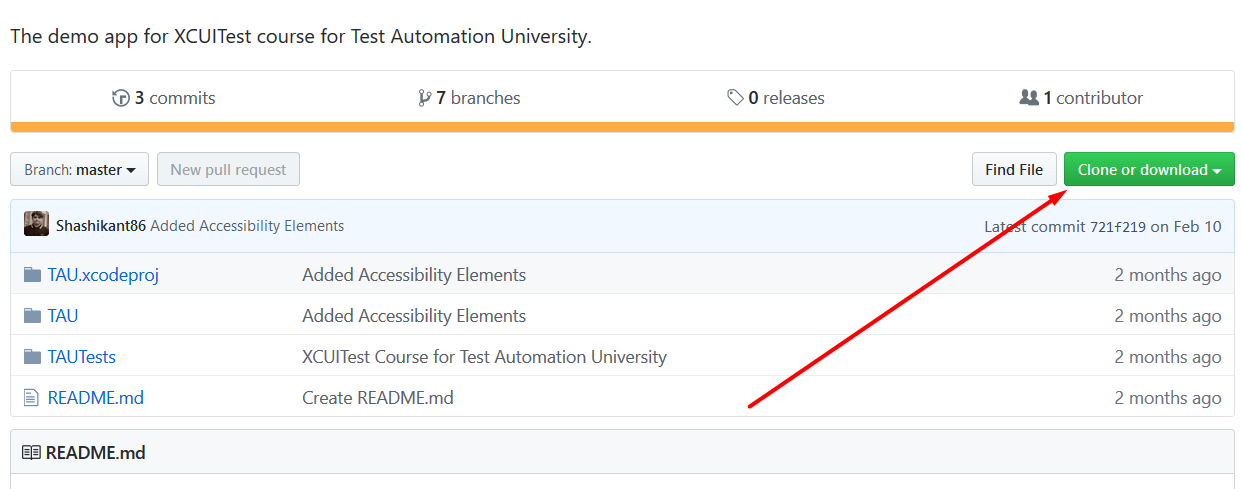
Once you got this repository, you actually download this repository here. And open this in the finder, you will get an iOS app.
If you click on this Xcode project, it will launch an Xcode and open our iOS app in the Xcode.
Before we get started with a XCIUTest and all those things, let's get familiar with this folder structure of Xcode.
Basically, we have an app called TAU, which is a short form for Test Automation University. And you can see we can turn the app from this play button here and we have some sample code here.
In this directory, we have an application code. Then we have a target for application code as well, which you can see in the general tab. You can get through this screen by getting through this, on this area here (navigation on the left side of the screen). It will show you all the targets, in this example project over here.
Currently we have a target for main application and target for unit test. We don't have target for UI test yet, but we will add it.
In main target — basically target is a process where we can run specific things — so this is a target for iOS app, where we can run an iOS app here. Then we have a target for unit test, and we have some template unit test.
Now let's go ahead and add UI test target for our app.
We can do that by going to the Xcode: "File" > "New" > click on "Target" (make sure you have iOS template) and if you scroll down, you will see the test targets are here.
We already got a target for unit testing, we just need to add it for the UI testing. So, if you click on "IOS UI Testing Bundle" and click "Next". You can give any name to your target, but I will keep it as a default and make sure target to be tested is our main app, which is TAU.
If you click on "Finish" you can see that out UI test target has been added over here. And if you click on here, in "General" tab, you can see that the UI test target has been added here as well.
You can also see that we have a sample UI test generated for us. You can see here that we have a template UI test, where we can see our class name for our UI test, extended from CS test case class — class TAUUITests: XCTestCase — normal setUp1, teardown and testExample.
We can execute this test, by clicking on the plus (+) button over here and that test will run in the iPhone XR simulator which is currently selected. But you can change to any simulator, if you want to use different iOS or different UI's. So, I'll select iPhone XR here and if I click on play button here (arrow symbol), that will execute our test.
We can see that there are some comments in the test method here, which saying use recording feature to record your test. So, the UI recorder is something that's registered below here. But, in order to activate that recorder, we have to be inside the test method. So, as soon as I click on inside the test method, you can see the UI recorder become active and now we can record our UI test by clicking here.
Before recording our UI test, let’s go through our application, by going through the simulator.
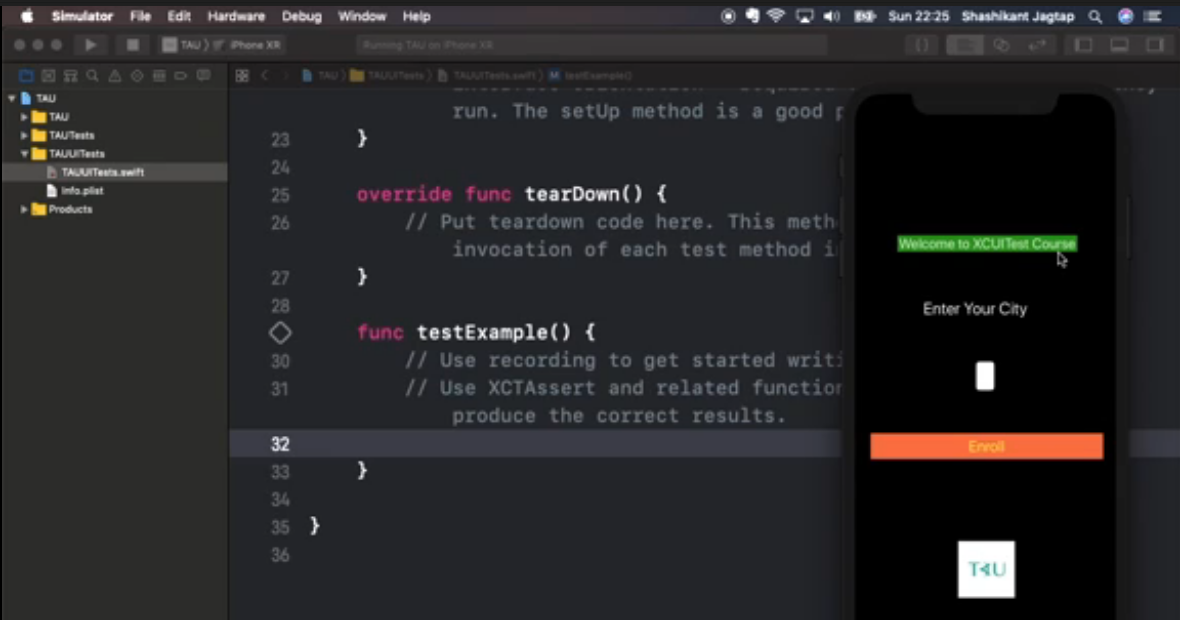
Our application is fairly simple. We have one screen where it says, "Welcome to the XCUTest Course" and it asks you to enter city.
So, if you enter “London” and click on "Enter", it will give a "Thanks for joining message". And if you enter without entering the city, it will complain: "Please enter city". So, that's a very basic application.
Let’s go ahead and start recording our UI test by clicking on the "Record UI test" button here. Once we click there, the Xcode will start recording the clicks. So, if I tap on this button, you can see that some source code is being generated. Let's tap on a few things here and once we finish let’s stop the recording.
As you can see, some source code has been generated for us. You can see that the recorder has created a constant XCUIapplication, then it tapped on the welcomeMessage and then it tapped on the enterCity, the enrollButton and staticTexts, which is "Please Enter City".
So, the recorder has done all the taps for us, but we don't have any assertion for this test.
We can add an assertion, by using XCTAssert.
So, you can use XCTAssert through all files. We can assert that this text is present.
So, we can guess this element, which is recorded element and we can assert that, that element exists. I can simply add exists here and now we got our recorded test and we got some assertions as well.
Before we run the test, we will rename this test with a meaningful name. So, we can say "TestAllElementsonMainScreen" and we can run this test by clicking on this arrow here.
Then, you can see, the test will start executing in the iPhone XR simulator. Now you can see that the test is launching our app.
Now you can see that our test succeeds. You can see the “succeed” check mark here and if you want to see the test logs, you need to click on this debug area. So, if you click on here, it will bring up the debug area and it will print all the logs of your test.
Now we have executed first ever XCUITest which we have done through recording, but we can also write XCUI test by our own.
Next, we will write a test to test the "Thank You" message, by actually entering some text in the enter city text field.
So, let's write a new function called testThankYouMessage and similarly, as for recorded tests, as we create an instance of XCUIApplication. We will also tap on the welcome test.
And now we will put a breakpoint on this text and execute this test.
We can execute this test by clicking on this play button here. As we put the breakpoint at line 44, apparently when the test starts running, the test will stop when it reaches to that point.
On that point onward, we can see how we can deeper and write the XCUITest by our self, using XCUITest API.
So, we will see how we can find the element on the view, also we will say how to form the queries and we also say how to type the text into the text field and how to tap on it.
These are the tests, some sample things we will be doing through XCUITest debug area.
So, the test has been launched now and once it gets to that point, you will see the debug area where we can see the test has then stopped.
What we will do now, we will just get the simulator on our right side and we will get Xcode on our left side. So, what we need to do, so this is our debug area where we can print out all the debug information.
Let's enter in the command po which is print object and let's see our application and let's do debugDescription.
This is the command to print all the UI elements appearing in the string. As we can see, there's a lot of things in the UI at the moment — all the buttons, all the text fields. If you want to just print all the buttons, so we can XCUITest "buttons" so that will print only buttons in the view.
po XCUIApplication().buttons
At the moment we have only two buttons, so we just call it “TAU” — "Enroll" is the only button in the TAU (enrollButton).
We need to get this text field, so we need to find the identifier of this text field, so that we can tap into it.
We can print XCUI test "textFields"
po XCUIApplication().textFields
We can see that we have a text field, which has identifier: ‘city’ — the city is an identifier for this text field.
So, how can we tap into it?
Basically, what we can do is, we can go and find all the text fields and tap by that name. So, we can put it into an added index, so we can type "city" so that will give us a unique element
po XCUIApplication(). textFields[“city”]
So, if you printed that one it is only printing that element. If we tap on that one, so we can just upload, enable this tap method on this element. If you do this, it will actually tap into that one.
po XCUIApplication(). textFields[“city”].tap()
So, now you can see that the cursor is in that text field.
The next thing we can do is, enter the text into that text field.
So, we can do that by using XCUIApplication, and get that limit and can say, type text and what you want to type. Say for example, "London"
po XCUIApplication(). textFields[“city”].typeText(“London”)
And if you tap on it you can see the XCUIElement, XCUITest actually types “London” in that text field.
Now we need to tap the enroll button.
Basically, we can do using XCUIApplication and let’s print all the buttons.
po XCUIApplication(). buttons
So now we have a few buttons, like the buttons from the keyboard, but our main button here is "Enroll".
Here's our enroll button, and the identifier of that button is actually this one. So, I can copy and paste that identifier and I can just perform the tap action on that button.
po XCUIApplication().buttons[“enrollButton”].tap()
Now it actually taps on the button and now we can see the message. So, we can get the message by printing all the static text.
In the view, now we have a message called "Thanks for Joining!". So, basically, we have done everything from the debug logs.
So, we have to do that in the tests, so basically, we can copy all the things we have done to debugger, into our test.
Finally, I can see the message "Thanks for Joining!".
I can assert that message using:
XCTAssertAssertTrue(XCUIApplication().staticTexts["Thanks for Joining!"].exists)
Now, I have found all my tests, without using recorder. So, I can execute that test now, by clicking on this button here.
This test will apparently go to the application. Launch application, then type "London" in the city, tap on the "Enroll" button and verify that the “Thanks for Joining!” message is there.
And while the test is executing, we can see the test logs. So, you can see all the actions in the debug area over here.
You can see that our text succeeded, which means we managed to write our test using the XCUITest API.
We will have a separate chapter on how to use XCUITest API and how we can use these assertions and how we can get through all the elements and how to perform different actions on the elements. We will cover all these things in the later chapter, where we will be covering XCUI testing API's.
That's it for this chapter. So in this chapter…
- We have added UItest target for our demo app.
- We have recorded our first UI test using UI recorder.
- We also wrote our own UI test using XCUI testing UI and the debug area, from apps.
In the next chapter, we'll improve this text by base classing and abstracting all the common workflows on this test.
See you there.
