

Transcripted Summary
Before we begin building a framework for API testing, let's make sure we have the basic dependencies already set up.
As a prerequisite to this tutorial, you have to ensure that you have Python 3 on your machine.
If you don't have Python already installed, then you can go to python.org and download the latest version for either the Windows, Mac, or Linux that you are working with.
Go to "Downloads".
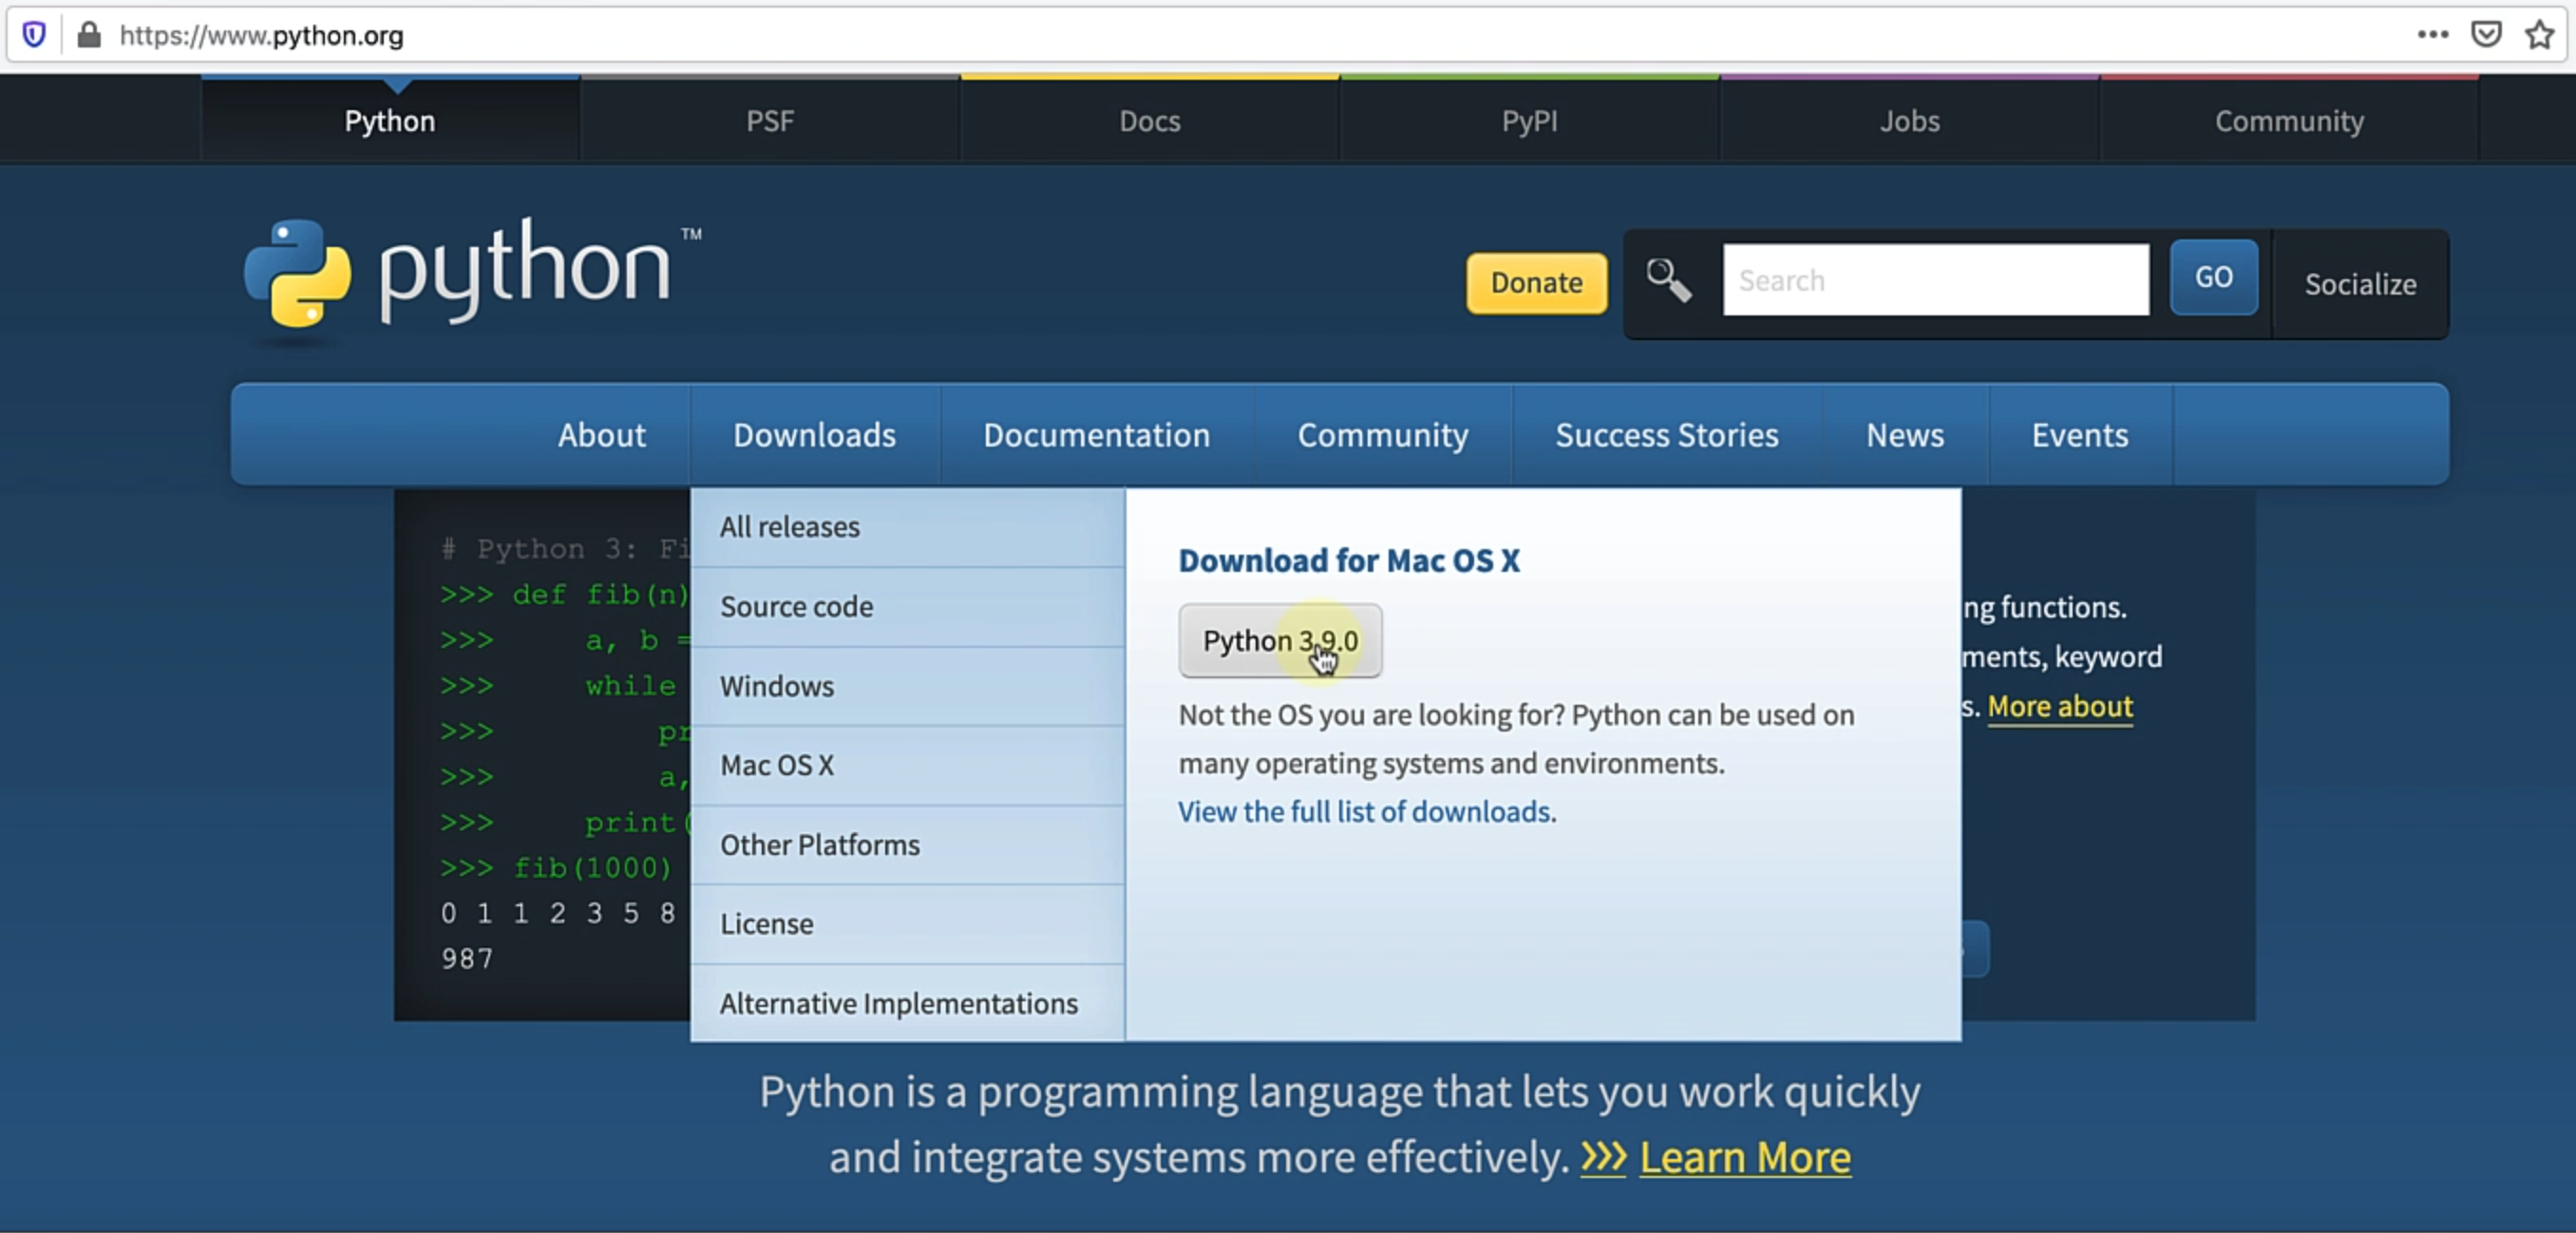
As of making this course, the latest version available is 3.9.0 for Mac.
If you're on Windows, then you can obviously download the latest release - this is going to make sure that you have a version of it already set up on your machine.
Another alternative for you, if you are on Mac or Linux is to use Homebrew.
So you could also do something like:
brew install python3
I already have Python 3 installed on my machine, so I'm not going to go ahead and install.
To verify that I have Python, you can do:
python --version
By default, Mac ships with Python 2.
However, I've already set up Python 3 as well.
So I can do this:
python3 --version
You can see that I have Python 3.8.6 at the moment.
Another thing to verify is to just execute:
python3
so that you come into the REPL and that means that you have Python installed and it's accessible on the command line and everything is set up.

With Python already set up on the machine, we need to take care of setting up a virtual environment and then install all the required packages, at least the basic ones that you need for this course.
Let's see how we do it.
I've already written a blog on how to actually set up a virtual environment and why that is a best practice.
You can go to the blog site and search for that - I'm just going to show you quickly where that is.
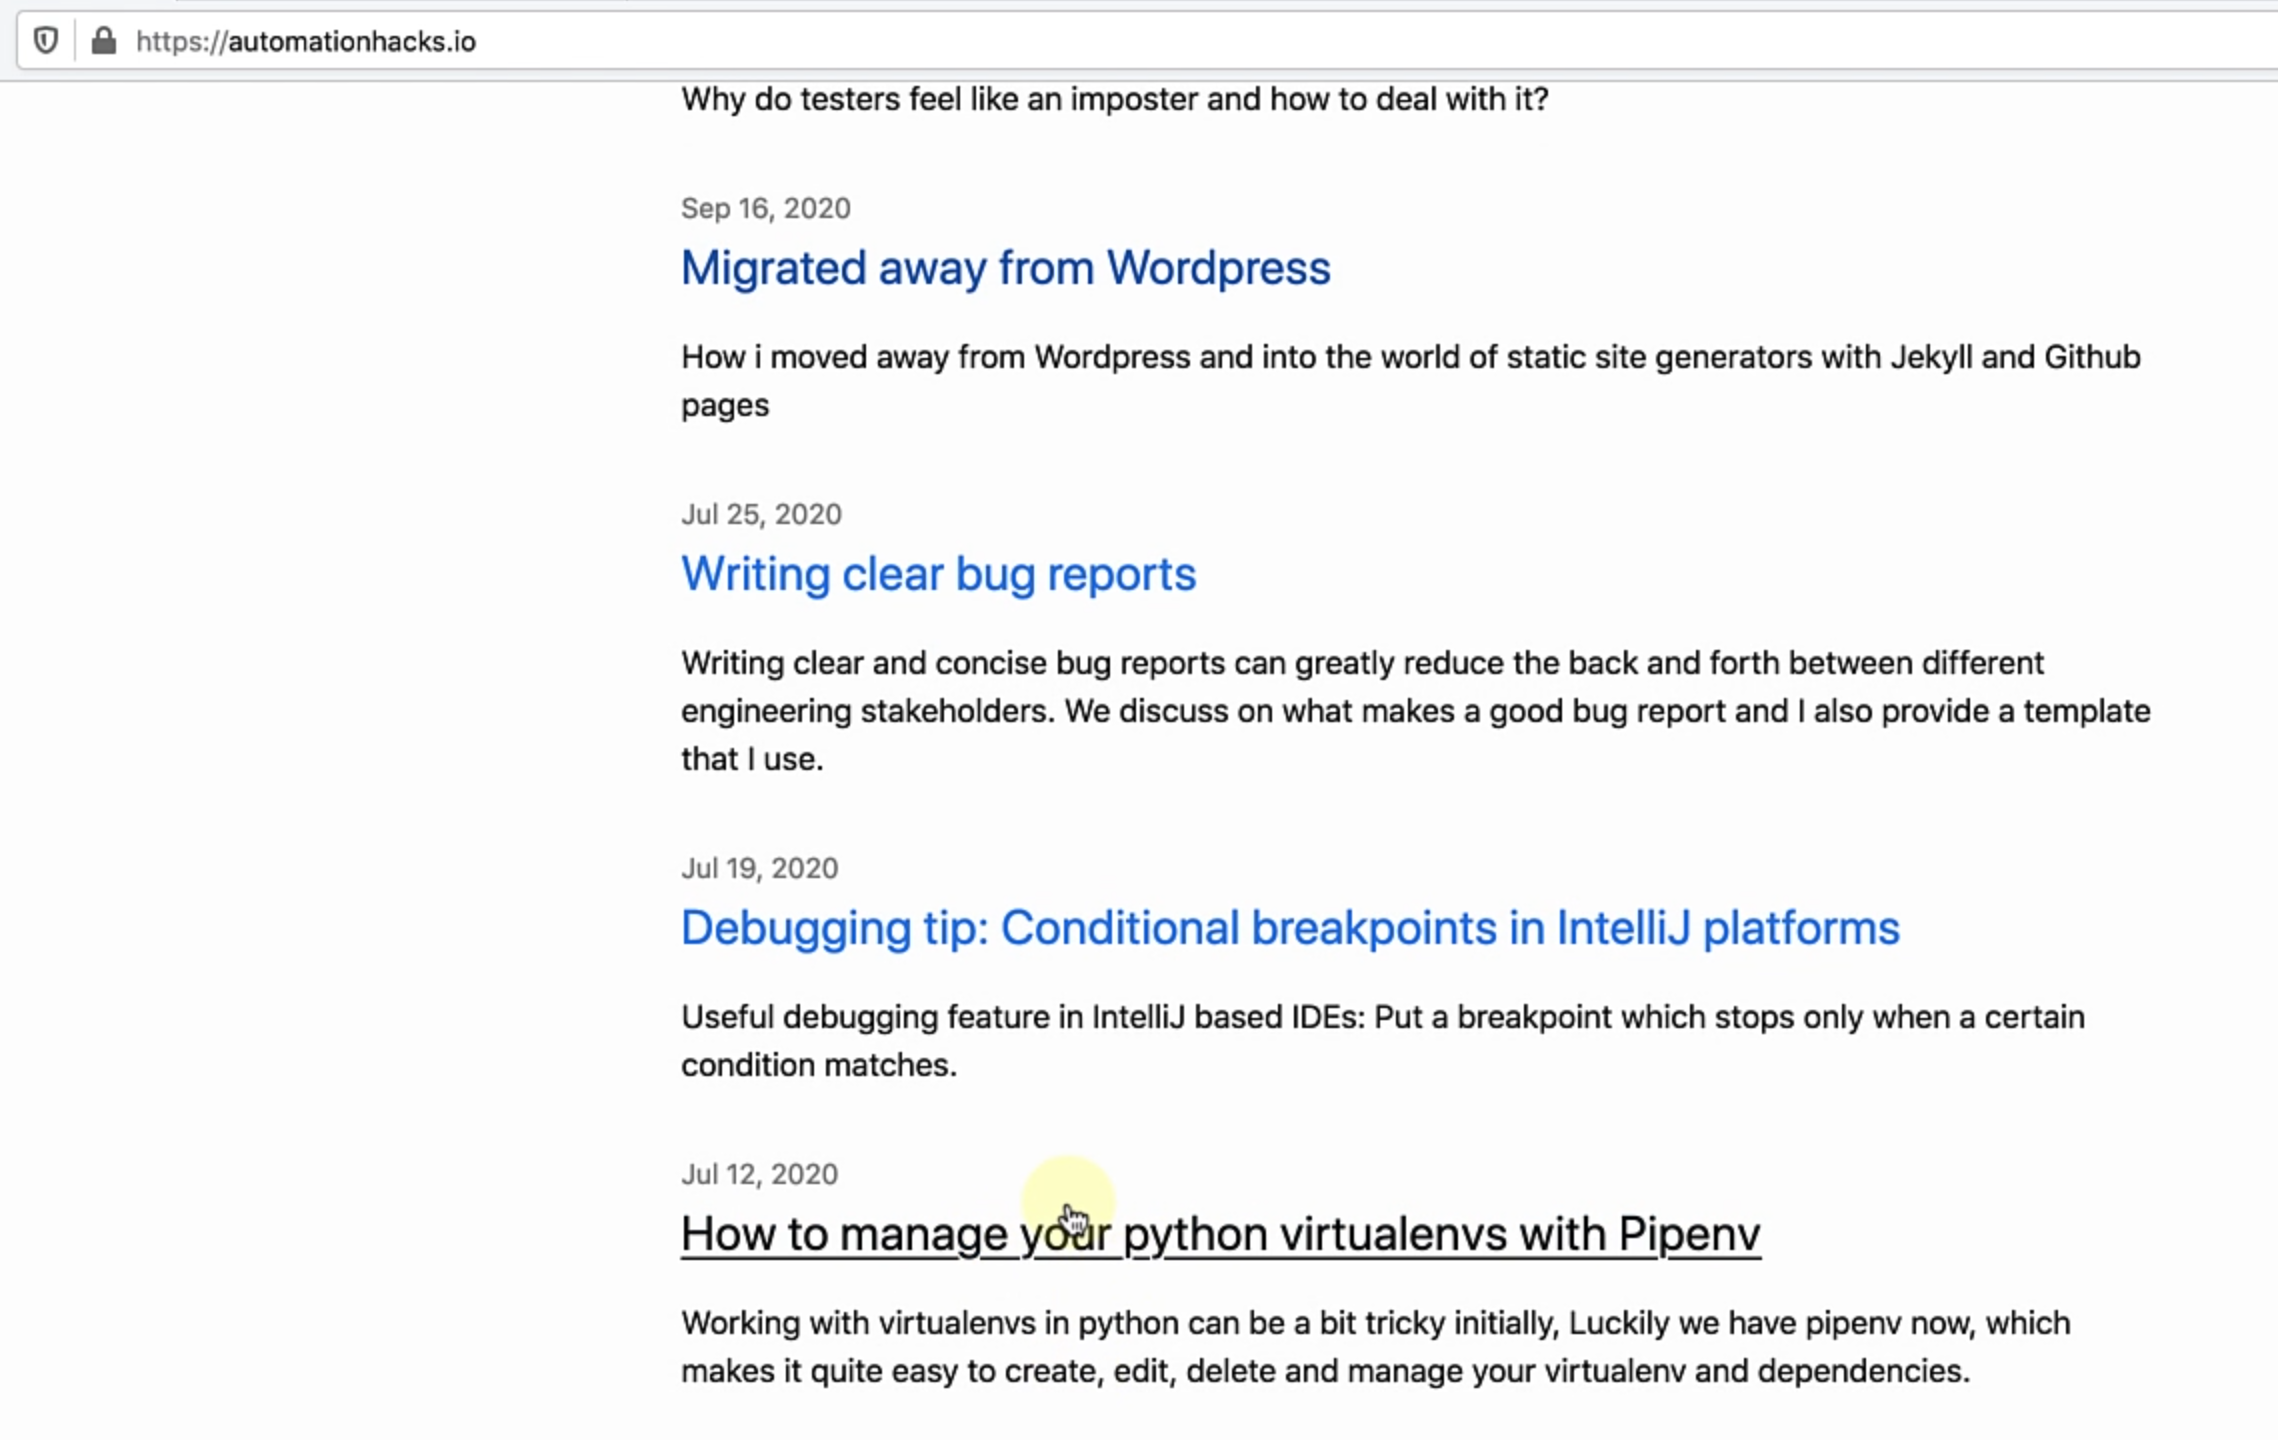
You have this article "How to manage your Python virtualenvs with Pipenv", and it talks about most of the commands that you need to set up Pipenv and I'm going to assume that that's already done.
If not, what you can do is you can use Homebrew - that's the easiest way and this sets up Pipenv on your machine.
brew install pipenv
Once Pipenv is there, you don't need to worry about managing the virtualenv and virtualenvwrapper in the Python ecosystem.
Another set of best practices is to make sure that you already have a virtualenvs directory.
Right now, in my users folder, I already have a virtualenvs directory, and this is already set up on my zsh.
If you are using Bash, then please make sure that you have $WORKON_HOME variable already set.
The next step is, after you make the changes, source the .zshrc file or the .bash_profile file that you have.
Once you have a Pipenv already set up, if you want to create a new virtual environment for you, then you can use:
pipenv --three
This will create a virtual environment with the default Python 3 version that you already have.
However, for the purpose of this course, we are going to follow our GitHub repository.
If you just go to my GitHub - course-api-framework-python, you'll see that it will have all the source code for this particular course.
If you take a look at Branches, you're going to have different branches for every chapter.
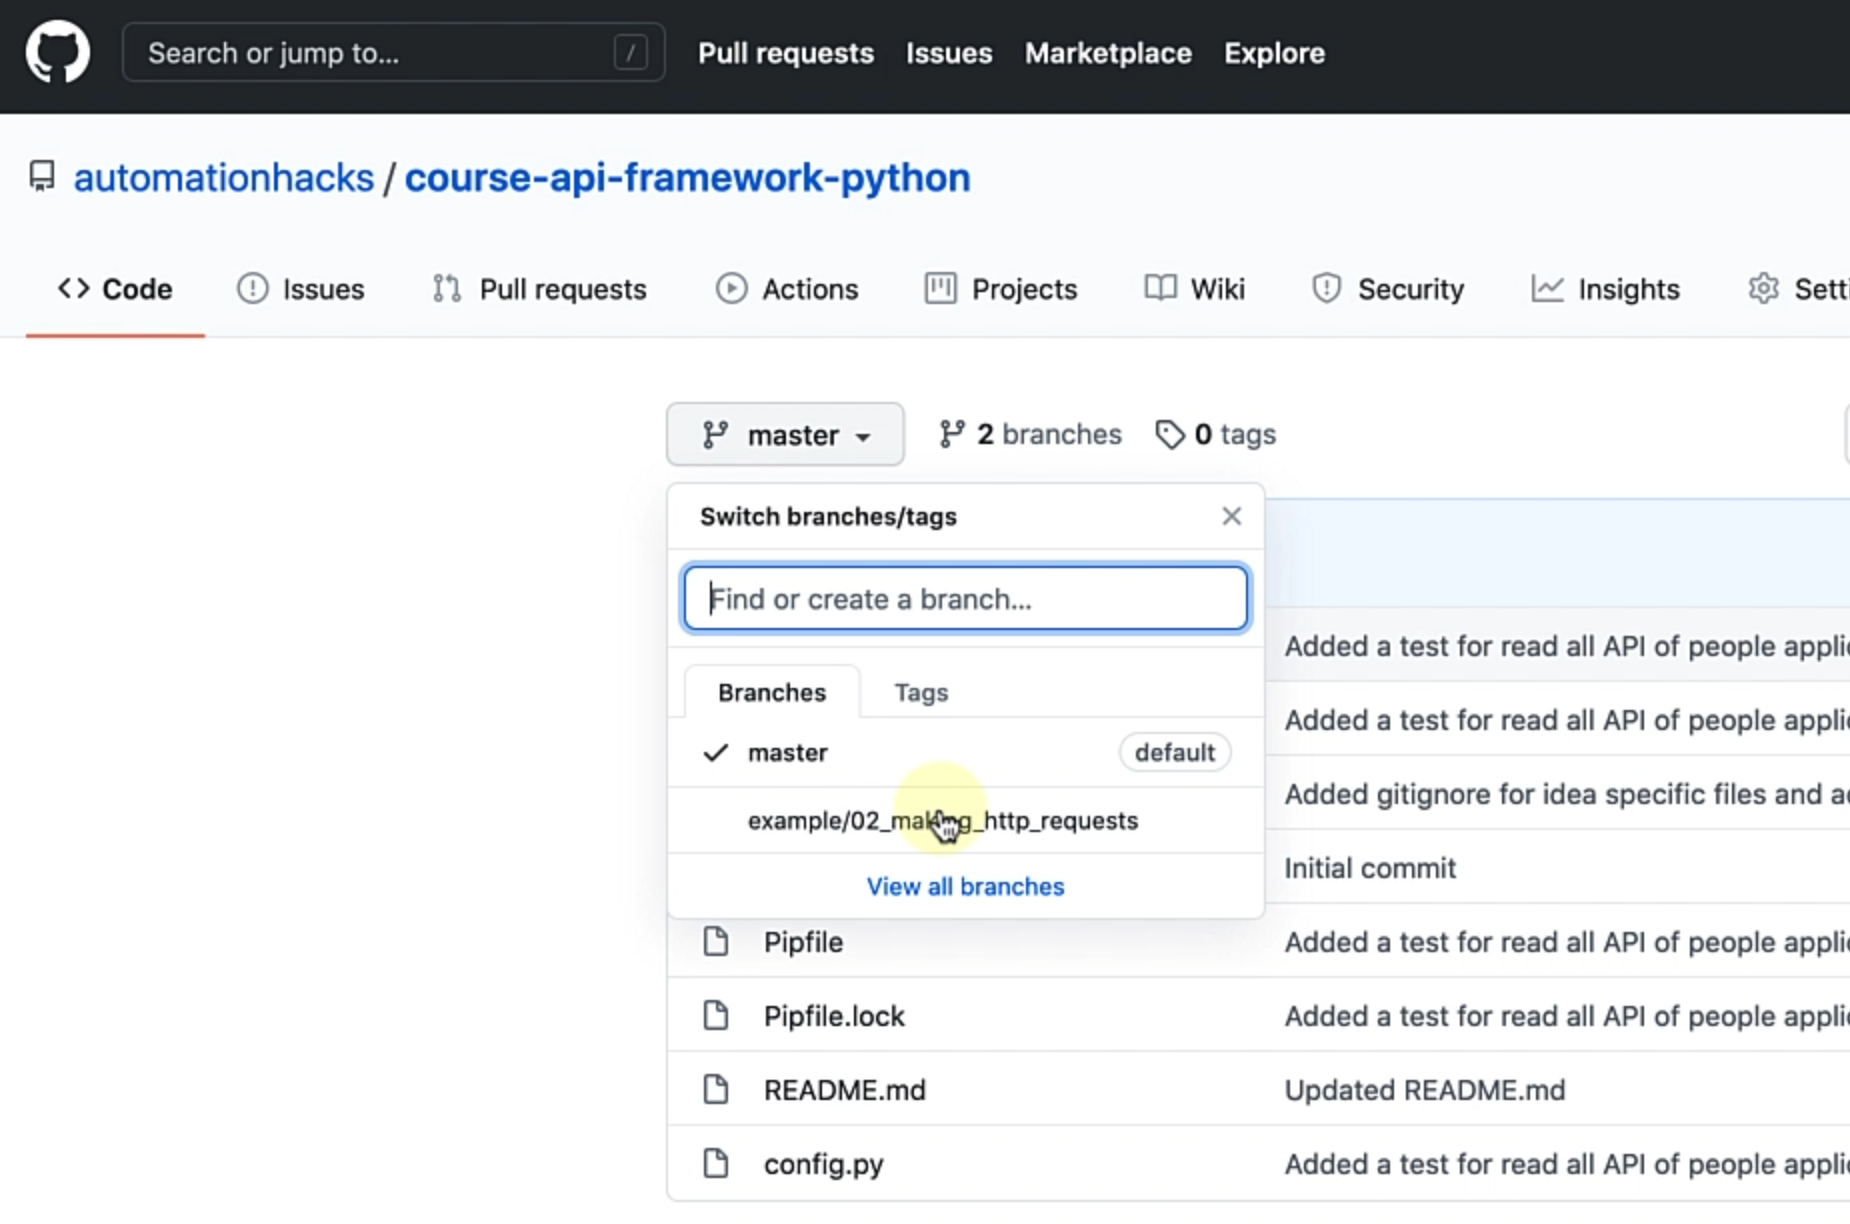
You can just either switch to that branch - let's try and do that now.
As you can see, I'm already on example/01_setup_python_dependencies.
Let's just see what I have right now.

As you can see, I already have a Pipfile and Pipfile.lock with their own set of dependencies.
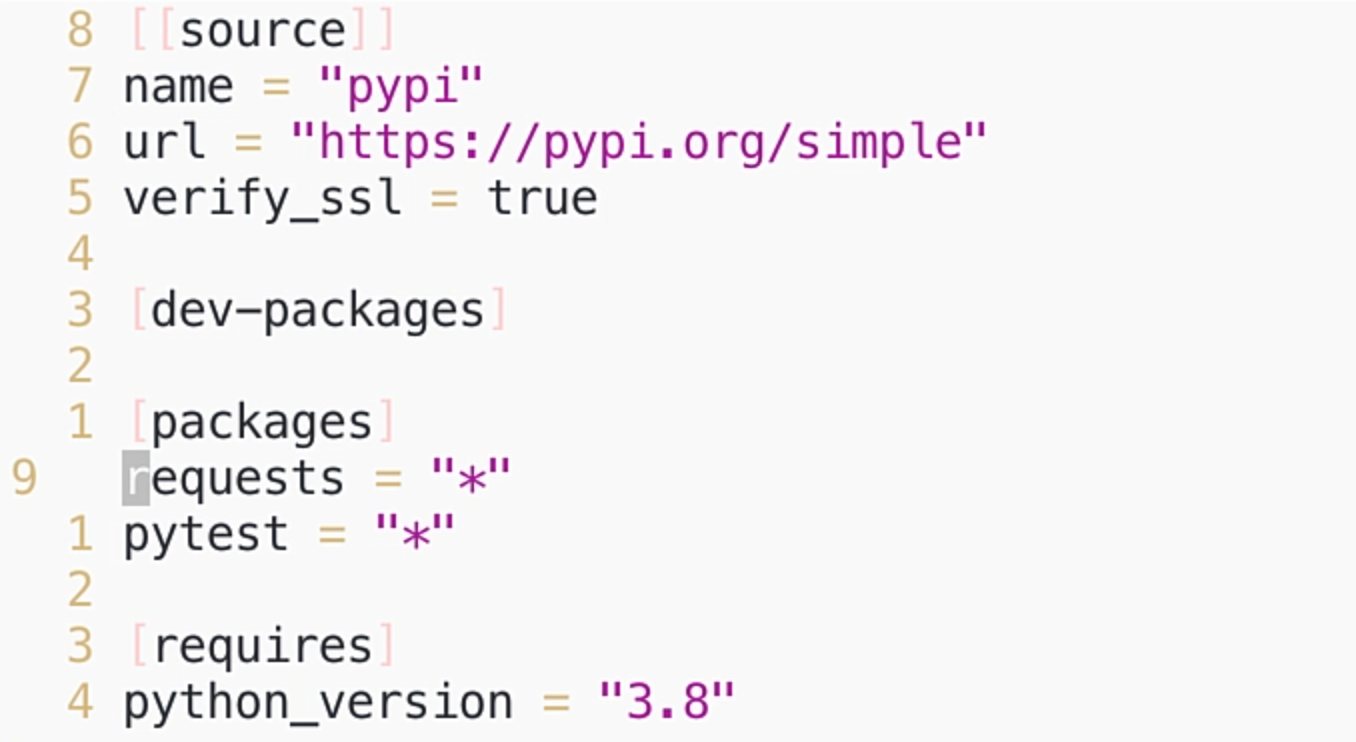
Let's just see what Pipfile has.

You can see that it's a very basic Pipfile at the moment and I have the requests as a module dependency already set up.
The easiest thing that you can do to set up is to first activate the shell.
pipenv shell
As you can see, it has already switched to a virtual environment that I have already created.

However, if the environment was not present, it's going to go ahead and create a virtual environment using the specification provided in this Pipfile.
Since it already had requests, if you just do:
pip freeze
while being in the virtualenv, you can see that I already have all these packages set up.
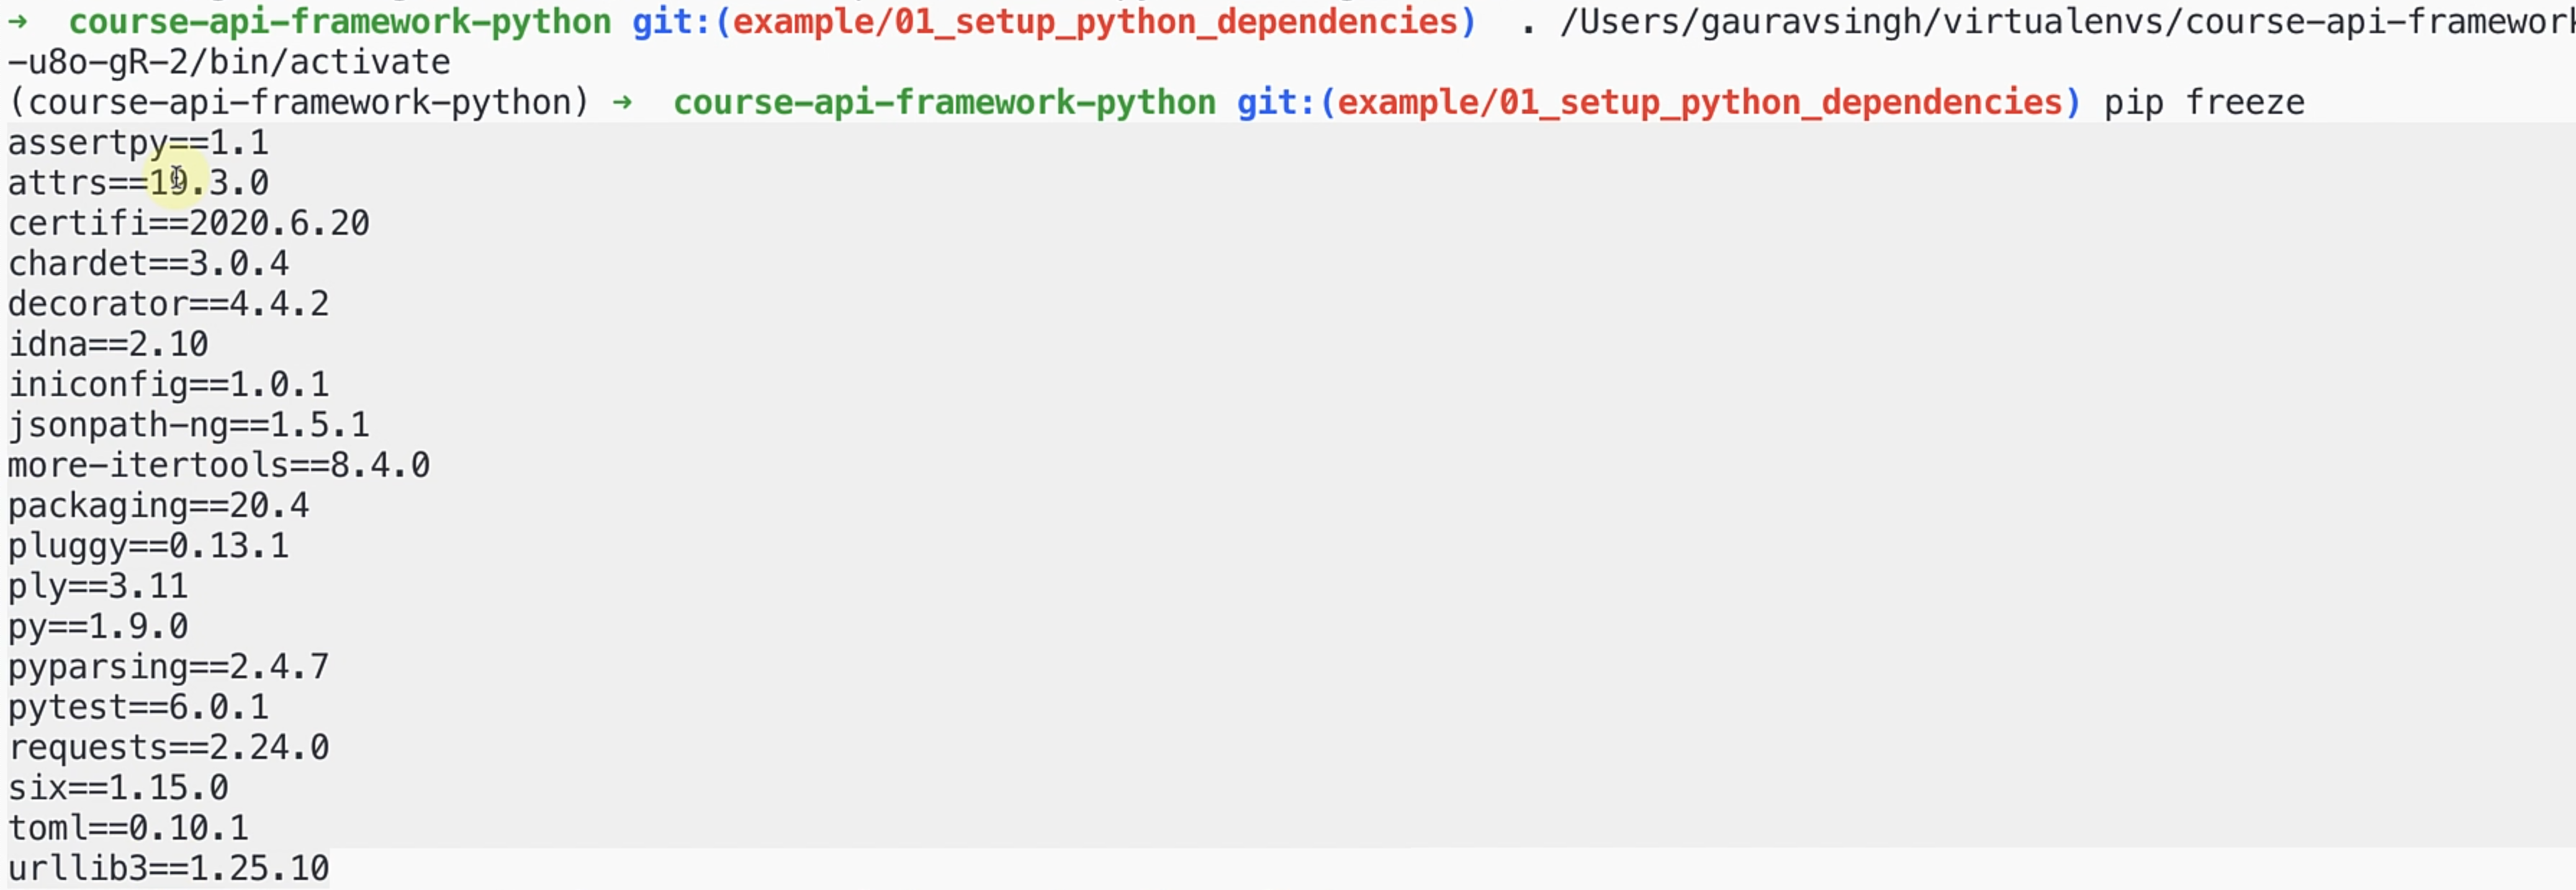
This is good and takes care of most of our requirements.
The key package that we are looking for is actually the requests package, which we'll be using in the next chapter to go ahead and make HTTP requests.
With requests already set up, we would also want to go ahead and set up pytest in this environment, because that is the default test runner we'll be using for all of our tests.
What you can just do is:
pipenv install pytest
You can see Pipenv is now fetching the Pytest module from the Python package index, and then it's also finding that my lock file is not updated and it's going to go ahead and update that as well.

Let me just show you how this looks in Pycharm, which is the primary editor we'll be using for our framework.
If you want to go ahead and use VS Code or something equal, then you can set up your own virtual environment and all the other things.
However, I find that Pycharm is quite intuitive and easy to use, even for beginners in Python.
Pycharm is the primary editor that I use for all my Python code, so we are going to also use the same thing.
So after Pipenv has already fetched Pytest for us and updated the Pip file, if you just take a look at Pipfile quickly, you can see that now it has Pytest as well as a package.
Let's take care of some setup on Pycharm so that it's already well set up for us.
Here, I have the Python project and it's already checked out for the first chapter's branch.
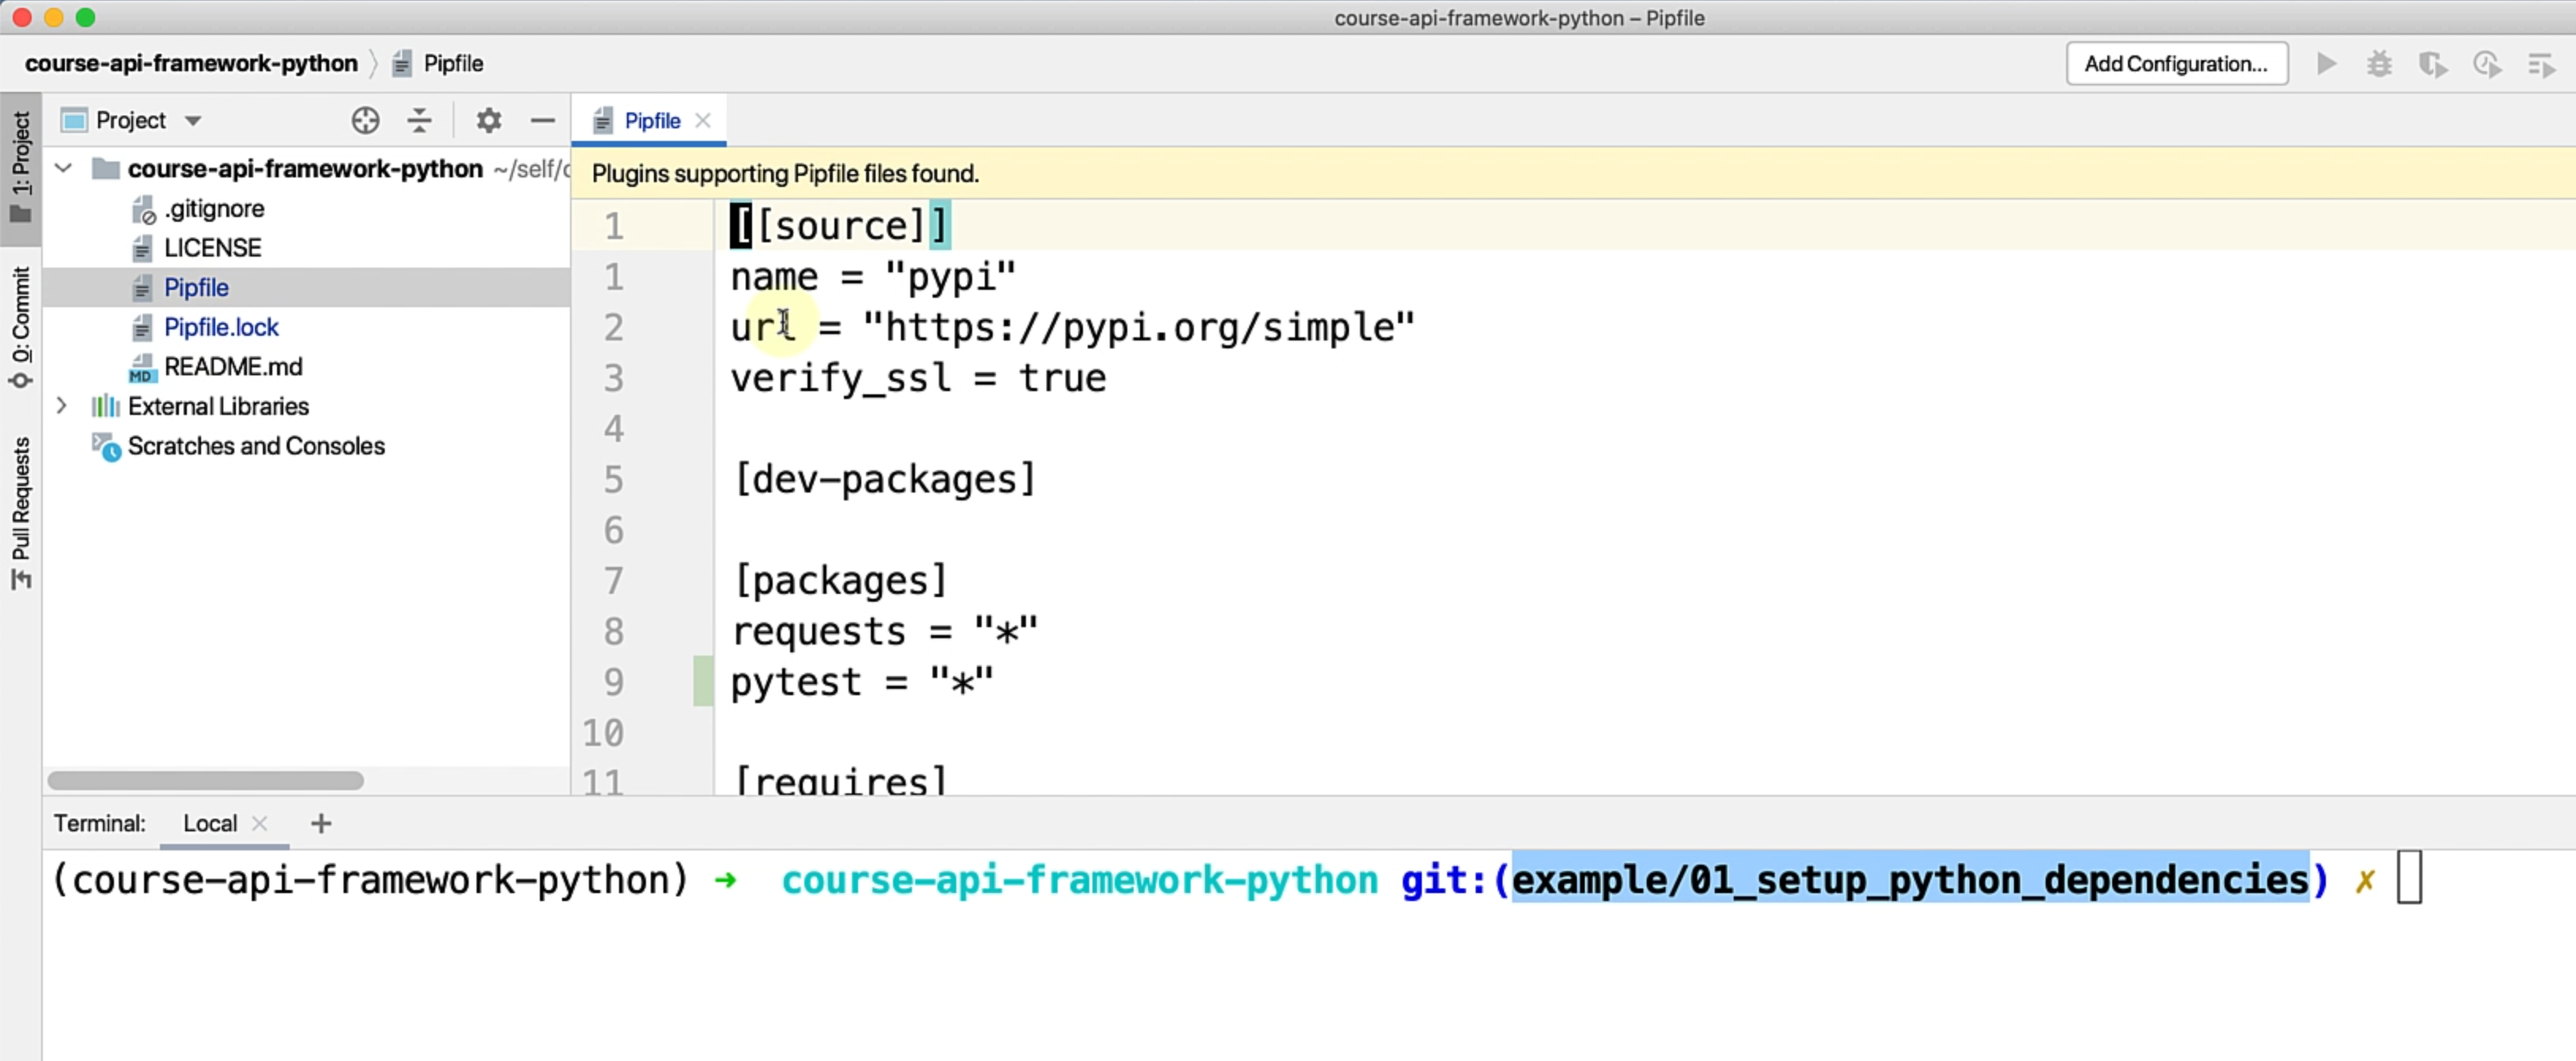
As you can see, I have the Pipfile that we have been working with so far.
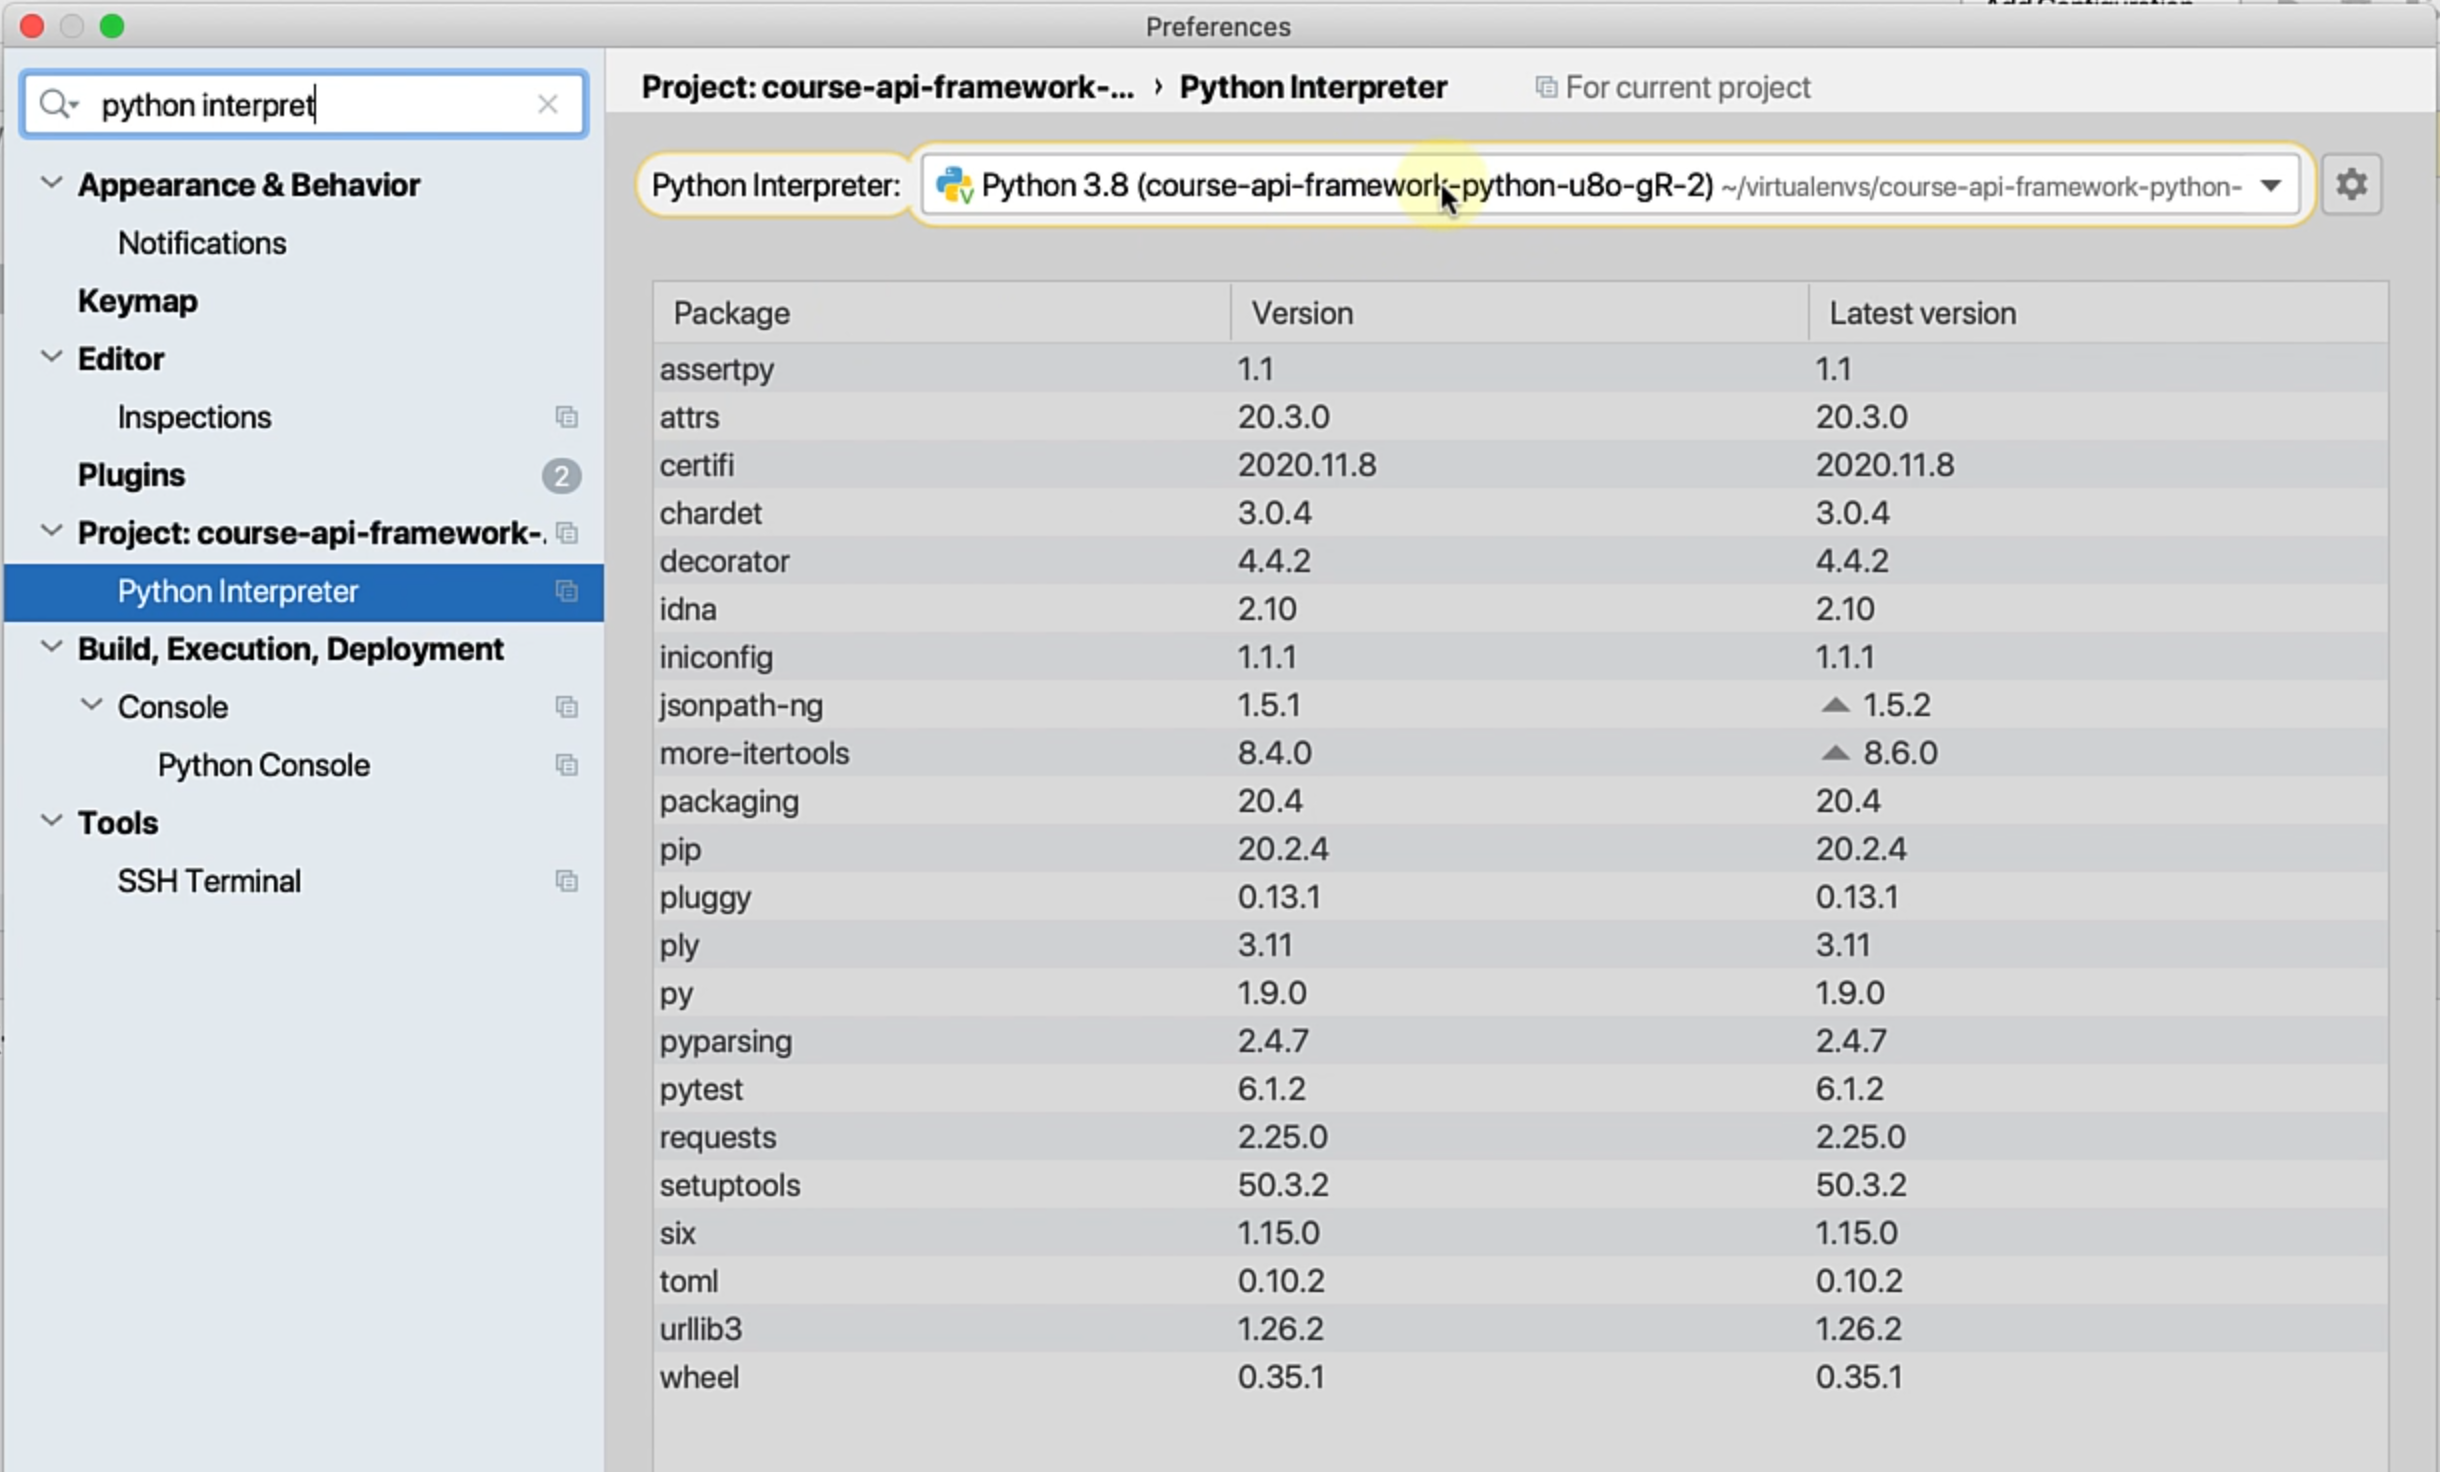
One setup that you might want to do is make sure that your Python interpreter is actually correct.
If you go to your Python interpreter, what you'll see is I have the correct virtual environment that was just created already set up.
However, if that's not already set up, you can click on this gear, go to "Add".
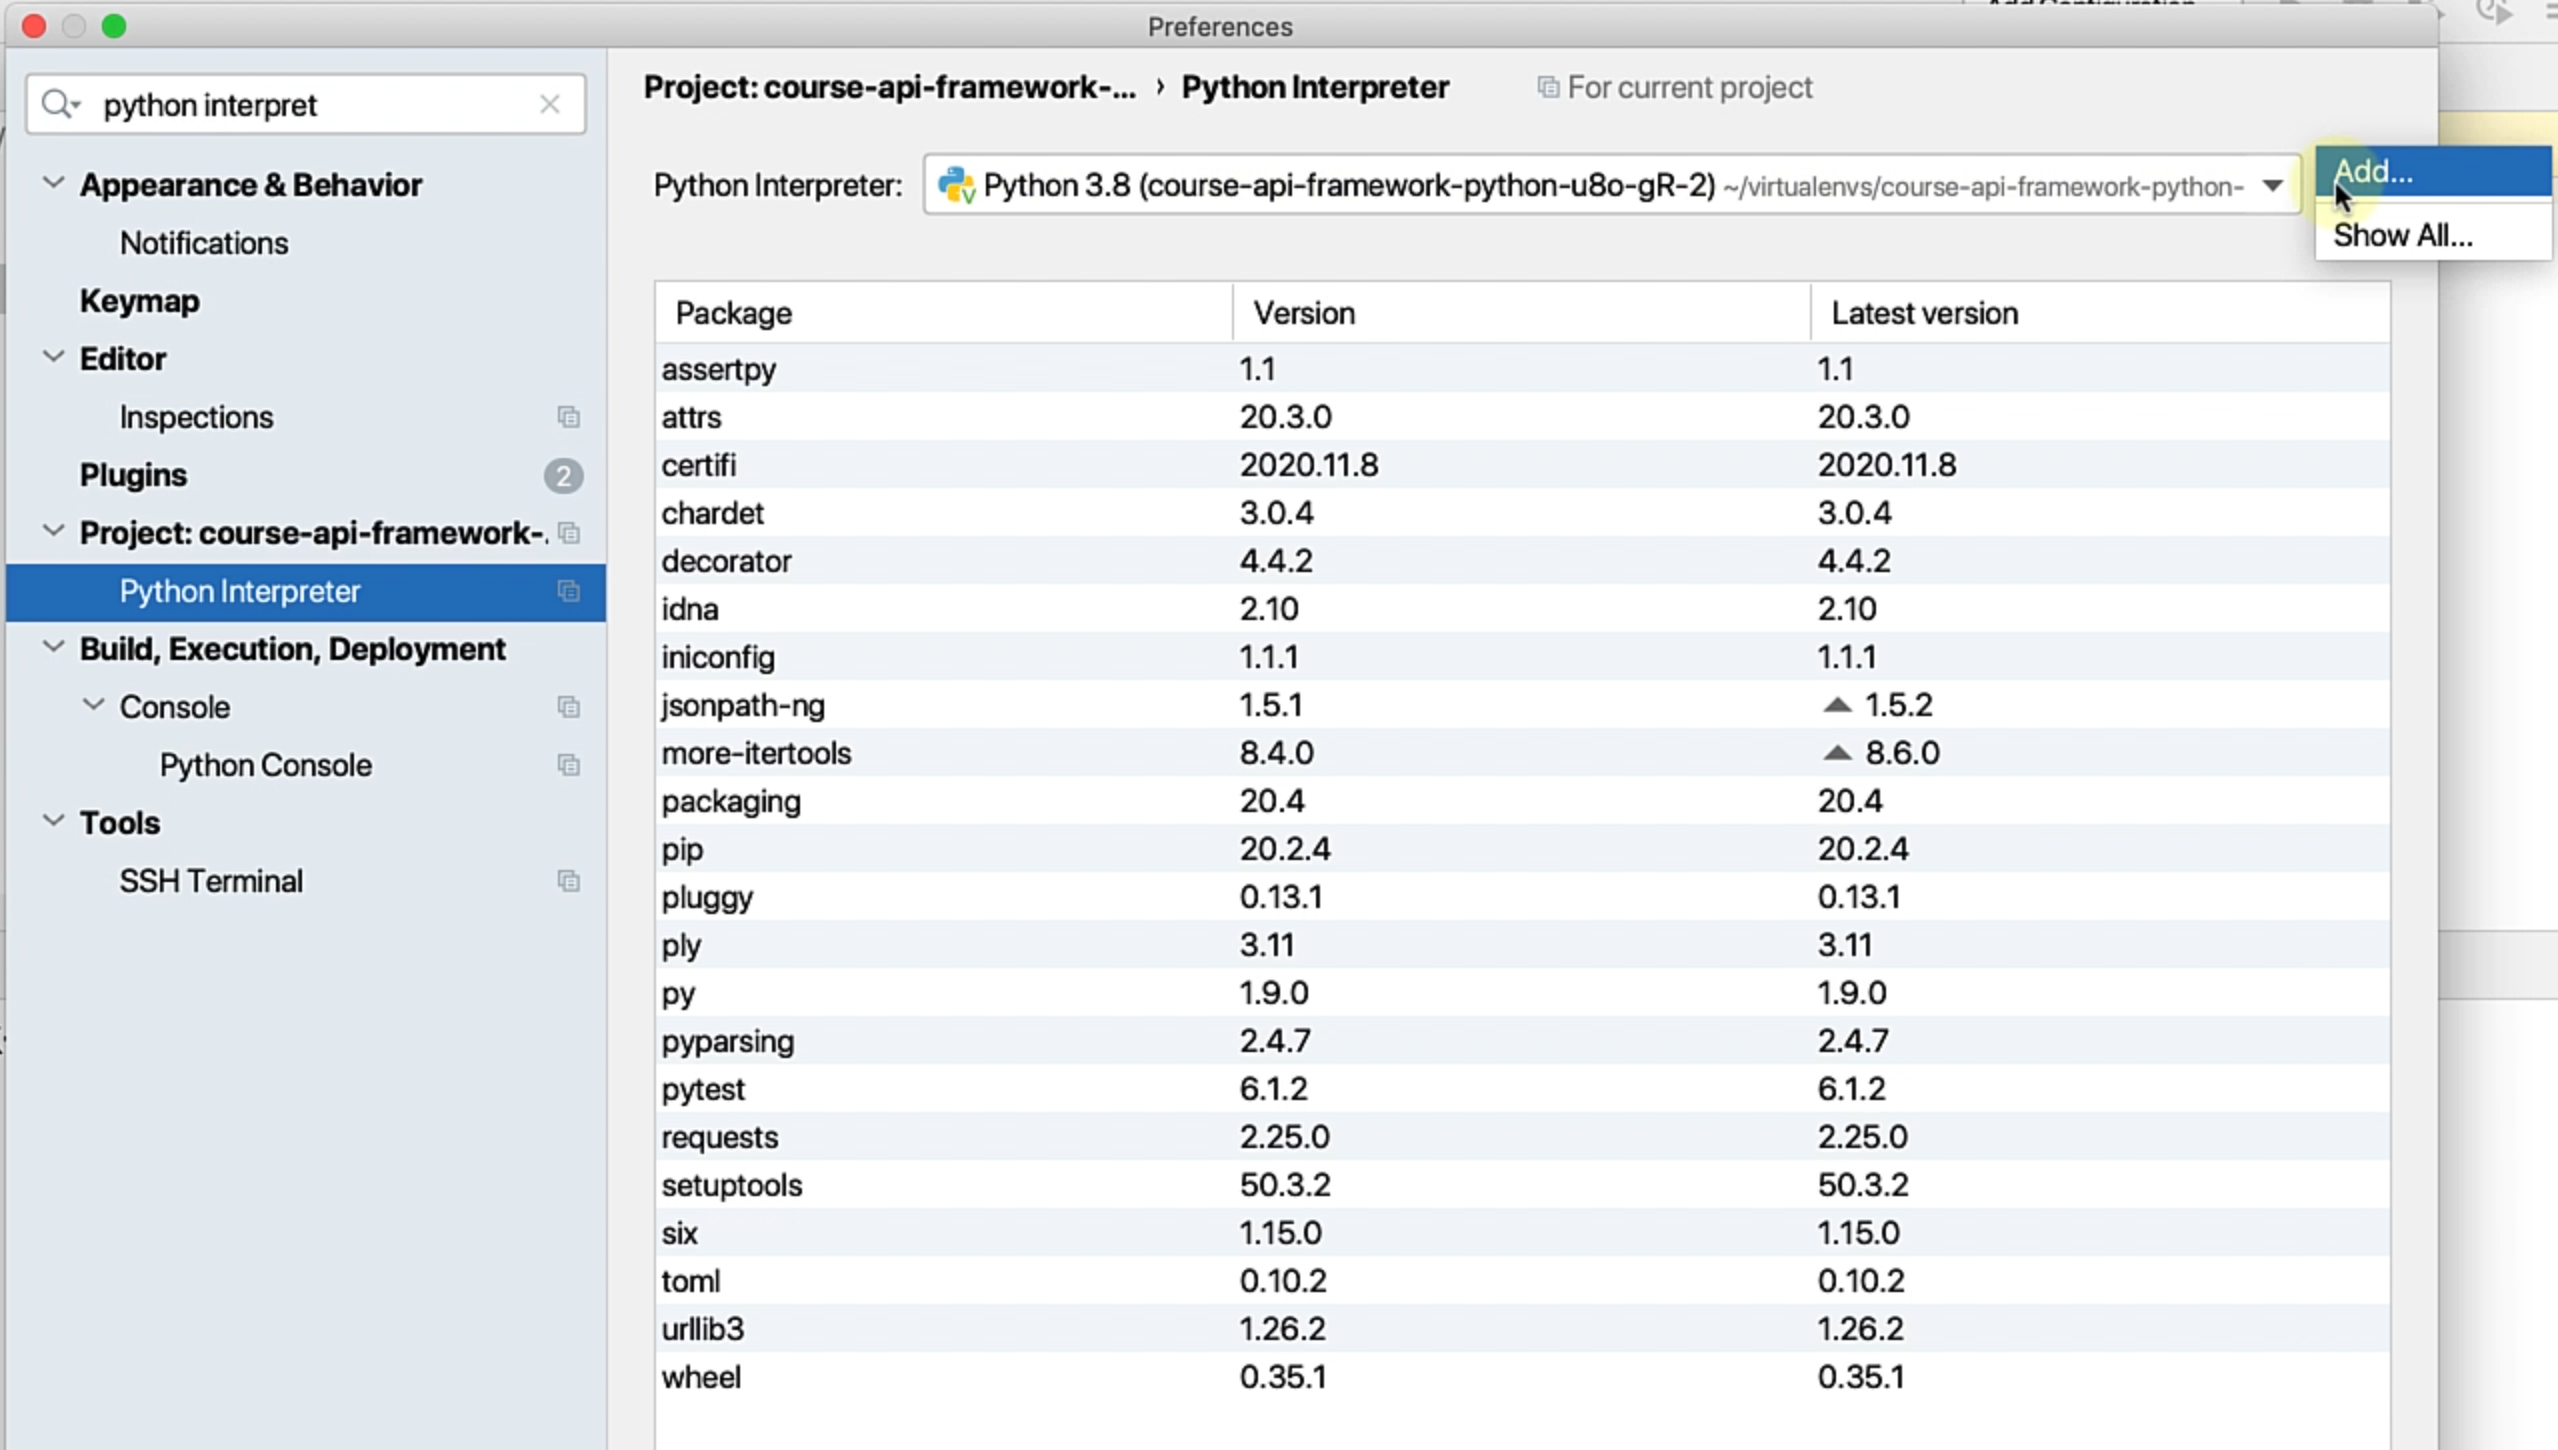
In the "Virtualenv Environment", either choose to create a "New environment" within Pycharm itself or if you have already used the command line and created the virtual environment, then you have to go ahead and set up that.
So what you can do is search for your specific virtualenvs and in my case, since I have set up $WORKON_HOME as a virtualenvs directory in my user folder, every virtual environment that we create is going to get created here.
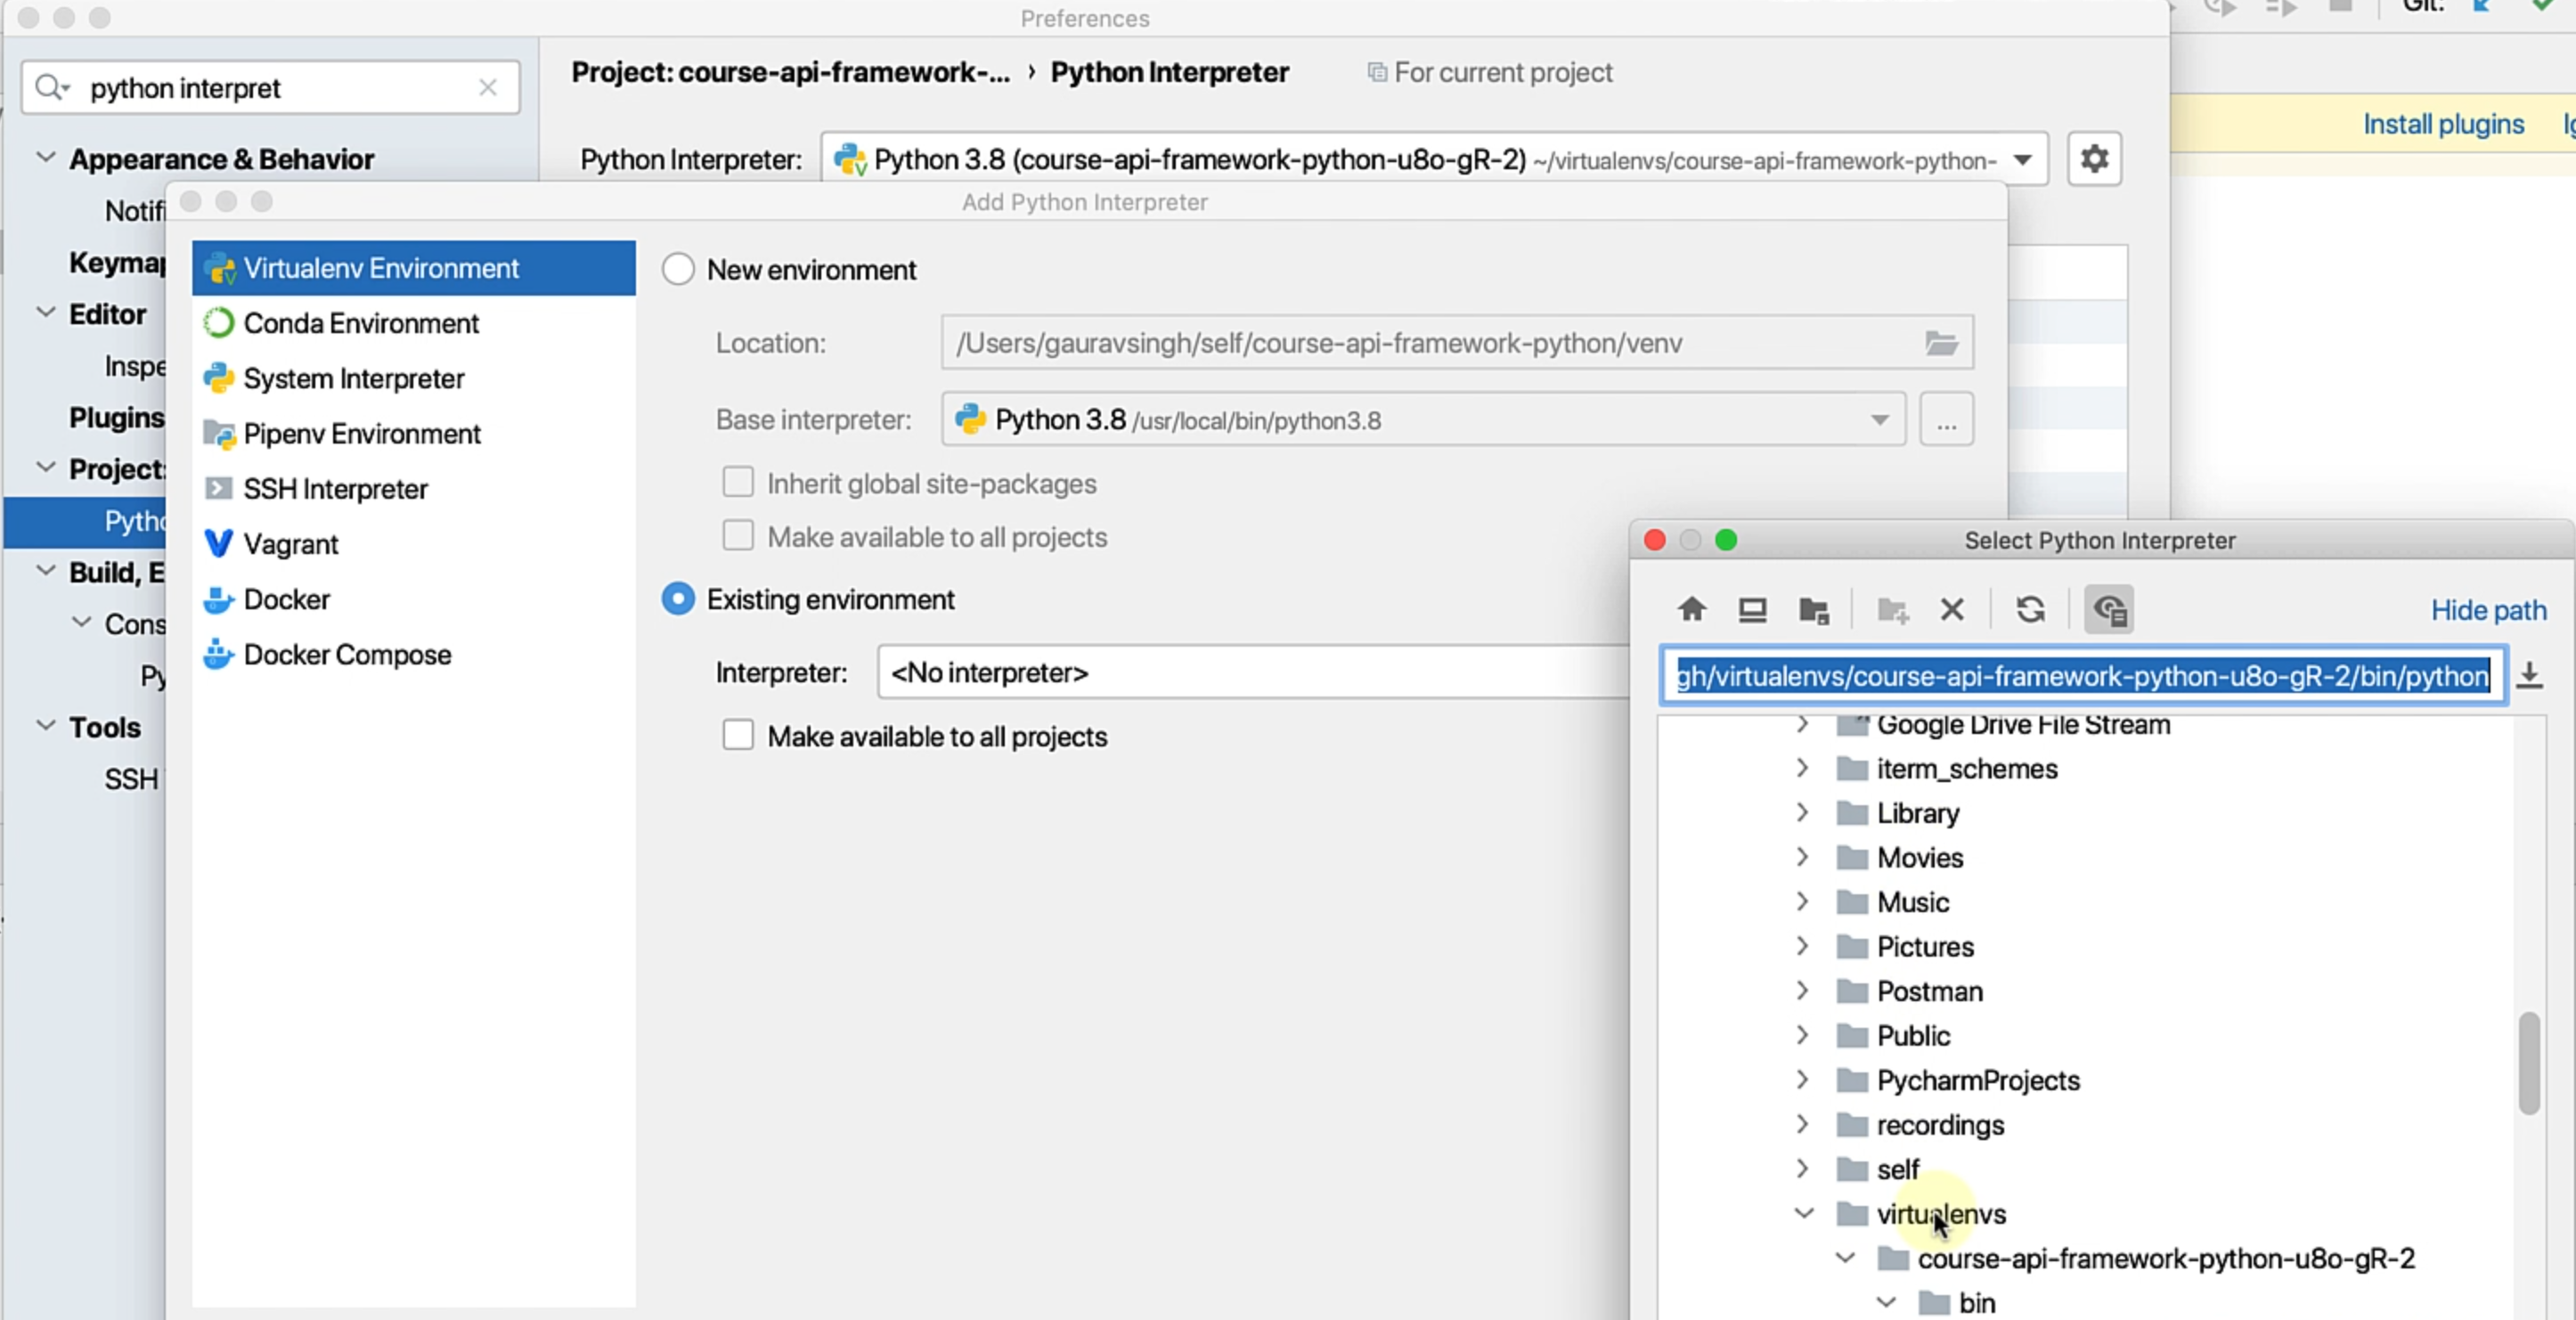
You can see that here I have the course-api-framework-python virtualenv.
You need to go to the bin directory and then select python.
That's going to make sure that your project takes care of that interpreter.
Optionally, you can also "Make available to all projects" if you have a generic virtual environment that you want to use.
It's up to you.
Pycharm gives you a lot of configuration options on how you want to use it.
Now, we have already set up the interpreter as well as basic packages like requests and pytest.
We are almost set to go ahead and start building our framework.
However, one final thing would be to go to "Preferences", search for "runner", and make sure that your "Default test runner" is "pytest" and not "Unittests", because that's what we are going to use.
That's it for the first chapter.
You already have Python set up.
You already have the required dependencies and we are all set to start building a framework.
