

Transcripted Summary
In this lesson we continue with our story and look at the basic Git concepts, committing and pushing. If you know these concepts, you will be ready and armed for the upcoming chapters.
To put the indexed files which we have in the staging area, definitely to our local repository, by linking them to a snapshot and a commit we have to commit them.

Only then we can be assured that our changes are usable and safely stored. Well, that's not entirely true. To be really on the safe side, we have to push the commits to a remote repository.
# Commit Messages
When you create a commit, you can add a so-called commit message.
A commit message is, besides the content, the second most important thing you can add to a commit. A commit message lets you know what the committers intention was with a particular commit.
When you commit with a clear and precise message, your teammates will be able to understand what your exact intention is with that commit.
How do we write a good commit message?
Well, that's actually not that hard because you just have to follow the Git convention.
Git uses the imperative form in all that it is doing. Init, clone, add, commit — easy, isn't it? Let's have a look.
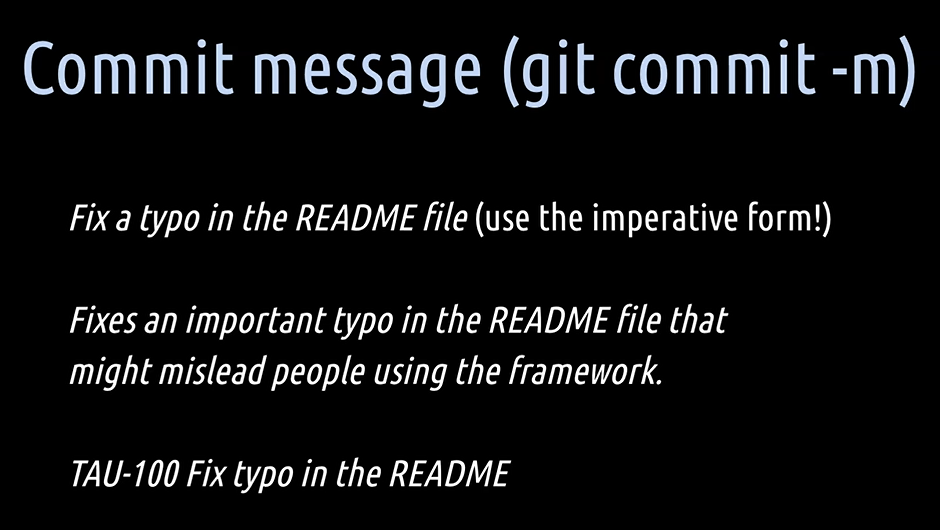
A good commit message consists of 3 parts:
- a short, precise title
- a body which can be a bit longer
- a one liner at the bottom
The title states what the commit will do once it is applied. For that, use the imperative form and ask yourself what this commit will do once it is applied. Then start writing with an upper-case letter. For example, this commit will “Fix a typo in the README file.”
The body then explains more deeply why exactly you did this commit. And at the bottom, you optionally can **add a reference **to an issue tracker system. For example, a JIRA issue number.
Good commit messages are like healthy eating habits. Most people know they are good for them, but just a few actually manage to follow them on a daily basis.
Good commit messages take practice and discipline to get used to. But once you are in the habit of writing them, you will learn to appreciate the many benefits that come along with them. So, from now on, you know how you can impress and inspire your teammates with your excellent commit messaging skills.
# Let's help Jessica to create her very first commit.
First, let's use git status to see where we currently are in Git. Git tells us that we have no commits yet. That's absolutely correct.
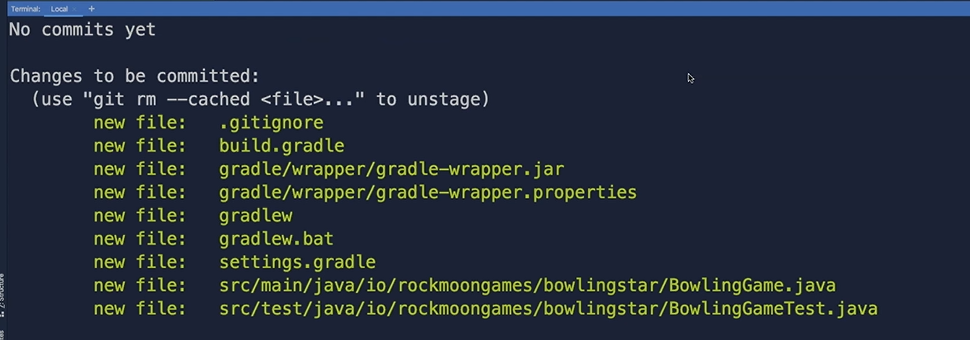
And it says that we have changes which need to be committed.
Now all these files here, all these new files are in the staging area indexed and ready for our very first commit.
Now we have three ways how we can create a commit.
Simply hitting
git commitin a command line here would open up our default Git text editor where we can enter a commit message.Or, directly by setting the commit message in the command itself by hitting
git commit -mand then followed by a commit message in quotation marks.
Let's go with just the git commit so that you can see how this works with Git default text editor, which in our case is visual studio code. Git will open up now our default text editor which we have set.
To add a proper commit message now, Jessica asks herself, what will my very first commit do once it is applied?
And her answer to this is: “this commit will ‘Initialize the project’.”
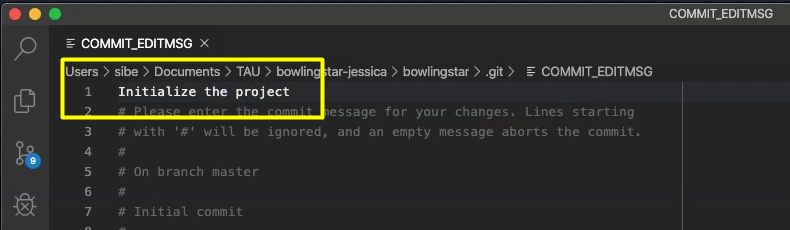
Perfect.
Now we can close our Git default text editor again and we see that Git created our very first commit here.
We can hit git status again to see where we are in Git.
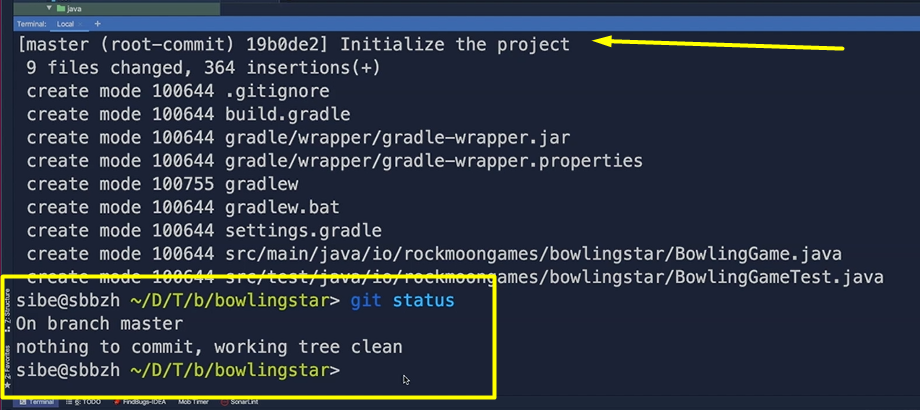
Git tells us we are on the master branch.
We have nothing which is open in the staging area to commit and the working directory is clean.
Now that we have done the very first commit, Jessica wants to see the commit history entry.
We do that by hitting git log.
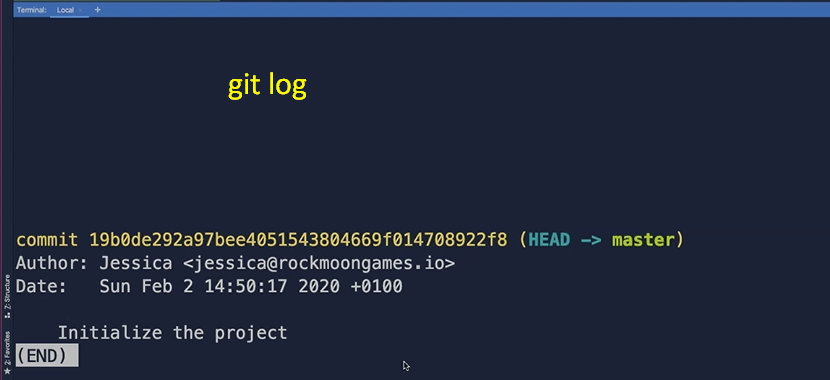
There it is. Our very first commit on the master branch. Awesome.
What do we can see here now is:
the commit itself with the hash
the author with user name and email address
the date
the commit message
Let's recap.
The local repository is located in the objects folder in the “.git” directory.
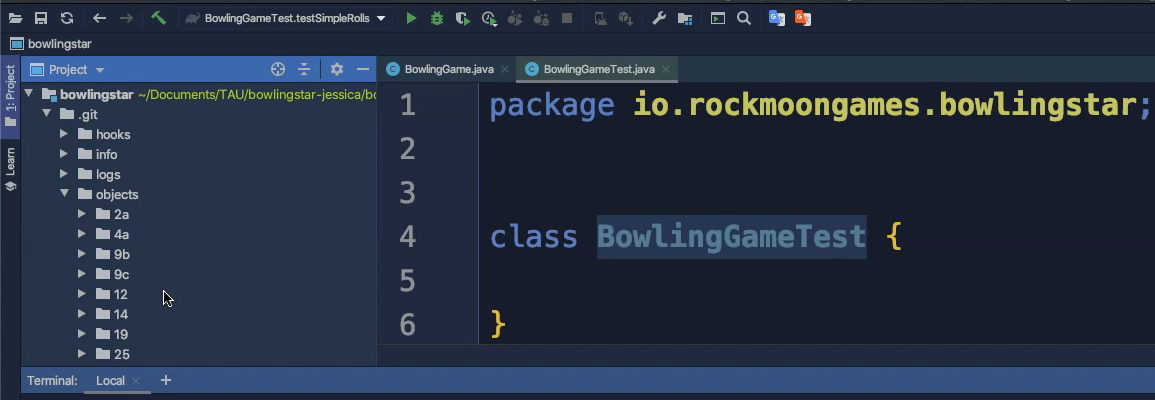
So that is here — “objects” directory.
Whenever we create the commit it creates a snapshot of the files we have in the index and also a commit object which then references the snapshot.
As we already saw before, the files, the blob objects are added to the local repository by staging them.
# Let's go further and have a look at pushing.

Once we do a git push, our commit (or commits, of course), will be sent from the local repository to a remote repository.
Assume we want to work as a team on a development project, we are going to need a Git repository manager like GitHub, Bitbucket, GitLab, Gitbucket, just to name a few, in place.
Now it's the perfect time to push our very first commit, which is on the master branch from the local repository to the company's remote repository manager.
We can do that by using git push.
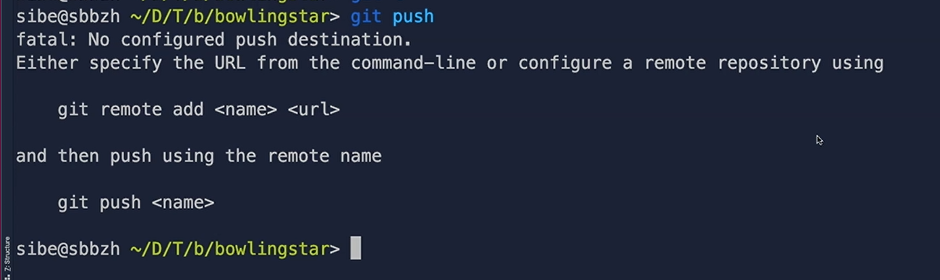
But, of course, it tells us that we first need to add a remote repository.
We head over to the remote repository manager of Rockmoon Games.
NOTE
As a side note here, most often remote repository managers like GitHub, GitLab, and so on, work with some nuances almost in a similar way.
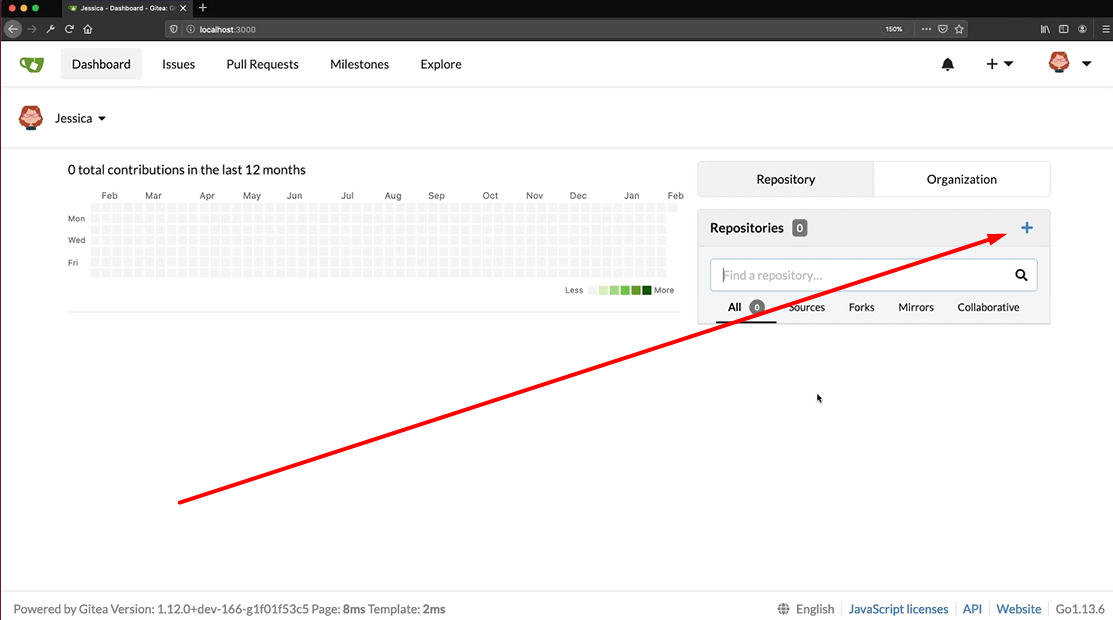
Let's create a repository called “The Bowling Star”.
For that we go to the plus icon here and we set a repository name, “thebowlingstar”. All other the fields, we leave them empty for a moment.
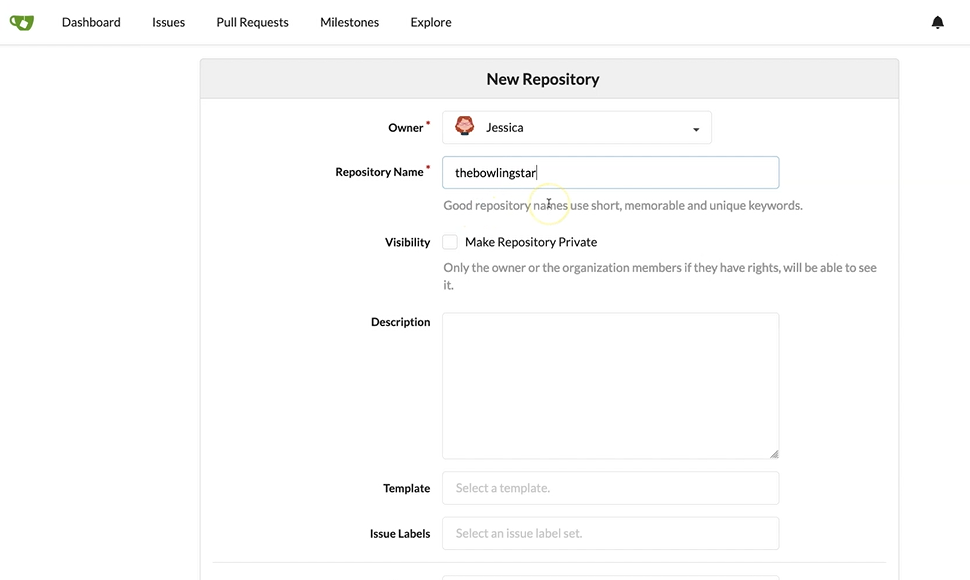
And we click Create Repository at the bottom.
The remote Git repository manager has created a corresponding repository called “thebowlingstar” and all we need from it now is the URL.
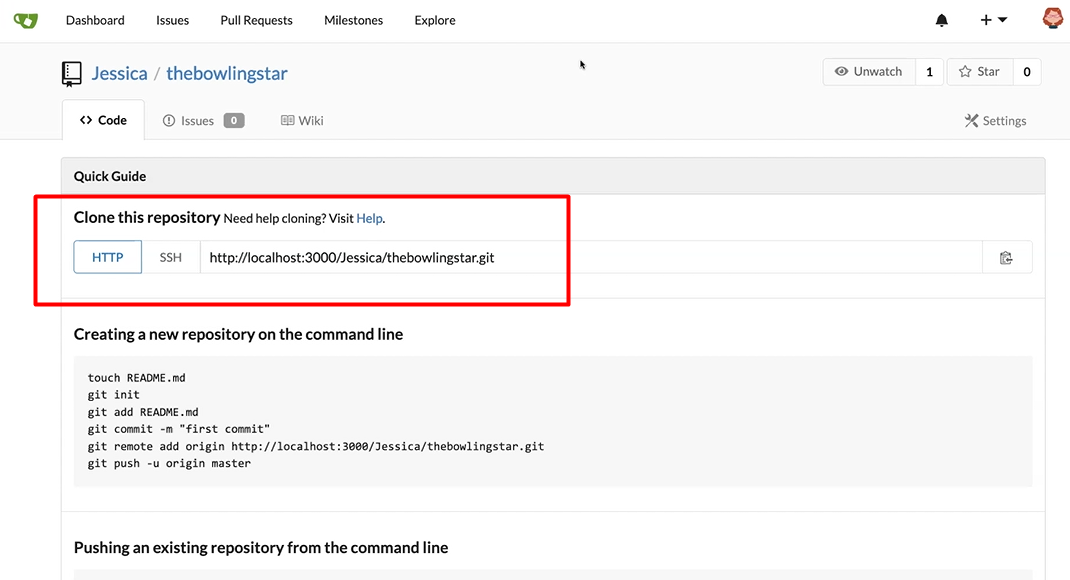
So, we copy that URL and go back to our local development environment.
Here we hit git remote add and then of course a name for the remote repository.
We call it “origin”, but it actually doesn't matter how we call it, we could also name it Black Swan or whatever. Then, we paste that URL to the remote repository manager and hit enter.
Then a git push again.
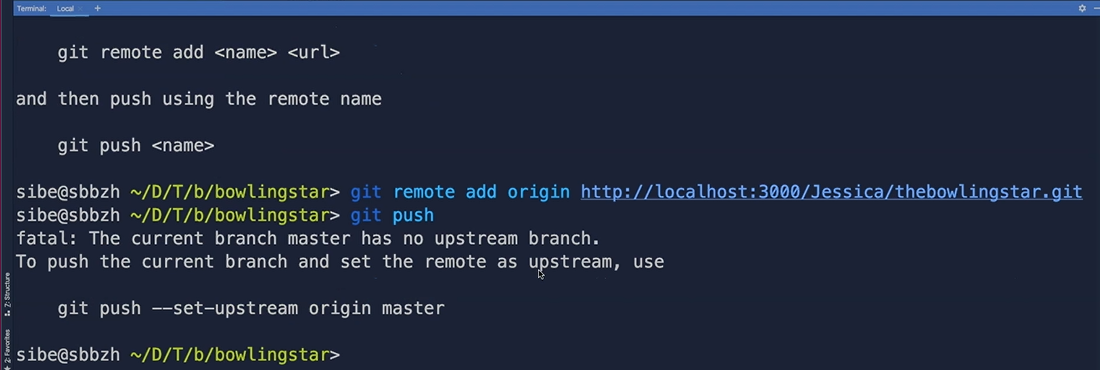
Now Git tells us that in order to push the current master branch, we have to set the remote repo named origin as an upstream and also provide a name for the remote branch we want to push too.
So, let's do this — git push – set-upstream origin master — with name of the remote repository “origin” (that's what we named it before) and then the master branch, because our local branch is also called “master” and we want to have the corresponding remote master branch.
With this command we do all in one. We actually set the upstream origin master and push it directly to the remote repository.
And now we have to enter Jessica's username and, of course, her password to actually write to the remote repository manager.
Perfect.
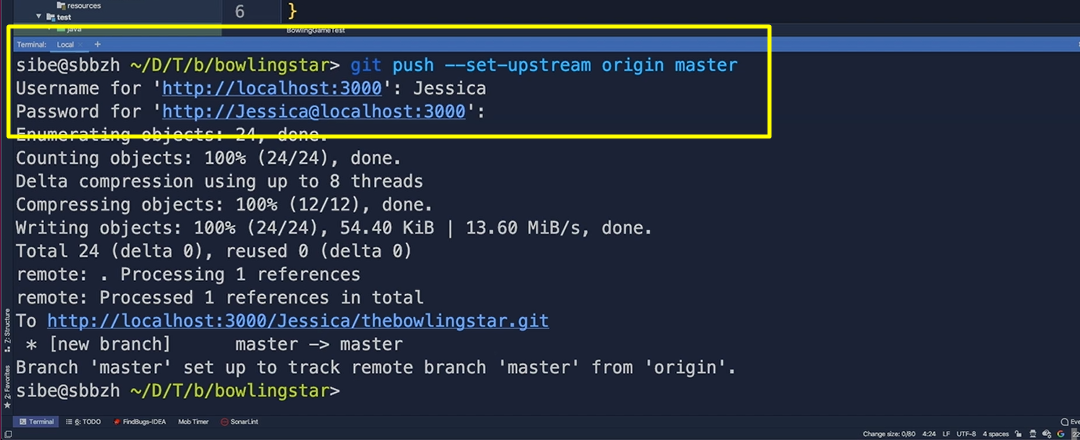
Wonderful.
We pushed our local master branch to the corresponding remote master branch on the remote repository manager.
We can verify that by going to the remote repository manager, refresh that page and we can see we did it.
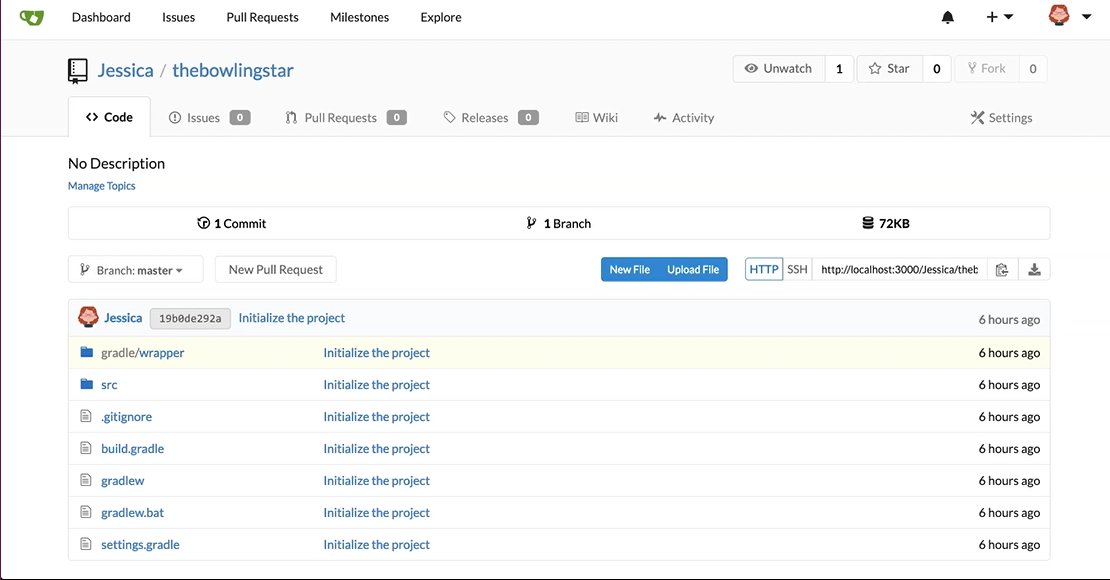
How cool is that?
We push now our very first commit to the remote repository manager here.
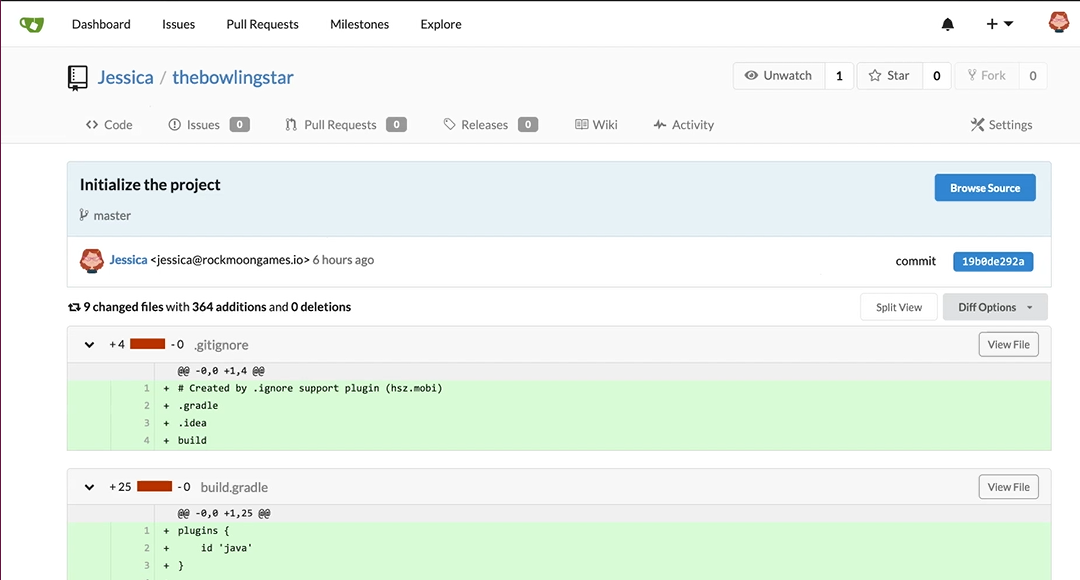
We can click on the commit. We can see the commit message and we can see all the content which we have created in this commit here.
We head back to our local repository and hit git status to see where we are. We see everything is clear.
We are under master branch and we are up-to-date with the “origin/master”, which means our local branch is in sync with the remote origin master branch.
We have nothing to commit, so the staging area is clear and also the working tree, the working directory, is clean.
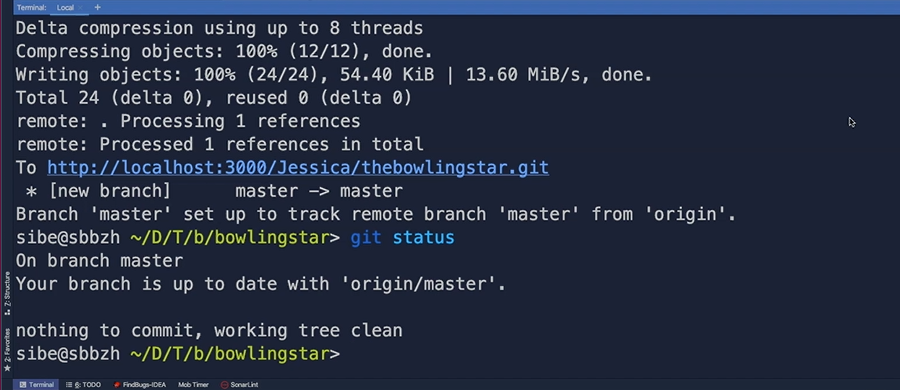
We have no new changes, no new files yet in the working directory.
# Now, Jessica adds her very first piece of test automation code.
Let's close the terminal for a minute and let's pretend we would implement an awesome first test for Jessica. Let's do that.
Create a Test and say public void, and name it “jessicaTestOne”.
class BowlingGameTest {

	@Test
	public void jessicaTestOne() {

	}
}
We open up the terminal and hit git status to see where we are. We have a modified file in the working directory.
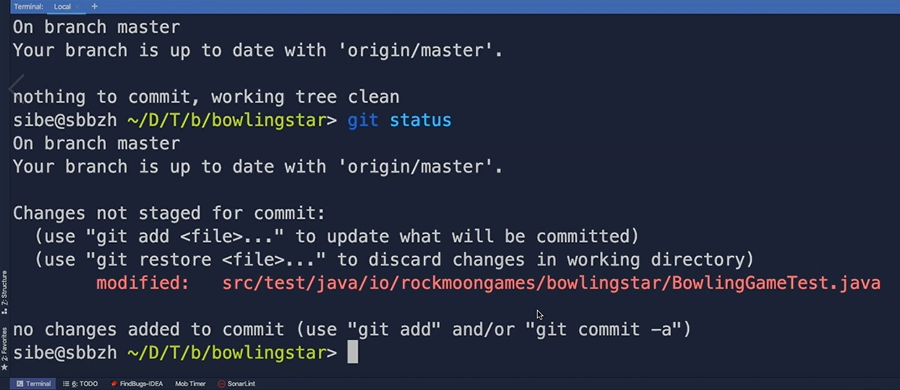
That's true.
We actually have now changed the BowlingGameTest class by adding a first test.
To add this file to the staging area, we can hit git add and then the file name as we already saw before.
Or we can take a shortcut and add a commit and a message in one go from here by writing git commit -am.
For the commit message we ask our ourselves what will this commit do? This commit will add first test.
git commit -am”Add a first test”
We use that -a for adding everything which is in the working directory to the staging area and then the m for adding a commit message. We can hit enter now.
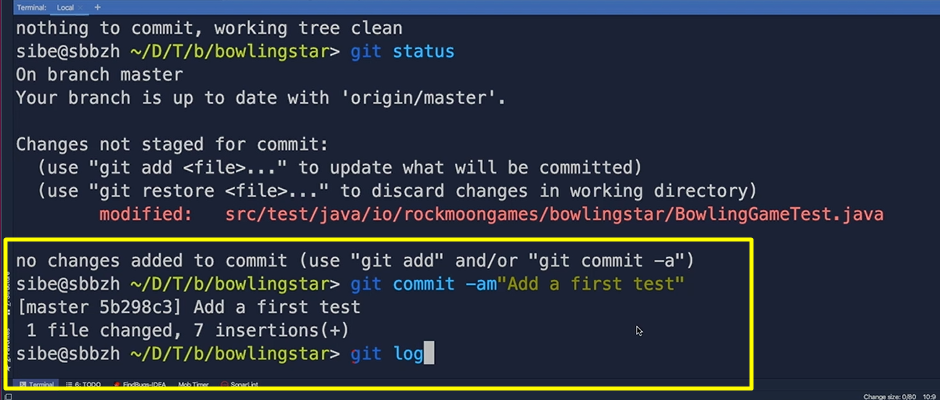
We can check that again if the commit is actually created by Git by hitting git log.
We see, yes, our second commit on the master branch is created.
We can hit again git push to push the modified master branch — which means the master branch with its second commit to the remote repository name origin.
So, we use git push origin.
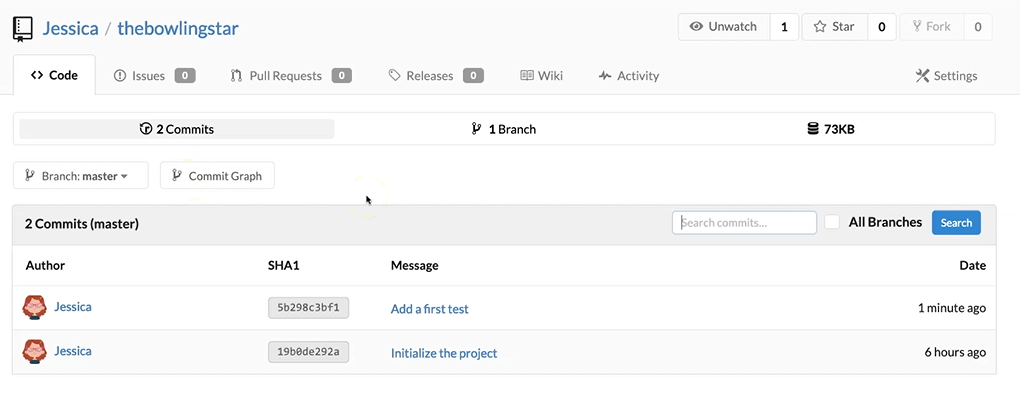
Of course, we have to go to the remote repository manager to check if it's actually there, then refresh that page. See?
Also, our second commit arrived safely on the remote repository manager. We can click again on commits and see there it is, our second commit on the master branch.
We have now done a full round trip of initializing a repository, adding something to the staging area, committing to the local repository, and finally pushing a branch with its commits to a remote repository manager.
Jessica is super happy now.
She mastered her first task in Git successfully. She's already looking forward to working together with Lisa.
Resources
Quiz
The quiz for this chapter can be found in section 3. 3
