

Transcripted Summary
This is the last hands-on chapter in this course. Let's dive deep for the last time and learn how to do cherry picking, resetting, and reverting.
The time has come, and Jessica and Lisa are given their last and final challenge for working together on their test automation framework.
Their task is as follows. Jessica shall create a new branch in Git and implement a new test. Lisa shall also create a new branch and implement a new test.
After that, Lisa shall integrate, with the help of cherry picking, the new commit a test from Jessica, in her own branch.
Before we start helping them, first, some theory. Let's pick some cherries.
# Cherry Picking
We might get into the situation one day, where we just want to take some specific changes in a commit from one branch and apply them to another branch. That is exactly what cherry-picking allows us to do, either forcing a commit or a series of commits.
Similar to rebase, it will create a new commit, or commits, and put them on the top of a branch.
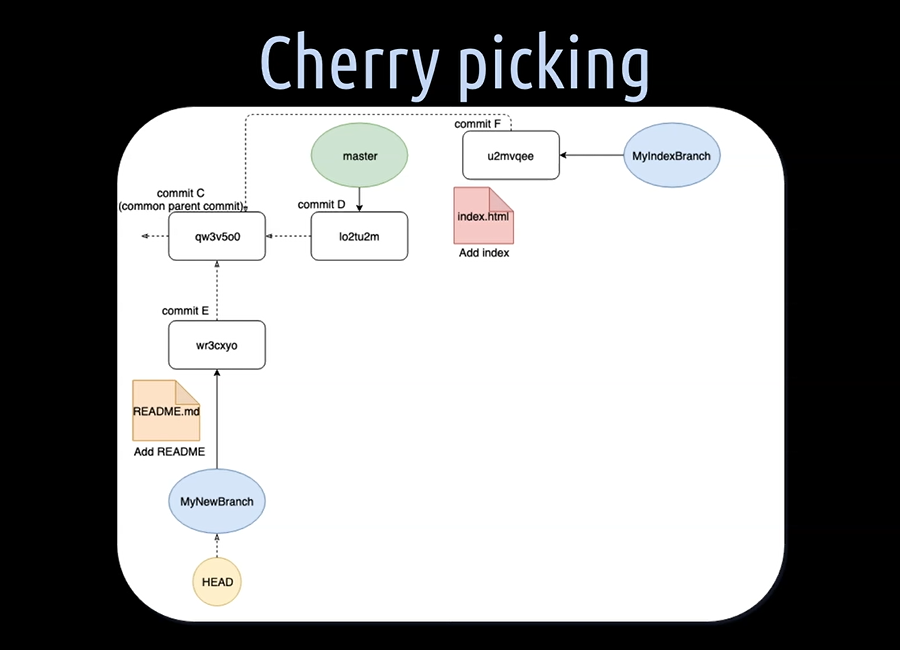
Let's have a look at our, by now, famous example.
We have a “MyNewBranch” with a README file and a separate, “MyIndexBranch”, with an index file. All we want to have, in the end, is the index file in our “MyNewBranch”, with the README file.
For doing that, we set the “MyNewBranch” as the active branch and hit git cherry-pick <commitHash> followed by the commit hash of the commit we want to cherry-pick.
In our case, this is the commit F.
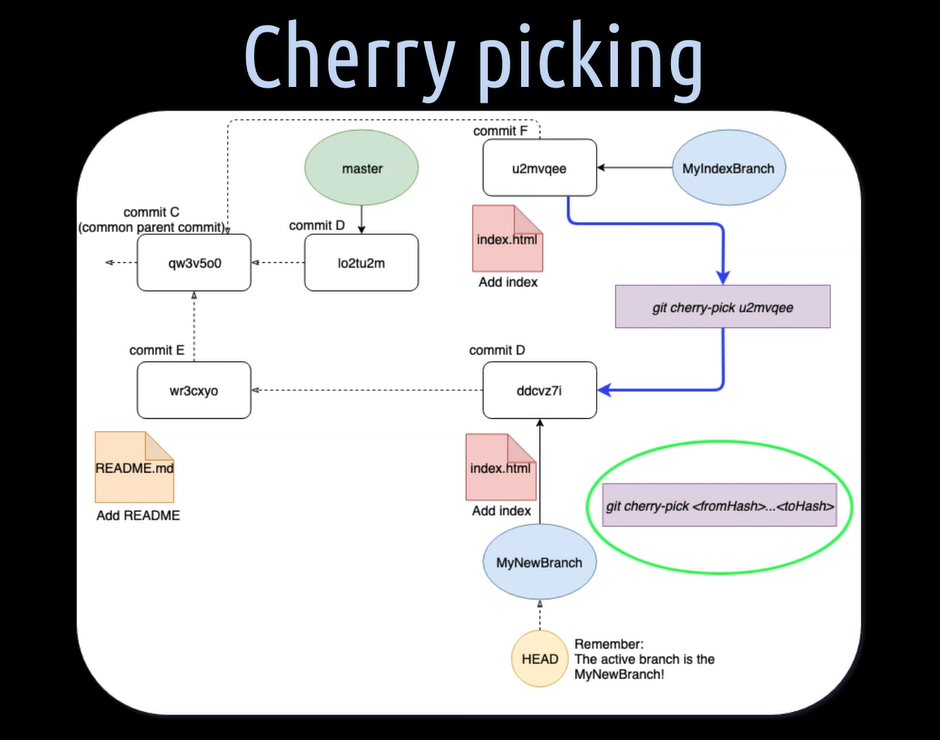
Git then reapplies this commit by creating a new one on top of the “MyNewBranch” and moves the branch and the HEAD pointer accordingly.
If we wish to do that for several commits in a row, we just have to write git cherry-pick followed by the hash of the commit we want to start with and ending with the commit hash of the commit we want to end with.
That's it with picking some cherries. Simple as that.
Okay, let's create a new test for Jessica on a separate feature branch.
So first, we will create a new feature branch — git checkout -b feature/test10-jessica. Great.
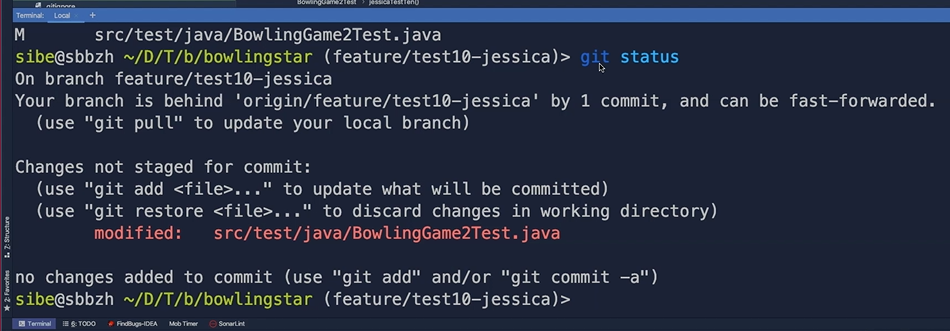
Then, we will create a new test in our BowlingGame2Test class and call that test “jessicaTestTen”.
We hit git status to see where we are.

Good.
We have modified the BowlingGame2Test class, so let's add that to the staging area with git add and then the name of the file.
Check with git status again.
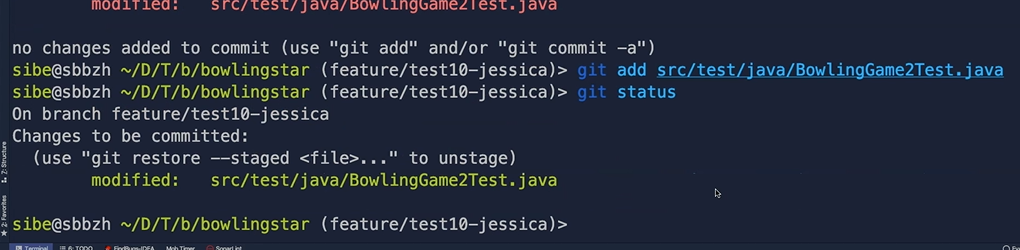
Yes.
Now we have changes to be committed — git commit. Let's add the commit message. So, this commit will “Add a tenth test”. Great.
Then next, we will push that new branch to the remote repository, by hitting git push origin.
And then we have to set it as upstream branch, of course — git push –set-upstream origin feature/test10-jessica. We push that and that's basically it.
Now, we switch over to Lisa, as Lisa wants to grab this commit into her new feature branch.
Let's create a new test for Lisa, in a separate feature branch.
So first, we will create a new branch and let's call that branch “test11-lisa” — git commit -b feature/test11-lisa. Good.
Now we will create a new test in the BowlingGameTest class and not in the BowlingGame2Test class, because we don't want to have merge conflicts when cherry picking.
And let's call this new test of Lisa, in the BowlingGameTest class, “lisaTestEleven”.
We hit git status.
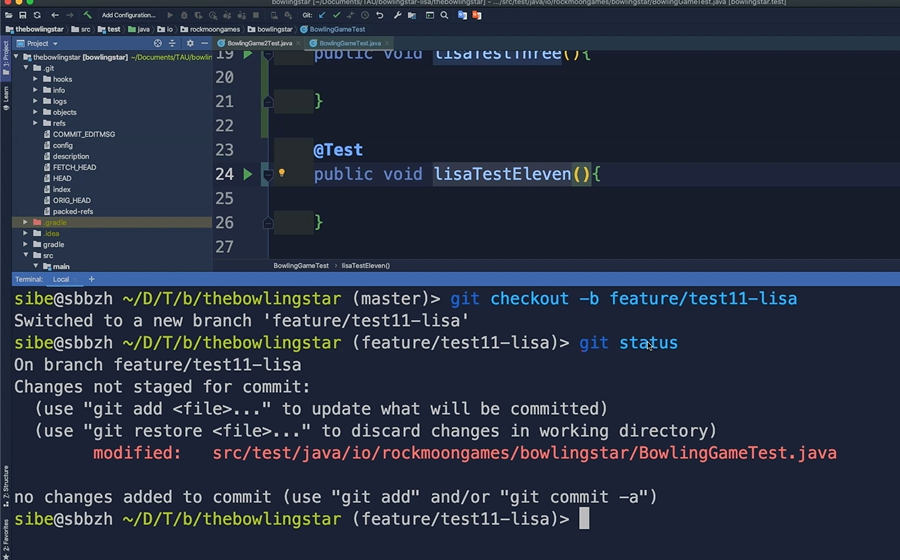
Then, we add the modified file to the staging area, using git add with the name of the file.
Now, we hit git status again.
Next, we will create a new commit, on that test11-lisa feature branch, by hitting git commit, and we say this commit will “Add a eleventh test”.
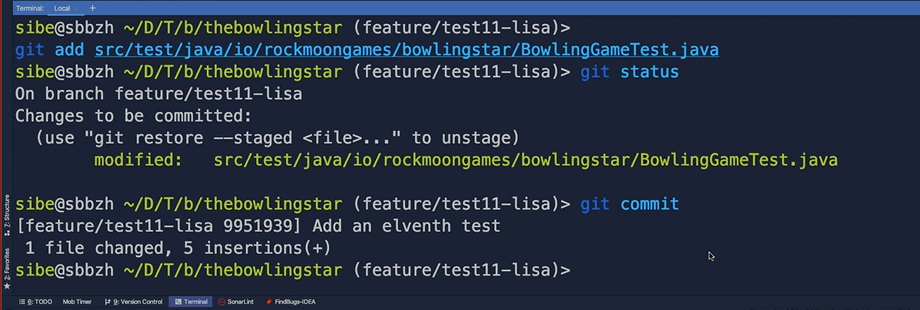
Very good.
Now, we have to git fetch the new changes, the new commit from the remote repository.
Now we can see that we have fetched the new feature branch from Jessica, the test10-jessica feature branch, into our local repository from Lisa.
Now, to cherry pick that commit from the test10-jessica feature branch, we have to know its commit hash.
There are several ways how we can do that.
First, we could go to the remote repository to see how the SHA-1 hash value of this commit looks like.
On the remote repository, we have to select the test10-jessica feature branch and then that specific commit from Jessica.
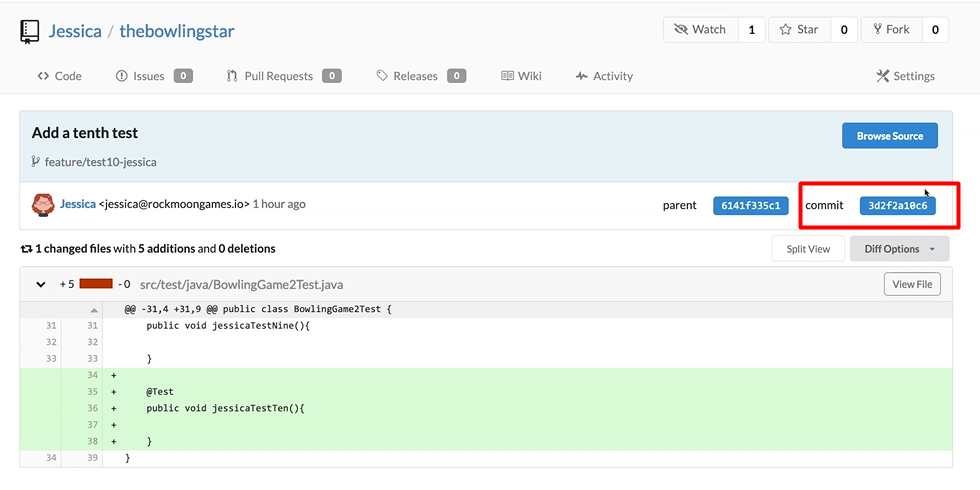
So, this here is the hash value of this commit.
Let's have a look at another option, how we could get that hash value.
Now another option, how we can find out what the hash value is of this new commit on the test10-jessica feature branch, we can also use a UI Git client.
So, let's use the built-in from IntelliJ. We go to Version Control.
In here, we can select the Add a tenth test from commit on the feature test10-jessica branch.
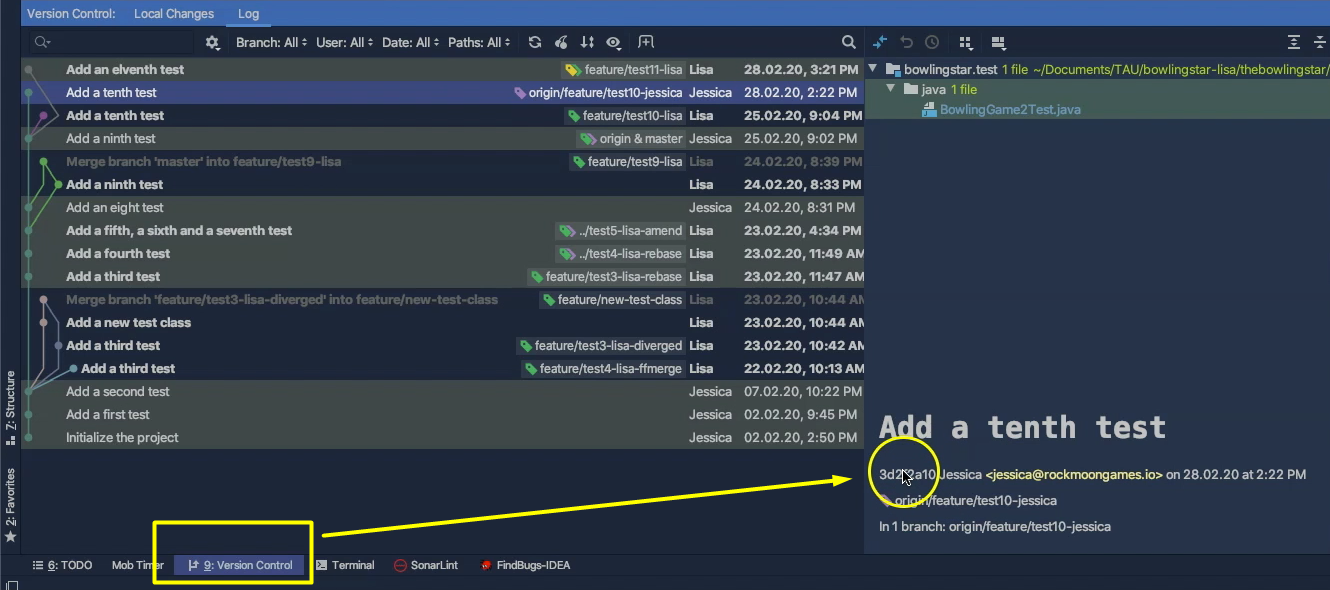
Here we also see the commit hash of that commit.
Then, a third option would be to check out that particular remote branch and create a corresponding local branch by hitting git checkout -t origin/feature/test10-jessica with the name of the remote branch.
The dash t is used for setting up a local branch, which is tracking the remote branch.
Then, once we are on that feature test10-jessica branch, we just have to hit git log and there it is.
“Add a tenth test” and its commit hash, so we copy that commit hash here.
We will go back, then check out the feature branch from Lisa — git checkout feature/test11-lisa.
And now we can cherry pick that commit from Jessica into the branch of Lisa, by hitting git cherry-pick <commitHash> followed by the commit hash. And now, we just have to hit enter.
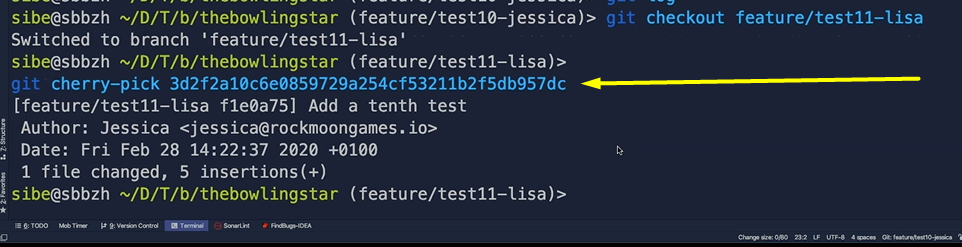
Wonderful.
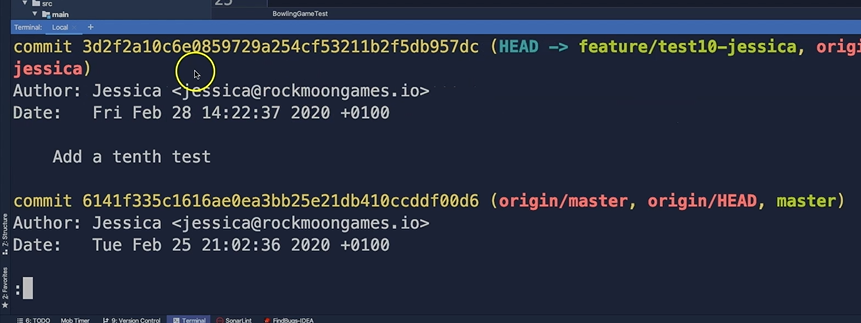
Now we can hit git log and there it is.
We cherry picked the “Add a tenth test” commit from Jessica, into the local branch from Lisa.
Notice here that Git preserved the author and the date of the creation of the original commit and packed everything into a new commit, by just changing the commit hash.
It's time for Jessica's final task.
One last time she shall create a new branch, commit a new test and then practice the concept of resetting.
Let's first have a look, again, at some theory.
# Resetting
Resetting is, besides reverting, probably one of the least understood Git concepts.
Resetting is a bit harder to understand than all the other concepts, but in the end, and especially after some practice, it is actually not that complex.
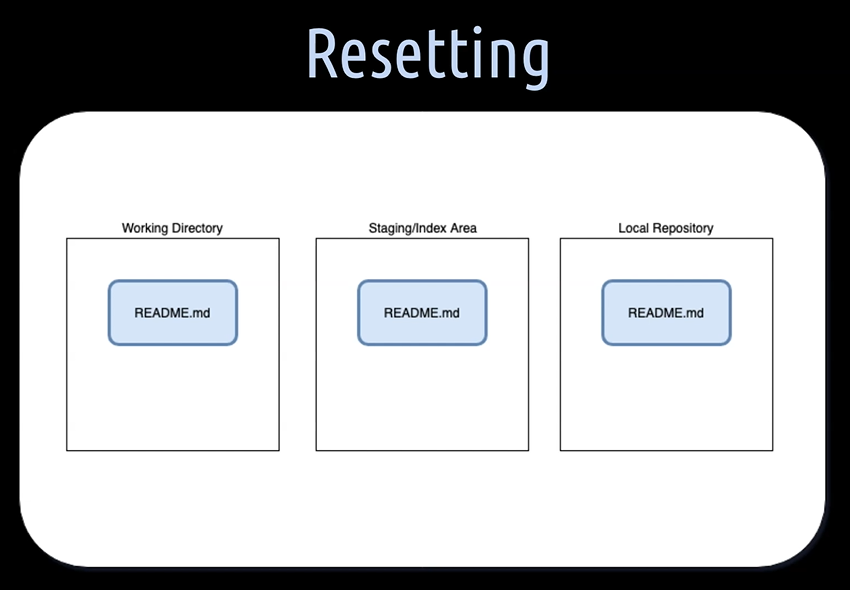
Let's say we have the following situation. We created a README file in the working directory, added that to the staging area and finally committed that into the local repository on our “MyNewBranch”.
Then, we did some refactoring and added and committed a second version of the README file in the same way. But wait, what about our first version of the file?
Remember, we learned that Git keeps all our previous commits, so the first version of the README file, here in blue, is still there.
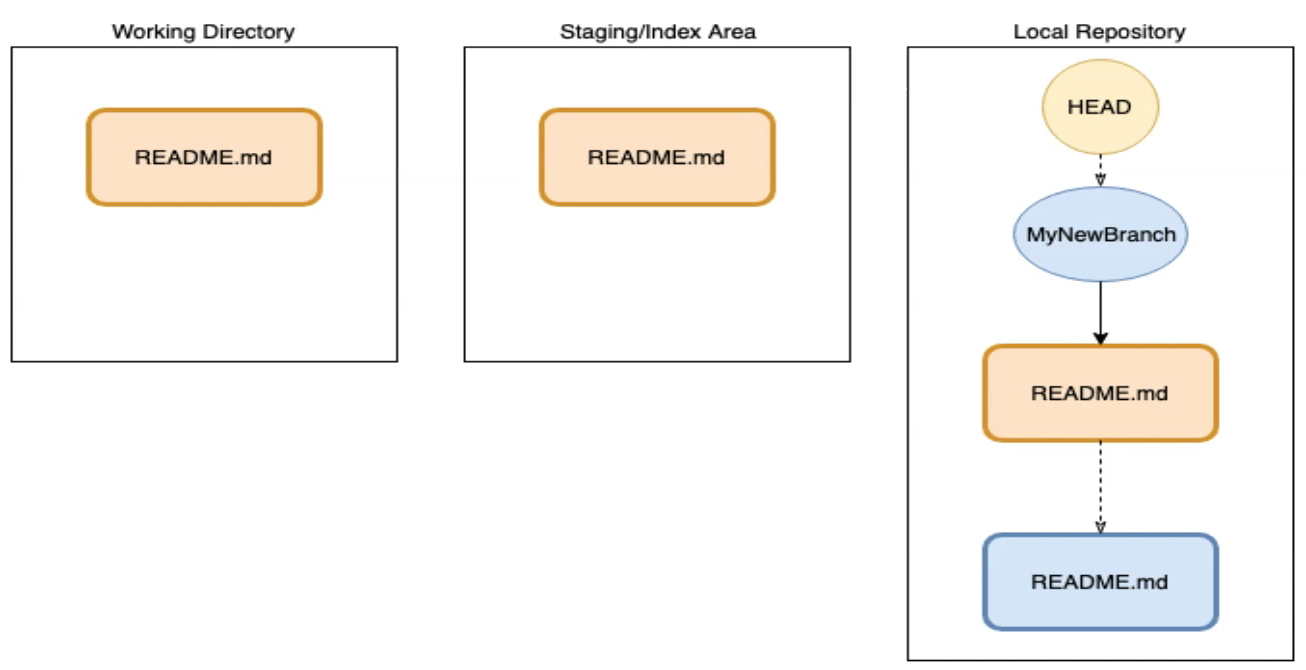
It is just that our branch and HEAD pointer is currently pointing to the latest commit, and we with it also to the latest version of the README file.
But what if we want to have back the first version of the README file?
Exactly for that purpose, we can use resetting, to reset the HEAD pointer of our active branch, so that it points to the commit with the first version of the README file.
The first mode of the reset command is git reset --soft and, as option, we tell tailgate “HEAD~1” — git reset --soft HEAD~1
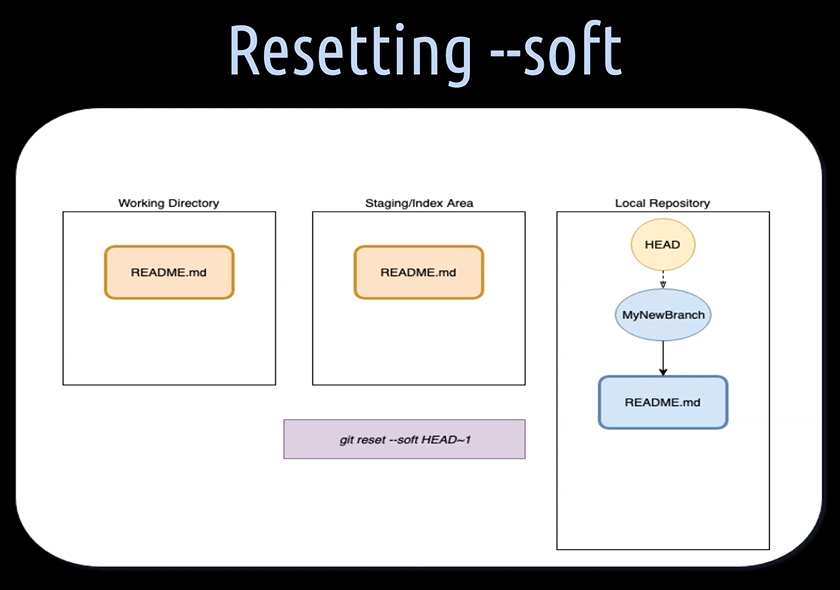
This will move the HEAD pointer to the previous commit, with the first version of the README file in the local repository.
This leaves the working directory and the staging area untouched. So, we still have the second version of our README file right at hand in case we want to use it.
The second mode of the reset command is git reset --mixed HEAD~1.

This will also move the HEAD pointer to the previous commit, with the first version of the README file in the local repository.
Plus, it will replace the second version of the README file in the staging area with the first version. So, we still have the second version of our README file in the working directory, but since it isn't any more in the index file, git status shows it as unstaged.
The third and last mode of the reset command is git reset --hard HEAD~1.
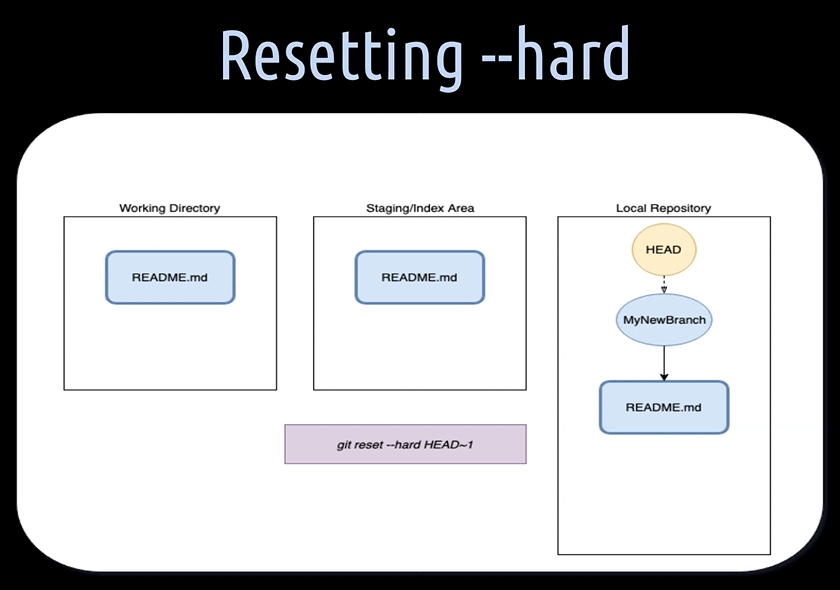
This will do all the things as the mixed mode does, plus, it'll also update the working directory with the first version of the README file accordingly.
This will give us a clean state in our local repo, on our active “MyNewBranch”, with the commit of the first version of the README file, as we have had it right at the beginning.
As Git keeps our commits, we still have the chance to find and use the commit we did with the second version of the README file in case we really need to. For that, we could use git reflog.
# Resetting --soft
Okay, let's first have a look how the soft mode of git reset works.
So here we are, on the test10-jessica feature branch with a “jessicaTestTen” in it. Now, let's reset this branch by one commit. First, we hit git log, to see how the commit history of this branch looks like.
Here is the “Add tenth test” from Jessica and now we want to reset that branch to the “Add a ninth test”.
We can do that by hitting it git reset --soft HEAD~1 and hit enter.
Now, when we hit git log again, we see that Git has now reset the HEAD pointer to the “Add a ninth test” commit.
And when we now hit git status, Git tells us that we have a modified file in the BowlingGame2Test class.
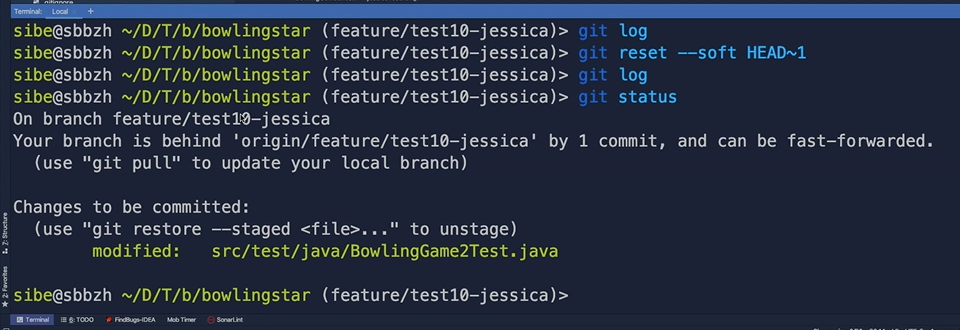
This, because the “jessicaTenTest” is still there. So, this test is still in the working directory and is also staged, so we can commit it again by hitting git commit.
And there we are again, “Add a tenth test”, but this time, with a completely new commit.
Cool.
# Resetting --mixed
Let's have a look what the mixed mode does.
So, we have the same situation as before. We are on the test10-jessica feature branch, with the “jessicaTestTen” on it.
And now, let's do a git reset mixed by one commit — git reset --mixed HEAD~1
When we hit git status, after reset, now we still have the JessicaTenTest in the working directory, because Git tells us that we have a modified file in the working directory.
So, we can add this file to the staging area again with git add and the file name.
And finally create, again, a commit with the “jessicaTestTen” in it. There we are. We have again created a completely new commit with the “Add a tenth test” in it.
# Resetting --hard
And now let's see what the hard mode of reset does.
So, once more, the situation as before, we have to commit with the “jessicaTenTest: on the feature branch.
Now let's do git reset --hard HEAD~1. Then, we hit git status and everything is gone.
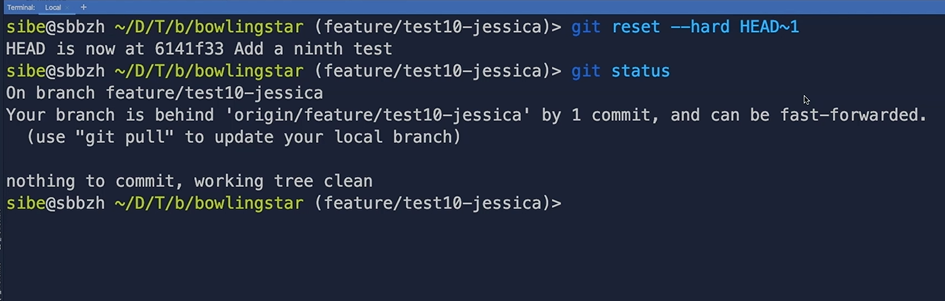
We have nothing to commit and our working tree is also clean.
Git tells us that our branch is behind the remote feature branch, by 1 commit. Yes, that's correct, because we still have the “jessicaTestTen” on the remote branch.
Finally, let's hit git log and see the “Add a tenth test” is completely gone from our local branch.
Also, for Lisa, it's time to face her final task.
She shall create a new branch. Then commit a README file and practice the concept of reverting.
Let's start with the theory first.
# Reverting
In contrast to resetting, reverting is quite simple and solves a different problem.
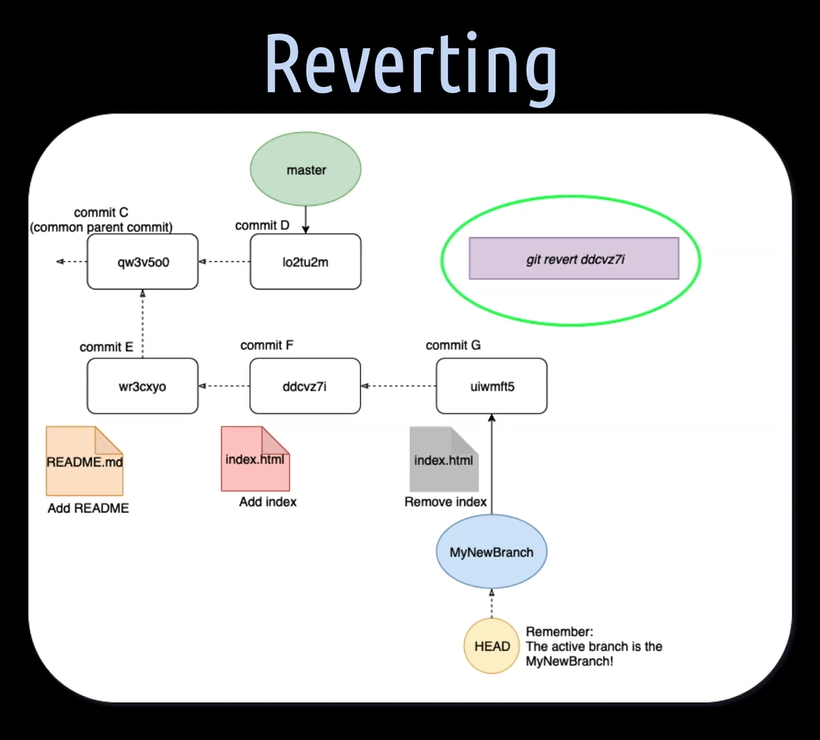
We might have a specific commit, for example, like here, commit F, that we want to undo, but at the same time, don't want to touch commit E, so the parent commit in the “MyNewBranch”.
Reverting solves this, by creating a new commit G, which contains the opposite changes of commit F. In this case, here the index file will be deleted again.
Let's have a look now at the practical example.
Okay, let's create a README file for Lisa in our project.
For that, we are creating a New File and call that “README.md”. Then, we will hit git status and see that it is there.
We will add this file— git add README.md
And we will commit this file — git commit -m Add a README file”.
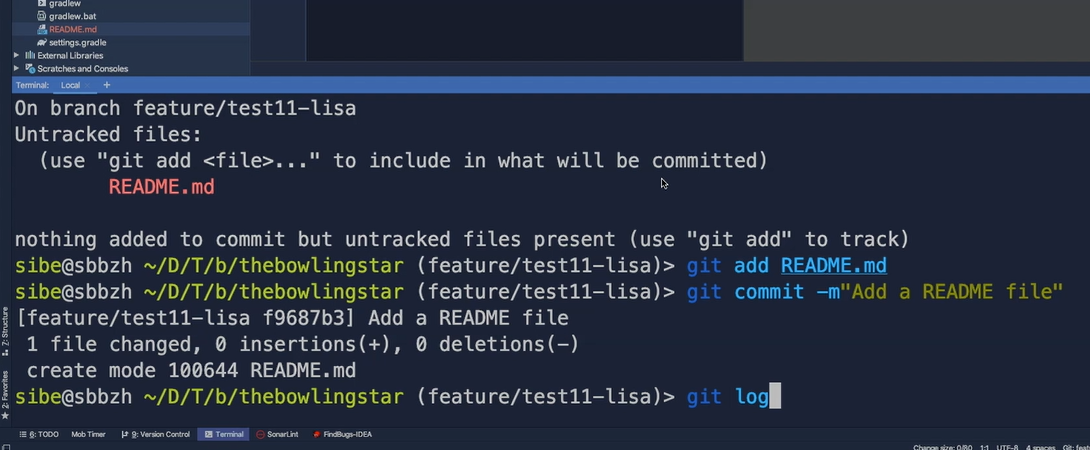
Now let's hit git log, and there it is, the “Add a README” file commit.
Now, we want to revert that commit.
So, what we need from this commit is its commit hash. We copy that one, go back and hit git revert <commitHash> with the commit hash.
Now Git will open up the commit message of the revert commit. We will leave that as it is, close the message, and hit git log.
And there it is.
We reverted the Add README file, via Revert Add README file commit.

Jessica and Lisa did it.
During the last three chapters, they have learned heaps of new stuff about Git. It was quite a ride so far.
Now, further experimenting, practicing, and learning awaits them, to become really good at using Git in their jobs. As the Bowling Star story ends now, it's time to say goodbye. We wish them all the best. See you two in a next course.
