

Transcripted Summary
Hello and welcome to Chapter 1, Introduction to GitHub Actions.
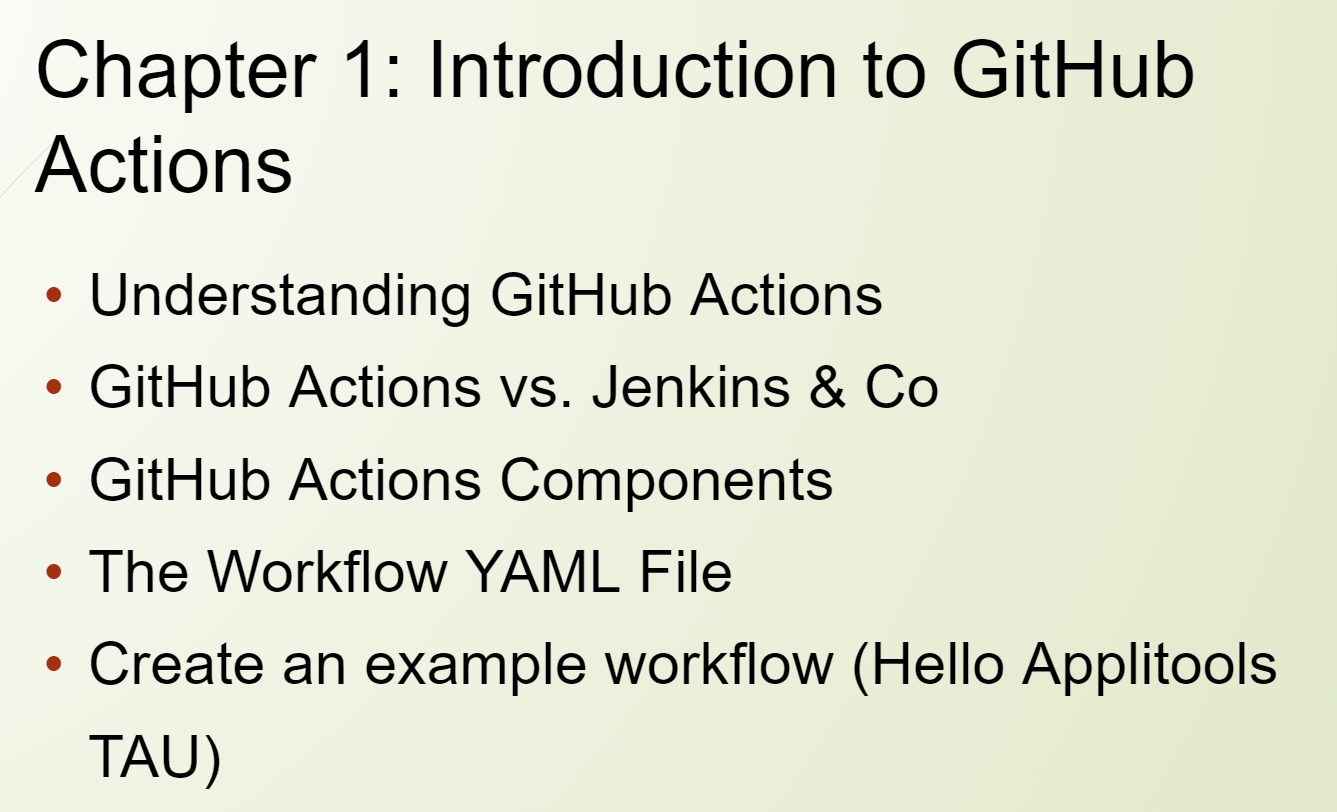
# What you will take away from this course.
- First, you will learn and understand GitHub Actions in general.
- We will clarify the difference between GitHub Actions and Jenkins because Jenkins is a commonly used tool for continuous integration.
- After this, we will put some focus on the GitHub Components.
- Then, we will shortly tackle what a YAML file is about.
- And by the end of this chapter, we create our first workflow. How cool is that? So, we will create our great Applitools platform from GitHub.
Let's start.
# GitHub Actions Background
Some general info about GitHub to give you some background information. I find this always quite useful. GitHub itself was founded in 2008, and since 2018, it has been owned by Microsoft. GitHub is an internet hosting service for software development and version control using Git.
GitHub Actions is the feature from GitHub that offers us a platform for continuous integration and continuous delivery, the so-called CI/CD.
With it, you can automate your pipeline for build, test, and deployment.
GitHub Actions goes beyond just DevOps and lets you run workflows whenever an event happens in your repository. For example, you can run a workflow to automatically add the appropriate labels whenever someone creates a new issue in your repository. So that's pretty powerful.
And GitHub provides us with Linux, Windows, and macOS virtual machines to run your workflows.
Or you can host your own self-hosted runners in your own data center or cloud infrastructure, which is a quite important feature for many enterprise companies if you cannot use the software or service or the cloud solution which is provided for GitHub.
# GitHub Actions vs. Jenkins
Let me now compare GitHub Actions and Jenkins and show you the difference or the benefits of GitHub Actions.
I'm sure a lot of you know Jenkins but let me read their description from Wikipedia.
Jenkins – From Wikipedia
Jenkins is an open-source automation server. It helps automate the parts of software development related to building, testing, and deploying, facilitating continuous integration and continuous delivery.
But let me also quote the official documentation from GitHub on GitHub Actions.
GitHub Actions – From GitHub Blog
GitHub Actions now makes it easier to automate how you build, test, and deploy your projects on any platform, including Linux, macOS, and Windows. Run your workflows in a container or in a virtual machine.
So, you see, both statements are a little bit similar; they go going into the same direction.
But let me elaborate now on the benefits of GitHub Actions.
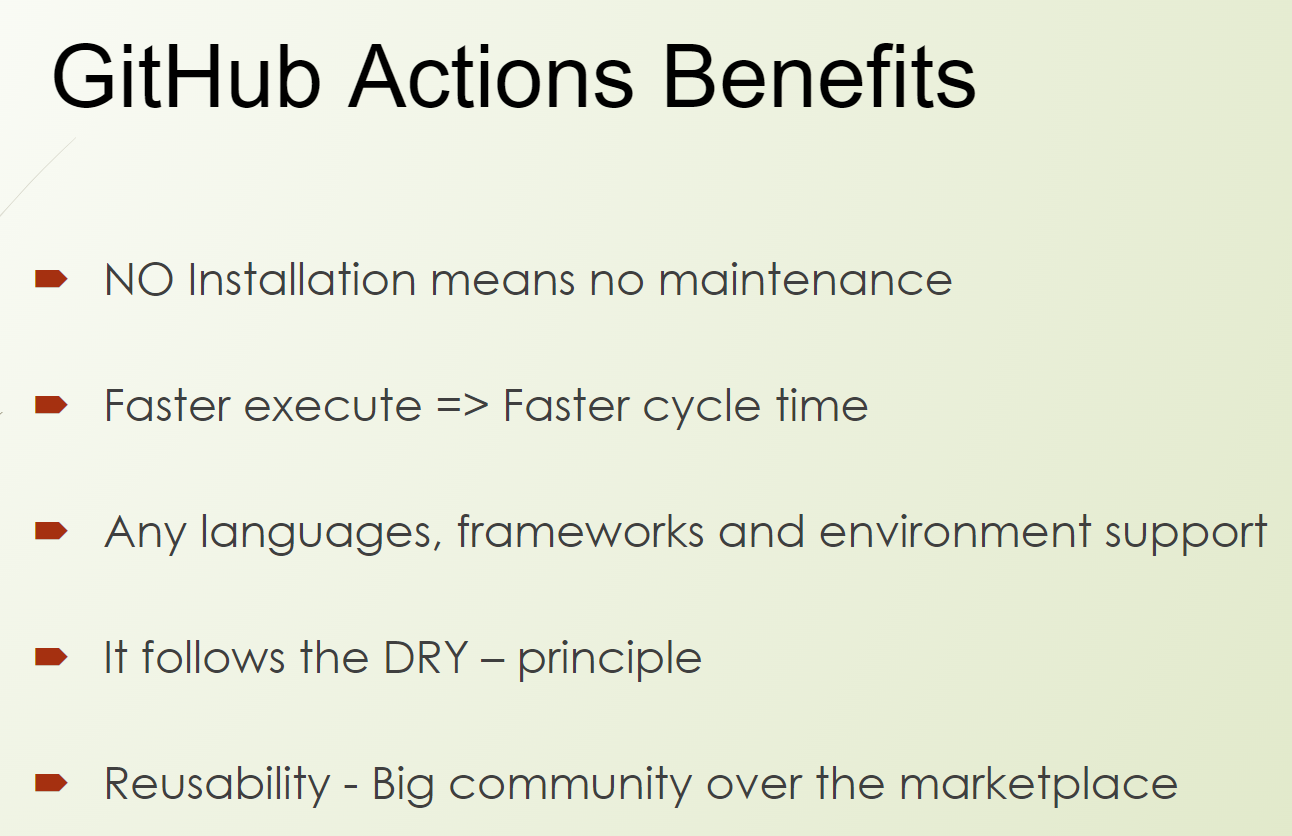
First, you don't need to install anything if you use GitHub Actions.
That's pretty great because you don't have to do maintenance, and this saves effort. You don't have to set up things and maintain them. This is done by GitHub.
It ends up in a faster cycle time because workflows and jobs can run asynchronously, which means we can deliver faster, and we have an earlier value for our customers. And that's what we aim for.
It supports, by default, any languages, frameworks, and environments. So, there are no restrictions,
It follows the DRY principle, the don't repeat yourself principle, because you can share the stuff that you're doing. Yeah, you can share your workflows with your team, in your company, and also with the community, which means reusability is very important and in the center because there is a big community around GitHub, which has workflows over the GitHub marketplace.
All over the reusability here is very high. And, of course, that's highly appreciated from all of us.
# GitHub Actions Components
So, what is GitHub Actions now all about? Let's take a look at the GitHub Components.
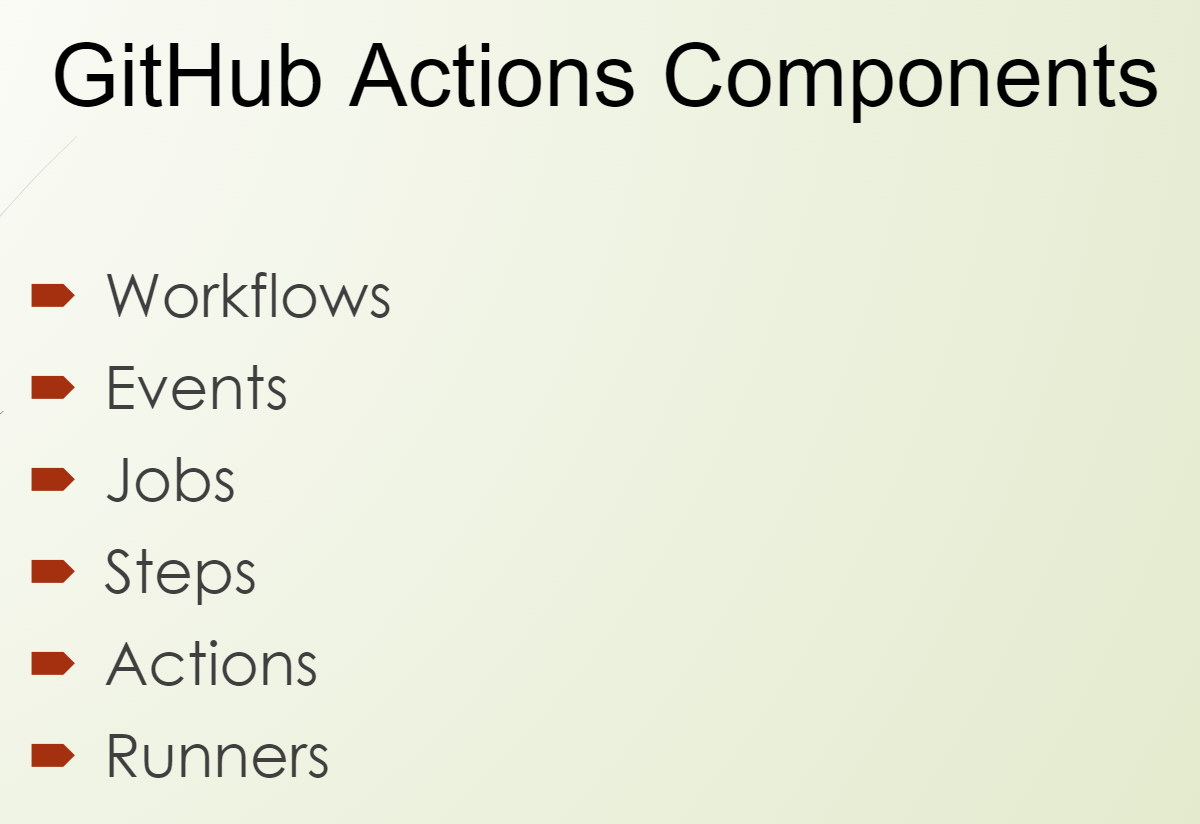
What is a workflow?
A workflow is a configurable automated process that will run one or more jobs.
What is an event?
An event is a specific activity in the repository that's triggerable for a run. And an event can also be triggered from outside the repository. For example, an API call.
What is a job? What are steps?
A job is a set of steps in a workflow that are executed on the same runner. So, each step is either a shell script that will be executed or an action that will be run.
And steps are always executed in order, but they can be dependent on each other.
So, what is an action now?
An action is a custom application for the GitHub Action platform that performs a complex but frequently repeated task.
What is a runner?
A runner is a server that runs your workflow whenever it's triggered, each runner can run a single job at the same time.
So that's the Components on the high level.
Let me draw a picture to explain to you the structure a little bit easier.
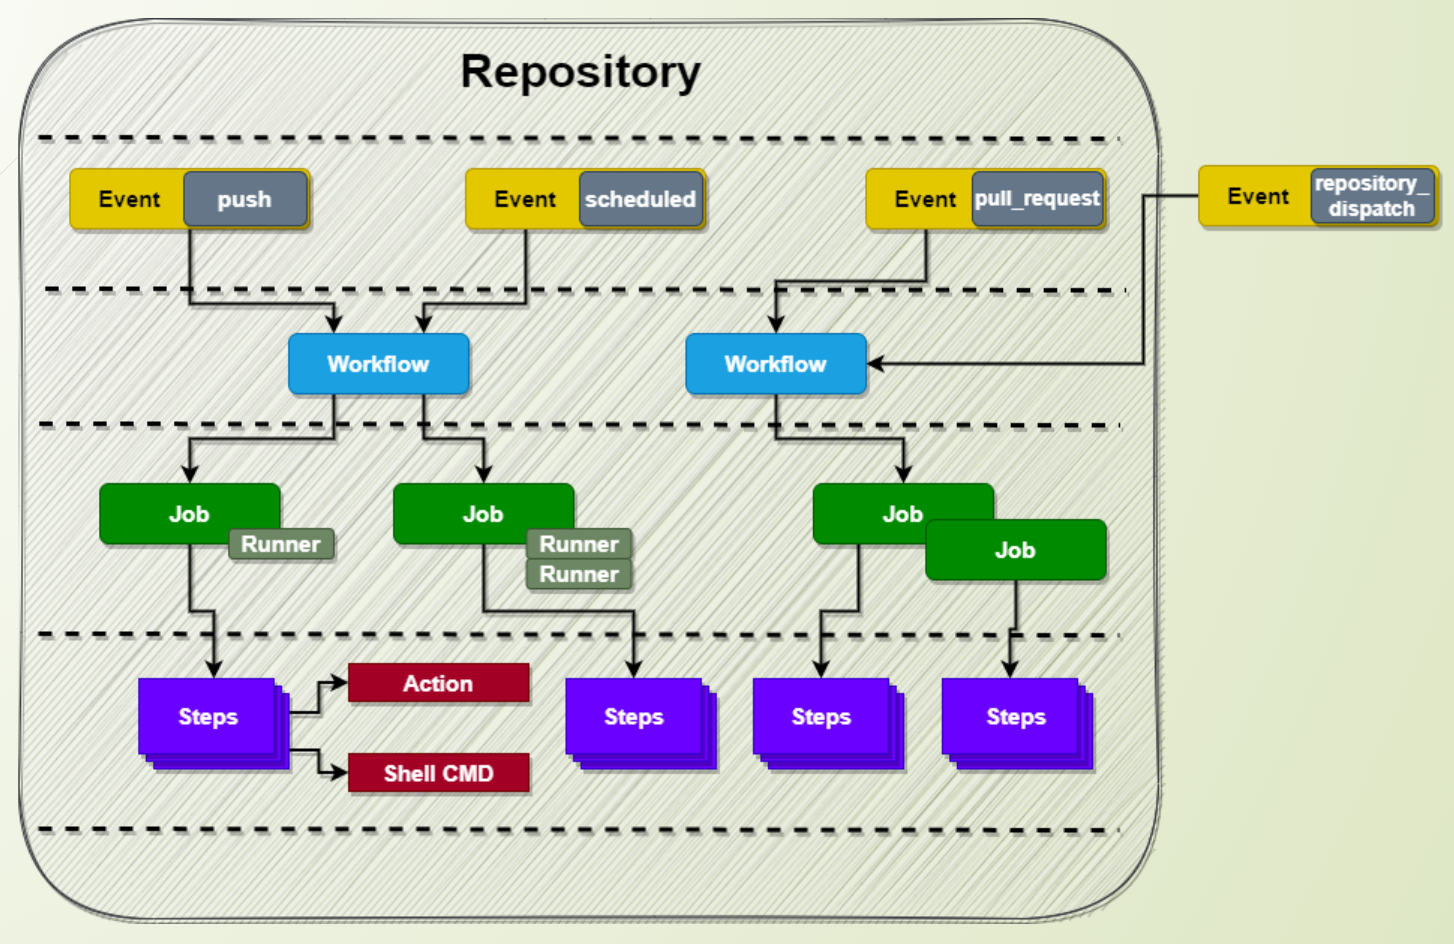
First, we have events.
We have your repository, and here you have events inside the repository, like the push event, the scheduled, and the pull_request event.
But also from outside the repository, like we have the repository_dispatch event.
Overall, there are more than 35 events, and we will not go through all of them, but we will cover a lot of them.
The event is the trigger that triggers the workflow.
Next, we have the workflow, and the workflow is now this configurable automated process. In the workflow, you have here all your jobs done.
And the jobs get executed on the runners, on one or even multiple runners. And this is configurable.
And then you have the steps.
So here you're really doing the work kind of, yeah, the steps get executed in order.
They could be dependent on each other. It could be a shell script which you execute. It could be a GitHub Action when you use a third-party one or whatever.
This is what you want to do, at the end, for example, building the application and so forth.
And here you can see, kind of the graph, how they relate to other.
There an event is happening, which is triggering a workflow.
This is one, the workflow is a set of jobs with defined runners. And each job has several steps where you have the actions and the shell script which can execute it.
So, in the end, this is what a GitHub Action is made of; this is how it works. And the details, of course, you will get in the next chapters. Cool.
# The YAML File
Let's come now to the YAML file. What is a YAML file?
Let me tackle this just shortly because it's not really the content of the course, but it's kind of a precondition.
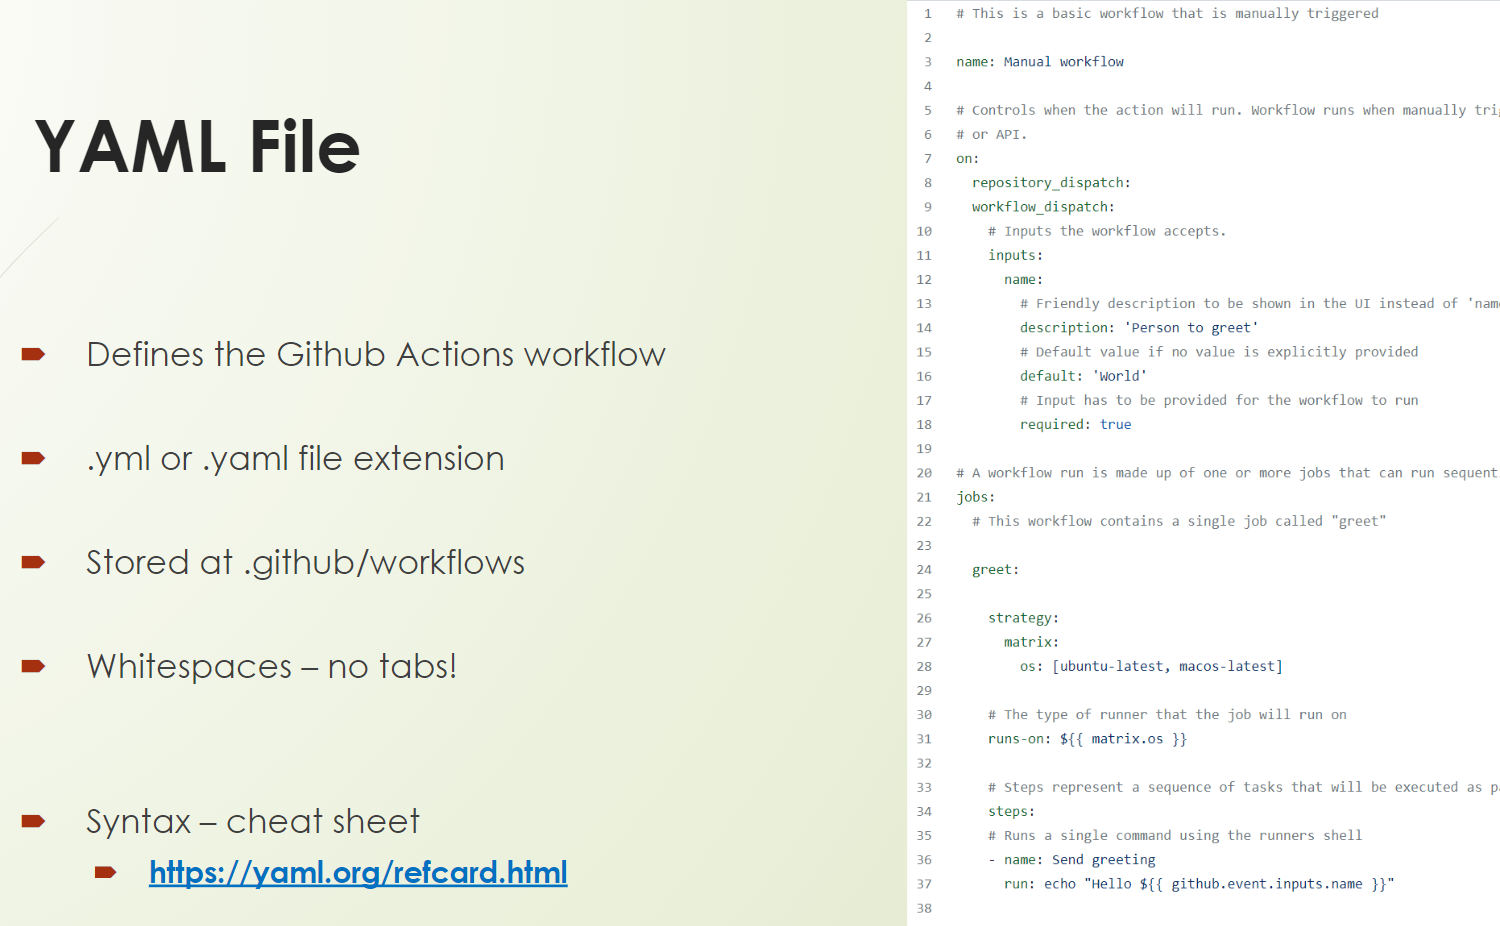
Workflows in GitHub Actions are defined as YAML file.
So it means to have an extension with “.yml” or “.yaml” and the get stored in the “.github/workflows” folder.
This is a must, so we cannot change this.
And we need to follow the YAML syntax, which means whitespaces are here, really important, no tabs, and so on and so far.
If you want to get more, I have posted here a link, which you can also find in the references, to learn more about the YAML syntax.
This is a precondition, as I already mentioned. So, if you are not aware of YAML, please check it out.
# Now we are ready to do something cool.
Don't worry, we will not code yet, but it will go to GitHub and use the UI.
What do you need now for this exercise?
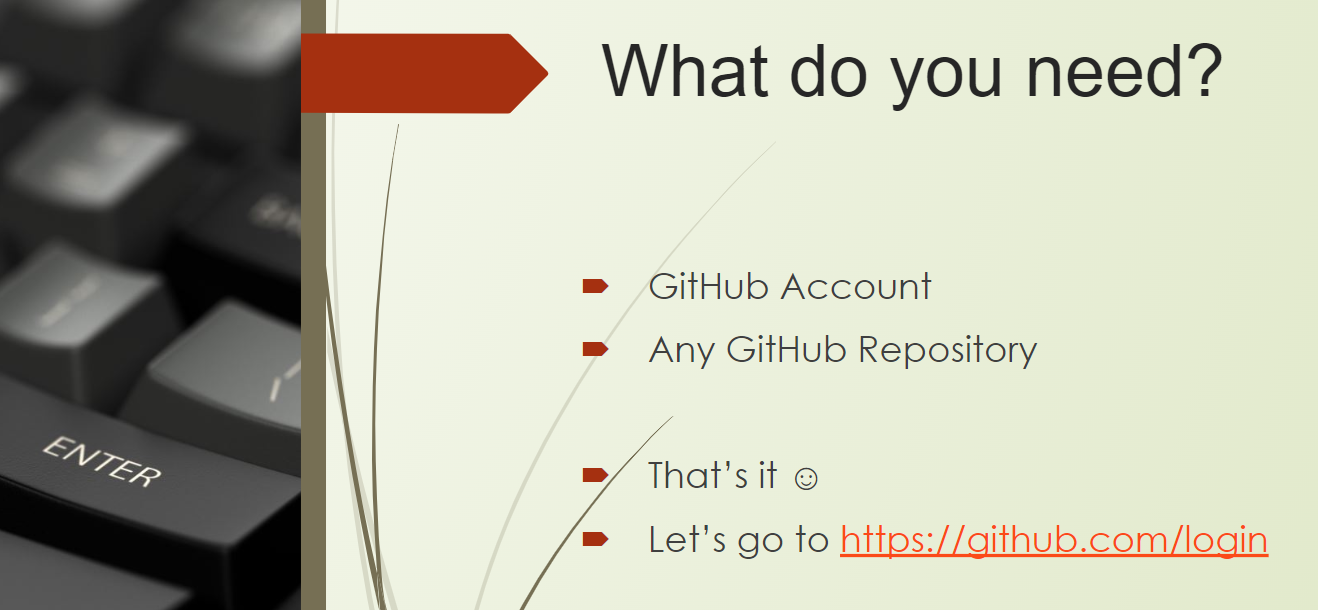
You need a GitHub account, and you need a repository, any one is good.
You can also clone mine one or fork mine. You can create a new one. You can use one which you already have.
Yeah, and that's it. So, you are ready to go.
Let's navigate to the website github.com and let's log in.

I opened the browser and navigated to github.com.
And let's sign in. Please use your credentials. I just inserted mine, and let's sign in.
What you see now is the dashboard kind of. When you log in, you see a lot of info about the latest changes, related repositories, and so on and so forth. If you want to explore it, please do so.
# Now the exercise is to greet our Applitools community.
So, I will use here the first repository, which I prepared.
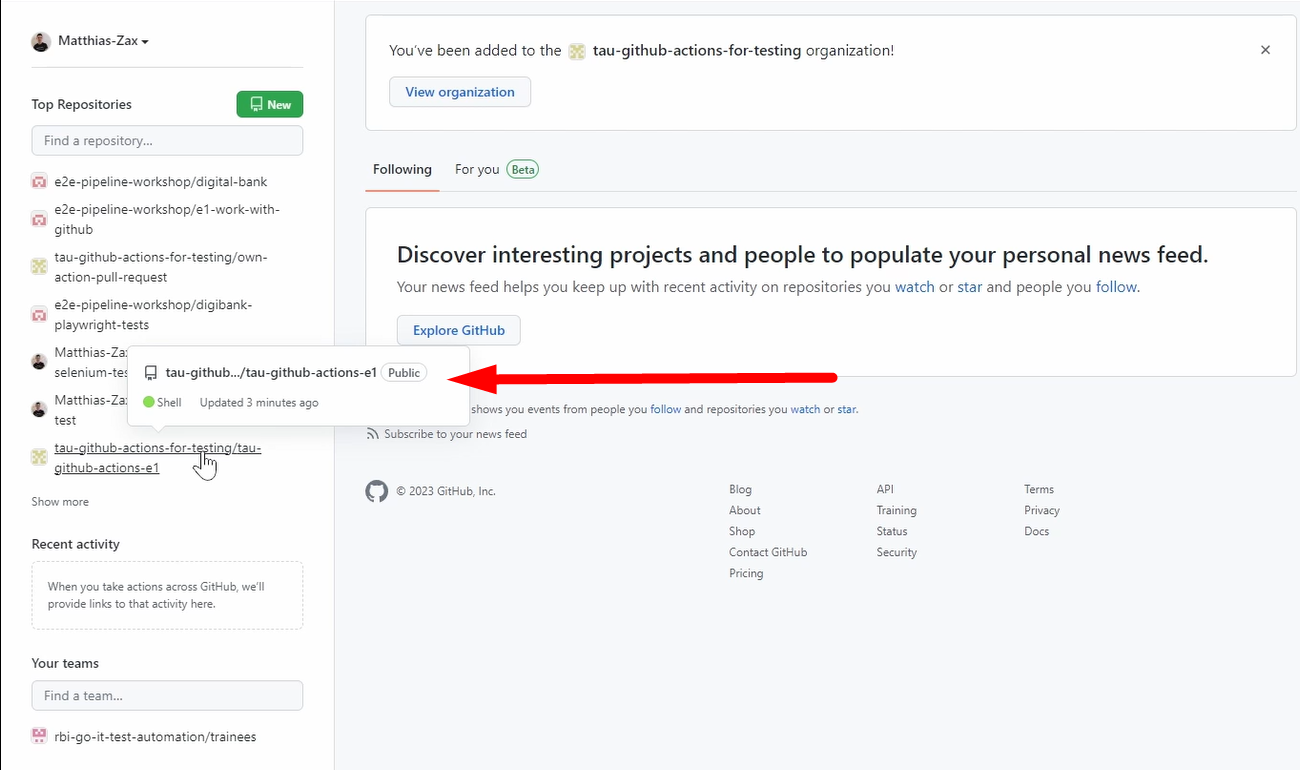
It's the tau-github-actions-e1 for exercise one.
Either use that one — clone it and fork it — or use your own one.
It's really not related to the repository.
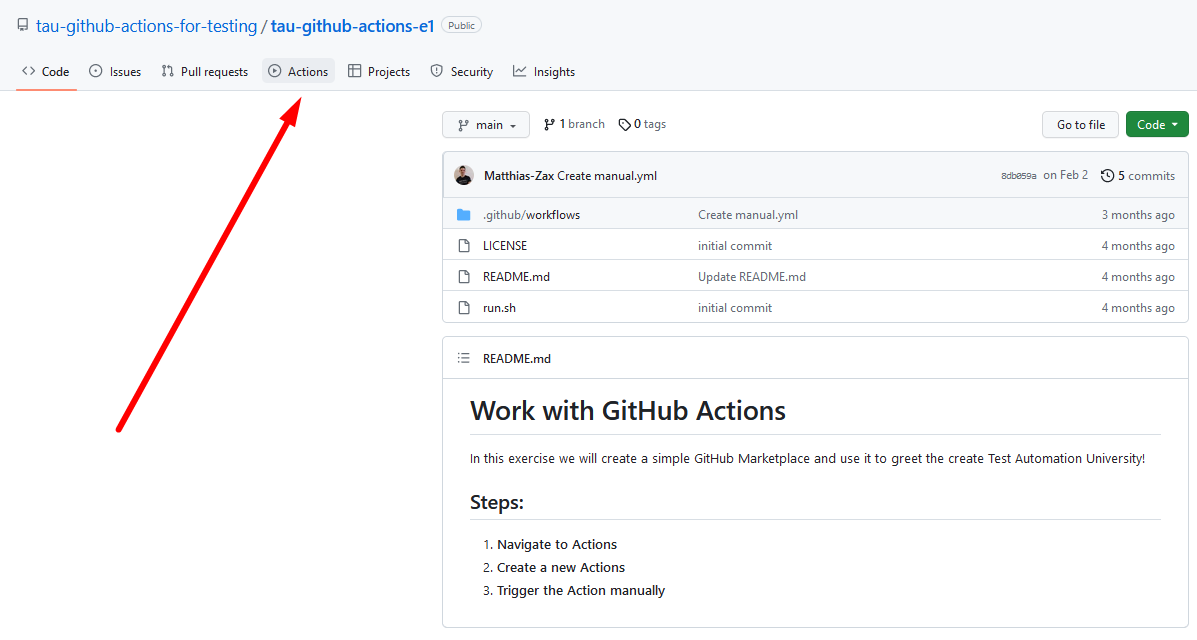
What is important, you need to go to Actions because here you can create Actions from the GitHub UI.
And what you see here is already the GitHub marketplace.
They are classified in several categories.
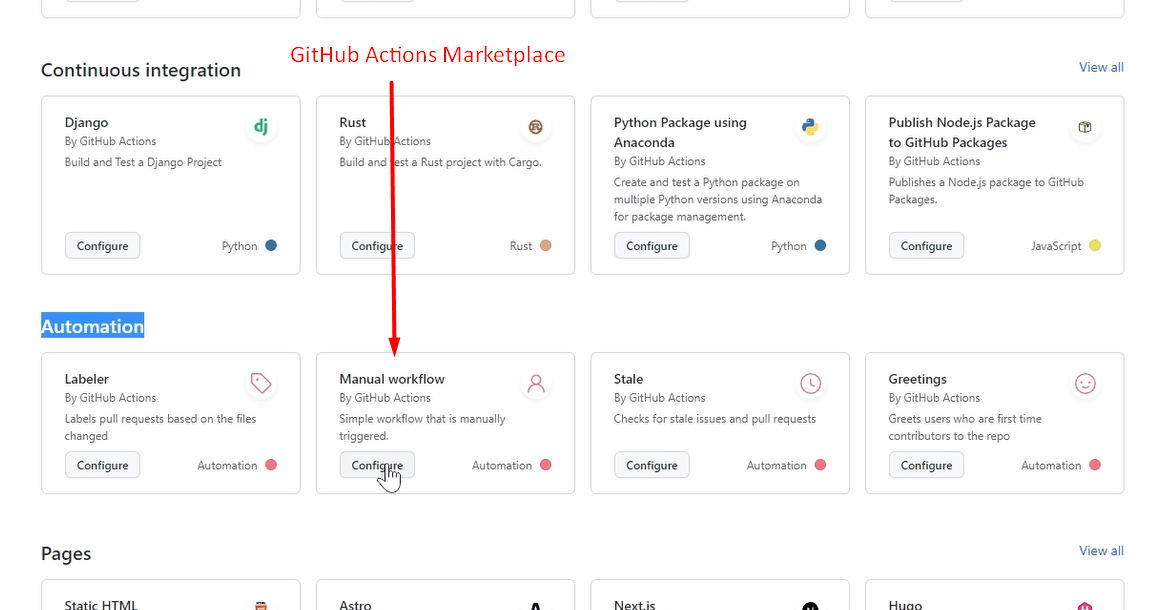
We go to the category Automation, and we want to use the Manual workflow because we want to trigger our workflow manually.
Let's click on the Configure button.
We will not go into these details right now. We will tackle all this what is written here in the next chapters and of course we will write our own Actions.
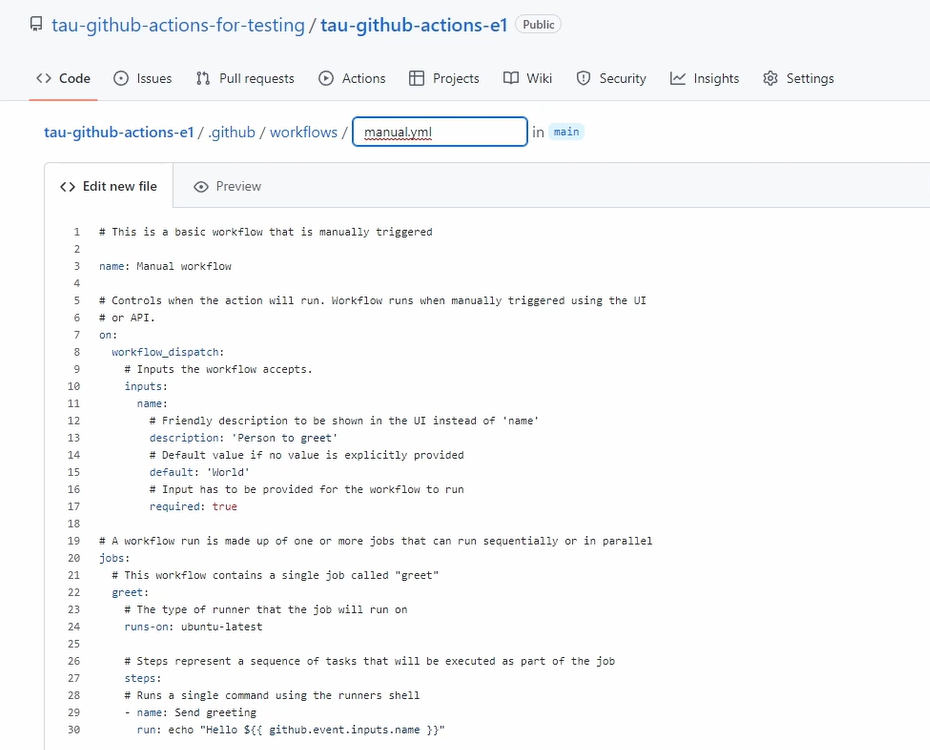
For now, we just want to make it running.
So, let's commit it, go to the Commit button, and commit it as it is.
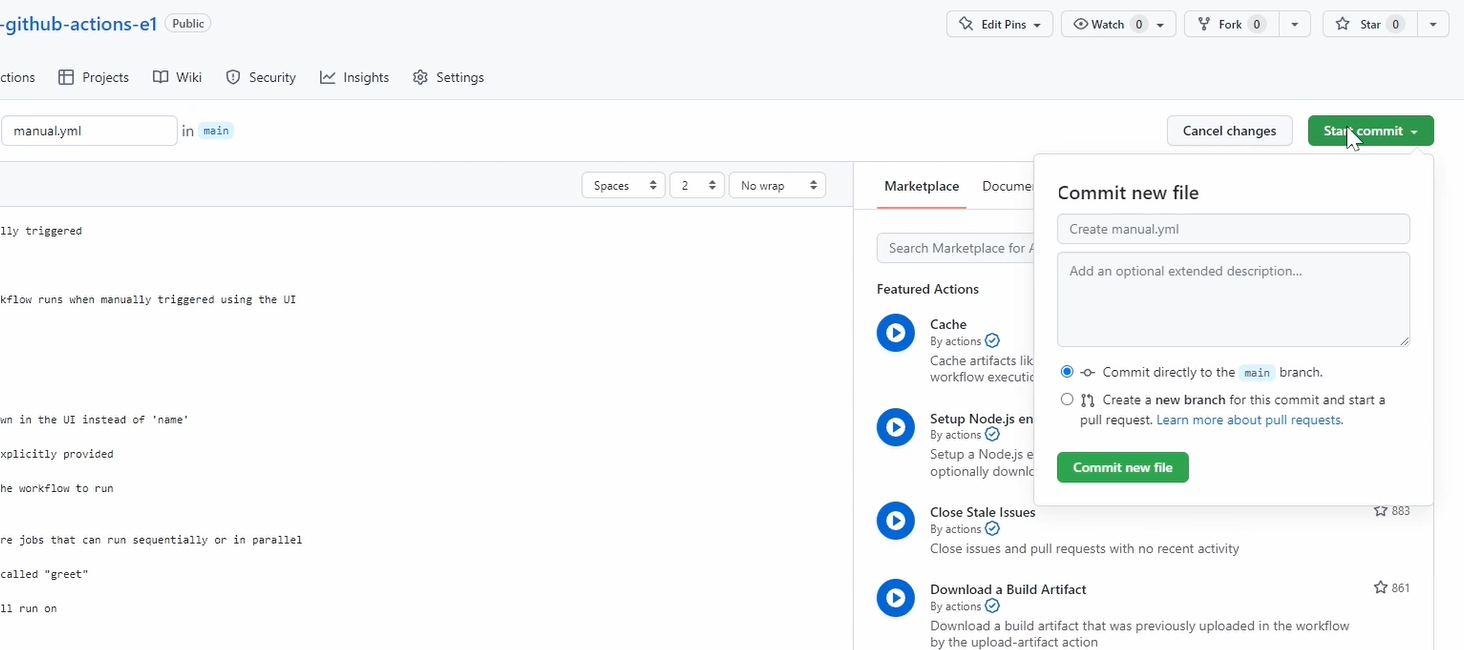
No changes here, not needed.
And you see we created a new file “manual.yaml” in this folder.
And now we want to execute it. We want to greet our community.
So, let's go to the Actions.
Here we can see all the workflows, you need to select our Manual workflow. And here you have the Run.
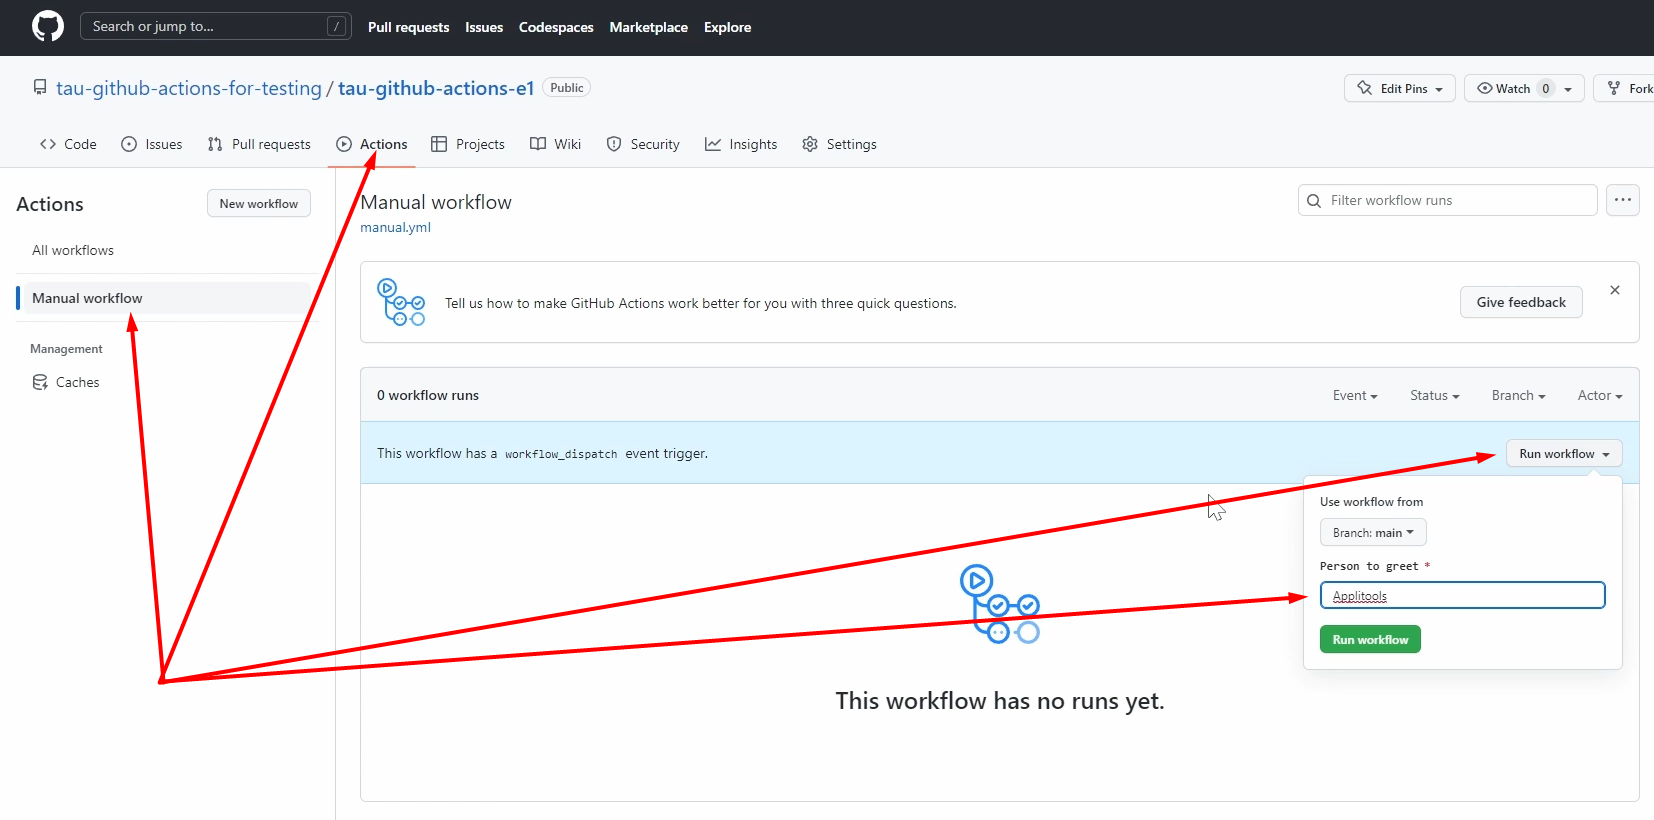
And you can see here, the person to greet is of course Applitools.
Run the workflow.
Here on the top, you can see that the workflow run was successfully requested.
It's a little bit hidden to be honest, but then you see it happened, something.
Here you can see already the trigger.
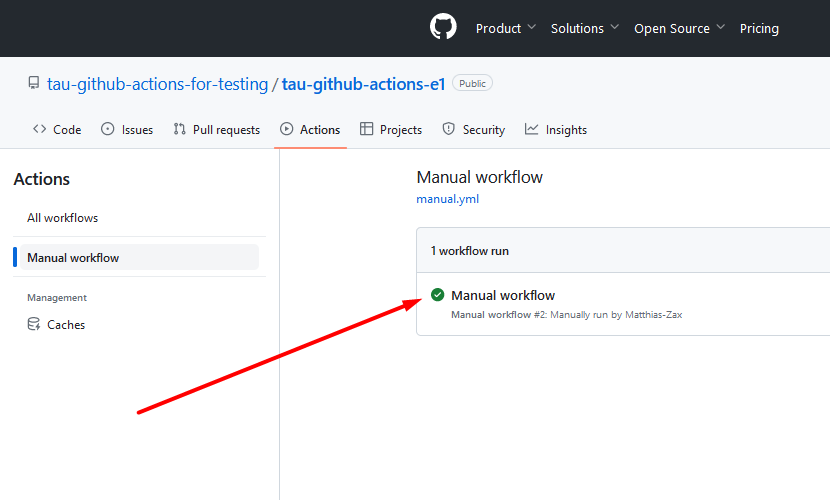
I click it.
So, something happened, and it did something.
It did a greeting, so a greet job.
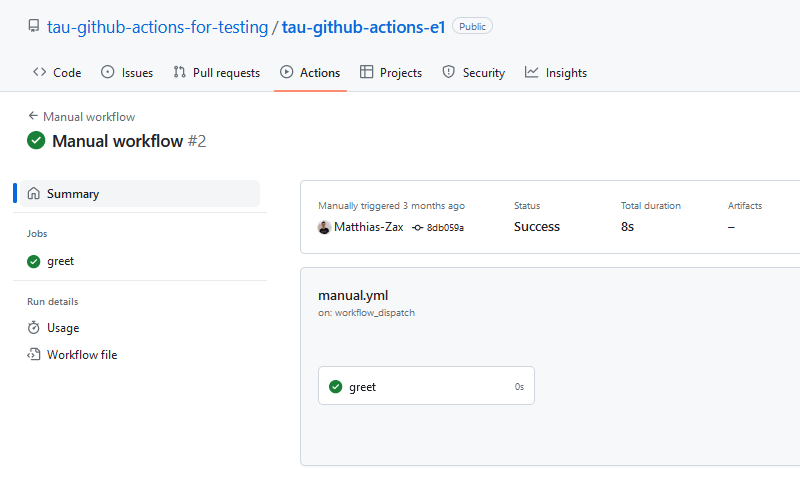
And if we go there and navigate inside the greeting you see here, “Hello Applitools”.
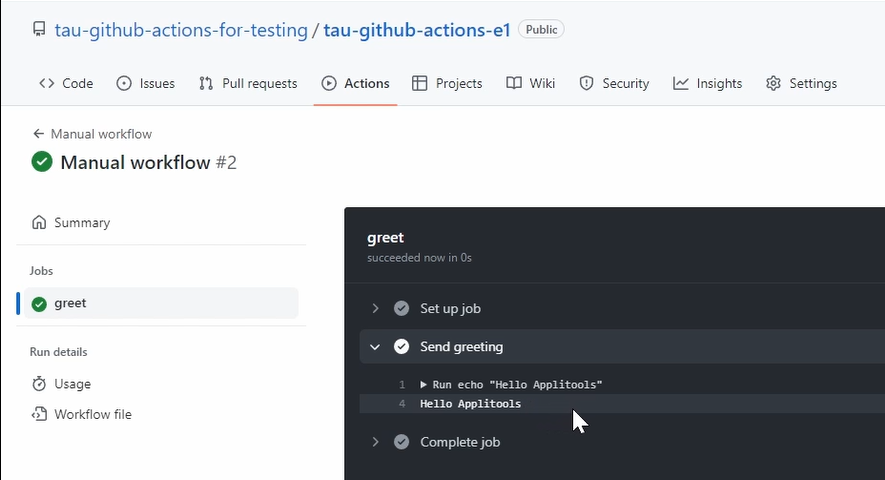
How cool is that?
Of course, here happened a lot of things behind the scenes, which we didn't see now, but we will go into that.
You will understand this afterwards if you have finished the whole course. This was enough for now.
We greeted our great community and now we are ready to go for chapter number 2.
Resources
- Git Repo for Course Code
- CI/CD: The what, why, and how. Building automated workflows for faster releases.
- YAML Syntax
- Jenkins Pipeline documentation
- YAML.org Reference card
- W3schools: YAML Cheatsheet
