

Transcripted Summary
Welcome to Chapter 5, Building Your Own Actions.
What we will learn in this chapter.
- Let's tackle the following question: why do we need this powerful feature?
- When to go for it?
- And at the end, we will create a simple action so you will see how to create it.
# Why Build Your Own Actions?
Why do we need this powerful feature?
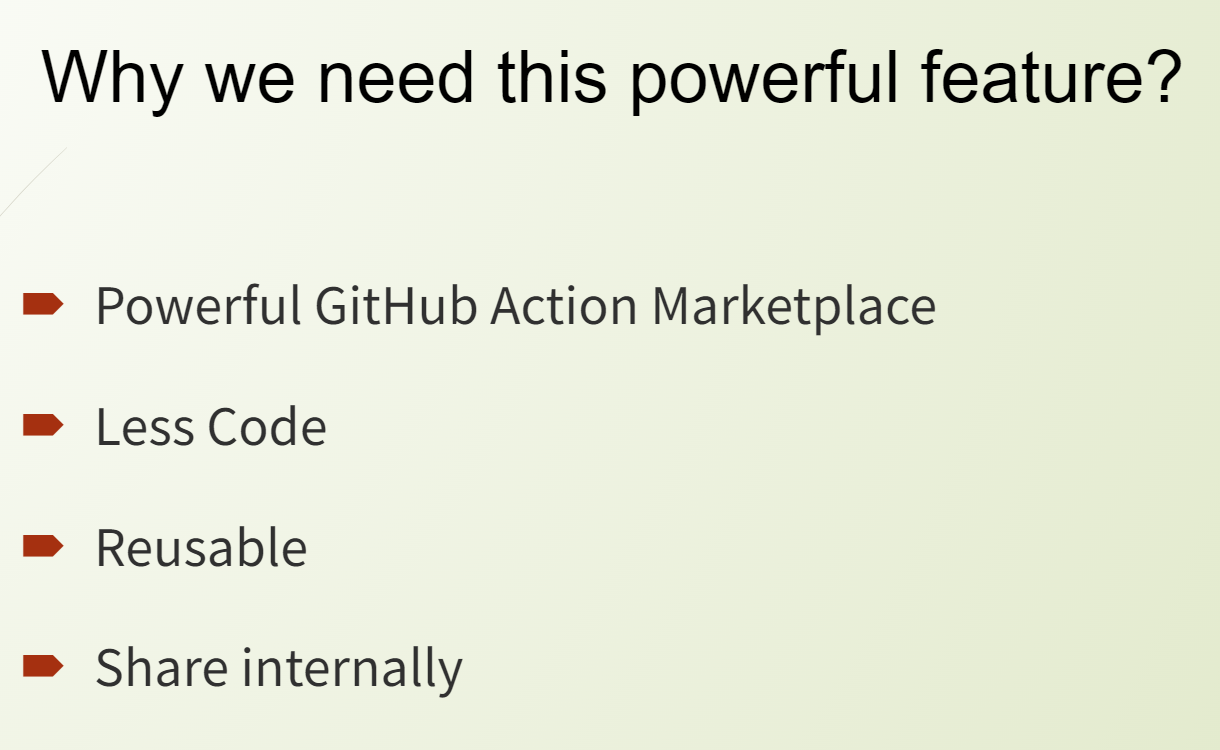
You’ve already seen examples of custom Actions. We experienced the GitHub Marketplace or GitHub Action Marketplace, and saw how many actions are already there.
And we used a lot of them. Just as a reminder, the SSH (ssh-action), copying files (scp-action), the checkout (checkout), installing Java (setup-java), and a lot of others.
In the end, this is an essential feature because it ends up with less code. And the code is more reusable, which gives you the possibility to share it — to share it with the marketplace, to share it internally.
This is what we want to achieve.
We want to have reusable components, we want to have less code, we want to have less maintenance, and therefore we have this powerful feature to develop our own GitHub actions.
# Building Actions: Components
So, which different kinds of reusable components do we have?
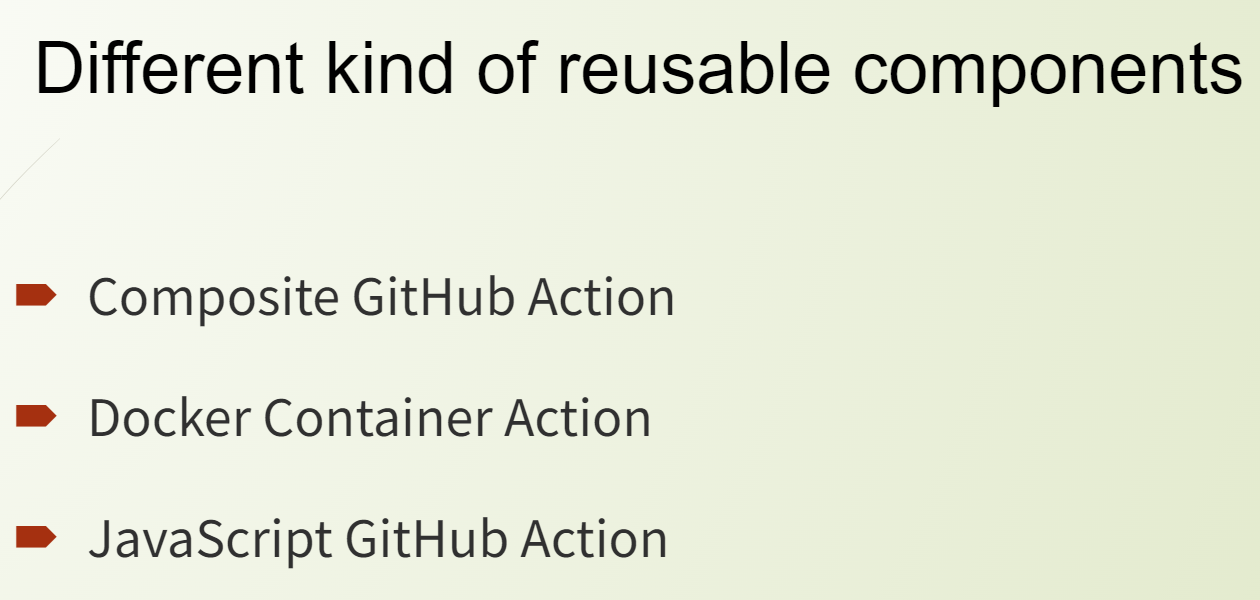
We have the composite action, the Docker container action, and JavaScript GitHub action.
What is the composite GitHub action?
A composite action allows you to combine multiple workflow steps into one action.
To provide you with an example, you can use this feature to bundle together multiple run commands into one action and use this action afterward in your workflow, in your step, and execute all these commands with one command.
What is the Docker container action?
The Docker container packages the environment with the GitHub actions code.
So, for this action, you must run on a specific environment configuration. If you have this need, then it's the way to use the Docker container action.
Just to know, you have one restriction. You only can run this on the Linux runner, so it's not supported for Windows or MacOS.
And then the JavaScript GitHub action?
Here we can use JavaScript code to develop your own action. You will see this done live because we will write a JavaScript action, a simple one, and we'll then run it on our project.
# When to Create Custom Actions
When to go for it?
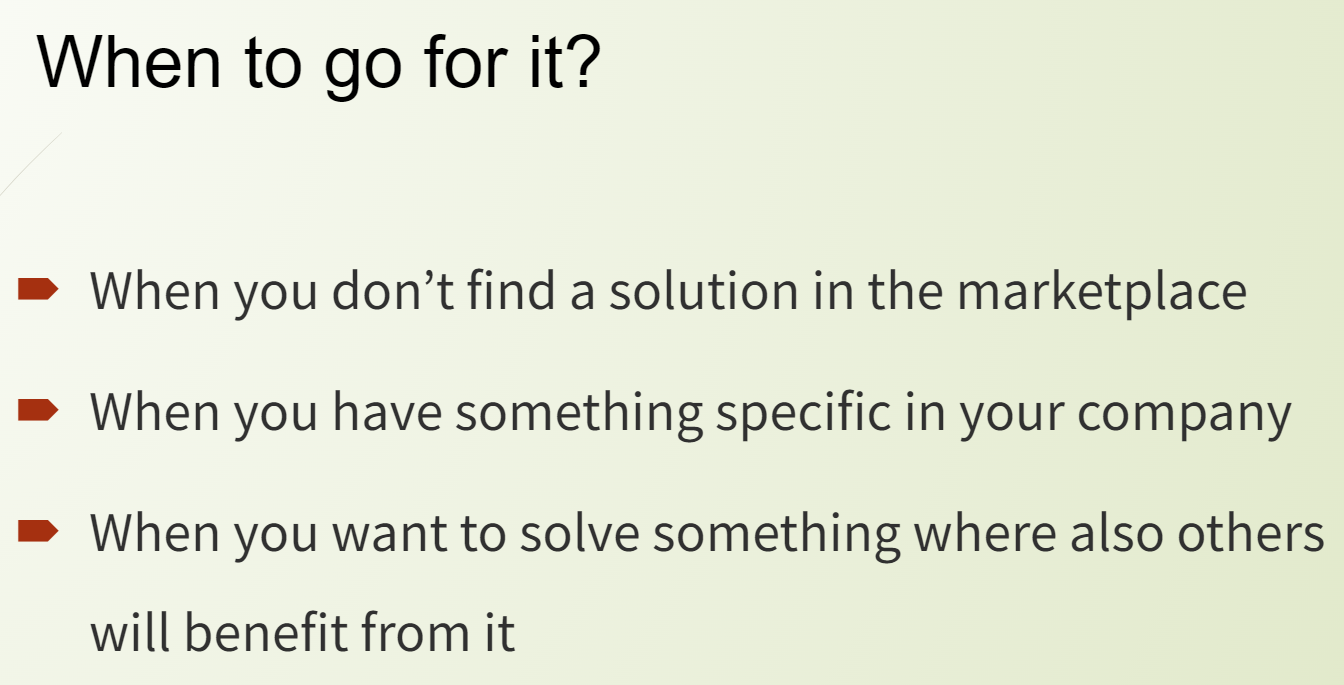
You should not directly jump and always write your own actions.
First, you should always check is there not a solution in the marketplace or maybe in your company if you shared actions internally.
When you have something which is very specific to your company, then you should maybe think, maybe let's write an action. Then not every team has to write the same code, so let's write an action and reuse it.
And when you want to source something where others will also benefit from it.
As I mentioned, focus on reuse — use this functionality so that other teams cab benefit from your solution.
Good. Now it's time that we get our hands dirty, so to say.
Let's create our first simple action.
# Creating a Custom Action
What do we want to do in our action
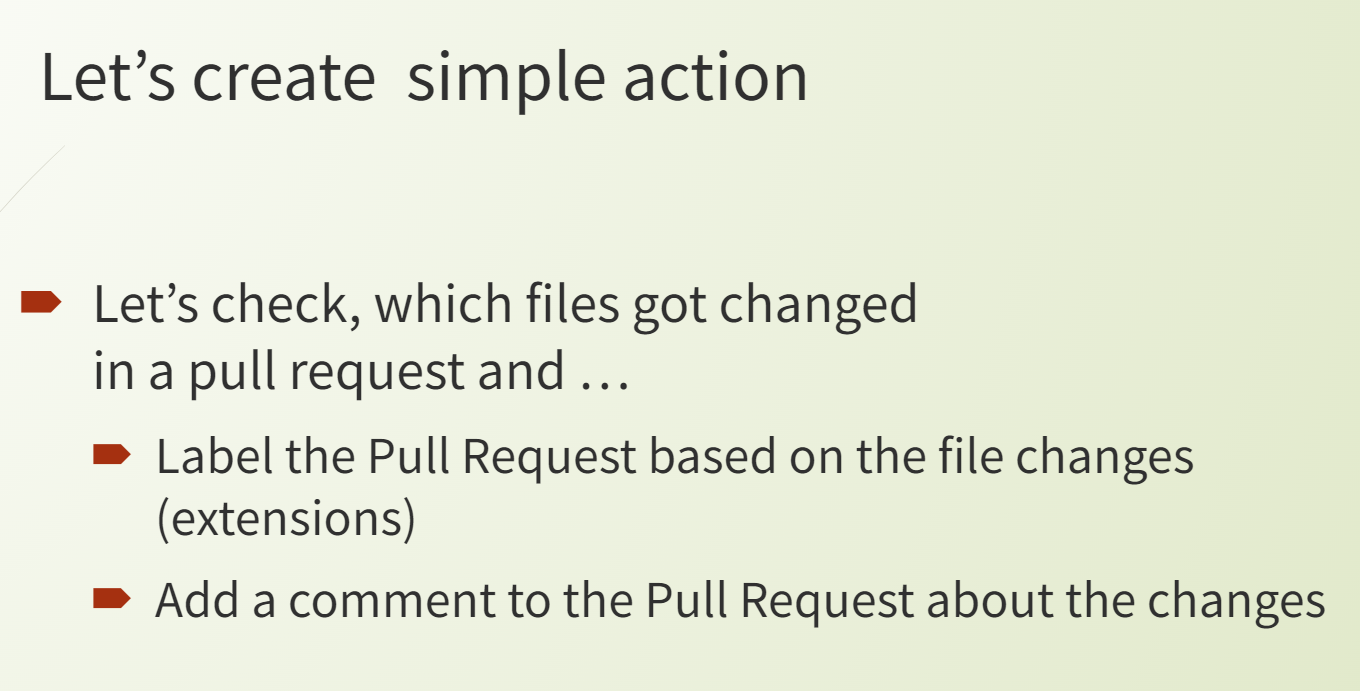
We want to check if someone creates a pull request. We want to clarify which files got changes.
Then we want to check which files have been referenced, based on the file extension.
We want to add an appropriate label to the pull request.
And finally, add a comment to the pull request, which kind of summarizes all the changes.
Good, let's go to GitHub.
This is a repository for our own action (tau-own-action-pull-request).
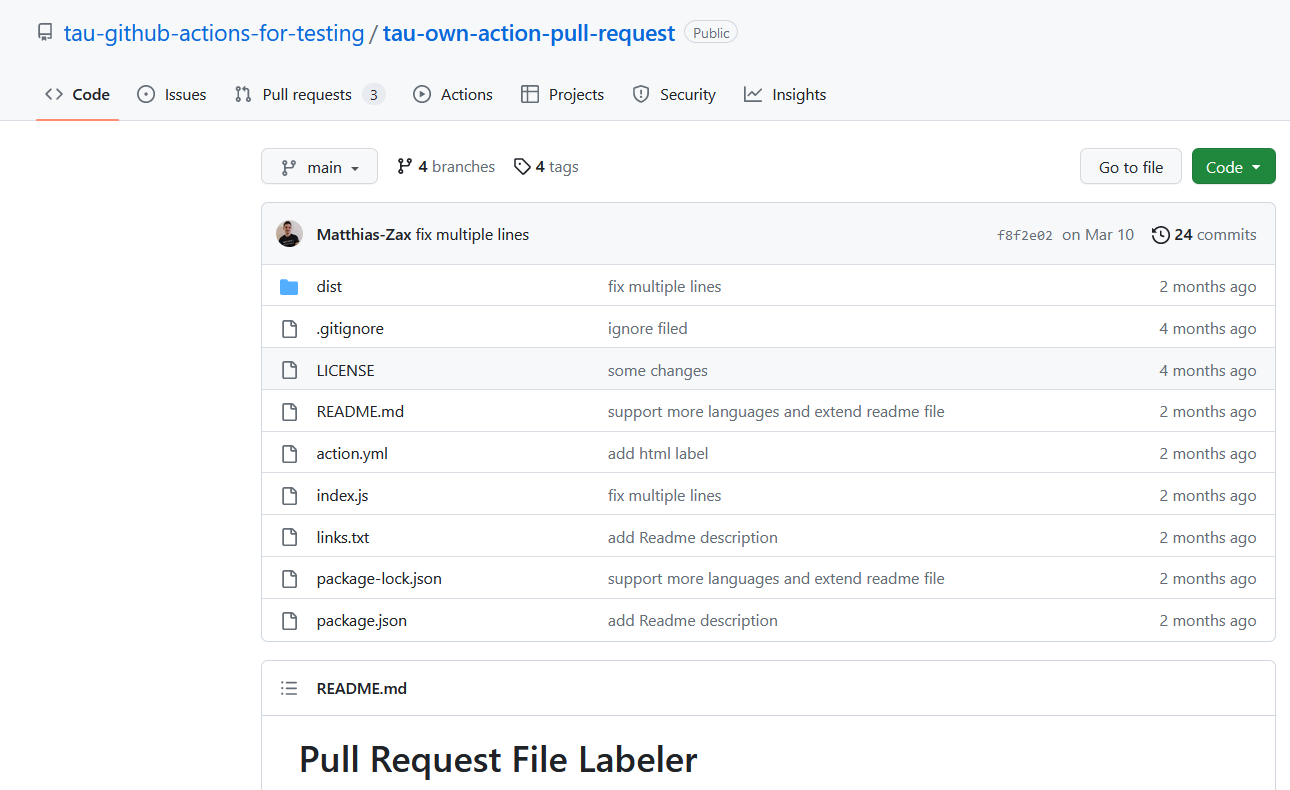
You see the same organization, the repository for Test Automation University’s own action pull request.
Let me show it in my IDE, in my Visual Studio.
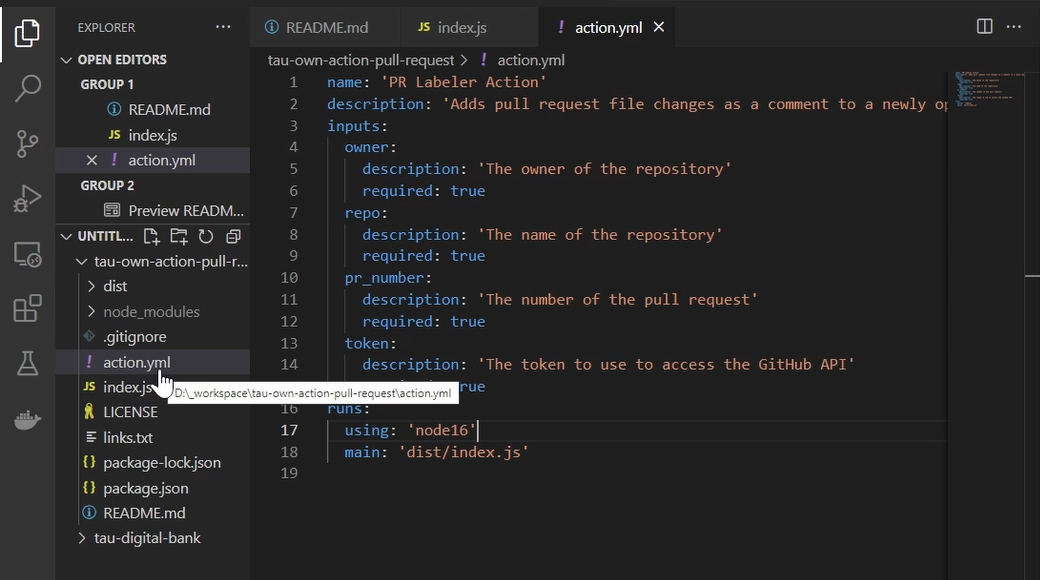
One thing is mandatory for a GitHub action, and this is the [action.yaml](https://github.com/tau-github-actions-for-testing/tau-own-action-pull-request/blob/main/action.yml) file in the root folder.
Here you describe the metadata of your pull request. So, give the name, the description, and you define here also the inputs.
For us, we need the owner, the repository, the pull request number, and our token where we can use them, and also our personal access token from Chapter 4.
And we define here where it's running on. So, it needs “node16,” and it will run our “index.js” from the “dist” folder.
name: 'PR Labeler Action'
description: 'Adds pull request file changes as a comment to a newly opened PR and add the appropiate labels to it'
inputs:
  owner:
    description: 'The owner of the repository'
    required: true
  repo:
    description: 'The name of the repository'
    required: true
  pr_number:
    description: 'The number of the pull request'
    required: true
  token:
    description: 'The token to use to access the GitHub API'
    required: true
runs:
  using: 'node16'
  main: 'dist/index.js'
What is this index.js file about?
You can see you need these 2 external dependencies.
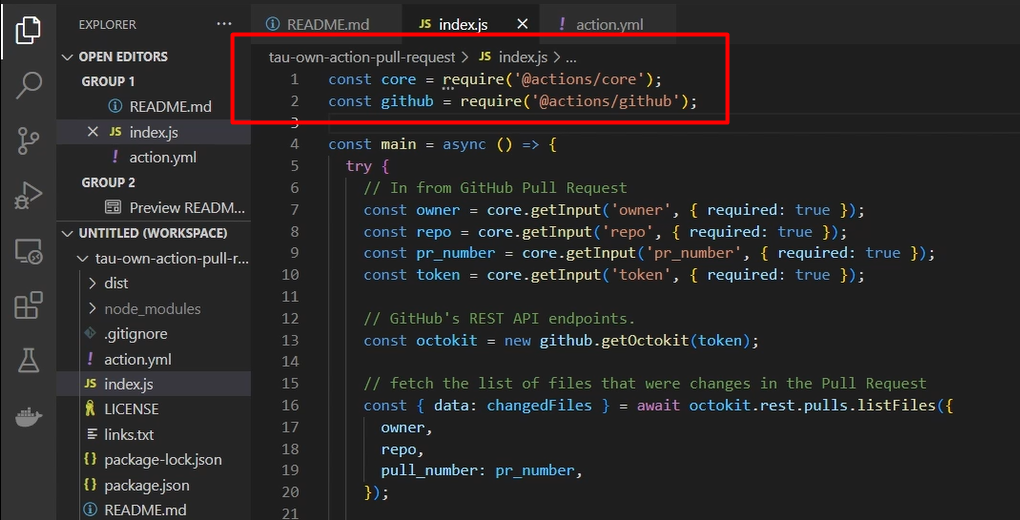
It's the core and GitHub one.
And this is the way we get the inputs.
We have the core.getInput.
Then this is how we can get access to the GitHub API, with github.getOctokit(token)
This is through this Octokit and here we get the list of files with octokit.rest.pulls.listFiles.
Here we trust this parameter to give us the owner, repo, and the pull request number. So, we get here now all files from this pull request.

Here with our console.log we just show you how you can also do some debugging with the “Hello, world!” and the changedFiles.
Yeah, here with the diffData I iterate over the files and do some counting. Nothing fancy.
Here I go over the files (this log, I don't need anymore).
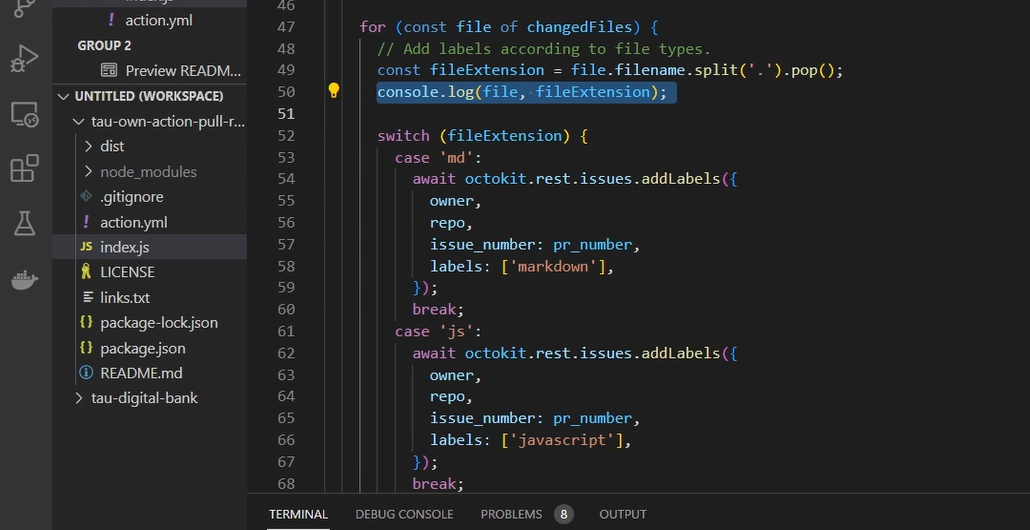
Based on the fileExtension, we add here a label.
So, let's add here also a new label with addLabels.
We already have code for if the file extension is markdown (case 'md'), JavaScript (case 'js'), TypeScript (case 'ts'), Java (case 'java), and YAML files (case 'yml'),
Let’s add a case, so that if an HTML file changes, we can add a label “html”.
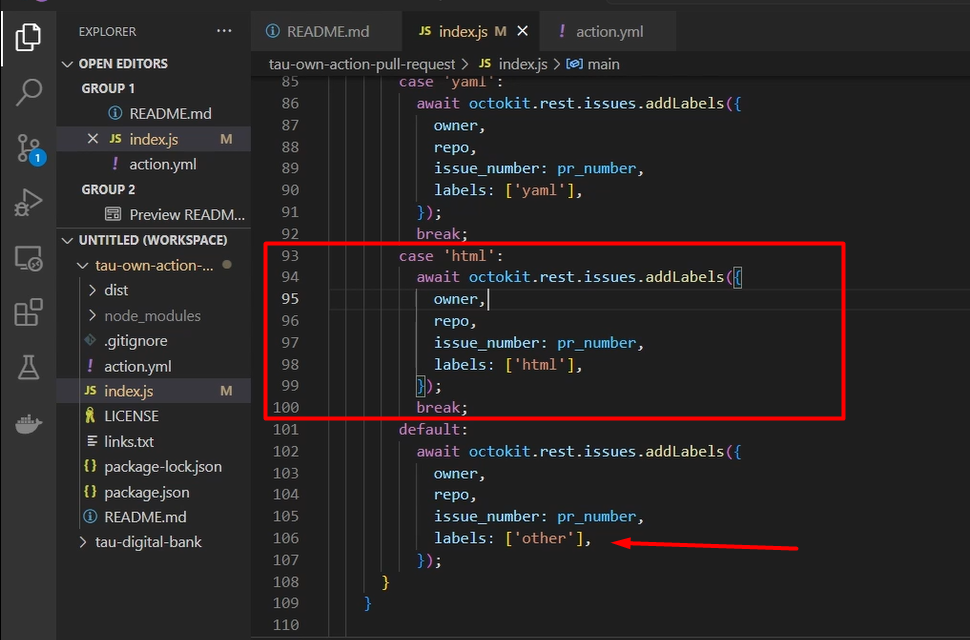
So based on your needs, you can of course extend it.
If it doesn't fit, we will add “other” label.
And of course, we add here this comment command to the progress.
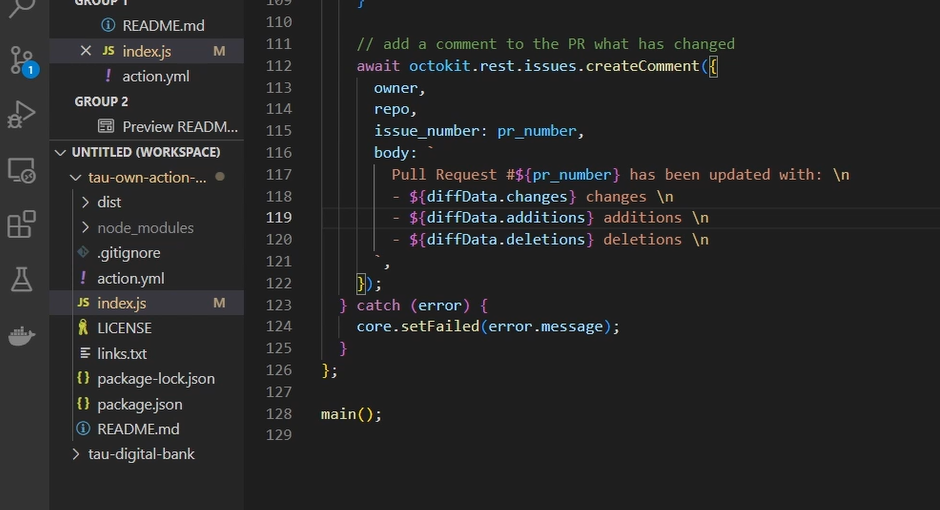
We use the createComment API call
We add you the simple command to comment about which files change, which got edited, which got deleted and so on.
One very important thing is that you have a proper README file.
You can see the README file for this custom action.
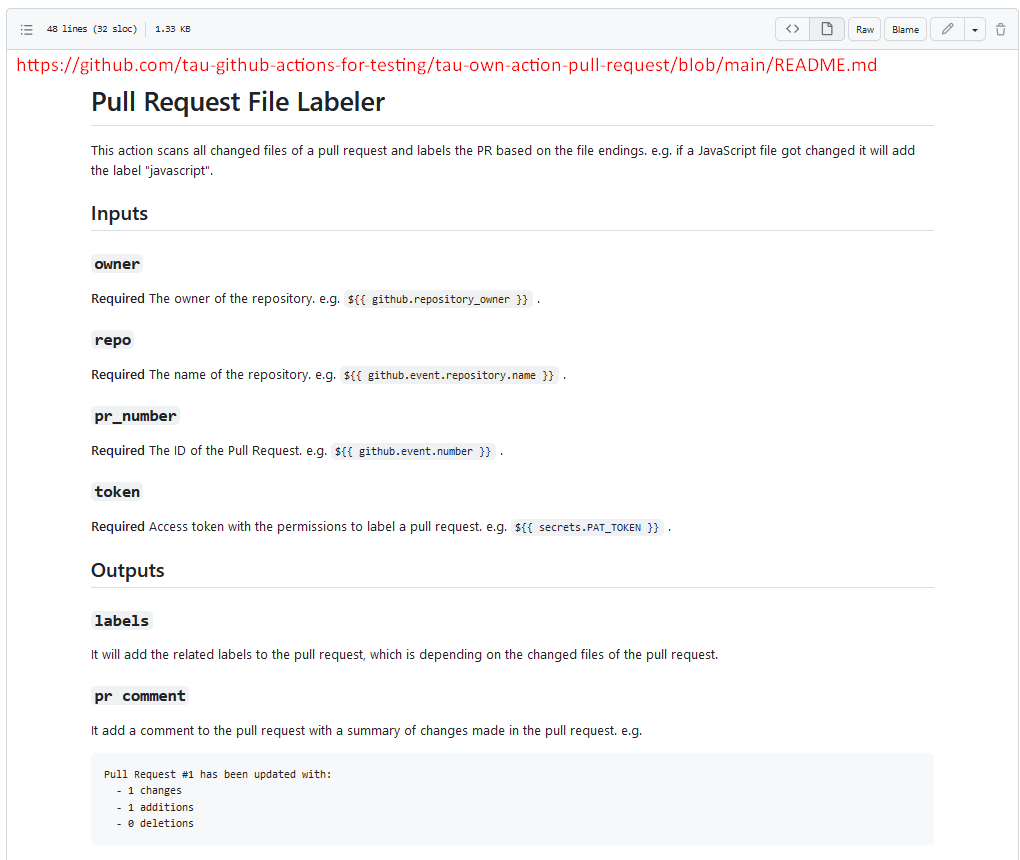
It's describing what it is about.
It describes the inputs, and it describes its outputs (or what gets delivered).
And, very important, what is the usage for the action.

So, how we can use it that you always can kind of copy-paste it. Of course, these you need to specify (for your particular use case scenario) but, to be honest, these are kind of default. And the secrets, this is what you need to provide with the necessary permissions.
We made some changes to the code, so we need to add these changes.
Let me just move my terminal here.
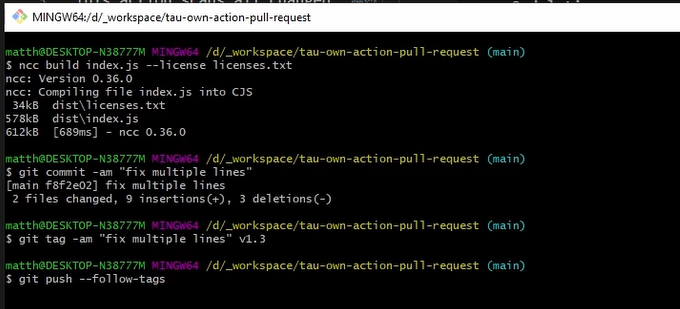
So first we need to build it. You can use the latest version from NCC (ncc build).
So, we built the index, add the license file to it, then let's commit it.
Let's tag it with version 1.3.
And let's push everything.
If we go back to our GitHub, we can see that we have a new release with 1.3.
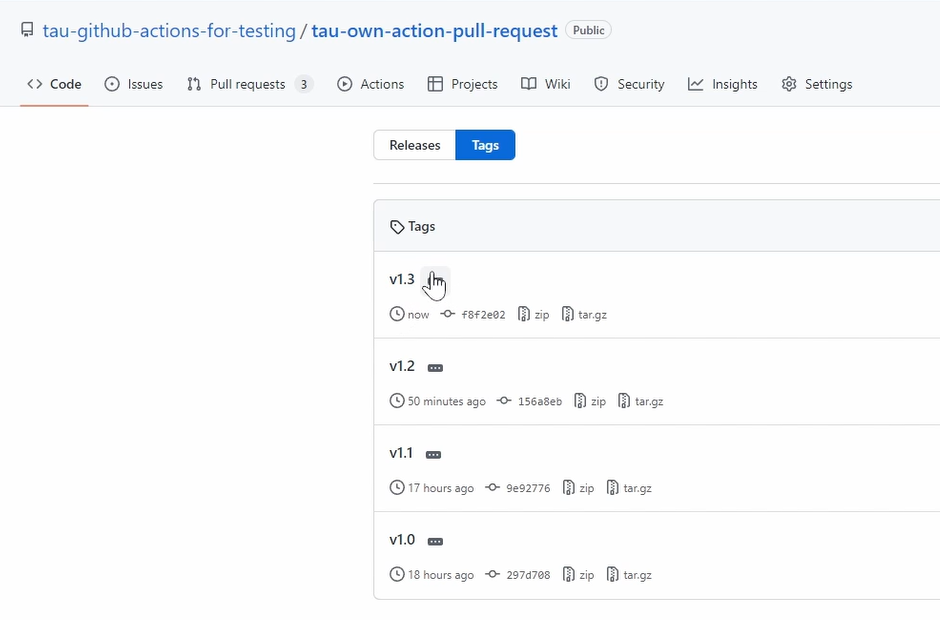
If you click on it, let me see here, okay, it's just a comment which I used here, “fix multiple lines”.
And we can see that in the index we have now added our html case block.
# Let's use our action.
Let's go to our pull request linter workflow (PR-linter.yml) and extend it.
And let's extend it with a job called “Annotates pull request with metadata” or scan-pr-changes.
  scan-pr-changes:
    runs-on: ubuntu-latest
    name: Annotates pull request with metadata
    steps:
      - name: Annotate PR
        uses: tau-github-actions-for-testing/tau-own-action-pull-request@main
        with:
          owner: ${{ github.repository_owner }}
          repo: ${{ github.event.repository.name }}
          pr_number: ${{ github.event.number }}
          token: ${{ secrets.PAT_TOKEN }}
We run on “ubuntu-latest”. And this is how we use it.
So basically, it's now a copy from the README file. And this token, we remember from Chapter 4.
Let's push it to our main, so that it’s changed.
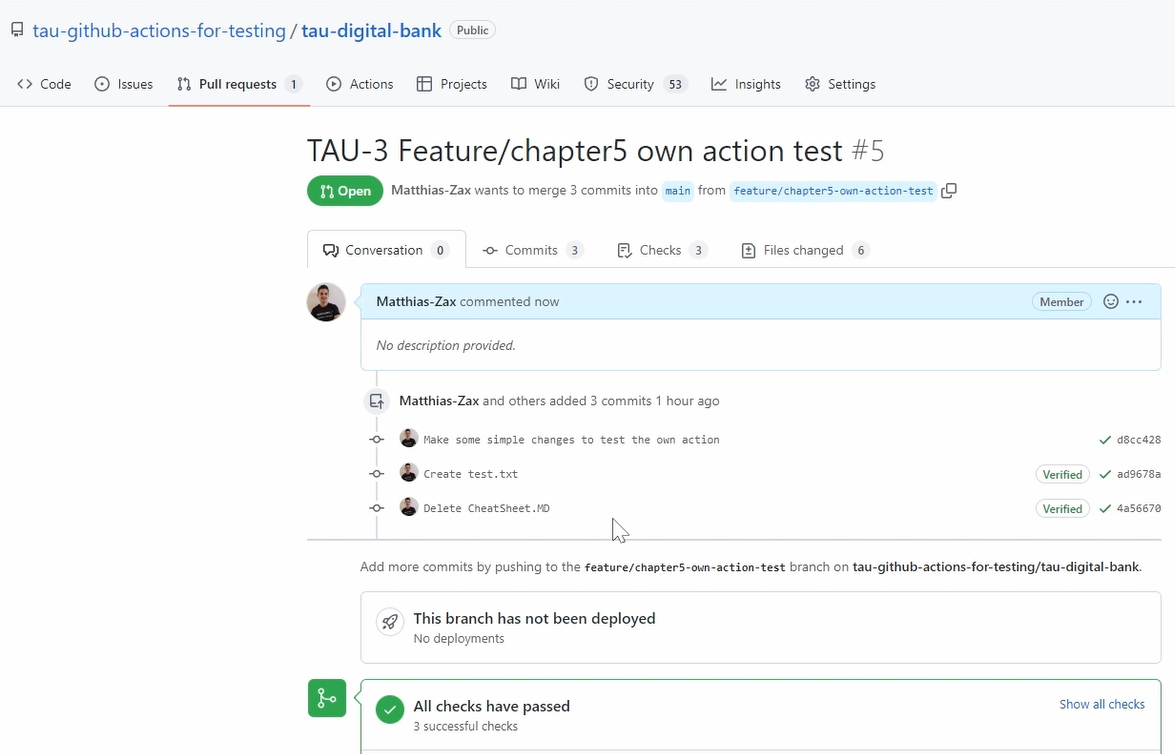
Let's go to Pull requests create a new pull request.
And to create the pull request, we want to comply with our other naming convention from Chapter 3.
So, we request pull request.
You see here that already some checks got created.
And if we go now to “Annotate pull request” one, you can see it got already started.
If we go here, you can see here our “Hello, world!”.
You remember the “Hello, world!” log from our code from the index.js file.
So, we have here our “Hello, world!” and then we also output our array of change files.
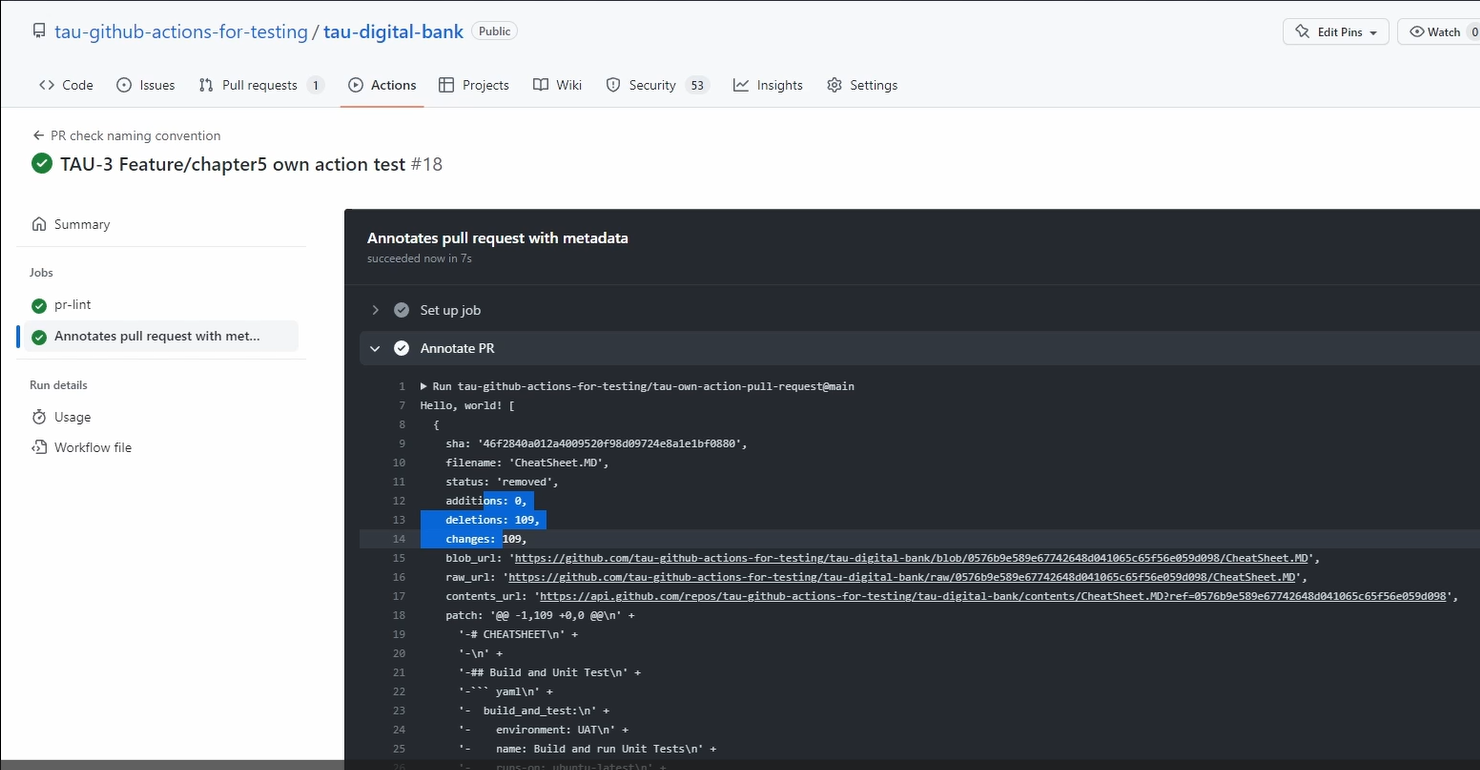
You can see here these are all the changed files.
You see also which files were affected and what was the file name, et cetera, et cetera.
Let's go back to our pull request.
You see here already added the labels.
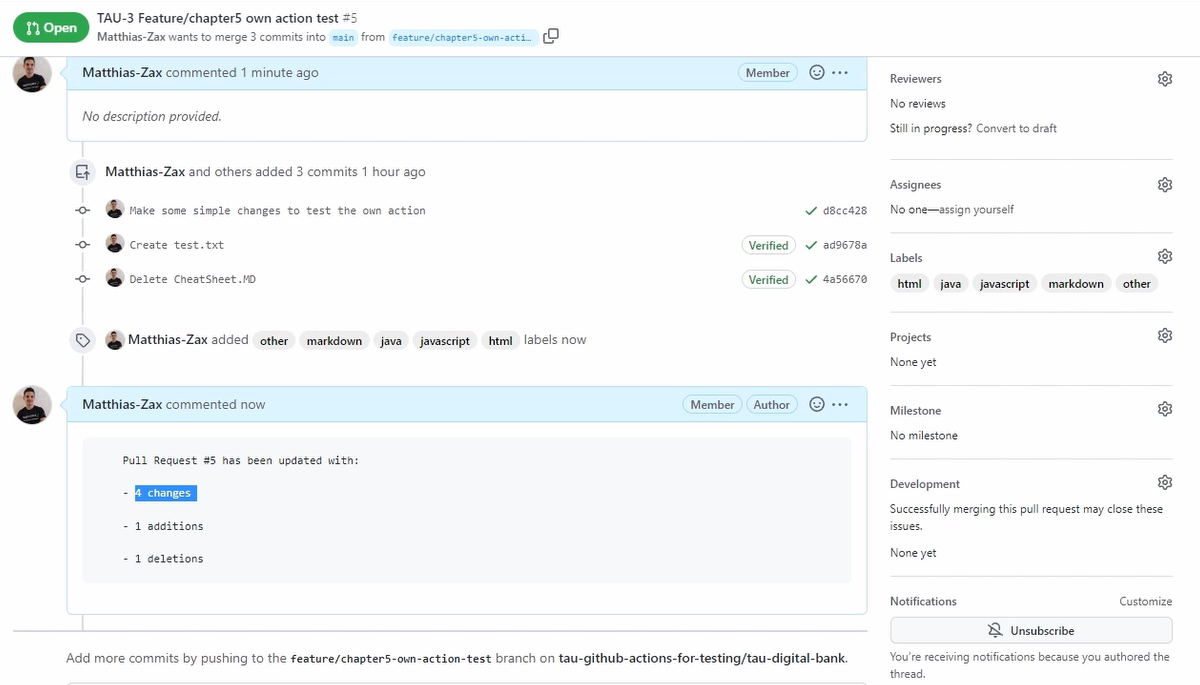
There were a lot of files changed. We have your 4 files changed, 1 added, and 1 deleted
So yeah, I guess you got the point.
It's really cool. You can really do a lot of things.
I personally like this feature to see which files were changed on the pull request, so I immediately know what's roughly changed.
If it's Java, I can review it. With JavaScript, maybe I cannot review it or vice versa, it doesn't matter.
It just adds some additional information.
I don't know if you need that one, but what you definitely need is the possibility of creating own actions.
We now come to the end of our course. Hopefully, you enjoyed it.
I personally learned a lot in the development of the course. I really enjoyed it and am happy that I could contribute to Test Automation University.
Hopefully, you also learned a lot, and I'm always happy to connect.
If you want, just ping me on LinkedIn, and we can have a nice conversation or discussion about the topic, also about other topics.
Thank you very much for participating in my course, and I wish you a great learning experience.
